Tag Archive | succulents

The Resilience of Plants

Updated 7/11/2024


resilience of plants

Drimiopsis maculata.


It happens to everyone. We’re busy with the kids’ activities, our jobs, or the weather isn’t convenient. Sometimes we just can’t get to all those chores on the list. These cool drizzly days before the gardening season kicks into gear provide the opportunity to tend some of those plants I’ve neglected for months or, admittedly, for years. The fact that they survived attests to the resilience of plants.

It’s rare when any of them actually die; that’s not a good look for someone who’s in her 51st year of professional horticulture! But, after growing these plants for decades, I know how far they can go before reaching the point of no return. Not the best way to garden, but that’s reality for many of us.

This article describes several examples of the adaptability and the resilience of plants.


The Resilience of Plants: Confined Spaces


Drimiopsis Maculata

Drimiopsis maculata is one of the leopard lilies native to Africa. This species (photo, above) and 2 other leopard lilies that I grow (Ledebouria socialis and Drimiopsis kirkii) are perennials where winters don’t approach the freezing point. The specific epithet, maculata, refers to the deep green, sometimes purplish, spots on new spring growth. Foliage grows from bulbs on or just below the soil surface. These 3 species are classified in the Asparagaceae family.

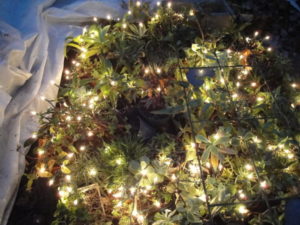
They prefer average to cool temperatures indoors from fall to spring, and often shed some of the previous year’s foliage. Leopard lilies tolerate temperatures down into the 40’s F, so they’re spending the winter on the enclosed porch with only the sun, an additional plastic bubble, and miniature incandescent Christmas lights for warmth. Although it might drop into the teens outside the porch, nighttime temperatures won’t get below 45° under the bubble.

I simply don’t have enough direct sunlight inside for hundreds of small plants. Anticipating that Arctic Blast (down to 4°F) on December 24, 2022, I moved all the tender plants indoors the night before. Good thing, because the power went out for a few hours at the coldest time of day, around dawn. No power, no lights, no plants! It’s only when outdoor temperatures drop below 12° that I move the tropicals indoors.

Repotting Drimiopsis

This clump and a few others stayed in 4½” pots for over a decade, since I last potted them up in Maryland. (I moved to North Carolina in 2013 and to this house in 2021.) They grew in only an inch of soil before I divided them in late summer, 2022. Because most of the organic matter had decomposed over that period of time, the level of the soil surface dropped a few inches lower in the pot.

In late winter or spring, the bulbs sprout shortly after repotting (photo, below). Drimiopsis maculata starts fresh every year after removing all old foliage and dividing the plant in late winter. Normally, I repot plants in spring to mid-summer, but this species is amenable to transplanting at other times, given good growing conditions. Don’t overpot or keep it too moist, though, or it will rot.
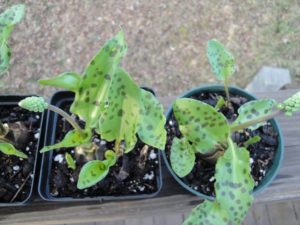
 

resilience of plants, drimiopsis after dividing

New growth and flower buds on Drimiopsis maculata.


Classification Confusion

The lily family and related families include many species that demonstrate the resilience of plants. These are some of the toughest plants for problem spots in the garden. I also brought from Maryland several hostas (Asparagaceae family) that had stayed in 4½” pots for over a decade. They leafed out nicely every spring, but never attained a good size until after I’d planted them at this rural North Carolina property in the autumn of 2021.

Cousins of drimiopsis that tolerate some neglect include ponytail palm (Beaucarnea recurvata), daylilies (Hemerocallis spp.), liriope, grape hyacinth (Muscari spp.), agave, and asparagus fern.

Nomenclature in the huge lily family (Liliaceae) has undergone adjustments over recent decades. Genera of the original Liliaceae family have been redistributed among 10 families, all of which remain members of the same order, Liliales.

The new taxonomy is based on modern studies of molecular biology (genetics) rather than on the number of tepals or the placement of the ovary in the flowers (i.e., physical characteristics). Liliaceae hasn’t been entirely disbanded, according to the APG, the Angiosperm Phylogeny Group; fifteen genera are still classified in the Liliaceae family.

Binomial Nomenclature

Swedish botanist, physician, and taxonomist Carl Linnaeus (1707-1778), later Carl von Linné, categorized thousands of plant species in his 2-volume 1753 work, Species Plantarum. Incorporating some of the discoveries of Georg Eberhard Rumphius (German-born botanist) from the 1600’s, Species Plantarum is considered the first attempt at organizing plant species according to a hierarchical system of binomial nomenclature.

Briefly, binomial nomenclature is a system of identifying organisms by assigning them 2 names: a genus and a specific epithet. Together, the 2 terms represent a species. For example, Liriope muscari ‘Royal Purple’ is the scientific or botanical name for a certain variety of the species. “Lilyturf” is the common name that also can refer to other species of liriope and Ophiopogon. The genus (Liriope) is always capitalized, while the specific epithet (muscari) almost always begins with a lower-case letter. The species is italicized, but the variety (‘Royal Purple’) is not.

Everywhere around the world, gardeners and scientists use the same Latinized scientific name to identify a particular plant. On the other hand, its common name might refer to several different unrelated species. The genus name is often used as a common name, as in liriope, hosta, and drimiopsis, as long as the reference is clear.

The taxonomical hierarchy after species proceeds to family, order, class, phylum, and kingdom. Genetic similarities and differences determine whether 2 plants are related closely enough to group them in the same genus or separately. The closer 2 species appear on the phylogenetic tree, the more likely they’re able to interbreed.

With modern genetic research, taxonomists have reworked several other plant families, including Lamiaceae (many of the herbs we use daily) and Asteraceae (the composites, perhaps the largest family of plants).


Swiss Chard
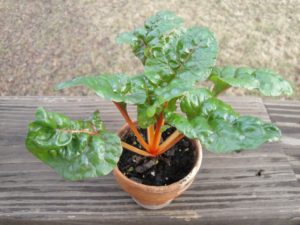
 

resilience of plants, Swiss chard in 2" pot

Swiss chard ‘Bright Lights’.


Here’s a little cutie that sits on the kitchen windowsill, right behind the sink. This Swiss chard ‘Bright Lights’ gets several hours of direct sunlight in the morning and early afternoon, and bright indirect light the rest of the day. Chilly nighttime temperatures don’t bother it. The tiny seedling found a temporary home in the nearest empty pot (the one in the photo) when I thinned it from a cluster of vegetable seedlings. And there it stayed.

What makes this plant special is the fact that I potted it up in March of 2022! And it has been in its 2¼” clay pot all this time! The other seedlings planted last spring grew to their normal 18″ height. This one stands a diminutive 3″ tall.

I’m not keeping it for the purpose of harvesting leaves; there’s not much to pick, after all. It looks perfectly healthy, as long as it gets watered every 1-3 days, depending on temperature. Every 3 weeks, I add a tablespoon of dilute fertilizer, such as Sea-Plus or fish emulsion—just enough to keep it in good color, but no more than that.

I’m curious to see how long this orange-stemmed miniaturized plant will last. Short-season (spinach, lettuce) or fast-growing (tomato) plants would not last long in such tiny quarters. Swiss chard is a foliage plant for almost a year before it flowers. Maybe that’s why it has shown this resilience over time. Now and then, a leaf turns yellow and is pinched off, but new foliage continues to grow. (***Update***: it looked great for almost 20 months. Then I placed a taller plant in front of it for a few days, obscuring the Swiss chard from view…  …   It dried out and died. 7/11/2024)


Agave


resilience in plants, agave


Another cousin of the lily family and a desert dweller, agave (in the Agavaceae family) is a very forgiving plant. I brought 2 varieties from Maryland. They slowly grew new leaves and strong stems with adventitious roots. Although confined in deteriorating 9-cell market packs for a long, long time (~15 years), they rooted into anything near them that stayed still for a year.

In the photo, above, the last of the agaves rooted into a nearby clay pot and unoccupied cells of the (removed) market pack. The resilience of plants once again has been demonstrated by this plant’s ability to survive.

I buried most of the long stem into a taller clay pot with barely damp potting soil and no additional water. I’ll water this one very sparingly until it shows signs of new growth. (***Update***: it rooted in, grew very well, and was purchased a few months later at the farmers’ market. 7/11/2024)

Succulents and other plants native to dry, harsh climates are masters of survival. They store water in stems, roots, and swollen leaves protected by a thick, waxy epidermis. Species needing constant moisture would not have endured this neglect.


The Old Orchid
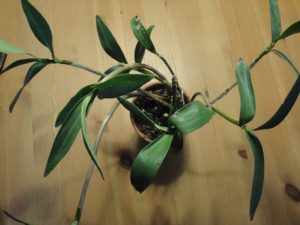
 

resilience of plants, mini orchid in 3" pot for 45 years

Dendrobium kingianum.


When I lived in Morgantown, West Virginia in the 1970’s, a friend and I drove out to The Glasshouse Works, over the border in Ohio. This nursery carried a dazzling assortment of plant species and varieties.

One of my purchases was a small orchid called Dendrobium kingianum. After returning home, I planted it in a 3″ clay pot. Every few years, I refresh the medium, using pine fines, long-fibered sphagnum moss, perlite, and a bit of potting soil.

It rarely blooms, and I propagate it when rooted plantlets form on the stems. An aerial plantlet is called a keiki, Hawaiian for “the little one”. It has been over 45 years now, and the orchid still resides in that 3″ pot.


Bonsai

 

Bonsai Plant Pot Tree Leaves - 20706085 / Pixabay


Bonsai are the ultimate in meticulous care, incredible beauty, and sometimes astonishing age. Many large botanical gardens have collections that truly are worth visiting. Specimens can be several hundred years old and grow in pots only a couple of inches deep. Or they might be trained on a carefully chosen slab of rock.

Plants trained as bonsai usually are woody perennials, either deciduous or evergreen shrubs and trees. Successful bonsai require very specific care in trimming, root pruning, watering, and fertilizing according to seasonal cycles. Most important is the degree of artistry that contributes to credibility, expressing the appearance of an exquisitely aged specimen.

Bonsai exemplify the resilience of plants, considering the means by which they’re maintained over decades or centuries. Each specimen requires a tailored set of precise horticultural skills to keep it alive and healthy.

(No, that’s not my plant in the photo, but this style of gardening deserves a mention.)


Headings

Page 1: The Resilience of Plants: Confined Spaces (Drimiopsis Maculata, Classification Confusion, Binomial Nomenclature, Swiss Chard, Agave, The Old Orchid, Bonsai)

Page 2: The Resilience of Plants: Opportunity (A Plant In a Strange Place, Young Lavender, Another Surprise Seedling), The Resilience of Plants: Recovery (Cryptanthus, Propagating Bromeliads, The Petunia, Giant Redwoods Define the Resilience of Plants, Wildfires)
Return to the top

Enclosing the Porch For Winter Growing

 2022

Updated 11/5/2024


Enclosing the Porch for Growing Plants In Winter


Average Temperatures

Winter weather is in a rush to make its presence known here in northern North Carolina. Average nighttime low temperatures in October are in the 50’s F falling to the 40’s by the end of the month. In 2022, though, many nights were frosty. In this article, I’ll describe how enclosing the porch can add more growing space for sun-loving tender plants—those killed by freezing temperatures.

I moved to this beautiful acre outside Elkin, in USDA plant hardiness zone 7b, in October, 2021. The average lowest extreme temperatures in winter are 5-10° F, with January the coldest month. That won’t stop most gardeners from finding ways to extend the growing season, and, in fact, encourages us to do so.

Abnormally cold weather prompted me to gather all plants that would have been damaged or killed by frost. Both daytime and nighttime temperatures have fallen 10-20° below average on many days in October and November. On the other hand, we’ve also enjoyed a few shorts-and-tee-shirt days hovering well above average.


Priority: Plants


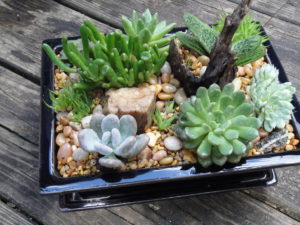
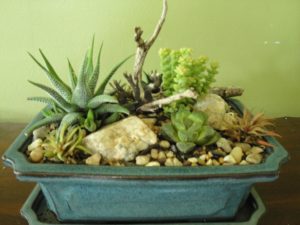
succulent dish garden

Succulents in this dish garden can begin stretching toward the light after less than a week in insufficient sunlight.


Priority went to succulents and tropical plants intolerant of cooling temperatures. Some I’ve had for decades and don’t want to lose. A collection that started in spring as 12 flats of tender plants blossomed to 40 by autumn.

Miniature succulents, succulent gardens in bonsai trays (photo, above), bromeliads, aroids (Alocasia, pothos, philodendron), amaryllis, leopard lilies (Drimiopsis, Ledebouria), tradescantias, ferns, ficus, begonias… I propagated all these houseplants for the farmers’ market, where I’ve been a vendor (“Wellspring Gardens”) since April, 2022.

Plants requiring warm temperatures fill every sunny window indoors. In the basement, more plants snuggle close to the 4′ fluorescent shop lights.

From autumn to spring, I carried many flats of houseplants outdoors to the sunny porch when it was warm enough, above 50° or 60°F. And later in the day, I brought them back indoors again. Almost every day. Winter ’21-’22 was quite mild.

That’s in addition to the dozens of flats of herbs and cool season greens (lettuce, spinach, arugula, broccoli, kale, etc.) started for the farmers’ markets and my own gardens. After 3-4 weeks of growth, they could safely be hardened off outdoors, exposed to colder temperatures—even frost—before planting or selling them.

The Best Option

I need an easier way to accommodate all these plants. A greenhouse is prohibitively expensive for now. Another option is to keep them in the porch, after enclosing it. In winter, this south-southwest-facing porch receives full sun from morning until sunset. Perfect!

How hard could it be to tack a big sheet of clear plastic to the structure? That will work in the daytime, when the sun’s out. But during cold overcast weather and at night, supplemental heat will be needed. Later in this article, you’ll see what I did to keep the tender plants comfortable.


Preliminary Plans


The goal was to create an inexpensive makeshift greenhouse environment from readily available materials, employing rudimentary carpentry skills. Winter winds, primarily from the west, can be fierce at times. This necessitated strong bracing for the structure to prevent the plastic from breaking loose.

At the hardware store, I bought a 12 x 100′ roll of clear 4-mil plastic for enclosing the porch and creating low tunnels in the garden for winter greens. You can find sheets and rolls of clear plastic in the paint department. Although it won’t last as long as greenhouse film, it is less expensive. A more attractive alternative is clear acrylic film, but I’m looking for the most economical solution for now.

Plastic degrades in sunlight, and faster in hot sunlight. So, if used on the porch only during the cold months, it should last 3-4 years. That’s based on many years’ experience using plastic to protect plants from cold winter weather.

The plan is to leave the wooden support grid in place all year. After weather warms up in spring, I’ll remove the plastic panels, still stapled to their 1 x 2 x 8′ posts, clean them, and store them in the basement. In the future, enclosing the porch in permanent materials (floor-to-ceiling operable windows) is a strong possibility.


***Updates***:

***Plastic used in the garden lasts longer than the plastic used to enclose the porch. After 2 full seasons, the porch plastic is showing signs of weakening in the hottest spots because the enclosed space heats up significantly, shortening the life of the plastic. If I don’t vent the plastic or open the front door and use a fan to blow the heat into the house, the porch heats up to 90-105° F on a sunny winter day. The air under plastic in the garden doesn’t get that hot because the plastic is removed or vented to prevent overheating the greens. January 14, 2024

***Recently, I bought a large roll of 6-mil greenhouse film that was on sale. It should last 3-4 years, and there’s plenty to cover other structures which are in the planning stage for now. I used the same staple gun and 1″ x 2″ x 8′ posts for the new plastic. Because this product is clearer than the hardware store’s plastic, it transfers more of the sun’s energy to the inside of the porch…so it gets hotter in the sun. That’s probably okay in the dead of winter when it gets very cold, but in autumn, some plants show a bit of sunscald. If it stays unusually warm over the next month as it did in October, I’ll tack up some of the old plastic on the inside to filter the sun. 11/5/2024


Enclosing the Porch: First, the Support System


Before cutting the plastic, I had to figure out how to put this whole thing together, preferably without piercing the aluminum siding. Where to start? How to seal it from drafts? What about a door?

The front porch measures approximately 20′ x 8′, so the 1 x 2″ x 8′ wood posts from the hardware store fit well. I used a hand saw for a few cuts. Posts with large knots, not visible when purchased in bundles, were returned to the store. Those are weak spots that could break in high winds. These posts have a smoother side—the side in contact with the plastic.

enclosing the porch

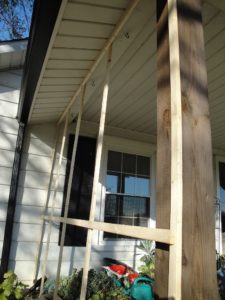
6 x 6″ timbers with 1 x 2″ x 8′ posts across the front of the porch.

Four 6 x 6″ timbers support the roof along the front edge of the porch, and the attic above is insulated. The timbers are secured 3″ inside the outer edge of the decking. Because the 1 x 2’s are attached at the top of the timbers and extend 8′ down, past the edge of the decking, the posts are slightly off vertical when viewed from the side.

I didn’t attach plastic directly to the bottom of the timbers because I wanted it to fall all the way to the ground on the 3 sides. That would help warm up the concrete block foundation and the ground underneath the decking. The goal was to retain the maximum amount of heat in the enclosed porch.

The porch is elevated 2 steps up from the ground. That made my time on the ladder somewhat less daunting. I took my time and was very careful. Safety first.


Brace Yourselves

Hardware included:

  • Hillman Red Exterior 8 x 1 5/8″ deck screws, with a special drill bit in the package
  • 3″ galvanized corner braces with smaller screws
  • a few nails

Although the deck screws are supposed to require “no pre-drilling”, a few of the 1 x 2’s split. I used a couple of nails to hold them together.


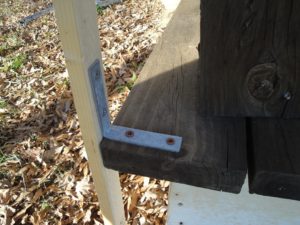
corner brace screwed to decking and post

Brace was placed with the edge of the post flush with the front edge of the floor.


Holding a 1 x 2 post firmly against the house and the edge of the floor, I positioned a brace, then marked where the first screw would go. The west and east sides would have five 1 x 2’s each.

I used a reversible drill to screw braces to the floor. For each of the east and west sides, one brace went next to the house, one on the outside corner, and one in the middle. The other 2 posts on each side were screwed to the edge of the decking without braces.

I used 2 longer deck screws—instead of the smaller screws in the package—for the horizontal half of the brace attached to the floor. This made a stronger attachment. Because the long screws would have gone through the 1 x 2’s and pierced the plastic, I used shorter screws on the vertical part of the brace (photo, above).


Next Up: The Vertical Posts

Once the braces had been secured on the west and east sides, the vertical 1 x 2″ posts were next. I attached five 1 x 2″ posts to the decking—about every 2′—on the west side and 5 more on the east side. Each post was screwed on at the bottom securely enough for it to stand straight. A carpenter’s level established true vertical and horizontal before I tightened the screws.

Then I fastened the middle horizontal post, and the top horizontal post as close to the ceiling (overhang) as possible. I can add more supports at any time, if necessary.

Where the ground level was higher near the house, I cut the posts so they stopped right above the soil. In other areas, the 8′ length doesn’t extend that close to the soil, but that’s okay. The excess plastic made a flange over the ground, on which I placed heavy pots and cinder blocks to block air infiltration. I haven’t trimmed any of the 12′ wide plastic, but I can play with that later. Incidentally, the flange helped keep the basement drier during a recent rainstorm. For now, it stays.


enclosing the porch, west side wood supports

The west side with 5 vertical and 2 horizontal 1 x 2″ x 8′ posts.


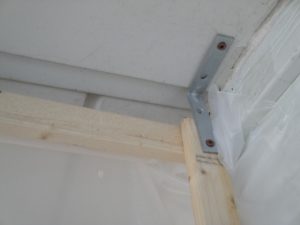
The braces and posts were sturdy, but there was too much play in the sides. So, I drilled another 3″ brace inside each of the upper 2 corners adjacent to the house, through the siding in the ceiling and into the vertical 1 x 2 (photo, below). A wooden beam hides under the siding. First, I hammered a nail through the aluminum, then replaced it with a deck screw, stabilizing the sides.


brace between ceiling and 1 x 2" post

Brace secures vertical post to the ceiling, near house. Clear tape, barely visible on the right, seals plastic to siding.


On the South Face


enclosing the porch, south side

Posts:                1        2        3        4            door            5        6        7        8


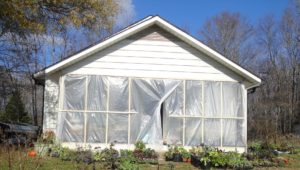
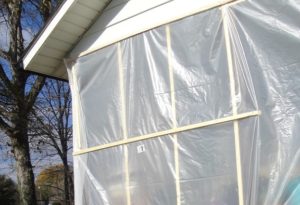
Here’s the 20′ south face of the porch. Imagine the vertical posts are numbered, from #1 at the left (west) corner to #8 at the right corner, with a larger gap in the middle for the “door”. The numbers don’t exactly correlate with the posts, but you get the idea. The door has not been finalized. Posts #1 and 8 were added previously to the corner timbers, when I worked on the east and west sides.

Across the front, I fastened braces to the floor and then added 2 middle posts on each side of the door (#2, 3, 6, 7). The other 2 new posts were fastened to the top of the inner 6 x 6″ timbers (#4, 5), and screwed directly to the edge of the decking. All 1 x 2″ x 8′ posts angled out slightly, below the edge of the floor.

Then the horizontal members went up: top and middle. Later, I had to remember to leave some extra plastic at the top of the outside corners to accommodate the slightly angled vertical posts (and longer dimension at the floor). Some of the posts were a bit bowed, so I’ll tape the gaps at the top from inside the porch.

At this point, all braces and support posts are in place. Progress!


Headings

Page 1: Enclosing the Porch for the Winter (Average Temperatures, Priority: Plants, The Best Option), Preliminary Plans, ***Updates***, Enclosing the Porch: First, The Support System (Brace Yourselves, Next Up: The Vertical Posts, On the South Face)

Page 2: Enclosing the Porch: Second, Wrapping It Up (The West Side, The East and South Sides, How?), Warming Up to This, Enclosing the Porch: A Winter Retreat for Succulents (An Arctic Blast, and I Don’t Mean Fun Times with Santa, Blown Away Or Not?, Why Not LED’s?, Enclosing the Porch for Edible Plants, Potted Herbs and Tender Plants, Enclosing the Porch for Me, Too!)

Return to the top

How To Plant a Strawberry Jar


How To Grow Plants In a Strawberry Jar


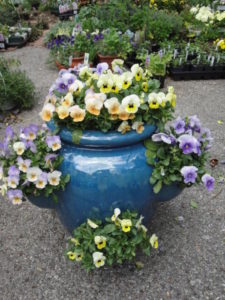
blue glazed strawberry jar planted with violas

A glazed strawberry jar planted with violas.


Have you ever wanted to plant a strawberry jar but just weren’t sure how to do it? In this article, I’ll provide lots of tips that will ensure a successful outcome.

Strawberry jars (or strawberry pots), those with pockets on the sides, make fascinating container gardens. You can find jars made of terra cotta or plastic, and ceramics with beautiful glazed finishes.

Over the past several years, the stackable plastic sorts have become popular. They are less expensive, true, but it’s hard to walk away from that ceramic strawberry jar that caught your eye (and your heart) at the garden show.

Yes, strawberry plants can be grown in strawberry jars. But, there are many other options, including succulents, herbs, annuals, and even houseplants.


Planting Succulents In a Strawberry Jar


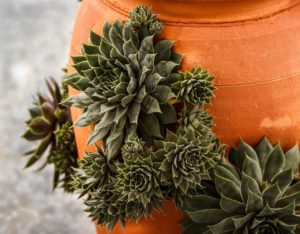
Hen And Chicks in a strawberry jar

A clay strawberry jar with hens and chicks.


Terra cotta jars dry out fast because the material is porous, so we must manage them carefully. The succulents, however, love terra cotta!

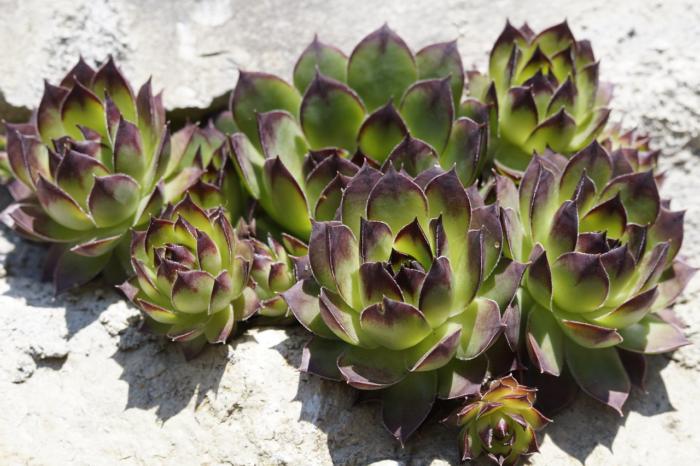
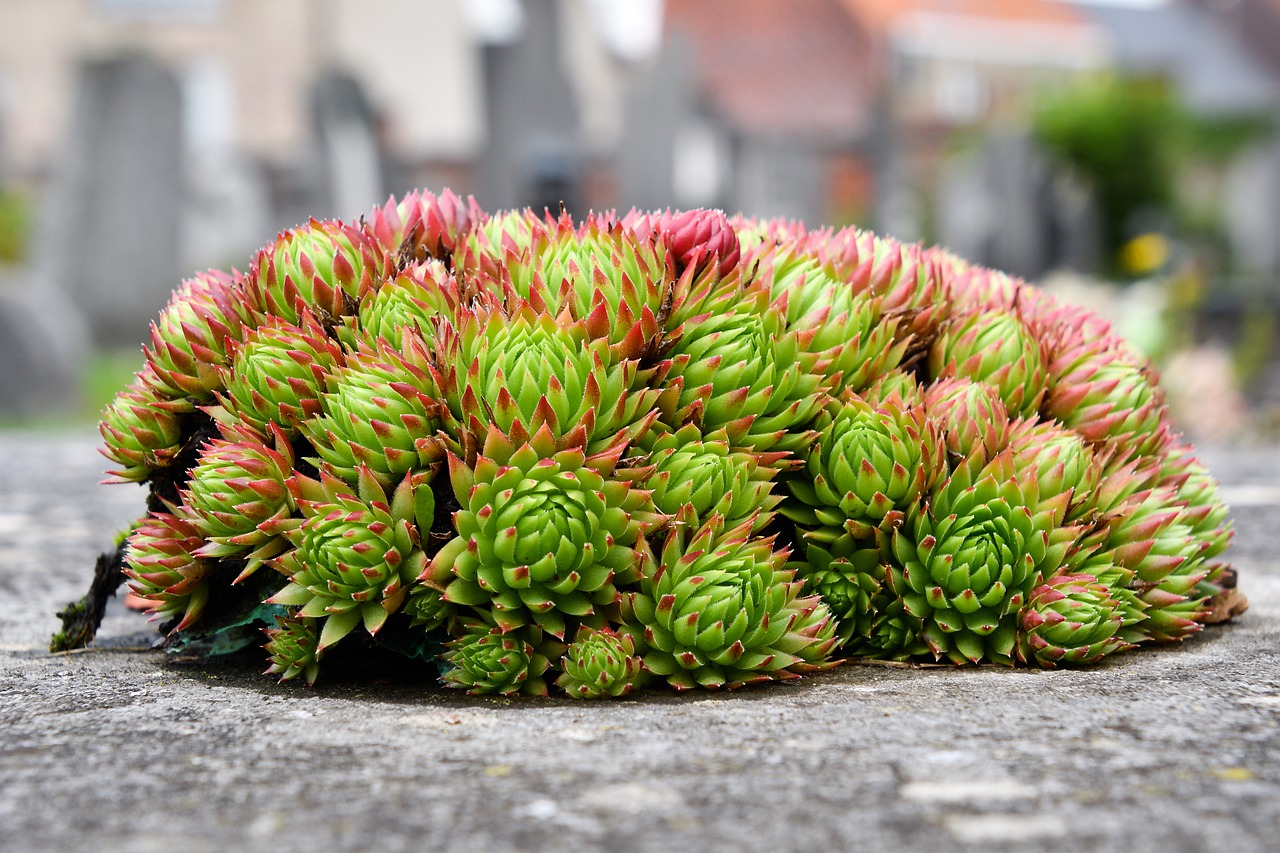
Dwarf succulents, such as hens and chicks (Sempervivum tectorum, S. arachnoideum), are perfect candidates for strawberry pots. A related genus, Jovibarba, grows in a similar fashion. Both need full sun and don’t mind drying out now and then. Excess growth is easily plucked off and planted elsewhere. The little “chicks”—offsets growing from stolons—cluster close to the “hen”.

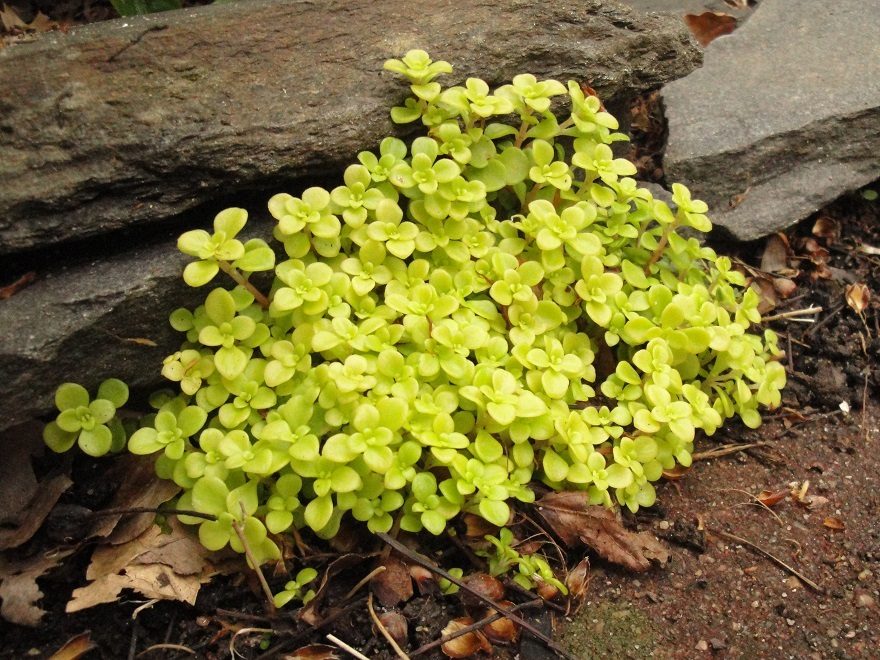
To add a little variety to the hens and chicks, include other hardy succulents, such as the small growing Sedum dasyphyllum, S. makinoi ‘Ogon’, S. spurium, and S. ‘Angelina’. Plant Sedum ‘Ogon’ on the north side to avoid sun scald. Most of these sedums are less winter hardy than the hens and chicks, so check their hardiness zones.

Sempervivum varieties grow rosettes of foliage (photo, above) and are available in many colors and bicolors, including green, gray, red, and burgundy. More recent introductions include colors of the sunset in their leaves (‘Gold Nugget’, ‘Orange Glow’). Some varieties have spider webbing, with fine white hairs connecting one leaf tip to another. The leaves of a variety called ‘Oddity from Albidum’ look as though they’ve been rolled into tubes.


When It Gets Cold

Hens and chicks are hardy to USDA zone 3 or 4 when they’re planted in the ground. Because roots are exposed to colder air temperatures, however, potted hens and chicks are hardy probably up to the warmer zone 5 or 6.

I’ve seen clay strawberry pots filled with hens and chicks that had been left out all winter in zone 6 Maryland. Because hens and chicks are hardy perennials, they normally survive winter weather. To avoid damaging the pot, though, it’s best to prevent it from repeatedly freezing and thawing. Clay absorbs water, and water expands when it freezes, so, eventually clay pots will weaken.

Keeping the pot quite dry or protected in a sunny shed during freezing weather will help it last longer. Another option is to remove plants from the strawberry jar and heel them into the garden for the winter. Then you can clean the pot, store it dry over the winter, and replant the same plants, or parts of them, in spring.

Gardeners living where winters are moderate to mild can leave hardy succulents outdoors, but others living in cold regions risk losing their terra cotta strawberry pots. You can use plastic strawberry pots instead. Ceramic pots labeled “frost resistant” probably will survive winter weather.

For non-porous pots (plastic and ceramic) that will be planted with succulents, mix a large quantity of extra pine fines, coarse sand, and/or perlite into the soil for faster drainage. Because clay strawberry jars dry out much faster than non-porous pots, they’re the better choice for succulents. However, with enough drainage material, succulents should do well in any pot.


The Tender Succulents

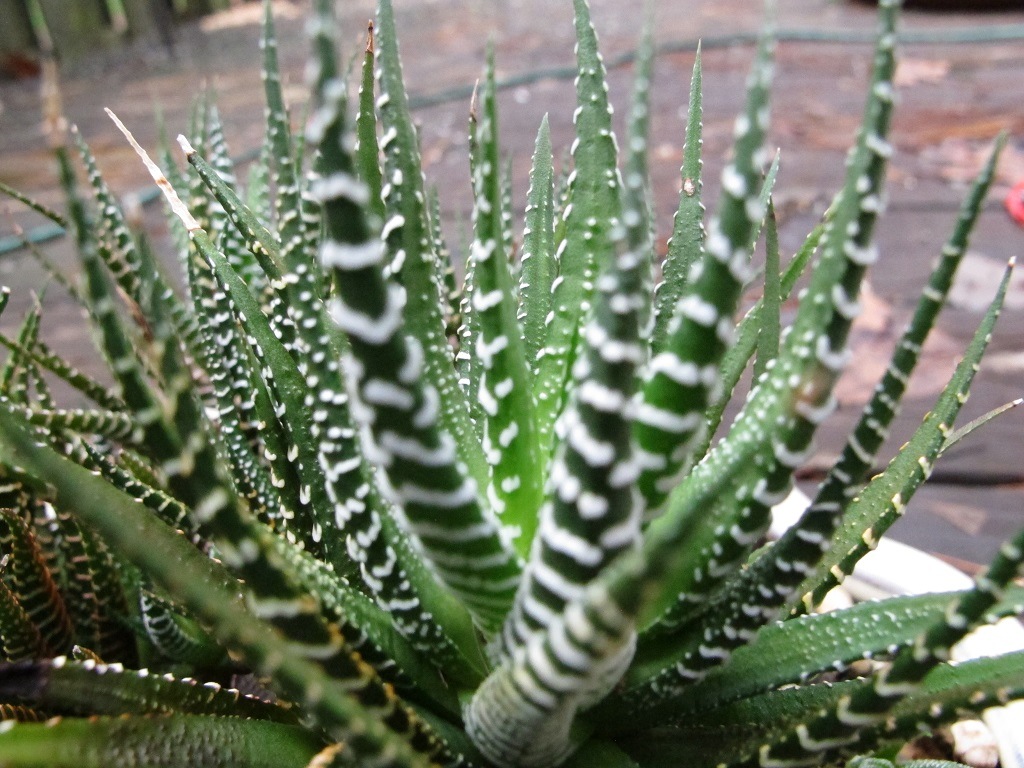
For the summer growing season, add rooted cuttings from tender (non-hardy) succulents (Echeveria, Haworthia, Gasteria, miniature burro’s tail, dwarf aloe, small cacti, etc.) for their unique coloring and form. Use small, clustering types of plants in the side pockets. Plant a few larger or taller types in the top of the pot. Avoid plants that grow too large because they’ll make the pot appear top-heavy.

All the tender succulents will perish if left outside to freeze. If you want to save them, place the pot in a sunny greenhouse. If you don’t have one, transplant the plants into clay pots at the end of the summer. You could also take cuttings in mid- to late summer so they’ll be rooted by early autumn. Keep tender succulents in sunny windows indoors.


Planting Herbs In a Strawberry Jar


herbs in a clay strawberry jar

Herbs newly planted in a clay strawberry jar (waiting for basil for the top.)


Strawberry jars planted with flavorful herbs were sure sellers at the garden shows. When using ceramic containers, check to see if they have non-toxic glazes. Sometimes you’ll see a sticker indicating that the pot is “not suitable for contact with food”, so I would not use those pots for herbs.

Violas planted in the glazed strawberry jar (photo, top of article) sold years ago, in late winter, at the Maryland Home and Garden Show. The manufacturer guaranteed that their pots were resistant to cracking in freezing weather and safe for edible plants. Win-win!

If the root ball doesn’t quite fit the shape of the pocket, a little molding will be necessary. Smaller divisions, younger seedlings, and rooted cuttings fit better into tight pockets. Look for plants in 2-2½” pots or cell packs, or grow your own from seed.

Planting mint with other herbs in a strawberry jar will result in mint growing from every opening! Therefore, it’s best to leave mint and lemon balm to themselves or construct an iced tea pot for the current season.

All plants will get adequate sunlight when growing outdoors in summer, especially if you turn the pot periodically. However, with limited sun indoors, it’s very difficult for all plants in a strawberry pot to get enough sun. This kind of pot will grow well in a sunny lean-to or a greenhouse. But, for growing herbs indoors in winter, choose a pot with a single growing plane. A window box planted with herbs or a simple pot will work better.


Which Herbs?

Dwarf and creeping varieties of herbs do well in strawberry jars. Use what you like, but trim the larger varieties more often to keep them in scale and for new foliage. Potted plants generally grow to a more restrained size compared to those planted in the garden. Look for herbs at local garden centers or farmers’ markets.

Here’s a sampling, with habit of growth:

  • Basil—small growing ‘Boxwood’, ‘Fino Verde’, ‘Marseillais Dwarf’, miniature purple, ‘Yevani’, ‘Spicy Globe’; the larger ‘Genovese Compact’, ‘Mrs. Burns’ Lemon’, ‘Obsession’ (or other basil downy mildew resistant varieties), ‘Siam Queen’ Thai. Upright, shrubby.
  • Chives—look for the finer-leaved variety ‘Dolores’, but any will work. Upright, tufted.
  • Cilantro—‘Calypso’ and ‘Cruiser’ seem to be the sturdiest, but all are short-lived. Clumping, tufted.
  • Dill—use small varieties, such as ‘Fernleaf’, ‘Teddy’. Upright.
  • Oregano—Greek, ‘Hot ‘n’ Spicy’, Italian. Clumping when young, then trailing.
  • Parsley—curly or flat-leaf varieties, try to find the dwarf flat-leaf ‘Titan’. Upright, tufted.
  • Roman chamomile—fragrant foliage but few flowers. Clumping, creeping.
  • Rosemary—‘Blue Boy’ (dwarf), ‘Chef’s Choice’ (intermediate), ‘Irene’ and ‘Mrs. Howard’s Creeping’ (prostrate varieties), ‘Golden Rain’ (variegated), ‘Hill Hardy’, ‘Salem’. Upright shrubby or trailing.
  • Sage—‘Berggarten’, dwarf silver sage, ‘Icterina’ (gold-variegated), purple, ‘Tricolor’ (mildest flavor). Upright, shrubby.
  • Savory—creeping dwarf savory. Clumping, spreading.
  • Sweet marjoram—‘Compactum’ (my favorite) and others, similar to oregano. Upright shrubby or trailing.
  • Thyme—‘Caraway’, French, ‘Golden Variegated’ (variegated lemon), ‘Hi Ho Silver’ (variegated), ‘Lemonade’, ‘Silver Edge’, ‘Transparent Yellow’, ‘Wedgewood’, and many others. Plant pots with several kinds of thyme for an “All Thyme High”. Clumping, trailing.
  • Viola—a smaller cousin of the pansy, edible flowers and leaves, needs cool weather. Clumping.

Herbs have different life cycles. The annuals (basil, cilantro, dill) need to be replaced once or twice each year. Parsley and viola are biennials. The rest of the listed plants are perennials, but check their USDA hardiness zone ratings to see how much cold they’ll tolerate.


Other Plants For a Strawberry Jar


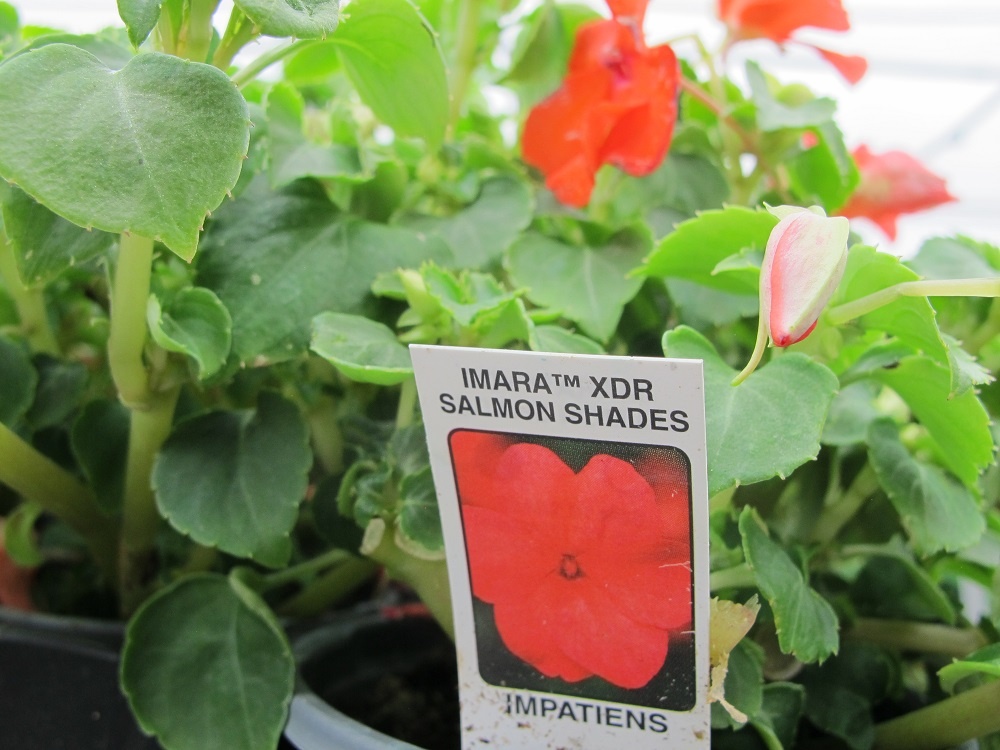
Colorful annuals spilling out of a large strawberry pot is a lovely sight. For a garden that gets shade or dappled shade, look for the newer ‘Imara’ impatiens, which is impatiens downy mildew resistant. Wax begonias and miniature fuchsias are more possibilities for morning sun or dappled shade.

Dwarf vinca (annual and perennials varieties), bacopa, fanflower (Scaevola), calibrachoa, miniature petunia, diascia, nemesia, alyssum, small varieties of coleus, and plants used in miniature gardens brighten sunny spots. Grow small varieties of scented geraniums for their wonderful fragrances.

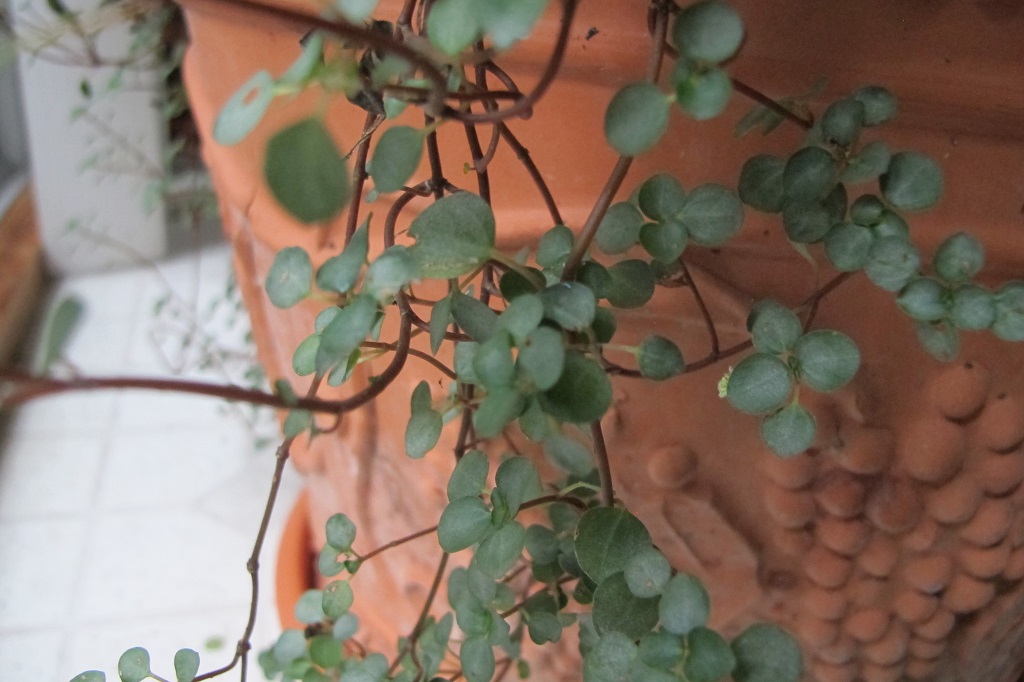
Try planting a strawberry pot with houseplants, such as Ceropegia (string of hearts), wandering Jew (Tradescantia spp.), Pilea ‘Aquamarine’, creeping Charlie (Pilea depressa), Peperomia, baby tears (Helxine), moses-in-the-boat (Rhoeo), and dwarf ferns. Small-leaved cultivars of variegated English ivy and rex or rhizomatous begonias add foliage color. Summering outdoors results in vigorous growth, so cut back overgrown plants.

Use plants that need the same conditions, either moist or somewhat dry, sunny or shady. I’ve included photographs of a few candidates, but there are many more worth considering:


Headings

Page 1: How To Grow Plants In a Strawberry Jar, Planting Succulents In a Strawberry Jar (When It Gets Cold, The Tender Succulents), Planting Herbs In a Strawberry Jar (Which Herbs?), and Other Plants for a Strawberry Jar

Page 2: Planting a Strawberry Jar (The Process), and Maintaining the Strawberry Jar (Light, Water, Fertilizer, Pruning)

Return to the top


How To Transplant Houseplants

2019

Updated 9/26/2024


Time To Transplant Houseplants?


potting soil, how to transplant houseplants


As the end of the growing season approaches, we need to prioritize all the chores that need attention. Do the houseplants require transplanting? The plants that summered outdoors must come back inside soon, before frost damages the foliage or kills the plants.

They’ve been luxuriating on the porch, in higher humidity and brighter light than they usually receive inside. It’s no wonder they look fabulous! So, reintroduce them to indoor conditions while the days are still somewhat long and before the furnace kicks on and dries the air.

Perennials that looked picture perfect in May now look a little stressed after those record high temperatures. And the tired vegetable garden needs fresh compost or aged manure before setting the fall crops.

In a few weeks, flowering bulbs will arrive at garden centers…with pansies, violas, snapdragons, dusty miller, and Heuchera, trailing ivy, and hardy grasses. You’ve been dreaming of those beautiful combination planters, like the ones you saw last autumn at the garden center. But first things first.


Should We Transplant Houseplants Now?


Let’s start with the houseplants. Exposing tropicals to cooling temperatures outdoors, as autumn takes hold, could stress your houseplants. And some of those plants are pleading for attention right now.

While certain plants can tolerate cooler temperatures (cyclamen, ferns, English ivy, succulents, ponytail palm), others can’t. The aroids (peace lily, Dieffenbachia, Anthurium, Philodendron, Alocasia, Chinese evergreen, pothos), prayer plants (Calathea, Maranta), and some of the begonias, for example, should come indoors before temperatures dip below 60°F.

Although they won’t be killed by a few nights in the 50’s, or even the 40’s, you don’t want to prolong their discomfort. Chilling stresses many of our tropical houseplants, and can rot roots and disfigure foliage.


Inspect Them First


You probably won’t need to transplant houseplants, summering on the porch, that were repotted in the spring. All you need to do now is to inspect them for insects and spider mites before bringing them indoors. Check the bottom of the pot for slugs and sowbugs hiding around the drainage hole.

Clean up the leaves, too, and remove any that are discolored, insect-eaten, or damaged. Peel away the entire leaf, so none of the leaf stems (petioles) remain that later will turn yellow or brown.

After the inspection, wipe down the pots, wash the saucers, and place the plants in front of the windows where they seemed to thrive last winter.


Horticultural Oil


scale insects on ficus neriifolia

Scale insects on Ficus neriifolia. Leaves are 7/16″ wide.


The dwarf Ficus neriifolia contracted a scale infestation, so I sprayed it with a horticultural oil solution. For insects and mites, horticultural oil works very well. It smothers the pests and is safe to use on most plants, including edibles.

Wiping the horticultural oil solution on smooth leaves (fiddle-leaf fig, pothos, peace lily) with a soft sponge removes dust, grime, and residue from water and fertilizers. It gives them a nice luster without appearing artificial. Read the label; I prefer to use less oil than is recommended on the label—to start with, anyway. Horticultural oil makes surfaces slippery, so be careful.


fiddle-leaf fig

The fiddle-leaf fig, Ficus lyrata.


Do Your Houseplants Actually Need Bigger Pots?


potted plant bonsai

Evergreen bonsai.

Knowing if the plant needs repotting, when to repot, and how large a pot to use is half the battle.

Does it wilt often? Perhaps instead of repotting, the plant needs to be deeply watered. Or maybe the roots have rotted in waterlogged soil, or the water rushes right through without moistening the soil.

I’ve seen a lot of dead plants over the years, and many simply were in pots that were too large. “Aren’t we supposed to transplant houseplants every year, just like our children outgrow their shoes every year?” No; once they have matured, plants can stay potbound for quite some time.

“If I transplant houseplants into bigger pots, won’t that make them grow faster and bigger?” No, another myth! If you transplant houseplants into pots twice the size they need, they more likely will die faster.

Large pots hold large quantities of soil and water. When the moisture is not used by the plant, the sodden mass just sits there, cutting off the oxygen supply and rotting the roots. So, if the entire volume is not tightly filled with roots, the plant doesn’t need to be repotted.

Many houseplants like being potbound. English ivy (Hedera helix), pothos (Epipremnum aureum), Philodendron, palm trees, Ficus trees, African violets, succulents, snake plants (formerly Sansevieria, now Dracaena), and bonsai prefer somewhat cramped quarters. Many potted herbs (rosemary, lavender, chives, sage, thyme) also fare better when potbound. But, in order to ensure good health, gardeners must provide nutrients according to the needs of the particular plant, and according to the time of year.

It’s helpful to know the habits and preferences for each kind of plant. For example, although the 4′ tall variegated snake plant (Dracaena trifasciata ‘Laurentii’) eventually will need a 10″ or 12″ pot, its cousin, the dwarf bird’s nest species (D. hahnii), can stay in a 4″ or 5″ pot for many years!


Fertilizing Houseplants

Most tropical plants spending the winter indoors won’t need fertilizer until late winter or early spring. If they continue to grow and look healthy, and they’re receiving good light, though, diluted solutions (1/4 to 1/2 strength) can be added every 4 to 6 weeks. Err on the side of using less fertilizer in winter.

As long as they’re properly watered and fertilized, your plants can remain perfectly happy while potbound. In fact, they’re easier to manage this way, since there’s less likelihood of overwatering. But you’ll have to water more frequently.

Look for products formulated for foliage houseplants or for flowering plants. They’re available in several forms: timed-release prills (use a low dose from fall through winter), liquids, granules, and soluble crystals. Read the label.


Fungus Gnats

Plants in smaller pots are less susceptible to diseases, root rot from overwatering, and fungus gnats. Ever have those annoying little “fruit flies” around your houseplants? The simplest remedy is to allow the soil surface to dry out.

Female fungus gnats lay eggs on moist soil. When the tiny larval worms emerge, they eat small roots, sap on cuttings, fungus, and organic matter in the top inch or two of the soil. Let the surface of the soil dry before watering again, and you’ll have fewer fungus gnats. See if adding a 1/2-1″ layer of pine fines as a mulch might prevent gnats from laying eggs.

Yellow sticky cards are good for catching flying insects. A card placed horizontally near the plants, on the pot’s rim, or in a sunny window attracts the most gnats.


Save the Spider!

spider plant

A green spider plant.

The spider plant in the 4″ pot that your girlfriend gave you two months ago is literally crawling out of the pot. She propagated it from one of her own plants, so it has sentimental value.

Spider plants, related to other strong-rooted Asparagaceae (formerly Liliaceae) family members, develop roots that circle around the inside of the pot. The vigorously growing roots raise the entire plant higher in the pot, opening up air spaces around the root ball. This dries out the finer roots, and water gushes immediately through the drainage holes without moistening the soil. Clearly, it’s time to work on this one.


When Should I Transplant Houseplants?


A good time to transplant houseplants is in spring to mid- or late summer. Plants that recover slowly (for example, succulents) should be repotted, if needed, by mid-summer. In autumn and winter, plants receive fewer hours of daylight, photosynthesizing at a reduced level. Our slower growing tropicals don’t grow much foliage in autumn and in winter. And roots also are reluctant to grow.

Cooler temperatures, compared to the balmy summer days spent on the porch, cause systems to slow down. So, trying to force plants to grow at a time when they’re entering semi-dormancy often does more harm than good. Plopping a plant’s almost dormant root system into wet soil and expecting it to grow is asking the plant to do something against its nature. It would rather stay semi-dormant.

greenhouseProviding a greenhouse atmosphere—warm, humid, and sunny—keeps your houseplants in much better condition, even through the shortest days of winter. Optimal light levels increase rates of photosynthesis, respiration, and transpiration. As a result, they might grow almost as fast as they did in June.

But most of us deal with dryer air, energy-saving chilly nights, and dim lighting (in the plants’ eyes) until the hyacinths bloom outside.
Plants, both indoors and out, take on renewed vigor once the days lengthen closer to springtime. Some of us humans do, too.


How Big Should the Pots Be?


succulent dish garden

Succulent dish garden in ceramic bonsai tray.

I’ve grown dwarf peperomias and miniature succulents, such as Echeveria minima and Haworthia truncata, in 2″ pots for many years. Since the succulents are prone to rot in wet soil, keeping them very potbound decreases the chances. There simply isn’t that much soil in the little clay pot, and it dries fast in direct sunlight.

Most of the succulents I enjoy growing are on the small side, anyway. Almost all are in 1½” to 4″ pots, and others have been planted in larger, but shallow, bonsai trays.

I brought with me from Maryland a 4½” pot of Drimiopsis kirkii, one of the African leopard lilies, and it has yet to be repotted into a larger pot, 6 years later. Its cousin, Drimiopsis maculata, however, grows from bulbs which multiply faster than those of D. kirkii. So, most of the D. maculata plants get divided more often, but they’re still in 4½” pots. Older plants are moved into 6″ pots, and remain crowded until divided.

Dracaena hahnii, the dwarf snake plant, lived happily for years in a 4½” pot. The small, glossy-leaved Spathiphyllum wallissii would have complained if it had been bumped up into anything larger than its 6½” plastic pot.


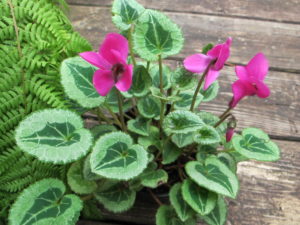
pink cyc.

We’ve had this miniature cyclamen for years.


A pink flowering miniature cyclamen stays in its 4½” pot (photo, above), year after year. Now, in late summer, it is coming out of dormancy and beginning to grow new foliage, contrary to what most other plants are doing. That’s because its growth cycle calls for cool to cold, but not freezing, temperatures in order to set flower buds. It will be fertilized accordingly, for a full canopy of marbled leaves.

The plant’s habit and its root structure help determine the required pot size. In general, transplant houseplants into pots that are only 1″ to 2″ wider, and only if they need it.


The Old Weeping Fig

weeping fig

Variegated weeping fig.

A weeping fig (Ficus benjamina), given time, will grow to the ceiling. Instead of raising the roof, its height can be managed by “aesthetically” cutting stems back in the spring, when it will respond faster.

I grew a variegated weeping fig in a 14″ pot for about 15 years, in front of a big window that received a few hours of morning sun. When the tree grew to almost 8′ tall, above the top of the window, I pruned it back a few feet. Then, when it regrew, all the foliage was once again in the sun and at eye level.


African Violets


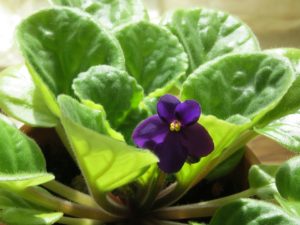
African violet

A healthy African violet.


African violets (Saintpaulia ionantha) are happy to stay in 4″ pots for years. Miniature African violets need smaller pots than that.

A rule of thumb for pot size and an African violet is to plant it in a pot that is 1/3 the spread of the foliage. So, a 4″ pot will accommodate a plant that is 12″ wide. Plants in top condition might take a slightly larger pot, but you have to pay very close attention to moisture and soil drainage.

“What should I do with an African violet that has a long trunk?”

As these plants grow new leaves from the top of the rosette, older leaves lower on the stem die off. That’s part of their natural growth pattern. When the plant develops a trunk, it’s time to make an adjustment. But don’t do this if the plant is slowing its growth. Spring to mid-summer is a better time for this procedure.

Remove the plant from its pot and slice off the bottom third of the root ball. Shave off a small amount from the sides as well. Wash the pot, check the plant for insects (mealybugs, especially), and treat with horticultural oil if necessary.

Place a small wad of polyester fiberfill (from a craft shop) over the hole. Add a small amount of African violet potting soil in the bottom of the pot. These plants like peat moss in their mix. Set the plant in the pot, and fill in the sides with more soil, using a chop stick to firm soil in the gap.

Part of the trunk will now be loosely covered with soil, and it will grow new roots. The top of the root ball should be lower in the pot than it grew previously. (Yes, this is exactly what we don’t ordinarily recommend.) Water it in, using lukewarm (about 85°F) water. Keeping the soil too wet will rot the trunk and the roots.

If needed, use the kitchen sink sprayer to wash soil off the leaves, using lukewarm water. Towel off the water drops, and let the plant dry in a warm location.

It’s less stressful for these plants if this is done every year or two, before the trunk grows a few inches tall. But I have seen perfectly happy violets with long stems curling over the edge of their pots.

“What are those marks on the leaves?”

Water the soil—always lukewarm for African violets—and avoid wetting the leaves. If water splashes on the leaves, absorb it with a towel, and let the plant dry in a warm place. As drops of water chill on this plant’s leaves, unsightly tan or brown rings and lines will be left behind.

Grow African violets at 70 to 74°, and fertilize regularly with a product formulated for this genus.


Less Is More

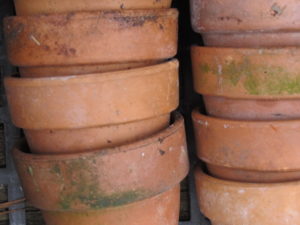
stack of clay pots, transplant houseplantsMove miniature species of plants into something only 1/2″ to 1″ larger, if they need it. I know; that doesn’t seem like it could make much of a difference. But for the plant whose roots, in the wild, might be crammed between layers of sedimentary rock on a blustery cliff, 1/2″ is plenty.

Large-growing plants require new pots up to 2″ wider in diameter. Peace lily (robust varieties of Spathiphyllum), weeping fig (Ficus benjamina), Chinese evergreen (Aglaonema spp.), and larger palm species can be moved from 6″ starter pots into 8″ pots. And, importantly, this assumes that the roots tightly fill the smaller pot.

Many of the tropicals will survive and prosper over the next several months, even while very potbound. If they’re already in 8″ pots, they’ll likely be fine until spring, when they can be potted on if needed. The 6′ tall fiddle-leaf fig in an 8″ nursery pot, though, can go into a 10″ pot, since the heated sunroom has floor-to-ceiling windows. Sunny conditions encourage plants to grow new roots, but carefully monitor soil moisture. Avoid watering houseplants (especially succulents) on cloudy days.

If growing conditions in your home are not ideal, but plants absolutely need to be repotted, transplant them now, before fall, into slightly larger pots. Wait until spring to transplant large houseplants, if it’s needed at all.

Houseplants don’t require repotting every year. Once they have attained a mature size, they no longer need to be moved into progressively larger pots. Instead, regularly fertilizing with products formulated for houseplants will supply all the nutrients they need.


Headings:

Page 1: Should We Transplant Houseplants Now?, Inspect Them First, Do Your Plants Actually Need Bigger Pots? (Fertilizing Houseplants, Fungus Gnats, Save the Spider!), When Should I Transplant Houseplants?, How Big Should the Pots Be? (The Old Weeping Fig, African Violets, Less Is More)

Page 2: Prepare for Transplant (Root Insects, Speaking of Spider Plants, Roots-Air-Water-Light) and Potting Up (Score the Root Ball, Potting Soil, Begin Filling the Pot, Downsizing, Water It In)

Return to the top


What Is Wrong With My Houseplants?


2019: HAPPY NEW YEAR!


Does your list of New Year’s Resolutions include paying more attention to your houseplants? Now that the busy holidays are over, we’re almost back to our routines. The plants look forward to returning to their normal locations. They missed those bright windows!

If you’re dissatisfied with your plants’ appearance, today might be a good day to give all the houseplants a thorough examination and a good cleanup.


 Philodendron selloum, easy houseplants

Philodendron selloum adds a tropical element to the indoor environment.


What Is Wrong With My Houseplants?


Let’s begin with some easily recognized problems:

  • the plant has collapsed into a sad-looking heap of wilted foliage
  • leaf tips are brown
  • leaves are turning yellow
  • many of the leaves are dropping off
  • the flowers are gone

But your houseplants have sentimental value, so they’re not going into the trash…or into the compost pile. And you know they probably will recover with a little attention. After all, the same thing happened last year.

A home without houseplants looks sterile—to me, anyway—so there will always be indoor plants wherever we live. They rid the air of benzene, formaldehyde, and other pollutants. In return, we get a small boost in the humidity and oxygen content of the air we breathe.

And we enjoy living with nature. Many studies point to the psychological benefits of living with plants at home, at the office, in school, and in the community.

With the renewed interest in growing houseplants, a huge number of species and varieties are available. Popular plants, such as Fiddle-leaf fig (Ficus lyrata), are in such high demand at garden centers that supply is often difficult to maintain.

cold frame before covering, with mini lights

Several dozen plants are protected here, and will be covered with plastic for the night.

There are hundreds of plants in my collection, from 1″ tall miniature Haworthias to a 6′ tall 40-year-old ponytail palm (Beaucarnea recurvata).

Many succulents and half-hardy perennials spend the winter in the cold frame outdoors, heated with a few strings of miniature incandescent Christmas lights and covered with 2 or 3 sheets of clear plastic (photo, right). There’s just not enough room inside for everyone!

We often have warm winter days in the Carolinas. This gives some houseplants the opportunity to spend a few afternoon hours on the enclosed deck, basking in the mild sunshine.


My Peace Lily Is Wilting


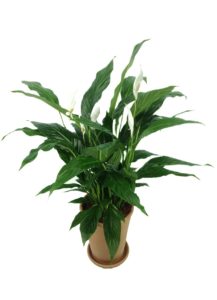
Spathiphyllum, or peace lily, popular houseplants

Peace lily, Spathiphyllum.

Wilt in peace lilies due to underwatering is a common problem. There are few plants that exemplify wilt more clearly than this one. A dry but still living peace lily, once watered thoroughly, will recover. But a few leaves might turn yellow, and they won’t green up again.

Peace lily (Spathiphyllum spp.) is commonly available and a good choice for beginning gardeners. You see them in malls and offices all over the country, where lush foliage lends a tropical flair to indoor spaces. Garden centers sell cultivars ranging from robust five-foot-tall specimens to table-top varieties less than 10″ tall.

They like soil that stays lightly moist all the time. But roots that stay wet all the time (from overwatering, overpotting, sitting in a wet saucer, or poorly-drained soil) are unable to “breathe”. Air and water are equally important to root health. Tiny root hairs that absorb moisture rot in wet soil, so the plant can’t get water to the leaves, causing the familiar wilt. A plant can wilt from either dry or constantly wet soil.


Keeping the Peace Lily Tidy

Strelitzia

Bird of paradise.

When yellow leaves appear, remove the entire leaf—both the blade (the wide part) and the petiole (the narrow leaf stem). The petiole is connected to the crown, stem, or the main trunk of a plant by a thin layer of cells. That layer of cells, the abscission layer, helps the petiole separate from the main part of the plant if the leaf is no longer useful.

After cutting off most of the yellow leaf, peel off the last bit of the yellow or brown petiole. If it is difficult to remove, as in large cultivars, cut the base of the petiole longitudinally down the center, toward the stem or the crown. Now you can easily peel off each half of the remaining petiole.

This works on other species with strong leaf attachments, such as Bird of paradise (Strelitzia, photo, above), yucca, palm, and dracaena. Removing all those dead fragments greatly improves the plant’s appearance.

Easy to Grow

Peace lilies are not demanding when it comes to light. Provide bright indirect light or morning sun for continuous growth. Disregard the advice that they thrive in “low light”. Sure, they’ll survive for a while, but brighter light toughens the tissues. New growth emerges thicker and stronger.

Plants photosynthesize and grow faster and often bloom in those locations, sometimes emitting a trace of scent soon after the white spathe flowers open. During the shorter days of the year, peace lilies welcome a few hours of direct sun.


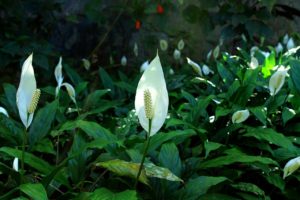
peace lily, flowers. easy houseplants

Peace lilies in bloom.


When the flower turns brown, snip off most of the stalk, wait a few days, and then pull out the remaining part of the shrinking brown stalk. You could remove it earlier, but sometimes a few green leaves are inadvertently removed at the same time. Once again, this keeps the plant tidy, with no lingering dead remnants.


How Often Should I Water My Peace Lily?

The Environmental Variables

diagram, wilted plantTemperature, light, humidity, fullness of the plant (number of leaves), pot size and type (porous or non-porous), soil composition, and air circulation affect moisture in the soil. A furnace cycling on more often during cold weather necessitates frequent watering of thirsty plants. Knowing how these variables work in conjunction with each other, for each species, will determine how often your plant needs water.

A full and potbound (roots tightly filling the pot) peace lily, in morning sun at 72°F, and in potting soil that drains fast (has a lot of bark chips), for example, might need water every 2 or 3 days. On the other hand, one that was recently transplanted into soil with mostly peat moss and kept in a room at 65°, in indirect light, with 15 other plants nearby (higher humidity) might need water every 5 or 10 days. That’s why it’s so difficult to answer the question, “How often should I water it?”

Most varieties of peace lily are potted into 6″ to 10″ diameter pots. Stick your finger into the soil an inch or two down from the surface. If the surface of the soil feels dry, but there’s damp soil below that, the plant does not need water.

Waiting to water your plants until they begin to wilt is not a good idea. Delaying for only one day could cause another leaf to turn yellow. Or the plant will refuse to produce new foliage.

How Can I Tell When To Water?

A better course of action is to feel the moisture in the soil and the weight of the plant and pot. Eventually, you’ll learn to recognize that when it feels “this” dry or light in weight, it’s time to water. Some gardeners rely on inexpensive soil moisture meters, but I don’t consider them to be very accurate.

And water your peace lily thoroughly! Not just a little bit that moistens the top 2″ of soil. Instead, give it enough to moisten the entire root ball. Some water will drain into the saucer, and a dry pocket of soil might soak up that excess. Drain off any excess that remains in the saucer after 15 minutes.

Many of us conserve energy in winter by keeping the thermostat in the mid to high 60’s F during the daytime and in the low 60’s at night. If you’re growing plants from the tropics, they appreciate being given lukewarm water, about 85° or 90°. This includes ficus, philodendron, pothos, African violet, Alocasia, Aglaonema, and spathiphyllum. Dry soil absorbs lukewarm water more readily than it does cold water.


Upon Careful Examination

Place a fully wilted peace lily in a bucket filled with lightly warmed water up to the pot’s rim. You might have to weigh down the pot. Keep it there for an hour or two, then let it drain. If it doesn’t revive after a few hours, remove the plant from its pot and examine the roots.

Certain materials used at the wholesale nursery, once dry, can resist absorbing water. It’s possible that, even though the plant had been transplanted into better quality potting soil, the plant’s original root ball stayed dry and was unable to produce new roots. When transplanting any plant, tease out some of the roots on the surface of the root ball, especially one that is solidly filled with roots. This helps stimulate the formation of new roots that will quickly grow into fresh potting soil.

I’ve worked on plants that seemed to have moist soil, yet remained in a wilted state. One of these conditions was usually the cause:

  • The plant was repotted too deeply, rotting the petioles and the crown of the plant. The crown should remain at soil level, where the green top growth meets the roots. Very few plants survive being planted lower in the soil. Rule of thumb: the original soil surface should be visible after repotting.
  • Over time, the organic matter (peat moss, wood products) in soil breaks down and loses most of its volume. Consequently, the soil surface drops lower in the pot. If roots are visible under the crown and are exposed to the air, add fresh potting soil to cover the roots. You might have to remove the plant from the pot and add soil under the roots to raise the crown to the proper level. Either way, don’t bury the crown.
  • The roots were not teased out from the root ball, and remained within the tight confines of the original root ball. The root ball dried out before new roots could grow into the moist new soil.
  • New potting soil was loosely added around the root ball, and not firmed in next to the roots. Moderate pressure against the roots helps develop a healthy root system, and fills any voids in the pot that could dry out delicate root hairs. It also prevents water from rushing through the pot, following the path of least resistance, and not soaking in.
  • The plant’s soil was wet for too long, and the rotted roots couldn’t regrow. Fungal and bacterial pathogens build up in wet soil and cause more problems.
  • The temperature in the room or of the water was too low. 
  • The plant was overfertilized, burning the roots. Many people think that fertilizing more often or using more than the recommended concentration makes plants grow faster. It doesn’t. Overfertilizing makes plants die faster. High salt concentrations draw water out of the roots, killing them.

Many of the problems we have with houseplants can be avoided if we keep them potbound in the winter. Cooler soil temperatures and shorter days do not favor root growth at this time of the year. It’s better to delay repotting houseplants into larger containers, if they need it, until spring to mid summer.


Headings:

Page 1: What Is Wrong With My Houseplants?, My Peace Lily Is Wilting, How Often Should I Water My Peace Lily? (The Environmental Variables, How Can I Tell When To Water?, Upon Careful Examination)

Page 2: How Often Should I Water Houseplants?, Should I Fertilize My Houseplants?, Brown Tips On Houseplants (Overwatering, Underwatering, Overfertilization, Disease, Guttation, Fluorine), Yellow Leaves, and My Houseplants Are Dropping Leaves

Page 3: Succulents (Porous Pots, Repotting and Refreshing), Ferns (Raise the Humidity), Pothos and Philodendron, Snake Plant (What is CAM?), English Ivy (Spider Mites), Will They Flower Some More?, and Before You Know It


Return to the top