Tag Archive | soil preparation

How To Grow Potatoes In 5 Simple Steps


Can we grow new potatoes from old potatoes?
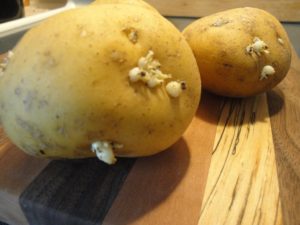


grow potatoes


Yes!

So… those potatoes left in the pantry or the bottom of the refrigerator decided to sprout. Instead of throwing them into the trash or the compost bin, try growing them! You can grow potatoes in the home garden or in large pots, following a few simple guidelines.
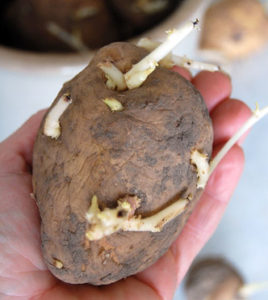
potato with eyes

Too withered for consumption, but fine for the garden.

We don’t recommend planting potatoes recently purchased from the grocery store because they’ve likely been treated with a sprout inhibitor. After the effect wears off, you’ll see the eyes begin growing. That, though, could take months.

Organic potatoes, if treated with sprout suppressors approved by the National Organic Program, sprout earlier than non-organic potatoes. Inhibitors, such as spearmint, peppermint, and clove oils, must be applied more frequently than chemicals used on traditionally treated potatoes.

Spouting potatoes (like the ‘Yukon Gold’ in photo, top) are still edible, after removing the eyes. Discard moldy and rotting potatoes. But save for the garden the ones with well-developed sprouts and those that have withered beyond the point of palatability.

Carbohydrates stored in the tuber provide energy for the developing shoots. When green leaves begin growing, photosynthesis will sustain the plant.


When can we grow potatoes outside?

Potatoes can tolerate cool soil, but not cold, wet soil or freezing temperatures. I live in USDA plant hardiness zone 7, where we plant early maturing varieties 4-6 weeks before the last spring frost. Gardeners plant mid-season and late varieties after that.

Wait for the soil to warm up to at least 45°F before planting tubers. Long-range weather forecasts might indicate whether it’s safe to plant or prudent to delay.

A garden exposed to full direct sunlight warms up earlier in spring than one in partial sun. Grow potatoes in full sun, but avoid exposing them to searing summer heat. Gardeners living in higher elevations or in cooler summer regions can grow potatoes through the season.

If the weather forecast predicts temperatures below freezing, I’ll mulch the soil with several inches of oak leaves, never in short supply around here. A thick, airy mulch insulates the ground from a sudden drop in temperature. Plants benefit from mulch kept in place all season. Not only does it moderate temperature, suppress weeds, and keep moisture in the ground, but it also prevents disease spores from splashing onto the potato’s leaves. This is easier to do in small garden plots than in larger farming operations.

Emerging foliage can tolerate light frost. It could take a few weeks for growth to show above ground.


Seed Potatoes

For a wider selection of varieties offered to farmers and home gardeners, look for “seed potatoes”. Some garden centers and many seed suppliers stock seed potatoes. They’re not actually seeds, but certified young potatoes almost ready for planting. Although they’re certified disease-free when purchased, plants are susceptible to a few pathogens as they grow.

Favorable conditions and good management practices decrease the likelihood of problems. If you’ve had diseases in your potato crops, don’t save potatoes year to year, but purchase certified potatoes instead. Don’t grow potatoes where they’ve been planted any time in the past 4 years.

Botanically speaking, potatoes are classified as Solanum tuberosum. They belong to the Solanaceae family and call tomatoes, peppers, and eggplants their cousins. Tobacco, petunias, and deadly nightshade, a poisonous weed, also belong to the nightshade family.

Potatoes are native to the cool mountainous regions of South America. In the 1530’s, European explorers gathered them and introduced potatoes to their homeland. Irish immigrants brought them to North America in the early 1700’s. Approximately 4,000 varieties of potatoes have been bred. True seeds, as opposed to seed potatoes, are poisonous when eaten and are used only for breeding purposes.

You can find potatoes with white, yellow, tan, red, blue, and purple skins and flesh. Thin-skinned potatoes, such as ‘Yukon Gold’, ‘Kennebec’, and ‘Red Pontiac’, grow well in the eastern parts of the U.S. The western states suit the thicker-skinned ‘Russet’ and other baking potatoes.


Crop Rotation

One of those good management practices involves rotating our crops. Related plants tend to be susceptible to the same pathogens and insect pests. When growing one crop in the same plot of land year after year, disease spores and insects can build up in that location. That’s why it’s recommended to move all members of a particular plant family to different plots over the next several growing seasons.

For example, if you grew potatoes, tomatoes, peppers, or eggplants in Plot A in any of the last 4 years, move your potatoes and other members of the Solanaceae family to Plot B this year, Plot C next year, and then Plot D the year after that.

Rotate among the various plant families, such as:

  • brassicas—arugula, broccoli, Brussels sprouts, cabbage, cauliflower, kale, etc., in the Brassicaceae family
  • cucurbits—cucumber, squash, zucchini, melons, in the Cucurbitaceae family
  • legumes—peas, beans, in the Fabaceae family
  • lettuces, in the Asteraceae family
  • onions, leeks, garlic, in the Amaryllidaceae family
  • Swiss chard, spinach, beets, in the Amaranthaceae family
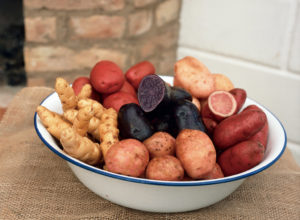


Root Vegetables

Several varieties of potatoes.


How To Grow Potatoes In the Garden


Step 1: The First Cut


Before planting potatoes in the ground, cut them into pieces about 1½” long. Each piece should have 2-3 eyes. Let them sit in the open air for 1-2 days to seal the cut surface. This helps prevent rot in moist soil.

Small potatoes can be planted whole.


Step 2: Prepare the Soil If You Want To Grow Potatoes
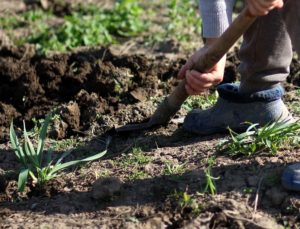


grow potatoes


Thorough soil preparation serves the immediate purpose as well as plantings in years to come. After improving the soil with generous amounts of drainage materials, you’ll need to add nutrient-rich amendments a few times each year after that.

Not repeatedly disturbing the soil profile retains healthy populations of beneficial microbes. Farmers are increasingly using no-till methods and cover crops to preserve soil structure and prevent erosion of valuable topsoil. Frequent tilling also introduces high levels of oxygen between the particles of soil, so organic matter is broken down too quickly.

Vegetable plants need good drainage, and potatoes are no exception. Loosen the soil at least 12″ deep, breaking up the clods. Potatoes struggle in compacted clay and stony soils; tubers that do form are often misshapen. Potatoes grow very well in raised beds.

Incorporate a few inches of pine fines, soil conditioner, peat moss, and/or coarse sand to improve the tilth (or workability) of the soil. Avoid layering materials in the soil profile. Layers of coarse and fine materials, with differing air pore spaces from one material to another, obstruct water percolating through the soil. This could cause soggy layers that can rot roots. For that reason, I never place a layer of gravel under plantings.

In the top 5″ of loosened soil, mix in compost, leaf mold, or planting mixes. These materials contain a variety of nutrients required by vegetables, and they encourage rapid rooting.

Aged manure and mushroom compost are not recommended for root vegetables.


Soil PH

Potatoes love heavily composted soil. They also require acidic soil, with a pH between 5.0 and 6.0. (Various websites recommend a pH anywhere between 4.8 and 7.0.)

Low pH helps prevent scab, a disfiguring disease of potato skins. Soil pH outside the preferred range for potatoes limits nutrient absorption and might cause nutrient toxicities.

Contact your local agricultural extension agents for information on taking a soil test. They can recommend preferred fertilizers, methods to lower soil pH, and varieties appropriate for your area.


Step 3: Place the Seed Potatoes


In rich, organic soil, simply lay the potato pieces on top of moist, loosened soil or nestle them into the surface. The eyes should face upward. Then mulch over the seed potatoes.

They’ll also grow when planted 2″ deep. Space potatoes 6-12″ apart, depending on variety. Because potato plants grow 2-3′ tall and might sprawl a bit, allow 30-36″ between rows.

Mulch the bed with a few inches of leaf litter, shredded leaves, and pine needles to cover the planted potatoes. It’s important to adequately shade the surface of the ground from sunlight to protect growing tubers from greening…


“Greening”?
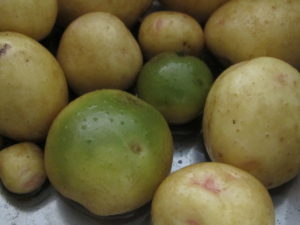
grow potatoes, but discard green ones

Potatoes with green skin needed deeper mulch.

Greening is caused by exposure to light, which, in itself, is not harmful. But the green pigment (chlorophyll) in potatoes is associated with the formation of a toxic glycoalkaloid called solanine.

Never eat green potatoes; if only the skin is green, cut off and discard that part before cooking. Never eat leaves, stems, or the berries that develop on potato plants. 

Solanine in potatoes is more concentrated when growing potatoes in high nitrogen soils and in soil that’s compacted or very sandy. Bruised potatoes, those held a long time in storage, and potatoes with large eyes are higher in this toxin. The greener the potato, the higher the level of solanine. This bitter substance is a natural repellent to insects and browsing animals.

Solanine can’t be boiled or cooked away. The level is somewhat lower in foods fried at very high temperatures, but that brings its own problems, described later in this article. I’m not intent on discouraging you from growing or eating potatoes, but moderate consumption of this popular vegetable and proper preparation make it a healthier indulgence.

Symptoms of solanine toxicity include vomiting, diarrhea, slow pulse or breathing, low blood pressure, and abdominal pain. It can cause coma and death in rare instances, so be very careful with green potatoes. If any of the flesh is green after removing the skin, I would discard the potato.


Step 4: Maintenance


Water

Water the garden thoroughly after planting and mulching. If rain is unreliable, water the garden every week, never letting the soil become dry. Provide 1-1½” of water each week if it doesn’t rain.

Avoid wetting the foliage, and water in the morning so the foliage is dry going into the night. This helps cut down on the incidence of disease. Some varieties are resistant to blight, scab, Rhizoctonia, and Verticillium wilt. Those that have not been bred with disease resistance often produce great yields when using good gardening practices.

Hollow Heart and Brown Center

Some large varieties, particularly ‘Atlantic’ (for potato chips) and ‘Yukon Gold’ (a personal favorite), might show hollow heart and/or brown center. These are physiological disorders characterized by a star-shaped cavity and a central area with dead brown tissue, respectively, in the center of the potato or near the ends.

These stress-related conditions often result from inconsistent soil moisture—for example, wet soil after a period of dry soil. In addition, a period of prolonged cold weather during tuber formation can cause brown center. Spacing seed potatoes too far apart and using small seed potatoes (with too few eyes) can be the cause. Low potassium and other nutrient deficiencies can initiate the disorders.

The potato’s skin shows no indication of a problem. Affected potatoes aren’t perfect but are still edible.


Hilling Up 

As the plants grow, hill up soil against the stems of the plants. Take soil from another part of the garden, adding a few inches up the stem and about 12″ out from it. This is an option—not necessary—but it should increase the yield.

Like tomatoes, potatoes root along buried stems. As they root, they’ll develop another layer of young potatoes at the ends of the stolons. Hill up around the stems 2 or 3 times during the growing season to maximize the harvest.

An alternative is to start potatoes in a moderately deep trench, reserving excavated soil on the side of the bed. Periodically fill in the trench with amended soil, a few inches at a time.


Fertilizer

Every few weeks, apply a complete fertilizer. The 3 numbers on the package representing nitrogen, phosphorus, and potassium (N-P-K) should be in a ratio of 1:1:1 or 1:2:2. Avoid fertilizers high in nitrogen. An analysis close to 10-10-10 or 5-10-10 is adequate.

Although you could use chemical fertilizers, they tend to damage populations of beneficial microbes. But, until the soil warms up, microbes aren’t sufficiently active to break down the organic components into molecules the plants can absorb. That’s when I use chemical fertilizers, and then switch to organic products when the soil warms.

To help prevent disorders in developing potatoes, it’s recommended to apply smaller concentrations of fertilizer more frequently.


Insect Pests

Colorado potato beetles can be especially bothersome as they consume significant amounts of foliage. Inspect the undersides of the leaves for yellow-orange egg masses and remove them. The beetles have 10 black stripes on their tan wings. Immature larvae are orangish-red with 2 rows of black dots down each side. Bacillus thuringiensis var. tenebrionis, a biological insecticide, kills this beetle.

Aphids might congregate in large numbers on the plants. A brisk spray of cool water from the hose takes care of most of them. Encourage ladybugs, braconid wasps, and green lacewings to populate your garden. For severe infestations, prepare a solution of horticultural oil and spray early in the morning. Apply the solution to the bottoms of the leaves as well. Read the label.

Cutworms feed on sprouts emerging from the ground. Since these C-shaped larvae become moths, treating the potatoes with Bacillus thuringiensis var. kurstaki effectively kills them. Keep in mind that they’ll have to eat some of the foliage in order to ingest the Bt.

Slugs and Deer
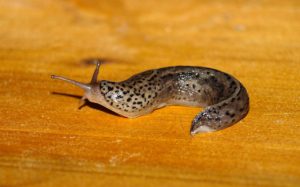
slug

A slug.

Slugs reproduce rapidly in moist conditions and where they can hide in crevices during the daytime.

Lay a board on moist ground, and slugs and snails will gather there after feeding through the night. You might notice those silvery slime trails on tender foliage. Early in the morning, take an old knife to the garden and… dispatch them forthwith! Or use organic Sluggo or similar product, which does not contain toxic chemicals. Except to slugs and snails. Read the label.

Although potato foliage is not the favorite choice of warm-blooded animals, deer and others will feed on it when not much else is available.

Other members of the nightshade family also host these pests. Row cover secured over the planting excludes most insects and browsing animals.
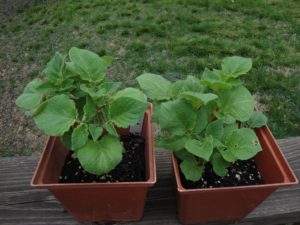
 

grow potatoes in pots or in the garden

Potatoes that sprouted in storage are now growing new plants in 6″ pots. They’ll need protection from hard frost if planted, but I didn’t want to delay planting the deteriorating tubers.


Headings

Page 1: Can we grow new potatoes from old potatoes? (When can we grow potatoes outside?, Seed Potatoes, Crop Rotation), How To Grow Potatoes In the Garden, Step 1: The First Cut, Step 2: Prepare the Soil If You Want To Grow Potatoes (Soil PH), Step 3: Place the Seed Potatoes (“Greening”?), Step 4: Maintenance (Water, Hollow Heart and Brown Center, Hilling Up, Fertilizer, Insect Pests, Slugs and Deer)

Page 2: Step 5: Harvesting!, How To Grow Potatoes In Containers, Grow Potatoes For Their Nutrients (The Power Of the Purples, Potato Skins, Resistant Starch), The Problem With High Heat
Return to the top

Seedlings For Your Garden: 12 Tips


2022

Updated 5/21/2024


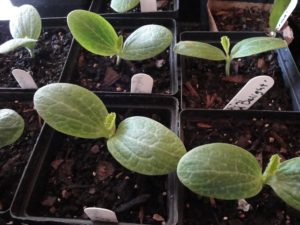
seedlings, zucchini


Starting Seedlings For Your Garden


Busy spring! This lengthy article focuses on starting and caring for seedlings and getting them established in the garden. If I’m not working on the seedlings, I’m working in the gardens, creating new beds and expanding those started last fall and winter. Winter weather was delightfully mild to allow planting right through the cold season. The weeds and I have come to an understanding, and in the next article, I’ll tell you how in “Patches for Pollinators”.

Foremost on the agenda has been starting plants to sell at our local Elkin Farmers’ Market. It’s been a challenge this year, keeping plants in good condition with high heat, heavy humidity, and frequent rainstorms. If I had a climate-controlled greenhouse, there might have been fewer losses. But, for the most part, my company, Wellspring Gardens, is producing more seedlings than I can sell at the market.

Some of that overproduction is destined for the vegetable gardens. It will yield small harvests of produce to sell at the market in addition to what’s needed in the kitchen. This is new territory for me, adding produce to the plants offered at the farmers’ market.

I might even consider canning, which I’ve never done…but let’s not get ahead of ourselves. That would be helpful, though, considering the rapidly rising prices at the grocery store. For that reason alone—the impact of rampant inflation on our wallets—it’s wise to learn how to grow at least a few vegetables.


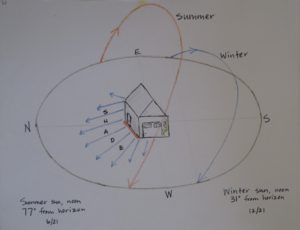
sun's path

The sun’s path across the sky, Charlotte NC.


Watching how the sun tracks across the sky from month to month reveals good spots for the sun worshipers and areas where leafy greens should thrive in partial sun. This is my first summer in this house. The massive oak trees create shifting shade patterns that cause me to periodically rethink the plans.

So, let’s begin!


12 Tips For Starting Seeds


1. Start with clean materials for seedlings.


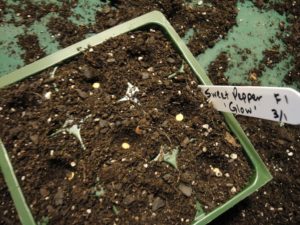
pepper 'Glow' seeds and cell pack

Sweet pepper ‘Glow’, started in 9-cell packs.


This calls for packaged seedling mix or fine-grained potting soil. Don’t use “dirt” from the garden, with its pathogens, insects, weed seeds, and worms that disrupt soil structure around tiny roots. In addition to the unknowns lurking in garden soil, its high clay content causes drainage issues in containers.

Potting soil that has a lot of coarse materials, such as pine fines (bits of pine bark), can be improved by sifting the soil. I use a clean plastic pot with small holes in the bottom. Fill the pot partway with the soil, and shake it vigorously up and down over the containers. Do the same thing when covering seeds.

Soil used previously for potted plants is not a good medium for your seedlings. It’s often depleted of nutrients, might contain pathogens, and the organic matter has partially decomposed. If it’s only one season old, it’s probably safe for transplanting potted annuals, when mixed with fresh potting soil, or incorporated into the backfill for that new sourwood tree. Or simply throw it under the shrubs or into the compost pile (never in the trash!).

Because seedlings are susceptible to soil-borne diseases, play it safe and start with pasteurized bagged seedling mix or potting soil. This, however, doesn’t guarantee a successful outcome, as many disease spores are air-borne. But we can increase the odds of success by using clean materials.

When reusing cell packs, pots, and flats for seeding, wash them in a 10% bleach solution, and rinse well before proceeding. Don’t smoke around plants, and wash hands thoroughly before working with them. Tobacco and other plants in the nightshade family (Solanaceae, including tomato, pepper, eggplant, and potato) can fall prey to the same disease organisms. Spores can transfer from tobacco products to your hands to the plants.


Pasteurizing Potting Soil

For bagged soil that’s questionable, you can pasteurize it in the oven. Don’t heat soil that contains timed release fertilizers. Use an oven-safe covered pot or baking dish, wet the soil, and heat the oven to 200°F. When the soil registers 140° on a meat thermometer, lower the oven temperature and maintain soil at that temperature for 30 minutes. This kills most pathogens. Wait for it to dry somewhat and to cool thoroughly before using. Various websites recommend different temperature levels from 140° to 300°. At the high end, however, beneficial microbes are killed off as well.

Let it cool down outdoors. Considering the pervasive “earthy” odor coming from hot soil, you might prefer buying a new bag of seedling mix or accept a small risk with the open bag in the garage.

Another method of pasteurizing (not sterilizing) soil is to place a heat-resistant container of soil in a black plastic bag. Place the bag in a sunny place outdoors on a warm day, and let the sun do the work for you. This is called solarization, and can raise the temperature inside the bag to 140-160°F. To prevent damage to the beneficial microbes, take the temperature, and maintain it at 140° for 30 minutes, opening the bag a bit to prevent overheating.

Most bagged potting soils and seedling mixes already have been heat-treated to eliminate pests. Close the bag securely and store in a cool dark place. The last and only time I pasteurized soil was nearly 50 years ago because that’s what the experts recommended.


2. Grow disease resistant varieties…


While fungicide and bactericide formulations—both organic and conventional—are available, I’d rather grow disease resistant varieties and not rely on spraying. Keep in mind that resistance is not 100% effective, particularly when plants are exposed to stressful weather or cultural conditions.

Certain varieties are more flavorful than others, but all well-grown fruits and vegetables from your own garden taste better than those purchased from grocery stores. Picked when vine-ripened perfect, anything coming from the garden will be superior to what’s found elsewhere except, perhaps, at farmers’ markets and farm stands. Freshly picked produce also has the highest nutrient content.

Digging in the garden is great exercise; proceed slowly at first. Working outside in nature feels good, and self-sufficiency is never amiss. A few steps from the back door gathering a green onion, spinach, dinosaur kale, and a little ripe sweet pepper for the veggie omelet is more rewarding than I can describe. You’ll see!

Those are just a few of the many benefits of growing our own vegetables. Using disease resistant varieties, if available, makes the job so much easier. Many new gardeners gave up after having suffered the disappointment of losing an entire crop to early blight or bacterial leaf spot. And we also have to deal with deer, rabbits, and insects!

Although this article concentrates primarily on edibles, flowering plants also have their own set of disease organisms. Again, look for resistant varieties, grow them in conditions that don’t favor infection, and look for remedies at the garden center.


…Especially Tomato Seedlings

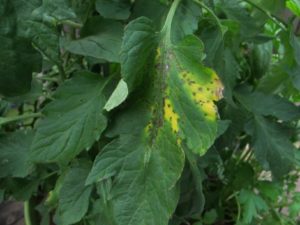
tomato disease septoria?

Disease beginning on ‘Rutgers’ tomato.

Tomatoes and peppers, two of the most popular crops for home vegetable gardens, are vulnerable to many diseases. They’re caused by fungal, bacterial, or viral pathogens. In some areas, nematodes also can be a problem. Usually, we can harvest some fruits before disease claims them, but resistant plants last longer in the garden. Plants infected with viruses should be removed and destroyed. For fungal and bacterial pathogens, products at garden centers will help. Always read the labels.

Tomato diseases include Alternaria stem canker, early blight, late blight (Phytophthora; very few varieties are resistant to this one), Fusarium wilt, grey leaf spot, leaf mold, tobacco mosaic virus, tomato mosaic virus, tomato spotted wilt virus, and Verticillium wilt. Catalog listings use initials to indicate disease resistance. For tomatoes, AS, EB, LB, F, GLS, LM, TMV, ToMV, TSWV, and V, respectively, represent those diseases.

Tomatoes are weedy plants and normally produce good crops, despite many organisms that target them. Peppers are susceptible to several races of bacterial leaf spot, and basil to basil downy mildew. Some zinnias are plagued by powdery mildew. Weather conditions, such as high humidity and frequent rain, exacerbate these disease problems.

Most hybrid (or “F1”) tomatoes have some resistance to one or more pathogens, but not to all of them. ‘Big Beef Plus’ is resistant to a wide variety of diseases. ‘Damsel’ and ‘Defiant PhR’ are resistant to late blight. Hybrid seeds carry a higher price than open pollinated varieties due to the cost of research that developed them and the extra steps needed to produce hybrid seeds each year.

It’s so hot out there!


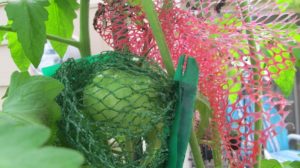
shading tomato flowers


If you live in a hot climate, look for tomato varieties that have been bred to produce better at high temperatures. The pollen in tomatoes and peppers, and others, can die at high temperatures. While these plants are comfortable at 65-80°F, pollen dies above 88°, 90°, or 92°, depending on the cultivar. No pollination = no fruits! A reference to “heat” or to the “south” in the plant’s variety name indicates its higher tolerance for heat.

Researchers are investigating thermo-tolerant genetics in wild tomato species (Solanum pimpinellifolium) and incorporating them in tomato breeding programs.

One trick to preserve viable pollen is lightly shading the plant in the hot afternoon hours. Attach shade fabric—a black woven mesh—to a support over and on the west side of the tomato or pepper plants. This provides a decrease of up to several degrees in hot climates or temporarily during a heat wave. In the photo, above, mesh bags from the grocery store protect fruits from squirrels and sun scald, and lightly shade new flowers and their pollen from high heat.

The young ‘Estiva’ tomato plants (“estiva” refers to summer), a hybrid bred for heat tolerance and great taste, lost most of their diseased bottom leaves in heavy rains, but those little fruits are still growing! I’ll plant them out this weekend, after the temperatures drop well below the 108° heat index value we have now. Recent weather has been in the record-breaking mid- to high 90’s F, with high humidity. Not my favorite conditions to dig in the garden…so I don’t.  I was not bred for heat tolerance!

***Update***: ‘Estiva’ tomatoes endured this hot summer and produced fruits past the first fall frosts. I covered them on chilly nights to ripen the last of the fruits. These were among the last tomatoes to succumb to the cold, in mid-November. Autumn 2022

A Few More Tomato Tips

Your best defense against tomato disease, in addition to growing disease resistant varieties, includes these tips:

  • Stake them. Tall indeterminate types need a 6-8′ tall stake, taller for some.
  • Space them farther apart, at least 3½-4′.
  • Thin the vines to 3 or 4 main stems by removing excess suckers.
  • Remove leaves on the bottom 12″ of the plants after they’ve become established.
  • Locate them where a breeze blows through the garden. These first 5 tips address increasing air circulation around and through the tomato plants.
  • Give them lots of direct sun—a minimum of 7 or 8 hours. The more sun they receive, the shorter the window of opportunity for pathogens to germinate on damp leaf surfaces.
  • Mulch the soil under the plants to prevent disease spores lying dormant in the soil from splashing onto and infecting the foliage. More on Page 4.
  • Water in the morning to early afternoon so all foliage is dry going into the night. Try to keep the foliage dry at all times and avoid handling wet foliage.
  • Water established plants heavily (1½”/week) when needed, but avoid giving little sips every day. Young seedlings need more frequent watering until their root systems expand.
  • Clip off leaves that show early symptoms (yellowing, spotting), and dip your pruners in alcohol when moving from plant to plant.
  • Don’t smoke near the garden, and wash hands thoroughly before working with plants.
  • Rotate your crops. Don’t plant a member of the Solanaceae family where any members have grown in the past 3-4 years. There’s more about crop rotation on Page 4.

All plants grown with good soil preparation, good air circulation, proper watering techniques, adequate sun, and appropriate fertilization are less stressed. Less stress equates to lower infection rates.

Growing Heirloom Seedlings


Heirloom tomatoes are always in demand because of their exceptionally good flavor. Heirlooms are open pollinated, which means gardeners can save seeds from fully ripened fruits each year for the next season’s garden. Because they’re not F1 hybrids but have been breeding true, for the most part, for many decades, heirlooms retain their traits from one generation to the next.

These varieties, however, don’t have much built-in disease resistance. Nevertheless, I’m growing a few heirlooms, and spacing them 4′ apart for improved air circulation. We’ll see what happens.

Commercially grown tomatoes must be able to survive long distance transportation and handling without damage. They’re picked early, when green or first showing color. Varieties of these tomatoes have skins that normally are tougher.

Heirloom tomatoes have more desirable thinner skins and, therefore, travel poorly. So, you won’t see them in grocery stores unless those stores buy from local farms. Heirloom tomatoes from the grocery store might cost $5.00/lb. or more! So, yes, it is worth growing a couple of heirloom tomato plants in our gardens.

A few prolonged and heavy rainy periods this spring almost wiped out certain tomato varieties, namely ‘Carmello’, ‘Brandywine’, and ‘German Johnson’. I still have a few that show less damage than others. ‘Black Krim’ and ‘Cherokee Purple’ are doing fairly well, although they are heirlooms. Most of the remaining plants will be set in the garden. There’s usually a breeze blowing through the property, and by spacing them appropriately, I should get plenty of fruits.


Basil Downy Mildew


basil downy mildew

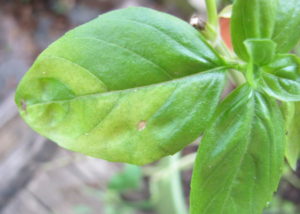
First symptom of BDM: yellow blotches between the main veins.


Although this dreaded disease targets only basil, it hasn’t appeared yet this year. But I’m prepared.

Last year, I grew ‘Rutgers Obsession DMR’ (DMR = Downy Mildew Resistant), an acceptable substitute for our beloved ‘Genovese’ and other susceptible sweet basils. Last year’s ‘Obsession’ did not develop any basil downy mildew (BDM)—not one speck—although wet and humid weather presented a worthy challenge. Other basil varieties in the ground or in pots succumbed to the disease within a week of infection…even young seedlings.

This year, I’m growing ‘Rutgers Obsession DMR’ and also ‘Rutgers Devotion DMR’ outside all summer. In addition, I’m seeding the old favorites, including ‘Genovese’, ‘Italian Large Leaf’, Thai basil ‘Siam Queen’, ‘Marseillais Dwarf’, and ‘Tuscany’, a lettuce-leaf basil. A few non-resistant basil plants will come indoors at night when warranted, as described below. But I’ll stop seeding susceptible varieties, except for a few pots, and concentrate on the resistant ones for the farmers’ market if the disease appears in the neighborhood.

Several other BDM resistant varieties can be purchased as seeds or as started plants.

Avoid High Humidity

basil seedlings in clay pot

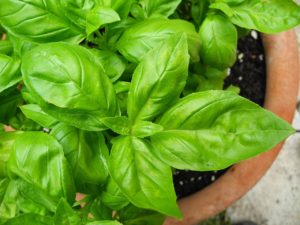
Healthy sweet basil, in a pot.

If you want to grow your favorite basil varieties that are not resistant to BDM, there is a way to prevent a total loss.

BDM spores move up from the south on the breeze or on infected plants shipped into the area. The spores don’t overwinter in cold climates. If spores land on a susceptible variety, they need a relative humidity above 80-85% for a couple of hours in order to germinate.

Even during pleasant weather, the relative humidity can reach 90% or higher in the 2-3 hours around dawn. That’s when the temperature is usually the coolest and, therefore, the relative humidity is the highest.

When plants show early symptoms of BDM, remove the affected leaves. Take potted basil plants indoors for the night, every night. Indoor conditions never reach those high humidity levels, so you can still grow your preferred basil varieties successfully with a little effort. Remember to place the plants back outdoors after the sun has been up for a couple of hours.

Follow this regimen during rainy weather, although the plants might need to spend a day or two inside. Find the brightest spot to keep them during their temporary stay indoors. If possible, provide some artificial light. Unless it’s wilting, avoid watering basil indoors. Less sunlight means the plant won’t be photosynthesizing optimally or using much water, and wet soil can initiate root rot.


Headings

Page 1: 1. Start with clean materials for seedlings. (Pasteurizing Potting Soil), 2. Grow disease resistant varieties… (…Especially Tomato Seedlings, It’s so hot out there!, A Few More Tomato Tips, Growing Heirloom Seedlings, Basil Downy Mildew, Avoid High Humidity)

Page 2: 3. Timing is important for seedlings. (The Fall Growing Season, Keeping Records, The Cooperative Extension Service, Starting Seedlings Outdoors, Don’t Start Seedlings Too Early, Cool Season Crops, Extending the Growing Season, Seedlings Transplanted Into Bigger Pots, Bunching Onions, The Brassicas, Brassicas In My Garden, Lettuce), 4. Is the temperature suitable for seedlings? (Miniature Incandescent Lights For Warmth, Water Temperature)

Page 3: 5. Start seedlings in small batches. (My Simple Infrastructure), 6. Seedlings need strong light. (Growing Seedlings Under Shop Lights), 7. Cull the weaklings and anomalies. 8. Prevent damping-off disease from killing your seedlings. (Actinovate), 9. Seedlings and plants need fertilizer. (The Elements, Read the Label)

Page 4: 10. Prepare the soil for your transplants. (Start With Good Drainage, Air Pore Space, Gypsum and Lime, Add Nutrient-Rich Amendments, Bury It), 11. Try succession planting for maximum yield. (Crop Rotation, Mulch), 12. Stop the pests before they ruin your garden. (Slugs and Snails, Larvae of Moths and Butterflies, Spider Mites and Thrips, Deer and Rabbits), Concluding

Return to the top of Page 1

Plant Trees To Transform Your Landscape, Part 2


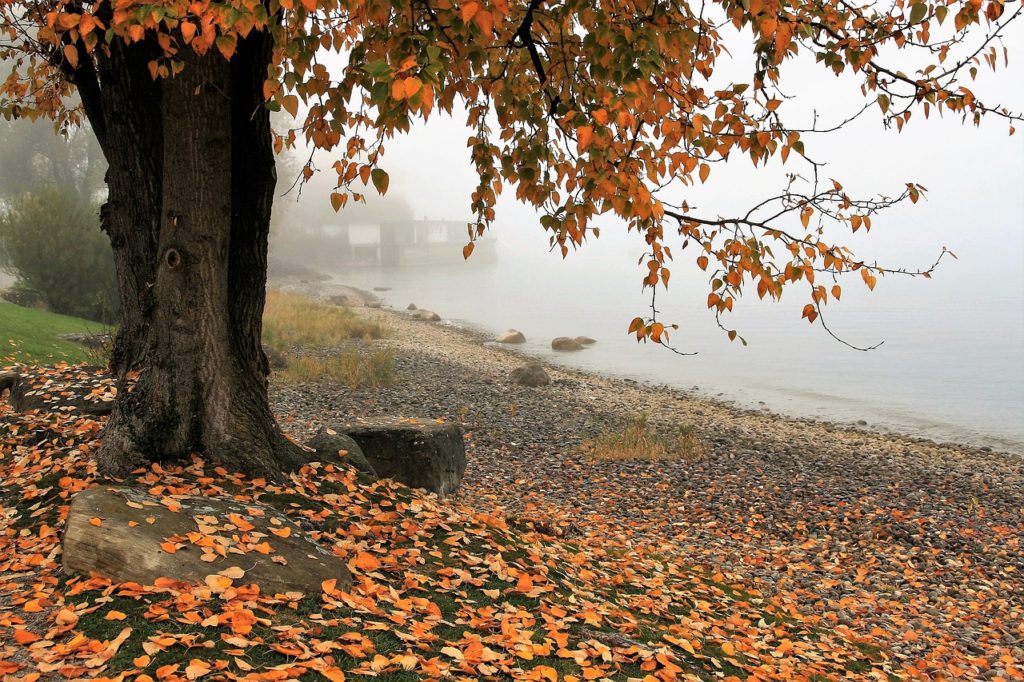
Autumn Lake Tree Nature Leaf - pasja1000 / Pixabay


After reading Part 1 of “Plant Trees to Transform Your Landscape”, you’ve located the best spot where a tree will shade the house from brutal summer sun. Recommendations and practices presented here are based on climate and soil in the eastern part of the United States, where I live and garden, but the basic principles apply everywhere.

If your main objectives are shade, attracting wildlife, and less grass to mow, include masses of shrubs and perennials in the landscape plan as well. This article concentrates on planting trees, the dominant features in the landscape.


Native Plants vs. the Non-Natives


The choices offered in garden centers can be narrowed down to native species and non-native, or exotic, species. Within each of those groups are the original species and the cultivars (cultivated varieties). Developed by plant breeders, cultivars exhibit more ornamental or desirable—or just different—characteristics than the species.

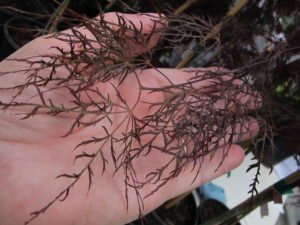
Japanes maple Red Filigree Lace

‘Red Filigree Lace’, a delicate cultivar of Japanese maple.

Non-native plants originated in a different country or perhaps only a few hundred miles away. If the plant doesn’t occur naturally in your geographic region, it’s non-native, although some gardeners restrict use of the term to plants evolving in another country.

There are many beautiful plants, exotic to our shores, which we’ve enjoyed in our gardens. Japanese snowbell (Styrax japonica), Stewartia pseudocamellia, and the dizzying assortment of Japanese maples (Acer palmatum) are just too hard to pass up. You can compromise, if you wish, by including both natives and exotics.

To most garden center visitors, none of this matters. We buy plants that solve problems and look pretty in our yards. But, to explain the relevance of native species, I’d like to expand the subject.


The Benefits of Native Species

First, native plants require less pampering to get them established.

Species that evolved locally can tolerate fluctuations in weather patterns. Temperature extremes, rainfall, humidity, soil types, altitude, wind patterns, and local fauna shaped today’s ecosystems.

Second, gardeners concerned about local pollinators choose plants that foster bees, butterflies, and other animals that pollinate farm crops and wild vegetation.

Every third bite of food we consume is attributable to pollinators. But, you might make the case that since most crops are alien to this country, it shouldn’t matter whether we use native or non-native trees. But we need to consider what larval insects consume, and that’s foliage and other plant parts. Thousands of species—not just bees—pollinate our farms, orchards, fields, and forests.

Egg-laying female moths and butterflies, beetles, and other insects are very selective and seek the natives they evolved with to supply sustenance for the following generation.

Incidentally, honey bees are not native to this part of the world. They will, however, forage from plants grown here, many of which are related to the plants they evolved with.

Making a Case For Single Flowers


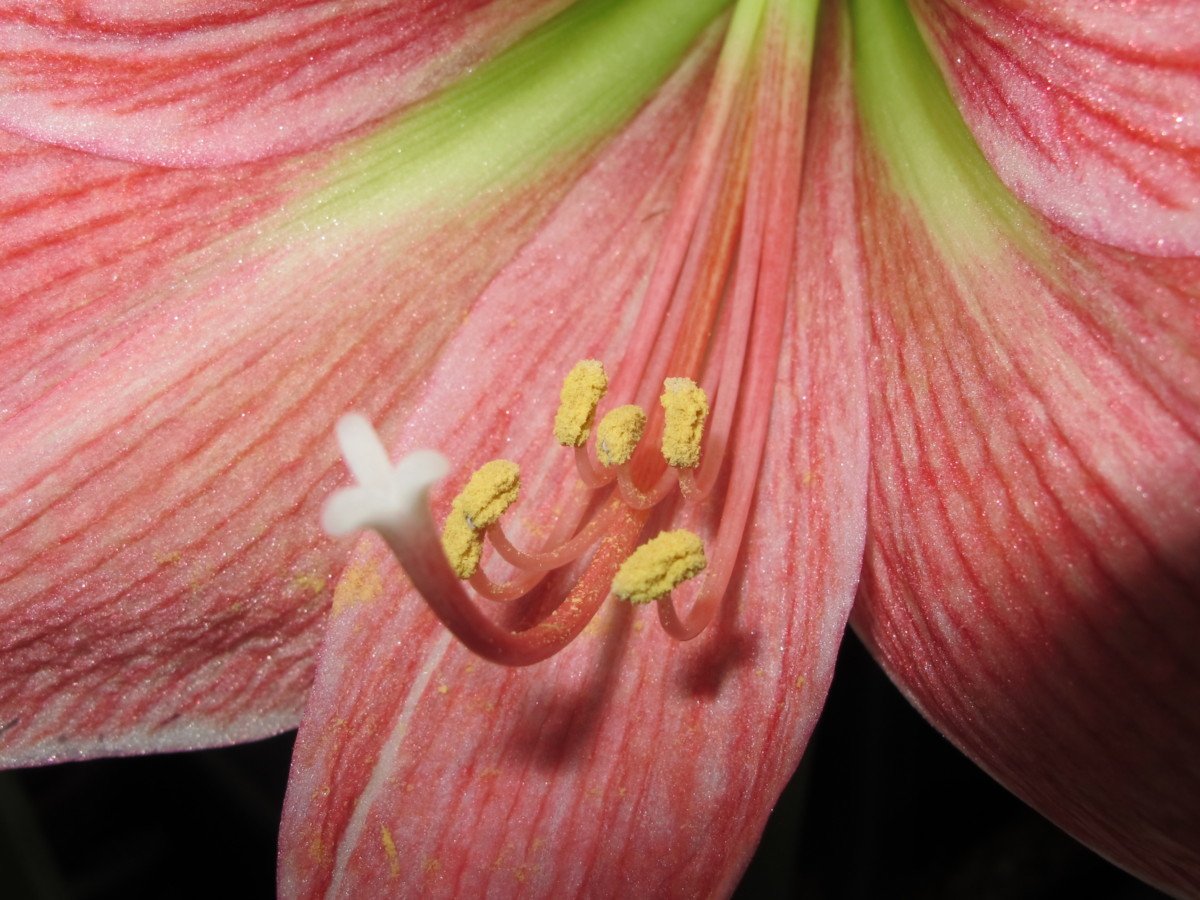
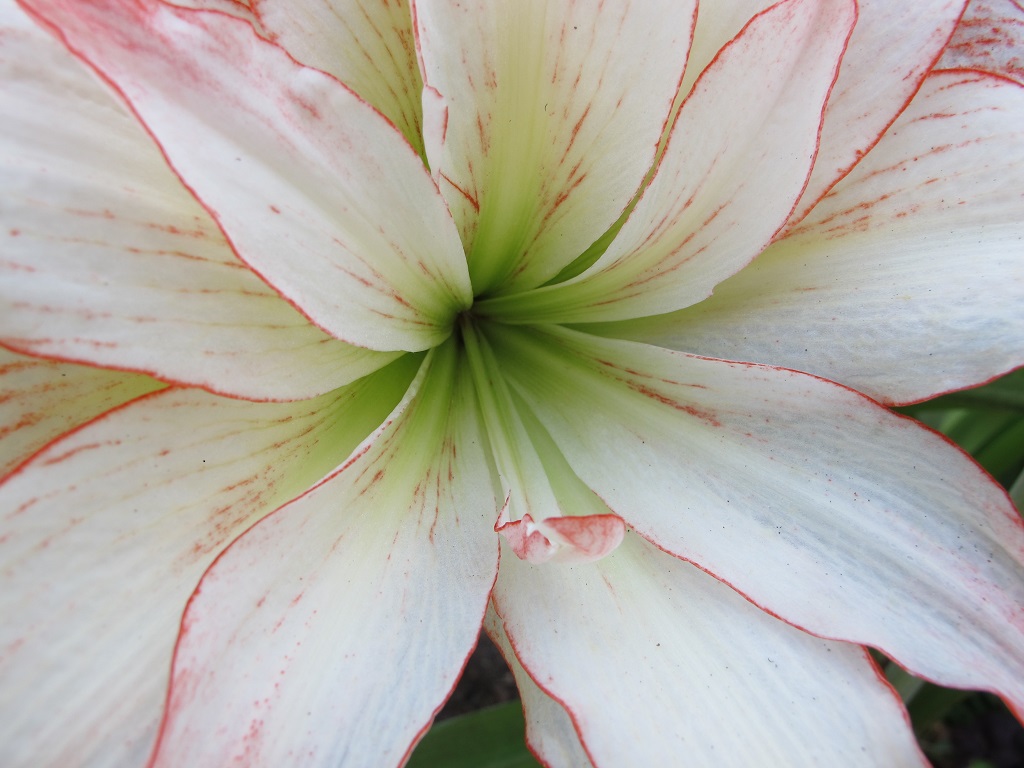
Flowers attract pollinators, which reap the harvest of nectar and pollen. But many double- and triple-petaled flowers have lost their nectaries, stigmas, and/or pollen-tipped stamens. Photos above clearly illustrate the loss of reproductive parts in a double amaryllis cultivar. If these hybridized doubles and triples have lost the ability to reproduce sexually, they can’t make seeds. They must instead be propagated asexually, or vegetatively, by cuttings, division, grafts, or tissue culture.

The anthers, supported by filaments, bear the pollen; the male portion of the flower, collectively, is called the stamen. Female parts comprise the stigma, supported by the style, and the ovary, with its ovules, deeper within the receptacle; the female portion is called the pistil.

Not all dense flower heads are pollinator wastelands, though. Species in the Asteraceae family, for example, have flowers that normally look full. This family includes all the composites, such as aster, coneflower, daisy, dandelion, rudbeckia, and sunflower. Their dense inflorescences are composed of small florets arranged in a head, called a capitulum. But the original species also have the necessary reproductive parts. The composites are one of the most successful groups of plants and are found on every continent except Antarctica.

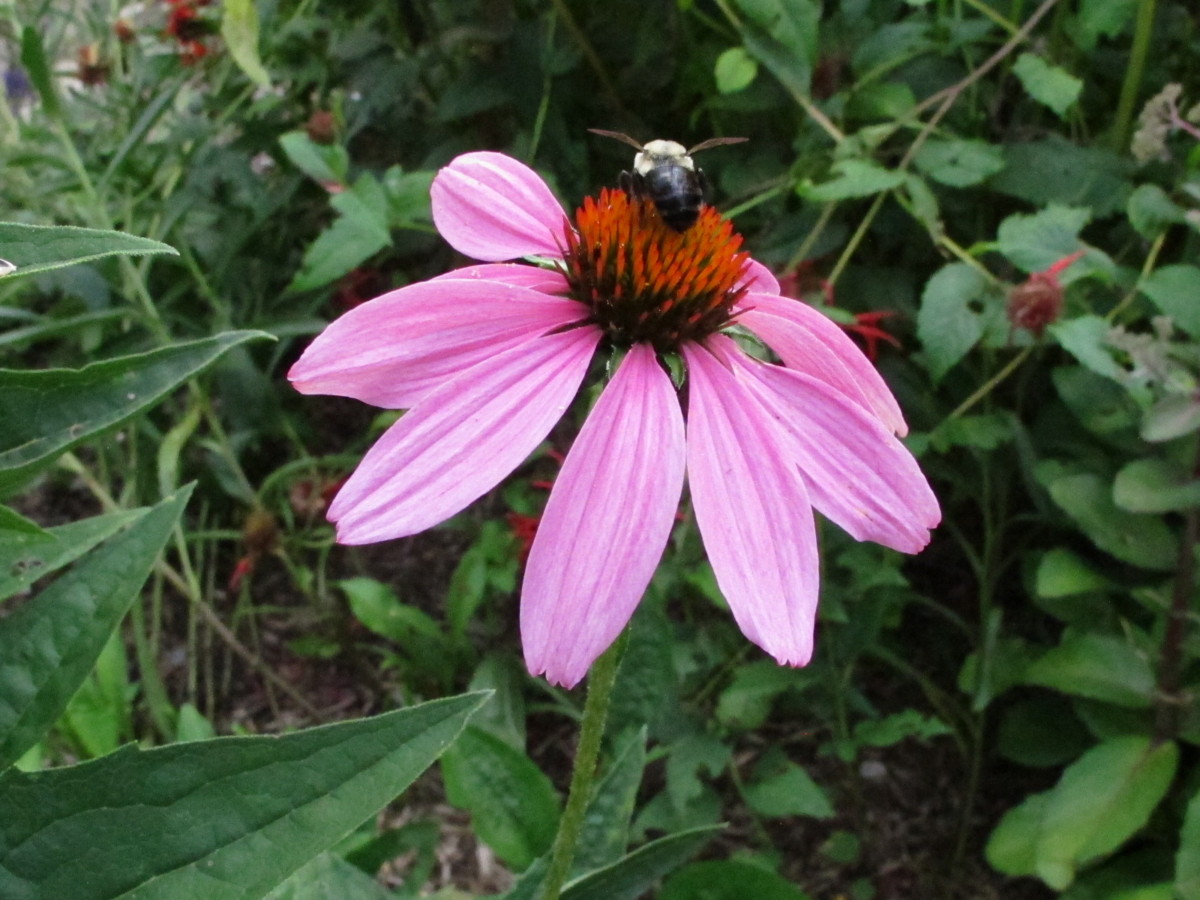
At a local garden center last year, I watched bumble bees that were quick to land on thickly-petaled hybrid red coneflowers (Echinacea). They were equally hasty in their departure! The bees stayed on the red flowers for a fraction of a second, while they lingered on the less frilly flowers of other cultivars, mining several florets in each flower for their treasure.

Pollinators waste precious energy visiting barren double-flowered hybrids. True, not all doubles lack nectar and pollen. For the pollinators’ sake, though, select more species or varieties with simple flowers. Natural selection favors plants that set seed, of course, which is why most native plants have simpler flowers.

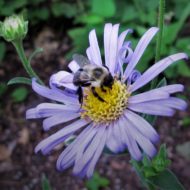
Photos below show examples of single-flowering cultivars. If you see a boss of stamens and pistils in the flowers, those plants can probably supply pollen and nectar to the pollinators. This is a fine point, granted, but one that is critically important to populations of pollinators, given the preponderance of double-flowering hybrids at garden centers.


Third, planting a multitude of native species helps secure the future of threatened or endangered insects and animals.

In many regions, songbird populations have declined by half due to human intervention. Some have disappeared entirely. Trees and shrubs that provide shelter, nesting sites, berries or seeds, and which host insects, can help bring back the birds. Abundant biodiversity is a valid protection against the domino collapse of interdependent species.

Civilization has claimed much of the insects’ natural environments, so each of us can play a small part in rebuilding habitats. Annual butterfly counts show drastic declines. Monarch butterflies, in particular, now have less territory available in Mexico, a major overwintering site, than in the past, when they migrated by the millions.

Maintaining brush piles for overwintering insects and animals will help repopulate your landscape early in the season. Hauling those materials off to the recycling center, however, is sure death for the insects tucked inside. Fewer insects = fewer birds and other animals.

Fourth, incorporating native plants into the landscape helps keep the entire food chain intact.

anole lizard

A green anole basking in morning sun.

Insects feeding on plants become food for frogs, lizards, birds, and mammals. They, in turn, become food for snakes, hawks, foxes, and other predators. In many ecosystems, insects native to the region are the foundation on which the entire food chain is based.

A rich diversity of plant material supports an enormous number of insect and animal species. Left undisturbed, populations find a balance among themselves. On the other hand, life in monoculture, such as a lawn, is sparse. Unfortunately, countless urban and suburban neighborhoods have become dead zones with all their natural vegetation bulldozed to the ground.

As we spray, mow, burn, or build in natural environments, species will continue their rapid decline. Certainly, we need places to live and work, but we can also “give back” by planting for wildlife instead of continually killing it off.

Check with your state’s native plant society, native plant finders, BeeCity USA, and the local agricultural extension service for information. In addition to these sources, find a knowledgeable salesperson at the garden center for practical advice and sources of plant material. Garden shows might feature vendors specializing in native plants as this branch of horticulture grows.


Native Species and Nativars


trees, red leaves in fall, native white oak

Red fall color in a native white oak tree.


Plant breeders have brought to the marketplace many cultivars of our native species. These nativars might have purple or red foliage instead of green, or double flowers instead of single. Perhaps they mature at a shorter height than the original species, making them a better fit for small properties.

Garden centers often stock varieties of native species, although those selling native plants might also stock the original species. By a comfortable margin, though, most of the trees and shrubs in U.S. garden centers are cultivars of non-native species. Many originated in Asia, a treasure trove of tempting horticultural novelties.

Red Leaves and Wildlife


native trees, dogwood, red leaves, flower buds

Red fall color and flower buds on native flowering dogwood.


Many trees develop red or burgundy fall foliage. Species native to the eastern U.S. with red fall foliage include sourwood (Oxydendrum arboreum), flowering dogwood (Cornus florida), black gum (Nyssa sylvatica), red maple (Acer rubrum), sugar maple (Acer saccharum), red oaks (Quercus rubra, Q. coccinea), and white oak (Quercus alba).

Beautiful fall color lures camera-toting visitors each year to the mountains, to New England, and to the Blue Ridge Parkway. The U.S. National Park Service provides an interactive map which tracks the progression of fall color.

Red- or purple-leaved cultivars sporting this color all summer are in high demand at garden centers. But if the point of planting trees and shrubs is for wildlife, we want to be sure the plants we choose will attract them. Each plant species has a particular menu of chemical compounds in their tissues that either attract or repel insects and animals. Organisms evolved a tolerance for these compounds…or they didn’t!

Purple and red leaves often repel insects due to their high levels of anthocyanins, the red pigments in the foliage. So, that defeats the purpose, doesn’t it? Not necessarily; these trees might have had green leaves that hosted insects before leaves turned red. Or insects simply tolerate the red pigments.

Oak trees support huge numbers of insects, birds, and mammals at various times during the year. This one genus, Quercus, hosts hundreds of species of moths and butterflies, although they often turn red in the fall.

Before planting a cultivar that stays red all season, though, find out if insects, such as mature caterpillars, will eat the leaves. This indicates that it could host insects for their entire life cycle. If all the larvae are tiny, however, when some larger individuals are expected, most might have crawled off to greener pastures.

If bees spend time working a flower and don’t fly off immediately after landing, that plant could be a good choice. Similarly, holes in the leaves indicate that the plant can host insects. Resources at the local university’s entomology department or botanical garden might have information that could help you choose plants that support wildlife.

The Untold Story

I’ve been packing the past couple of weeks, preparing to move to a rural location in northern North Carolina. I took a break from the work and sat on the deck, listening to the birds and insects.

One of those sounds was the hum of an approaching ruby-throated hummingbird, the only species summering in this area. Four feet away, and less than 4″ long, this tiny bird landed on a twig of the potted native dogwood tree, sitting right next to me. He then hovered near the flower buds (photo, above, with last year’s fall color), and I could see his tongue working the buds, one after another. These buds are tightly closed, yet he found something worth gathering, despite the presence of other flowers nearby.

Within a minute, another hummingbird arrived for the same reason, apparently. The two tiny birds fought for feeding rights, and the second one flew away after some impressive aerial maneuvering among the twigs. The first hummingbird continued searching for hidden sustenance held inside those buds. I’ve never seen this behavior.

My point is this: there’s much about the natural world that remains unobserved—a mystery to us—perhaps lending more credibility to the importance of using native plants in our gardens. (This section added 10/6/21.)


Deciduous Trees For the Eastern U.S.


Here’s a partial list of native and non-native trees that support wildlife. Large deciduous shrubs can substitute for trees in smaller spaces. Many other species might suit your purpose, so visit a few nurseries to see what’s available.

Most trees are sold in large plastic nursery pots, although you might also see freshly dug trees with their roots wrapped in burlap (“b&b”, or balled and burlapped).

  • American hop hornbeam (Ostrya)
  • basswood (Tilia)
  • birch (Betula)
  • black gum (Nyssa)
  • Carolina silverbell (Halesia)
  • chaste tree (Vitex)
  • cherry and plum (Prunus)
  • crabapple (Malus)
  • crape myrtle (Lagerstroemia)
  • dogwood (Cornus)
  • franklin tree (Franklinia)
  • fringe tree (Chionanthus)
  • hornbeam (Carpinus)
  • magnolia (Magnolia)
  • maple (Acer)
  • oak (Quercus)
  • poplar, cottonwood (Populus)
  • redbud (Cercis)
  • serviceberry (Amelanchier)
  • sourwood (Oxydendrum)
  • willow (Salix)
  • winterberry (Ilex verticillata)
  • witch hazel (Hamamelis)


maple trees fall color

Native red maple can have yellow, orange, or red fall color.


Most of the trees listed above have small- or medium-sized species or varieties. Compare suitability of native and non-native species within the genus. The familiar weeping willow, for example, is non-native and quite messy in the landscape. But smaller native willows behave better and host a large number of moths and butterflies.

Research disease resistance, flowers for pollinators, fruits for animals, sun or shade preferences, and soil types. Consider planting species that drop excessive amounts of fruit, acorns, or seedpods farther from the house and paved surfaces.

Also look into the tree’s habit of growth. A specimen with horizontal branches softens the strong vertical lines of a house. Pay close attention to utility poles and wires. Don’t plant trees near them that the utility company will butcher in future years.

Trees with invasive surface roots should be reserved for areas far from structures, pipes, and vegetable gardens. Find out from your town how close to the street or the property line you’re permitted to plant trees. Don’t forget to call 8-1-1 to locate underground utilities before digging.

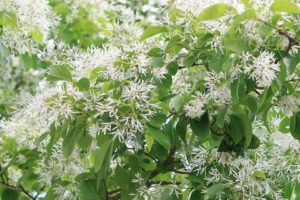
Chionanthus, the fringe tree (photo, below), is a beautiful bloomer for gardens. This multi-stem plant has 2 species commonly available (C. virginicus, C. retusus), one native and the other from Asia. Male plants have larger flowers, but females set deep blue fruits for birds. The plants, however, are rarely sexed at the nursery.


fringe tree with white flowers

Fringe tree.


The Hollies

Gardeners have used hollies in gardens for centuries. We can choose among deciduous and evergreen species.

Holly Red Christmas Winter Berry - 165106 / PixabayThe hollies (Ilex spp.) are another genus of primarily dioecious (Latin for “two houses”) plants that fruit on female plants. They ordinarily require a male plant, or pollenizer, to set fruit, although holly pollenizers (the males) themselves do not set fruit. Modern breeding techniques have yielded several cultivars that can make berries without pollination.

Ask your nursery salesperson for specifics regarding the need for pollenizers and how close they should be planted to female hollies. Choose the male hollies carefully; they must be closely related to the female holly and bloom at the same time. Incidentally, holly flowers are often nicely fragrant, and the bees love them! Just don’t shear them off after the buds have formed. Pruning should be minimal if you want flowers and fruits. And bees.


The Curious Case of Crape Myrtle

imperial moth

The Imperial moth.

Lagerstroemia indica is an extremely popular landscape tree or shrub in USDA zones 7-9. Crape myrtle, from China and Korea, was first introduced to the southeastern U.S. over 200 years ago. Adapting readily to our hot, humid summers and sometimes drought, it blooms for months despite the adversity.

What makes this non-native plant peculiar is a native moth’s preference for its leaves even when offered a multitude of its local favorites. Last year, I raised caterpillars of the huge Imperial moth. They went for the crape myrtle every time, ignoring all the others. Unless female moths instinctively target this species to host their young, the caterpillars will not likely eat these trees to the bone any time soon.

Several songbirds, including American goldfinches and juncos, feed on the seedpods.


Evergreens

You might prefer an evergreen specimen instead of a tree that drops its leaves in autumn. Look into arborvitae, chamaecyparis, hemlock, certain holly species, juniper, pine, rhododendron, spruce, and yew. Consider the shade evergreens will cast in winter, and whether sunlight might be blocked from entering windows or melting ice on the driveway.

Although not all evergreens are native to this part of the country, they make suitable nesting places and provide shelter in inclement weather. A dense border of evergreens can block fierce winter wind for a considerable distance downwind.

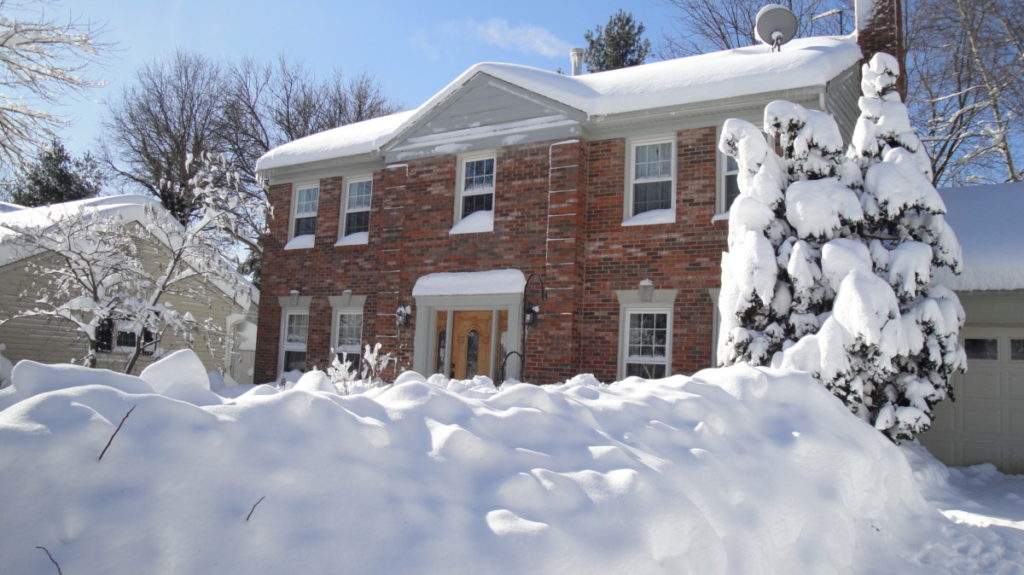
Soon after moving into the Maryland house in the 1980’s, I planted a chamaecyparis with deep green whorled foliage. Although it was supposed to get only 6′ tall according to the nursery, it grew to about 20′, when it was cut down by the people who bought the house from me. I left it in the front yard because birds raised a few families among its evergreen branches every year. And it looked gorgeous in the snow.


trees in the snow, my house in Maryland

Chamaecyparis on the right, after 2010 blizzard. Sourwood on the left.


Good Looks


If you’re landscaping purely for aesthetics, plant a tree with characteristics that appeal to you. It’s your property, after all. Besides, all trees provide cover and nesting opportunities, even if they’re passed up by caterpillars.

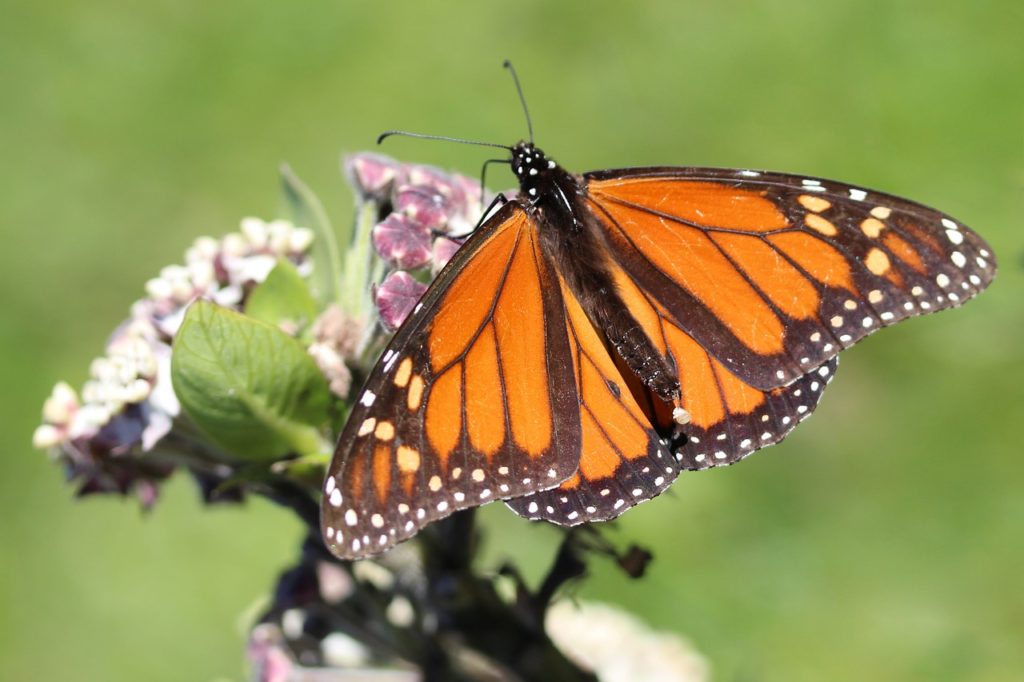
Perhaps elsewhere you could grow perennials that offer food to wildlife. Planting a bed of milkweeds among the shrubs, for example, will help the monarch butterflies (photo, below).

While you might not consider insects important in your landscape, and, in fact, have invested considerable time and expense eradicating them, they are primary links in the food chain. A healthy landscape hosts a complex assortment of insects and animals. And with the rate at which natural habitats are losing out to development, it’s no wonder we see fewer ladybugs, butterflies, and songbirds in our neighborhoods.

Creating welcoming landscapes provides resting places for migrating birds. But they need natural corridors all along their path in order to find food and perching opportunities. We can help by planting at least part of our property with them in mind—every one of us! Provide food, water, and trees to rest in, and you might catch a glimpse of a bird you’ve never seen before.

I urge you to adopt a new attitude toward welcoming wildlife. You don’t need 10 acres to make a difference. A well-planted fraction of an acre will encourage many kinds of insects and animals to reside there. If you let them eat your plants and the sprayer hasn’t been used once this year, well done!


Monarch Butterfly Laying An Egg - Chesna / Pixabay

Monarch butterfly on milkweed.


Before Planting Trees


Let’s imagine a 2-story house and an appropriately proportional medium-sized tree. Your landscape plan calls for locating this tree off the southwest corner in the front of the house.

To prevent branches from rubbing against the siding in the future, you’ll want to plant the tree far enough from the house. Divide the mature spread of the tree by 2. Because plants tend to grow larger than the dimensions printed on the label, add a few feet to the measurement. So, a tree with a mature spread of 25-30′ should be planted 15′ or more from the corner.

While that little tree might look lonely out there, it will grow. Maybe that’s the extent of your garden project this fall. Or perhaps you’d like to develop a full garden on that side of the house with an underplanting of shrubs, perennials, and ground covers.

Walking a pathway through the garden to the side yard will feel like a walk through a park. This is a good solution where space is limited between your house and the neighbor’s. Consider your neighbor, though, and don’t plant too close to the property line. Perhaps the two of you could create an appealing garden that fills the space between both houses.


But first, it’s soil prepplease turn to page 2…


Headings:

Page 1: Are You Ready To Plant Trees?, Native Plants vs. the Non-Natives (The Benefits of Native Species, Native Species and Nativars, Red Leaves and Wildlife, The Untold Story), Deciduous Trees For the Eastern U.S. (The Hollies, The Curious Case of Crape Myrtle, Evergreens), Good Looks, and Before Planting Trees

Page 2: Soil Preparation For Trees (Slope, Outline the Bed, Heavy Clay, “How Deep?”, Adding Amendments, Organic Matter, and Time To Plant Trees (Trees In Pots, B&B Trees, Backfill, Edge, Mulch, And Water)

Return to the top

Strawberries From Your Own Garden


2021

Updated 7/14/2024


Strawberries


 Strawberries!


Do you have an empty plot in the garden where you’ve wanted to plant something but aren’t sure what to plant? It’s too small for blueberries or raspberries. Tall plants will shade vegetables in the other raised beds, so you need something that stays rather short on this south side of the garden.

Here’s an option: strawberries! 

Now that spring is in the air—and in your local garden centers—this is the perfect time to plant young strawberry plants. Nurseries are filling up with all sorts of temptations—hardy annuals, trees and shrubs, early greens and vegetables, and budded spring-flowering bulbs in pots. You might find young, well-rooted strawberry plants already leafing out.

Strawberry plants can be purchased from neighborhood nurseries, farmers’ markets, and specialty mail order companies. Some varieties are available as seeds, but most are bare-root plants sold in bundles or rooted plants in pots. Bare-root crowns are less expensive than potted plants but need to be planted right away. I’ve been selling ‘Seascape’ strawberry plants at local farmers’ markets.

Strawberries, by the way, are not berries at all, but aggregate accessory fruits. Those little brown spots on the outside of the strawberry are the achenes, or ovaries of the flower, each containing a seed. The achenes are the true berries. The colorful part is an enlarged receptacle, the flower part that normally holds the ovary. But I’m quite sure no one will warm up to the term “strawreceptacle”.

U.S. per capita consumption of strawberries was 7.6 pounds in 2020, and that number is growing. North Carolina is third in the nation for strawberry production, after California and Florida. Among nations, top producers include the United States, China, Mexico, Turkey, and Egypt.


Types of Strawberries


Strawberry species are native to the Americas, Europe, and Asia. In the 1700’s, French botanists crossed the strawberry native to the eastern U.S. (Fragaria virginiana) with a Chilean species (F. chiloensis), yielding, eventually, most of today’s cultivars. That explains the “x”, representing an interspecific cross, in the name Fragaria x ananassa. Breeding efforts using genetics from several species have resulted in hundreds of varieties available today.


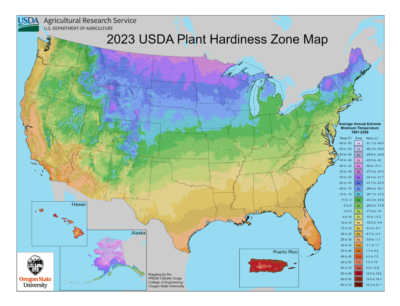
2023 USDA plant hardiness zone map


Strawberries grow within USDA zones 3 to 9. Some varieties prefer the cooler end of that range, and others need somewhat warmer climates. Most require at least 200 to 300 chill hours, when plants are exposed to cool temperatures between 32° and 45° F. Most strawberry plants stop fruiting above 75° or 80°. (Above: the newer edition of the USDA plant hardiness zone map.)

Planting varieties that mature at different times prolongs the harvest, but place them in separate beds for ease of maintenance. Keep track of the varieties you’ll be growing in your garden.

There are 4 main groups of strawberries, with many varieties within each category. Look for disease resistance, and consider other characteristics, such as color, fruit size, and time of harvest.


1. June-Bearing

These large-fruiting varieties bear heavily over a period of two weeks to a month in mid to late spring. They respond to a short daylength, having formed flower buds the previous autumn. The buds, though, stay dormant through winter, safely tucked inside the mulched plants.

For gardeners living in areas with a limited growing season, June-bearing strawberries are a good choice. Those who wish to preserve the fruits often select varieties from this group.

June-bearers develop many runners, or stolons, which root at the tips and grow new plants from there. The “matted row system” is commonly used on farms and in home gardens for this group of berries. Runners are permitted to roam about and root in at will, within the confines of the bed. Each year, the beds are thinned or renovated immediately following the harvest.

Because flowers will be snipped off over the first 4 to 6 weeks after a new planting, as recommended, June-bearers will have no fruits the first year. You can avoid this task by planting crowns of June-bearers later in the season, after they flower. They will bear fruits in the next spring season.

Although strawberries are short-lived herbaceous perennials, some commercial operations renew their stock every year, establishing young plants in a new location.


2. Everbearing

Everbearing strawberries have a large first crop, a smaller late crop (especially in areas with warm summers), and sometimes a few berries in between. They are not affected by daylength.

Berries in this group are smaller and not as abundant as June-bearing types. The total harvest is about the same as for June-bearing types, although it is spread out over time.

Remove flowers and runners the first 4 to 6 weeks after the initial planting. This will sacrifice the early harvest, but they’ll flower again and yield berries later in the season.


3. Day-Neutral

Day-neutral varieties produce strawberries through the growing season and will flower regardless of daylength. Fruits are smaller and the plants don’t yield as heavily as the June-bearers.

As with the everbearers, remove flowers and runners that develop during the first 4 to 6 weeks after planting. They will flower again later and set fruits in the current season. Cooler temperatures might yield heavier crops in late summer.


4. Alpine


Wild Strawberry Red Fruit Sweet - Radfotosonn / Pixabay

Alpine strawberry.


These are the smaller, oval-shaped berries carpeting the ground in their native northern hemisphere habitats. Sometimes called “fraises des bois“, French for “strawberries of the woods”, these strawberries often belong in the species Fragaria vesca, although several species of alpine strawberries grow around the world.

They’re found in a wide range of climates, in USDA zones 3 to 9. Avoid planting in low spots or where the soil stays soggy after rain.

Alpine strawberries tolerate some shade but give them 4-6 hours of direct sunlight. Plant them 12-18″ apart. They don’t grow a vigorous system of runners but will propagate from seeds and division.

Some strawberry enthusiasts swear by these tiny morsels and grow no others.


Preparing the Bed for Strawberries


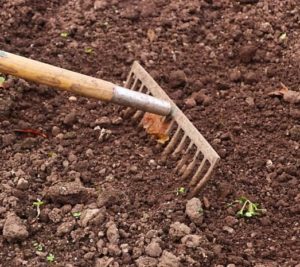
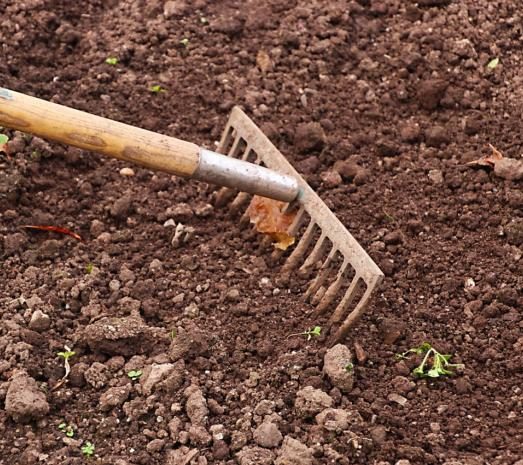
garden rakeFind garden space that gets full sun for the best yields. Strawberries start growing before the end of winter, when the sun is still low in the sky. Take this into consideration when locating your garden. In partial sun, foliage and fruits might be plagued by diseases that ruin the crop.
Avoid low spots. Locate the beds on higher ground where cold air won’t collect and freeze the flowers. Try growing strawberries in containers if you don’t have garden space.

Don’t plant them where tomatoes, peppers, potatoes, or eggplants have grown in the past 5 years. Verticillium wilt disease from infected plants in the nightshade family (Solanaceae) can also infect strawberries (family Rosaceae).

Strawberries prefer sandy loam and must have well-drained soil. This is one reason you often see them growing in raised beds. Another benefit of raised beds is increased air circulation, which helps prevent diseases from spreading among the plants.


How To Configure Strawberry Beds

The Matted Row System

In the matted row system, space strawberries 18″ apart down the middle of a 4′ wide bed. Spacing between the beds depends on the method of harvest and whether large tools (tiller, mower, wheelbarrow) will be required. For most home gardeners, 2′ or 3′ between beds serves that purpose.

June-bearing strawberries grow in matted rows, allowing their numerous runners to spread. Over the growing season, let plants fill in to a density of 4 or 5 plants per square foot. Heavy leaf canopy discourages weeds from growing in the bed, but overly congested growth encourages diseases.

The Hill or Mounded System

In this technique, crowns will be spaced in a zigzag manner 12″ apart, in mounds 8″ high. These hill systems are narrower than matted row systems, at about 24″ wide. This permits better air circulation and drainage around the plants. Disease prevention is of prime importance.

This method suits everbearing and day-neutral strawberries, which have fewer runners. In fact, websites recommend removing all runners in hills, forcing plants to grow lateral crowns next to the original plants.


Dig In!


Loosen the Clay 

First, remove all vegetation where the strawberries will be planted. They don’t compete well with weeds.

Loosen the existing soil, breaking up the clay to a depth of about 12″. This is easier to do if the soil is damp. Don’t work the soil if it’s wet, though; that will collapse the air spaces between soil particles.

Add Drainage Material

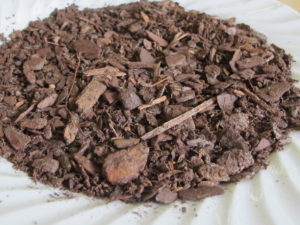
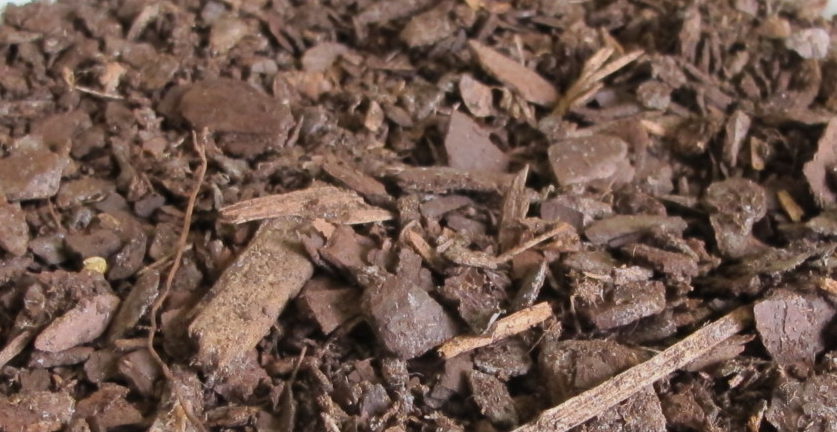
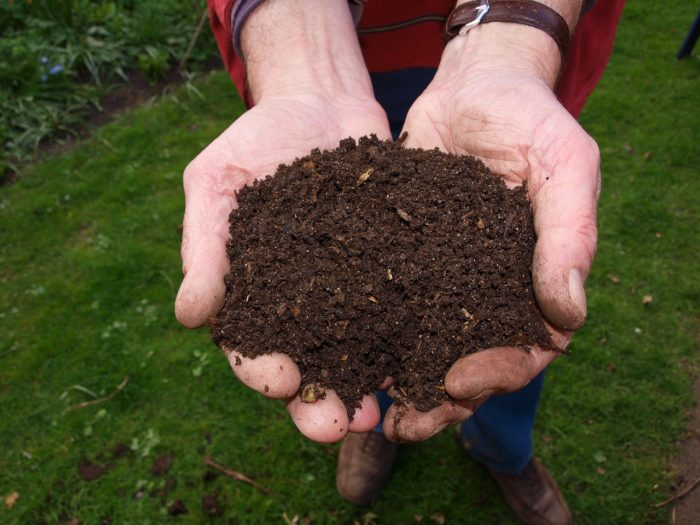
Now, incorporate (don’t layer) 2″ to 4″ of pine fines, sometimes called soil conditioner, into the loosened soil. Pine fines (photo, above) are partially composted small bits of pine bark. Because they decompose very slowly, they help keep the soil open, improving drainage for many years. Pine fines might not be available everywhere. See if you can find bags of “soil conditioners” that include pine fines.

Strawberries also like large-grained coarse sand (not play sand) added at this time.

Adjust PH, Peat Moss

Strawberries need acidic soil, with a pH range between 5.5 and 6.5. One or two inches of pre-moistened peat moss incorporated 8″ into the bed will help lower the pH in alkaline soil.

Your local agricultural extension office can analyze a soil test and make recommendations about pH and fertilizers.

Compost

Next comes the nutrient-rich compost. Incorporate 2″ or 3″ of compost into the top 4″ of soil. Placing it deeper in the soil will put it out of reach of the strawberry’s shallow roots.

Compost provides nutrients for the strawberries as well as for the microbes living in the soil. Microbes, active during the growing season, break down organic matter, making nutrients available to plant roots in a usable form. These microorganisms derive the benefit of carbohydrates from this relationship. Microorganisms also help plants fend off soil pathogens and contribute in other ways that scientists are now researching. In healthy gardens, billions of microorganisms occupy a tablespoon of soil!

For sandy soil, add more water-holding amendments, such as peat moss, pasteurized loam, and compost.

Some gardeners apply 10-10-10 fertilizer with the initial soil preparation.

Rake the soil, filling in low spots.


Planting the Strawberries


strawberry ozark beauty in pot

Strawberry ‘Ozark Beauty’.


If you received bare-root plants, trim long roots to about 6″. Place the roots in a bucket of cool water for an hour, in the shade.

Although a raised bed is an efficient method of growing strawberries, they can be planted in level gardens. Pay special attention, though, to slope, drainage, and air circulation.

After preparing the soil, dig a hole for each plant, spreading out the roots and firming soil around them. The crown of the plant, where the leaves meet the roots, should be right at (never below) soil level.


Mulch


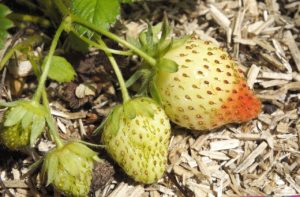
Strawberries Flowers Spring Fruit - Eric-Tanas / PixabayOnce all the plants are in place, apply 2″ or 3″ of an airy mulch, such as pine straw or weed-free straw (photo, right). The traditional use of straw as a mulch might be where the term “strawberry” came from.

Don’t cover the crowns; give them space to emerge freely. This kind of material, rather than a heavier mulch, permits air circulation and lowers humidity around fruiting stems, helping prevent rot.

Mulch cools the soil, conserves moisture, and keeps the fruits clean as they grow. As it rots, it adds organic matter to the soil and needs to be replenished now and then.

Using mulch in the growing season is optional, of course. In beds of June-bearing strawberries, a thick layer of mulch could hinder runners trying to root into the soil.

Another option used by many commercial growers and home gardeners is black plastic or fabric over the soil. This warms the soil rapidly in late winter and early spring. Commercial growers using “plasticulture” renovate the beds every year. If you’d rather not use plastic, you could use biodegradable black mulch. Using a soil cover might extend strawberry production. And weeds won’t stand a chance. Still, this is optional.

Water the bed, making sure the entire planting depth has been moistened.


In Their First Year


Most experts recommend removing all flowers during the first 4 to 6 weeks after planting. This concentrates energy in the roots and runners. For plants in the June-bearing group, however, there will be no harvest the first year if you planted them in early spring. But they should yield a bountiful harvest the next year.

Other groups of strawberries will develop more flowers in the months ahead. They will bear fruit later in their first season. For everbearing and day-neutral varieties, apply fertilizer after their first crop.
Water the beds every week if there isn’t substantial rainfall. Strawberries need 1″ to 2″ of water per week, most importantly after planting and during fruit set. Most of their roots are found in the top few inches of soil, so they are very susceptible to damage from drought.


Pollination

These early flowering plants attract bees and other pollinators. Strawberry flowers contain both male and female reproductive parts. Although they can self-pollinate or be pollinated by wind, strawberry flowers achieve more complete pollination from the activity of pollinating insects. This results in fruits that are plump and well-formed.


Headings

Page 1: Types of Strawberries (June-Bearing, Everbearing, Day-Neutral, Alpine), Preparing the Bed for Strawberries (How To Configure Strawberry Beds, The Matted Row System, The Hill or Mounded System, Dig In!), Planting the Strawberries, Mulch, and In Their First Year (Pollination)

Page 2: The Harvest, Renovating the Strawberry Bed, Varieties, Winter Protection, Potted Strawberries (The Pots and Potting Soil, Watering the Containers), Problems? (Insects and Mites, Slugs and Snails, Diseases), and Celebrate!

Return to the top


Lavender Cuttings: Tips for Propagating Lavender


2020

Updated 5/25/2024


Kim’s Tips for Rooting Your Own Lavender Cuttings


taking lavender cuttings

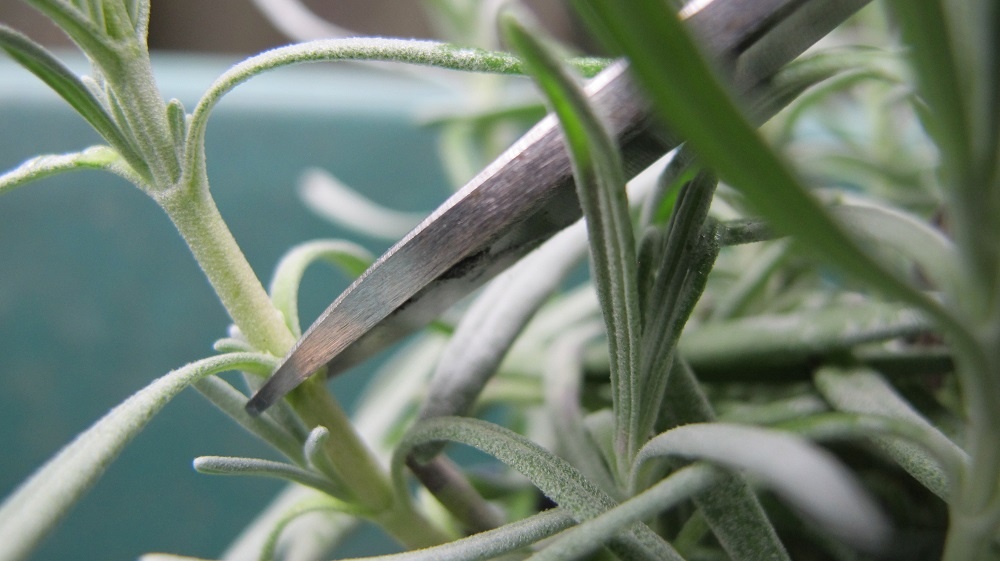
Cutting a lavender stem at a node.


How wonderful—the fragrance of lavender wafting through the back yard. You’re pleased beyond measure with these silver-leaved subshrubs in the pollinator garden, and perhaps you’d like more of them. The bees and butterflies are all over them! And the deer never touch them!! Garden centers stock several cultivars of lavender, but they are not inexpensive. Problem solved: “I’ll root my own lavender cuttings!”

The plants have performed well, and the garden is buzzing with activity. Now, you’d like to expand the garden to provide even more sustenance for all the bees and other insects. Admittedly, there is some work involved. Properly preparing the heavy clay soil takes effort and materials, but you know it will be worthwhile.

We need pollinators for farms and orchards, for our own vegetable gardens, and to regenerate natural stands of greenery. They pollinate every third bite of food we eat.

Because it takes several weeks to root cuttings and to grow them on to the proper size for transplanting, time is on your side. So, let’s begin by taking cuttings from the plants in the garden. While they’re rooting, you’ll have plenty of time to get the soil just right for the new plants.


Patent Rights

Because it’s illegal to propagate trademarked plants for resale, I bought the newer lavender cultivars in trays of 60 to 200 tiny rooted plants, called plugs. Labels of branded varieties carry the caution, “Unauthorized propagation prohibited”. Many varieties were not under patent protection, however, so those were the ones I propagated.


Lavender from Seed

Another option is sowing seeds—‘Ellagance Purple’ and ‘Lady’ are two that you might try growing. ‘Munstead’ is a strain that has been around for a long time. Seeds take a few weeks to germinate, so this project is best started in spring. Plants grown from seed (sexual propagation) can vary in certain characteristics, including plant size, foliage color, flower color and size, and time to first bloom.

Plants vegetatively propagated, on the other hand, will have consistently similar characteristics. Cloned plants, from cuttings, have the same genetics as the stock plant, so the rooted cuttings will look identical to the parent.


Lavandula and butterfly


Prepare the Pots and Soil for Lavender Cuttings


First, assemble 4″ or 4 1/2″ plastic pots. Bigger pots hold a much larger volume of soil and dry too slowly.

Lavender is susceptible to several fungal diseases, so starting with clean materials is essential. At the very least, wash the pots with soap and hot water. Better yet, clean the pots with a bleach solution, let them sit for a few minutes, then rinse thoroughly.

Another option is to use new cell packs, with 4 to 9 cells per pack. Soil in small cells dries faster, so you’ll need to closely monitor these containers.

Don’t use soil left over from last year’s plants; it could be harboring disease spores. Never throw “used” soil into the trash. Instead, add it to the flower gardens or the shrub border, where it will contribute organic matter as it decomposes.


Options for Potting Soil:

  • Always begin with pasteurized potting soil. Mix this with clean coarse sand or perlite. The medium should drain well, allowing both water and air to percolate through the soil.
  • Use products formulated for succulents, and add houseplant potting soil to make a gritty medium, but one which will hold some water.
  • Or, simply, use a fresh bag of pasteurized potting soil, which includes perlite, and be very careful about watering.

Avoid using soil containing a large percentage of peat moss, which is acidic and stays too wet for lavender. This herb, like many others, needs close to a neutral pH.

Incidentally, most potting soils sold in garden centers contain no soil at all, and are sometimes called “soilless potting mixtures”. For our purposes, the term “potting soil” will do.

If the medium is dusty dry, mix in a small amount of water. Avoid breathing in the dust. The soil should be slightly damp. Fill the pots with potting soil, and firm lightly. Leave about 1/2″ to 1″ of space between the soil surface and the pot’s rim.


Making the Cut


joyce chen scissors for cutting lavender

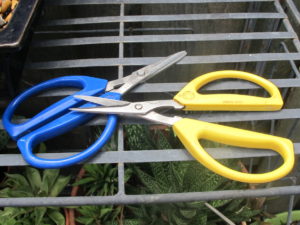
Joyce Chen scissors.


When To Cut

Cuttings taken in early to mid summer should root adequately before autumn. These are considered “semi hardwood” cuttings. The stems aren’t fully matured, but they aren’t too tender, either. Tough old woody stems will not root.

Collect lavender cuttings in the morning, when they’re fully plumped with water. Don’t use material from the bottom or from the shady side of the plant. Use healthy foliage, without any spots. Cuttings from plants that have not been overfertilized with nitrogen are more likely to root successfully.


How To Take Lavender Cuttings

With clean sharp scissors, take cuttings from non-blooming, non-budded stems. Lavender cuttings from the tips of the stems, rather than from middle sections, make better propagating material. If your early blooming lavender plants were deadheaded (old flower stems cut back) early in the season, the remaining stems might already have branched out, providing fresh cutting material.


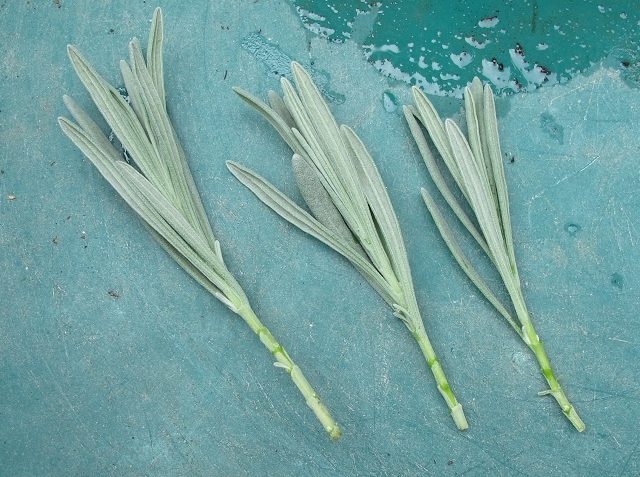
lavender cuttings

Cuttings, before removing bottom leaves.


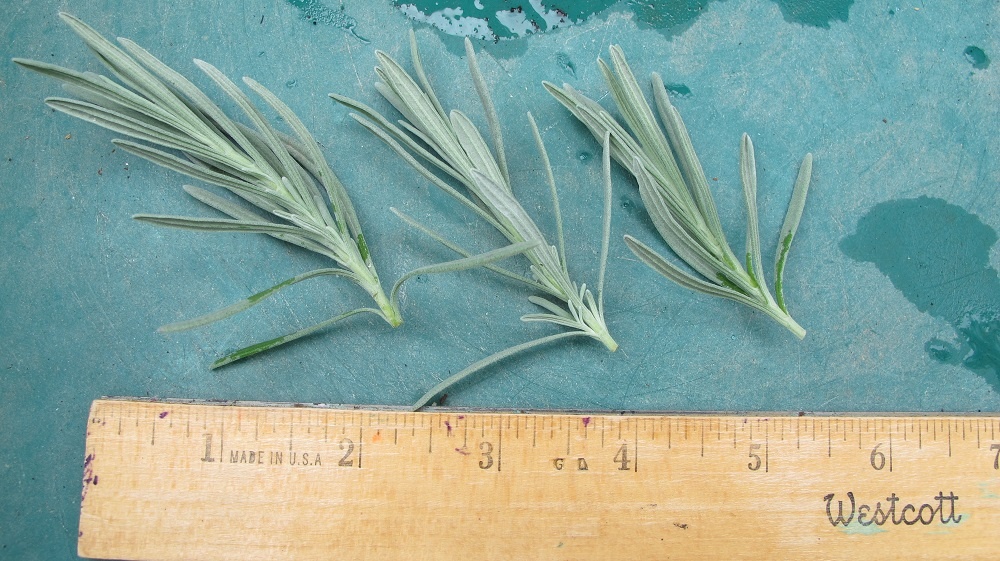
Lavender cuttings should be only 2″ to 3 1/2″ long, depending on variety. Large cuttings have greater leaf surface area, and the cuttings might wither before roots form. When taking cuttings from any plant, consider the number of leaves, light, water, humidity, and time to root. Each variety has its own combination of variables that results in prompt, successful rooting. Long cuttings, low humidity, lack of light, and wet or dry soil will not yield rooted plants.

Make the cut where two leaves join the stem (photo at top). This part of the stem is called the “node”, and the first roots often emerge there.

Now, remove leaves on the bottom inch or so of the stem. Gently peel them off. Otherwise, leaves will rot in the soil, which could rot the stem.


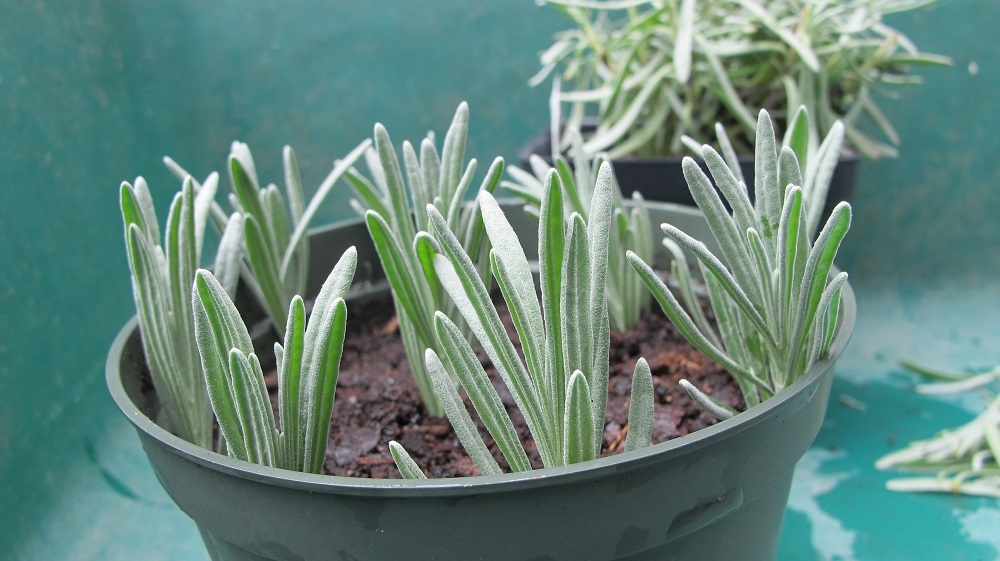
lavender cuttings

Cuttings, ready for sticking.


Rooting Lavender Cuttings In Water

Coleus cuttings start rooting in water in a few days; lavender requires weeks in soil. When possible, I always root plants in potting soil rather than in water. The roots’ cell structures differ between the two methods, and those growing in water often die when re-adapting to soil.

If you have plenty of cuttings, perhaps rooting some in water will work for you. Cuttings should still be about 3 1/2″ long. Use only an inch of water in a glass, don’t crowd the cuttings, and remove leaves in the water. Place the glass in part sun, and change the water every few days.


Sticking the Lavender Cuttings


After decades of rooting plants under lights for my business, I’ve had the most success with cuttings that were stuck right next to the inside of the pot. Particles of soil touching the wall of the pot tend to permit more air to circulate around the stems. That’s precisely what lavender needs.

The stems aren’t sitting in wet soil, although there is some contact. At night, as the temperature drops, water vapor precipitates on the inside of the pot. And the humid air in that space helps the cuttings root.


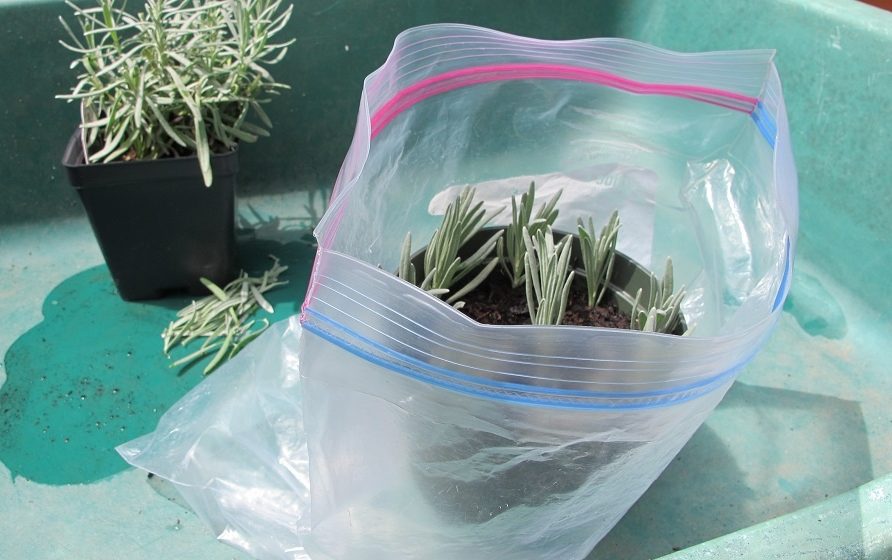
lavender cuttings in a pot

Lavender cuttings.


This 4 1/2″ pot accepted 9 cuttings, with 1 in the center. Avoid crowding the cuttings; space them so their leaves don’t touch each other. Lightly water in the cuttings to make better contact between the stems and the soil.

I propagate other herbs, including thyme, rosemary, oregano, sage, and bay laurel, in the same way.


Actinovate

When propagating herbs and perennials each season, I use an organic biological fungicide called Actinovate. This product, a bacterium called Streptomyces lydicus strain WYEC 108, prevents vulnerable plants from succumbing to most diseases. Water the solution into the soil after sticking or lightly mist the cuttings, occasionally, in the morning. I also use it when germinating seeds.

This fungicide is quite expensive, but it makes plant propagation much easier for me. It carries the OMRI label and is safe to use on edibles.

Always exercise caution when using materials for treating plants. Don’t breathe the dust, avoid getting it on your skin (rinse thoroughly), and don’t improperly dispose of leftover product or the container. Read the label.


Rooting Hormone

Rooting hormone powder coats the base of the cutting with a chemical fungicide and plant hormones. While it accelerates the rooting process for many plants, this product carries the Environmental Protection Agency’s Caution rating, as does Actinovate.

I haven’t used it for many years, but, if you’ve had good results using rooting powder, then try it on your lavender cuttings. Always read the label, and never discard leftover powder where it can pollute streams.


Raise the Humidity


lavender cuttings in clear plastic bag

Pot of cuttings in open plastic bag.


To raise the humidity around the cuttings without causing rot, place the pot of cuttings into a clear plastic bag. Pull up the bag so it surrounds the cuttings, but don’t secure it. Fuzzy-leaved plants, such as lavender, rot (not “root”) easily in high humidity. A closed plastic bag or some other closed system raises the relative humidity to 100%. It also causes the “greenhouse effect”, raising the temperature too high when exposed to the sun.

So, keep the top of the bag open. Enough humidity will remain around the lavender cuttings. In very dry environments, the bag can be partially closed, but don’t let heat build up. Empty any water that collects at the bottom. If the soil is moist and there’s significant condensation inside the bag, open the top more widely, and let excess moisture dissipate. Wet soil will rot the cuttings.


Light For Lavender Cuttings


sunshine through trees


Lavender loves to bask in the sunshine. The sooner the cuttings get back to the sun, the sooner they can resume strong growth. But harsh sun will desiccate the unrooted cuttings. This is a race against time.


Indoors

Indoors, place the cuttings where they will get gentle direct sunlight. Sunlight helps cuttings root faster, but strong sun will dry them and overheat the air inside the bag. Bright filtered sun most of the day, as through a sheer curtain, works well. Average indoor temperatures (high 60’s F to the mid 70’s) will help them root.

Don’t put the cuttings too close to a window, in the hot sun. Check to make sure excess heat can escape. Lavender cuttings will not root in low light, so it might require a bit of experimentation to find the perfect light level to root the cuttings without desiccating them.

New growth emerging from the tip of the stem indicates a cutting that is beginning to root. Congratulations! Patience pays off!


Artificial Light

A 4′ long fixture with 2 daylight LED or fluorescent tubes makes a perfect nursery. Here, the plants never see a cloudy day, and you can keep a close eye on progress.

Place the lavender cuttings close to the tubes, within 3″. They should be as close as possible to the lights, but not feel heat from the fixture. Keep the lights on for 16-18 hours each day.

Smaller tubes and grow bulbs emit less light, which might not be enough for lavender. But if that’s what you have, try it. Make sure the cuttings are close to the tubes and that the lights are kept on for 18 hours each day.


Outdoors

Many of us don’t have indoor space suitable for rooting lavender cuttings. In that case, place the pots outdoors in dappled shade when the temperature is suitable. Give them more bright shade than harsh sun. Don’t expose them to hot afternoon sun and find a location out of the wind.

In a pinch, take a few cuttings and simply stick them at the edge of a planter, in light shade cast by a plant. I’ve been able to root many kinds of plants this way. Watch out for slugs, by the way, and use organic Sluggo to bait them. Scoop out rooted plants, and pot up for a few additional weeks of growing and getting used to full sun before planting them in the garden.

The cuttings in the photographs go outdoors on the deck in the morning. I take them back inside at noon or in early afternoon. It’s been way too hot and humid outside this summer—mid 90’s F, over 100° heat index for days at a time. When it cools down, they’ll spend more time outdoors.

(***Update***: The pot of cuttings in the photographs has only one survivor. Prolonged heat, frequent downpours, and mischievous chipmunks digging in the soil killed the rest. But that one well-rooted plant looks great, and will stay in its 4″ pot over the winter. 1/1/2021)


Ready for Transplant?


Okay…it’s been about 5 or 6 weeks and most of the cuttings show new leaves growing at the tips of the stems. That’s great!

If you see roots at the drainage holes in the bottom of the pot, the cuttings might be ready to divide. Remove the cuttings from the pot by gently tipping the pot upside-down. See if there are enough roots to move them to the next stage. Each cutting should have a few 1″ to 2″ long roots. Handle with care, since the roots detach easily from the stems and dry quickly when exposed to air.


Cuttings Rooted in Pots

Before settling them into their permanent homes, the rooted cuttings in pots will need to grow a more extensive root system. Transplant them individually into their own small pot or into 4-cell market packs. Be sure to maintain the same soil level against the stem; never bury the stems. Use the same kind of soil you used to root them.

If they’re rooted, give them a few hours of direct sun for a few days before exposing them to full sun. Let them root into the pots before planting in the garden. Rooted cuttings don’t require high humidity, so remove the plastic bag.


Cuttings Rooted in Cell Packs

If you planted the cuttings in market packs to begin with, simply push up the bottom of a cell to check root growth. Don’t pull the cutting itself. Well-rooted plants can be planted directly into the garden if you monitor them very closely. If needed, cover temporarily with a “caterpillar” tunnel fitted with bird netting. This protection admits air and sunlight, and will prevent damage from digging animals while the lavender becomes established.

If cold weather is approaching, use a clear plastic cover over the tunnel, and vent it in the daytime. This will buffer severe conditions, and could save the plants.


Harden Off the Lavender Cuttings

Harden off the cuttings by gradually introducing them to outdoor conditions over a period of a week or so. Place the pots of lavender outdoors, in morning sun for a few days, then in more hours of sun. It’s easy to forget them, when they’re out of sight, so remember to water! Plants receiving abundant sunshine make more food for themselves, through photosynthesis, so their roots will grow faster. By the end of the hardening off process, the plants should be able to tolerate direct sun all day.

Remove flower buds appearing on young cuttings. For now, all energy should be directed toward growing a robust root system.

Any cuttings that haven’t rooted and have foliage that feels limp can be discarded. If they look like this after a month, it’s not likely they will root. Figure out how to improve the growing conditions, and try again.


The Garden is Ready


garden rake, prepared soil


And so are the plants. Water them first. Then remove the rooted plant from its pot and gently loosen the outer roots if they form a tight root ball.

Plant the little lavenders, maintaining the same soil level next to the stem. Firm the soil around the roots to eliminate air pockets. For almost all plants, you should be able to see the top of the original root ball after transplanting.

Be sure to space them properly, according to the variety. Some mature at 16″ tall and wide, while others can grow as large as 3′ or 4′ across. Lightly shade the plants if the leaves wilt in moist soil. Sticking a leafy twig in the ground on the sunny side works well enough.

During hot weather, check the soil moisture every day, although you might not have to water every day. Feel the soil a few inches down and next to the root ball. If you detect moisture, don’t water. If it wilts or the soil feels dry, water around the root ball.

When you do water, keep the foliage dry. This helps prevent disease.


To Mulch Or Not To Mulch

If you use mulch in the garden, avoid placing it under the canopy of the plant. Where it rains regularly, mulch can hold too much moisture in the soil, so use only a thin layer or, preferably, none at all right under the plant. Keep mulch off the stems.

Avoid finely shredded hardwood mulches, and choose pine fines or small nuggets instead. They permit better air circulation around the lavender.

Planting lavender on raised ground helps the soil drain faster, and plants display better when elevated above surrounding lawn or paving.


Is Your Lavender Winter Hardy?


lavender


Each plant variety has a hardiness zone rating, usually between zone 5 and zone 9 for lavender. If you live at the colder end of that variety’s hardiness zone, the rooted plants might need the protection of a cool greenhouse or a cold frame until next spring. It depends on expected weather patterns—temperature and precipitation—over the next several months for the cultivars you’ve selected.

At this point, in late summer, waiting to propagate lavender until next year might be more feasible, especially for gardeners in colder climates.

Lavender is drought resistant once established in the garden, but often dies when overwatered. Improving soil drainage is especially important for cultivars planted in the colder regions of their hardiness zones. “Winter wet” is a frequent cause of lavender failure.

Plant lavender with other perennials and shrubs that share its preferred growing conditions. Although it isn’t native to the U.S., it is non-invasive.

You might enjoy reading about the history of lavender and its uses through the centuries. This article at The Farm In My Yard includes more detailed information for growing lavender successfully.

Better for the Environment

Traditional property management calls for removing winter shelter and sources of food for insects and animals, so this is how we can begin to compensate, right in our own gardens.

Propagating plants is an economical means of providing new material for your gardens. Planting species that offer sustenance to pollinators is not only ecologically preferable to maintaining lawn grass, but it’s also prettier!


lavender


Return to the top

Daffodil Bulbs: Divide, and Multiply the Flowers


How Do Your Daffodils Look This Year? 


daffodil bulbs, yellow, cane creek park

Daffodils in February at Cane Creek Park, Waxhaw NC.


For years, your daffodil bulbs bloomed to great satisfaction. From late winter to mid-spring, there was never a shortage of cut flowers to bring indoors. And plenty remained in the garden to admire from indoors or for neighbors to enjoy.

But this year, they were so disappointing! Masses of slim green leaves look healthy enough, but there were only a few flowers! Come to think of it, there weren’t many last year, either. They should be in their prime right now.


daffodil leaves, no flowers comp

Clumps of daffodils with all leaves, very few flowers.


Why does this happen? You’ve been using the bulb fertilizer recommended by the garden center, and, heaven knows, they never went dry! They looked great a few years ago. Clearly, there’s a problem with the daffodils.

This is called daffodil “blindness”, or lack of flowers. A number of factors contribute to this condition.


“Should I Remove Them?”


Not yet. Just let them soak up the sun’s energy, undisturbed, for as long as the leaves remain green. Don’t cut, knot, braid, or mulch over the leaves. Keep them exposed to direct sunlight. Remove any seedpods, if you see them, to conserve energy and resources. All energy should be directed toward plumping up the bulbs.

In this article, you’ll find tips for restoring your daffodil gardens back to their spectacular spring show. I’m including information on conditions for growing daffodil bulbs successfully for many years into the future. But it’s too early to dig them up right now. Once the leaves have turned yellow or brown, we can begin to dig, divide, and re-set the bulbs.

Bulbs that have been forced in a pot should be planted into the garden after the foliage yellows. While the leaves are green and photosynthesizing, continue watering and provide sunlight. Lasagna pots, crowded with layers of bulbs, rarely bloom well, if at all, a second time. These bulbs might need a year or two in the garden gathering strength for more blooms in the future.


Hardiness 

There are 13 divisions of Narcissus, grouped according to their flower structure. Thanks to the efforts of daffodil hybridizers, consumers can choose from among 32,000 registered daffodil varieties! Also, according to the American Daffodil Society, there are between 40 and 200 daffodil species.

In general, daffodils grow in USDA plant hardiness zones 3 to 11, although some prefer the cooler end, and others, the warmer zones. Before purchasing your bulbs, find out which zone you live in and which varieties will grow there.

‘Camelot’ and ‘Flower Record’, for example, are better suited to zones 3 to 7, struggling in a warm zone 7 season and failing south of it. The paperwhites Narcissus tazetta (N. papyraceus) ‘Avalanche’ and ‘Minnow’, on the other hand, do better in the warmer zones 5 or 6 to 9.


For Now, Fertilize the Daffodil Bulbs


Apply a complete bulb fertilizer to your daffodils and other spring-flowering bulbs. It should have low levels of nitrogen (N), but more phosphorus (P) and potassium (K) content. Use a low analysis product, such as 5-10-10 (N-P-K). 10-10-10 also is acceptable.

As plants photosynthesize, they make their own food and store it in the bulbs. This nourishes the embryo, which is dormant in summer, and prepares the plant for next year’s growth. The more carbohydrates stored in the bulbs, the more flowers for next spring, as long as other conditions are favorable.

Fertilizer applied as the bulbs begin to emerge from the ground could cause the robust foliage and heavy flower heads to flop over. I normally fertilize the bulbs later, around the time of peak bloom, if they need it. Non-flowering bulbs can benefit from a light fertilizing before dividing the clumps. Because the foliage will stay green for several more weeks, the bulbs will have time to utilize the fertilizer.

A soil test conducted by your local agricultural extension service will indicate whether any nutrients should be added.


Bone Meal

For years, many gardeners have relied on bone meal to fertilize their bulbs. Bone meal contains a small amount of nitrogen (3-4%), more phosphorus (12-14%), no potassium, and some micronutrients (Ca, Fe). Mixed products available for bulbs might include bone meal, but also have additional nutrients to make a complete formulation.

The problem with exclusively using bone meal is that it takes longer than other products to break down and become available to the roots. Furthermore, phosphorus, the primary ingredient, moves very slowly through the soil profile. For that reason, bone meal added to the root zone—before planting the bulbs—might be more useful than applying it to the surface of the ground. Avoid direct contact, though, between the bulbs and the fertilizer. Still, it’s not likely to provide nutrients until months or a full season later, after microbes have begun decomposing it.

Bone meal is a slaughterhouse by-product, after sterilizing and grinding cow bones. Some animals are attracted to the scent, so burying it might prevent it from being consumed.

Because daffodils and other bulbs aren’t very demanding, giving them anything should result in good growth. Soil pH should be somewhere between 6.0 and just below 7.0 for nutrient availability. If a soil test indicates adequate phosphorus, I wouldn’t use bone meal. An excess of P will interfere with the uptake of other nutrients.


Food or Fertilizer?

Notice the distinction between the terms “fertilizer” and “food”. Fertilizer is the product we apply to plants. There are many kinds of fertilizers, including soluble and granular types, and compost. They provide various amounts of nutrients to help plants function at an optimum level.

Food is a product of photosynthesis; plants make their own food inside the foliage. This substance is stored as carbohydrates in bulbs, stems, and roots, depending on the species.


Easy Does It!

Daffodils and other bulbs we plant in our gardens don’t need much in the way of nutrients, so never overfertilize. Perhaps you’ve seen clusters of yellow or white daffodils randomly appearing along roadsides or in the middle of a field. Heirloom varieties of Narcissus bulbs are sometimes the only surviving clues that an old homestead once stood nearby. Daffodil bulbs can live for decades!


***Update***: At the south edge of the woods at the new property, daffodils emerged under snow and after a tangle of growth had been cleared away (photos, above). Once the honeysuckle vines, brambles, and tree saplings had been removed, the daffodils grew thick and healthy, although there were few flowers. The soil there is rich with decomposed leaf litter. After the foliage begins to yellow, I’ll divide and transplant most of the bulbs. 3/20/2022


daffodil bulbs


***Update***: Well, I never got around to dividing these bulbs. Starting in January 2023, abundant flowers grew on stronger plants (photo, above). And the flowers lasted 2 months! I don’t know the variety, but it’s an older one with fragrant double flowers. Because the flowers last such a long time, I’ll transplant several divisions to the garden on the far side of the driveway, visible from my office. 4/13/2023

“Then, why do those old abandoned daffodils look better than mine?”

Over time, year after year, fallen leaves and other organic debris have collected at the soil surface above the daffodil bulbs. Microorganisms decompose this material from spring through fall, while the soil is warmer. Nutrients from decomposition slowly filter down to the roots, and are absorbed as the roots emerge in late summer and autumn.

Those abandoned daffodil bulbs don’t need fertilizer from us, nor do they need a layer of mulch. Mother Nature is looking after them! Sometimes, less is more.

Growing our bulbs leaner could help. Pushing them to “grow better” is one reason for overabundance of foliage and lack of flowers. High nitrogen is particularly problematic. For spring-flowering bulbs in decent garden soil, the application rate recommended on the package of bulb fertilizer can be halved. Unless your garden soil is absolutely wretched, keep the fertilizer levels somewhat low.

If the garden soil is good enough to sustain annuals and perennials, it is more than adequate for daffodil bulbs. With occasional applications of fertilizer to garden plants through the growing season, the bulbs lying dormant in the soil below them will have plenty of nutrients when they begin to root out.

I fertilize lightly, sometimes, in autumn, as the bulbs root into cooling soil, and again when they’re in full leaf in spring. It just depends on how the garden has been managed. In many years, I don’t fertilize at all.

Bulbs planted in gardens under irrigation might be getting too much water, which can rot the bulbs. Daffodils don’t appreciate dry soil, but wet soil will kill the bulbs, and then nothing will sprout.


mount hood daffodil bulbs

‘Mount Hood’ daffodils. As they age, they turn ivory white. Soil in the mulched garden was good, so I rarely fertilized them.


“Can I use compost?”

A moderate amount of compost top-dressed on the surface and watered into the soil makes a fine addition. Or scratch the compost into the surface of the ground. Covering the compost preserves the beneficial microbes, which will be destroyed by the sun. Because the bulbs are deeper, they won’t be damaged by light cultivation.

Nutrients in decomposing mulch also contribute to the health of the soil. Soil under slowly decaying shredded hardwood mulch is probably sufficient for daffodils and other spring-flowering bulbs. Earthworms consume partially decayed material, enriching it in their own special way. They then distribute the castings (earthworm excrement) throughout the garden soil, and aerate it as well.

Shredded hardwood mulch breaks down faster than pine products, but don’t pile on large amounts. That could cause manganese toxicity and raise the pH too high. It’s a good idea to use shredded hardwood for a few years, and then switch to pine for a few years.


Headings

Page 1: How Do Your Daffodils Look This Year?, “Should I Remove Them?” (Hardiness), and For Now, Fertilize the Bulbs (Bone Meal, Food or Fertilizer?, Easy Does It, “Then, why do those old abandoned daffodils look better than mine?”, “Can I use compost?”)

Page 2: Sunlight For Daffodil Bulbs, Daffodil Bulbs Under the Trees, Soil and Drainage (Soil Preparation, Dig In!), Divide and Multiply Daffodil Bulbs (The Process, “And How Deep Is That?”), Time To Plant Daffodil Bulbs (Planting in Autumn, Planting in Early Summer), Summary

Return to the top

Annuals That Tolerate Heat, and Garden Tips

2019


Annuals That Can Take the Heat


American flag


Happy 4th Of July!


Well, it looks as though the heat is on, as we celebrate our nation’s 243rd birthday. And summer just got started! Enjoy your Independence Day barbecues with family and friends, but don’t neglect the garden annuals and other potted plants. They’re going to need more frequent watering at these temperatures.

Here are some things we can do to mitigate problems that come with extreme heat, followed by a list of heat tolerant annuals.


Mulch the Beds


Mulching the gardens will keep annuals and shrub borders looking fresh all summer. Mulch serves several purposes:

  • it retains moisture in the soil
  • the soil stays cooler without the sun beating down on it
  • it helps prevent weeds from germinating
  • mulch helps prevent soil erosion
  • it prevents mud and dormant disease spores from splashing onto the plants
  • long term, it breaks down and adds organic matter to the soil
  • and it looks good

If bags of mulch have been hanging around for a while, gases can build up that might damage tender young annuals. So, open the bags and let the gases escape. I recall mulching newly planted alyssum many years ago, and by the next morning, they looked as if they’d been fried!

Sometimes, termites are found in old bags of hardwood mulch. Once the contents are spread around the gardens, though, the termites probably will die from exposure or due to separation from the colony.


Types of Mulch


pine straw

Pine straw under a tree.


There are many kinds of mulch available from garden centers. I’ve always liked the look of dark brown shredded hardwood mulch. On a slope, it holds better than pine bark nuggets because the fibers interlock. Large quantities of shredded hardwood used repeatedly, however, can cause manganese toxicity and it can drive up the soil’s pH. Limit the depth to only 1″ in flower gardens or 2″ around shrubs and trees.

It’s a good idea to switch to a pine bark product for a few years to avoid these imbalances. Rhododendrons, azaleas, blueberries, hollies, and other acid-loving plants prefer pine products. But, if you want to use shredded hardwood around these plants, don’t pile it on and use an acidifying fertilizer.

Grass clippings break down quickly when used as a mulch by itself or under another mulch product. They contain some nitrogen, gently released as it decomposes. Use a very thin layer around your plants because it can heat up significantly as decomposition begins. But grass clippings can carry residue from weed killers and other chemicals used on the lawn, so maybe the best thing to do is to leave them on the lawn itself.

mulch for heat tolerant annuals

Pine bark nuggets can last a few years, but, if you’re a tidy gardener, you’ll have to blow away or pick out fallen leaves. It’s graded according to particle size, from pine fines, to small and large nuggets. Pine straw is new to me, since moving to North Carolina, but I still prefer shredded hardwood.

Mulch should not be piled high in the garden. Two inches suffices for most applications, although pine straw is applied more thickly. Keep it away from the stems and trunks of the plants.

Tree leaves that fall in autumn make a protective layer for garden plants, although many will blow around in high wind. This is more acceptable in rural areas or where the gardens aren’t open to public view. Most homeowner associations will find this free source of natural mulch objectionable. You could use a mulching mower to chop the leaves into smaller pieces, rake them into gardens, and cover with an inch of a more attractive mulch. Earthworms and decomposition will make them disappear.


Gravel In the Garden

I’ve never used gravel as a mulch around plants, except for potted lavender or succulent dish gardens. It settles into the mud, and “gravel travels” on an incline.

In certain circumstances, such as in the desert southwest and in dry rock gardens, gravel is a good choice. Around dry stream beds and in paths, gravel and rocks add natural elements, but should be laid over landscape fabric to prevent settling into the soil. If using gravel on the surface of a walkway, look for the kind with angular rather than rounded edges; it is less likely to sink underfoot.


Landscape Fabric

I am not a fan of using landscape fabric under mulched plants. This barrier interrupts the natural decomposition that occurs where the mulch meets the soil. Without the fabric, earthworms ingest the partially decomposed material next to the soil surface, and deposit fertile castings (excrement) into lower levels of soil, improving it in the process. This is how it works in nature, accompanied by thriving populations of various microbes.

Leaves, fallen trees, and dead insects and animals contribute to a healthy environment on the forest floor as they decompose. Microbes, earthworms, rain, and freeze-thaw cycles help distribute nutrients through the soil profile.

As the mulch breaks down over the fabric, weed seeds blowing into the beds will readily germinate in this rich medium. So, most gardeners using landscape fabric will be disappointed when they see those dandelions, plantains, and weedy maple trees taking root there. Mulch, with or without landscape fabric, doesn’t entirely prevent weeds, but it will greatly reduce their numbers.


Water the Garden Beds


marigolds, easy annuals

Marigolds planted by volunteers in Arbourgate Meadows, Charlotte NC.


Make sure the flower beds and the shrubs, especially new ones, get a deep soak now and then if rain is scarce. Unless your area receives a prolonged period of rain, passing showers will moisten only the mulch. In most soils, 1″ to 2″ of water per week ensures that deeply growing roots will get their share.

Watering a little bit every day or two will not produce deeply rooted plants. Unfortunately, shallow roots are susceptible to stress from not only dry soil but also from hot soil.


watering can


It’s always best to water early in the morning, so the foliage is dry going into the night. This lessens the likelihood of diseases infecting annuals and other plants. Some of the water applied during the heat of mid-day will be wasted because of rapid evaporation. But if you’ve forgotten, and the plants are wilting, water as soon as possible, regardless of the time of day!

For busy families, watering with soaker hoses or tubes and emitters saves time. By placing the water directly on the soil, or under the mulch, very little is lost to evaporation. These systems can be attached to a computerized control center at the faucet. Just be doubly careful, though, when digging nearby, that the spade doesn’t land on the soaker hose. But if it does, there are repair kits for that.

The kids might enjoy a sprinkler or Slip ‘n’ Slide on a hot Fourth of July, especially the ones under 35. For a softer landing on the slippery strip, water the lawn underneath it first.


About the Hose

A garden hose kept in the sun will significantly heat the water inside it. Spray it out over the grass until it’s cool enough to apply to the gardens. Water under the canopy and beyond the drip line of the plants. Watering heavily as needed will cool the soil…for a while, anyway.


Water and Potting Soil


caladium impatiens pot, annuals

Caladium, variegated English ivy, and ‘Prizm’ impatiens, before impatiens downy mildew came along. The new ‘Imara’ impatiens is downy mildew resistant.


The trend in gardening over the years leans toward growing annuals in pots for key areas around the yard. Gardeners also are decreasing the square footage devoted to annual garden beds.

Container gardening requires vigilance, because soil in pots generally dries faster than garden soil. Hanging baskets filled with thirsty annuals and small blooming pots on the picnic table probably will need daily watering in areas with intense summer heat. For this reason, I prefer using larger pots when possible, such as 12″ to 18″ hanging baskets.

Strawberry jars introduce verticality and a unique appearance. Look for smaller varieties of plants to fill these containers.

Adding a thin layer of mulch to potted plants has the same advantages as mulching the garden. I use 1/2″ of pine fines, and sometimes shredded hardwood.


Amendments For Annuals

Potting soil with a high percentage of coarse drainage material, such as pine fines or perlite, tends to dry quickly. The soil doesn’t hold water, due to the large air pore space between the particles. Supplementing the potting soil with compost, peat moss, fine coir, or even some clean loamy topsoil from the garden adds more particle surface area where water can cling. You don’t want to create a heavy soil, though, that doesn’t drain well enough.

Rountree's potting soil

Planting mix, above, with high levels of pine fines, is best used to improve garden soil. Potting soil tends to have more finely textured materials.

When I lived in Maryland, Leaf-gro was readily available to amend potting soil and garden beds. I used tons of it! It was pure, rich compost, and was the end product of all that yard debris (weeds, grass, leaves) sent to the recycling center.

An additional benefit of using garden loam is the introduction of root-friendly microbes and micro nutrients, although you might have to pull a weed now and then. I can see you shaking your finger and warning of soil pathogens and worms…yes, true. If you’re concerned, you can buy bagged products that have been pasteurized. Ask to see the contents, though. The last bag of “sandy loam” I purchased contained mostly finely ground pine bark and sawdust.

Water-holding crystals are another option for potted plants and garden beds. Read directions carefully. Don’t add dry crystals to a pot; they need to be pre-moistened. I never found them to be that effective, but these new potting soils with all those pine fines might be improved with them.


Amending After the Fact

Supplementing bagged potting soil is becoming common practice for my pots these days. For the potted tomatoes that were drying too fast, I scratched about a gallon of clay loam from the vegetable garden into the top layer of soil in each 20″ pot. With each watering, the fine particles will sift down through the pot, filling some of the pore spaces.

It seems to have worked. The tomatoes aren’t beginning to wilt by mid afternoon after watering in the morning. And, on some days, I can even skip a watering. Much better.


Fertilizing Annuals

Heat-tolerant plants growing in pots will run out of fertilizer within just 2 to 4 weeks, depending on soil quality. Frequent watering and rainstorms leach nitrogen, in particular, through the soil. And, once nitrogen levels drop too low, older leaves will turn yellow, the plant might become pale overall, and growth will slow down. Nitrogen is the macronutrient that is needed in greater quantities than any of the other nutrients.

Each plant species is different. Some need more phosphorus or iron or magnesium. Check the label for a comprehensive list of ingredients.

Many annuals are particular about soil pH; some need acidic soil, while others tolerate a higher pH. At either end of the scale, certain nutrients become unavailable to plants. Most plants, however, grow well enough over a fairly broad range. But, if you notice yellowing, consider taking a soil test and having the chemistry analyzed.

Garden centers stock many kinds of fertilizers. They’re available as soluble crystals, dry granules, liquid concentrates, and as slow-release (or timed-release) prills.

Fast growing annuals need regular applications of nutrients. Rather than a feast-or-famine regimen, put the plants on a schedule so they never show the effects of “hidden hunger”. This and other good horticultural practices will keep your plants in prime condition until the end of the season.

Slow-Release Fertilizer

At high temperatures, slow-release fertilizer is consumed faster than the label might indicate. So, a 6-month product might be depleted after 4 months at 85°. Instead of simply placing the prills on the hot soil surface in a pot, dig a few small holes between plants, add the prills, and cover them with about an inch of soil. This will keep them cooler and prevent rapid release of the fertilizer.

In gardens, slow-release fertilizer can be placed under the mulch, scattered over the root zone. A small amount is released as water percolates through the medium.


Pot Colors


heat tolerant annuals in pots

As these plants grow, they will shade part of the pots’ surfaces as summer temperatures rise.


Roots growing on the sunny side of dark pots, in hot summers, can heat to the point of death. So, most plants prefer light colored pots that reflect energy from the sun. If you really want to use the new rust-brown pots by the front door, add plants that trail over the side of the pot, shading enough of it to make a difference.

Another option is to use an insert, a plastic pot that sits inside the pretty pot, with space for hot air to escape. Maybe your beautiful teal pots can be tucked under the tree near the pool and planted with shade loving annuals.

This isn’t a concern in most parts of the country, but in southern states, the plants will appreciate this detail. Choose heat tolerant annuals that are less likely to be damaged by these conditions.


Winter Pots

Conversely, in chilly winter climates, dark pots absorb the sun’s warmth, delaying freezing of the soil. Find out if your pots will tolerate frost, and make sure they drain freely. “Frost resistant” does not mean “frost proof”.

When I potted large planters for customers’ winter gardens, I included sheets of styrofoam in the shoulders and on the sides of the pot, which absorbed the soil expansion as it froze. Pots with straight or sloping sides, with no curved shoulders, allow freezing soil to heave upward, usually avoiding breakage. In Maryland winters, expensive concrete pots were most likely to survive the cold.


Evaporative Cooling

clay pots

Efflorescence on clay pots.

Most terra cotta pottery is porous, allowing air and water to pass through the sides of the pot. Some clay pots, though, are fired at higher temperatures, making them non-porous.

A clay pot with moist soil stays relatively cool, as moisture wicks through the pot. As water evaporates, the surface of the pot feels cooler. The same principle applies to perspiration evaporating from your skin. So, decorative clay pots in the summer are another alternative. But, they dry out faster because of the moisture loss through the pot.

The pots in the photograph have a white mineral coating called efflorescence. When fertilizer salts in solution migrate through the clay, they crystallize as the water evaporates. It can be removed or enjoyed.


Nursery-Grown Landscape Plants


nursery trees


Because containerized nursery plants are watered daily in warm weather, growers use a mix comprising mostly fast-draining pine fines, sand, and perlite, with some organic matter (peat moss, ground coir, compost) for water retention.

During hot summer weather, it is important to get transplants established as quickly as possible. New roots reluctantly grow into the native soil, but can be encouraged to do so by scoring the root ball or by teasing out some of the roots on the sides. This causes slight injury to the roots, and stimulates the plant to quickly form new side roots from the pericycle, a layer of cells inside the root.

Also, amending garden soil with organic matter, such as nutrient-rich compost, and pine fines for better drainage creates a welcoming habitat for new roots. Heavy clay soil is not very accommodating and hinders rapid rooting. You want to give your plants soil that drains well and entices roots to grow deeply. If you’ve ever tried to dig in dry, compacted clay soil, you know why plants are slow to establish. Good soil preparation makes a huge difference!


Why New Plants Sometimes Fail

A newly planted ‘Soft Touch’ holly, azalea, or autumn fern needs to have water replenished in the root ball every day in hot breezy weather. Until new roots expand into the soil, plants are entirely dependent on you for their daily dose. Make sure the water isn’t too hot.

I often consulted with homeowners when their new plants failed. When the shrubs were unearthed, their roots often were quite dry.

One landscape I visited here in Charlotte had very large evergreens newly planted in front of the house. All were dead or dying during a prolonged drought. After a little digging, I saw that 95% of the root system on each plant was bone dry because there was no organic matter mixed into the heavy clay soil. And only one irrigation emitter was placed on the side of the root ball. Each plant this size would have required a few emitters.

To make matters worse, the soil had been backfilled in large clods, and not broken up at all. Any water that flowed from the emitter drained right into the crevices, bypassing the root system. Those large air-filled gaps dried exposed roots even more. Any moisture in the root ball was quickly wicked away by the clay. This costly disaster illustrates the need for thorough soil preparation: breaking up heavy soils, incorporating amendments (drainage materials, organic matter) for improved tilth, and firming the soil around the root ball.

The problem is this…

…and it’s a point that doesn’t get a lot of attention. Water is sucked into the tiny spaces between clay particles by capillarity. And what’s abundant in soils throughout much of the country? Clay! So, when the shrub’s potting soil that is mostly pine fines (with large air pore spaces) sits next to native soil that’s composed of mostly clay (with tiny air pore spaces) what happens to the water? That’s right! It’s pulled from the shrub’s potting soil into the surrounding clay.

Clay always wins! This is one explanation for nursery plants that fail, even though the surrounding soil in the bed feels damp.

The remedy for a shrub with a high percentage of pine fines and perlite in the pot is to work some of the native clay into the root ball. Poke some holes a few inches deep (try using a dibble) on the surface of the root ball and fill with a few handfuls of clay or loamy clay; water it in.

This improves the water-holding capacity of the soil inside the root ball. Granted, this is a fine point. But the principle was effective for the potted tomatoes, mentioned in “Amending After the Fact”, above.


When Can I Plant?

Shrubs and trees establish in the landscape faster in autumn, when soil temperatures are still warm enough to promote root growth. Even in chilly soil, in the 40’s F, roots can grow. Air temperatures are more moderate then, and rain falls more predictably. The next best time is early to mid spring, as the soil begins to warm and before the trees leaf out.

But plants can settle into the landscape during the summer, too, as long as soil preparation was adequate and water is provided when needed. That ‘Jelena’ witch hazel would much rather be in the ground than sitting in a black pot at the nursery on this Independence Day.

Summer annuals root quickly, but give them enough water to prevent wilt. They’ll probably need water every day until their roots grow more extensively through the soil. And give them enough to moisten the entire root ball and the surrounding soil. It takes only one sunny 90° day to dry that new plant to a crisp!


Reservoirs and Saucers


creekMost hanging baskets and large plastic pots have a reservoir or an attached saucer at the bottom. It holds an inch or two of water that the plant’s soil will gradually absorb by capillarity.

It isn’t necessary to drain it off in the summer, if the plant is full of foliage. Any water the soil can’t absorb within 30 minutes, however, should be poured off.

For young plants and for succulents or plants that like dry soil, the reservoir or the saucer should be drained. Pour the excess water onto other plants instead of wasting the nutrients. Even worse is to let dissolved fertilizer wash down the street to the storm drain, eventually polluting the local creek.

Another option is to remove the saucer and allow water to drain freely into the flower beds or the shrub border.


Planting Wire Baskets

When I plant a wire basket, I line the inside of the coco liner with a “repurposed” sheet of plastic, such as an empty mulch bag. The plastic prevents evaporation through the coco liner, and slows decomposition of the coco liner.

Be sure to punch holes through the plastic in several places to allow drainage. But leave the bottom inch or so intact, forming a reservoir to hold water a bit longer, until it’s absorbed by the plants.

(For decades, as owner of Wellspring Garden, I never bought trash bags. I saved all the empty bags from potting soil, amendments, and mulch for that purpose. Using less plastic is the way to go!)


So, It’s Your Turn To Host the Party


red-white-blue


A trip to the garden center reveals plenty of options to dress up the landscape for the holiday:

  • full grown, colorful blooming baskets for the deck or the porch
  • a potted combination “drop-in” worthy of that gorgeous ceramic container near the front door
  • some large annuals, in 6″ or 8″ pots, for the garden, looking as if they’d been growing there for months
  • a potted herb garden that guests can pinch to customize their salads (basil, chives, and others), and some mint ‘Julep’ or ‘Kentucky Colonel’ for iced tea, or other beverages.

Finally, string some lights for evening ambiance, and add red, white, and blue accents to celebrate Old Glory. Don’t forget to bring greenery into the powder room, in a pretty pot, adorned with a small flag.


Headings

Page 1: Happy 4th of July!, Mulch the Beds (Types of Mulch, Gravel In the Garden, Landscape Fabric), Water the Garden Beds (About the Hose), Water and Potting Soil (Amendments For Annuals, Amending After the Fact, Fertilizing Annuals, Slow-Release Fertilizer), Pot Colors (Winter Pots, Evaporative Cooling), Nursery-Grown Landscape Plants (Why New Plants Sometimes Fail, When Can I Plant?), Reservoirs and Saucers (Planting Wire Hanging Baskets), and So, It’s Your Turn To Host the Party

Page 2: Heat-Tolerant Annuals

Return to the top

Time To Think About Fall Greens and Vegetables

Updated 11/16/2024


Ready To Grow Fall Greens and Vegetables?


seedings of early spring greens


It’s hard to believe it’s already time to start seeds for fall greens and vegetables. I’ve been putting it off because of the hot weather we’ve been having. But, unless I want to buy transplants, seeds will have to be started soon. You folks up north probably have sown seeds for the broccoli and cauliflower by now, and certainly the Brussels Sprouts.

Here in North Carolina, fall seems a long time away, but in order for us to harvest those fall greens, we need to start sowing seeds now. Remember to locate your fall/winter garden where it will receive adequate sunlight. And, of course, I’ll sow successive crops through the rest of summer and early fall, as space permits.

Because we have a long growing season in the Carolinas, we can squeeze in another crop of summer vegetables. Zucchini, summer squash, cucumber, and beans can be sown again. But with the encroaching canopy of the trees on the berm, south of the garden, I’ll be planting only cool-season vegetables for late summer and autumn harvests. The ‘Diva’ cucumber is loaded with fruits. And I will wait patiently for every last fruit to ripen on the tomatoes and peppers.

(***Update***: A few days ago, a large and dangerously crooked pine tree was taken down, and now there’s more afternoon sun for the tomatoes and peppers. More sun also gives us opportunities to grow containerized vegetables and fall greens inside the fence, protected from deer. August 2018)


If They Can’t Take the Heat


spinach in a bowl

Spinach.

Temperatures are still too high to sow lettuce and spinach outdoors, so I’ll wait another week or two. It’s still in the 90’s! They can be started indoors, in air-conditioned space, if needed.

Check the temperature of the soil before sowing seeds in the garden. Direct sun beating down on the dark soil surface can raise the temperature too high and dry it out very quickly. Look for one of those “Easy Tunnels”, or fabricate something yourself, to partially shade the soil and the tender young seedlings. You can purchase knitted shade fabric, made from black polyethylene, from mail order suppliers. In the southern states, 30-50% shading should work during the late summer months. This could lower the temperature by 10° or 15°F. Keep the soil surface moist to ensure good germination and to cool it down.

The best germination occurs between 55° and 70°F for lettuce and spinach. I usually put transplants into the garden instead of sowing seeds directly because hungry slugs, snails, and cutworms find tiny seedlings very tender and delicious.

Organic Sluggo will bait the mollusks (slugs and snails) to their deaths, and Bacillus thuringiensis (Bt), sprayed on the seedlings, will kill cutworms. Slug baits made with iron phosphate, such as organic Sluggo, are far less harmful to pets and to people than products containing metaldehyde, so be sure to read the labels.

One way to gather up a whole lot of slugs is to place a board, maybe 1′ x 2′, over damp soil. Go out and check the underside early the next morning, old knife in hand, and cut them quickly in half or squish them any way you choose…but, don’t use salt in the garden!


Choosing Varieties of Fall Greens


botanical interests seeds 

Sowing seeds for fall greens and vegetables, which prefer cool weather, can be tricky in July’s heat. Look online or through seed catalogs for lettuce, spinach, broccoli, and other crops that are described as being heat tolerant varieties. Yes, all lettuce and broccoli varieties prefer cool temperatures, but some will take warmer or colder weather than others as they form heads. If you’re buying transplants, ask the grower.

Either way, plan to provide some sort of device that will lower the temperature during these last hot weeks of summer. For later harvests, I’ll sow seeds that grow cool and mature in cold weather, and they will not need the shade fabric. Plants grow better with more hours of direct sun as the temperatures cool down.

Check with your local agricultural extension office for recommendations or for a planting calendar.


Planting Young Transplants


Soil

turned soil

Rich, dark soil with lighter brown clumps of clay, before incorporating.

Starting a vegetable garden with soil that has not been conditioned could result in a mediocre or poor harvest. Fall greens grow faster and larger in well-prepared soil.

Garden soil for these crops needs additional organic matter (compost, composted cow manure), drainage material (pine fines, coarse sand), and sometimes lime. A soil test will indicate the need for lime.

Our fall greens are being planted in soil that has been worked for 6 years, so it’s in very good condition. I will, however, continue to add compost, fertilizer, or manure to the garden with all new plants.

When digging soil, bring some of the lower-level clay up to the surface, and turn under the richer topsoil 4″ to 6″ deep (a few inches deeper for tomatoes, in spring). Over time, the clay soil on the surface will improve as mulch decomposes or when compost is added as a top dressing. Here you can see clumps of light brown clay that were brought to the surface of the soil (photo, above) before they were broken up.


Roots

Growers use pots and market packs of various sizes, including small 9-cell packs, 4-cell packs, 2″ peat pots and 4″ plastic pots. A smaller root ball needs more careful monitoring while the plant becomes established.


An important step before planting is to rough up the outside of the root ball (photos, above). This slightly injures the inner root layer called the pericycle, stimulating the plant to quickly send out new lateral roots into the soil. Be careful not to so severely damage the root system that the plant can’t supply water to the leaves on a hot, sunny day. Do this for every plant that is about to be repotted or planted into the garden.

A root ball that’s tightly packed with roots can be shallowly scored down the sides in a few places. Use a knife, a rock, or even a twig. Or use a cultivator to pry out some of the roots.


To Bury or Not To Bury?

broccoli

Broccoli ‘Arcadia’ from 4-cell-pack.

Most young vegetable transplants can be placed an inch deeper into the soil, or up to the bottom leaves. If the plant is more mature and has developed a somewhat woody or tough stem, plant it at the same level it was growing in the pot. But always, if possible, choose younger transplants.

Older plants can be stressed by being potbound or underfertilized, and might go to flower or head up prematurely, yielding undersized harvests. Young plants require more time to grow, but they will give you the largest heads of lettuce, broccoli, cauliflower, and cabbage. If in doubt, plant the top of the root ball level with the soil surface.

Firm the soil around the roots and stem using medium pressure. Humidity between the soil particles encourages the stem to grow fine roots without interference from tightly packed soil. Watering the plant helps the soil settle in around the root system and charges the soil with much-needed moisture.


broccoli in winter

Broccoli ‘Arcadia’ in winter.


These are same broccoli ‘Arcadia’ plants photographed in late December (photo, above). Trees on the berm cast too much shade until leaves dropped off, delaying harvest. When the garden gets more sun, heads should form in mid to late winter.


Fertilizer for Fall Greens

Planting fall greens and vegetables into late September, I mix a handful of granular organic vegetable fertilizer into the planting area. These crops grow beautifully with adequate nitrogen, so I will soon use higher nitrogen fish emulsion. Another application of fish emulsion will be made every 2-3 weeks through November, or every 2 weeks for potted greens.

mustard seedlings

Mustard seedlings in the garden.

Microbes in the soil break down organic compounds and make nutrients available to the roots. But, as the weather cools significantly, microbial activity slows down. I’ll use synthetic soluble fertilizers a few times in winter to keep the plants growing.

Greens and vegetables can grow all winter here, with some protection during very cold weather. This is worth the effort, since I can pick beautifully fresh kale and spinach for the Sunday omelet, or a big bunch of collards for collards soup.

Mustard greens ‘Florida Broadleaf’ was sown in late September, and germinated a few days later. The thinned seedlings will be used in soup, salad, or an omelet. Spinach sprouted about a week later.


Arugula


Love, love arugula! A forkful of salad greens that has a piece of arugula in it…mmm… The variety I prefer is ‘Astro’. It’s not as hot as the wild types, and it tolerates warmer temperatures. Arugula self-sows if it likes where it’s growing. Just let it flower and set seed. The papery seed capsules release the seeds, which germinate within 2 weeks, during favorable weather, near the mother plant.

It grows well in morning sun, during warm weather, and in moist, rich soil. Those who are more adventurous than I might enjoy growing the hotter ‘Wasabi’. Arugula doesn’t look like a member of the family Brassicaceae, but it, too, is in that famous family.

You might have seen the term “cruciferous” being used when describing members of the Brassicaceae family (formerly Cruciferae). It refers to the flowers of these plants, which have 4 petals arranged in the shape of a crucifix. The terms brassica, cole crops, and crucifer (or cruciferous) refer to the same plants.


Broccoli


One of the most nutrient-rich foods, broccoli is a must in my garden. Nutrients include protein, Vitamins A, several B’s, C, K, minerals, fiber, and their famous phytonutrients. To say that we eat broccoli in one form or another every 2 or 3 days is not an exaggeration. Just ask Mother.

broccoli crowns

Broccoli crowns.

Heat and cold tolerance ranges from poor to excellent, depending on the cultivar. In this zone 7b area, ‘Imperial’ can be sown in July or planted as transplants from July through August; Johnny’s Selected Seeds’ catalog rates it “excellent” in heat tolerance for broccoli. Normally, broccoli grows best in cool weather, but you can extend the harvest by choosing 2 or 3 varieties that are suited to the weather at different times of the year.

The variety that will see us through the winter is cold-hardy ‘Arcadia’, which grows a large number of side shoots once the main head has been harvested. For that reason, don’t cut off too many leaves when you do harvest broccoli, because each of those leaves could be topped by another side shoot.

By the way, tender broccoli leaves are edible as well. Add them to soup, a smoothie, pasta, or a stir-fry. After the harvest is done, I keep the plants in the garden to flower. Bumble bees and other early risers are fond of this bounty, and the flowers are quite pretty!


broccoli flowers and bumblebee

Bumble bee visiting broccoli flowers in early spring.


Miniature Broccoli ‘Happy Rich’


broccoli happy rich, delicious fall greens

Broccoli ‘Happy Rich’.

I’ve grown ‘Happy Rich’ for many years. This plant grows a small head at the end of a stem, harvested ideally before the white flowers open. Each of those little green beads is a flower bud, and even if the buds start opening when the stems are picked, they’re still going to the kitchen.

The head will never get to the same size as regular broccoli, but the flavor is superb. Once the little heads have been cut off with 6″ to 10″ of the stem, the plant will branch out and grow more little heads. The stem, the leaves, and the head are edible—steamed, stir-fried, or added to soup or a pasta dish.

Two plants have been growing in the garden since the spring, and they don’t look very happy. It’s been a hot summer in Charlotte, so I didn’t expect them to survive this long.

***Update***: In autumn, 2021, I moved to a larger property in the Piedmont, with lots of gardening potential. In the photo, below, ‘Happy Rich’ produced harvests for over 9 months in 2022. An Arctic Blast just before Christmas, when the temperature dropped 50 degrees to the low single digits, put an end to this planting. This area is in USDA zone 7b, so average temperatures allow growth all through the winter for many types of greens…usually. 11/16/2024


miniature broccoli 'Happy Rich'

Miniature broccoli ‘Happy Rich’ in spring.


Bt


The imported white cabbage butterflies visit frequently—more frequently, alas, than I do with the bottle of Bt.

Bt is an abbreviation for Bacillus thuringiensis, a naturally-occurring bacterium that kills caterpillars of moths and butterflies, and nothing else. Before you groan “no chemicals”, Bt is used by organic growers and it’s been around for decades. Perfectly safe, even for pollinators, and not a chemical. It easily rinses off produce. You can find both organic and conventionally prepared products.

All brassica crops are targeted by a few kinds of moths and one species of butterfly, which lay eggs on the leaves. The eggs soon hatch into voraciously hungry and well-camouflaged caterpillars. After consuming some of the Bt, they stop feeding and die shortly thereafter. Young caterpillars are more easily controlled than older caterpillars. Thuricide and Dipel are two brand-name products with Bt as the active ingredient.


cross-striped cabbageworm, common on cool season greens

Cross-striped cabbageworm, becoming more common here, on mustard greens. Expect several generations per season. Look for clusters of white woolly eggs.


Return to the top

Page 1: Ready To Grow Fall Greens and Vegetables?, If They Can’t Take the Heat (Choosing Varieties of Fall Greens), Planting Young Transplants (Soil, Roots, To Bury Or Not To Bury?, Fertilizer for Fall Greens), Arugula, Broccoli, and Miniature Broccoli ‘Happy Rich’ (Bt)

Page 2: Brussels Sprouts, Cabbage, Cauliflower, Collards, Kale, Lettuce, Nutritional Considerations of Fall Greens (The Sulforaphanes, Where’s the Beef?), and Only the Beginning

Improving the Landscape Is Like Painting a Picture


A Landscape Primer


Now that you and your family have enjoyed a few months of outdoor activities, you’ve noticed a few changes you’d like to make. Summer is a good time to start thinking about improving the landscape, but many gardeners wait until the cooler days of early autumn before starting the work. The weather at that time is more favorable for establishing most plants than it is during the hot—and often dry—conditions of summer.

This is not to say that you can’t successfully plant at other times of the year. With careful maintenance, plants will survive a summer installation.

Before the first time a shovel goes into the ground, get the underground utilities and cables marked. Call your municipal authorities (8-1-1, in the U.S.) to have it done.


Lake Geneva Lakeshore Path - islandworks / Pixabay

A fine example of framing the house.


Check All That Apply


  • Is the patio too small for family gatherings?
  • Are you tired of spending your weekends pruning shrubs?
  • Are you putting your house on the market within a few years?
  • Does retirement allow more time for vegetable gardening?
  • Is it time for the greenhouse you’ve always wanted?
  • Where will I put the cold frame the kids gave me last Christmas?
  • Now that the trees are mature, is it time to get rid of the struggling lawn (and the mower)?
  • Are the children showing an interest in butterfly gardening or a goldfish pond? Are you?


child watering tulips


Walk around the property, clipboard in hand, and note all the issues that need improvement. Go ahead; dream a little! Start to visualize how you could use different areas of the property.


A Little Research


Visit public gardens and parks at different times of the year, taking notes and pictures. Notice how the interplay among trees, shrubs, ground covers, flowering plants, and structures creates a harmonious picture. Don’t ignore how you got from point A to point B; pathways are practical and are among the most important features of the landscape.

Books, magazines, online sites, and classes offered by Master Gardeners’ programs and community colleges are excellent sources of information. Record the names of plants you can’t live without as well as those that do nothing for you. And get all the information, so you can avoid asking, after the planting, “What did I ever see in you?”

Cupressus arizonica blue ice

Cupressus arizonica ‘Blue Ice’.

Take a look at the trees, shrubs, and flowering plants offered by your local garden centers, and ask about winter hardiness and susceptibility to disease and insects. Find out what they do in every season of the year, what kind of maintenance they require, and how they can contribute to improving the landscape.

If low maintenance is important, look for dwarf varieties of plants that don’t need to be sheared every other month. Copy the full name of the plant: the botanical name (Genus and specific epithet), the ‘Cultivar’, and the common name. Then research them. “Japonica”, “Holly” and “White Splendor” refer to dozens of plants!

In the spring, and sometimes in the fall, landscape contractors set up full-size exhibits at home and garden shows. See which displays appeal to you the most. Personnel are available to answer questions and to set up consultations, but first find out how they will be compensated.

Compile a list of likes and dislikes (colors, materials, styles), which will guide the designer (or you!) in planning a garden that will give you the greatest pleasure. Decide what’s realistic financially and in terms of time and effort required to maintain your project.


Using Native Plants When Improving the Landscape

Plants that are native to your area adapt more readily to local environmental conditions. Seasonal temperatures, precipitation, and soil composition are a few factors that contribute to a species’ evolution. So, if the sourwood tree (Oxydendrum arboreum) evolved in the Carolinas, then the one planted in a North Carolina garden is likely to survive without being pampered.

Plant breeders have introduced “new and improved” versions that you might find more appealing than the original species. Cultivars of trees, shrubs, and perennials native to a region are available in a wide variety of plant heights or foliage and flower colors. Look for these “nativars” at your local garden centers.

cardinals bathe, watching while Coronavirus keeps us home.

Cardinals come for a daily dip.

If you want to attract more butterflies to your garden, find out which plants will feed the larval stage of a particular insect. Many species of butterflies have declined significantly in numbers, and it’s up to us gardeners to make an attempt at reversing that trend. Remember that insects, birds, and other animals evolved alongside a unique set of plant species, and that they’re all interdependent for long-term survival. If holes in the leaves bug you, perhaps confining those unsprayed plants to the back yard is a good compromise.

My mother and I enjoy watching the northern cardinals and other birds visiting the bird feeders. To make them feel at home in your garden, incorporate shrubbery that provides nesting opportunities and shelter. And don’t forget the bird bath! There’s nothing like a beautiful cardinal to enliven a winter landscape.

Speaking of shelter, consider constructing a simple brush pile to protect overwintering insects and other small animals. All that garden debris hauled off to the recycling center includes many insects in their pupal stage. Keeping cocoons and chrysalises on your property will ensure greater numbers of butterflies and other insects that might feed the next brood of bluebirds or wrens.


Leave It To the Professionals


landscape plan, improving the landscape


Perhaps the scope of this kind of work is beyond your comfort zone and you’d rather employ a landscaper to install it. If you hire a contractor, try to accommodate him or her by confining the family pets, removing children’s toys, and providing easy access for the workers.

Improving the landscape and transforming it from blah to beautiful requires a fair amount of disruption. Expect dust, mud, noise, and possible delays.

Identify existing plants that are special to you and ask the contractor early in the process if they can be worked into the plan. Some might be too large and unlikely to survive the transplant. Dig up dormant bulbs, if you can find them, and replant later in areas suggested by the designer.

If you’re an experienced gardener or an avid beginner, you might wish to participate in some aspects of the project. Maybe you’d prefer to have the contractor deal with permits, inspections, hardscape (utilities, paths, structures), and large specimens, while you plant the annuals, vegetables, and bulbs. All details should be spelled out in the contract. Open communication prevents most misunderstandings.

You might prefer to have the first phase installed this year, with additions made over the next few years. Ask the contractor which parts should go in first.


Headings

Page 1: A Landscape Primer, Check All That Apply, A Little Research (Using Native Plants When Improving the Landscape), Leave It To the Professionals

Page 2: Design Considerations For Improving the Landscape (The Right Size, Getting the Picture, But I’m Repeating Myself, One Garden in Derwood, Add Some Rocks), Improving Curb Appeal (Under the Parrotia Tree (Surprise!), Raise It Up, Only the Beginning

Return to the top

How To Grow the Best Blueberry Plants


blueberries maturing on the plant


Planting a Blueberry Patch?


July is National Blueberry Month, but it’s a rare day when I don’t consume blueberries. For many years, breakfast 5 or 6 days per week consisted of plain Cheerios, a handful of English walnuts, a handful of fresh strawberries, and a handful of fresh blueberries. Throw in half a nectarine or peach in season, or part of a banana, and I’m “doin’ the body good”. More fruit and nut than anything else.


Today is Day One


Until today. This morning, when I was researching nutritional information on the luscious little berry, I read the caution about eating blueberries and dairy, especially high-fat dairy, at the same time. The super-healthy antioxidants found in blueberries (strawberries, too) lose their desired effect when dairy and berries are eaten together.

Eating a lot more blueberries will increase the level of antioxidant activity, even in the presence of dairy. Apparently, this goes for strawberries as well. But this can get expensive, especially when berries are out of season.

So, all of you smoothie drinkers out there who use yogurt as a base might consider saving the blueberries until a few hours later. Or skip the yogurt. And today, the blueberry partnership comes to an end in my kitchen. At breakfast, anyway.


Blueberry Nutrients

A few berries in the bowl won’t hurt, and they certainly have other healthful reasons for including them. A ½-cup serving contains:

  • 40 calories
  • 1 g. protein
  • <1 g. fat
  • 11 g. carbohydrate
  • 7 g. sugars (blueberries have a low glycemic index of 53)
  • 2 g. fiber
  • high amounts of vitamins A, C, K (blood clotting, bone health, heart health), and the mineral, manganese

But it’s the antioxidant benefit I’m after more than anything else. Blueberries contain huge numbers of antioxidants, including the flavonols, quercetin (linked to lower blood pressure and reduced heart disease) and myricetin (cancer, diabetes).

Anthocyanins include malvidin and delphinidin, found predominantly in the blueberry skins.


blueberry, raspberry, strawberry photo


What Antioxidants Do


Blueberries have the highest antioxidant levels among commonly found fruits and vegetables—when they’re not eaten with dairy products. Anthocyanins are one group of antioxidants, the pigments that give red, blue, and purple fruits and vegetables their colors.

Antioxidants are health-promoting flavonoids belonging to a huge group of polyphenols. They circulate through our vascular system and help protect us from the damaging effects of free radicals. Those free radicals are produced as normal products of metabolism. They also help prevent free radical cell damage due to exposure to alcohol, cigarette smoke, and other pollutants.

A free radical, lacking an electron or two in the molecule’s outer orbit, is unstable as it tries to steal an electron from a nearby molecule, replicating the instability. This can lead to the development of cancerous cells if it happens in DNA. Antioxidants neutralize the unstable molecules.


More Benefits


blueberries in shape of heart


In addition to helping prevent oxidative DNA damage, potentially leading to cancer, and slowing down the aging process by 2½ years, antioxidants in blueberries are also linked to lower LDL cholesterol, the “bad” cholesterol that can lead to heart disease. But there are many other factors that contribute to this illness. One of those factors is inflammation, and blueberries—you guessed it—are also anti-inflammatory.

Many studies point to the positive effects blueberries have on blood pressure, type 2 diabetes, urinary tract infections, brain function, and muscle damage after strenuous workouts. Antioxidants help our bodies produce more nitric oxide and can relax blood vessels, helping to lower blood pressure.

This little fruit also slows the progression of age-related macular degeneration and glaucoma. There are plenty of reasons to include blueberries and other colorful plant pigments in the diet.

One clue to their growing popularity is the fact that per capita blueberry consumption tripled between 2000 and 2015, to just over 3 pounds per person per year. When I move to a place with more land, planting a blueberry patch is high on the list of garden projects.


Prepare for Planting Your Blueberry


Sun

First, locate your blueberries where they’ll receive at least 6 or 7 hours of direct sunlight. In areas with hot summers, dappled shade in mid-afternoon helps prevent stress. Consider the tree canopy and how soon it might begin to cast too much shade on your blueberry garden.

For all permanent plantings, I like to give plants an excellent base to root into. The section in Soil Prep 101 for Your Vegetable Garden headed “Prepare for Soil Prep” offers details on getting started, with a few exceptions for blueberries. Blueberries, in particular, require very acidic soil.

A soil test is recommended to get an accurate reading of the soil’s fertility, pH, and tilth. Proper planting and management will reward you with perhaps 20-30 years of blueberry harvests.


Drainage


Rountree's potting soil

Planting mix composed primarily of pine fines.


Very dry soil is difficult to dig, so watering the area a few hours or the day before starting the process will make it easier. I usually use a sturdy garden fork for the initial dig.

Loosen the soil 15-20″ deep, and 3 or 4 times the width of the root ball. Add a cubic foot or more, depending on how bad the soil is, of partially composted pine bark chips, also called soil conditioner or pine fines (photo, above) to facilitate drainage. Don’t layer the pine fines; instead, incorporate them into the full depth of excavated soil.

If you have sandy loam to begin with, you might not need as much soil conditioner. Here in the piedmont of North Carolina, however, we have heavy, sticky clay. Clay soil holds moisture and fertility, but it requires amendments to improve the drainage.

Coarse sand (not play sand, which is too fine) is another material that can improve drainage, but it should be used in conjunction with organic matter.

Loosening the soil and adding amendments and plants raises the finished level of the bed. Take this into consideration as you sculpt the land. Blueberries need good drainage, and you want to make sure you didn’t create a berm where the water has nowhere to drain. Hire a professional gardener, if you prefer, to till and prepare the soil according to how you want it done.

If you’re planting the shrubs in a row or in a group, the plants will thank you if you dig the entire bed instead of just the area around each plant. Remember to place the tallest-growing varieties on the north side of the garden (northern hemisphere). Concentrate the peat moss and compost near the plants, but add some peat and pine fines between them as well.


Gypsum

Gypsum (calcium sulfate) can be added annually for several years to soils that are especially intractable. It works by “flocculating”, or gathering, tiny particles of clay soil into larger particles, opening up minute channels through the soil profile. The larger air pore space allows water, air, and roots to more easily penetrate the soil.

Unlike lime (no lime for blueberries!), gypsum doesn’t raise the pH of the soil. Pelleted gypsum can be incorporated into the soil at the beginning of the process and applied as a top dressing in subsequent years. Water will carry it lower into the soil.


Soil PH 

Because blueberries are sensitive to high salt content, do not add mushroom compost or composted manure to the garden. Manure also can raise the pH of the soil.

Our soils in the eastern U.S. tend to be acidic, but not acidic enough for blueberries. Blueberry plants need a pH below 5.5, even as low as 4.3. Peat moss is very acidic, and blueberries love it. In addition to the pine fines, add at least one cubic foot of pre-moistened peat moss per plant. Again, thoroughly incorporate the peat with the top 12″ to 15″ of soil, breaking up the clods as much as possible.

Pockets of dry peat moss buried in soil will remain dry for a long period of time because it resists absorbing water. Clay readily absorbs water; you need to thoroughly mix the clay particles into the peat moss. Pre-moistened peat moss is easier to work with.

A moderate amount of aged compost can be incorporated into the top 6-8″ of soil. The amended soil should be at least 3 times the width of the root ball. Sure, that sounds like work, and the plants probably would survive with a lesser effort, but greater effort equals greater rewards!

Rake the area smooth.


Time to Plant Your Blueberry


Before removing the blueberry plant from its pot, water it. This will help the root ball slide out of the pot. Don’t pull the plant by the stem; this could damage the delicate root system. Avoid heavily damaging the roots of blueberries because they lack root hairs. Keep the label for each plant with the plant.

Let gravity help you. Tilt the pot almost upside-down and see if the plant comes out without too much coaxing. Be ready to catch it before it lands on the ground; stems are brittle and easily broken. If the roots still won’t let go of the pot, cut away the plastic pot with a utility knife or sharp pruners. Or use an old bread knife along the inside of the pot, separating the pot from the outside of the root ball.

Know how large the plants will grow when they reach maturity in order to gauge how far apart they should be planted. Plants often grow larger than the size indicated on labels. And to maintain the health of the foliage, spacing them farther apart assures good air circulation.


Grab Your Shovel


garden tools


Hollow out a hole in the prepared garden. The depth should be almost the height of the root ball. Allowing ½” to 1″ of the root ball to protrude above the finished grade is advised.

Never cover the original root ball with new soil; doing so would suffocate the roots and damage the stem. Blueberries prosper when planted in a raised bed, ensuring good drainage and high oxygen content at the crown of the plant.

Use a cultivator to loosen some of the roots on the outside of the root ball, or score it several times with a knife, slicing shallowly from top to bottom. This light damage will stimulate the root system to quickly send out new roots.

You want to encourage the plant to grow roots away from the plant and into the amended soil instead of circling around the original root ball.  Whenever you add anything into the landscape, do not dig a bowl with a smooth surface. Use a shovel to create jagged edges, which will direct growing roots into new territory.

Now plant the blueberry, backfilling with amended soil. Guide the loosened roots out into the prepared ground. Using medium pressure, firm the soil. Loosely packed soil will settle, possibly dragging the plant too deep into the ground.


First Pruning


blueberry branch


With young plants, remove very thin twigs, crossing or damaged stems, and cut back long stems to remove most flowers. Mature plants at the nursery, grown in large pots—okay, experts still recommend pruning them, but I’ve had no problems letting them set some fruit the first year when the plants are well cared for.


Label the Blueberry Plant

For new plants, bury the label on the north side of the stem. This way, you’ll know where to find the label if you need to know the cultivar’s name. Plastic labels that are shaded will last a long time. It’s not a bad idea to take pictures or to record this information in a journal. Keep track of the plants’ names in case one or two should perish, because…

…blueberries are particular about their pollinizers—the plants that provide the pollen. So, you’ll want to know the names of plants that need to be replaced. All blueberries bear fruit, but you don’t want to create a gap in bloom cycles by guessing which varieties to buy. Ensuring an uninterrupted succession of flowers and mature pollen throughout the bloom season yields an abundant harvest of beautiful berries.


Mulch

Once all the blueberries have been planted and the soil raked smooth, apply the mulch. I prefer to use pine products, such as 4″ of pine straw or 2″ to 3″ of pine bark nuggets for blueberries. An inch of pine fines also works. Don’t apply mulch against the stems.

Avoid walking over the newly prepared garden to prevent compressing the soil.


pine straw mulch for blueberry patch

Pine straw.


Mulch helps cool the soil and hold in moisture. It also helps prevent most weeds from growing, which compete with blueberries for moisture and nutrients. More mulch will be needed as it decomposes, but pine bark chunks can last a few years.

Shredded hardwood mulch is attractive and readily available. And it holds well on a slope, except during heavy rains. A thin layer, an inch or so, is acceptable. But too much hardwood will raise the pH of the soil. As long as you can maintain the pH that blueberries require, using a thin layer of shredded hardwood is okay. But pine straw and pine nuggets are preferred.

If the soil pH is too high, switch from shredded hardwood to pine bark nuggets. In fact, specialists recommend alternating between pine products and hardwood every several years. Changing the pH with mulch is a very slow process. So, you’ll need soil acidifier, which is available at garden centers, to lower the pH if it drifted too high.


Water

blueberry in a pot

Blueberry ‘Patriot’, in a pot for several years.

If you can’t plant the blueberries right away, they might require water every day.

Water the new garden well. For the next 2 weeks, or until the plants root in, the only water available to them is the moisture held by the original root ball. Naturally, if ample rain falls while they’re rooting in, you might not need to water. Dry clay soil in the bed will steal moisture from the plant’s root ball.

If the plant was being watered daily at the nursery, it might require daily watering after planting. Large leafy plants dry fast in warm, breezy conditions. New growth on the tips of the stems visibly wilts if the roots have been damaged or if the soil is dry. Having no root hairs subjects blueberries to early wilting if moisture levels drop too low. Water immediately, or those tender new leaves will turn brown.

Direct water from the hose over the original root ball. Feel the water first, to make sure it’s not hot. Give each plant at least 3 gallons of water, more for larger specimens. Water the soil a few inches beyond the root system to encourage new roots to grow toward the moisture. Monitor soil moisture levels for the first growing season.

Tap water has a high pH, so regularly irrigated soil will require acidifying.


How Are They Looking? 

Do they wilt every day although you water every day or two? Water deeply so that the entire root system is moistened. Shallow watering might satisfy roots near the surface, while those deep in the soil remain dry. As new roots grow into the soil, water more widely around the plants. The original root ball often resists absorbing moisture if it has gone too dry. That’s why we recommend pre-moistening peat moss and watering the potted plant before planting.

Overwatering also can cause wilt. Don’t overdo it. Too much water in clay soil prevents air from reaching the roots. Essentially, they drown. An overwatered plant is less likely to recover. I can’t over-emphasize the importance of good drainage… and that means amending clay soil.

Excessive root injury sustained when planting will cause the plants to wilt. You might need to lightly shade them for a few days to ease the stress. After a week or two, prune off branches that didn’t recover, or leave them for a while longer to see if dormant buds sprout from live wood.

Check to see if the root ball has settled too deeply into the soil. Raise it up if that’s the case. The crown of the plant should be flush with the surrounding soil level, or, preferably, raised a little above it. And make sure all air pockets around the roots have been filled with soil.

If your new blueberries are looking good and starting to grow, congratulations! Blue star!


Settled In


water from the hose


Once the plants begin to root in, after a couple of weeks, you can decrease the frequency of watering. It’s tempting to assume that the recent gentle rain is enough for the next few days. But it might have been only ¼”, which dampens the mulch but not the soil.

If in doubt, dig several inches into the soil near the edge of the original root ball to see whether the soil is running dry or is sopping wet. You don’t want either of those conditions.

One inch of water throughout the garden will moisten the top 4-6″ of soil. Every week during the growing season, the entire garden should receive 1½” of water, and more than that in sandy soil. After the plants have become established, water less often, if you need to at all, but water deeply when you do.


Family Likeness


our potted blueberry 'Patriot'

Early season flowers and leaves on our potted ‘Patriot’ blueberry.


Looking at the flowers in late winter to late spring, you might have noticed the similarity between blueberry (Vaccinium spp.) flowers and the flowers of Pieris japonica, and those of the sourwood tree, Oxydendrum arboreum. Their flowers resemble little bells.

All of them belong to the family Ericaceae, which includes heaths, heathers, azaleas, and rhododendrons, although these shrubs’ flowers bear less similarity to those of blueberries. Cranberry, bilberry, and huckleberry also belong to the Vaccinium genus.

Gardeners cultivate 50 or 60 species of blueberries around the world. Several species native to the United States and Canada formed the basis for almost all of the many blueberry varieties available today.

New dwarf cultivars of blueberries feel right at home in foundation plantings. Edible landscaping highlights both the ornamental and the edible aspects of growing blueberries.


Headings

Page 1: Planting a Blueberry Patch?, Today Is Day One, What Antioxidants Do (Blueberry Nutrients, More Benefits), Prepare for Planting Your Blueberry (Sun, Drainage, Gypsum, Soil PH), Time To Plant Your Blueberry (Grab Your Shovel, First Pruning, Label the Blueberry Plant, Mulch, Water, How Are They Looking?, Settled In), Family Likeness

Page 2: The 5 Major Groups of Blueberries (Lowbush Blueberry, Northern Highbush Blueberry, Southern Highbush Blueberry, Rabbiteye Blueberry, Half-High Blueberry), Blueberry Maintenance (Water, Mulch, Fertilizer, Pruning, Blueberry Pollination, Disease, Picking), Woodchucks and Friends, Plant Protection, Cage Your Blueberries


Return to the top

Soil Prep 101 For Your Vegetable Garden


cool season vegetables

Cool season vegetables and greens.


Finding the Perfect Spot for Your Vegetable Garden


For the purpose of this post, I’ll assume that your vegetable garden will be flush with the surrounding lawn, rather than in a raised bed. However, sound horticultural principles apply to either method. Locate the garden where it gets lots of direct sunlight, and avoid low areas that collect water after heavy rain. Place it close to a source of water.

Now that you’ve found the perfect spot for your vegetable garden, you’re ready for Soil Prep 101. The types of crops you plant in any season are weather-dependent, so make sure weather patterns in your location suit the peppers, basil, kale, or cauliflower.

Although this article concentrates on preparing beds for vegetable gardens, the principles apply to other plants as well, including new shrub borders and flower gardens for pollinators. Page 2 of this article has tips for improving the soil’s tilth, or workability, for most garden projects.

Prerequisites for this class: “How to Prepare the Soil: An Introduction” and “Yes, But Is It Sunny In the Winter?”


Swiss chard in a raised vegetable garden

Swiss chard in a raised bed.


Depending on your level of affinity for precise measurement, you can use either a measuring tape or simple paces to mark the dimensions of your garden. Gardeners who want to indulge in culinary experimentation by growing a wide variety of crops might regret not having made the vegetable garden large enough from the outset. Consider the possibility of expansion in the future.


How Much Sun Does the Vegetable Garden Need?


There is no substitute for sunlight. Without at least 6 hours of direct sun, the results will be disappointing. Anything less than that will reduce and delay the harvest.

Indirect, dappled, and filtered light don’t really count. In fact, during most of the growing season, fruiting plants perform so much better with 7 or 8 hours of sun, minimum! There are other types of crops that can be grown in less than full sun, including leafy greens (lettuce, arugula) and a few herbs (cilantro, parsley).


Layout


Tomato.

Someone out there is asking, “Do I run the rows (the long axes) east-to-west or south-to-north?” Good question! If your plans include growing several tomato plants and maybe some pole beans on a trellis, and you prefer one long plot that is accessible from both sides, I recommend east-to-west.

Long-term plants (tomatoes, peppers, etc.) will continue to get good sunlight all season. Spaced properly, they won’t cast as much shade on each other, especially as fall approaches and the sun sinks lower in the sky. But, if your garden receives sun all day, it won’t make much difference to main season crops.

Cool season crops, grown from fall through early spring, however, will get more sun when planted east-to-west. They’ll face the sun all day even though the days are short.

Taller plants should be planted on the north side of any plot (northern hemisphere), so they don’t shade smaller plants nearby. Some varieties of staked indeterminate tomatoes can grow 8′ tall!


lettuce basket, a portable vegetable garden

Lettuce growing in a basket.


On properties where spatial considerations are limited, do what you can to provide enough direct sun to those crops you can’t live without. Your crops might not be lined up in neat rows, but rather planted individually in a sunny corner over here and another by the back gate. Doesn’t matter. Do what works for you!

Container-grown crops, such as this lettuce basket (photo, above), can be moved around as conditions change.


Multiple Vegetable Garden Beds


With ample space, a series of garden beds can be laid out in a grid. When deciding where the plants will go, always keep in mind that you want to prevent tall plants from shading short plants, with few exceptions. Using straight pathways makes maneuvering the wheelbarrow and equipment easier.

Crops that prefer cooler, part-shade conditions as the weather warms can be planted between the taller plants or in the partial shade they cast. Those include late spring lettuces, arugula, cilantro, and spinach.

savoy cabbage

Savoy cabbage.

Having several plots allows for crop rotation, planting one family of plants in Plot A this year, in Plot B next year, and so on. This helps prevent the soil from being severely depleted of certain micronutrients and from allowing populations of insects and diseases to build up.

The nightshade family (Solanaceae: tomato, pepper, eggplant, potato), the cucurbits (Cucurbitaceae: cucumber, summer squash, zucchini, melon, pumpkin), and the brassicas (Brassicaceae: broccoli, cabbage, cauliflower, kale, Brussels sprouts) are groups of plants that benefit from being rotated every 4 or more years.

To clarify, one member of a family (tomato, for example) should not be planted where any member of that family (tomato, pepper, eggplant, potato) has grown in the past few years.

This is a good reason to keep a record describing where you plant each crop every year, as well as documenting successes and losses. Knowing the family names that crops belong to also helps with crop rotation.


Seed Or Transplant?


antique seed packet

Don’t go overboard if this is your first attempt. You’re not obligated to germinate every pack of seeds you bought. There’s always next season. Most seeds will remain viable for a few years if kept dry and cool.

Starting out with young tomato, pepper, or slow-growing parsley transplants might be more practical than growing them from seed, even though it is more expensive. You’ll find them at garden centers, farmers’ markets, and local hardware stores, and the growers often have good suggestions for cultivation.

If you’re late getting the vegetable garden going, transplants will save you several weeks of growing time. You can always supplement with fast sprouting varieties of seeds, such as those mentioned in the next section.

Starting plants from seed is a welcome challenge to many and is a source of fascination for children—and for adults, too. Don’t laugh, but, for me, it’s a thrill when the catalogs start showing up in the mailbox. I would never discourage you from exploring this facet of gardening. And, of course, there are so many excellent varieties available from seed that never show up in retail stores as transplants.


Seedlings For Vegetable Gardens Need Sun

Seedlings of fruiting crops need at least 6-8 hours of direct sunlight for strong growth. Use clean pots, pasteurized seed starting mix, and a waterproof tray. Provide the proper temperature for germination.

If you don’t have very sunny windows or a greenhouse, consider starting seeds under shop lights with daylight tubes. I use 4′ long fixtures that hold 2 tubes each. Seedlings growing very close to the tubes—only a few inches away—grow strong stems and roots.

Lettuces, arugula, and other leafy greens tolerate fewer hours of sun, although they appreciate full sun during the cooler months.

Avoid starting seeds too early in the season. This could result in leggy, weak plants that might not perform up to par in the garden.


seedlings

Broccoli ‘Happy Rich’ and Arugula ‘Astro’ seeded into cell packs (late winter, 2022).


Seeding Directly Into the Garden

Some crops grow easily from seed sown directly into the vegetable garden. Peas and beans, for example, and radishes, beets, and carrots are just a few species that can be planted right into prepared ground. Dinosaur kale, mustard spinach, mesclun, leaf lettuce mixes, zucchini, spinach, and cucumbers are more crops that can be directly seeded.

Read all the information on the packet, paying special attention to when to start and how deeply to sow the seeds. Although these crops germinate readily, gardeners must still watch out for pests, both above and below ground, and turns in the weather.


Spacing the Plants


It’s important to calculate how much square footage each of your plants requires, or at least to get a rough idea. On graph paper, map the proposed garden to scale. Use the plants’ spacing recommendations found on the label or the seed packet for the amount of space needed.

With a 1/4″ grid, each square can represent 6″ or 12″ of garden space. The diagram is optional, but it can help in future years when considering crop rotation.

It’s better to have more than enough room rather than not enough; plants don’t respond well to crowding. The seemingly large gaps between the major crops can be interplanted with “ephemerals”—those plants that grow quickly and are harvested before the majors achieve full size. Examples include radishes and lettuce between tomato plants, or green onions and beets between autumn-grown Brussels sprouts.


If It Looks Like This…


dry cracked soil

Clay soil shrinks as it dries, creating surface cracking.

Soil that dries as hard as a brick is impossible to work with. You can thoroughly water the area the day before or start digging a day or two after a good rain. Avoid digging or walking in the garden when the soil is wet. This compresses the soil, squeezing out tiny channels of air space that are critical for healthy root growth.

Sandy soil that drains too fast should be amended with copious amounts of organic matter. Bagged topsoil is also available, but quality varies widely. The tiny clay particles in clay loam help hold water and nutrients in the soil.

In a large vegetable garden, plan for pathways every 4′ or 5′, and restrict foot traffic to those areas. Use pavers, flagstones, pine bark, or even that old pile of bricks for the pathways. You can get very creative with stonework, and your garden can be the neighborhood show-stopper, but don’t lay out the stones until the end of the soil prep process.

Let’s begin! Please turn the page…


Return to the top

Headings

Page 1: Finding the Perfect Spot for Your Vegetable Garden, How Much Sun Does the Vegetable Garden Need?, Layout, Multiple Vegetable Garden Beds, Seed Or Transplant? (Seedlings For Vegetable Gardens Need Sun, Seeding Directly Into the Garden), Spacing the Plants, and If It Looks Like This…

Page 2: Remove Sod, Tilth, Soil Prep (The First Dig: Loosen the Clay, The Second Dig: Add Drainage Materials, Organic Matter vs. “Organic”, The Third Dig: Add Organic Matter), Fertilizers, Rake Smooth and Pave, Agricultural Extension and Soil Tests (To Lime Or Not to Lime, and What is pH?)

How to Prepare the Soil: An Introduction


trowel in soil


Along with the early daffodils comes really beautiful weather. It’s been sunny, the birds are singing…not too hot, not too cold. It’s time to prepare the soil. But first, we need to understand it.


Prepare the Soil


Herbs, vegetables, and flowers are going to be living—hopefully, thriving—in your garden for several months. For trees and shrubs, providing a good home will see them through the next decade, or the next century! It pays to give them the best conditions you can provide, and it all starts below the surface of the ground.


Axiom of the day: soil preparation is 90% of your effort.


If that sounds like work to you, you are correct! But you’re reading this presumably because past results have fallen short of expectations, and you want to improve your gardening skills. I’ve played in the “dirt” professionally for 50 years and can honestly assert: successful gardening depends on the health of the soil.

And here’s the good news. Thorough soil preparation will have benefits for many years to come. You won’t have to prepare the soil to this extent again.


The Soil Is Alive


Microbes


prepare the soil for seedlings

Seedlings in prepared soil.


Soil is more complex than meets the eye. There is a dynamic interplay among minerals, organic matter, air, and moisture. Earthworms, insects, nematodes, and tiny microbes also contribute. Healthy soil is teeming with life! These organisms play an important role in how soil functions. Without them, organic matter would not break down into those vital nutrients needed by all plants.

Vast mycelial mats of beneficial fungi, or mycorrhizae, live in close association with roots. Millions—or perhaps a billion—species of these beneficial microbes inhabit soils around the globe, many of which live within or around a particular species’ roots. Researchers estimate that there could be a trillion species of microbes living in air, soil, water, and living organisms.

Soil-borne mycorrhizae have enzymes that can unlock, or chelate, micronutrients tightly bound to soil particles, making them available to plants. These organisms can gather water and provide it to plants even though the plants’ roots don’t have direct access to moisture. And these microbes act as barriers to certain soil pathogens.

Bacillus, Streptomyces, and Pseudomonas are common bacterial microbes. Fungal mycorrhizae, such as Trichoderma, Hebeloma, and Glomus help roots absorb water and phosphorus. Other microbes, such as viruses and archaea, also inhabit the rhizosphere, the area surrounding the roots. Gardeners are familiar with the nitrogen-fixing bacteria (Rhizobium) that increase yields in legumes.

Scientists have only recently begun deciphering the enormous number of microbes and what they do for or to plants. Only a few plant families, including Brassicaeae, do not have associations with fungal mycorrhizae. Blueberries and other plants in the Ericaceae family (azalea, rhododendron) have very limited associations with mycorrhizae.

Microbes benefit from the symbiotic relationship with roots by getting carbohydrates in return. The numbers of microbes inhabiting just a tablespoonful of soil are staggering. Believe it or not, that’s greater than the number of people living on the planet! Of course, not all of these microbes are beneficial; many cause diseases in plants and animals.


Tilth

earthworm castings

Nutrient-rich earthworm castings.

Consider yourself lucky if your soil has good tilth, or friability, to begin with. Perhaps all you’ll need to do to prepare it is to add compost, aged manure, or some fertilizer periodically.

Soil stays more biologically active over a long period of time if it is not disturbed by frequent tilling. Beneficial fungi and nematodes are especially sensitive to major disturbances. Simply scratching products into the soil surface and watering them in preserves existing microbial populations in the soil.

There are several soil types distributed throughout the United States. They’re determined primarily by the kind of bedrock beneath the surface, the kinds of vegetation growing there, climate, and management practices employed through the centuries. Minerals from rock, eroded by water and wind, will be deposited downstream or downwind.


Soil Composition

Soil is composed of:

  • mineral matter (rocks, sand, silt, clay)
  • organic matter (carbon-containing [once-living] compounds such as compost, aged manure, dead roots, dead organisms). Never use fresh manure; the ammonia content can harm plants, and it might harbor pathogens.
  • living organisms (such as earthworms, nematodes, microbes, insects)
  • air
  • water

Tilth and fertility are determined by relative proportions of these materials. All kinds of soils benefit from the addition of compost and other organic materials. I confess to going a little overboard on these amendments when I prepare the soil. But the plants look great!

You might be fortunate to start with soil that has good tilth. It already has physical characteristics which promote plant growth. Or experience indicates that the roots will need some encouragement to grow beyond the original root ball.

Soil that is a rocky clay, for example, dries to the consistency of brick, and will need lots of amendments to improve drainage and to encourage roots to grow vigorously. On the other hand, sandy soils need materials that will improve water and nutrient retention. Instead of repeatedly failing with plants that can’t adapt to your soil, try starting out with those that can. Working the garden over the years will condition the soil sufficiently so you’ll be able to grow more species.


foxglove

Biennial foxglove (Digitalis purpurea).


Simply digging a hole in the ground, adding a cupful of compost, and plopping the plant in place won’t do the trick in heavy clay or rocky soils. Depth of topsoil, drainage patterns, ratio of clay to organic matter, air pore space (the space between particles), and, of course, fertility and pH, all enter into the equation.

The rich, black ground in our West Virginia garden needed no amendments at all; the foxgloves grew 7 feet tall! Still, I added organic matter every time new plants went into the ground.


From Awful to Awesome


First, the Awful Bit

Our first house in Maryland sat on the crest of a hill. Sunrises and sunsets were spectacular, but the soil was just awful. It was all clay and shale. Any organic matter that did exist blew away or washed down the slope. That “dirt” refused to yield even to the most enthusiastic shovel.

I created a vegetable garden farther down the slope, next to the greenhouse, that gave us fabulous crops of tomatoes and peppers. Digging in autumn leaves, vegetable scraps from the kitchen, and discarded material from my horticultural business greatly improved the soil. It didn’t take long for decomposition to begin and for the earthworms to show up.


wheelbarrow with compost to prepare the soil


Almost Awesome

A few years later, we moved farther south to a community that had been carved out of an old oak and hickory forest. Although the soil quality was better here than at the previous property, I continued to prepare the soil with every new project for the next 3 decades.

Before planting rhododendrons (like the one in the photo, below) in the afternoon shade, I added peat moss and pine fines to the soil. These materials were not merely thrown on top of the ground. Instead, generous quantities of amendments were incorporated (not layered) into the top 12″ to 18″ of existing soil. Then, I mixed nutrient-rich LeafGro (locally sourced compost) into the top 8″ of loosened soil.

This effort created a well-balanced mixture, composed of existing clay and loam, and the added peat moss, composted pine bark, and compost. After that, the soil remained undisturbed except for top dressings of fertilizer, compost, or mulch.


rhododendron

Rhododendron catawbiense.


I left the ditch behind the shrub border undisturbed, allowing rainwater to travel down the slope. Water that did not drain away would have meant death for the shallowly rooted rhododendrons.

Blueberries must have very acidic conditions, in a range from about 4.3 to 5.3 pH. Rhododendrons, azaleas, and hollies like their pH a bit higher than that, but still on the acidic side. Peat moss and pine fines incorporated into the soil helped provide the acidity and aeration.


calibrachoa with chlorosis

This calibrachoa has chlorosis from high pH.


Petunia, calibrachoa, pansy, and viola also benefit from a lower (acidic) pH. Plants growing in soil with closer to neutral pH will have sickly yellowish leaves with green veins (photo, above).


A Shady Oasis

Gradually, most of the back yard grew into a private woodland. Japanese snowbell (Styrax japonica), paperbark maple (Acer griseum), Pieris, Abelia, Viburnum, Kolkwitzia, and a group of monarch birches (Betula maximowicziana) were the main players. And the rhododendrons and existing vegetation, of course.

Mulched pathways meandered under the cool canopy, and all sorts of shrubs and perennials luxuriated in that rich soil. There was a small pond, a greenhouse, and no grass to mow in the back yard. Awesome. (***Update***: As it often happens, subsequent owners of the house altered the property to suit their needs and removed almost all of those plants.)


Monitor Soil Health Over Time


Preparing the soil for vegetables is not difficult, and the results will last for years. Most varieties prosper in improved soil 10 to 14 inches deep. Lettuce and radishes need only 5 or 6 inches.

Using the space efficiently and intensively calls for carefully managing the soil. Vegetables grow quickly, fruit heavily, and, therefore, require frequent additions of nutrients. 

Thoroughly preparing the existing soil will pay dividends, spelling the difference between getting a few vegetables from the garden (“Why bother?”) and having a truly abundant harvest (“Take some veggies, please!”). And, if you properly prepare the soil at the start, you’ll never have to repeat the effort to that degree.

Keep in mind, though, that, as organic matter breaks down and is absorbed by plants and other living things, you’ll need to add more compost. For top performance, plants need balanced fertilizers that are appropriate for specific uses, such as for vegetables, flowers, spring flowering bulbs, or the shrub border. That’s in addition to the compost or aged manure you originally used to prepare the soil. Lack of nutrients and compacted soils are among the top reasons for low crop yields.


Soil Testing

Contact your local Master Gardeners program, or the agricultural extension office, for information on soil testing. The results will indicate which amendments to add, and whether the pH is appropriate for the plants you want to grow. The report also includes a breakdown of the soil components: clay, silt, sand, and organic matter. Normally, I add more organic matter than soil tests recommended.

Soil pH is a measure of acidity or alkalinity. Neutral is 7.0, with acidic values below that and alkaline values above 7.0. A simple soil test will indicate pH and nutrient levels. Soil pH affects the availability of nutrients to plant roots, with most vegetables preferring pH levels between 6.0 and 7.3.

Years ago, a landscape client wanted to prepare the soil for a vegetable garden on the property she and her young family had just bought. She expressed concern for “bad things” in the ground, so I suggested that she ask for a lead test in addition to the basic tests. The cost of the basic test is very reasonable, but extra requests will raise the fee. No matter; it’s worth the cost.

The report showed a surprisingly high lead content in the soil, unusual for a newer home. So, you don’t want vegetables growing there! She submitted tests from different areas, and felt confident that the original spot was unique. Something probably had been dumped there before the house was built. Later, the family was going to have the contaminated soil professionally removed.

Lead Paint

trowel in soilIn 1977, the Consumer Product Safety Commission banned the use of lead paint in residential properties. If you live near an industrial region, a busy highway, or where lead paint might be a concern, I strongly advise testing for lead before you prepare the soil. Local zoning authorities should have records on past property use. For more information, contact the National Lead Information Center at 800 424-5323.

Lead poses a serious health risk, especially to young children. There is no level of lead that is considered “safe enough”. And most of us grow our own vegetables for the health benefits, after all.

For now, gather your tools and your help, and pace yourselves. This is not something to be accomplished in the hour before your daughter’s softball game. So, you might as well turn it into a party—arrange for pizza delivery at the end of the day! You certainly will have deserved it.


pizza


Return to the top