Tag Archive | pollinators

Patches For Pollinators: Less Grass To Mow

2022


patches for pollinators


Patches For Pollinators


In this article, I’ll describe how new garden spaces and “Patches for Pollinators” have decreased mowing time, while providing nectar and pollen for pollinators and seeds for songbirds. Also included is information about several insects found in the gardens this summer.

A common theme running through The Farm In My Yard is my goal of replacing much of the lawn with layered gardens, including trees, shrubs, perennials, bulbs, and annuals. Flowers and more natural surroundings attract bees and butterflies, toads and birds.

All the rest of the animal kingdom are showing up as well. Mice, moles, and voles…snakes and rabbits…foxes and deer. Lots of praying mantises, five-lined skinks, ladybugs, fireflies, and many insects I’ve never seen before. Occasionally, a cat sits patiently under the bird feeder until he’s shooed off. And some pests, too, such as…


…Japanese Beetles
lettuce-leaf basil, Japanese beetles

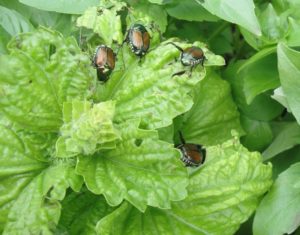
Lettuce-leaf basil ‘Tuscany’, with Japanese beetles.

Japanese beetles (Popillia japonica), accidentally imported into the U.S., were first spotted in New Jersey in 1916. They’re present here (northern NC) in enormous numbers this year and demonstrate a particular fondness for my lettuce-leaf basil, marigolds, blueberries, and raspberries. But they will feed on hundreds of species, including linden, cherry, plum, birch, rose, grape, and hollyhock.

To prevent “skeletonized” foliage on farmers’-market-bound basil, I cover the plants with an old sheer curtain to exclude the beetles. Future plans include growing berries and other susceptible plants under insect screening, with allowances made for bumble bees to pollinate the flowers.

Although a few birds eat them, the damage these beetles do to the landscape and to my inventory far outweighs their benefit.

Japanese Beetle Life Cycle

With regular rainstorms, soil stays softer, allowing female beetles to repeatedly lay eggs deeper into the soil in July and August. There, the eggs and young grubs are not stressed by hot, dry soil. White C-shaped grubs feed voraciously on healthy roots (particularly those of lawn grasses), and, in autumn, descend deeper into the ground, protected from severe cold.

In spring, grubs rise closer to the surface to continue feeding. In late spring, well-fed larvae pupate in the ground, and adult beetles emerge in early summer. Moist soil—from rain or irrigation—contributes to this beetle’s success. Where the ground is soft and moist in summer and fall, you can count on large populations of Japanese beetles the following year.

Incidentally, chewed plant tissues emit certain scents which attract even more beetles. That’s why we find them congregating in large numbers in the tops of blueberry bushes or in rose flowers.

Applying Milky Spore powder, a bacterium, to the property (grass and gardens) in early autumn kills grubs feeding on roots. This remedy isn’t 100% effective because beetles fly in from quite a distance—miles, in fact. At the very least, there will be fewer grubs devouring roots in your landscape. If you can encourage the entire neighborhood to apply Milky Spore, everyone will benefit. Except Japanese beetles. Moles, by the way, feed on these grubs. Plenty of those around, as well.

Other than that, I’m not fertilizing the lawn, applying any chemicals, or reseeding. In the future, I might work on a limited amount of presentable lawn close to the house. But for now, since the lawn comprises about 75% weeds and undesirable grasses, I’m just cutting it. Besides, much of that ground will be turned over, amended, and planted with something other than grass.


Less Grass To Mow With Patches For Pollinators


New Gardens

When I bought the house in late 2021, the lawn covered about half the property, taking 5½-6 hours to cut with a walk-behind self-propelled mulching mower. Part of the lawn’s square footage has been taken up by the many plants installed last fall and winter. They’re the beginnings of new gardens, which will expand as I propagate perennials, seed the annuals, and plant drifts of new shrubs. Space taken up by low-maintenance gardens will decrease the time required to cut grass.
 

foxglove

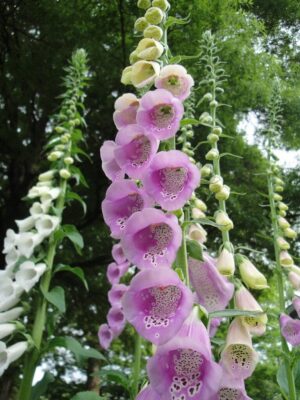
Foxglove.


Several white oaks (Quercus alba) tower over the property, providing a high canopy for proposed shady gardens underneath. About 200 tiny foxgloves just began germinating from seeds sown in a pot. Some will be sold at the market, and many will be planted in morning sun or under the trees’ dappled shade.

Foxglove (Digitalis purpurea) is toxic to most warm-blooded animals, including rabbits and deer. (It is a source of pharmaceuticals, but only under a doctor’s care.) The greatest risk to these plants is from dead twigs falling from the old oak trees.

Foxglove is a biennial, and, if happy, drops seeds at the end of its growth cycle for a self-sustaining colony of plants with stately flower spikes, from cream and pink, and rose to purple. It blooms in spring to early summer, then sheds seeds and dies. After those tiny seeds germinate in summer, young plants will remain dormant in winter. They’ll bloom the following spring, thus repeating the cycle. Insects and hummingbirds gain sustenance from the flowers.

From Crape Myrtle To Virginia Sweetspire
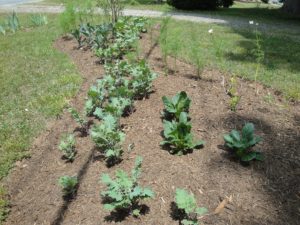
 

patches for pollinators, garden bed with flowers and edible greens

‘Red Russian’ kale, komatsuna, and tiny itea, foreground, plus kales, collards, cosmos, and crape myrtle, toward the back, after planting and mulching.


Growing plants from seed is one way to economically fill a large garden bed. I started a new garden last fall, close to the street, where I planted a pink crape myrtle (Lagerstroemia indica) and 2 tiny Virginia sweetspires (Itea virginica ‘Henry’s Garnet’) brought from Charlotte.

Early this year, I turned over the ground to a depth of 10″ between the shrubs and beyond, and added leaf mold and black topsoil from the woods. Also incorporated into the soil was a generous portion of chopped oak leaves stored in trash bags since the previous autumn.

All this loosening of the soil and the additional materials created a raised bed about 22′ long and 6-8′ wide. It’s an irregular shape with a curved outline. And, naturally, it will be enlarged over the years.
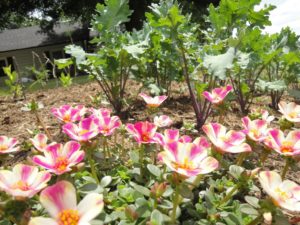
purslane, pink and white flowers

Purslane and ‘Red Russian’ kale.

This garden is where I’d planned to have a mass of large light pink cosmos. So, I grew ‘Cupcakes Blush’ from seed and planted about 40 of them in 2 groups. Between them, I added dozens of blue-gray ‘Lacinato’ kale, the similar but more purple ‘Dazzling Blue’ dinosaur kale, and the frilly ‘Red Russian’ kale. Behind the crape myrtle, I planted 10 collards, with rounded light grayish-green leaves. On the end, near the itea, I added a few clumps of komatsuna ‘Green Giant’, with broadly rounded dark green leaves. These plants complement each other in both color and form, and all the greens (kale, collards, komatsuna) are edible.

I picked up a purslane at a local roadside stand. It had solid deep pink flowers on a low, spreading plant. But the heat, apparently, turned the new flowers pink and white striped. So, I stuck that into the “pink garden”, and put a few cuttings near it, which are now growing.

Not In the Pink

I won’t grow ‘Cupcakes Blush’ cosmos again because it took too long to grow and fill out. It didn’t have the number of flowers hyped in the catalog, and fewer than half were light pink!

The fast-growing greens are winners in both vegetable and flower gardens. They’ll look even better when paired with blooming violas in fall and winter. The fact that they survived at all during this overheated summer is a marvel. Adding ‘Scarlet Frills’ mustard greens (edible) will echo the burgundy fall color of the iteas and crape myrtle.
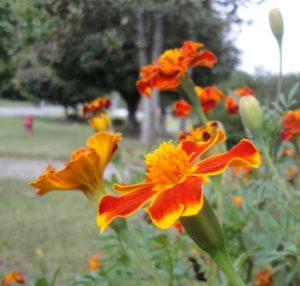
 

Marigolds.


***Update***: Close to 2½-3 months of frost-free weather is just too long to put up with plants that aren’t delivering. So, all the “pink” cosmos were taken out in early August, and replaced with dwarf marigolds (photo, above), dwarf ‘Cosmic Orange’ cosmos, and coppery-leaved coleus. Much better. But the pink purslane will have to move. The crape myrtle bloomed very lightly this first season in the garden. 8/6/2022


Vegetable Gardens

This property includes a sizable fenced garden, partially shaded by the oaks on the east side of the house. As the sun’s arc shifts through the year, the garden receives more or less sun than it did the previous month.

Last autumn, I stuffed oak leaves into large trash bags, and stored them next to the foundation over the winter. In early February, I incorporated a few of those bags of leaves into the top 12″ of this garden’s soil, along with aged cow manure. After planting the greens, a thick layer of oak leaves was applied as a mulch, keeping soil moist, cooler, and weed-free. By late spring, the greatly improved soil was well-populated by earthworms, and the organic matter will continue to break down for months to come.

I’ll dig and amend more of this garden and add cool season greens, such as spinach, Swiss chard, green onions, and leeks. And peas, of course—the edible-podded ‘Sugar Snap’ and a variety of snow pea called ‘Oregon Giant’. It’ll receive more hours of sun after the trees defoliate. The brassicas (arugula, broccoli, miniature broccoli ‘Happy Rich’, Brussels sprouts, cabbage, cauliflower, collards, kale, mustard greens, pac choi, and others), or cruciferous crops, figure prominently in autumn and winter gardens and in the kitchen.

Hostas brought from Maryland a decade ago grow plump in the composted soil on the shadiest end of the garden. I’ll add more varieties of hostas here, safe from deer, until it’s time to pot them up for the market.

Miniature Broccoli ‘Happy Rich’
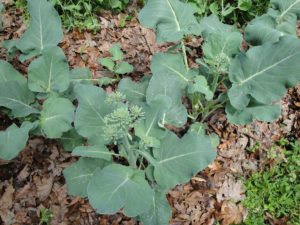
 

mini broccoli 'Happy Rich'

Miniature broccoli ‘Happy Rich’ planted 14-16″ apart, with peas behind them.


Brassicas (plants in the Brassicaceae family) appreciate moist, well-composted soil, generous portions of aged cow manure, and neutral pH. Here in USDA zone 7, many types of greens can grow in cold weather, even through the winter. I plant several kinds of brassicas every fall. During severely cold periods, a loose covering of clear plastic keeps the foliage in good condition.

Late last winter and in spring, I set out about 30 plants of miniature broccoli ‘Happy Rich’ on the north end of the garden, farthest from the oaks. While the trees were leafless, the plants grew in full sun. Now, in summer, these brassicas enjoy a couple of hours of mid-day shade from the hot sun.

This is one of my all-time favorite vegetables. Maybe even the favorite. I eat this versatile broccoli a few times a week, sell some at the Elkin Farmers’ Market, and donate a bunch when the market hosts cooking demonstrations. Great sweet flavor, and super healthy!

(***Update***: These same plants produced small harvests into mid-November. Then, with cooler weather, leaves grew larger. Unusually cold fall weather—up to 20 degrees colder than average—has caused them to decline earlier than expected. However, after the oaks dropped their leaves, the broccoli grew more vigorously, almost until Christmas, 2022. That’s why ‘Happy Rich’ is my favorite vegetable—9 months of harvests!)

‘Happy Rich’ and Insects
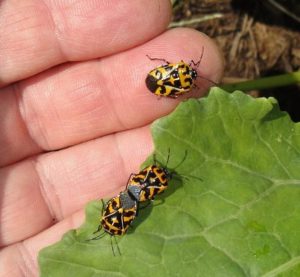
 

harlequin bugs on cabbage

Harlequin bugs on cabbage.


‘Happy Rich’ branches out after each cut, producing more stems, leaves, and small heads to harvest. Four species of caterpillars (from 3 species of moths and 1 butterfly) prove quite troublesome all season long, even beyond the first frosts. To prevent them from ruining the brassicas, I spray every 7-10 days with Bt (Bacillus thuringiensis). This isn’t a chemical, but a naturally occurring bacterium that kills larvae of moths and butterflies.

Bright orange and black harlequin bugs (photo, above) also feed on brassicas, spotting and distorting the heads and leaves. I squish them when I see them.
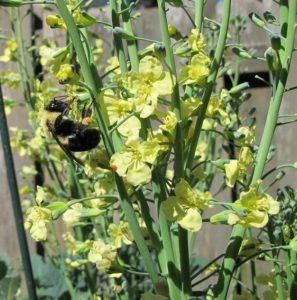
 

patches for pollinators, bumble bee on broccoli flowers

Broccoli ‘Arcadia’ and a bumble bee in spring.


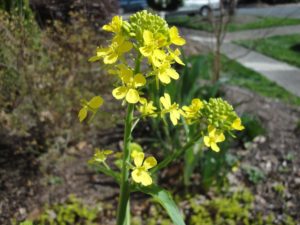
As the plants finish up their last harvests now and in spring, some of the stems will bloom. Beneficial insects, especially bumble bees, honey bees, sweat bees, and tiny braconid wasps, collect nectar and pollen from the flowers. Heading broccoli has yellow flowers, but ‘Happy Rich’ has pure white flowers on stems up to 5′ tall.

Tomatoes

After warm weather had settled into the area, I planted several tomatoes and peppers among the mini broccoli plants.
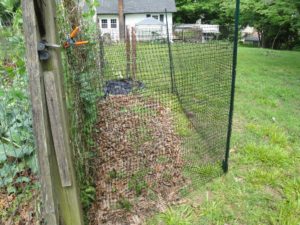
 

tomatoes protected from deer

A small garden for cherry tomatoes.


Another section, north of the garden, gets sunlight longer into the season. There, I secured posts and strung deer netting between them (photo, above). It’s a narrow space, so deer won’t jump into it. This small area has a few cherry tomatoes, which can lean against the stronger existing fence, where edible-podded peas grew from late winter to early summer. You can see the pea vines growing through the fence.

Tobacco Hornworms
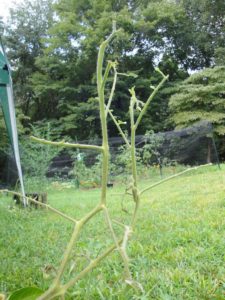
Tomato plant denuded by tobacco hornworm.

If one of your tomato plants seems a lot less leafy than it did yesterday, it might have a tobacco hornworm (slash markings) or a tomato hornworm (V-shaped markings). This very hungry caterpillar is the larval stage of a hawkmoth. A few weeks after a ‘German Johnson’ tomato went into the garden, it suddenly lost all its foliage. I’ve seen this before and knew to search for a 4″-long green caterpillar.

Several hornworms were found munching on the tomatoes this season. Most were carrying the pupae of a parasitic wasp and had stopped feeding. These pupae look like small grains of white rice. A female wasp lays eggs on or in the caterpillar. The eggs hatch into tiny larvae, which eat the inner tissues of the caterpillar, weakening or killing their host. Those should be left alone.

The few that hadn’t been parasitized lived out their lives on old tomato plants tossed behind the gardens. Birds or other animals might eat them.

Two dozen tomato plants that weren’t good enough to sell found homes in a few other areas around the property. Most are surrounded by posts and deer netting, although the deer did find—and destroy—90% of the big sunflowers meant for the winter songbirds… …


***Tomato Update***:

(This section added 9/4/2022.)

Tomatoes generally are underproducing. Those getting just an hour more sun are yielding fairly well, but not abundantly. Gardeners in this region experienced devastating blights on tomatoes from frequent rainstorms and persistent humidity.

After planting cleaned up not-quite-dead tomato plants, I sprayed them with a solution of dissolved aspirin. Here’s another link. They recovered better than I had any hope of expecting. Although not receiving the recommended biweekly spraying, they’re still producing fruits.

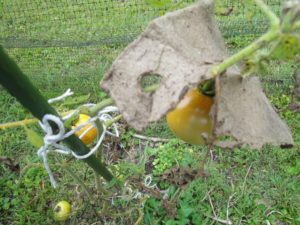
Later in the season, tomatoes had sun scald due to the sparse foliage, so I shaded new fruits with mesh bags, old peat pots, or large cucumber leaves. Sun scald causes tomatoes to rot.
 

tomato shaded with peat pot to prevent sun scald

Tomato shaded by old peat pot.


Headings

Page 1: Patches For Pollinators (Japanese Beetles, Japanese Beetle Life Cycle), Less Grass To Mow With Patches For Pollinators (New Gardens, From Crape Myrtle To Virginia Sweetspire, Not In the Pink, Vegetable Gardens, Miniature Broccoli ‘Happy Rich’, ‘Happy Rich’ and Insects, Tomatoes, Tobacco Hornworms, Tomato Update)

Page 2: Long Vines That Might Smother the Grass (Next To the Tree Stumps), Patches For Pollinators: Don’t Mow Here (Weeds To Watch, Early Patches For Pollinators, Late Spring and Summer Patches For Pollinators, Patches For Pollinators: Living Proof, The Saddleback Caterpillar), The Pretty Moths and Butterflies

Return to the top

Fall Cleanup: Brush Piles For Wildlife


Brush Piles and The Fall Cleanup


trees in fall color

Autumn in NC.


Fall weather has debuted in most regions of the northern temperate zone. And frost has kissed the peaks of the higher elevations in western North Carolina. But, before you gather the tools, the leaf bags, and the kids for the fall cleanup, consider being a little less tidy this year. I’ll explain how to do this when constructing a few brush piles in the garden.

“What? Why?” you might ask. Sure, the gardens always look neat and orderly after the fall cleanup, while the plants remain dormant and bare. But at what cost?

While cooling weather invigorates, it also sends signals to local wildlife that they must prepare for winter, or they will perish. Food and water for those remaining active, shelter from the elements, and protection from predators will become life-or-death issues for these organisms over the coming months.

Plants benefit from a layer of organic matter on the ground below them. It insulates their root systems from severe cold and holds moisture in the soil. A covering over the soil also prevents topsoil from blowing away. As the material decomposes, plants absorb valuable nutrients. This natural mulch also provides nutrients for earthworms and soil microbes, which contribute to the biological health of the soil. “I’m with you so far, Mother Nature.”

“Okay, so I’ll mulch the gardens.” Well…that’s better than nothing, but it’s not quite the same.


And Here’s Why:


caterpillar and dogwood twig

This caterpillar mimics a dogwood twig.


In each region, thousands of species of beneficial spiders, insects, and other animals rely on that garden debris over the harsh winter months. It protects them from temperature extremes, icy storms, and desiccation. It protects them from certain death, which is inevitable when that debris is hauled off to the recycling center.

Imagine how many butterfly chrysalises or praying mantis eggs will be carted off to their doom. Or the enormous number of native bees seeking refuge inside and among dead plant stems.

And what’s the buzzword of the decade in gardening circles around the world? Right: Pollinators! But are we doing them a favor by removing them and the debris they’re sheltering in? We are not.


What We Can Do About It

maintain brush piles after fall cleanupDormant insects remaining on the property, protected in brush piles all winter, will restock the garden in the spring. Otherwise, the landscape is pretty lifeless, until bees, beetles, butterflies, and moths gradually move back to your garden months later. But there won’t be nearly as many of them if so many were removed with the fall cleanup.

Begin construction of new brush piles by mid- to late summer. Caterpillars crawling around will find them suitable resting places and pupate among the twigs for a long winter nap. Some insects overwinter as adults, briefly emerging on warm winter days to feed. Leaving the shelters in place all year, however, is the best option, and one which benefits many insects and animals.

Consider letting nature behave closer to the way it was intended, the way it evolved over time. Who doesn’t want more butterflies and birds flying around the garden? This complex web of life in your own neighborhood will improve as a result. More insects to pollinate the vegetables, fruit trees, and natural stands of vegetation. And more food for frogs and baby birds. More beauty, more interest, more life!


Brush Piles For the Birds


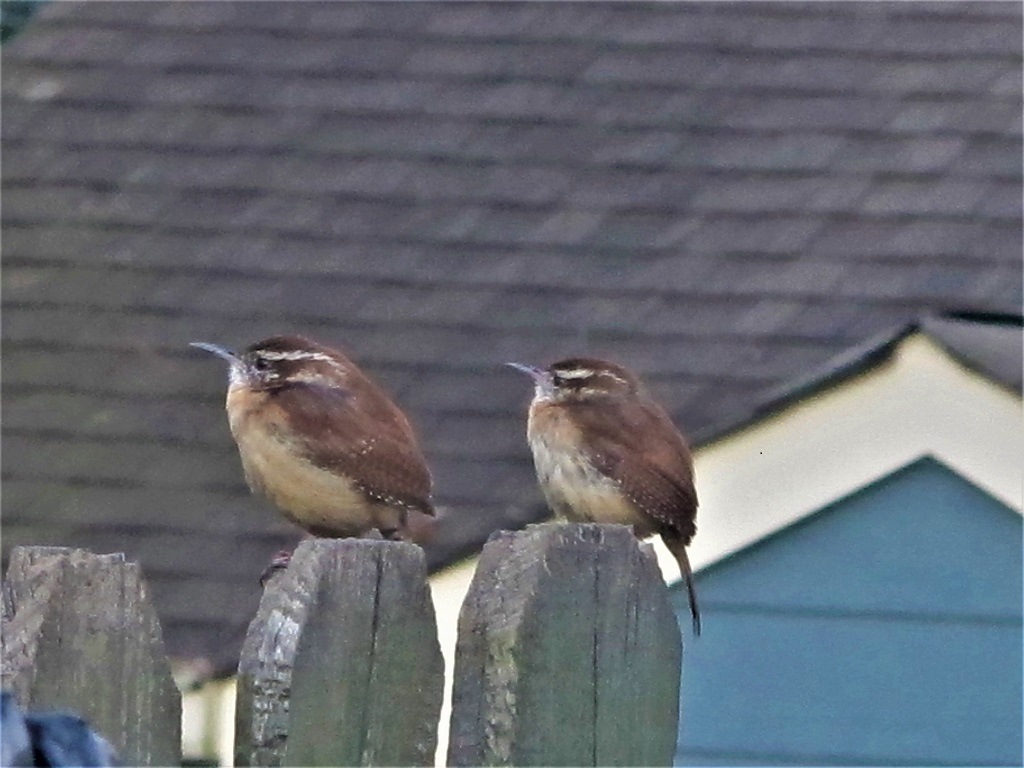
carolina wrens often shelter in brush piles

Carolina wren, a tiny bird with a mighty voice.


Birds (including wrens, cardinals, juncos, thrashers, robins, sparrows, mourning doves, and towhees) often forage close to the ground. All my life, I’ve been fascinated by birds and by all of nature. We’ve watched them search through leaf litter and brush piles for worms, seeds, insects, and other sources of food. They also will find materials for nest-building activities in late winter and spring.

Some birds seek shelter among the piles of twigs when storms blow in. And they’re handy places to hide when predatory hawks are spotted overhead. Wrens are particularly active around these structures, so you might want to construct one within view of the house.


Any Other Benefits?

There are ecological benefits of keeping in place the biomass produced on your property. Considering the “carbon footprint”, nature’s mulch is an improvement on bringing in bagged mulch that had to be processed and transported to your retailer and then to your home.

Truth be told, though, I often used mulch in gardens that I installed for customers. But I also planted a variety of evergreen and deciduous material, flowering plants, and ground covers. These gardens hosted a rich assortment of indigenous insects and animals, even after the fall cleanup.

And, of course, you won’t need as many of those yard bags often seen lining residential curbsides. Imagine the savings in resources by making brush piles on your property: plastic bags, paper bags, and time, gasoline, and money spent picking up mulch or paying the town to recycle garden debris. Recycling is better than the landfill, but not removing debris from the property is even better.

Another bonus is the compost that gathers under the pile as organic materials break down. Scoop it out and use it in the vegetable garden or in potted plants. Replenish with leaves and twigs as the material reduces to compost. You might want to start a separate compost pile for leaves, weeds, twigs, and kitchen vegetable scraps and eggshells. Or simply bury the kitchen scraps in a hole in the garden. If earthworms are active, they’ll consume it within a week or two.

It’s entertaining, for many of us, to watch the birds on a cold winter day. Provide a source of clean water and a bird feeder to attract them to your yard.


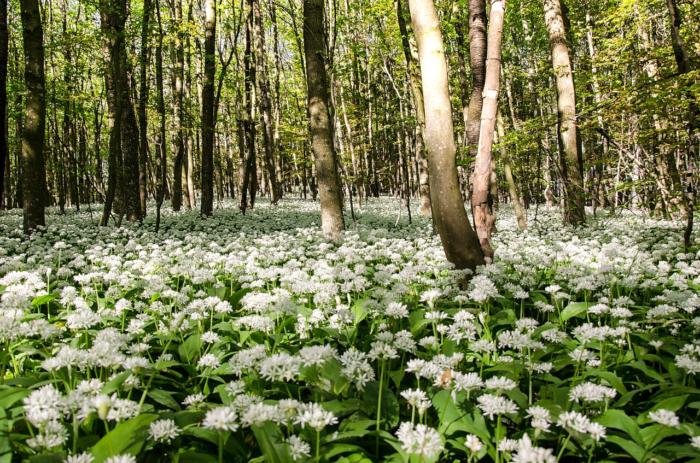
white woodland allium, forest

Undisturbed environments provide habitat for overwintering insects and animals.


“But what will the neighbors say?”


I realize this requires a leap of tradition to implement. One suggestion is to edge the beds and to keep grass neatly mown. Plant up a few colorful pots for the summer and winter seasons. This will indicate that the gardener living there does care about her property and that her brush piles are intentional. Maybe the neighbors will take a cue and do likewise; mention the pollinators! And the carbon footprint!

If space permits, keep a few brush piles in the back yard, out of public view. If you have space only in the front, perhaps you can hide your Pollinator Palace behind some shrubs.


Suburban Life

Now, if you have a homeowner’s association to deal with, you can keep the front yard looking presentable and still be ecologically correct. Even in the city, constructing attractive twig sculptures as “garden art” can serve several purposes at the same time. I’ve seen twigs and leaves molded into animal shapes and simple mounds.

During the fall cleanup, rake or use a mulching mower and direct the chopped leaves under the trees and shrubs and into flower gardens. Smaller pieces of material decompose faster and are less conspicuous. Then place a 1″-2″ layer of shredded hardwood mulch or pine bark nuggets over the chopped leaves. Nice and tidy. Earthworms will feast on those leafy bits while the worms are still active, and insects will hide in the debris.

Move fallen twigs and dead stems to the piles out of view. If you’re absolutely overwhelmed with too much material, choose which parts will go to the recycling center. But if you notice a mantis egg case or butterfly chrysalises, cut those parts of the stems and add them to your brush pile or tuck them among the shrubs.


spring landscape


Replacing Grass with Mixed Plantings

Making brush piles is a natural part of the fall cleanup in rural areas. But many of us live where expansive lawns, trees, and HOA’s predominate. By adding shrub borders and undergrowth, though, more birds, mammals, and insects will make your garden their home.

A verdant, layered landscape naturally provides more opportunities for insects and animals to find food and shelter. This kind of environment supports the rich biodiversity that is becoming increasingly rare as suburbs gobble up more territory. We can help by providing conditions that attract wildlife: food and water, shelter, and places to raise offspring. For starters, let the dandelions bloom! If you see a large area of clover, mow around it and let the honey bees collect nectar and pollen. And, of course, avoid using pesticides in the landscape.

Replacing grass with trees, shrubs, perennials, bulbs, and annuals gives me the greatest satisfaction. And, no, it doesn’t have to look like “a jungle out there”. Well-designed and diversified borders are very attractive, and they bring biological activity within view. They also add to the property value!

Being connected to nature is an innate need that benefits us psychologically. And shrub borders afford a measure of privacy in communities where houses line up with little space in between.

You’ll enjoy seasonal blooms, dazzling fall color, winter structure, and the promise of spring in delicately unfolding leaves. While we enjoy the beauty of the garden, the wildlife will have found a welcoming home for generations to come.


Brush Piles: Basic Construction


brush piles, simple piles of twigs


There’s no formula for building these brush piles. Frankly, anything will work. Make it large enough, though. Several feet on each side will do, and 2′ or 3′ tall to begin with. Smaller lodgings will function well enough for pupating insects.

If you have the space, however, construct something more substantial. A large twiggy brush pile in the old Maryland garden discouraged deer from jumping over the fence in that location. And all kinds of animals found food and shelter there.

Removing all the dead stems and leaves during the fall cleanup severely reduces populations of these little critters. Advancing up the food chain, fewer caterpillars and beetles means less food for larger insects, frogs, and birds…which means less food for snakes, bigger birds, and foxes. So, that means less life overall in the garden.


Multiple Brush Piles


Several habitats around a spacious yard are better than one big brush pile. Think of a little caterpillar roaming around, looking for a place to pupate in late summer. Close, in his case, is better than far.

Caterpillars are in a race against time when looking for their winter homes. As masters of camouflage, chrysalises often look like dead leaves or sticks, blending in with the surroundings. But caterpillars traveling a greater distance have a higher risk of being consumed by predators.

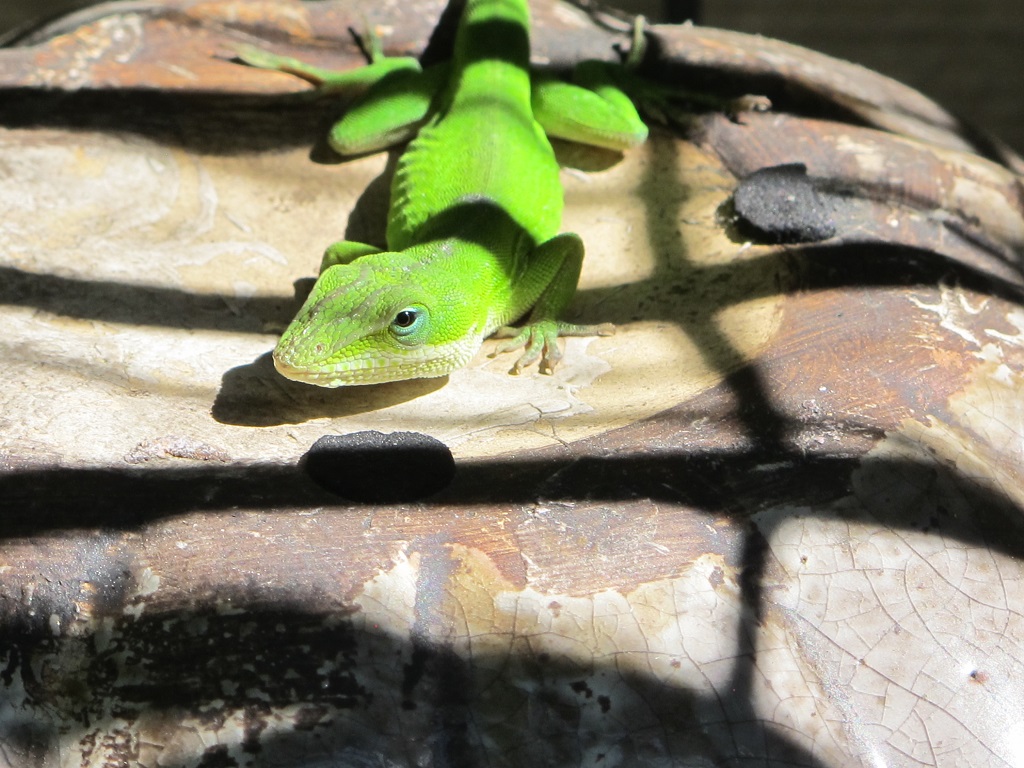
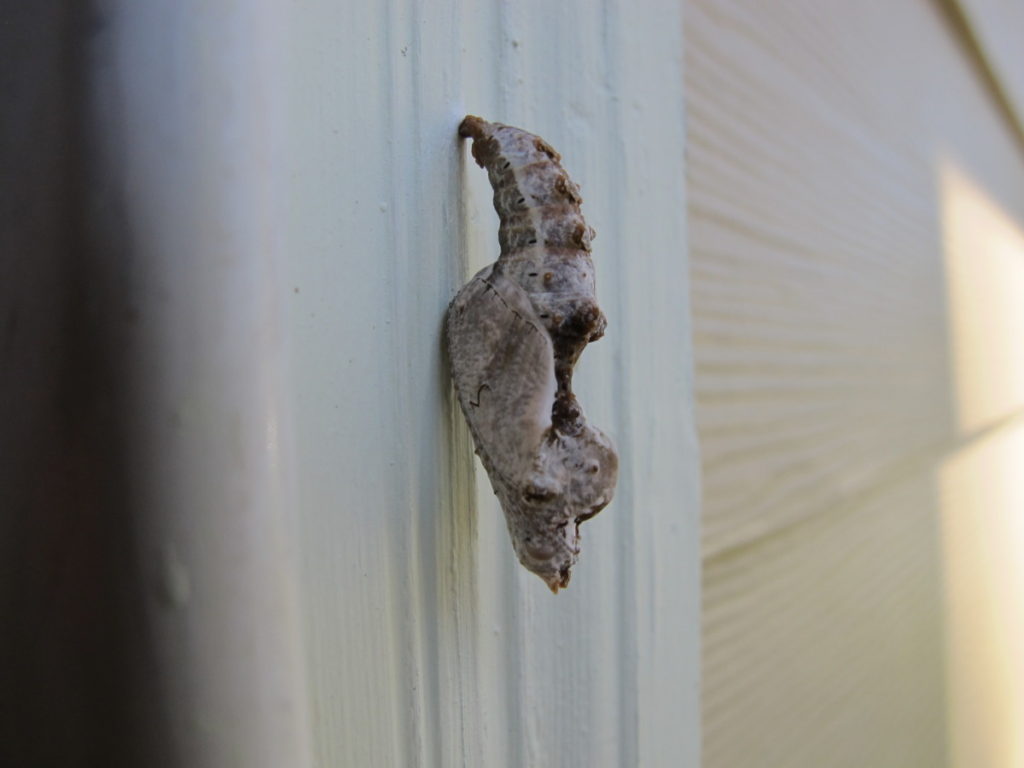
The gulf fritillary’s chrysalis (photo, above) is difficult to detect on plants that are dying down in autumn. Unfortunately, this one pupated on the door frame, and ended up as dinner for a local lizard.


The Process

Autumn leaves for brush piles

Oak leaves keep a more open, airy structure.

First, lay down a bed of fallen leaves. Then pile large branches on the leaves, and add twigs, and more leaves on top. Add some perennial stems from the front yard, and the frosted zinnias and seedy marigolds. Simple!

Add more branches, leaves, and twigs through the season. The shelter doesn’t need to be airtight. Insects and animals will find nooks and crannies to hide in. Adding a layer of evergreen boughs on top and on the windward side will help keep the pile dry for the inhabitants inside.

Keep some openings large enough for birds to enter when they need shelter from a predator. Chipmunks, mice, toads, and reptiles also will enjoy your efforts. Some are likely to hibernate in the soil under the brush pile.

The old potting soil from the summer pots can be used in the gardens, where organic components will continue to break down and improve the soil. Or place it on the windy side of the shelter.


Perennials In Place, Then To the Brush Piles


If possible, let the herbaceous perennials, such as black-eyed Susan (Rudbeckia hirta, R. fulgida), coneflower (Echinacea), tickseed (Coreopsis), goldenrod (Solidago), asters, and ornamental grasses remain in place as they go dormant. Bees and other pollinators will busily collect pollen and nectar as long as the flowers produce it. Birds will pick at the seedheads in autumn and winter.

Insects that fed on plants during the summer will shelter or lay eggs on or near them for next year’s generation. A good time to cut back the dead plant stems is in late winter or early spring, just before new growth begins. If you must remove the stems earlier, add them to the brush piles. But leaving the dead plants standing in place distributes the habitats—and the sheltering wildlife—throughout the property.


An Attitude Adjustment


While the fall cleanup has been the normal practice for generations of homeowners, the consequences include diminished populations of wildlife. Most of the plants that feed us and animal life require insects to pollinate them. Disposing overwintering insects in enormous bags for curbside pickup, however, eliminates huge numbers of beneficial organisms.


And then we wonder why there aren’t as many fireflies and ladybugs, moths and butterflies, frogs, lizards, and birds as there were in generations past.


Fewer caterpillars and beetles will support fewer toads and birds. It’s as simple as that. Bird populations in several types of ecosystems are disappearing at an astonishingly rapid rate. Loss of habitat is part of the cause, but we can start to reverse that trend by simply adopting a fresh attitude toward wildlife. Appreciate it. Encourage it. Nurture it. Where you live.

Watch Douglas W. Tallamy’s videos or pick up a copy of his book, Bringing Nature Home, for inspiration and lists of plants that attract wildlife. Also, there are loads of pictures of insects, and a strong emphasis on using native plants. On the back cover:


“…Douglas Tallamy presents a powerful and compelling illustration of how the choices we make as gardeners can profoundly impact the diversity of life in our yards, towns and on our planet.”


gulf fritillary butterfly

Female gulf fritillary butterfly.

Return to the top

Lavender Cuttings: Tips for Propagating Lavender


2020

Updated 5/25/2024


Kim’s Tips for Rooting Your Own Lavender Cuttings


taking lavender cuttings

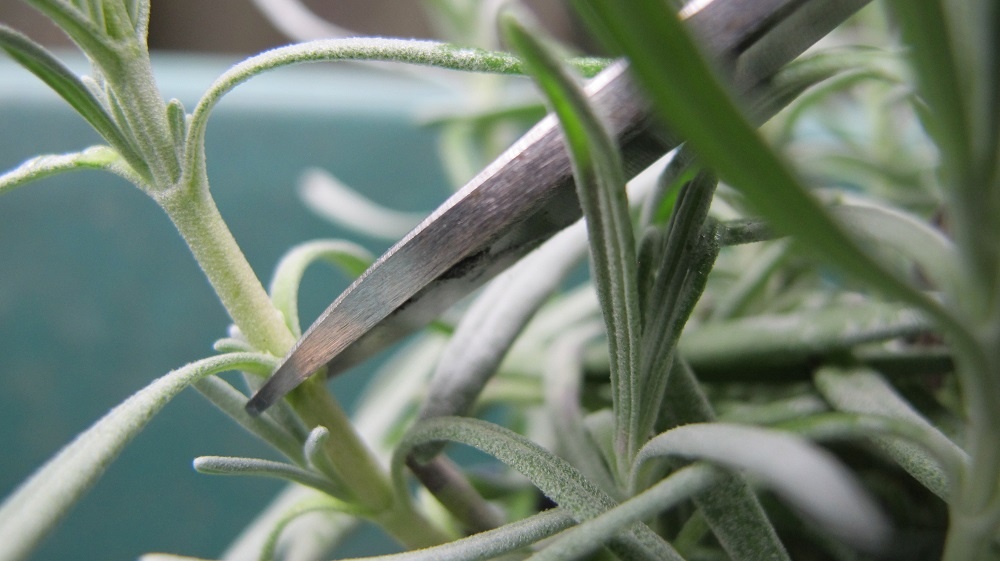
Cutting a lavender stem at a node.


How wonderful—the fragrance of lavender wafting through the back yard. You’re pleased beyond measure with these silver-leaved subshrubs in the pollinator garden, and perhaps you’d like more of them. The bees and butterflies are all over them! And the deer never touch them!! Garden centers stock several cultivars of lavender, but they are not inexpensive. Problem solved: “I’ll root my own lavender cuttings!”

The plants have performed well, and the garden is buzzing with activity. Now, you’d like to expand the garden to provide even more sustenance for all the bees and other insects. Admittedly, there is some work involved. Properly preparing the heavy clay soil takes effort and materials, but you know it will be worthwhile.

We need pollinators for farms and orchards, for our own vegetable gardens, and to regenerate natural stands of greenery. They pollinate every third bite of food we eat.

Because it takes several weeks to root cuttings and to grow them on to the proper size for transplanting, time is on your side. So, let’s begin by taking cuttings from the plants in the garden. While they’re rooting, you’ll have plenty of time to get the soil just right for the new plants.


Patent Rights

Because it’s illegal to propagate trademarked plants for resale, I bought the newer lavender cultivars in trays of 60 to 200 tiny rooted plants, called plugs. Labels of branded varieties carry the caution, “Unauthorized propagation prohibited”. Many varieties were not under patent protection, however, so those were the ones I propagated.


Lavender from Seed

Another option is sowing seeds—‘Ellagance Purple’ and ‘Lady’ are two that you might try growing. ‘Munstead’ is a strain that has been around for a long time. Seeds take a few weeks to germinate, so this project is best started in spring. Plants grown from seed (sexual propagation) can vary in certain characteristics, including plant size, foliage color, flower color and size, and time to first bloom.

Plants vegetatively propagated, on the other hand, will have consistently similar characteristics. Cloned plants, from cuttings, have the same genetics as the stock plant, so the rooted cuttings will look identical to the parent.


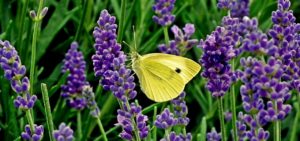
Lavandula and butterfly


Prepare the Pots and Soil for Lavender Cuttings


First, assemble 4″ or 4 1/2″ plastic pots. Bigger pots hold a much larger volume of soil and dry too slowly.

Lavender is susceptible to several fungal diseases, so starting with clean materials is essential. At the very least, wash the pots with soap and hot water. Better yet, clean the pots with a bleach solution, let them sit for a few minutes, then rinse thoroughly.

Another option is to use new cell packs, with 4 to 9 cells per pack. Soil in small cells dries faster, so you’ll need to closely monitor these containers.

Don’t use soil left over from last year’s plants; it could be harboring disease spores. Never throw “used” soil into the trash. Instead, add it to the flower gardens or the shrub border, where it will contribute organic matter as it decomposes.


Options for Potting Soil:

  • Always begin with pasteurized potting soil. Mix this with clean coarse sand or perlite. The medium should drain well, allowing both water and air to percolate through the soil.
  • Use products formulated for succulents, and add houseplant potting soil to make a gritty medium, but one which will hold some water.
  • Or, simply, use a fresh bag of pasteurized potting soil, which includes perlite, and be very careful about watering.

Avoid using soil containing a large percentage of peat moss, which is acidic and stays too wet for lavender. This herb, like many others, needs close to a neutral pH.

Incidentally, most potting soils sold in garden centers contain no soil at all, and are sometimes called “soilless potting mixtures”. For our purposes, the term “potting soil” will do.

If the medium is dusty dry, mix in a small amount of water. Avoid breathing in the dust. The soil should be slightly damp. Fill the pots with potting soil, and firm lightly. Leave about 1/2″ to 1″ of space between the soil surface and the pot’s rim.


Making the Cut


joyce chen scissors for cutting lavender

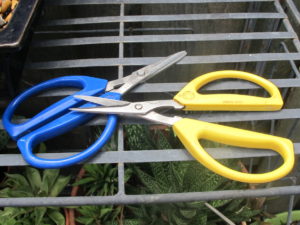
Joyce Chen scissors.


When To Cut

Cuttings taken in early to mid summer should root adequately before autumn. These are considered “semi hardwood” cuttings. The stems aren’t fully matured, but they aren’t too tender, either. Tough old woody stems will not root.

Collect lavender cuttings in the morning, when they’re fully plumped with water. Don’t use material from the bottom or from the shady side of the plant. Use healthy foliage, without any spots. Cuttings from plants that have not been overfertilized with nitrogen are more likely to root successfully.


How To Take Lavender Cuttings

With clean sharp scissors, take cuttings from non-blooming, non-budded stems. Lavender cuttings from the tips of the stems, rather than from middle sections, make better propagating material. If your early blooming lavender plants were deadheaded (old flower stems cut back) early in the season, the remaining stems might already have branched out, providing fresh cutting material.


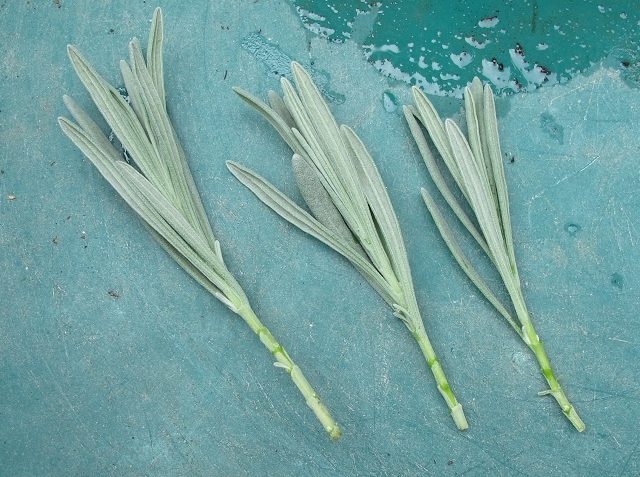
lavender cuttings

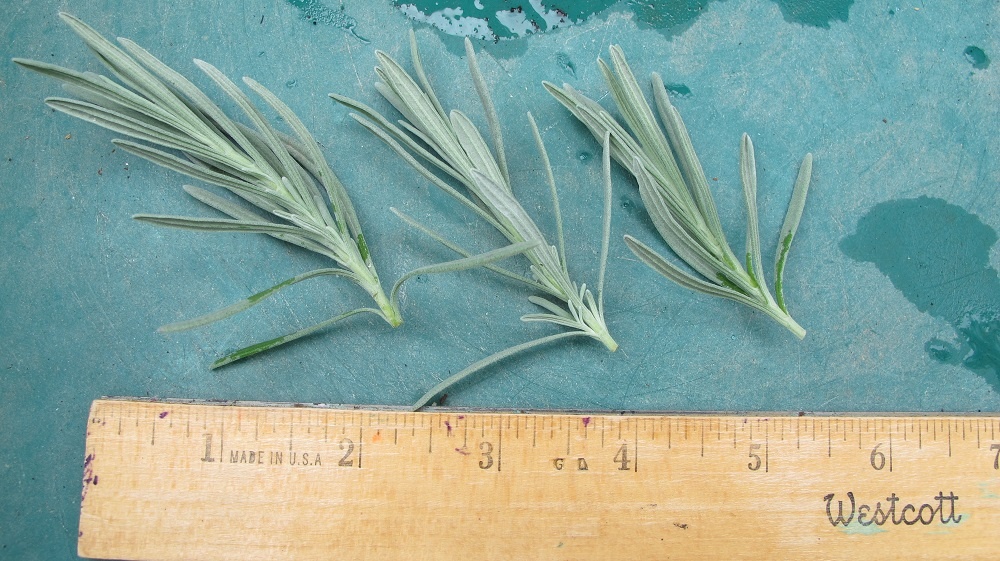
Cuttings, before removing bottom leaves.


Lavender cuttings should be only 2″ to 3 1/2″ long, depending on variety. Large cuttings have greater leaf surface area, and the cuttings might wither before roots form. When taking cuttings from any plant, consider the number of leaves, light, water, humidity, and time to root. Each variety has its own combination of variables that results in prompt, successful rooting. Long cuttings, low humidity, lack of light, and wet or dry soil will not yield rooted plants.

Make the cut where two leaves join the stem (photo at top). This part of the stem is called the “node”, and the first roots often emerge there.

Now, remove leaves on the bottom inch or so of the stem. Gently peel them off. Otherwise, leaves will rot in the soil, which could rot the stem.


lavender cuttings

Cuttings, ready for sticking.


Rooting Lavender Cuttings In Water

Coleus cuttings start rooting in water in a few days; lavender requires weeks in soil. When possible, I always root plants in potting soil rather than in water. The roots’ cell structures differ between the two methods, and those growing in water often die when re-adapting to soil.

If you have plenty of cuttings, perhaps rooting some in water will work for you. Cuttings should still be about 3 1/2″ long. Use only an inch of water in a glass, don’t crowd the cuttings, and remove leaves in the water. Place the glass in part sun, and change the water every few days.


Sticking the Lavender Cuttings


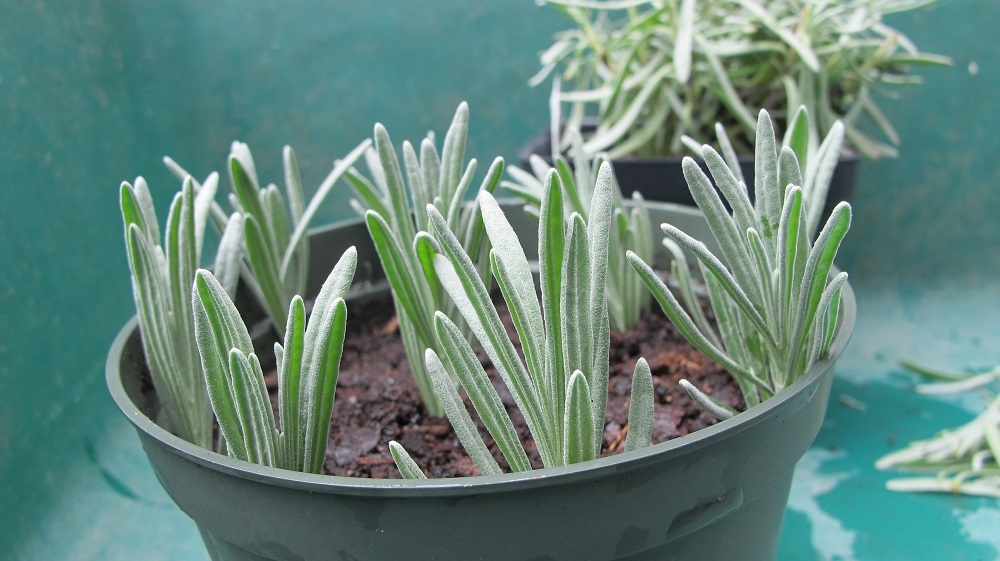
After decades of rooting plants under lights for my business, I’ve had the most success with cuttings that were stuck right next to the inside of the pot. Particles of soil touching the wall of the pot tend to permit more air to circulate around the stems. That’s precisely what lavender needs.

The stems aren’t sitting in wet soil, although there is some contact. At night, as the temperature drops, water vapor precipitates on the inside of the pot. And the humid air in that space helps the cuttings root.


lavender cuttings in a pot

Lavender cuttings.


This 4 1/2″ pot accepted 9 cuttings, with 1 in the center. Avoid crowding the cuttings; space them so their leaves don’t touch each other. Lightly water in the cuttings to make better contact between the stems and the soil.

I propagate other herbs, including thyme, rosemary, oregano, sage, and bay laurel, in the same way.


Actinovate

When propagating herbs and perennials each season, I use an organic biological fungicide called Actinovate. This product, a bacterium called Streptomyces lydicus strain WYEC 108, prevents vulnerable plants from succumbing to most diseases. Water the solution into the soil after sticking or lightly mist the cuttings, occasionally, in the morning. I also use it when germinating seeds.

This fungicide is quite expensive, but it makes plant propagation much easier for me. It carries the OMRI label and is safe to use on edibles.

Always exercise caution when using materials for treating plants. Don’t breathe the dust, avoid getting it on your skin (rinse thoroughly), and don’t improperly dispose of leftover product or the container. Read the label.


Rooting Hormone

Rooting hormone powder coats the base of the cutting with a chemical fungicide and plant hormones. While it accelerates the rooting process for many plants, this product carries the Environmental Protection Agency’s Caution rating, as does Actinovate.

I haven’t used it for many years, but, if you’ve had good results using rooting powder, then try it on your lavender cuttings. Always read the label, and never discard leftover powder where it can pollute streams.


Raise the Humidity


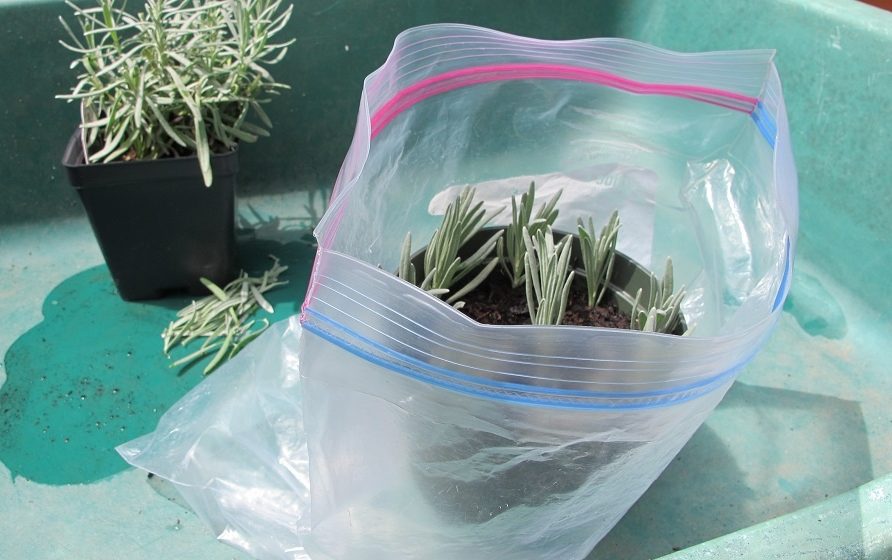
lavender cuttings in clear plastic bag

Pot of cuttings in open plastic bag.


To raise the humidity around the cuttings without causing rot, place the pot of cuttings into a clear plastic bag. Pull up the bag so it surrounds the cuttings, but don’t secure it. Fuzzy-leaved plants, such as lavender, rot (not “root”) easily in high humidity. A closed plastic bag or some other closed system raises the relative humidity to 100%. It also causes the “greenhouse effect”, raising the temperature too high when exposed to the sun.

So, keep the top of the bag open. Enough humidity will remain around the lavender cuttings. In very dry environments, the bag can be partially closed, but don’t let heat build up. Empty any water that collects at the bottom. If the soil is moist and there’s significant condensation inside the bag, open the top more widely, and let excess moisture dissipate. Wet soil will rot the cuttings.


Light For Lavender Cuttings


sunshine through trees


Lavender loves to bask in the sunshine. The sooner the cuttings get back to the sun, the sooner they can resume strong growth. But harsh sun will desiccate the unrooted cuttings. This is a race against time.


Indoors

Indoors, place the cuttings where they will get gentle direct sunlight. Sunlight helps cuttings root faster, but strong sun will dry them and overheat the air inside the bag. Bright filtered sun most of the day, as through a sheer curtain, works well. Average indoor temperatures (high 60’s F to the mid 70’s) will help them root.

Don’t put the cuttings too close to a window, in the hot sun. Check to make sure excess heat can escape. Lavender cuttings will not root in low light, so it might require a bit of experimentation to find the perfect light level to root the cuttings without desiccating them.

New growth emerging from the tip of the stem indicates a cutting that is beginning to root. Congratulations! Patience pays off!


Artificial Light

A 4′ long fixture with 2 daylight LED or fluorescent tubes makes a perfect nursery. Here, the plants never see a cloudy day, and you can keep a close eye on progress.

Place the lavender cuttings close to the tubes, within 3″. They should be as close as possible to the lights, but not feel heat from the fixture. Keep the lights on for 16-18 hours each day.

Smaller tubes and grow bulbs emit less light, which might not be enough for lavender. But if that’s what you have, try it. Make sure the cuttings are close to the tubes and that the lights are kept on for 18 hours each day.


Outdoors

Many of us don’t have indoor space suitable for rooting lavender cuttings. In that case, place the pots outdoors in dappled shade when the temperature is suitable. Give them more bright shade than harsh sun. Don’t expose them to hot afternoon sun and find a location out of the wind.

In a pinch, take a few cuttings and simply stick them at the edge of a planter, in light shade cast by a plant. I’ve been able to root many kinds of plants this way. Watch out for slugs, by the way, and use organic Sluggo to bait them. Scoop out rooted plants, and pot up for a few additional weeks of growing and getting used to full sun before planting them in the garden.

The cuttings in the photographs go outdoors on the deck in the morning. I take them back inside at noon or in early afternoon. It’s been way too hot and humid outside this summer—mid 90’s F, over 100° heat index for days at a time. When it cools down, they’ll spend more time outdoors.

(***Update***: The pot of cuttings in the photographs has only one survivor. Prolonged heat, frequent downpours, and mischievous chipmunks digging in the soil killed the rest. But that one well-rooted plant looks great, and will stay in its 4″ pot over the winter. 1/1/2021)


Ready for Transplant?


Okay…it’s been about 5 or 6 weeks and most of the cuttings show new leaves growing at the tips of the stems. That’s great!

If you see roots at the drainage holes in the bottom of the pot, the cuttings might be ready to divide. Remove the cuttings from the pot by gently tipping the pot upside-down. See if there are enough roots to move them to the next stage. Each cutting should have a few 1″ to 2″ long roots. Handle with care, since the roots detach easily from the stems and dry quickly when exposed to air.


Cuttings Rooted in Pots

Before settling them into their permanent homes, the rooted cuttings in pots will need to grow a more extensive root system. Transplant them individually into their own small pot or into 4-cell market packs. Be sure to maintain the same soil level against the stem; never bury the stems. Use the same kind of soil you used to root them.

If they’re rooted, give them a few hours of direct sun for a few days before exposing them to full sun. Let them root into the pots before planting in the garden. Rooted cuttings don’t require high humidity, so remove the plastic bag.


Cuttings Rooted in Cell Packs

If you planted the cuttings in market packs to begin with, simply push up the bottom of a cell to check root growth. Don’t pull the cutting itself. Well-rooted plants can be planted directly into the garden if you monitor them very closely. If needed, cover temporarily with a “caterpillar” tunnel fitted with bird netting. This protection admits air and sunlight, and will prevent damage from digging animals while the lavender becomes established.

If cold weather is approaching, use a clear plastic cover over the tunnel, and vent it in the daytime. This will buffer severe conditions, and could save the plants.


Harden Off the Lavender Cuttings

Harden off the cuttings by gradually introducing them to outdoor conditions over a period of a week or so. Place the pots of lavender outdoors, in morning sun for a few days, then in more hours of sun. It’s easy to forget them, when they’re out of sight, so remember to water! Plants receiving abundant sunshine make more food for themselves, through photosynthesis, so their roots will grow faster. By the end of the hardening off process, the plants should be able to tolerate direct sun all day.

Remove flower buds appearing on young cuttings. For now, all energy should be directed toward growing a robust root system.

Any cuttings that haven’t rooted and have foliage that feels limp can be discarded. If they look like this after a month, it’s not likely they will root. Figure out how to improve the growing conditions, and try again.


The Garden is Ready


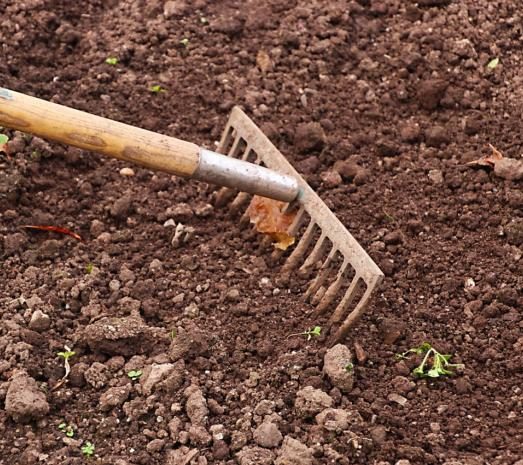
garden rake, prepared soil


And so are the plants. Water them first. Then remove the rooted plant from its pot and gently loosen the outer roots if they form a tight root ball.

Plant the little lavenders, maintaining the same soil level next to the stem. Firm the soil around the roots to eliminate air pockets. For almost all plants, you should be able to see the top of the original root ball after transplanting.

Be sure to space them properly, according to the variety. Some mature at 16″ tall and wide, while others can grow as large as 3′ or 4′ across. Lightly shade the plants if the leaves wilt in moist soil. Sticking a leafy twig in the ground on the sunny side works well enough.

During hot weather, check the soil moisture every day, although you might not have to water every day. Feel the soil a few inches down and next to the root ball. If you detect moisture, don’t water. If it wilts or the soil feels dry, water around the root ball.

When you do water, keep the foliage dry. This helps prevent disease.


To Mulch Or Not To Mulch

If you use mulch in the garden, avoid placing it under the canopy of the plant. Where it rains regularly, mulch can hold too much moisture in the soil, so use only a thin layer or, preferably, none at all right under the plant. Keep mulch off the stems.

Avoid finely shredded hardwood mulches, and choose pine fines or small nuggets instead. They permit better air circulation around the lavender.

Planting lavender on raised ground helps the soil drain faster, and plants display better when elevated above surrounding lawn or paving.


Is Your Lavender Winter Hardy?


lavender


Each plant variety has a hardiness zone rating, usually between zone 5 and zone 9 for lavender. If you live at the colder end of that variety’s hardiness zone, the rooted plants might need the protection of a cool greenhouse or a cold frame until next spring. It depends on expected weather patterns—temperature and precipitation—over the next several months for the cultivars you’ve selected.

At this point, in late summer, waiting to propagate lavender until next year might be more feasible, especially for gardeners in colder climates.

Lavender is drought resistant once established in the garden, but often dies when overwatered. Improving soil drainage is especially important for cultivars planted in the colder regions of their hardiness zones. “Winter wet” is a frequent cause of lavender failure.

Plant lavender with other perennials and shrubs that share its preferred growing conditions. Although it isn’t native to the U.S., it is non-invasive.

You might enjoy reading about the history of lavender and its uses through the centuries. This article at The Farm In My Yard includes more detailed information for growing lavender successfully.

Better for the Environment

Traditional property management calls for removing winter shelter and sources of food for insects and animals, so this is how we can begin to compensate, right in our own gardens.

Propagating plants is an economical means of providing new material for your gardens. Planting species that offer sustenance to pollinators is not only ecologically preferable to maintaining lawn grass, but it’s also prettier!


lavender


Return to the top

Bees and Butterflies: At Home In Your Garden


National Pollinator Week: June 22-28, 2020


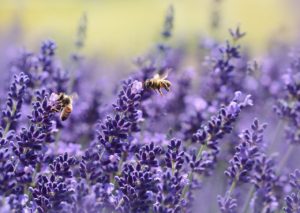
lavender, for bees and butterflies

Lavender and honey bees.


In 2007, the U.S. Senate passed a bill designating one week in June as National Pollinator Week. This legislation recognizes the importance of pollinators, including bees and butterflies, in our food supply and in the health of all ecosystems.

Every third bite of food we consume is directly attributable to pollinators. The global economic value is worth between $300 billion and $600 billion per year. Around 85% of all flowering plants are pollinated by insects, ensuring the regeneration of forests and fields as well as high yielding edible crops.

Our morning coffee beans are primarily self-pollinated, depending on crop species. Introducing bees, however, can increase the yields and lower costs of production.

In tropical regions of South America, Africa, Indonesia, and, more recently Australia, a tiny midge is responsible for pollinating cacao trees, bringing us chocolate. Chocolate contributes, incredibly, $100 billion annually to the global economy.

In the southern hemisphere, pollinator awareness programs take place in November. The Australian Government’s Department of the Environment recognizes November 8-15 as their pollinator week for 2020. Many countries throughout the world observe this initiative, and local organizations sponsor programs to raise awareness.

An outdoor project can be an enjoyable and healthy way to use our time. Having the children participate will teach them valuable skills they will carry with them wherever they live.


And, if there’s one thing we could use more of, it’s nature.


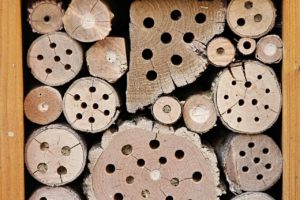
bee box

A bee house.


What Bees and Butterflies Need
 

All living creatures need food and water, shelter, and a place to raise their young. By adapting the way we maintain the property around our homes, we can achieve both an attractive landscape and one that fosters populations of wild creatures. Currently, 40% of the insect pollinator species are at risk of extinction. A few of us can make a small difference in our neighborhood; millions of us can really shake it up!

Houses—entire communities—generally have been built after felling all the native trees, bulldozing the rest, and covering the ground with a high maintenance lawn. Streams were diverted to concrete pipes underground, taking habitat from frogs, salamanders, and turtles. Where this tradition is changing, developers are roping off and protecting native stands of trees and understory species.

Maybe the builder spotted in a fast growing silver maple, a row of clipped hollies along the foundation, and a couple of forsythias in the back. Well, that won’t do much for all the bees and butterflies, or for the hummingbirds, bats, moths, and beetles that pollinate our crops and wild plants. And right there, in this yard and in that yard, lie the broken links in the food chain. Our monocultured and unnaturally manicured properties are sold as low maintenance, but there’s little life there.


The Missing Elements


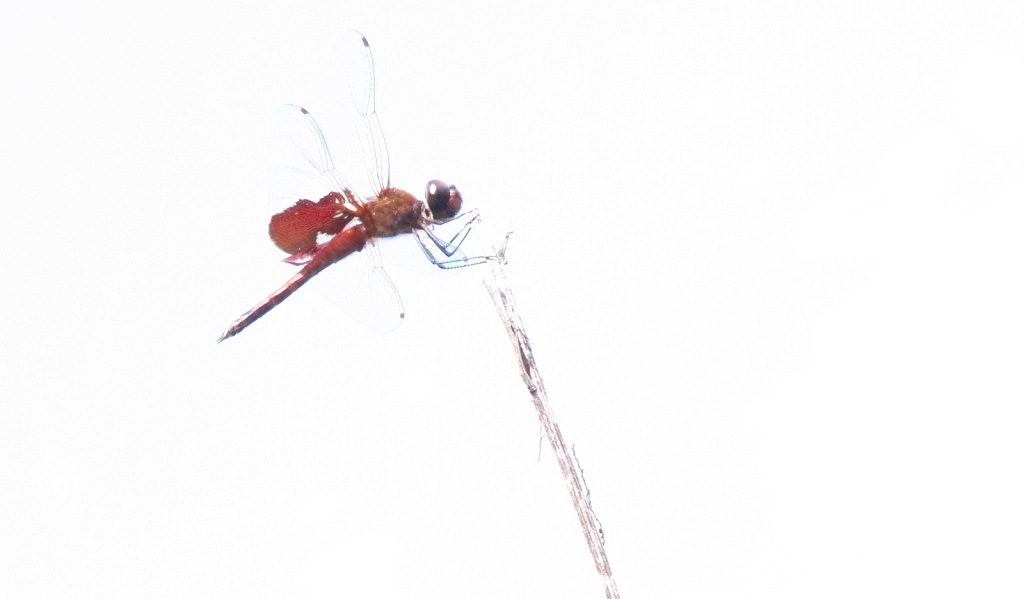
dragonfly


We concentrate instead on creating an “indoor oasis”, untroubled that the quiet stillness outside the door is not what Mother Nature had intended. No birds chirping or warbling…no cicadas or katydids…no lizards leaping for their dinner…nowhere for the dragonfly to land.

Yes, we need more nature in our lives. By cultivating a relationship with the natural world, there’s more than just a pretty sight beyond the living room windows. There’s life. Birds will continue to follow million-year-old migration paths. Mason bees and swallowtail butterflies will secure homes for their young. And there will be less talk of scarcity.

Need to feel better? Try gardening!


1. A Garden of Annuals for Bees and Butterflies
 

marigolds for bees and butterflies

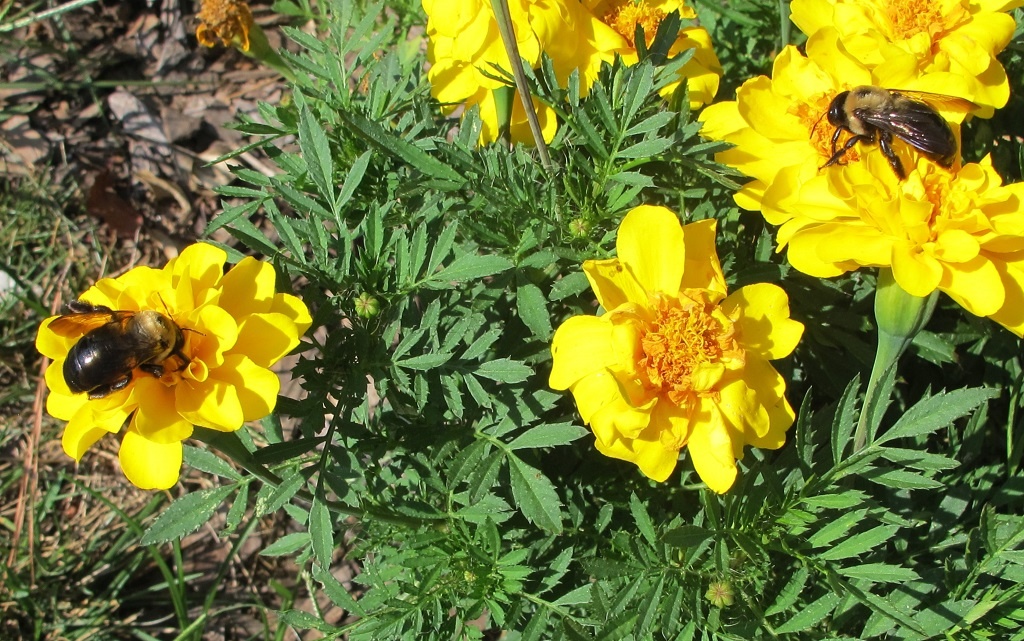
Bumble bees in the marigolds.


Maybe this week’s goal is to carve out a section of the big lawn in the sunny back yard, and plant a flower garden. Mid summer isn’t too late for annuals, either from seeds or from transplants. Or, for now, consider how your family can use the property in the future. It’s always a good time to decrease the amount of lawn space we have to mow, fertilize, and treat for insects and diseases.

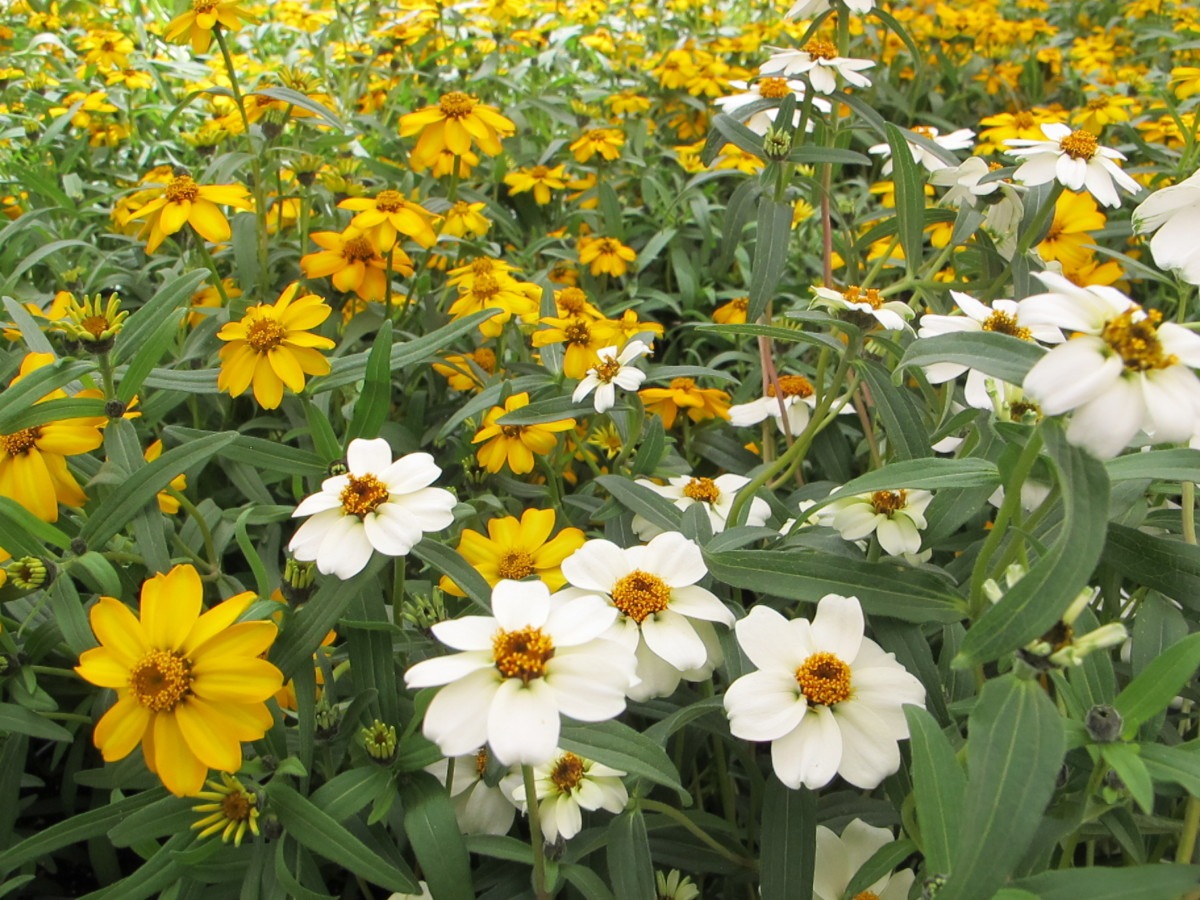
Be sure to plant significant drifts of flowers instead of a dot of zinnias here and a couple of marigolds over there. Large blocks of similar colors are more likely to get attention from pollinators. If your space is limited, though, there are some options. Sunny windowbox gardens and pots filled with bright colorful flowers will generate interest from the pollinators. Or perhaps there’s room for hanging baskets.

Each pollinator has its own preferences. Hummingbirds are attracted to the color red, but bees can’t see it. Bees are initially attracted to blue, yellow, and white, and then will visit a red flower nearby. Hummingbirds can feed from long tubular flowers, but hover flies need short little flowers.

At night, moths can detect white or pale colored sweet-smelling flowers that are open at that time. Almond flowers are pollinated primarily by honey bees, and tomatoes by bumble bees. Butterflies are especially interested in landing platforms, such as those found on plants with wide, flat flowers.


What Is An Annual?

An annual grows from a seed that germinates, generally, in spring or summer. It grows for several weeks to a few months, matures, and then begins to flower. Many species of annuals bloom all summer, until frost ends their lives in autumn, roots and all. But, by then, the plant will have set seed, with help from the local pollinators. An annual completes its life cycle within one growing season.

Those seeds will remain dormant over the winter, protected by their seed coats. With favorable weather conditions next spring, some of the seeds will germinate. Many, however, will be consumed by small mammals, birds, and insects.


What Do Pollinators Do?


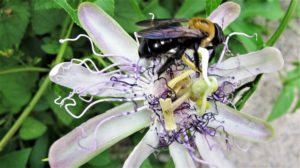
bumble bee on passiflora

Bumble bees on passion flower vine. Arrangement of flower parts facilitates pollination.


Bees and butterflies, and other pollinators, transfer pollen grains from the male anthers of a flower to the stigma, the female part of a flower. Sometimes male and female flowers grow in separate flowers on the same plant (that’s a monoecious plant). And other plants have either all male or all female flowers (dioecious plants). Some have both male and female reproductive elements within each flower (perfect flowers).

Pollinators don’t do this intentionally. Instead, their goal is to collect the flowers’ pollen and nectar. They inadvertently pick up the pollen on their hairs or wings, after being lured in by the flowers and the sweet nectar. Then the pollinators transfer pollen from flower to flower, from plant to plant, as they forage. Thus, they enable fertilization of the ovules, germ cells in the ovary of the female flower.

The male and the female parents must be the same species in order for their chromosomes to be compatible. However, interspecific and intergeneric hybrids sometimes do occur among closely related individuals.

The end result is a ripe fruit with viable seeds. That could be a zinnia’s seedpod, for example, or a blueberry, a peach, or a tulip poplar’s samara.

Cross Pollination

Ah, the genius of nature. Pollen grains and stigmas in many species mature at different times, preventing self-pollination.

Moving pollen among different plants of the same species permits cross-pollination, resulting in stronger genetics and, potentially, a better future for the species. Apple trees and blueberries are two crops that benefit from cross-pollination.


Single? Double? Triple?


double pink vinca--less nectar for bees and butterflies

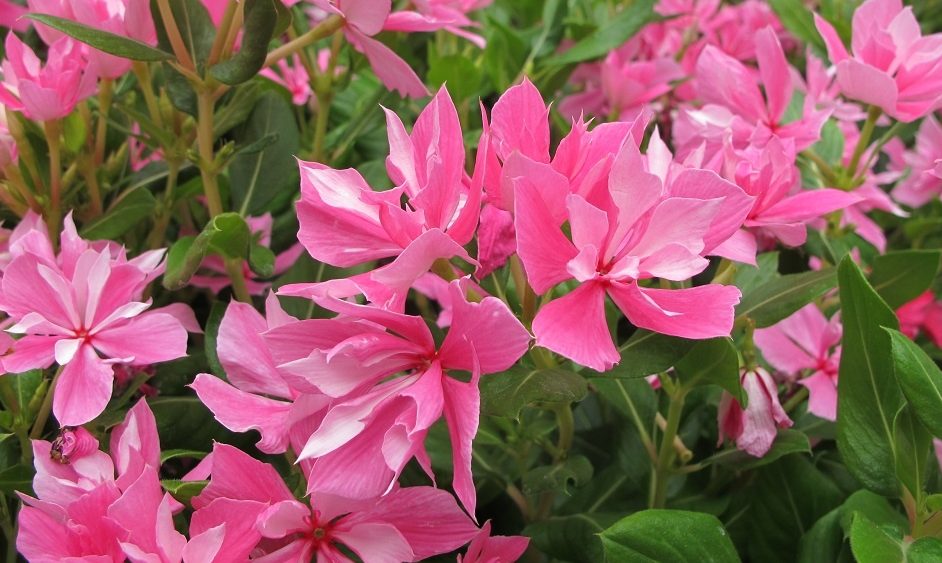
Catharanthus ‘Soiree Double Pink’, an annual vinca. Extra petals replace reproductive parts.


Flowers with single rows of petals usually have more pollen and nectaries than those with a more complicated petal structure. Plant breeders all over the world have brought to market thousands of these kinds of fluffy triple-flowered hybrids, and they are beautiful. That’s fine, for aesthetics.

But, for bees and butterflies, there’s less treasure for them in flowers filled with petals. Reproductive structures that produce nectar and pollen are often reduced and replaced with additional petals (photo, above). Collecting pollen or nectar from these packed doubles is less efficient, and requires extra visits to gather sufficient quantities. So, pollinators will look for more desirable plants elsewhere, to conserve energy, and avoid such anomalies of nature.

When choosing the varieties for your annual garden, keep these details in mind. Gardens loaded with heavy producers of nectar and pollen (in other words, single flowers) will better serve the pollinators that visit them.

Sunflowers

sunflower seeds for birds, bees and butterfliesMany varieties of recent sunflower introductions have been hybridized to grow flowers with very little or no viable pollen at all. When looking through catalogs, make note of the ones called “pollenless”. These varieties will make less of a mess on the credenza and won’t cause you to sneeze. But they have little to offer bees and butterflies.

Pollenless sunflowers won’t develop mature seeds filled with sustenance for birds and other animals. If pollinators and full seedpods are what you want, ask the seed supplier for varieties that make edible seeds, not just edible flowers.

These varieties of sunflowers will attract pollinators and make edible seeds: ‘Big Smile’, ‘Black Peredovik’, ‘Chocolate’, ‘Giganteus’, ‘Hopi Black Dye’, and ‘Kong Hybrid’. Also, ‘Mammoth Grey Stripe’, ‘Mammoth Russian’, ‘Paul Bunyan’, ‘Royal’, ‘Royal Hybrid 1121’, ‘Sunzilla’, ‘Super Snack’, and ‘Titan’.

Sunflowers have a row of showy ray florets surrounding the disc florets. Disc florets open slowly over time, from the outer edge to the center, ensuring many visits from different pollinators.

The Asteraceae family is perhaps the largest, with 1900 genera and over 32,000 species. (The orchid family is its main rival, but no one knows exactly how many species are in either family.) Members of this extended family include sunflowers, dianthus, lettuce, coreopsis, marigold, zinnia, coneflower, gerbera daisy, chrysanthemum, and shasta daisy.


Where to Plant?


squash flowers

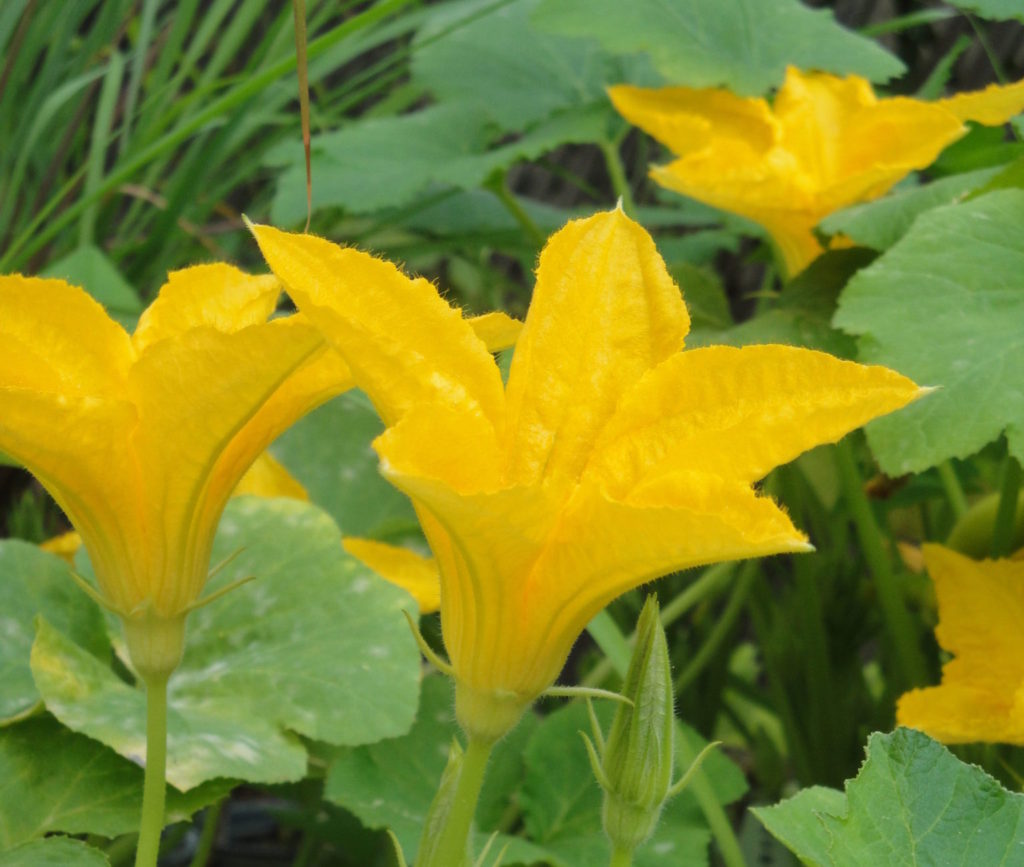
Thin peduncle (flower stalk) under summer squash flower indicates a male flower. A female flower has a rounded peduncle.


A large bed of color around the patio or the mailbox, a free-standing raised bed, and a border close to the vegetable garden are just some of the possibilities. Farmers often include wide bands of wildflowers alongside their fields of crops for better pollination and heavier yields.

One plant that attracts all sorts of pollinators is ‘African blue’ basil. This is a sterile herb—unable to set seed—so it flowers constantly. Other varieties of sweet or flavored basils customarily are used in the kitchen. Plant an ‘African blue’ basil in early summer, close to tomatoes, peppers, and squash to encourage bees to visit the veggies. And let it flower.

Check with local garden centers to see what they have available. Ask for help choosing annuals—seeds or transplants—that attract pollinators.

Before you do any digging, ask your municipality (call 8-1-1) to mark underground utilities. Whether you’ll be tilling the area or digging it by hand, you’ll certainly want to avoid damaging any of those lines.

Locate the garden where a source of water is easily accessible. New transplants and young seedlings will need consistent moisture until they’re established. During summer drought, water the bed thoroughly every week or so.

Sun or Shade?


fuchsia flowers

Fuchsia flowers.


Find an area that gets full sun if you want lots of flowers. Full sun is at least 6 hours, but annuals will positively thrive in more sun than that. Summer annuals blooming heavily in sun will attract the most pollinators.

But several species prefer shade, such as impatiens. The ‘Imara’ impatiens, resistant to impatiens downy mildew, provides a carpet of color under the trees and shrubs. This plant attracts bees and butterflies, and also hummingbirds.

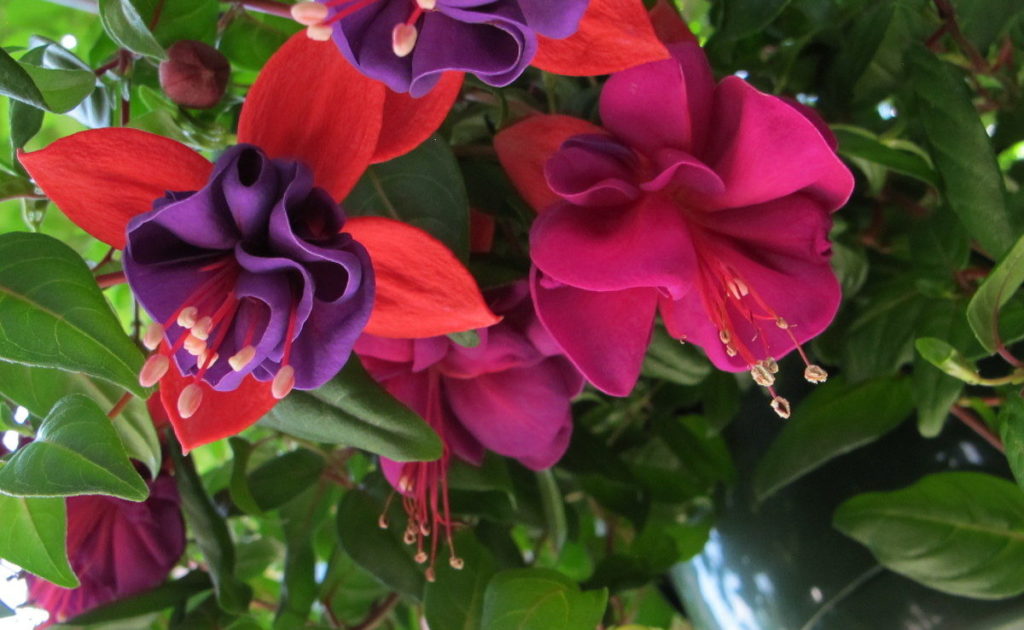
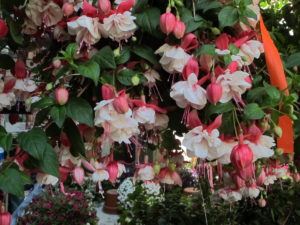
Where summers aren’t too hot, the fuchsia baskets (photo, above) will entice the hummingbirds to visit every day, like clockwork. This plant does well in dappled shade or early morning sun. And it likes moist soil. As the temperatures climb and fuchsia fails, hummingbirds will flock to the single petunias and salvias, which need lots of sun. They also visit herbs in bloom, including basil and lavender.


How Big Is Big?

hummingbird at feeder

Hummingbird.

With proper soil preparation and regular maintenance, a plot that measures 10′ x 6′ can become a magnet for pollinating insects. The flowers will buzz with activity from perhaps dozens of species of bees and butterflies, and moths and hummingbirds, too.

This country is home to over 4,000 species of bees alone! More than 20,000 species live around the globe. Some live in colonies, and many are solitary creatures. Interestingly, the honey bee is not native to the United States. It was brought by European settlers hundreds of years ago and proliferated throughout the country.

To increase the activity and the number of pollinating species lured in, make the bed even larger. And include more variety in the plants selected. Use masses of the same plant, and repeat elsewhere in the garden, if you want. Planting larger blocks of a particular color or flower type will attract more pollinators than scattering them about.

If this is your first gardening effort, keep the garden a manageable size so you’re not overwhelmed. There will be maintenance involved! Weeds, no doubt, will have to be pulled. And your garden will need fertilizer a few times through the growing season for the best results. An inch or two of mulch will help cool the soil, retain moisture, and restrain weeds. You can always expand the area as you gain confidence in your skills.

Container Gardens

Even in a very limited space, some of the local bees and butterflies will find the lovely combination pots on your balcony or the patio. Use bright colors, and have your camera ready—for the flowers and their visitors. Once they find their preferred flowers, pollinators will come back day after day.

Remove seedpods to encourage more flowers to develop, although finches and other birds will feed on seeds remaining on stalks late in the season. Fertilize regularly to keep the plants in prime condition. Plants in containers might need daily watering.


Added Benefits

  • Vegetables and Fruits


bee and blueberry flower

Blueberry flowers.


Insects are on a constant lookout for sources of pollen and nectar. You might discover your fruit trees, blueberries, and vegetable crops yielding heavier harvests since installing a flower garden.

Edible crops and plants growing naturally in or around your property will benefit from complete pollination because of the larger populations of pollinators. Include plants whose flowers attract pollinators early and late in the growing season, as well as during the summer months.


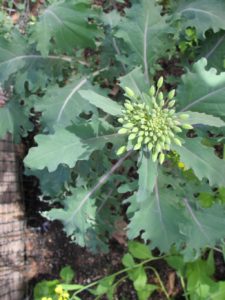
I grow many kinds of greens (photos, above) in the cool seasons. Before they’re replaced with summer crops, I allow them to go to flower in late winter to early spring. Most are biennials in the Brassicaceae family, including kale, collards, broccoli, arugula, and mustard greens. Although they don’t require pollination for a harvest, the cruciferous flowers provide pollen and nectar for bees, braconid wasps, hover flies, and other pollinators at the time of year when little else is available.

Pansies and violas provide sustenance for bees that emerge on pleasant winter days. These colorful cold-tolerant biennials grow in garden beds and in containers.

  • Braconid Wasps

braconid wasp, aphids

Braconid wasp.

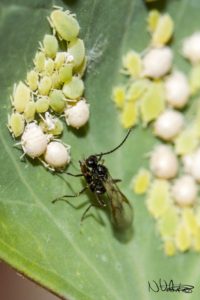
The tiny non-stinging braconid wasps are hardly noticeable, but they help keep populations of live-bearing aphids in check. A female braconid wasp deposits an egg in or on an aphid. After hatching, the wasp larva consumes the tissues, killing the aphid. One braconid wasp can parasitize 200 aphids in her brief lifetime. Adults emerge to mate, and a new generation of females will begin hunting aphids.

Pollen is an important food source for the braconid wasps, which will feed on some aphids as well. So, even these tiny insects help pollinate plants.

Photo at right shows a wasp about to deposit some eggs. White aphids have been parasitized, and the others are alive. I’ve often seen leaves with a hundred aphid mummies (the aphid’s empty exoskeleton) attached, with no living aphids.

Planting a wide variety of flowers helps these beneficial insects. Self sustaining populations of beneficials contribute to the overall health of your garden, reducing or eliminating the need for pesticides.

  • For the Birds

Let’s not forget about the birds! Although most species, other than hummingbirds, don’t play a major role in pollinating plants, songbirds certainly have a place in any natural ecosystem. We can play an important part, in our own yards, by maintaining an environment that fosters healthy populations of native animals.

ruby crowned kinglet

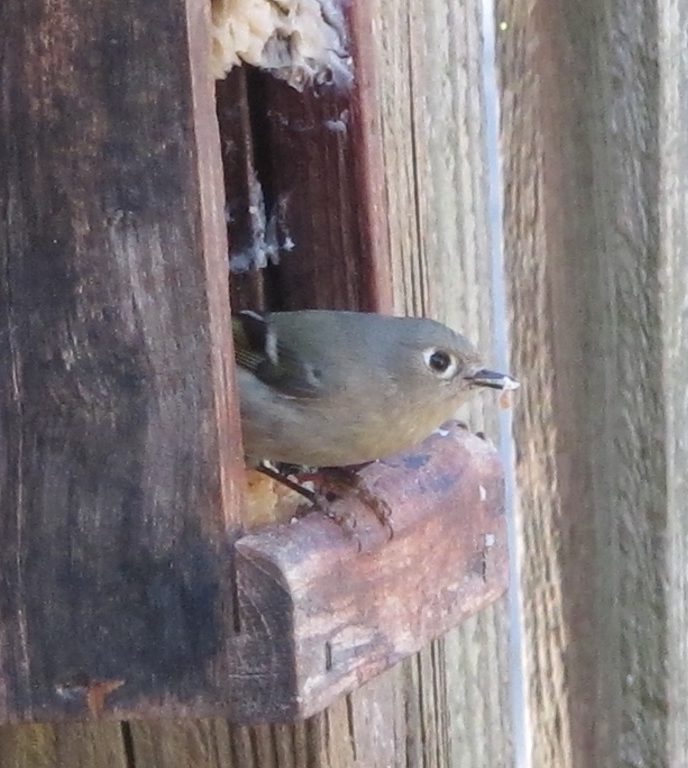
The tiny ruby-crowned kinglet at a winter feeder.

The numbers of many species of birds are declining, due primarily to human interference. We’ve removed their habitat in favor of expansive lawns and non-native trees and shrubs. And we’ve killed off their food sources by spraying pesticides every time a “bug” shows up. Can we please adopt a new attitude?

After all, birds help by consuming huge numbers of insect pests that otherwise could destroy crops or damage potted plants. Birds and bats keep mosquitoes and moths in check. More insects in the garden will support more avian activity.

Restoring healthy populations of all native animals and insects will return balance to the ecosystem. Sometimes, though, the songbirds fall prey to foxes, snakes, or hawks. Predator and prey: yes, folks, that’s how it works.

There are many benefits to living in modern society, but loss of habitat for wild creatures is not one of them. Letting nature be is a crucial step in re-establishing native populations and preventing extinctions.

Let ‘Em Seed About

Finches, sparrows, and chickadees feast on seeds that develop after the flowers fade. So, don’t be too hasty to deadhead the last round of flowers. Allow them to remain in place through the fall and winter, so the birds have another food source available when they need it. Birds will soon recognize your property as a wellspring of year-round sustenance.

Bright yellow and black American goldfinches are fond of zinnias, cosmos, salvias, and asters that have gone to seed. In late summer and autumn, the finches, northern cardinals, thrashers, blue jays, and other animals eagerly consume seeds atop the black-eyed Susans and tall sunflowers. And you might notice plants germinating next spring from seeds the birds overlooked.

Water


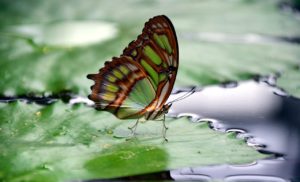
butterfly on lily pad


Include a source of clean water for the birds. A birdbath in the garden is fine, or you could keep a large plant saucer on the deck. Change the water frequently to prevent mosquito wrigglers from reaching adulthood.

The bees and butterflies also will appreciate a small saucer of water on a hot summer day. Place a flat rock island in the water for safe sipping. A mud puddle, just a bare patch of wet sandy clay, provides moisture and minerals for butterflies.

  • Cut Flowers

Another benefit of growing a garden of annuals is the almost endless supply of cut flowers for indoor arrangements. Include plans to expand the garden next year, to keep the pollinators happy, too. Check with your agricultural extension service to see which flowers last longest in a vase.

Try Some Of These For the Bees and Butterflies
Ageratum, alyssum, bachelor’s button, cleome, cosmos, fuchsia (hummingbirds), herbs, impatiens, lantana, marigold, and pentas. Rudbeckia (annual and perennial varieties of black-eyed Susan), salvia (annual and perennial types, a hummingbird favorite), some of the sunflowers, tithonia, verbena, and zinnia.


Headings

Page 1: National Pollinator Week, June 22-28, 2020, What Pollinators Need (The Missing Elements), and A Garden of Annuals for Bees and Butterflies (What Is An Annual?, What Do Pollinators Do?, Cross Pollination, Single-Double-Triple?, Sunflowers, Where To Plant?, Sun or Shade?, How Big Is Big?, Added Benefits, Vegetables and Fruits, Braconid Wasps, For the Birds, Cut Flowers)
Page 2: Perennial Favorites For Bees and Butterflies, Lavender, Herbs, Brush Piles, Go Native, A Comprehensive Garden Plan (Dream, Plan, and Implement, On the Right Path, Stone, Diversify, Some Native Woody Plants, Asking for Help, Dig In!, Small Is Beautiful), and Links

Return to the top

A Passion For The Gulf Fritillary Butterfly


2019

Updated 9/12/2024


The Gulf Fritillary Butterfly


gulf fritillary butterfly

Female gulf fritillary butterfly.


At the Hendersonville Garden Jubilee in May, I bought a small Passiflora vine as a gesture of support for Bee City USA. One third of the food we eat and 80% to 90% of all flowering plants rely on pollinators to set fruit and, therefore, to reproduce.

Bees are efficient pollinators, but other insects and animals, including butterflies, beetles, moths, bats, and hummingbirds, also provide this service. This article concentrates on attracting the gulf fritillary butterfly to your garden.


bumble bee on passiflora

Bumble bees love this passionflower vine (Passiflora).


Passiflora incarnata


Planting the passionflower vine had to be delayed until late summer, after the siding replacement had been completed. And then the plant took off! 

Passionflower vine (Passiflora incarnata), also called maypop, is the primary food source for larvae of the beautiful gulf fritillary butterfly. This herbaceous perennial is native to the southeastern quadrant of the U.S., in USDA zones 5 to 9. A substantial vine, growing to 20′ in length, it blooms from late spring to late summer. Its pale purple 3″ flowers yield kiwi-size yellow-orange fruits from which you can make jams and jellies, although I haven’t tried it.

Other species of Passiflora can host larval fritillary populations, but some are toxic and will kill the caterpillars. So, choose carefully! Usually, the female senses chemicals with her antennae and determines suitability of a particular plant for oviposition (depositing the eggs).

Passionflower vines also host the variegated fritillary, the Mexican fritillary, the Julia butterfly, and the zebra longwing. I was hopeful but not overly optimistic that the caterpillars would show up this late in the season. But I have since learned that caterpillar activity of the gulf fritillary ordinarily takes place in late summer.


If You Plant It, They Will Come


It wasn’t long before the vine had wrapped its tendrils around the coleus and the Salvia coccinea planted only 2′ away.

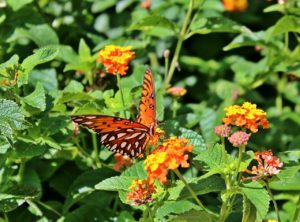
I saw the bright orange butterflies a few times this summer, flying around the gardens. But now they visited the vine almost every day to lay eggs, and then the nearby hanging basket of flowers to sip nectar. Adults feed only on nectar, including flowers of lantana, zinnia, Buddleia (butterfly bush), salvia, and Liatris.


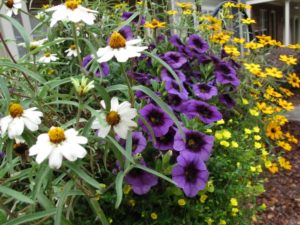
zinnia, calibrachoa basket

Hanging basket with zinnias and calibrachoa.


Soon, holes appeared in the leaves…already?…and then bigger holes. Success! Long gone are the days when I would have implemented measures to “remedy” this behavior.

gulf fritillary butterfly cqterpillar

Caterpillar of gulf fritillary butterfly.

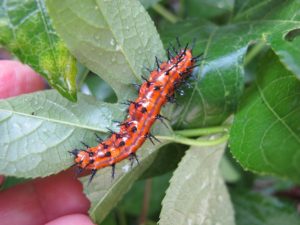
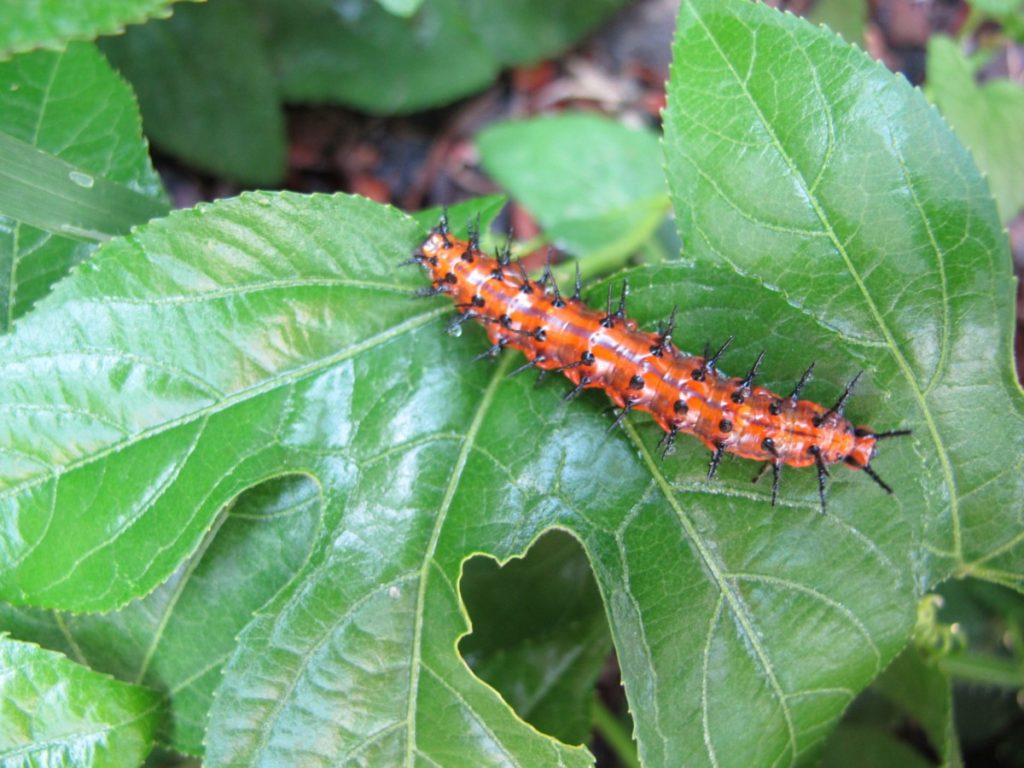
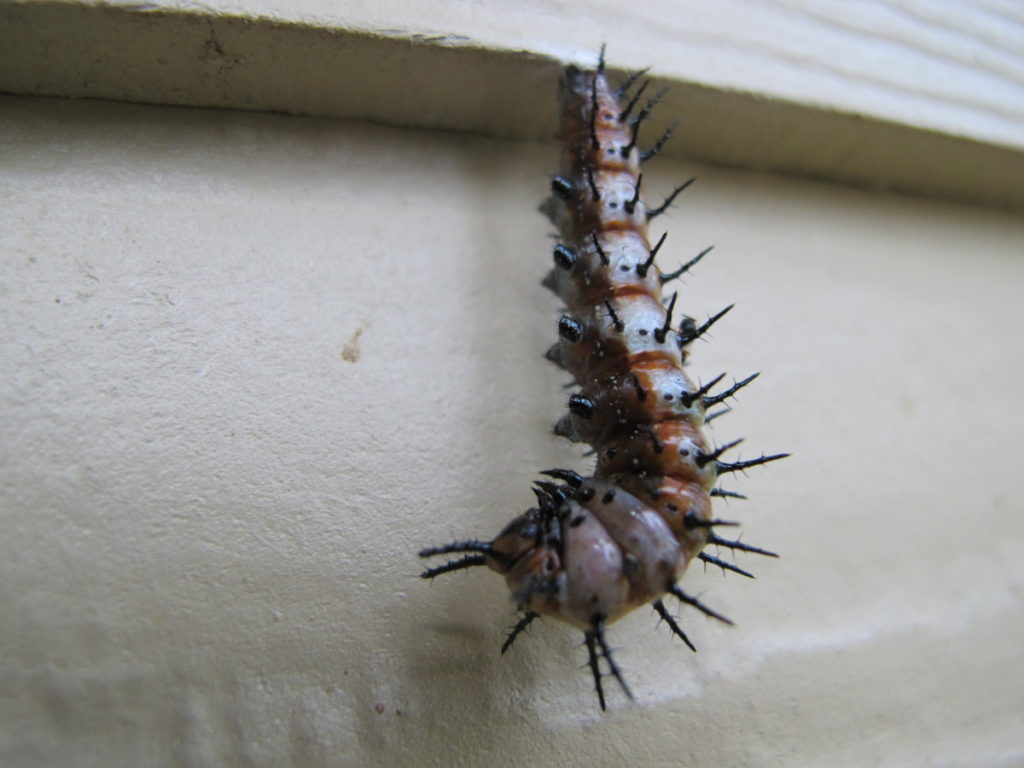
Close inspection revealed several orange caterpillars with purplish stripes and black bristly projections. Then more appeared, wave after wave, as the older ones matured and crawled away to pupate. I would not have thought that a plant this small could sustain more than 40 caterpillars over a few short months. But it did, although some chrysalises have succumbed to a fungal disease. Recently I noticed more small caterpillars, even though we’ve already had a light frost.

Thank goodness, I thought, because this Charlotte NC garden isn’t large enough for this vigorous vine. These caterpillars and their voracious appetites help keep this young plant in bounds. The plan is to dig it up and to transplant it to a bigger garden when I move. All of it will be removed, or it will take over the neighbors’ gardens as well. The vines had no trouble growing under the sidewalk and emerging several feet on the other side.

***Update***: Since planting the passionflower vine (in northwest NC) at the edge of the woods almost 3 years ago, it has spread to cover the ground 20′ around the trellis. In 2023, I saw several male gulf fritillary butterflies, but no females. This year, we have both males and females and plenty of flowers for the pollinators, but no caterpillars yet. Rocky clay soil and mowing confine the spread of the vines. 9/12/2024


Life Cycle of the Gulf Fritillary Butterfly


gulf fritillary butterfly on lantana

Gulf fritillary butterfly on lantana.


Gulf fritillaries (Agraulis vanillae) are commonly found in open sunny habitat, grasslands, woodlands, fields, and in gardens. These subtropical butterflies range from Texas to Florida and migrate north from Missouri to Delaware. This butterfly is also found in Central America and in Hawaii.

The gulf fritillary and the zebra butterflies belong to a group called the longwings (Heliconiinae). Larvae of both species feed on passionflower vines. Although the gulf fritillary resembles other fritillaries, it is, in fact one of the longwings. Other fritillary larvae (meadow and great spangled) feed on wild violets.

Predators avoid longwing butterflies due to several odorous chemicals produced in abdominal glands. Passionflowers contain poisons (alkaloids, cyanogenic glycosides), which are picked up by the caterpillars as they feed on the leaves. These chemicals make them distasteful to birds and other animals, but less so in the gulf fritillary.

After mating and consuming protein-rich pollen for several days, the female butterflies lay eggs on passionflower vines. This caterpillar prefers mature foliage, if it is plentiful, leaving other butterfly caterpillars to feed on the young leaves at the tips. I’ve read conflicting information, which states their preference for the young growth tips of the vines. There, the plant doesn’t produce nectaries on its foliage, which attract ants that defend the plant from butterflies and larvae.

Adults measure about 2½” to 3½” wide, with females being larger and a bit darker than the males. Females also have more pronounced markings, and both have white spots on the undersides of their wings.


Eggs and Larvae


Eggs are yellow when first laid. They hatch in 3 to 8 days, depending on temperature.

The caterpillar feeds on foliage and molts 4 or 5 times over the next 11 to 20 days. Then it crawls to a suitable point of attachment for its chrysalis.


Pupae of the Gulf Fritillary Butterfly

For 5 to 12 days, according to the websites I read, the caterpillar pupates. But the chrysalis by the front door has been hanging around for at least 2 weeks. It is alive; it reacts when I nudge it. A small sign just under the doorbell, where the pupa resides, requests “Please Do Not Disturb.”

The small chrysalis, at only 1 1/8″ in length, could easily be mistaken for leafy debris. But hanging on the door trim or on the shutters, it becomes conspicuous. In fact, the first chrysalis I saw, also on the door trim, had been partially eaten, probably by a resident lizard. Although I’m tempted to move them to the shrubs to “save” them, it’s better to let nature decide. If this were a rare species, I might think differently. (***Update***: Well, someone dined on this chrysalis, too! 11/2019.)


Mature Butterflies
Adults typically live for a few to several weeks in warm weather, and longer in cooler temperatures. This butterfly prefers warmer regions, and dies when it gets close to 20°F.

The gulf fritillary butterfly can produce several generations per year in warm winter zones.


gulf fritillary butterfly, lake lure flowering bridge

Gulf fritillary butterfly, Lake Lure Flowering Bridge.


Typical Butterfly Life Cycle


The typical life cycle of a butterfly:

  • starts as an egg,
  • which hatches into a caterpillar (the larval stage),
  • which pupates in the chrysalis (the pupal stage), undergoing metamorphosis,
  • and then emerges as the adult butterfly.

The gulf fritillary overwinters in cooler zones as adults. Do them a big favor and build a brush pile where they can find shelter in cold and inclement weather. Simply stack piles of twigs, branches, straw, and weeds, and let fallen leaves blow in. Birds, insects, and other creatures will appreciate this kind gesture. And you’ll get some compost out of it.

I give the results of this small experiment Four Stars, an A+. As I mentioned earlier, I was pleasantly surprised by how readily the butterflies found the passionflower vine, and by the number of caterpillars feeding from it. If you’ve been considering what to plant to attract pollinators or pretty butterflies, you won’t go wrong with this one. Just give it time and some space!


passion flower vine eaten by caterpillars

What remains of the Passiflora. Good job, caterpillars!


Return to the top

Annuals That Tolerate Heat, and Garden Tips

2019


Annuals That Can Take the Heat


American flag


Happy 4th Of July!


Well, it looks as though the heat is on, as we celebrate our nation’s 243rd birthday. And summer just got started! Enjoy your Independence Day barbecues with family and friends, but don’t neglect the garden annuals and other potted plants. They’re going to need more frequent watering at these temperatures.

Here are some things we can do to mitigate problems that come with extreme heat, followed by a list of heat tolerant annuals.


Mulch the Beds


Mulching the gardens will keep annuals and shrub borders looking fresh all summer. Mulch serves several purposes:

  • it retains moisture in the soil
  • the soil stays cooler without the sun beating down on it
  • it helps prevent weeds from germinating
  • mulch helps prevent soil erosion
  • it prevents mud and dormant disease spores from splashing onto the plants
  • long term, it breaks down and adds organic matter to the soil
  • and it looks good

If bags of mulch have been hanging around for a while, gases can build up that might damage tender young annuals. So, open the bags and let the gases escape. I recall mulching newly planted alyssum many years ago, and by the next morning, they looked as if they’d been fried!

Sometimes, termites are found in old bags of hardwood mulch. Once the contents are spread around the gardens, though, the termites probably will die from exposure or due to separation from the colony.


Types of Mulch


pine straw

Pine straw under a tree.


There are many kinds of mulch available from garden centers. I’ve always liked the look of dark brown shredded hardwood mulch. On a slope, it holds better than pine bark nuggets because the fibers interlock. Large quantities of shredded hardwood used repeatedly, however, can cause manganese toxicity and it can drive up the soil’s pH. Limit the depth to only 1″ in flower gardens or 2″ around shrubs and trees.

It’s a good idea to switch to a pine bark product for a few years to avoid these imbalances. Rhododendrons, azaleas, blueberries, hollies, and other acid-loving plants prefer pine products. But, if you want to use shredded hardwood around these plants, don’t pile it on and use an acidifying fertilizer.

Grass clippings break down quickly when used as a mulch by itself or under another mulch product. They contain some nitrogen, gently released as it decomposes. Use a very thin layer around your plants because it can heat up significantly as decomposition begins. But grass clippings can carry residue from weed killers and other chemicals used on the lawn, so maybe the best thing to do is to leave them on the lawn itself.

mulch for heat tolerant annuals

Pine bark nuggets can last a few years, but, if you’re a tidy gardener, you’ll have to blow away or pick out fallen leaves. It’s graded according to particle size, from pine fines, to small and large nuggets. Pine straw is new to me, since moving to North Carolina, but I still prefer shredded hardwood.

Mulch should not be piled high in the garden. Two inches suffices for most applications, although pine straw is applied more thickly. Keep it away from the stems and trunks of the plants.

Tree leaves that fall in autumn make a protective layer for garden plants, although many will blow around in high wind. This is more acceptable in rural areas or where the gardens aren’t open to public view. Most homeowner associations will find this free source of natural mulch objectionable. You could use a mulching mower to chop the leaves into smaller pieces, rake them into gardens, and cover with an inch of a more attractive mulch. Earthworms and decomposition will make them disappear.


Gravel In the Garden

I’ve never used gravel as a mulch around plants, except for potted lavender or succulent dish gardens. It settles into the mud, and “gravel travels” on an incline.

In certain circumstances, such as in the desert southwest and in dry rock gardens, gravel is a good choice. Around dry stream beds and in paths, gravel and rocks add natural elements, but should be laid over landscape fabric to prevent settling into the soil. If using gravel on the surface of a walkway, look for the kind with angular rather than rounded edges; it is less likely to sink underfoot.


Landscape Fabric

I am not a fan of using landscape fabric under mulched plants. This barrier interrupts the natural decomposition that occurs where the mulch meets the soil. Without the fabric, earthworms ingest the partially decomposed material next to the soil surface, and deposit fertile castings (excrement) into lower levels of soil, improving it in the process. This is how it works in nature, accompanied by thriving populations of various microbes.

Leaves, fallen trees, and dead insects and animals contribute to a healthy environment on the forest floor as they decompose. Microbes, earthworms, rain, and freeze-thaw cycles help distribute nutrients through the soil profile.

As the mulch breaks down over the fabric, weed seeds blowing into the beds will readily germinate in this rich medium. So, most gardeners using landscape fabric will be disappointed when they see those dandelions, plantains, and weedy maple trees taking root there. Mulch, with or without landscape fabric, doesn’t entirely prevent weeds, but it will greatly reduce their numbers.


Water the Garden Beds


marigolds, easy annuals

Marigolds planted by volunteers in Arbourgate Meadows, Charlotte NC.


Make sure the flower beds and the shrubs, especially new ones, get a deep soak now and then if rain is scarce. Unless your area receives a prolonged period of rain, passing showers will moisten only the mulch. In most soils, 1″ to 2″ of water per week ensures that deeply growing roots will get their share.

Watering a little bit every day or two will not produce deeply rooted plants. Unfortunately, shallow roots are susceptible to stress from not only dry soil but also from hot soil.


watering can


It’s always best to water early in the morning, so the foliage is dry going into the night. This lessens the likelihood of diseases infecting annuals and other plants. Some of the water applied during the heat of mid-day will be wasted because of rapid evaporation. But if you’ve forgotten, and the plants are wilting, water as soon as possible, regardless of the time of day!

For busy families, watering with soaker hoses or tubes and emitters saves time. By placing the water directly on the soil, or under the mulch, very little is lost to evaporation. These systems can be attached to a computerized control center at the faucet. Just be doubly careful, though, when digging nearby, that the spade doesn’t land on the soaker hose. But if it does, there are repair kits for that.

The kids might enjoy a sprinkler or Slip ‘n’ Slide on a hot Fourth of July, especially the ones under 35. For a softer landing on the slippery strip, water the lawn underneath it first.


About the Hose

A garden hose kept in the sun will significantly heat the water inside it. Spray it out over the grass until it’s cool enough to apply to the gardens. Water under the canopy and beyond the drip line of the plants. Watering heavily as needed will cool the soil…for a while, anyway.


Water and Potting Soil


caladium impatiens pot, annuals

Caladium, variegated English ivy, and ‘Prizm’ impatiens, before impatiens downy mildew came along. The new ‘Imara’ impatiens is downy mildew resistant.


The trend in gardening over the years leans toward growing annuals in pots for key areas around the yard. Gardeners also are decreasing the square footage devoted to annual garden beds.

Container gardening requires vigilance, because soil in pots generally dries faster than garden soil. Hanging baskets filled with thirsty annuals and small blooming pots on the picnic table probably will need daily watering in areas with intense summer heat. For this reason, I prefer using larger pots when possible, such as 12″ to 18″ hanging baskets.

Strawberry jars introduce verticality and a unique appearance. Look for smaller varieties of plants to fill these containers.

Adding a thin layer of mulch to potted plants has the same advantages as mulching the garden. I use 1/2″ of pine fines, and sometimes shredded hardwood.


Amendments For Annuals

Potting soil with a high percentage of coarse drainage material, such as pine fines or perlite, tends to dry quickly. The soil doesn’t hold water, due to the large air pore space between the particles. Supplementing the potting soil with compost, peat moss, fine coir, or even some clean loamy topsoil from the garden adds more particle surface area where water can cling. You don’t want to create a heavy soil, though, that doesn’t drain well enough.

Rountree's potting soil

Planting mix, above, with high levels of pine fines, is best used to improve garden soil. Potting soil tends to have more finely textured materials.

When I lived in Maryland, Leaf-gro was readily available to amend potting soil and garden beds. I used tons of it! It was pure, rich compost, and was the end product of all that yard debris (weeds, grass, leaves) sent to the recycling center.

An additional benefit of using garden loam is the introduction of root-friendly microbes and micro nutrients, although you might have to pull a weed now and then. I can see you shaking your finger and warning of soil pathogens and worms…yes, true. If you’re concerned, you can buy bagged products that have been pasteurized. Ask to see the contents, though. The last bag of “sandy loam” I purchased contained mostly finely ground pine bark and sawdust.

Water-holding crystals are another option for potted plants and garden beds. Read directions carefully. Don’t add dry crystals to a pot; they need to be pre-moistened. I never found them to be that effective, but these new potting soils with all those pine fines might be improved with them.


Amending After the Fact

Supplementing bagged potting soil is becoming common practice for my pots these days. For the potted tomatoes that were drying too fast, I scratched about a gallon of clay loam from the vegetable garden into the top layer of soil in each 20″ pot. With each watering, the fine particles will sift down through the pot, filling some of the pore spaces.

It seems to have worked. The tomatoes aren’t beginning to wilt by mid afternoon after watering in the morning. And, on some days, I can even skip a watering. Much better.


Fertilizing Annuals

Heat-tolerant plants growing in pots will run out of fertilizer within just 2 to 4 weeks, depending on soil quality. Frequent watering and rainstorms leach nitrogen, in particular, through the soil. And, once nitrogen levels drop too low, older leaves will turn yellow, the plant might become pale overall, and growth will slow down. Nitrogen is the macronutrient that is needed in greater quantities than any of the other nutrients.

Each plant species is different. Some need more phosphorus or iron or magnesium. Check the label for a comprehensive list of ingredients.

Many annuals are particular about soil pH; some need acidic soil, while others tolerate a higher pH. At either end of the scale, certain nutrients become unavailable to plants. Most plants, however, grow well enough over a fairly broad range. But, if you notice yellowing, consider taking a soil test and having the chemistry analyzed.

Garden centers stock many kinds of fertilizers. They’re available as soluble crystals, dry granules, liquid concentrates, and as slow-release (or timed-release) prills.

Fast growing annuals need regular applications of nutrients. Rather than a feast-or-famine regimen, put the plants on a schedule so they never show the effects of “hidden hunger”. This and other good horticultural practices will keep your plants in prime condition until the end of the season.

Slow-Release Fertilizer

At high temperatures, slow-release fertilizer is consumed faster than the label might indicate. So, a 6-month product might be depleted after 4 months at 85°. Instead of simply placing the prills on the hot soil surface in a pot, dig a few small holes between plants, add the prills, and cover them with about an inch of soil. This will keep them cooler and prevent rapid release of the fertilizer.

In gardens, slow-release fertilizer can be placed under the mulch, scattered over the root zone. A small amount is released as water percolates through the medium.


Pot Colors


heat tolerant annuals in pots

As these plants grow, they will shade part of the pots’ surfaces as summer temperatures rise.


Roots growing on the sunny side of dark pots, in hot summers, can heat to the point of death. So, most plants prefer light colored pots that reflect energy from the sun. If you really want to use the new rust-brown pots by the front door, add plants that trail over the side of the pot, shading enough of it to make a difference.

Another option is to use an insert, a plastic pot that sits inside the pretty pot, with space for hot air to escape. Maybe your beautiful teal pots can be tucked under the tree near the pool and planted with shade loving annuals.

This isn’t a concern in most parts of the country, but in southern states, the plants will appreciate this detail. Choose heat tolerant annuals that are less likely to be damaged by these conditions.


Winter Pots

Conversely, in chilly winter climates, dark pots absorb the sun’s warmth, delaying freezing of the soil. Find out if your pots will tolerate frost, and make sure they drain freely. “Frost resistant” does not mean “frost proof”.

When I potted large planters for customers’ winter gardens, I included sheets of styrofoam in the shoulders and on the sides of the pot, which absorbed the soil expansion as it froze. Pots with straight or sloping sides, with no curved shoulders, allow freezing soil to heave upward, usually avoiding breakage. In Maryland winters, expensive concrete pots were most likely to survive the cold.


Evaporative Cooling

clay pots

Efflorescence on clay pots.

Most terra cotta pottery is porous, allowing air and water to pass through the sides of the pot. Some clay pots, though, are fired at higher temperatures, making them non-porous.

A clay pot with moist soil stays relatively cool, as moisture wicks through the pot. As water evaporates, the surface of the pot feels cooler. The same principle applies to perspiration evaporating from your skin. So, decorative clay pots in the summer are another alternative. But, they dry out faster because of the moisture loss through the pot.

The pots in the photograph have a white mineral coating called efflorescence. When fertilizer salts in solution migrate through the clay, they crystallize as the water evaporates. It can be removed or enjoyed.


Nursery-Grown Landscape Plants


nursery trees


Because containerized nursery plants are watered daily in warm weather, growers use a mix comprising mostly fast-draining pine fines, sand, and perlite, with some organic matter (peat moss, ground coir, compost) for water retention.

During hot summer weather, it is important to get transplants established as quickly as possible. New roots reluctantly grow into the native soil, but can be encouraged to do so by scoring the root ball or by teasing out some of the roots on the sides. This causes slight injury to the roots, and stimulates the plant to quickly form new side roots from the pericycle, a layer of cells inside the root.

Also, amending garden soil with organic matter, such as nutrient-rich compost, and pine fines for better drainage creates a welcoming habitat for new roots. Heavy clay soil is not very accommodating and hinders rapid rooting. You want to give your plants soil that drains well and entices roots to grow deeply. If you’ve ever tried to dig in dry, compacted clay soil, you know why plants are slow to establish. Good soil preparation makes a huge difference!


Why New Plants Sometimes Fail

A newly planted ‘Soft Touch’ holly, azalea, or autumn fern needs to have water replenished in the root ball every day in hot breezy weather. Until new roots expand into the soil, plants are entirely dependent on you for their daily dose. Make sure the water isn’t too hot.

I often consulted with homeowners when their new plants failed. When the shrubs were unearthed, their roots often were quite dry.

One landscape I visited here in Charlotte had very large evergreens newly planted in front of the house. All were dead or dying during a prolonged drought. After a little digging, I saw that 95% of the root system on each plant was bone dry because there was no organic matter mixed into the heavy clay soil. And only one irrigation emitter was placed on the side of the root ball. Each plant this size would have required a few emitters.

To make matters worse, the soil had been backfilled in large clods, and not broken up at all. Any water that flowed from the emitter drained right into the crevices, bypassing the root system. Those large air-filled gaps dried exposed roots even more. Any moisture in the root ball was quickly wicked away by the clay. This costly disaster illustrates the need for thorough soil preparation: breaking up heavy soils, incorporating amendments (drainage materials, organic matter) for improved tilth, and firming the soil around the root ball.

The problem is this…

…and it’s a point that doesn’t get a lot of attention. Water is sucked into the tiny spaces between clay particles by capillarity. And what’s abundant in soils throughout much of the country? Clay! So, when the shrub’s potting soil that is mostly pine fines (with large air pore spaces) sits next to native soil that’s composed of mostly clay (with tiny air pore spaces) what happens to the water? That’s right! It’s pulled from the shrub’s potting soil into the surrounding clay.

Clay always wins! This is one explanation for nursery plants that fail, even though the surrounding soil in the bed feels damp.

The remedy for a shrub with a high percentage of pine fines and perlite in the pot is to work some of the native clay into the root ball. Poke some holes a few inches deep (try using a dibble) on the surface of the root ball and fill with a few handfuls of clay or loamy clay; water it in.

This improves the water-holding capacity of the soil inside the root ball. Granted, this is a fine point. But the principle was effective for the potted tomatoes, mentioned in “Amending After the Fact”, above.


When Can I Plant?

Shrubs and trees establish in the landscape faster in autumn, when soil temperatures are still warm enough to promote root growth. Even in chilly soil, in the 40’s F, roots can grow. Air temperatures are more moderate then, and rain falls more predictably. The next best time is early to mid spring, as the soil begins to warm and before the trees leaf out.

But plants can settle into the landscape during the summer, too, as long as soil preparation was adequate and water is provided when needed. That ‘Jelena’ witch hazel would much rather be in the ground than sitting in a black pot at the nursery on this Independence Day.

Summer annuals root quickly, but give them enough water to prevent wilt. They’ll probably need water every day until their roots grow more extensively through the soil. And give them enough to moisten the entire root ball and the surrounding soil. It takes only one sunny 90° day to dry that new plant to a crisp!


Reservoirs and Saucers


creekMost hanging baskets and large plastic pots have a reservoir or an attached saucer at the bottom. It holds an inch or two of water that the plant’s soil will gradually absorb by capillarity.

It isn’t necessary to drain it off in the summer, if the plant is full of foliage. Any water the soil can’t absorb within 30 minutes, however, should be poured off.

For young plants and for succulents or plants that like dry soil, the reservoir or the saucer should be drained. Pour the excess water onto other plants instead of wasting the nutrients. Even worse is to let dissolved fertilizer wash down the street to the storm drain, eventually polluting the local creek.

Another option is to remove the saucer and allow water to drain freely into the flower beds or the shrub border.


Planting Wire Baskets

When I plant a wire basket, I line the inside of the coco liner with a “repurposed” sheet of plastic, such as an empty mulch bag. The plastic prevents evaporation through the coco liner, and slows decomposition of the coco liner.

Be sure to punch holes through the plastic in several places to allow drainage. But leave the bottom inch or so intact, forming a reservoir to hold water a bit longer, until it’s absorbed by the plants.

(For decades, as owner of Wellspring Garden, I never bought trash bags. I saved all the empty bags from potting soil, amendments, and mulch for that purpose. Using less plastic is the way to go!)


So, It’s Your Turn To Host the Party


red-white-blue


A trip to the garden center reveals plenty of options to dress up the landscape for the holiday:

  • full grown, colorful blooming baskets for the deck or the porch
  • a potted combination “drop-in” worthy of that gorgeous ceramic container near the front door
  • some large annuals, in 6″ or 8″ pots, for the garden, looking as if they’d been growing there for months
  • a potted herb garden that guests can pinch to customize their salads (basil, chives, and others), and some mint ‘Julep’ or ‘Kentucky Colonel’ for iced tea, or other beverages.

Finally, string some lights for evening ambiance, and add red, white, and blue accents to celebrate Old Glory. Don’t forget to bring greenery into the powder room, in a pretty pot, adorned with a small flag.


Headings

Page 1: Happy 4th of July!, Mulch the Beds (Types of Mulch, Gravel In the Garden, Landscape Fabric), Water the Garden Beds (About the Hose), Water and Potting Soil (Amendments For Annuals, Amending After the Fact, Fertilizing Annuals, Slow-Release Fertilizer), Pot Colors (Winter Pots, Evaporative Cooling), Nursery-Grown Landscape Plants (Why New Plants Sometimes Fail, When Can I Plant?), Reservoirs and Saucers (Planting Wire Hanging Baskets), and So, It’s Your Turn To Host the Party

Page 2: Heat-Tolerant Annuals

Return to the top

The Hendersonville Garden Jubilee, 2019

2019


So, What Can I Add To the Garden This Year?


This past Saturday, I headed for the cool North Carolina mountains to attend the Garden Jubilee Festival. Over 250 vendors set up their booths on the streets of downtown Hendersonville, on Saturday and Sunday, from 9:00 a.m. to 5:00 p.m. It was going to be hot, but Charlotte was going to be hotter. We’ve been stuck in this prolonged period of July-like weather, and the grass is already browning out.

I love going to garden shows. Rain or shine, but, preferably, not extreme heat. This is the type of venue where my little horticultural company, Wellspring Gardens, sold herbs and vegetables, annuals, perennials, seasonal plants, and houseplants…succulent dish gardens, herb gardens in decorative clay pots, and colorful combinations. If it sounds as if I would like to do this again…well, you’re right.

Many of the vendors I met last year were back again. Some who braved constant rain a few weeks ago in Waynesville were here in Hendersonville, happier about the weather. This garden show traditionally runs during Memorial Day weekend. Here are some of the booths I visited.


water feature, Hendersonville garden jubilee


Water Dance


“Water Feature Specialist”

This outdoor display (photo, above) required 5 hours to set up on Main Street. The company installs water gardens, patios, and other landscape projects. They also maintain them.

www.waterdancellc.com, waterdancellc@gmail.com.  828 687-9007, 828 712-8268.


Brigg’s Garden Center, Horse Shoe NC


I started the day at Brigg’s, after finding a shady parking space. They had lots of annuals, perennials, and shrubs, including blooming hydrangeas. A few pots of blue/lavender Hydrangeas clustered around a blue ceramic seat created a lovely color combination.

They demonstrated, under the city’s trees within their space, the value of repeating colors within a garden by grouping plants with related colors. Lots of customers. I bought a few bright yellow Sanvitalia, or creeping Zinnia, for pots.

Briggsgardencenternc.com.


Stepp’s Plants, Etc., Flat Rock NC


swingtime fuchsia

Fuchsias like cooler temperatures, such as eastern (morning) sun. And hummingbirds love them.

Stepp’s had the biggest and some of the best-grown plants at the show. Their specialty, at this show anyway, was large combination hanging baskets. Nice combinations, good healthy plants, beautiful, and selling like hotcakes!

One or two plants filled the little red wagons that customers carted them around in. Gorgeous fuchsias, million bells (Calibrachoa), petunias…

steppsplants@yahoo.com. Larry Jr., Gayle, and Larry Stepp. 828 243-5299.


Plant Smart Shade Gardens


Karen had a large collection of Hosta varieties, from large growing plants to miniatures to unusuals. Tiny golden ‘Little Miss Muffet’ grows only 4″ tall, nice for tucking between rocks or at the edge of a shady garden walk. ‘Whee!’ grows to 15″ tall and has rippled edges. ‘Golden Tiara’, with gold margins, quickly fills a space and is a medium small variety.

Hosta breeders are trying to bring new features to this huge genus. Several recent introductions have red petioles, including ‘Fire Island’ and ‘Miss Susie’, two that were represented here. Informative signs.

George and Karen Smart, hostas@alwaysplantsmart.com, facebook.com/AlwaysPlantSmart.


Barry Farms


Lots of herbs, including uniquely fragrant patchouli, and hardy succulents. They also had one of my favorite annuals, the variegated Nasturtium ‘Alaska’, which is both pretty and edible.

barryfarms@gmail.com.


Landy’s Woods, Nebo NC


Natural log and wood planters. Simply drop in a large pot of plants and add some moss to the edge for a finished look.

Landyswoods@gmail.com.


MrMaple, East Flat Rock NC


Concurrently with this event, MrMaple on Saturday hosted the “MrMaple Festival 2019” in East Flat Rock. Ever popular Japanese maples and other species, many rare varieties…and expert advice to ensure longevity (for the tree) in the garden.


Japanes maple Red Filigree Lace

‘Red Filigree Lace’ Japanese maple.


mrmaple.com. Tim Nichols 828 551-6739, and Matt Nichols 828 226-5684, facebook.com/japanesemaple. Open to the public by appointment.


Linda’s Plants


Many nicely-grown flowering plants, including Osteospermum, Verbena, herbs, sweet potato vine. Busy booth!

lindasplants.com.


Lindas plants, Hendersonville garden jubilee

Linda’s Plants.


Ziba Cards and Jewelry


zibaKaren had hundreds of glass-covered pendants for sale. Images in a broad range of subjects (birds, zebras, plants and flowers, religious, inspirational, insects, graphics, music…).

Karen Rollefson, www.zibacards.com, zibacards@gmail.com. 704 806-1725.


caristo silver jewelryCaristo Jewelry Designs, Asheville NC


Silver bracelets with free “organic” design, and nicely detailed enameled (cloisonné) earrings and pins.

Southern Highland Craft Guild. www.caristojewelrydesigns.com, caristojewelry@yahoo.com. Linda 828 691-7700 and Carl 828 778-7247.


Wildwood Herbal


pink gypsophila“Plants-Produce-Cannabis”

Succulents, herbs…this is where I found the pink flowering gypsophila that’s going into the small wire basket on the deck. I used to grow one like this from seed, nice in smaller combinations. I’ll post the cultivar name as soon as I can recall its name (‘Pink Fairy’?).

Darsey Driver, 336 692-7615, Darsey@wildwoodherbal.org. And Seth Salmon, 828 407-3339, Seth@wildwoodherbal.org.


Dean Epperson


Hand-made natural live-edge wood tables and seats, complete with Ambrosia beetle tunnels and verticillium streaks. So…bugs and fungus, but beautiful bugs and fungus! Nature is awesome.

deanepperson@gmail.com.


Memories by Laura, Franklin NC


“Vintage Framed Memory Art & One of a kind collectibles”

Teacups, old keys, crystal butter dishes, small cut glass bowls, glass beads, decorative metal accents and other treasures fused in a glass panel and framed.

Hang them in windows or wherever light passes through them if plants are kept in the cups. Try small succulents and tillandsias (air plants).

Laura Williams—LL Design, www.MemoryGlassArt.com, laura34275@gmail.com. 942 223-9109.


dancing peacock mapleHigh Country Nursery


Acer japonicum ‘Aconitifolium’ (Dancing Peacock), must be spectacular in full autumn “plumage”, when showing off its scarlet and orange foliage.

japmaple.com.


green wind chimesWindy Mountain Chimes, Asheville NC


Stained glass of the audible kind, including wind chimes in red-white-and-blue, appropriate for this Memorial Day weekend.

I bought one in peaceful shades of green, with glass and beads hanging from an old horse shoe.

Mother enjoys the nice sound when we “accidentally” bump into it, where it temporarily hangs on the kitchen wall.

Denise Parlier, mtnchimesandcrafts@gmail.com. 828 667-3518.


J & B Herb & Plant Farm, Inc., Roxboro NC


Bay laurel! I had just run out of the last of the dried bay leaves, so I bought a nice, full plant. Make sure you’re buying Laurus nobilis for cooking, since other similar laurels are toxic if ingested. J & B carries a wide variety of organically grown herbs, vegetables, and scented geraniums.

On my way back to the truck, I bought a pot of Origanum ‘Compactum, a marjoram with velvety leaves and wonderfully aromatic fragrance. Although both of these herbs are hardy to zone 8 or in a protected microclimate here in zone 7b, I lost the two that I had a few years ago. But I’m not going to take the chance again, and will keep these potted herbs outside in the summer and inside during the coldest parts of winter.

www.facebook.com/JandBHerbFarm.


Bella Bonsai


Many species of potted bonsai…tiny-leaved variegated Serissa, variegated Schefflera arboricola, dwarf Pomegranate (with fruit), citrus plants (with fruits), Fukien tea. But the showstopper is the old Yaupon Holly that had been cut back as a mature plant, sprouting above a magically, fantastically gnarled trunk (photographs, below).

Larry Morton, BellaBonsaiNursery.com, bellabonsainursery@gmail.com.


Hendersonville Bee City


gulf fritillary butterfly

Female gulf fritillary butterfly.

“Celebrate Pollinator Month by learning about how bees, birds, and butterflies are crucial to our native plant habitats, local agriculture and the health of our communities.”

You’ve come to the right place, to this display, if you want to know anything about bees. Information on an initiative to repopulate the environment with bees and other pollinators can be found at Hendersonville.gov/bee-city, with a month-long calendar of events. June is, after all, Pollinator Month. Proceeds from plant sales go toward painting a mural on one of the Hendersonville buildings. I bought a perennial Passiflora (photo, right, with one of the dozens of gulf fritillary butterflies that laid eggs on the vine).

Hendersonville.gov/bee-city.


Muddy Llama Pottery Studio, Zirconia NC


“From Earth to Art”

Among the collection of bowls, mugs, vases, and (I had to ask) sponge racks, some had salamander handles and real leaf impressions. Most of their pottery is sold through retail stores.


Cathey Chet, muddyllamapottery@yahoo.com.  828 674-2671.


Canvas bags, hats; shows in Hendersonville, WaynesvilleAll Things Canvas, Bryson City NC


“Hats—made of 100% cotton duck. Bags—made of 100% Acrylic Sunbrella®. Highly resistant to UV rays, water and mildew.”

Well-made, and in nice colors, these items will last a long time.

Jan Kleinrath, www.jansallthingscanvas.com, info@jansallthingscanvas.com. 828 788-1767.


Preston Montague


“Artist, Educator, Landscape Designer”

I bought a card, but I doubt if it will be mailed away. It shows a flurry of monarch butterflies. Meticulously detailed natural elements in all of his artwork, and in the display—mosses, bracket fungi, and a cicada!


Preston Montague, carolinanaturalist.com, naturalistnc@gmail.com. 336 558-6137.


The Silk Thread, Franklinton NC


“Eco printing. I gather leaves, plants and flowers and through a natural process, transpose Nature’s actual colors, designs and faux textures onto pure silk in my NC Studio.”

Silk and raw silk, naturally imprinted with leaves, moss, and even pecans! Treat yourself to something unique and beautiful. Clothing, purses, scarves. Exquisite compositions.

Theresa Brown, theresa@thesilkthread.com. 919 880-7431.


   *    *    *    *    *    *    *    *    *


yaupon holly at Hendersonville Garden Jubilee

A woman sitting under a huge tree?? Actually, it’s the Yaupon holly bonsai, from Bella Bonsai, less than 2 feet tall.


Hendersonville Garden Jubilee 2019


oaklead hydrangea, Hendersonville garden show

Oakleaf hydrangea in one of the large streetside planters.

This show was sponsored by Lowe’s, “Our State” Magazine, and the city of Hendersonville NC. The schedule included 5 presentations each day, with topics ranging from plants for shade, unique trees, native plants, pruning, and lawns to native bees, composting, mushroom logs, starting a veggie garden, and joy in gardening.

Thank goodness for the shade cast by trees up and down the street. Lots of shrubs and perennials were in bloom, adding to this town’s reputation for bringing ambiance to the busy downtown shopping district. “Leave your pets comfortably at home” during show hours.

There were some food vendors, and Hershey’s ice cream, whose chocolate chip mint hit the spot! And, of course, the local shops and restaurants were ready and waiting for visitors.

VisitHendersonvilleNC.org. 800 828-4244.


Thanks to all the participants, the sponsors, and the crowds for making this another successful event. Great show, Hendersonville!


The 2020 Hendersonville Garden Jubilee


***Update*** 5/1/2020: The 2020 Garden Jubilee will have a different look this year, in order to enforce hygiene and social distancing required by state and federal authorities.

So, in 2020, the festival will take place from May 22 through May 25, from 9 to 5, but not in downtown Hendersonville. Instead, booths will be clustered at various nurseries and other sites in the area.

***Update*** 5/22/2020: This link will give you updated information and a list of participants. In 2020, downtown Hendersonville was awarded Accredited Main Street America recognition for maintaining a vibrant economic community in their historic downtown.

Until the vaccines come along, we need to follow such practices so fewer of us become casualties. My best wishes for your good health, and I’ll see you in Hendersonville…or thereabouts!


Return to the top

Pollinators: What’s All the Buzz About?


What’s All the Buzz About Pollinators?


Trips to the garden center and articles about landscaping and edible gardening. Radio garden programs and school field trips. What do they have in common?


fruit tree, honey bee


The subject of Pollinators will come up!


bee, pollenAnd for good reason: we rely on pollinators for more than a third of our entire food supply! Without the bees, butterflies, bats, and hummingbirds, we would not be able to feed our growing populations. Apple, peach, and nut trees, tomatoes and peppers. Zucchini, cucumbers, berry bushes, and farm animal feed. These are just a few crops that depend on these little critters. Trees, grasses, shrubs, and wildflowers also rely on pollinators for procreation.

Pollinators are attracted to the flowers’ sweet nectar, for carbohydrates, and to pollen for proteins and lipids. Insects and other pollinators gather nectar and pollen from the flowers they visit. During this beneficial arrangement, called mutualism, they unintentionally transfer pollen grains from one flower to the next.


The Fruits of Pollination

Pollen (the male component) deposited onto a receptive stigma (female) in a flower belonging to the same species initiates the fruiting process. The half set of haploid chromosomes in ovules and sperm are recombined during fertilization. (This is not the kind of fertilization that involves nutrients). This restores the full diploid chromosome count. The ovary (fruit) grows and toughens, protecting the seeds until the fruits are harvested or the seeds dispersed.

Fruits, though, aren’t limited to the recognizable apples, peaches, and pears on a grocery store shelf. Botanically, a fruit is any seed- or spore-bearing structure in flowering plants and other organisms. This includes wheat, a kernel of corn, a plump blueberry, a sweet cherry, or an heirloom tomato. Even fungi, including mushrooms, have “fruiting bodies”.

Animals attracted to these nutritious fruits aid in seed dispersal, although in many cases, the seeds themselves are consumed and digested.

And there are some anomalies in Mother Nature’s kingdom that permit us to call strawberries “fruits” or “berries”, although they are neither! The luscious little strawberry is the swollen receptacle, the part that connects the flower to the stem. The actual fruits, or achenes, are those little brown things on the outside. And there’s a seed inside each achene.

No pollination means no fruit in up to 80% of our edible crops!


Honey Bees


honeycomb, bees--pollinators

A honeycomb.


Honey bees (Apis mellifera) are not native to the Americas. They originated in Africa and migrated to Indonesia, Europe, and Asia. The early colonists brought them here, where they proliferated throughout the frontier, preceding the settlers’ expansion into new territory. Before this species was imported, thousands of other types of insects and animals pollinated flowers. And they still do!

As the nation’s population grew, more crops entered cultivation. Agriculture became even more dependent upon these easily domesticated pollinators.


almonds

Almonds.


California’s almond harvest relies entirely on bee activity for nut production. In fact, beekeepers ship 75% of the country’s “beehives for hire” to flowering almond orchards to ensure a good crop.

Of the many thousands of bee species found worldwide, the honey bee is the only one that makes honey. Forager bees returning to the hive with nectar give this bounty to the processor bees. Processors pass the nectar among themselves, helping to lower the water content. Then they deposit the liquid into cells and fan it with their wings to concentrate the honey. After that, they cap the cells with wax to seal the compartment.

Forager bees mix their saliva with the pollen they collected, which the processors place in the cells. Once they’re capped, the mixture begins fermenting, resulting in a substance called bee bread. Both types of cells, with pollen and nectar, also contain enzymes from the bees. Nurse bees feed this bee bread to all larvae, and the colony can access it for sustenance during winter. Enriched bee bread, called royal jelly, is reserved for queen larvae. Not all the honey is harvested by beekeepers; most is kept in the hives.


Why All the Fuss About Pollinators?

A syndrome known as Colony Collapse Disorder has raised the alarm to protect the honey bees. It is not precisely known what prevents most of the bees from returning to the hives. However, it is known that the queen, the larvae, and the honey have been abandoned. Without help from the drones and worker bees, the colony fails.

This is not a new phenomenon, though. Farmers a hundred years ago reported losing up to 90% of their bees to this “disappearing disease”.

CCD was named around 2006, when sudden losses affected increasingly larger proportions of total hive counts. By then, some honey bee operations had lost 50 to 90% of their hives. For the next 8 years, farmers reported hive losses averaging 33% per year.


Current Research

Research has pointed to several possible explanations, although combinations of factors are probably in play. In 2013, the U.S. Department of Agriculture and the Environmental Protection Agency joined forces to monitor CCD.

Various avenues of research are being pursued involving mites, fungi, loss of habitat, and lack of genetic diversity. Additional issues include chemical contamination of food sources and agricultural pesticides, notably the controversial neonicotinoids and fungicides. The Varroa mite and phorid flies are being researched for diseases that they could be vectoring into the hives.

Another question centers on pollen’s nutritional content from our crops, which might be weakening immunity.

In 2006, the honey bee’s genetic code was sequenced, opening up molecular approaches to treating CCD. Continuing research projects, through surveys, samples, and mitigation techniques overseen by the USDA, are getting closer to solutions. Unfortunately, there are no definitive answers for now.

Courses of action currently being followed include using antibiotics, fumigants, and genetic stock showing immunity to disease.


bee on pink aster flower, pollinators

Honey bee on aster.


So, What Can We Do About It?


To Spray Or Not to Spray

We can manage our properties in ways that are less harmful to the bees’ health. First, consider whether or not we really need to spray every insect that shows up in our landscape. No, of course we don’t!

Maybe you’ve been using a certain product for the last 30 years because it has delivered a 100% kill rate. Overkill? Okay, then, now might be a good time to reassess the need for it. By the way, most municipal recycling stations take old or unwanted containers of chemicals. Please don’t throw them in the trash or pour them down the drain or in the yard!

Make some changes today that help restore ecological health and predator/prey balance to your landscape.

If there are only a few pests damaging your plants, hand-pick them. Cutting them in half or squashing them is more humane than salting them or dropping them in a bucket of soapy water. Never use salt in the garden. A strong spray of water from the hose will wash away most of the aphids.

It’s unrealistic to be entirely free of insect life. And no one wants to live in that world.


Try Using These

In my gardens, I rarely use anything stronger than horticultural oil, organic Sluggo, or Bt. All of them are available in garden centers. See if you can tolerate less than perfect foliage or fruit in return for a cleaner environment. As I grow older, imperfection becomes increasingly acceptable.

Investigate some of the organic options, which are gaining favor throughout the gardening world. The products I mentioned are available from some manufacturers that have been licensed to print the “OMRI” logo (Organic Materials Review Institute) on their labels. Some companies choose not to pay the licensing fee, but their products are “just as organic” as the OMRI products.

Most importantly, don’t spray plants when pollinators are actively visiting them. The products mentioned above do not harm honey bees if used according to label instructions. Follow them carefully, paying special attention to dilution rates and time of application.

Bt

Bt (Bacillus thuringiensis) is a naturally occurring bacterium that paralyzes the digestive system of moth and butterfly larvae by changing the pH in their gut. After ingesting some of the Bt, the caterpillar stops feeding and dies a day or two later. It is more effective on younger caterpillars.

kale with caterpillar holes

Dinosaur kale with caterpillar holes.

I use it on the brassicas (broccoli, kale, etc.) to prevent utter devastation by caterpillars. Not using it at all means more than just a few holes in the leaves. The leaves disappear!

It works on gypsy moths, canker worms, cabbage worms, cutworms, squash vine borers, tent caterpillars, and the “very hungry caterpillar” known as the tobacco hornworm, among others.

The tomato hornworm looks similar to the tobacco hornworm (photo, below), except it has V-shaped lines and a black “horn” instead of a red one. But, again, if you see entire tomato stems denuded of their leaves, look for that hornworm first before filling the sprayer. There might be only one or two on a large plant. (Tip: if you see their poop pellets, look above them.)

Different strains of Bt also control fungus gnats, potato beetles, mosquitoes, and nematodes.


tobacco hornworm

Tobacco hornworm with parasitic wasp pupae.


Braconid Wasps

This species of Braconid wasp, Cotesia congregata, will kill or severely weaken the tobacco hornworm (photo, above). First, a female wasp lays eggs on or in the caterpillar. After hatching, the wasp larvae feed on the caterpillar’s internal tissues, and then pupate in the white cocoons.

Although it looks menacing, there’s really no need to spray this one. Simply remove the weakened caterpillar to the shrubs. The adult wasps will emerge, and then a bird or a lizard might finish off the caterpillar. The adult form of the hornworm is a type of hawk moth.


Headings

Page 1: What’s All the Buzz About Pollinators? (The Fruits of Pollination), Honey Bees (Why All the Fuss About Pollinators?, Current Research), and So, What Can We Do About It? (To Spray Or Not To Spray, Try Using These, Bt, Braconid Wasps)

Page 2: Planting for Pollinators (For Bees, For Butterflies and Moths, For Hummingbirds), Pollinators In the Landscape (Plant Selection, Host Plants and Nectar Plants, The Importance of Native Plants for Pollinators, Water and Minerals, Shelter), Attracting Pollinators to Your Garden, and National Pollinator Week
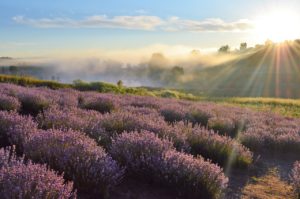
Return to the top