Tag Archive | lettuce

Sowing Seeds For Early Crops

2024


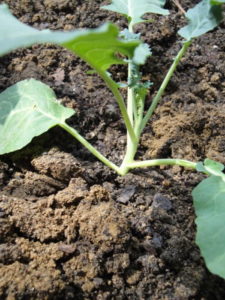
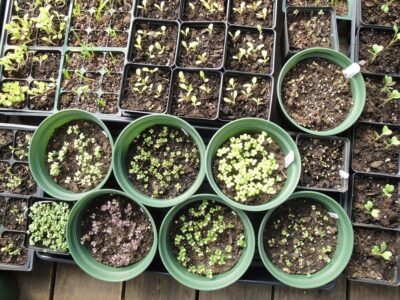
A few days after sowing brassica seeds.

Brassicas germinated 3 days after sowing seeds in these round 6″ pots.


Sowing Seeds For The First Crops: Too Early?


The calendar is approaching my favorite part of the year—warming temperatures… birds singing their special songs… starting seeds for the garden. New crops of brassicas—arugula, broccoli, cabbage, cauliflower, collards, kale, mustard greens, pac choi—top the list. I also grow lettuce, spinach, Swiss chard, peas, bunching onions, and others. In this article, I’ll describe an easy step-by-step process for sowing seeds you can do right now.

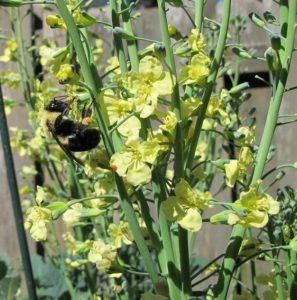
bumble bee on flowering broccoli

Bumble bee on ‘Arcadia’ broccoli in spring.

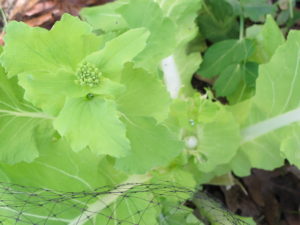
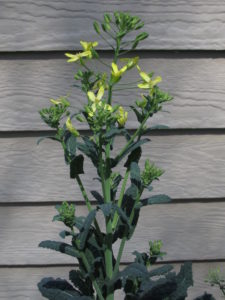
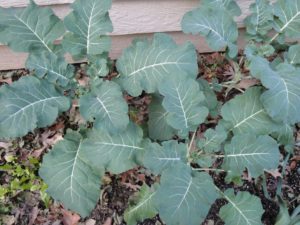
Some varieties of leafy greens are productive from early autumn through spring here in zone 7b, in the Piedmont of North Carolina. Last fall’s crops will flower in late winter or spring (photo, right), and are then replaced with young transplants. With cooperative weather, cool season crops offer a fantastic return on investment!

Starting in early March, I’ll sell transplants at local farmers’ markets or plant them into my own gardens. In preparation for the season, though, growers have nurtured these plants for 4-6 weeks before they’re offered for sale.

It’s important to plant young plants; heading crops, such as broccoli and cauliflower, confined in cell packs only 1 or 2 weeks too long will not properly head up. So, it’s important to start sowing seeds at the proper time—not too early and not too late.

Gardeners living in colder climates need to adjust their gardening calendar accordingly. Yes, at this time, it might be too early for some. Leafy greens prefer chilly weather. Many fail in the heat of high summer, although they might succeed in northern gardens (northern hemisphere) at that time. With careful variety selection and placement (light shade during the hottest hours of the day), we can stretch the season for these healthy greens.


“How do I use these greens?”

Although I’m not a vegetarian, cool season greens are the foundation of my diet. I can’t tell you how satisfying it is to pick fresh greens for salads, sauces, veggie omelets, soups, sandwiches, and stir-fries in winter. And as a side dish, on pizza, with pasta, and in smoothies, if you like them. It never gets old!

Cool season greens are versatile in the kitchen but curiously underrepresented in our gardens. Considering the fact that many contain the highest levels of vitamins, minerals, fiber, and beneficial antioxidants among edible foods, it’s a wonder more gardeners aren’t growing them! The brassicas (Brassicaceae family, formerly Cruciferae) are particularly nutrient-dense, and this family of plants is the only one with measurable amounts of the sulforaphanes. Sulforaphanes are antioxidants that help prevent cancer, type 2 diabetes, cardiovascular disease, and inflammatory illnesses. They also help maintain eyesight, brain function, and heathy skin.

Growing your own produce from seed saves money in these times of high inflation. You can harvest what you need for the day, so nothing goes to waste. And most crops can be grown cleanly, without pesticides, before the insects move in. Furthermore, there are hundreds of varieties to choose from that never appear in garden centers or grocery stores.

Maybe you’d enjoy experimenting with new varieties each year, as I do. Some have become my favorite foods, so they’re planted in my gardens each year. Among cool season greens, those include my favorite vegetable—mini broccoli ‘Happy Rich’—as well as ‘Nabechan’ bunching onions, Johnny’s AllStar Gourmet Lettuce mix, a butterhead lettuce called ‘Skyphos’, arugula ‘Astro’, ‘Arcadia’ broccoli (in autumn), dinosaur kale, and ‘Sugar Snap’ and ‘Oregon Giant’ peas.

Ready to begin?


Preparing To Sow Seeds
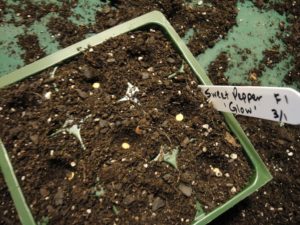
 

9-cell market pack with pepper seeds

Pepper seeds sown in a 9-cell market pack.


It’s helpful to read this entire article before proceeding so you can gather materials and plan your setup. You will need:

  • supplies (cell packs or pots, flats, labels, soil, seeds, vegetable fertilizer)
  • warmth to start the seeds
  • a waterproof surface
  • adequate light to keep seedlings healthy and strong
  • timely transplanting to prevent crowded plants
  • detailed records for future reference

Perhaps you’ve chosen lettuce, arugula, and ‘Black Magic’ kale seeds for your first project. You’ll need clean cell packs or pots, fresh seedling mix, and at least one flat to keep them in. You might already have used pots and flats lying around somewhere. Clean them first with a 10% bleach solution to kill pathogens.

Instead of trashing the failing window blinds, I cut the plastic slats, which make perfect plant labels. You can also use a plastic milk jug. Sharpie pens write smoothly, but the ink eventually fades in bright sun. Placing the label below ground or on the shady side of the plant keeps it legible for a while longer. A journal or a computer log is recommended as a backup and for additional notes.

I recently bought a few inexpensive heavy gauge flats from a big box store. Made by Ferry-Morse, they have no holes in the bottom and measure 10 x 20½” (inside diameter). They’ve proven their usefulness for holding pots of germinating seeds, so I’ll go back for several more.


Temperature For Sowing Seeds

Successful germination depends on a source of warmth if your home is on the cool side, as mine is. Although lettuce can sprout at 40-50° F, it germinates erratically or not at all above 70-75°. Other greens will get off to a better start when the soil temperature is in the 70’s to low 80’s. After germination, these seedlings will need cooler temperatures.

What are the options? Heat mats are available. One that measures 21 x 21″ consumes 45 watts of electricity and costs about $40-60. Larger commercial sizes, for 8-10 flats, cost over $125.

Maybe the top of the water heater provides suitable temperatures for starting a few pots of seeds. You might need to moderate the heat by raising the pots above the warm surface. Check them daily!

Miniature Incandescent Christmas Lights
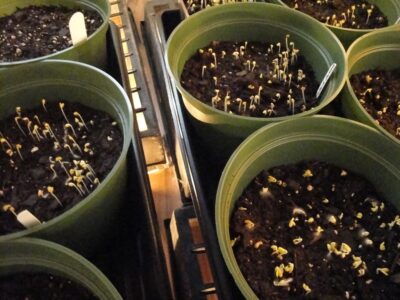
 

mini lights under flats of seedlings

These brassica seeds germinated overnight, above the mini lights.


I use indoor/outdoor miniature incandescent Christmas lights for warmth—not light—under the seeded flats. One 100-bulb string of lights (approximately 40 watts) on the hard floor of the spare bedroom and covered with 6 upside-down mesh flats (photo, above) works for me. Their gentle warmth is distributed over a large area, so I can start many flats of seeded pots at one time.

Be careful not to crush any bulbs, as this can cause remaining bulbs to burn hotter or to go out entirely. Don’t use higher wattage bulbs. Safety first!

You might want to test this layout before proceeding. Perhaps you have a folding table or counter space in the utility room that could serve this purpose.

When that greenhouse kit gets built, I’ll probably start seeds out there. Indoor space is very limited, and plants fill every bright window. Now that the knee replacement has improved mobility, I’ll work on a more efficient infrastructure for sowing seeds and transitioning them to outdoor growing. Maybe I’ll start seeds indoors and grow them on in the minimally heated greenhouse; it all depends on the severity of the weather and electric rates.


Preparing Pots For Sowing Seeds
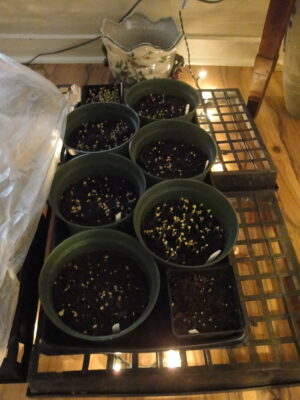
 

sowing seeds in pots

A flat of seeds over mini lights, with plastic to hold the warmth until seeds germinate.


I start over 200 varieties of plants for the farmers’ markets, so many of the flats are shifted around almost daily. After the first round of seedlings has been transplanted, I start another. Some varieties need more time to sprout, while others, such as arugula, germinate in just 2 days.

A sheet of clear plastic over the flats holds in humidity and warmth from the mini lights. Labels identifying each variety hold the plastic above the soil. For good air circulation and to let condensation evaporate, keep the plastic open on the edges.


Light For Germinating Seeds


sun and clouds


Your seedlings must receive direct sunlight or strong artificial light as soon as they emerge from the soil. One or two days in inadequate light will cause the seedlings to weaken and stretch toward the light, so don’t delay getting them into the sun.

From horticultural supply companies, you can find ready-to-assemble light stands with shelves and LED fixtures. There’s one with 3 shelves, six 4′ LED tubes, and an attractive powder-coated aluminum frame that costs $1,000. Smaller units for 1-3 flats are more affordable at $100-400. They might give off enough warmth to satisfy the need for warm soil. One advantage in using this setup is that the light fixture above each shelf sustains transplanted seedlings for 2-3 weeks as long as the temperature is at acceptable levels. Cool season greens do best with a drop in temperature (below 60-65°) after germination.

You won’t need advanced carpentry skills to put something together yourself. One or two 4′ long shop lights each fitted with 2 daylight (full spectrum) tubes (LED or fluorescent) cost $30-70. Use 2 x 4’s for the supporting framework or suspend the fixture under a table. Chains and S-hooks raise or lower the fixture, or simply elevate the seed trays to get them closer to the light.
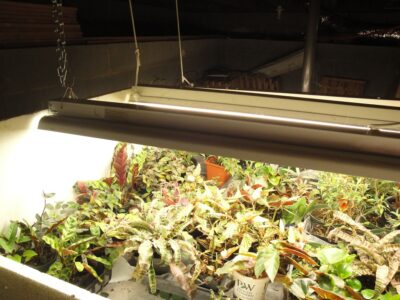


artificial light and plants


In My Basement

In the basement and over two 6′ tables, I nailed chains and rope to the floor joists and positioned the lights as needed (photo, above). I’ve used these fixtures for decades to start seeds and root cuttings, to rehabilitate plants, and to grow delicate species and stock plants.

Plants that need strong light (vegetables, herbs, succulents) grow only 3-4″ below the tubes; 12″ below the tubes, however, is too far away. Light intensity drops precipitously with each inch of distance from the light source. Running the fixtures for 16-18 hours per day should supply enough energy for the plants to grow normally.

Seedlings won’t mind 24/7 lighting over the short term. Not turning the lights on and off every day adds to their longevity.

I prefer to start seeds without relying on electricity, using just the sun. But, at times, starting seeds under these light fixtures is convenient, particularly when they can grow there for a week or two before I’m able to transplant them.


Natural Sunlight And Temperature
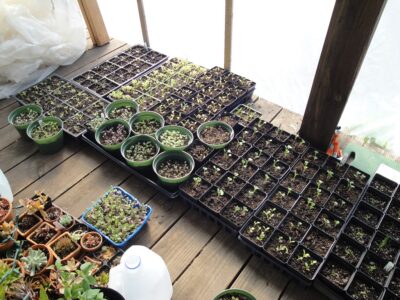


sowing seeds, small transplanted seedlings

Seedlings and fresh transplants enjoy the protected space on the porch.


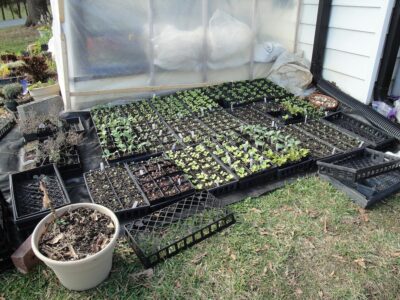
Newly transplanted seedlings go out to the sunny enclosed porch (photo, above), which faces south. I usually keep them there, in bright but filtered sun, for their first 1-2 days. On an overcast, calm day, new transplants can go outside if the temperature is above 50°. When the wind’s blowing, though, I keep the flats on the porch and vent the plastic to admit cool air. The enclosed porch—when the plastic “door” is closed—heats up to 90° or higher on a sunny winter day.

For a few nights when the porch was too cold for young plants, I brought them back indoors. Now, at the end of February, dozens of flats stay outside on woven ground cover (a durable polypropylene fabric), hugging the wall of the porch. That’s on the south side of my house, a warm microclimate. There’s less wind here and nighttime temperatures rise a few degrees above areas farther from the house.

Success depends on temperature, so I check expected hourly temperatures daily and the forecast for the coming week. I cover the flats with plastic or an old sheet when they need a little protection. But, at this stage, they’re becoming more resilient to temperature fluctuations.

In the morning, I’ll remove the plastic and let them bask in the sunshine. Those little seedlings double in size in a week, and roots are filling the pots. Almost ready for the market!

How Low Can They Go?

Maturing seedlings of cool season greens tolerate temperatures in the high 20’s and 30’s. They’ll take temperatures lower than that when they’re a bit older and planted in the garden. Remember, this regimen applies to cool season greens and vegetables, not to main (summer) season crops, which need a frost-free environment.

In this part of northern North Carolina, elevation 1200′, late February temperatures range from the mid- to high 50’s in the daytime to the mid-30’s at night. Keep in mind that those are averages and that actual temperatures can vary considerably from the average.

As an experiment, I left 3 containers of newly transplanted ‘Freckles’ lettuce seedlings outside, exposed to 21-22° on 2 nights. They’re fine! Lettuce resists damage better than some of the other crops.

One Step At A Time

We don’t want to subject tender seedlings only a few days old to the rigors of outdoor conditions, especially freezes and wind. Indoor-grown seedlings that received less than adequate sunlight will need a more gradual transition. Some will thrive, while others—the spindly, weak ones—will sulk or die.

When in doubt, proceed in incremental steps—gradually lowering the temperature and introducing seedlings to increasing sun and wind speeds. (For summer vegetables, harsh sunlight is another factor to consider.) This is called hardening off. Assuming the weather cooperates, vegetable plants can be hardened off within one week.

Root systems grow quite fast in order to supply water to foliage and stems. Leaves adapt to prevailing outdoor conditions, growing a thicker cuticle. The cuticle is a protective waxy outer layer over the epidermis, designed to slow moisture loss from within the leaves.


Growing On To Transplant Size


brassica seedlings hardening off outdoors

Broccoli, turnip greens, cabbage, and arugula seedlings hardening off next to the porch.


Choose a location where your plants can grow for another 2-3 weeks before they’re planted out. Maybe that’s a sheltered patio or the sunny side of a carport. You might need to take them indoors for the night if it’s too cold.

Check local weather reports, paying close attention to nighttime temperatures. If the cool season greens have been properly hardened off, they shouldn’t be damaged by temperatures around 30°F. After the first week, they’ll tolerate temperatures down to the mid-20’s, and some even lower.

Research the varieties you’re growing. A few cool season vegetables, such as ‘Tokyo Bekana’ Chinese cabbage, tatsoi, and Swiss chard exposed to extended periods of cold weather might bolt (flower prematurely) before reaching full size. Have an old sheet or floating row fabric available to cover them on cold nights. I’d rather plant these crops and take a chance with the weather than let them get potbound in their cell packs.

Soil warmed by the sun lends some protection to plants in the ground. Or you could repot them into 1-2″ larger containers and protect them indoors at night if it’s still too cold.

Alternatively, a caterpillar tunnel or similar clear covering placed over the garden row can protect transplants during a stretch of freezing weather. Vent it in the daytime to prevent overheating. A cold frame helps plants transition to outdoor conditions.

Good planning includes preparing garden soil so it will be ready to receive your transplants when that moment arrives.

Agricultural extension offices print spreadsheets online that indicate when to plant seeds or transplants into the garden. This guideline for sowing seeds helps keep North Carolina gardeners on track, although we need to heed local weather forecasts.


Fertilizer

lack of fertilizer in lettuce

Lack of fertilizer in ‘Freckles’ lettuce compared to 2 pots that were fertilized.

Potting soil normally doesn’t remain fertile for more than 2 or 3 weeks unless timed-release fertilizer is included in the mix. The package’s ingredients label should indicate whether or not fertilizer has been added. To maintain steady growth of seedlings, fertilize with a product formulated for greens or vegetables every 2 weeks starting 2-3 weeks after germination.

Rain and frequent irrigation rapidly leach the primary nutrient needed for greens—nitrogen—through the soil. Running low in nitrogen stresses plants, and they might not recover when they’re planted. Always keep these seedlings evenly moist—but not wet—to prevent checking their growth. Heavy rain necessitates more frequent fertilization (photo, above).

From speaking with my customers over the years, it appears that many are hesitant to use any kind of fertilizer on edible plants. Fertilizer is not toxic! Organic sources and chemical (or synthetic) sources of fertilizer break down to the same molecules, and the plant, to a large degree, decides which ones to absorb. Organics add other beneficial nutrients to the soil.

In cold soil, microbes that break down fertilizer into usable forms are not active. So, using a synthetic fertilizer in winter supplies the needed nutrients until the ground warms up. Otherwise, I do prefer organic fertilizers in all my gardens. Used frequently, chemical fertilizer kills microbes and earthworms living in the soil.

Continued on Page 2.


Headings:

Page 1: Sowing Seeds For The First Crops: Too Early? (“How do I use these greens?”), Preparing To Sow Seeds (Temperature For Sowing Seeds, Miniature Incandescent Christmas Lights, Preparing Pots For Sowing Seeds, Light For Germinating Seeds, In My Basement, Natural Sunlight And Temperature, How Low Can They Go?, One Step At A Time), Growing On To Transplant Size (Fertilizer)

Page 2: Sowing Seeds: The Process, Transplanting Into Larger Containers (The Process, Sowing Seeds and Transplanting In Multiples)
 

Return to the top of Page 1


More Quick Tips for Today’s Garden


More Quick Tips For Today’s Garden


Here are several more quick tips for the gardens in early spring. Several links have been provided, where you’ll find more details.


1. Fertilize Violas and Pansies


It’s no wonder these cold-hardy little biennials are seen all around town. They’re planted in median strips, at neighborhood entrances, around shopping centers, and in our gardens.

They live through the winter, delighting all of us with their colorful, cheerful appearance. Cold is what they like; in late spring or early summer, they will fail in the heat. This year, we had a very mild winter in zone 7b Charlotte, so they looked beautiful all season.


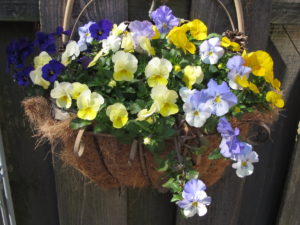
wire basket with cool wave pansies

A wire basket with hardy violas and ‘Cool Wave’ pansies.


Quick tips: As long as they’re in active growth, fertilize every 6 or 8 weeks, even in the winter! Use fertilizer that has a higher percentage of phosphorus, the middle number on a package. A ratio of 1-2-1 or 1-3-1 will work. Those three numbers represent the percentages of nitrogen, phosphorus (phosphate), and potassium (potash) in the product. They are always listed in that order: N-P-K.

Keep in mind that violas and pansies need acidic soil. You can mix peat moss into the bed in preparation for planting, also incorporating pine fines (soil conditioner) to improve drainage. Or use a product (Soil Acidifier) that will lower the pH, if your soil tests on the high side. Soil that has been limed might be too alkaline for violas, which prefer a pH level around 5.5 to 6.0.

If you have a spare hour or so, deadhead (pinch off) the old faded flowers. Whether or not that actually helps promote bloom, it certainly will improve the appearance of the plants, especially for pansies.


2. Harvest Greens


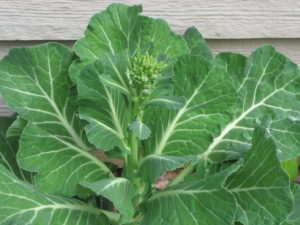
collards

Collards, with flower bud.


Recently I cleaned the vegetable garden. I harvested most, but not all, of the greens that have been producing since last fall.

Later today or tomorrow, I will wash and sauté the greens down to “wilt”. Then they will be divided into portions and frozen in plastic zip lock bags. The next time I make soup from scratch (or from a can), a rice dish with rotisserie chicken, lasagna, or buy a store-bought pizza, one or two of those bags of greens will be added to the dish. That’s an easy way to add greens to a meal, and increase the nutritional content.

The two large clumps of collards will make a fabulous Collards Soup. For that, I use a large stockpot, which makes about a gallon of soup. I also freeze some of it in plastic containers for later use.

tokyo bekana

Chinese cabbage ‘Tokyo Bekana’.

In addition to the collards, I harvested mustard greens and dinosaur and ‘Red Russian’ kales. The light green Chinese cabbage ‘Tokyo Bekana’ will be added to the next salad. Swiss chard ‘Bright Lights’ remains in the garden, and should last until autumn if it’s partially shaded.

The vegetable garden next to the house is becoming increasingly shaded. The trees on the berm to the south have grown larger and wider over the past 5 years. At this point I’m seriously considering growing a couple of tomato plants in containers on the enclosed deck, safe from the deer.

The sweet pepper plant did well enough in the garden, so it will go there again this year. But most of that garden will contain a variety of greens, green onions, leeks, and probably a cucumber. It’s still the perfect place for fall and winter greens because it’s a warm microclimate, being right next to the house. And at that time, the trees are leafless, so there’s more sun.


The Beneficials

Quick tips: Several of the brassicas are in flower, so I left a few of them in the garden for the honey bees and the tiny braconid wasps. During late winter and early spring, few food sources are available for these beneficial insects, so I like to help when I can. And you can add some flowers to a salad or as a garnish.


3. Plant More Cool Season Greens and Vegetables


dinosaur kale in flower

Dinosaur kale in bloom.

Broccoli ‘Happy Rich’ is ready! So I made a trip to the garden center a few days ago to pick up a few pots of this delicious miniature broccoli. Ordering seeds is just not feasible right now; I’d have lost 4 or 5 weeks of growing time, so I went for the quick fix: transplants!

Broccoli ‘Imperial’ is one of the varieties recommended for growing in the spring and late summer. This crop will be able to tolerate the warmth of the late spring season, when it will be harvested. I love broccoli. So many vitamins, minerals, phytonutrients…and protein too.

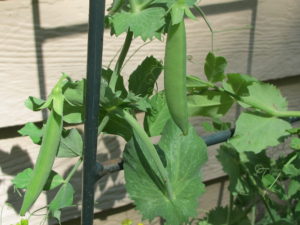
Carrot, radish, and beet seeds can be planted now, even before frost has retreated north. Pea seeds could have gone into the ground weeks ago, but the ones I planted in the fall made it through the winter, and are now flowering and making pea pods (photo, below).

As space opens up in the garden, I’ll sow seeds of mesclun, tatsoi, leeks, and maybe ‘Scarlet Frills’ mustard for its beautiful and fairly spicy foliage, adding some spark to salads!


pea vine

Fast growing edible-podded peas on a trellis.


Check with your local agricultural extension service for a chart describing what can be planted when. It wouldn’t be a bad idea to get a soil test, to remove doubt about the pH or which nutrients need to be added.


Lettuce


Salanova lettuce

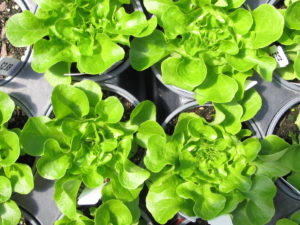
Pots of ‘Salanova’ lettuce ready for the garden.


A few pots and market packs of lettuce purchased over the past week will supplement the patch of lettuce seedlings that survived the winter in the garden. Smaller plants will continue to grow after the mature heads have been harvested.

A red butterhead lettuce called ‘Skyphos’ is reliable even in warm temperatures, up to a point. It retains very good flavor when others turn bitter in the heat.

When trying to extend the lettuce harvest, look for varieties that tolerate high temperatures. Varieties listed for planting at this time include ‘Nancy’ (green butterhead), ‘Vulcan’ (red leaf), ‘Sparx’ (Romaine), ‘Muir’ and ‘Magenta’ (summer crisp), and ‘Skyphos’, of course, one of the favorites I’ve grown for years. The heirloom ‘Black Seeded Simpson’, a loose-leaf lettuce, and ‘Outredgeous’ Romaine are more options for a spring garden.


healthy greens--AllStar Gourmet lettuce mix

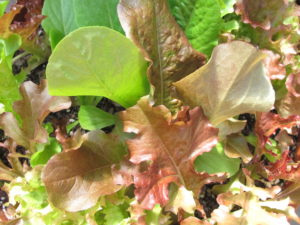
Johnny’s Selected Seeds’ Allstar Gourmet lettuce mix.


Quick tips: ‘Red Sails’ lettuce is too pretty to pass up, and it can grow well into spring. Leafy vegetables with deep green color and red pigments, the anthocyanins, have more antioxidants. These nutrients help us fight many illnesses, including cancer and inflammation. So, I always prefer richly colored varieties.

More Quick Tips: How To Grow Lettuce

Lettuce seed germinates readily at a soil temperature in the 60’s F. It will take longer, but seeds will even germinate at 45°. They won’t, however, do anything above 75° or so.

Lettuce appreciates very rich, moist soil. Fertilize every couple of weeks with high nitrogen fish emulsion, earthworm castings, or compost if the soil temperature has increased. And provide ground limestone for calcium and to raise the pH, which prevents tip burn. If a soil test indicates proper pH for greens, add gypsum instead, which also provides calcium but doesn’t change the pH. It’s best to deal with pH months ahead of planting crops.

Organic products rely on soil microbes to break them down and to make their nutrients available to plant roots. But, in winter, microbes are dormant, so I use a synthetic soluble fertilizer.

As the weather warms up, give lettuce morning sun, which is less harsh than hot afternoon sun. You can plant a quick crop between young tomato plants, in partial shade.

Watch out for slugs; scatter granules of organic Sluggo outside the lettuce bed, to draw them away from their intended meal. Slugs can transmit a form of meningitis when ingested, so… And aphids can be a problem, too, but you can just wash them away.


4. Pick the Parsley


parsley for chicken soup

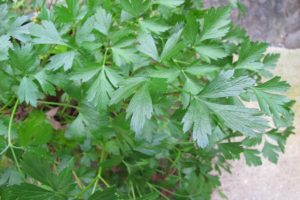
Italian (flat-leaf) parsley.

This versatile herb gives fresh flavor to meat, fish, and poultry dishes, sauces, soups, potatoes, eggs, salads, sandwiches, garlic bread, mayonnaise, and herb butter.

The addition of vitamin- and mineral-rich parsley enhances just abut anything you cook. But add it late in the cooking process, in the last few minutes, as you would most leafy herbs. Cooked for a long time, the flavors will evaporate away.

Concerned about your breath? Chew on a couple of leaves; the chlorophyll will freshen it.

There are two main groups of parsley:

  1. flat-leaf, plain, or Italian (‘Giant of Italy’, a new improved sweeter ‘Peione’, and smaller ‘Titan’)
  2. curled leaf parsley (‘Favorit’, ‘Double moss curled’, ‘Paramount’), famous as a garnish and pretty as a garden edging, but also edible.

Decades ago, as a kid, I remember seeing my grandmother in her Englewood, New Jersey, kitchen, holding a huge bunch of flat-leaf parsley inside her arm. Nanny was the real thing—Sicilian-born and a great cook—so for those looking for real parsley flavor, go for the flat-leaf.

When I was growing up, my mother (Nanny’s daughter) always used curly parsley. Several years ago, I asked her why she used the curled and not the flat-leaf. She said the Italian parsley always tasted funny, so she preferred the curled. Do you know which other herb looks like flat-leaf parsley? That’s right…she must have bought cilantro! Neither of us likes this herb at all! So, if you’ve been reluctant to buy or grow flat-leaf parsley, see if its resemblance to cilantro might be the root of that problem.


Here’s good news: it’s easy to grow!

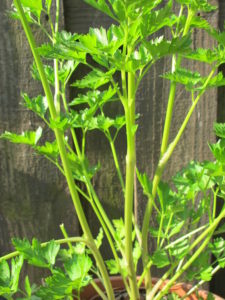
Parsley (Petroselinum crispum) is a biennial member of the Apiaceae family, a cousin of dill, cilantro, carrot, and fennel. Set young transplants into the garden in early spring, through the summer, and in the fall. Fertilize every few weeks with a high nitrogen product, such as fish emulsion. Parsley also is adaptable to growing in potted herb gardens.

In areas with moderately cold winters, it will tolerate freezing temperatures. The foliage will stay in better condition if it receives some protection from a warmer microclimate, such as next to a south-facing wall. Or grow it in a cold frame in colder climates.

parsley with flower stems

Flat leaf parsley, going to flower.

Quick tips: Plant parsley in rich soil. Amended with compost or aged manure to a depth of 12″ or more, parsley will develop a large root system when grown in the ground. ‘Gigante’ (or ‘Giant of Italy’) grows into a massive mound of dark green leaves, 2′ tall and wider than that. In spring, the stems begin to grow tall, preparing for its blooming phase (photo, right).

This is parsley’s natural cycle of growth as a biennial. It’s seeded in one year, grows, overwinters once, and then flowers the next spring or early summer. Sometimes parsley goes to flower the first year if it was seeded very early.

Harvest the plant before it goes to flower, or when you notice that the stems are growing tall (photo, right). If you wait much longer than that, the sweet flavor will become strong or bitter. Cut the stem at soil level, and remove any yellow or pale green leaves.

Cut parsley stems will stay fresh for a few days in a glass of water on the counter or in the refrigerator.


Prepare the rest this way:

  • Wash the parsley thoroughly in cool running water. Shake off as much water as you can, or put it through a salad spinner.
  • Have a couple of 1- or 2-cup plastic containers handy.
  • Remove thick stems. Cut and reserve the leaflets, and keep them intact.
  • Transfer leaflets to the plastic containers, packing them in tightly.
  • Freeze the containers.
  • The next time you need some parsley for soup or tomato sauce or roasted vegetables, simply flake off the quantity you need. Chop them before adding to cooking.
  • Simple! Although it doesn’t look like fresh parsley (it looks wilted), the flavor is better than the dried option. And it takes up less space than chopped parsley frozen in ice cubes.


Who’s eating all the parsley?

Deer and Rabbits

quick tips: dont feed the rabbits!


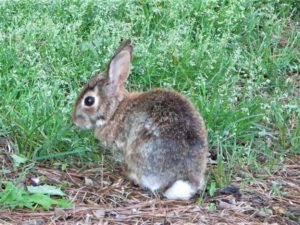
Does this sound familiar? The parsley is growing beautifully, it has great color, and it’s providing lots of clippings for the kitchen. All of a sudden, the leaves disappeared…overnight! Well, we’re not the only ones who are fond of parsley. Deer and rabbits like it, too. They can do a lot of damage in one sitting.

Quick tips: You can’t use chemical deer repellents, but you can construct a frame around the parsley plants. If you have a big old lamp shade with “ribs”, remove the fabric and replace it with bird (deer) netting. The bigger the shade, the better. Anchor it to the ground so it can’t be kicked over. Or fabricate something yourself from hardware cloth or chicken wire. Make sure young rabbits won’t be able to squeeze through the openings. The goal is to physically exclude animals from reaching the parsley, cilantro, and dill.

Black Swallowtail Butterfly Caterpillars


black swallowtail butterfly egg on parsley

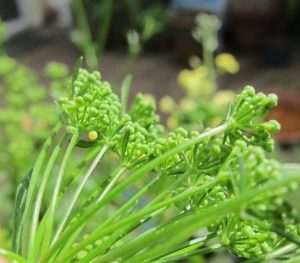
Yellow egg, left of center, on parsley flower bud.


If the parsley looks smaller than it did last week, look for little caterpillars feeding on the leaves. The female black swallowtail lays tiny yellow eggs on plants in the Apiaceae family (parsley, cilantro, fennel, dill). She deposits them primarily on the bottoms of the leaves. They’re hard to spot, but once you’ve learned to recognize them, you can simply rub them off.

Quick tips: Look for young caterpillars a few days or a week later, in case you missed a few of the eggs. The young brown and white larvae look like bird droppings, appearing less appealing to predators. An organic approach is to spray with Bt (Bacillus thuringiensis), a naturally occurring bacterium. Bt causes caterpillars of moths and butterflies to stop feeding, and they’ll die a day or two later.

But I like butterflies!

caterpillar on fennel

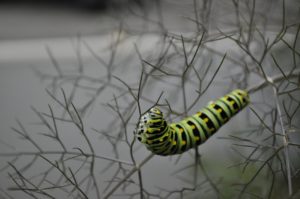
Black swallowtail larva on fennel.

Quick tips: Now, if you would rather keep the butterflies, as I do, simply transfer caterpillars from the parsley to a bronze fennel plant. Bronze fennel is a large growing and pretty perennial herb, and a food source for this insect. The fennel is edible for us as well, in salads or to garnish fish.

As the larvae grow, they turn into large black and green striped caterpillars (photo, right). These parsley worms, as they’re sometimes called, will consume more and more of the foliage. Not a problem for the vigorous bronze fennel, but a smaller parsley plant can disappear in a flash.


5. Weed!


Dandelions, chickweed, and hairy bittercress top the list of winter weeds around here. In untended fields, the bright yellow flowers of wintercress cover acres of ground, not unattractive at all!

Your local garden center can help with products that prevent weed seeds from germinating or that will kill weeds after they sprout. Don’t use them, though, near the edibles. Bring fresh samples with you. Diligent weeding and mulch are recommended.


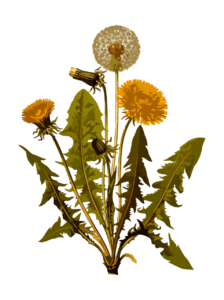
Dandelion


Derived from the French “dent de lion”, dandelion refers to the toothed (dent) edges of the leaves. Bright yellow flowers dot the landscape from late winter on. If they are not killed or removed, each of those flowers will develop into a cluster of seeds. This method of seed dispersal, by the wind, is called anemochory.

Quick tips: This weed develops a taproot sometimes more than a foot deep. Leaving part of the taproot behind after “pulling” the weed will result in a new dandelion regrowing from the root. Either remove the entire root (there’s a tool for that), spot treat with a non-selective herbicide, or use a broadleaf weed killer. Always read the labels. Keep weed killers away from herbs and vegetables.

The dandelion in our lawns (Taraxacum officinale) looks similar to edible “dandelion greens”, in the species Cichorium intybus, a type of chicory.


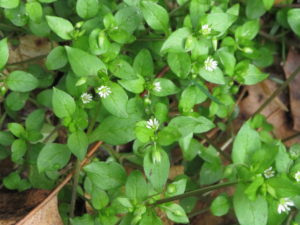
Chickweed


chickweed, quick tips: remove the seeds

Common chickweed, with small white daisy flowers.


Chickweed grows close to the ground, spreading about 1 1/2′ wide. Thick mats of this weed will hide among the lawn grasses, winter greens, and last year’s fallen leaves. Their seeds germinate in cool seasons, and the plants grow fast, lodging against walls and other objects that trap winter warmth.

If you pull the top, the roots have such a strong hold on the soil that the stem will stretch and break off. In a couple of weeks, you’ll have the pleasure of pulling it again. Grasp firmly under the crown of the plant, just below where the stem meets the soil, and make sure you get the roots.

Two species that often grow here in North Carolina are common chickweed and the more hairy mouse-ear chickweed.

Quick tips: Don’t wait as long as I did for this garden chore. Next winter, there will be an even bigger crop of chickweed. That’s not such a bad thing, though, because tender young greens are edible. Like many greens, common chickweed (Stellaria media) is very high in vitamins and minerals. One website claims it is fairly high in oxalic acid; for those with certain health conditions, check with your doctor. Add it to salads, soups, sandwiches, and stir-fries.


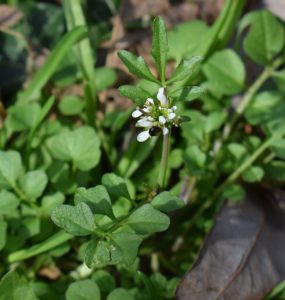
Hairy Bittercress

bitter cress. Quick tip: remove weeds before they seed about.

Hairy bittercress.

This species of cress (Cardamine hirsuta) is a short but abundant winter annual that grows a small rosette of edible bitter foliage, topped by a cluster of white flowers. It is related to broccoli and cabbage, in the Brassicaceae family. Disturbed seedpods open explosively, dispersing seeds in every direction. Ballochory is the name of this method of seed dispersal.

The “ounce of prevention is worth a pound of cure” axiom certainly holds true with weeds. Many times more weeds will grow in the next season if they are allowed to go to seed.

Not all of them will germinate, though. Seeds can remain viable for decades, patiently waiting underground for that moment when the soil is disturbed. Exposing the seed to favorable conditions, such as light, water, and the right temperature, is all they need to germinate.


6. Take a Moment to Just Enjoy Spring


There will always be more quick tips for the garden, but they can wait. Take the kids or the dog or yourself outside, listen to the sounds of nature, and just enjoy being!


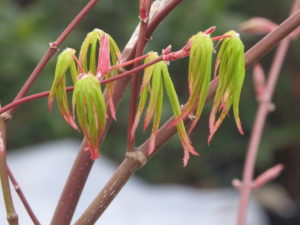
Japanese maple, new leaves. Quick tip: enjoy spring!

New leaves on Japanese maple.


Return to the top

Time To Think About Fall Greens and Vegetables

Updated 11/16/2024


Ready To Grow Fall Greens and Vegetables?


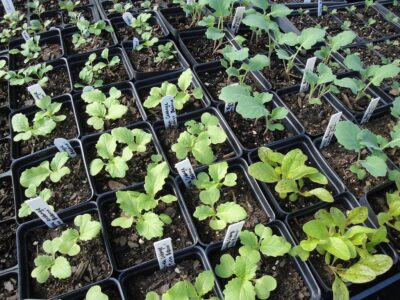
seedings of early spring greens


It’s hard to believe it’s already time to start seeds for fall greens and vegetables. I’ve been putting it off because of the hot weather we’ve been having. But, unless I want to buy transplants, seeds will have to be started soon. You folks up north probably have sown seeds for the broccoli and cauliflower by now, and certainly the Brussels Sprouts.

Here in North Carolina, fall seems a long time away, but in order for us to harvest those fall greens, we need to start sowing seeds now. Remember to locate your fall/winter garden where it will receive adequate sunlight. And, of course, I’ll sow successive crops through the rest of summer and early fall, as space permits.

Because we have a long growing season in the Carolinas, we can squeeze in another crop of summer vegetables. Zucchini, summer squash, cucumber, and beans can be sown again. But with the encroaching canopy of the trees on the berm, south of the garden, I’ll be planting only cool-season vegetables for late summer and autumn harvests. The ‘Diva’ cucumber is loaded with fruits. And I will wait patiently for every last fruit to ripen on the tomatoes and peppers.

(***Update***: A few days ago, a large and dangerously crooked pine tree was taken down, and now there’s more afternoon sun for the tomatoes and peppers. More sun also gives us opportunities to grow containerized vegetables and fall greens inside the fence, protected from deer. August 2018)


If They Can’t Take the Heat


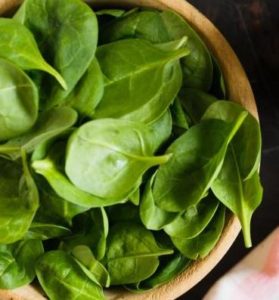
spinach in a bowl

Spinach.

Temperatures are still too high to sow lettuce and spinach outdoors, so I’ll wait another week or two. It’s still in the 90’s! They can be started indoors, in air-conditioned space, if needed.

Check the temperature of the soil before sowing seeds in the garden. Direct sun beating down on the dark soil surface can raise the temperature too high and dry it out very quickly. Look for one of those “Easy Tunnels”, or fabricate something yourself, to partially shade the soil and the tender young seedlings. You can purchase knitted shade fabric, made from black polyethylene, from mail order suppliers. In the southern states, 30-50% shading should work during the late summer months. This could lower the temperature by 10° or 15°F. Keep the soil surface moist to ensure good germination and to cool it down.

The best germination occurs between 55° and 70°F for lettuce and spinach. I usually put transplants into the garden instead of sowing seeds directly because hungry slugs, snails, and cutworms find tiny seedlings very tender and delicious.

Organic Sluggo will bait the mollusks (slugs and snails) to their deaths, and Bacillus thuringiensis (Bt), sprayed on the seedlings, will kill cutworms. Slug baits made with iron phosphate, such as organic Sluggo, are far less harmful to pets and to people than products containing metaldehyde, so be sure to read the labels.

One way to gather up a whole lot of slugs is to place a board, maybe 1′ x 2′, over damp soil. Go out and check the underside early the next morning, old knife in hand, and cut them quickly in half or squish them any way you choose…but, don’t use salt in the garden!


Choosing Varieties of Fall Greens


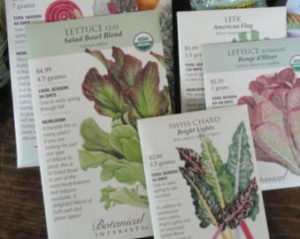
botanical interests seeds 

Sowing seeds for fall greens and vegetables, which prefer cool weather, can be tricky in July’s heat. Look online or through seed catalogs for lettuce, spinach, broccoli, and other crops that are described as being heat tolerant varieties. Yes, all lettuce and broccoli varieties prefer cool temperatures, but some will take warmer or colder weather than others as they form heads. If you’re buying transplants, ask the grower.

Either way, plan to provide some sort of device that will lower the temperature during these last hot weeks of summer. For later harvests, I’ll sow seeds that grow cool and mature in cold weather, and they will not need the shade fabric. Plants grow better with more hours of direct sun as the temperatures cool down.

Check with your local agricultural extension office for recommendations or for a planting calendar.


Planting Young Transplants


Soil

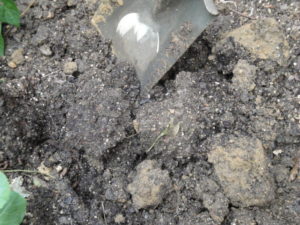
turned soil

Rich, dark soil with lighter brown clumps of clay, before incorporating.

Starting a vegetable garden with soil that has not been conditioned could result in a mediocre or poor harvest. Fall greens grow faster and larger in well-prepared soil.

Garden soil for these crops needs additional organic matter (compost, composted cow manure), drainage material (pine fines, coarse sand), and sometimes lime. A soil test will indicate the need for lime.

Our fall greens are being planted in soil that has been worked for 6 years, so it’s in very good condition. I will, however, continue to add compost, fertilizer, or manure to the garden with all new plants.

When digging soil, bring some of the lower-level clay up to the surface, and turn under the richer topsoil 4″ to 6″ deep (a few inches deeper for tomatoes, in spring). Over time, the clay soil on the surface will improve as mulch decomposes or when compost is added as a top dressing. Here you can see clumps of light brown clay that were brought to the surface of the soil (photo, above) before they were broken up.


Roots

Growers use pots and market packs of various sizes, including small 9-cell packs, 4-cell packs, 2″ peat pots and 4″ plastic pots. A smaller root ball needs more careful monitoring while the plant becomes established.


An important step before planting is to rough up the outside of the root ball (photos, above). This slightly injures the inner root layer called the pericycle, stimulating the plant to quickly send out new lateral roots into the soil. Be careful not to so severely damage the root system that the plant can’t supply water to the leaves on a hot, sunny day. Do this for every plant that is about to be repotted or planted into the garden.

A root ball that’s tightly packed with roots can be shallowly scored down the sides in a few places. Use a knife, a rock, or even a twig. Or use a cultivator to pry out some of the roots.


To Bury or Not To Bury?

broccoli

Broccoli ‘Arcadia’ from 4-cell-pack.

Most young vegetable transplants can be placed an inch deeper into the soil, or up to the bottom leaves. If the plant is more mature and has developed a somewhat woody or tough stem, plant it at the same level it was growing in the pot. But always, if possible, choose younger transplants.

Older plants can be stressed by being potbound or underfertilized, and might go to flower or head up prematurely, yielding undersized harvests. Young plants require more time to grow, but they will give you the largest heads of lettuce, broccoli, cauliflower, and cabbage. If in doubt, plant the top of the root ball level with the soil surface.

Firm the soil around the roots and stem using medium pressure. Humidity between the soil particles encourages the stem to grow fine roots without interference from tightly packed soil. Watering the plant helps the soil settle in around the root system and charges the soil with much-needed moisture.


broccoli in winter

Broccoli ‘Arcadia’ in winter.


These are same broccoli ‘Arcadia’ plants photographed in late December (photo, above). Trees on the berm cast too much shade until leaves dropped off, delaying harvest. When the garden gets more sun, heads should form in mid to late winter.


Fertilizer for Fall Greens

Planting fall greens and vegetables into late September, I mix a handful of granular organic vegetable fertilizer into the planting area. These crops grow beautifully with adequate nitrogen, so I will soon use higher nitrogen fish emulsion. Another application of fish emulsion will be made every 2-3 weeks through November, or every 2 weeks for potted greens.

mustard seedlings

Mustard seedlings in the garden.

Microbes in the soil break down organic compounds and make nutrients available to the roots. But, as the weather cools significantly, microbial activity slows down. I’ll use synthetic soluble fertilizers a few times in winter to keep the plants growing.

Greens and vegetables can grow all winter here, with some protection during very cold weather. This is worth the effort, since I can pick beautifully fresh kale and spinach for the Sunday omelet, or a big bunch of collards for collards soup.

Mustard greens ‘Florida Broadleaf’ was sown in late September, and germinated a few days later. The thinned seedlings will be used in soup, salad, or an omelet. Spinach sprouted about a week later.


Arugula


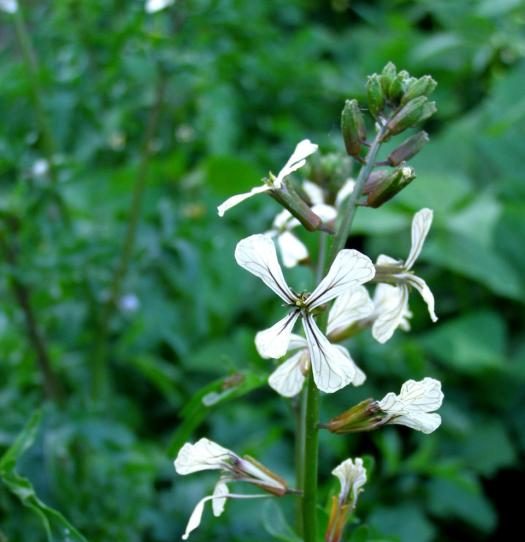
Love, love arugula! A forkful of salad greens that has a piece of arugula in it…mmm… The variety I prefer is ‘Astro’. It’s not as hot as the wild types, and it tolerates warmer temperatures. Arugula self-sows if it likes where it’s growing. Just let it flower and set seed. The papery seed capsules release the seeds, which germinate within 2 weeks, during favorable weather, near the mother plant.

It grows well in morning sun, during warm weather, and in moist, rich soil. Those who are more adventurous than I might enjoy growing the hotter ‘Wasabi’. Arugula doesn’t look like a member of the family Brassicaceae, but it, too, is in that famous family.

You might have seen the term “cruciferous” being used when describing members of the Brassicaceae family (formerly Cruciferae). It refers to the flowers of these plants, which have 4 petals arranged in the shape of a crucifix. The terms brassica, cole crops, and crucifer (or cruciferous) refer to the same plants.


Broccoli


One of the most nutrient-rich foods, broccoli is a must in my garden. Nutrients include protein, Vitamins A, several B’s, C, K, minerals, fiber, and their famous phytonutrients. To say that we eat broccoli in one form or another every 2 or 3 days is not an exaggeration. Just ask Mother.

broccoli crowns

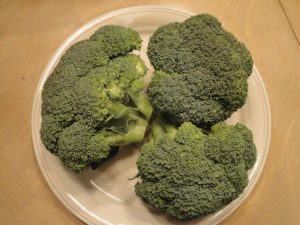
Broccoli crowns.

Heat and cold tolerance ranges from poor to excellent, depending on the cultivar. In this zone 7b area, ‘Imperial’ can be sown in July or planted as transplants from July through August; Johnny’s Selected Seeds’ catalog rates it “excellent” in heat tolerance for broccoli. Normally, broccoli grows best in cool weather, but you can extend the harvest by choosing 2 or 3 varieties that are suited to the weather at different times of the year.

The variety that will see us through the winter is cold-hardy ‘Arcadia’, which grows a large number of side shoots once the main head has been harvested. For that reason, don’t cut off too many leaves when you do harvest broccoli, because each of those leaves could be topped by another side shoot.

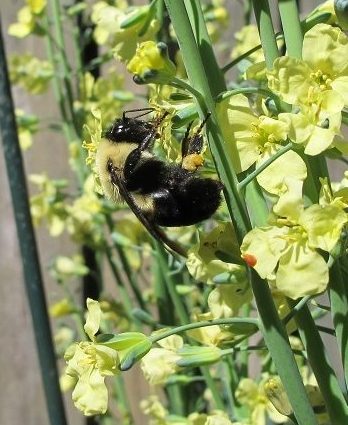
By the way, tender broccoli leaves are edible as well. Add them to soup, a smoothie, pasta, or a stir-fry. After the harvest is done, I keep the plants in the garden to flower. Bumble bees and other early risers are fond of this bounty, and the flowers are quite pretty!


broccoli flowers and bumblebee

Bumble bee visiting broccoli flowers in early spring.


Miniature Broccoli ‘Happy Rich’


broccoli happy rich, delicious fall greens

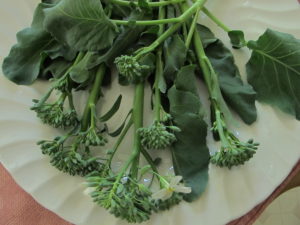
Broccoli ‘Happy Rich’.

I’ve grown ‘Happy Rich’ for many years. This plant grows a small head at the end of a stem, harvested ideally before the white flowers open. Each of those little green beads is a flower bud, and even if the buds start opening when the stems are picked, they’re still going to the kitchen.

The head will never get to the same size as regular broccoli, but the flavor is superb. Once the little heads have been cut off with 6″ to 10″ of the stem, the plant will branch out and grow more little heads. The stem, the leaves, and the head are edible—steamed, stir-fried, or added to soup or a pasta dish.

Two plants have been growing in the garden since the spring, and they don’t look very happy. It’s been a hot summer in Charlotte, so I didn’t expect them to survive this long.

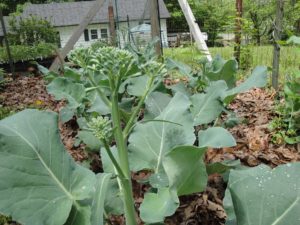
***Update***: In autumn, 2021, I moved to a larger property in the Piedmont, with lots of gardening potential. In the photo, below, ‘Happy Rich’ produced harvests for over 9 months in 2022. An Arctic Blast just before Christmas, when the temperature dropped 50 degrees to the low single digits, put an end to this planting. This area is in USDA zone 7b, so average temperatures allow growth all through the winter for many types of greens…usually. 11/16/2024


miniature broccoli 'Happy Rich'

Miniature broccoli ‘Happy Rich’ in spring.


Bt


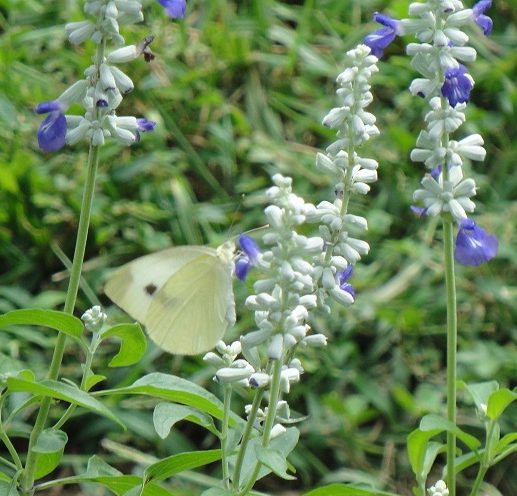
The imported white cabbage butterflies visit frequently—more frequently, alas, than I do with the bottle of Bt.

Bt is an abbreviation for Bacillus thuringiensis, a naturally-occurring bacterium that kills caterpillars of moths and butterflies, and nothing else. Before you groan “no chemicals”, Bt is used by organic growers and it’s been around for decades. Perfectly safe, even for pollinators, and not a chemical. It easily rinses off produce. You can find both organic and conventionally prepared products.

All brassica crops are targeted by a few kinds of moths and one species of butterfly, which lay eggs on the leaves. The eggs soon hatch into voraciously hungry and well-camouflaged caterpillars. After consuming some of the Bt, they stop feeding and die shortly thereafter. Young caterpillars are more easily controlled than older caterpillars. Thuricide and Dipel are two brand-name products with Bt as the active ingredient.


cross-striped cabbageworm, common on cool season greens

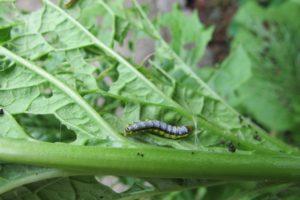
Cross-striped cabbageworm, becoming more common here, on mustard greens. Expect several generations per season. Look for clusters of white woolly eggs.


Return to the top

Page 1: Ready To Grow Fall Greens and Vegetables?, If They Can’t Take the Heat (Choosing Varieties of Fall Greens), Planting Young Transplants (Soil, Roots, To Bury Or Not To Bury?, Fertilizer for Fall Greens), Arugula, Broccoli, and Miniature Broccoli ‘Happy Rich’ (Bt)

Page 2: Brussels Sprouts, Cabbage, Cauliflower, Collards, Kale, Lettuce, Nutritional Considerations of Fall Greens (The Sulforaphanes, Where’s the Beef?), and Only the Beginning