Tag Archive | how weather affects plants

Potted Peppers For A Winter Harvest: 5 Easy Tips

2024

Updated 12/9/2024


Potted Peppers for Growing—in the Winter?
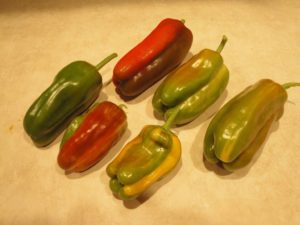


'Candy Cane' peppers

‘Candy Cane’ sweet peppers.


Autumn Has Arrived!


With cool weather approaching, our attention shifts from harvesting heirloom tomatoes to preparing our gardens for winter. Some gardeners clean the shed, weed the beds, and pile fallen leaves onto bare soil or dig them into the ground. Others continue growing greens and vegetables outdoors. In this article, I’ll show you why and how to grow potted peppers through the winter!


Why would we grow potted peppers in winter?

Peppers are warm-climate perennials that, with proper care, can live for a few years. Here’s the key: these frost-tender plants must stay indoors through the colder seasons. Left outdoors, they’ll die with the first freeze of early autumn.

For the coming months, you’ll be able to enjoy moderate harvests for salads, frying, stir-fries, dips, and veggie omelets. They’ll bear fruit over most of the cool season, from mid-autumn through spring, although not as heavily as they would in summer.

During the short days of January and into February, the plants might stop flowering, although fruits that have already set will continue developing. As days lengthen, the plants begin blooming and fruiting again.

Earlier this year, I retired the potted peppers—‘Aura’, ‘Glow’, and ‘Candy Cane’—I’d been growing for 3 years. But several others now fruiting in pots will take their place indoors for the winter.

With good sunlight and proper temperatures, I’ll harvest dozens of peppers from a few moderately sized plants. I’ve been doing this for years at other residences, but now the sunny enclosed porch makes it much easier.

As the temperature drops, warm season crops outdoors will succumb to seasonal changes. Pepper plants begin to decline when temperatures dip below 50°F. If you decide to proceed with this project, you’ll need to watch the weather very carefully.

Early Fruits Next Summer
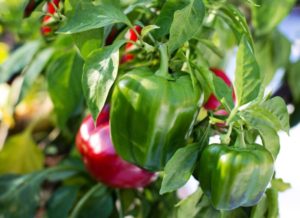
bell pepper

Peppers take quite a while to grow and mature. Most cultivars of peppers require around 2 months of growing time after transplanting into the garden for fruits to form. Since they must have warm soil and air temperatures, they can’t be planted too early. Even if frosts are over, the ground might still be too cold—from a few days of rain or cloudy weather—to plant sensitive crops, such as peppers and basil. They sulk or die in cold, wet soil.

If your last spring frost date is May 1, for example, you’ll pick your first bell pepper from a new transplant from early to mid-July. For a colorful ripe fruit, you’ll need to wait another 3 weeks. In contrast, potted peppers begin bearing fruits months earlier than new transplants set in the spring garden. You’ll enjoy a significant head start by overwintering these plants indoors. For that reason alone, you might decide to give this a try.

Many of my farmers’ market customers complained of poor flowering and fruit set due to extreme heat and drought this past summer (2024). Each variety of pepper and tomato has a threshold above which the pollen denatures, or dies. No living pollen = no pollination = no fruits. Some gardeners harvested no peppers at all! Growing potted pepper plants indoors could be the solution to poor harvests. Because they’ll be in flower and fruiting by the time they go outdoors for the summer, you’ll have harvested several peppers before the hottest months settle in. Covering tomato and pepper plants with shade fabric can prevent non-fruiting during the hottest weeks of summer.

Are you ready to expand your horticultural experience? If so, here are the 5 tips describing how to grow potted peppers:


Tip #1: Start with Healthy Transplants 


pepper seedlings

Young pepper seedlings in spring.


When planning your summer garden, consider keeping one or a few vegetable plants in pots. Keep in mind that some pepper varieties grow large while others attain only half that size. This information is often found in the catalog. Because roots are restricted, potted vegetables normally won’t grow as large as healthy plants in the garden.

A grower in your area might have kept some pepper plants from an early sowing. I ordinarily grow more than I can sell, so I keep a few dozen potted peppers well into the summer for customers who regretted not planting them earlier.

Another option is to start seeds in early summer. Raised in containers all season and properly fertilized, these plants grow fruits from late summer and continue as long as outdoor conditions favor growth. It helps to let the plants root into garden soil under the pots. This way, their roots can explore the soil for moisture and nutrients.

Later, you’ll sever the roots from each of the drainage holes, one at a time, giving the plant time to adjust before autumn arrives. The leaves probably will wilt somewhat as you cut the roots at the drainage holes, but less severely if you remove some of the foliage. For vigorously growing plants, it would be a good idea to cut back some of the stems by mid to late summer.

Look for plants without symptoms of disease, including wilt and heavily spotted or discolored leaves. Remove old pale or insect-eaten foliage. Potted peppers in winter might not have perfect foliage, but if the leaves are green and photosynthetic, they can remain on the plant.

Inadvertently, a few small peppers hang around here in their market packs, undernourished and barely alive, with some reduced to just a few leaves. Plants often can be restored to a healthier state with proper potting and pampering, as long as the roots have not been severely compromised.


Tip #2: Transplanting Potted Peppers
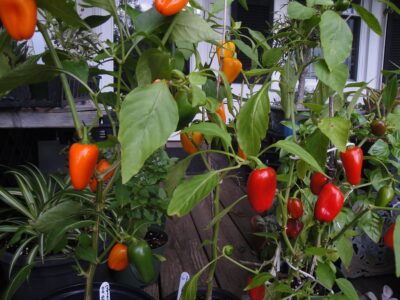


ripe peppers

Orange and red ‘Lunchbox’ peppers.


The Pots

I transplant plants that prefer warmer conditions, particularly sweet or hot peppers, into black nursery pots. You can buy them or ask a landscaper or a local nursery if they can spare a few pots that they might otherwise discard or recycle. Black pots absorb more of the sun’s energy, helping to warm up the soil in cooler months.

Conversely, try to shade the pot so the soil doesn’t overheat in the summer. In hot climates, the sun bakes the soil on the sunny side and damages the roots. I either shade the black pots with other plants or drop them into larger white nursery pots. All pots must have drainage holes.

Avoid planting a young seedling directly into a 2-gallon pot. Instead, transplant the small plant into a 6″ pot and let it thoroughly root into that pot. A few weeks later, move it into the larger pot. This helps the plant develop roots with a more extensive branching structure.

Moisture in a pot behaves differently than moisture in the ground. New soil (with no roots growing through it) in a large pot stays saturated after a day of rain and could suffocate the roots. Even though much of the excess water drains through the holes, a layer of wetter soil remains in the bottom of the pot before it is absorbed by the roots. But in the ground, water is pulled through the soil by gravity and capillary action. As water drains, air is pulled into the soil. Roots need oxygen in the soil as much as they need water.


The Potting Soil

Potting soil should drain well, but it also should be able to hold some moisture and nutrients. Most potting soils today contain large amounts of wood products (bark, wood), which cause them to quickly drain and dry out. A few brands offer excellent soils, but they’re quite expensive.

I tailor the potting soil for each plant species by amending it with ingredients that improve either drainage or moisture retention. Clean garden loam, peat moss, compost, finely ground coir, and aged cow manure have smaller particles and, therefore, help hold water in the air pore spaces.

On the other hand, perlite, pine fines, pieces of wood, coarse coir, and expanded rock products introduce larger air pores spaces, facilitating drainage and drying the soil.

Information on the bag of soil usually indicates whether it’s best used in pots (“potting soil”, “raised beds”, or “container gardening”) or for planting in the garden (“planting mix”, “garden beds”, or “in-ground gardening”). Potting soils tend to have a finer texture than planting mixes.

Amend potting soil that seems coarse (has lots of large particles) with some of the components that hold moisture, as mentioned above. If you’re using more than a small amount of peat moss, which is very acidic, mix in a teaspoon of pulverized limestone. The soil pH should be around 6.0-6.5 for peppers, which is slightly acidic.

If in doubt, have the soil tested for pH and nutrients through your local cooperative extension service. Lime can take a while to work on the pH, so test your soil before adding lime.


The Process
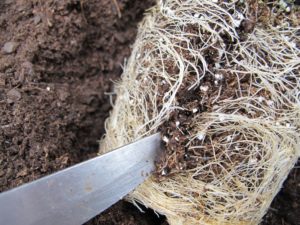
 

scoring the root ball

Scoring the root ball encourages rapid re-rooting.


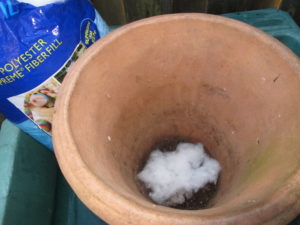
Most nursery pots have large drainage holes which can cause erosion of the soil. To prevent loss of soil, line the pot on the bottom and partway up the sides with a piece of landscape fabric, polyester fiberfill, or similar material. Water can still drain from the pot, but soil particles won’t wash though the holes. This compromises the plant’s ability to root into the ground beneath the pot, however, so you’ll need to carefully monitor soil moisture levels.

Fill the new pot almost to the rim with lightly dampened potting soil, firming gently. Before setting the plant into the new soil, score the outside of the root ball or use a fork to tease some of the roots out from the root ball. This slight damage stimulates the root system to branch out, helping new roots establish quickly in the soil.

Set the transplant into a hole in the center, and firm the soil around the root ball. Don’t bury the stem with new potting soil when transplanting peppers. If space is a consideration, 2 plants might comfortably fit into a pot that’s a bit larger than you’d use for just one plant. This works better for cultivars that normally grow into small or medium-sized plants.

The finished soil surface should be 1-2″ below the rim of the pot. A pot completely filled with soil can be quite messy when applying a thorough watering.

After planting the pepper, insert a stake (2-3′ long bamboo, a tomato cage, vinyl-clad metal, or a twig) all the way to the bottom of the pot. Secure the stem with twine, but not tightly, to keep the stem upright. The main stem or side branches heavy with fruits will slump over and might need additional support as the plant grows.

The First Watering
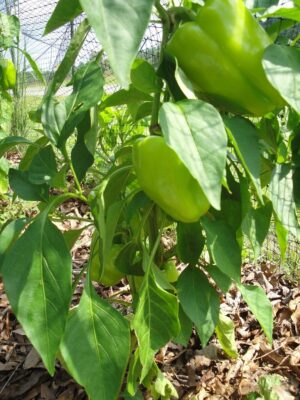
'Flavorburst' sweet bell pepper

High yielding ‘Flavorburst’ pepper in the summer garden.

Water the plant. Apply enough water to soak the original root ball and some of the soil surrounding it. Thoroughly watering a new transplant needlessly leaches nutrients out through the drainage holes.

As roots grow into the soil, you’ll need to moisten more of the soil volume. If you begin this process by midsummer, the pot will have filled with roots by late summer to early autumn.

Plants slow their growth as days shorten, so they might struggle to fully root into their pots if you delay transplanting until autumn. If you transplant them at that time, be very careful not to overwater.

Keep the potted peppers outdoors in full sun (7-8+ hours/day) through the summer and early fall, or until nighttime temperatures drop below 55°F. While pepper plants can tolerate colder conditions than that once in a while—but not close to freezing—exposing them to low temperatures on consecutive nights weakens them.


Varieties of Potted Peppers I’m Growing This Year

‘Flavorburst’ is a medium-large sweet bell pepper (photo, above) that starts out lime green and matures to a golden orange color. The flavor is milder than the deep green bells. The plant is a medium-large grower, so it’s in a 3-gallon pot.

‘Olympus’ is a medium-sized plant growing in a 2-gallon pot. This large, deep green bell pepper turns red when fully ripe. I’ll harvest most ‘Olympus’ peppers, however, in the mature green stage when preparing curried tuna or sweet-and-sour chicken. (Photo, bottom of this page.)

‘Lunchbox’ peppers are medium-sized plants. They grow very well in 1-2-gallon pots over the winter. The red fruits on some plants are a bit smaller, so most of the ones I’m saving ripen to orange. Each plant develops fruits that start green and ripen to just one color: red, orange, or yellow. (Photo, bottom of this page.)

‘Aura’ and ‘Gourmet’, in 1- or 2-gallon pots, are orange-when-ripe bell peppers on small plants. Sweet bell peppers that ripen to orange contain extremely high levels of zeaxanthin—10 times more than ripe red peppers. The antioxidants zeaxanthin and lutein help preserve eyesight. (Spinach, pistachios, goji berries, and egg yolks also boast high levels of these antioxidants.) If I need bell peppers when my plants aren’t producing, I usually buy orange bells. I’ve read that orange hot peppers do not contain those elevated levels of zeaxanthin.
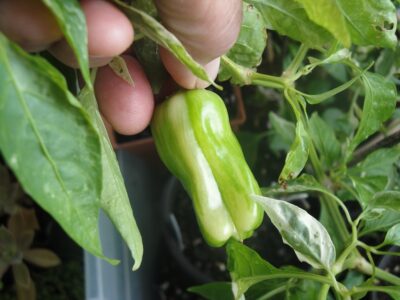
 

'Candy Cane', a variegated pepper, white splotches in leaves, striped fruits.

‘Candy Cane’ variegated pepper.


‘Candy Cane’, a sweet pepper with green and white variegated leaves, is among the potted peppers I’ll grow again this winter. The thin-walled fruits grow irregularly striped green and creamy-white, ripening to bright red (photos, top of article and above). This cultivar needs full direct sun to maintain good variegation in both the foliage and the fruits. Even if it loses its white splotches, it will yield good peppers.

‘Jimmy Nardello’, an heirloom Italian frying pepper, has long, curved, red, sweet fruits when mature. At the last minute, before cool weather moved in, I literally yanked a few young plants out of the ground and potted them into 6-8″ pots. (Photo, next page.)

You can dig up peppers that aren’t very big but try to keep the root system intact. Removing half of the foliage (by cutting back the stems) and lightly shading them for a couple of days prevents severe wilt. Misting a few times a day for a few days should help. Then, with good sunlight and careful watering, they’ll recover.

I don’t eat hot peppers and will sell the rest of the potted habaneros, cayennes, and jalapeños. ‘Helios’ habanero is so cute with its bright orange lanterns (photo, below) hanging on small glossy-leaved plants. It’s ornamental qualities merit keeping it around during the autumn holidays.


Headings

Page 1: Autumn Has Arrived! (Why would we grow potted peppers in winter?, Early Fruits Next Summer), Tip #1: Start with Healthy Transplants, Tip #2: Transplanting Potted Peppers (The Pots, The Potting Soil, The Process, The First Watering, Varieties of Potted Peppers I’m Growing This Year)

Page 2: Tip #3: Caring for Your Potted Peppers (Direct Sunlight and Temperature, Artificial Light, Water for Potted Peppers, Fertilizer, Timed Release Fertilizer, “Should I use organic fertilizer?”, Insects and Spider Mites), Tip #4: Pollinating Your Potted Peppers, Tip #5: Fruits from Your Potted Peppers (No New Fruits?)

Return to the top

Sowing Seeds For Early Crops

2024

Updated 12/11/2024


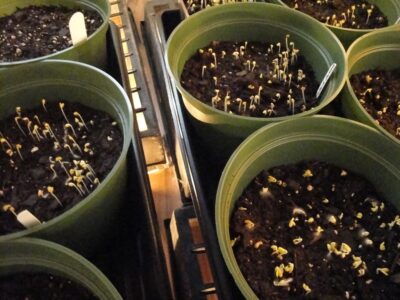
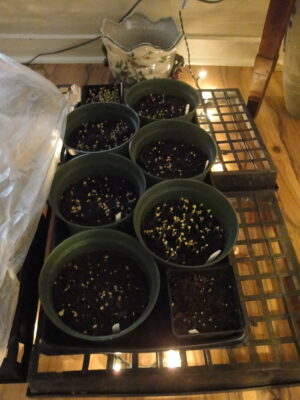
A few days after sowing brassica seeds.

Brassicas germinated 3 days after sowing seeds in these round 6″ pots.


Sowing Seeds For The First Crops: Too Early?


We’re getting close to my favorite part of the year—warming temperatures… birds singing their special songs… starting seeds for the garden. New crops of brassicas—arugula, broccoli, cabbage, cauliflower, collards, kale, mustard greens, pac choi—top the list. I also grow lettuce, spinach, Swiss chard, peas, bunching onions, and others. In this article, I’ll describe a step-by-step process for sowing seeds you can do right now, well before frost has left the area.

bumble bee on flowering broccoli

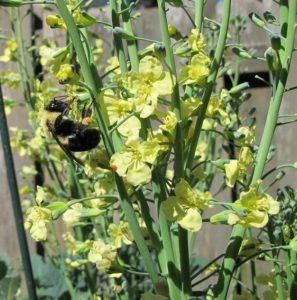
Bumble bee on ‘Arcadia’ broccoli in spring.

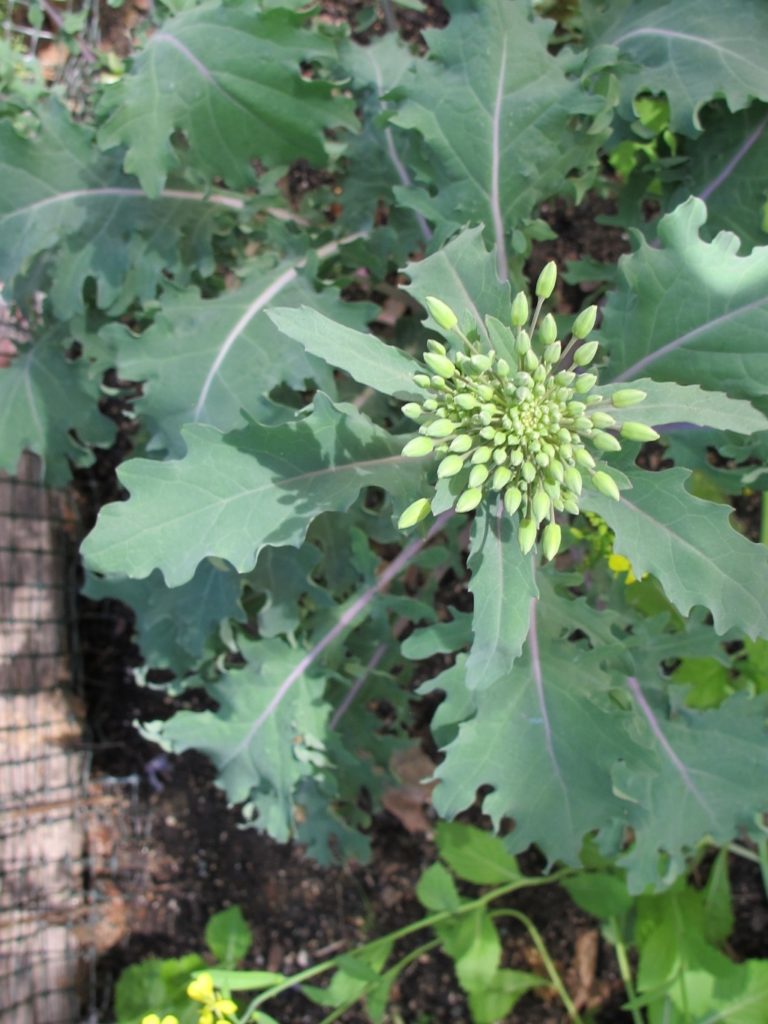
Some varieties of leafy greens are productive from early autumn through spring here in zone 7b, in the Piedmont of North Carolina. Last fall’s crops flower in late winter or spring (photo, right), and are then replaced with young transplants. With cooperative weather, cool season crops offer a fantastic return on investment!

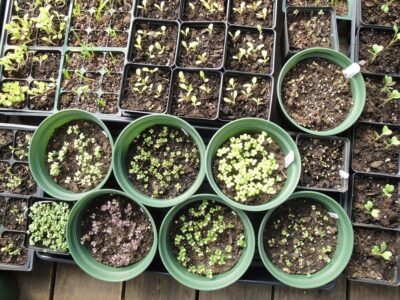
Starting in late winter, I’ll sell transplants at the Surry County NC farmers’ markets or plant them into my own gardens. In preparation for the season, though, growers have nurtured these plants for 4-6 weeks before they’re offered for sale.

It’s important to plant young plants; heading crops, such as broccoli and cauliflower, confined in cell packs only 1 or 2 weeks too long will not properly head up. So, it’s important to start sowing seeds and to plant the seedlings at the proper time—not too early and not too late.

Gardeners living in colder climates need to adjust their gardening calendar accordingly. Yes, at this time, it might be too early for some. Leafy greens prefer chilly weather. Many fail in the heat of high summer, although they might succeed in northern gardens (northern hemisphere) at that time. With careful variety selection and placement (light shade during the hottest hours of the day), we can stretch the season for these healthy greens.


Summer Broccoli?

***Update***: This section added 12/11/2024.

The summer of 2024 tormented us with extremely high temperatures (over 100°F heat index) for many days at a time, coupled with periods of prolonged drought. The broccoli I planted in early March yielded well, but I left them in the garden after their main season had passed. The summer crop of tomatoes cast dappled shade on these normally cool-loving ‘Green Magic’ broccoli plants. I cut off large broccoli leaves for the purpose of shading the tomatoes’ flower clusters and ripening fruits, preventing pollen death and sun scald in the tomatoes.

Over the hot summer, I picked small side shoots from the broccoli plants (that was unexpected), and, when the temperatures began dropping in late summer, the broccoli yielded many more and larger side shoots! So, it was worth keeping them in the garden. With partial sun, great soil, regular watering, and a thick mulch of oak leaves, they surprised me with their abundant offerings. I will do this again!


“How do I use these greens?”

Although I’m not a vegetarian, cool season greens are the foundation of my diet. I can’t tell you how satisfying it is to pick fresh greens for salads, sauces, veggie omelets, soups, sandwiches, and stir-fries in winter. And as a side dish, on pizza, with pasta, and in smoothies, if you like them. It never gets old!

Cool season greens are versatile in the kitchen but curiously underrepresented in our gardens. Considering the fact that many contain the highest levels of vitamins, minerals, fiber, and beneficial antioxidants among edible foods, it’s a wonder more gardeners aren’t growing them! The brassicas (Brassicaceae family, formerly Cruciferae) are particularly nutrient-dense, and this family of plants is the only one with measurable amounts of the sulforaphanes. Sulforaphanes are antioxidants that help prevent cancer, type 2 diabetes, cardiovascular disease, and inflammatory illnesses. They also help maintain eyesight, brain function, and healthy skin.

Growing your own produce from seed saves money in these times of high inflation. You can harvest what you need for the day, so nothing goes to waste. And most crops can be grown cleanly, without pesticides, before the insects move in. Furthermore, there are hundreds of varieties to choose from that never appear in garden centers or grocery stores.

Maybe you’d enjoy experimenting with new varieties each year, as I do. Some have become my favorite foods, so they’re planted in my gardens each year. Among cool season greens, those include my favorite vegetable—mini broccoli ‘Happy Rich’—as well as ‘Nabechan’ bunching onions, Johnny’s AllStar Gourmet Lettuce mix, a butterhead lettuce called ‘Skyphos’, arugula ‘Astro’, ‘Arcadia’ broccoli (in autumn), dinosaur kale, and ‘Sugar Snap’ and ‘Oregon Giant’ peas.

Ready to begin?


Preparing To Sow Seeds


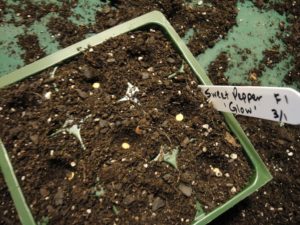
9-cell market pack with pepper seeds

Pepper seeds sown in a 9-cell market pack.


It’s helpful to read this entire article before proceeding so you can gather materials and plan your setup. You will need:

  • supplies (cell packs or pots, flats, labels, soil, seeds, vegetable fertilizer)
  • warmth to start the seeds
  • a waterproof surface
  • adequate light to keep seedlings healthy and strong
  • timely transplanting to prevent crowded plants
  • detailed records for future reference

Perhaps you’ve chosen lettuce, arugula, and ‘Black Magic’ kale seeds for your first project. You’ll need clean cell packs or pots, fresh seedling mix, and at least one flat to keep them in. You might already have used pots and flats lying around somewhere. Disinfect them first with a 10% bleach solution to kill pathogens, or at least clean them very well.

Instead of trashing the failing window blinds, I cut the plastic slats, which make perfect plant labels. You can also use a plastic milk jug. Sharpie pens write smoothly, but the ink eventually fades in bright sun. Placing the label below ground or on the shady side of the plant keeps it legible for a while longer. A journal or a computer log is recommended as a backup and for additional notes.

I recently bought a few inexpensive heavy gauge flats from a big box store. Made by Ferry-Morse, they have no holes in the bottom and measure 10 x 20½” (inside diameter). They’ve proven their usefulness for holding pots of germinating seeds, so I’ll go back for several more. You can find similar trays from horticultural supply companies or Amazon, often in the “Microgreens” section.


Temperature For Sowing Seeds

Successful germination depends on a source of warmth if your home is on the cool side, as mine is. Although lettuce can sprout at 40-50° F, it germinates erratically or not at all above 70-75°. Other greens will get off to a better start when the soil temperature is in the 70’s to low 80’s. After germination, these seedlings will need cooler temperatures.

What are the options? Heat mats are available. One that measures 21 x 21″ consumes 45 watts of electricity and costs about $40-60. Larger commercial sizes, for 8-10 flats, cost over $125. (***Update***: I just received heat mats from Amazon at a much lower price, but I haven’t tried them yet. 12/11/2024)

Maybe the top of the water heater provides suitable temperatures for starting a few pots of seeds. You might need to moderate the heat by raising the pots above the warm surface. Check them daily!

Miniature Incandescent Christmas Lights


mini lights under flats of seedlings

These brassica seeds germinated overnight, above the mini lights.


I use indoor/outdoor miniature incandescent Christmas lights for warmth—not light—under the seeded flats. One 100-bulb string of lights (approximately 40 watts) on the hard floor of the spare bedroom and covered with 6 upside-down mesh flats (photo, above) works for me. Their gentle warmth is distributed over a large area, so I can start many flats of seeded pots at one time.

Be careful not to crush any bulbs, as this can cause remaining bulbs to burn hotter or to go out entirely. Don’t use higher wattage bulbs. Safety first! Incandescent lights are becoming harder to find, so check with online sources. I bought several from a big box hardware store’s website, although the retail store didn’t have any for sale.

You might want to test this layout before proceeding. Perhaps you have a folding table or counter space in the utility room that could serve this purpose.

When that greenhouse kit gets built, I’ll probably start seeds out there. Indoor space is very limited, and plants fill every bright window. Now that the knee replacement has improved mobility, I’ll work on a more efficient infrastructure for sowing seeds and transitioning them to outdoor growing. Maybe I’ll start seeds indoors and grow them on in the minimally heated greenhouse; it all depends on the severity of the weather and electric rates.


Preparing Pots For Sowing Seeds


sowing seeds in pots

A flat of seeds over mini lights, with plastic to hold the warmth until seeds germinate.


I start over 200 varieties of plants for the farmers’ markets, so many of the flats are shifted around almost daily. After the first round of seedlings has been transplanted, I start another. Some varieties need more time to sprout, while others, such as arugula, germinate in just 2 days.

A sheet of clear plastic over the flats holds in humidity and warmth from the mini lights. Labels identifying each variety hold the plastic above the soil. For good air circulation and to let condensation evaporate, keep the plastic open on the edges.


Light For Germinating Seeds


sun and clouds


Your seedlings must receive direct sunlight or strong artificial light as soon as they emerge from the soil. One or two days in inadequate light will cause the seedlings to weaken and stretch toward the light, so don’t delay getting them into the sun.

From horticultural supply companies, you can find ready-to-assemble light stands with shelves and LED fixtures. There’s one with 3 shelves, six 4′ LED tubes, and an attractive powder-coated aluminum frame that costs $1,000. Smaller units for 1-3 flats are more affordable at $100-400. They might give off enough warmth to satisfy the need for warm soil. One advantage in using this setup is that the light fixture above each shelf sustains transplanted seedlings for 2-3 weeks as long as the temperature is at acceptable levels. Cool season greens do best with a drop in temperature (below 60-65°) after germination.

You won’t need advanced carpentry skills to put something together yourself. One or two 4′ long shop lights each fitted with 2 “daylight” (full spectrum LED or fluorescent) tubes cost $30-70. Use 2 x 4’s for the supporting framework or suspend the fixture under a table. Chains and S-hooks raise or lower the fixture, or simply elevate the seed trays to get them closer to the light.


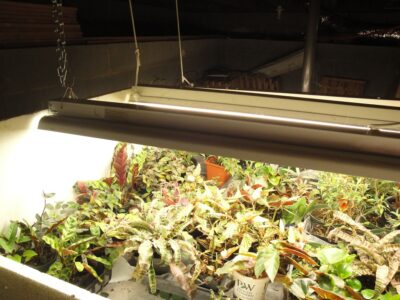
artificial light and plants


In My Basement

In the basement and over two 6′ tables, I nailed chains and rope to the floor joists and positioned the lights as needed (photo, above). I’ve used these fixtures for decades to start seeds and root cuttings, to rehabilitate plants, and to grow delicate species and stock plants.

Plants that need strong light (vegetables, herbs, succulents) grow only 3-4″ below the tubes; 12″ below the tubes, however, is too far away. Light intensity drops precipitously with each inch of distance from the light source. Running the fixtures for 16-18 hours per day should supply enough energy for the plants to grow normally.

Seedlings won’t mind 24/7 lighting over the short term. Not turning the lights on and off every day adds to their longevity.

I prefer to start seeds without relying on electricity, using just the sun. But, at times, starting seeds under these light fixtures is convenient, particularly when they can grow there for a week or two before I’m able to transplant them.


Natural Sunlight And Temperature


sowing seeds, small transplanted seedlings

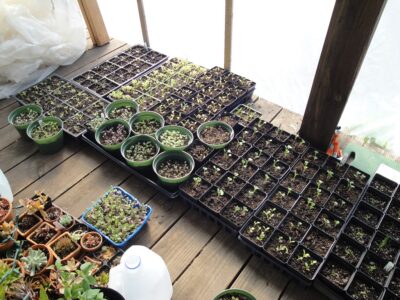
Seedlings and fresh transplants enjoy the protected space on the porch.


Newly transplanted seedlings go out to the sunny enclosed porch (photo, above), which faces south. I usually keep them there, in sun that’s lightly filtered by the plastic enclosure, for their first 1-2 days. On an overcast, calm day, new transplants can go outside to the open air if the temperature is above 50°. When the wind’s blowing, though, I keep the flats on the porch and vent the plastic to admit cool air. The enclosed porch—when the plastic “door” is closed—heats up to 90° or higher on a sunny winter day.

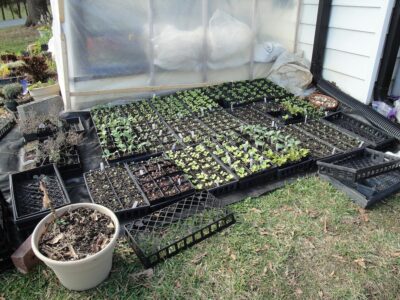
For a few nights when the porch was too cold for young plants, I brought them back indoors. Now, at the end of February, dozens of flats stay outside on black woven ground cover (a durable polypropylene fabric), hugging the wall of the porch. That’s on the south side of my house, a warm microclimate. There’s less wind here and nighttime temperatures stay a few degrees above areas farther from the house.

Success depends on temperature, so I check expected hourly temperatures daily and the forecast for the coming week. I cover the flats with plastic or an old sheet when they need a little protection. But, at this stage, they’re becoming more resilient to temperature fluctuations.

In the morning, I’ll remove the plastic and let them bask in the sunshine. Those little seedlings double in size in a week, and roots are filling the pots. Almost ready for the market!

How Low Can They Go?

Maturing seedlings of cool season greens tolerate temperatures in the high 20’s and 30’s. They’ll take temperatures lower than that when they’re a bit older and planted in the garden. Remember, this regimen applies to cool season greens and vegetables, not to main (summer) season crops, which need a frost-free environment.

In this part of northern North Carolina, elevation 1200′, late February temperatures range from the mid- to high 50’s in the daytime to the mid-30’s at night. Keep in mind that those are averages and that actual temperatures can vary considerably from the average.

As an experiment, I left 3 containers of newly transplanted ‘Freckles’ lettuce seedlings outside, exposed to 21-22° on 2 nights. They’re fine! Lettuce resists damage better than some of the other crops.

One Step At A Time

We don’t want to subject tender seedlings only a few days old to the rigors of outdoor conditions, especially freezes and wind. Indoor-grown seedlings that received less than adequate sunlight will need a more gradual transition. Some will thrive, while others—the spindly, weak ones—will sulk or die.

When in doubt, proceed in incremental steps—gradually lowering the temperature and introducing seedlings to increasing sun and wind speeds. (For summer vegetables, harsh sunlight is another factor to consider.) This is called hardening off. Assuming the weather cooperates, vegetable plants can be hardened off within one week.

Root systems grow quite fast in order to supply water to foliage and stems. Leaves adapt to prevailing outdoor conditions, growing a thicker cuticle. The cuticle is a protective waxy outer layer over the epidermis, designed to slow moisture loss from within the leaves.


Headings:

Page 1: Sowing Seeds For The First Crops: Too Early? (Summer Broccoli?, “How do I use these greens?”), Preparing To Sow Seeds (Temperature For Sowing Seeds, Miniature Incandescent Christmas Lights, Preparing Pots For Sowing Seeds, Light For Germinating Seeds, In My Basement, Natural Sunlight And Temperature, How Low Can They Go?, One Step At A Time), Growing On To Transplant Size (Fertilizer)

Page 2: Sowing Seeds: The Process, Transplanting Into Larger Containers (The Process, Sowing Seeds and Transplanting In Multiples)

Return to the top of Page 1


Early Spring: Wrens, The Wire Basket, And Edibles

2021


early spring offerings at garden center, potted bulbs, violas, lemon cypress

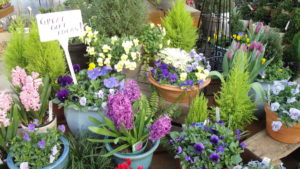
Early spring offerings at the garden center where I worked for a few years.


Early Spring Activities


This is my favorite time of the year…when winter transitions into spring. In this USDA zone 7b location, in southern North Carolina, warm spring weather might alternate with cold rainy days, but the trend, at least, is going in the right direction.

Give the gardens some time to dry somewhat before working in the soil. Walking on wet soil will collapse the minute air tunnels that help the soil drain. We’ve had so much rain through the winter that gardening activities might best be limited to growing plants in pots for now.


For the Birds


Yesterday, after working on the potted plants outdoors, I sat for a few minutes just to listen to the songbirds calling to each other. Cardinals, goldfinches, Carolina wrens, chipping sparrows, tufted titmice, and robins are communicating with their mates or looking for new ones. A delightful soundtrack!

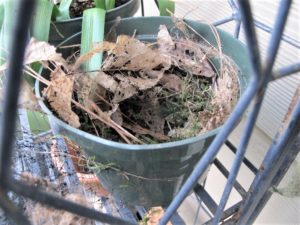
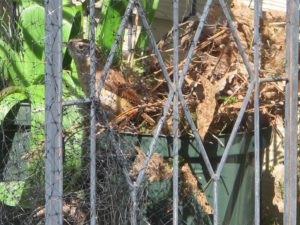
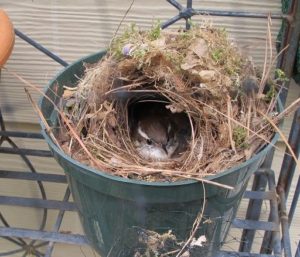
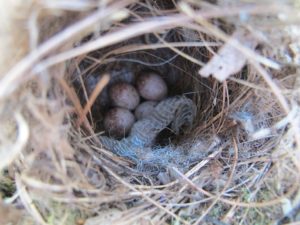
In early spring of last year, a pair of wrens built their nest in an empty 6″ pot (photos, below), sitting on a plant stand. This location is under an overhang and faces south, creating a warm microclimate. The deer netting stopped raccoons from climbing the stand, but it didn’t deter the birds.

The wrens and nuthatches, in particular, normally come to the feeders only a few feet away from where I pot up plants. Unfortunately, the wrens abandoned the nest after laying eggs, even though they were comfortable having me around. It appeared that a snake must have scared them off. Occasional disappointments are par for the course in the natural world. The eggs were cold when I found them and wouldn’t have hatched.

The wrens are now investigating the pots stored under the potting table, so I moved one to the plant stand.


Replanting the Wire Hanging Basket


The Basket and the Liner 

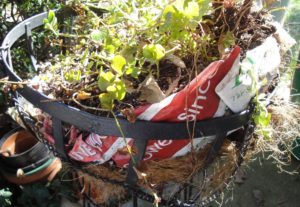
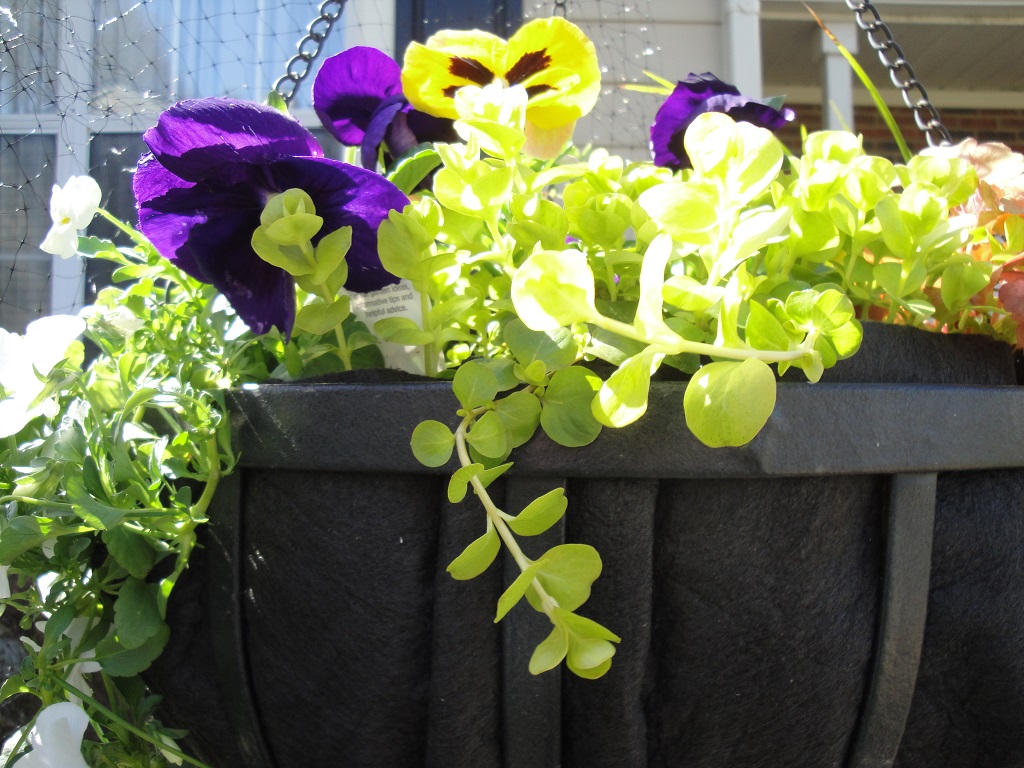
A 16″ wire hanging basket has hung on the shepherd’s hook in the front garden for 5 or 6 years. It’s planted with a few perennials and a rotating cast of colorful characters. For fall through mid-spring, I add pansies and violas, and then replace them with heat tolerant annuals for the summer.

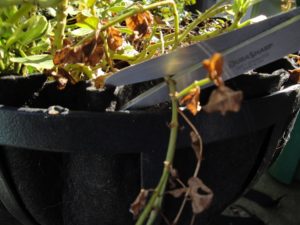
This time, instead of buying another coco liner that the birds will instantly pick to shreds, I used a large fabric pot that had been idly hanging around the shed for years. After planting and installing it on the hook, I wrapped the completed basket with deer netting to prevent the kind of damage they can do.

The heavy synthetic material was cut and shaped, and the excess was later trimmed to just above the rim. The material is similar to landscape fabric, but sturdier. So, I wasn’t concerned about the liner slumping through the wires. Nor am I concerned that the birds would steal it! Water will drain through without taking any soil with it. It doesn’t look bad, after smoothing the sides. In fact, I now prefer it over coco liner!

More Options

So, maybe you have something that can be repurposed to use in your wire baskets. A couple of layers of porous landscape fabric or heavy burlap probably would work as well. I was prepared to tie black deer netting inside the basket to support the liner, but it wasn’t needed.

When planting wire baskets, I always add a layer of plastic inside the liner to help slow evaporation. It also delays decomposition when using a coco liner. Poke several holes in the lower third of the plastic to allow for drainage. But keeping the lowest 1″ to 1 1/2″ intact will provide a small reservoir of water for thirsty plants on a hot summer day.


Add Some Color For Early Spring Plantings

On one of my daytrips to northern North Carolina last autumn, I bought a few packs of pansies and violas from Beautiful Earth Garden Shop on NC 704 in Lawsonville, North Carolina. (Phone 336 593-1083; call for hours.) Well, I never got around to planting them, so they overwintered on the covered porch. Rabbits helped themselves to the flowers as they opened. But the plants look fine, and it was time to give them a proper home.


wire basket, planting

Help wanted!


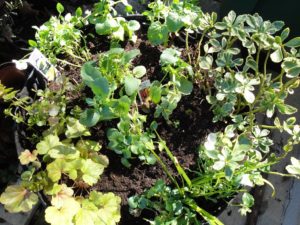
I replaced about 1/3 of the soil in the basket with fresh potting soil. The new soil contains a fair amount of peat moss, which provides the acidity these plants need. The pansies and violas will fill the spaces between the existing heuchera, variegated pachysandra, and acorus.

Golden creeping jenny (Lysimachia nummularia ‘Aurea’) replaces the English ivy that the deer yanked out of the pot. Chartreuse foliage spreads wherever it wants and will trail over the sides. These existing perennials already have started growing during this early spring weather. Creeping jenny spreads rapidly in moist soil, so take care if you prefer not letting it escape to the garden.

I’ll enjoy this arrangement until warm weather settles in, and when summer annuals will be planted in all new potting soil. Violas and pansies die in hot temperatures but can be grown again in late summer/autumn. In this climate, they’ll survive the winter and flower most of that time.


And Edibles for Early Spring


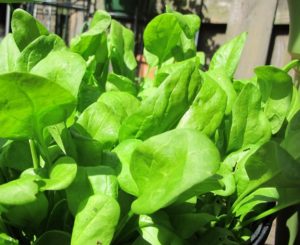
Spinach ‘Monstrueux de Viroflay’


spinach 'Monstrueux de Viroflay' in pot, early spring

Last year’s spinach ‘Monstrueux de Viroflay’.


Also called ‘Monster of Viroflay’, this is my favorite spinach to grow in pots. A few plants sown last fall remain in a 14″ wide bowl (6″ deep), so I added more seeds and some fresh potting soil around them. The seeds are 4 years old, so they might germinate…but they might not (…they didn’t).

Spinach, lettuce, and other greens are among the easiest crops to grow from seed, either in pots or in the garden. All seeded pots outside must be covered with deer netting to protect them from perpetually hungry chipmunks, mice, birds, and squirrels.

Oxalates and Kidney Stones

This spinach, a French heirloom dating back to 1866, has huge leaves and a milder flavor than the smaller-leaved varieties. It also has lower levels of oxalates, which, for some, are a concern. If you get kidney stones, ask your doctor, and also ask about kidney pH levels.

A diet high in animal proteins tends to lead to an acidic (or low) pH. On the other hand, those consuming a primarily plant-based diet have higher (more alkaline) pH levels. People with acidic systems are more likely to develop kidney stones.

We’re all different, of course. And to further complicate matters, our bodies make oxalates, some absorb more than others, and certain gut bacteria consume them!


Broccoli


early spring, broccoli


This year, I bought a variety called ‘Lieutenant’. It was the only one the garden center had. The label says “few side shoots”, which is a disadvantage since those smaller side shoots can prolong the harvest for weeks or months. But I’ll try it. I planted 4 of them in a 20″ wide pot, in soil well enriched with composted manure.

As broccoli grows, I’ll harvest a lower leaf now and then to add to soup or a stir-fry. Super nutritious.

(***Update***: Although I’ve grown broccoli twice a year in these pots for a few years, this crop of ‘Lieutenant’ was rather disappointing. May 2021)


Lettuce


lettuce 'Red Sails'

Lettuce ‘Red Sails’.


I planted a few ‘Red Sails’ from the cell pack into a 12″ wide pot. This red and green leaf lettuce is more heat tolerant than many and should keep producing for quite a long time. Even so, lettuce prefers cool weather and can be planted in late winter in southeastern U.S. Red-leaved lettuces have more beneficial antioxidants, such as anthocyanins, than green lettuces.

Pick the outer leaves and let the center of the plant continue growing. When it turns bitter or goes to flower, that’s the end of lettuce in the garden until the weather cools again in autumn. Regularly fertilizing all greens with fish emulsion or some other high nitrogen product provides nutrients for steady growth.

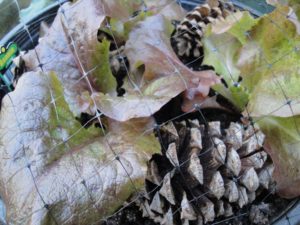
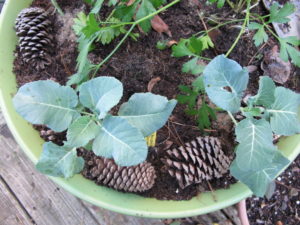
Sharp-tipped pine cones and deer netting discourage animals from burying seeds from the bird feeder.


Strawberries For Early Spring Planting


The garden center also had strawberry plants, which looked very healthy. I planted all 4 ‘Ozark Beauty’ plants in a 12″ pot. Yes, that is tight. There’s limited space where I currently live, so this is just a fun experiment. Later, a larger garden will be planted with lots of berries and other perennial edibles.

When transplanting strawberries, be sure to keep the crown at or slightly above the soil surface (photo, above), not buried. Before long, big ripe berries will join me for breakfast, even though the first few weeks of flowers should be removed. This is another plant that will need to be netted. Everyone wants ripe strawberries.

***Update***: I harvested about 15 yummy strawberries this season. The first few were delicious and large, followed by smaller berries. It’s recommended to remove all flowers during the early weeks, but, for this pot, I just let them grow…and set fruit. June 2021


strawberries

No, these did not grow on the potted plant.

*    *    *    *    *    *    *    *    *

I need a good-sized pot to grow snap peas on a trellis, and another for dinosaur kale. Maybe I’ll find them under the potting table, before they’re claimed by our local wrens.

This is just the beginning. There are so many cool season crops, from seeds or transplants, that can be grown in containers. Ask your local agricultural extension agent for early spring recommendations tailored to your climate.


Return to the top


Basil Downy Mildew: You Can Prevent It!


Yes, You Can Prevent Basil Downy Mildew!


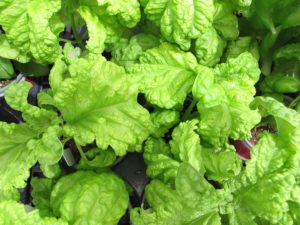
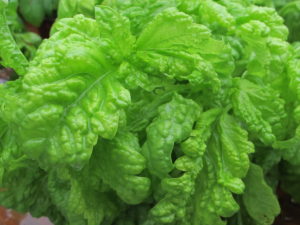
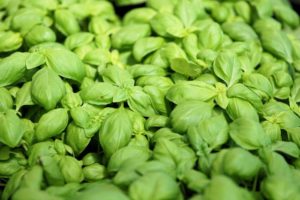
lettuce-leaf basil

Pots of young lettuce-leaf basil.


What could be more refreshing than a garden salad harvested from your own back yard? We love our tomatoes, cucumbers, green onions, ripe sweet peppers, and the ‘Tango’ celery added to mixed greens. And don’t forget the basil!

But you’ve noticed how basil has struggled the past few years despite all the suggestions offered by the garden center. It just doesn’t look quite right, which prompts the question,


“What Is Wrong With My Basil?”


Gardeners throughout the world are having issues with basil. From Anchorage to Adelaide, readers at The Farm In My Yard clearly have problems with this herb. And it used to be so easy to grow! Now their leaves develop black spots every summer, and they’re yellow between the veins. This is not appetizing at all.

Does that sound familiar?

Well, join the club! For over a decade, we’ve been dealing with spotty ugly basil, infected by that awful disease known as basil downy mildew. This water mold has been seen in more than 44 of these United States, and in just about every country where this herb is grown. Once the disease has reached your plants, you might think it’s all over.

But it isn’t! By managing it differently than you normally do, you can have beautiful basil once again. I’ve successfully grown it in pots every year since the disease was first identified in the United States. The plants grown in the garden, however, almost always have succumbed to BDM. But there’s more to it than just growing them in pots, as you’ll read later.

You need not worry that Peronospora belbahrii will infect other plants in your garden. BDM targets only basil.


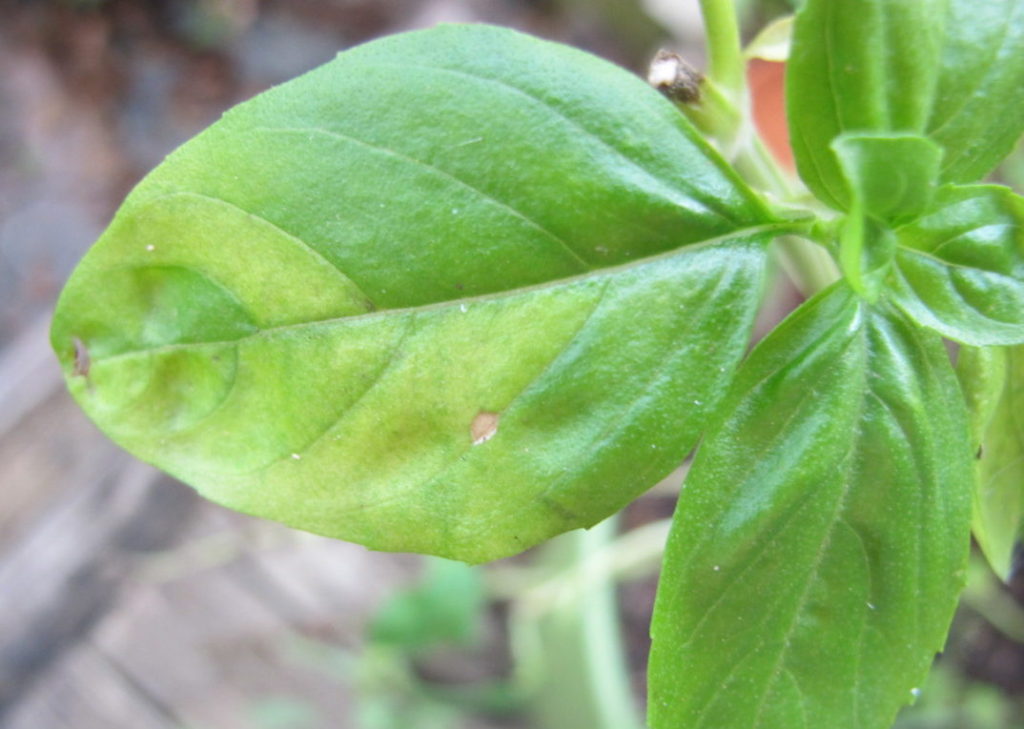
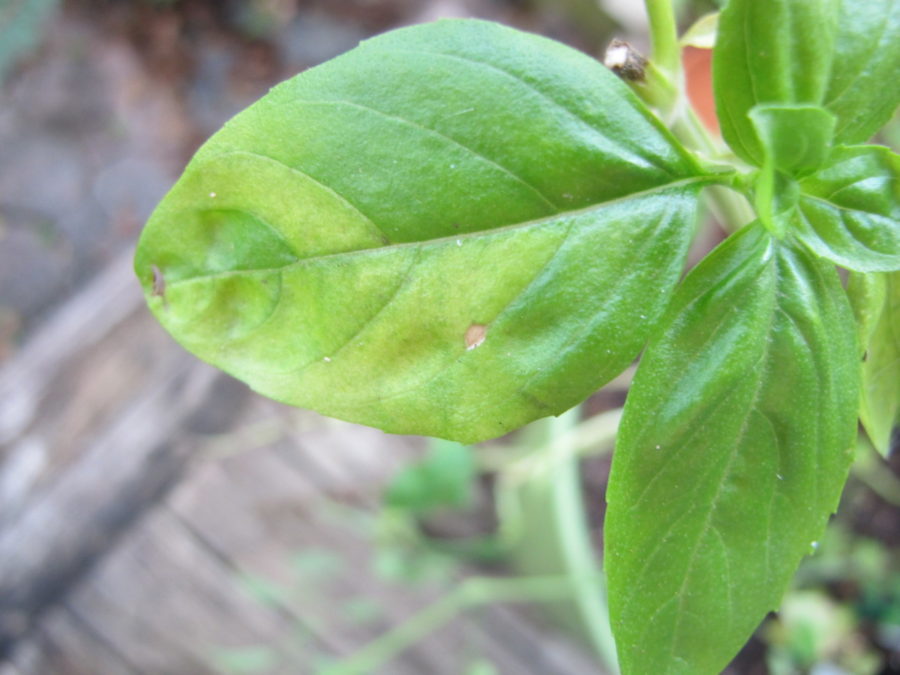
basil downy mildew

Yellow areas between the veins.


How To Recognize Basil Downy Mildew


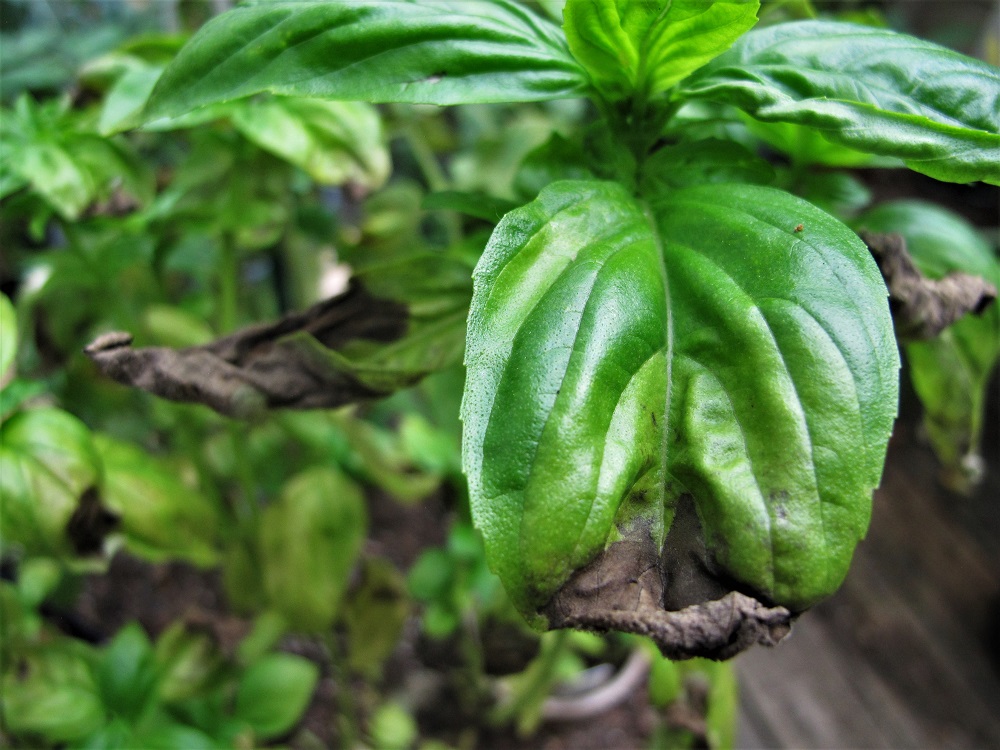
As you can see in the photo, above, formerly healthy green leaves developed yellow patches bordered by the main veins. After a stretch of high humidity or rain, the symptoms became readily apparent. The plant looked fine one day, and the next morning it looked like this!

The condition worsened, as it infected more leaves and more stems. The leaves became yellow overall, and black spots showed up. Within a week, the plant was worthless. It had been growing in a large pot with a tomato, so I cut the basil at soil level and threw it in the trash.

We’ve had a very rainy spring and summer so far (2020), and this plant started showing signs of distress by mid June. I picked the good green tips, and kept them indoors in a glass of water until they went into tomato-basil salads.

The local grocery store had full sweet basil in small pots, so I bought one. The first thing to do is to discard the clear plastic wrap around the plant. Why? Because humidity causes the problem in the first place!


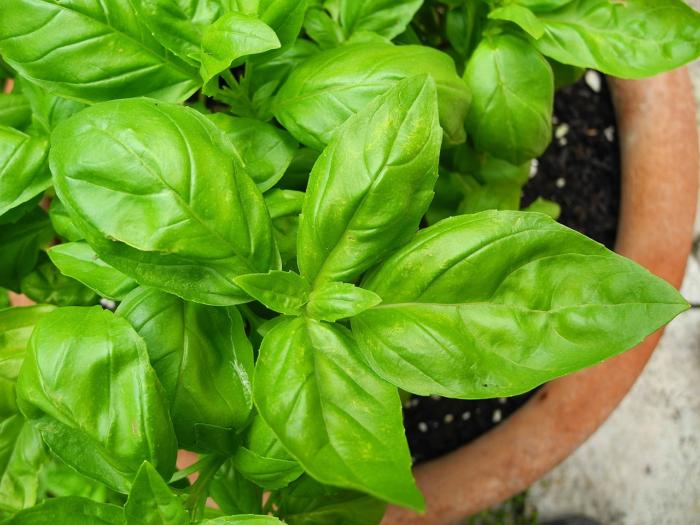
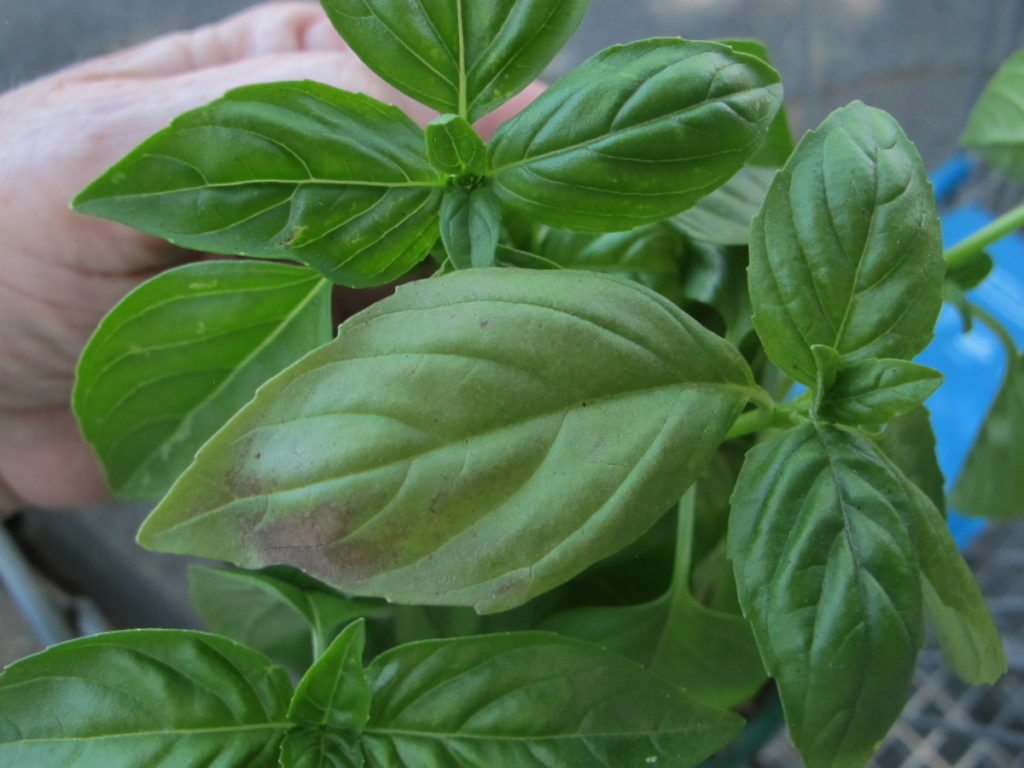
potted bsil

This is a pot of healthy sweet basil.


How BDM Starts


Microscopic BDM spores on the leaves need relative humidity above 80% or 85% for only a few hours in order to germinate. Local weather reports will indicate the relative humidity, and you might be surprised by how high that number is at dawn, even during “nice” weather.

Although you might not have had rain or high humidity during the daytime, your basil can still become infected. Here’s how:

As the temperature decreases through the night, the relative humidity rises. It’s usually around dawn, the coolest hours, that the relative humidity reaches its highest reading. With BDM spores on a susceptible variety, 2 or 3 hours of high humidity will get the disease growing. So, even during comfortable daytime weather, the infection gets its start quietly, hours before the alarm clock goes off.

Most years, we can grow basil successfully for a few months before the humidity increases. But over the past few years, BDM has struck earlier in the growing season.

If the summer is hot—in the mid 90’s and above—and the nights don’t cool off very much, the relative humidity won’t rise to the critical 80-85% level required for germination. Unless there’s rain.

Gardeners living where the humidity is always low probably won’t have problems with BDM. But one brief rainstorm could be enough to initiate the disease, if spores are present, even in a normally dry region. If the weather dries sufficiently, though, the disease will subside. Pick off and discard infected leaves, and normal growth should resume.

Wind carries the spores from infected southern-grown plants to northern zones (northern hemisphere) each year. Plants that are shipped to garden centers around the country, infected seeds, and overwintered infected plants are potential sources of basil downy mildew. But the spores do not survive cold winters, and the disease needs a living host.


At Dawn, The First Day


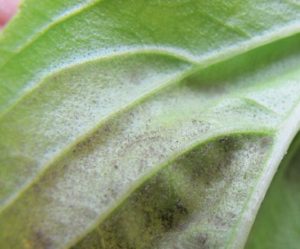
basil downy mildew

Early symptom–fuzzy gray layer on reverse.


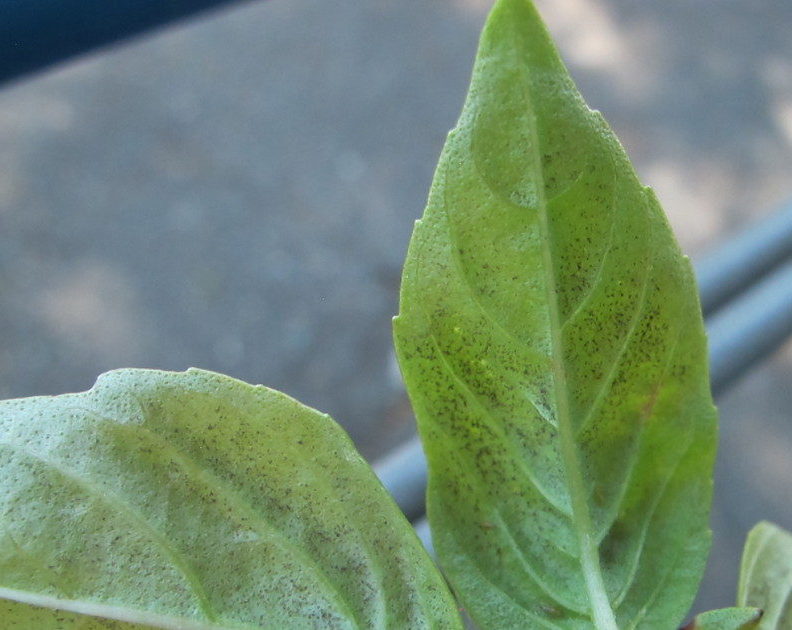
Once the spores germinate, they grow into a gray fuzzy film on the leaf’s reverse. You have to be an early riser to catch this stage of the disease. You’ll notice a change in the leaf’s appearance, showing light green to yellow areas between the main veins.


Later, Or The Next Day


The mold progresses to the next stage, when tiny black dots become visible on the back of the leaf. Those dots are the sporangia that have burst open, releasing spores to infect the next basil that comes along. The leaf becomes more discolored, wrinkled, and spotted. The sporangia can be so thick that most of the leaf reverse is covered in black.


basil downy mildew

Black sporangia on reverse.


And Then


Yellowing between the veins continues, and leaves develop black edges or spots. Although the infected leaves won’t harm you if eaten (unless there’s a true allergy to the mold), they will not have that rich summer basil flavor and aroma you longed for. It’s time to look for new, healthy young plants. Or start some seeds!

Any basil without good color, either light or dark green, or purple, tastes awful. Whether it’s caused by disease, poor growing conditions, or lack of nitrogen, pale leaves will disappoint your taste buds. Some varieties, notably the lettuce-leaf basils, normally have light green leaves (photo at top).


Three Suggestions To Prevent Basil Downy Mildew


At the end of this post, I’ll include links to other articles at The Farm In My Yard with information on basil downy mildew. They have all the details you’ll need to grow beautiful basil. And there are methods for growing this herb outdoors in the garden in ways which might decrease the likelihood of BDM.

For disease-free basil, consider these 3 tips:


1. Grow Basil Under Artificial Lights

The Structure

Many gardeners don’t have sunny windows or any garden space to grow basil. You can grow a decent crop, however, under artificial lights, such as fluorescent tubes or LED’s. The more expensive LED’s last longer and consume less energy.

You can buy light cart kits to assemble at home, but they will cost you dearly. Instead, gather a few materials from the hardware store, including the light fixtures, and construct your own light table. Another option would make use of an empty bookshelf. Perhaps the basement or a spare bedroom could become indoor growing space for houseplants and edibles. I recommend a small fan to circulate the air.

A 4′ long plug-in fixture with 2 tubes and a reflector on top will suffice. Smaller units emit much less light and might not provide enough light for herbs. So, for plants that normally require lots of sunlight, try to find space for the larger fixture.

Two or three fixtures lined up about 2′ apart significantly increase the light levels, so you can grow other edibles or houseplants with the basil. Maybe you’d like to add parsley and cilantro to your indoor garden. Lots of possibilities!

For 35 years, I used plant tables originally built by our contractor friend, Wally. I broke them down and reassembled them each time we moved. Constructed from 2″ x 4″ framing, carriage bolts, screws, hooks, small chains, 4′ light fixtures, and 4′ x 8′ sheets of exterior grade plywood, each table was a marvel of functional simplicity. Matte white surfaces reflect light back to the plants, so consider painting the structure, including the plywood, and the room white or off-white.

Be careful using electricity and water in close proximity. If you have any doubts, ask a licensed electrical contractor for advice. But it’s not difficult to set up a simple table with lights. Double the fun and add fixtures under the table, where it’s a bit cooler. Lettuce and mesclun should do well there.

Growing Basil

Keep the plants very close to the tubes—within a couple of inches—and leave the lights on for 14 to 16 hours each day. Yes, this is more hours of light than they’d receive outdoors, but with lower photosynthetic photon flux density (“weaker” light) indoors, plants use this light more efficiently over a longer period of time, resulting in increased growth. Your indoor basil probably will look better than outdoor basil.

Basil likes temperatures from the high 60’s and into the 80’s F, but prefers to be above 70°. You might be able to grow it indoors all year. Keep the soil slightly moist, but not wet.

Pinch back the stems so the basil won’t grow too tall. This prevents lower leaves from being shaded, which will cause yellowing. Cutting back the plants also forces branching, supplying more tender growth for the kitchen. Remember to fertilize every 2 to 3 weeks to keep the foliage a rich green color; pale foliage tastes terrible.

Start seeds or buy young transplants every few months. Basil is an annual, and once in flower mode, it often starts deteriorating. Cutting off the flower buds and a few nodes (pairs of leaves) under them, however, will delay its demise. Place potted basil plants on inverted pots, if needed, to raise young plants closer to the lights.


microgreens in a tray

Microgreens, primarily broccoli.


Growing microgreens in shallow trays is another worthwhile project for your light table. Tender basil seedlings, among many other edible plants grown for microgreens (photo, above), can be harvested 2 to 4 weeks after germination.

Advantages:

  • Basil is within reach of your kitchen.
  • You can grow it all year long.
  • No insects, with careful monitoring. No pesticides.
  • Pick only what you need, without any of it deteriorating in one of those plastic clamshell containers.
  • Basil growing in conditioned air (heat or AC) indoors has low relative humidity, so downy mildew will never be a concern. Don’t mist the plants.
  • Growing plants indoors keeps you connected to nature, which has proven psychological benefits.


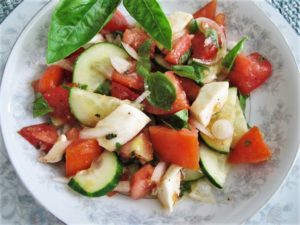
tomato-basil salad

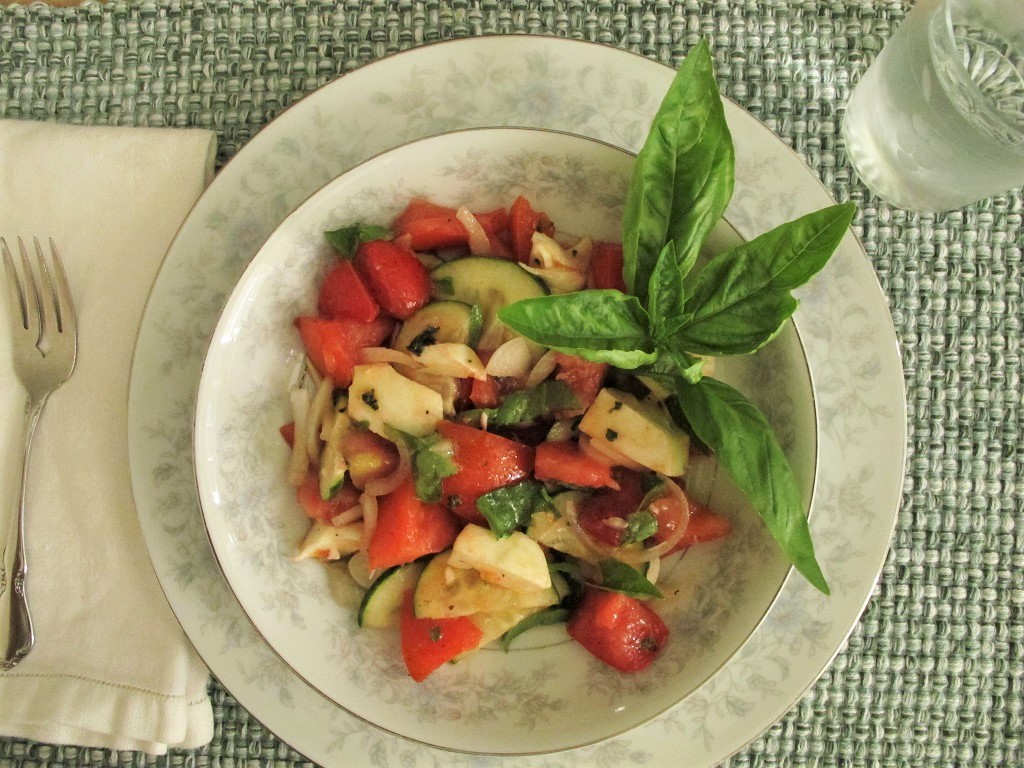
Tomato-basil salad.


2. Move Potted Basil Indoors In the Evening

Now that you know how BDM becomes established in your plants, keeping basil in pots is a good solution. Sure, you can also grow it in the summer garden. But having at least one potted basil is a safety net if BDM ravages your garden.

Once rainy weather settles into your neighborhood, or if you’ve noticed BDM in gardens around town, it’s time to pull the pots indoors for the night. Humidity indoors will never reach the levels that exist in the garden outside. Basil I’ve kept indoors has never gotten BDM.

Don’t forget to place the pots back outside in the morning, if it’s warm enough. Basil should receive at least 6 hours of direct sun outdoors. If rainy weather is in the forecast, keep potted basil plants in a bright spot or under lights indoors for the day. Avoid watering them indoors unless it’s absolutely necessary. Plants in 7″ or 8″ pots are easier to move around than basil in huge, heavy ceramic pots. So, consider ahead of time which pots you’re going to use.

A collection of several pots will be easier to wheel back and forth on a cart. How convenient is that?! Treat yourself to one of those carts with a recessed surface, which doubles as a saucer. But don’t let water collect beneath the pots. This will cut off air circulation in the root ball, and could rot the roots. Out to the deck for sunshine, indoors at night for disease-free basil!


3. Use Varieties That Are Resistant to Basil Downy Mildew 

Recent breakthroughs in basil breeding show promise for disease-free and pesticide-free growing. Rutgers University developed several new BDM resistant varieties of sweet basil. Look for ‘Rutgers Obsession’, ‘Rutgers Devotion’, ‘Rutgers Thunderstruck’, and ‘Rutgers Passion’. When I ordered seeds this spring, my regular supplier had already sold out.

In Israel, Genesis Seeds and Bar-Ilan University bred the variety called ‘Prospera’. It is available through the commercial arm of the partnership, BIRAD Research and Development Company, Ltd. Your favorite seed house might stock it.

Proven Winners is offering ‘Amazel’. This is a vegetatively propagated variety, and is sterile. It will be sold only as plants since it doesn’t set seed.

In a Maryland trial testing all of these BDM resistant varieties, ‘Prospera’ and ‘Amazel’ did not show any symptoms. Some of the Rutgers plants showed very mild symptoms in autumn, probably because other stressors made them more vulnerable at that time.

I look forward to trying some of these new varieties next year. Check with these suppliers: Johnny’s Seeds, High Mowing Seeds, Harris Seeds, and Proven Winners. As far as I know, only sweet basil is available as disease resistant varieties. I’m not aware of disease resistant lemon and Thai basils, two more of my favorites.

No, none of these new varieties are genetically modified organisms (GMO’s).

(***Update***: I’m pleased to report that the ‘Rutgers Obsession’ basil growing in front of a tomato plant in a 20″ pot outdoors has not shown one speck of basil downy mildew. We’ve had the weather to put it to the test, though, with high humidity and long periods of rainy weather. 9/2/2021)


Concluding


American goldfinch, male

Male American goldfinch.


At the end of the season, as any surviving basil goes to seed, consider leaving it in the garden. The cheery little American goldfinches will appreciate this windfall.

I hope you’re encouraged by these options for growing BDM-free sweet basil. It takes a little effort, yes, but I can’t imagine a season without this fresh herb. I strongly recommend growing the new BDM-resistant varieties.

Good luck, and happy gardening!


Here are two other posts about basil (Ocimum basilicum), with detailed growing instructions:

Growing Basil In Pots: How and Why

Basil Downy Mildew: Symptoms and Solutions


basil downy mildew

Symptoms of basil downy mildew.


Return to the top

Daffodil Bulbs: Divide, and Multiply the Flowers


How Do Your Daffodils Look This Year? 


daffodil bulbs, yellow, cane creek park

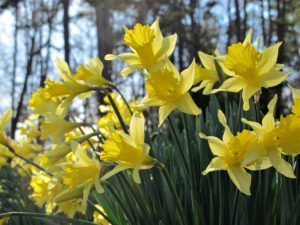
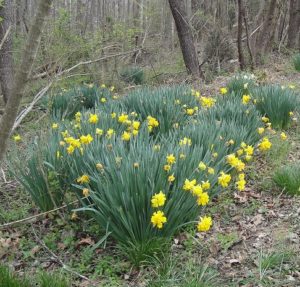
Daffodils in February at Cane Creek Park, Waxhaw NC.


For years, your daffodil bulbs bloomed to great satisfaction. From late winter to mid-spring, there was never a shortage of cut flowers to bring indoors. And plenty remained in the garden to admire from indoors or for neighbors to enjoy.

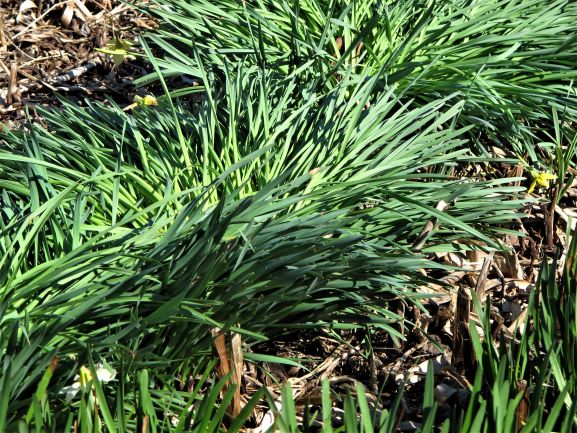
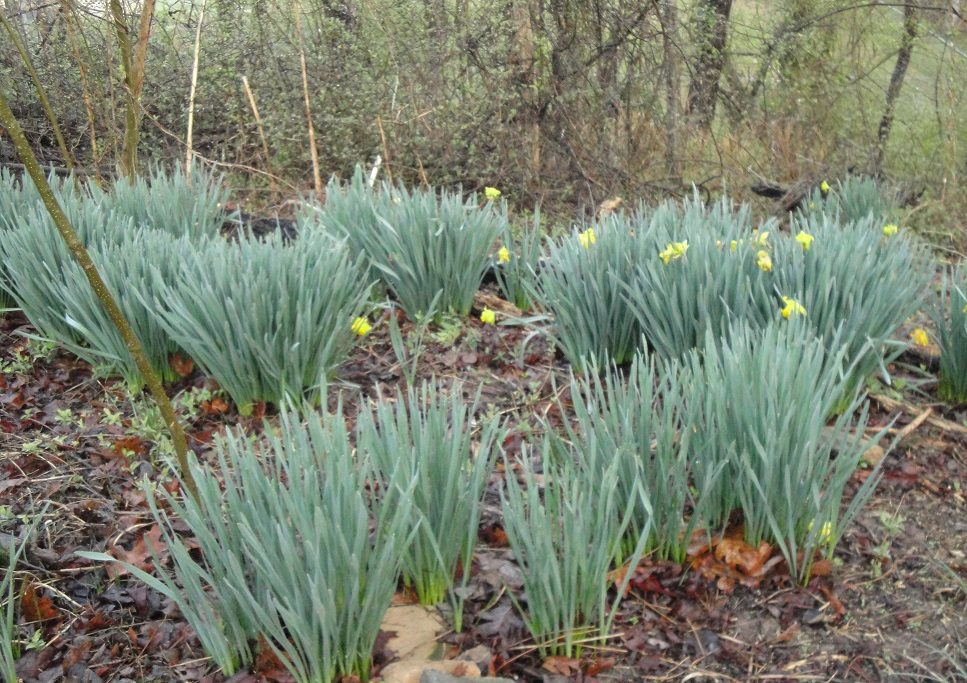
But this year, they were so disappointing! Masses of slim green leaves look healthy enough, but there were only a few flowers! Come to think of it, there weren’t many last year, either. They should be in their prime right now.


daffodil leaves, no flowers comp

Clumps of daffodils with all leaves, very few flowers.


Why does this happen? You’ve been using the bulb fertilizer recommended by the garden center, and, heaven knows, they never went dry! They looked great a few years ago. Clearly, there’s a problem with the daffodils.

This is called daffodil “blindness”, or lack of flowers. A number of factors contribute to this condition.


“Should I Remove Them?”


Not yet. Just let them soak up the sun’s energy, undisturbed, for as long as the leaves remain green. Don’t cut, knot, braid, or mulch over the leaves. Keep them exposed to direct sunlight. Remove any seedpods, if you see them, to conserve energy and resources. All energy should be directed toward plumping up the bulbs.

In this article, you’ll find tips for restoring your daffodil gardens back to their spectacular spring show. I’m including information on conditions for growing daffodil bulbs successfully for many years into the future. But it’s too early to dig them up right now. Once the leaves have turned yellow or brown, we can begin to dig, divide, and re-set the bulbs.

Bulbs that have been forced in a pot should be planted into the garden after the foliage yellows. While the leaves are green and photosynthesizing, continue watering and provide sunlight. Lasagna pots, crowded with layers of bulbs, rarely bloom well, if at all, a second time. These bulbs might need a year or two in the garden gathering strength for more blooms in the future.


Hardiness 

There are 13 divisions of Narcissus, grouped according to their flower structure. Thanks to the efforts of daffodil hybridizers, consumers can choose from among 32,000 registered daffodil varieties! Also, according to the American Daffodil Society, there are between 40 and 200 daffodil species.

In general, daffodils grow in USDA plant hardiness zones 3 to 11, although some prefer the cooler end, and others, the warmer zones. Before purchasing your bulbs, find out which zone you live in and which varieties will grow there.

‘Camelot’ and ‘Flower Record’, for example, are better suited to zones 3 to 7, struggling in a warm zone 7 season and failing south of it. The paperwhites Narcissus tazetta (N. papyraceus) ‘Avalanche’ and ‘Minnow’, on the other hand, do better in the warmer zones 5 or 6 to 9.


For Now, Fertilize the Daffodil Bulbs


Apply a complete bulb fertilizer to your daffodils and other spring-flowering bulbs. It should have low levels of nitrogen (N), but more phosphorus (P) and potassium (K) content. Use a low analysis product, such as 5-10-10 (N-P-K). 10-10-10 also is acceptable.

As plants photosynthesize, they make their own food and store it in the bulbs. This nourishes the embryo, which is dormant in summer, and prepares the plant for next year’s growth. The more carbohydrates stored in the bulbs, the more flowers for next spring, as long as other conditions are favorable.

Fertilizer applied as the bulbs begin to emerge from the ground could cause the robust foliage and heavy flower heads to flop over. I normally fertilize the bulbs later, around the time of peak bloom, if they need it. Non-flowering bulbs can benefit from a light fertilizing before dividing the clumps. Because the foliage will stay green for several more weeks, the bulbs will have time to utilize the fertilizer.

A soil test conducted by your local agricultural extension service will indicate whether any nutrients should be added.


Bone Meal

For years, many gardeners have relied on bone meal to fertilize their bulbs. Bone meal contains a small amount of nitrogen (3-4%), more phosphorus (12-14%), no potassium, and some micronutrients (Ca, Fe). Mixed products available for bulbs might include bone meal, but also have additional nutrients to make a complete formulation.

The problem with exclusively using bone meal is that it takes longer than other products to break down and become available to the roots. Furthermore, phosphorus, the primary ingredient, moves very slowly through the soil profile. For that reason, bone meal added to the root zone—before planting the bulbs—might be more useful than applying it to the surface of the ground. Avoid direct contact, though, between the bulbs and the fertilizer. Still, it’s not likely to provide nutrients until months or a full season later, after microbes have begun decomposing it.

Bone meal is a slaughterhouse by-product, after sterilizing and grinding cow bones. Some animals are attracted to the scent, so burying it might prevent it from being consumed.

Because daffodils and other bulbs aren’t very demanding, giving them anything should result in good growth. Soil pH should be somewhere between 6.0 and just below 7.0 for nutrient availability. If a soil test indicates adequate phosphorus, I wouldn’t use bone meal. An excess of P will interfere with the uptake of other nutrients.


Food or Fertilizer?

Notice the distinction between the terms “fertilizer” and “food”. Fertilizer is the product we apply to plants. There are many kinds of fertilizers, including soluble and granular types, and compost. They provide various amounts of nutrients to help plants function at an optimum level.

Food is a product of photosynthesis; plants make their own food inside the foliage. This substance is stored as carbohydrates in bulbs, stems, and roots, depending on the species.


Easy Does It!

Daffodils and other bulbs we plant in our gardens don’t need much in the way of nutrients, so never overfertilize. Perhaps you’ve seen clusters of yellow or white daffodils randomly appearing along roadsides or in the middle of a field. Heirloom varieties of Narcissus bulbs are sometimes the only surviving clues that an old homestead once stood nearby. Daffodil bulbs can live for decades!


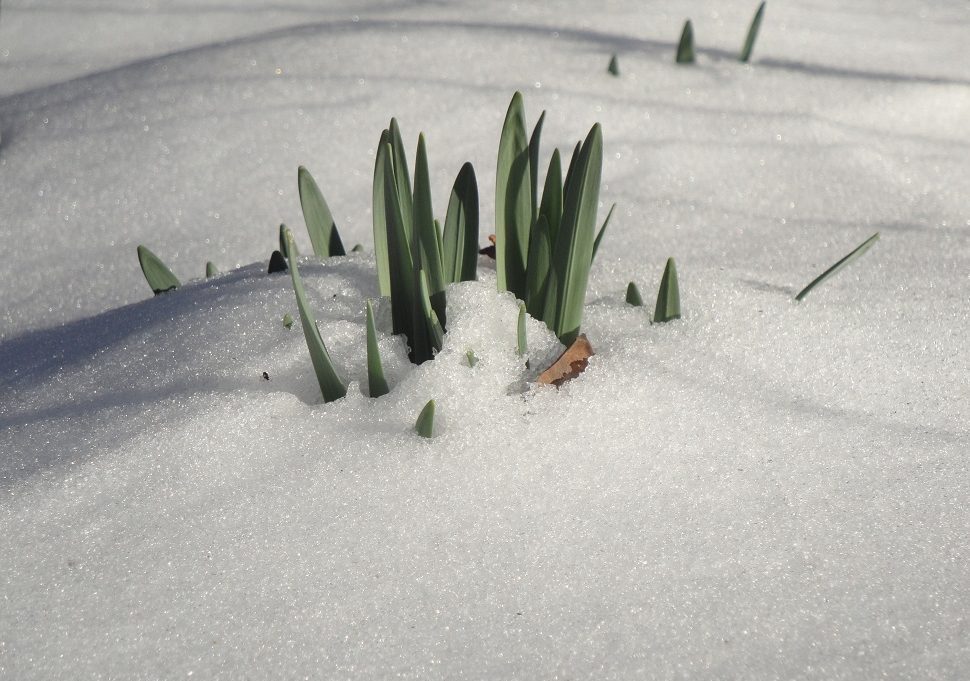
***Update***: At the south edge of the woods at the new property, daffodils emerged under snow and after a tangle of growth had been cleared away (photos, above). Once the honeysuckle vines, brambles, and tree saplings had been removed, the daffodils grew thick and healthy, although there were few flowers. The soil there is rich with decomposed leaf litter. After the foliage begins to yellow, I’ll divide and transplant most of the bulbs. 3/20/2022


daffodil bulbs


***Update***: Well, I never got around to dividing these bulbs. Starting in January 2023, abundant flowers grew on stronger plants (photo, above). And the flowers lasted 2 months! I don’t know the variety, but it’s an older one with fragrant double flowers. Because the flowers last such a long time, I’ll transplant several divisions to the garden on the far side of the driveway, visible from my office. 4/13/2023

“Then, why do those old abandoned daffodils look better than mine?”

Over time, year after year, fallen leaves and other organic debris have collected at the soil surface above the daffodil bulbs. Microorganisms decompose this material from spring through fall, while the soil is warmer. Nutrients from decomposition slowly filter down to the roots, and are absorbed as the roots emerge in late summer and autumn.

Those abandoned daffodil bulbs don’t need fertilizer from us, nor do they need a layer of mulch. Mother Nature is looking after them! Sometimes, less is more.

Growing our bulbs leaner could help. Pushing them to “grow better” is one reason for overabundance of foliage and lack of flowers. High nitrogen is particularly problematic. For spring-flowering bulbs in decent garden soil, the application rate recommended on the package of bulb fertilizer can be halved. Unless your garden soil is absolutely wretched, keep the fertilizer levels somewhat low.

If the garden soil is good enough to sustain annuals and perennials, it is more than adequate for daffodil bulbs. With occasional applications of fertilizer to garden plants through the growing season, the bulbs lying dormant in the soil below them will have plenty of nutrients when they begin to root out.

I fertilize lightly, sometimes, in autumn, as the bulbs root into cooling soil, and again when they’re in full leaf in spring. It just depends on how the garden has been managed. In many years, I don’t fertilize at all.

Bulbs planted in gardens under irrigation might be getting too much water, which can rot the bulbs. Daffodils don’t appreciate dry soil, but wet soil will kill the bulbs, and then nothing will sprout.


mount hood daffodil bulbs

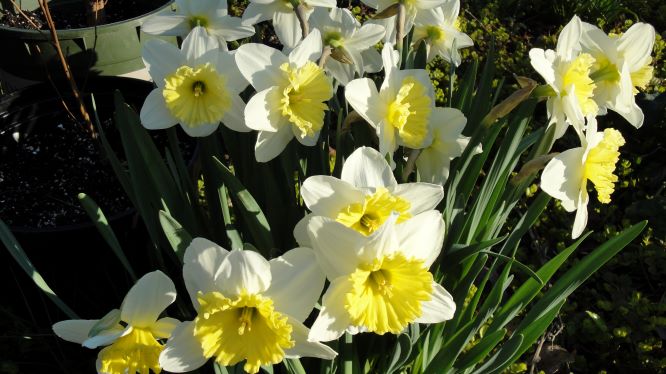
‘Mount Hood’ daffodils. As they age, they turn ivory white. Soil in the mulched garden was good, so I rarely fertilized them.


“Can I use compost?”

A moderate amount of compost top-dressed on the surface and watered into the soil makes a fine addition. Or scratch the compost into the surface of the ground. Covering the compost preserves the beneficial microbes, which will be destroyed by the sun. Because the bulbs are deeper, they won’t be damaged by light cultivation.

Nutrients in decomposing mulch also contribute to the health of the soil. Soil under slowly decaying shredded hardwood mulch is probably sufficient for daffodils and other spring-flowering bulbs. Earthworms consume partially decayed material, enriching it in their own special way. They then distribute the castings (earthworm excrement) throughout the garden soil, and aerate it as well.

Shredded hardwood mulch breaks down faster than pine products, but don’t pile on large amounts. That could cause manganese toxicity and raise the pH too high. It’s a good idea to use shredded hardwood for a few years, and then switch to pine for a few years.


Headings

Page 1: How Do Your Daffodils Look This Year?, “Should I Remove Them?” (Hardiness), and For Now, Fertilize the Bulbs (Bone Meal, Food or Fertilizer?, Easy Does It, “Then, why do those old abandoned daffodils look better than mine?”, “Can I use compost?”)

Page 2: Sunlight For Daffodil Bulbs, Daffodil Bulbs Under the Trees, Soil and Drainage (Soil Preparation, Dig In!), Divide and Multiply Daffodil Bulbs (The Process, “And How Deep Is That?”), Time To Plant Daffodil Bulbs (Planting in Autumn, Planting in Early Summer), Summary

Return to the top

Tornado in Matthews NC! Time for Smaller Trees?


2020

Updated 11/4/2024


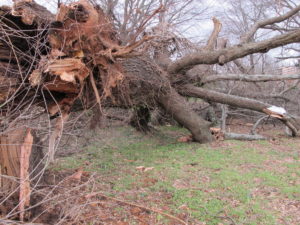
fallen oak tree, tornado

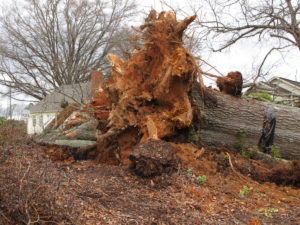
An old oak tree felled by the Matthews tornado.


Tornado!


I’ve been out of town for a few days, visiting family in New Jersey. On the return drive, the weather report on Charlotte’s WBT radio warned of impassable flooded streets and a tornado that had toppled old oaks and mature maples near my home, in Matthews, and in nearby towns. Over 3″ of rain fell last Thursday, swelling streams and rivers and saturating the ground. When the soil is that wet, it becomes more fluid; a brisk wind can push over 200-year-old trees.

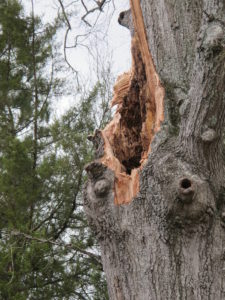
tree trunk with rotten core exposed by tornado

Rot inside the trunk, a weak spot.

And that’s just what happened. Shallowly rooted evergreens and even perfectly healthy bare trees couldn’t stand up to the sustained high winds. Trees with rotten cores (photo, right) fell over at ground level or shattered some distance up the trunk. Healthy or somewhat compromised—it didn’t seem to matter. Tornadoes choose their victims indiscriminately.

On Friday, I drove around and saw those damaged trees, twisted and gnarled, some sheared of all their branches and leaves. On Pineville-Matthews Rd., the junipers, cypresses, and evergreen magnolias fell like dominoes, one against the next. For all the beauty Nature reveals to us, there’s always the flip side, too—devastation and death.

Police were out directing traffic. Stoplights were dark, and trees leaned on overhead wires. When this happens, remember to observe local laws. Here, we treat an intersection with a non-functioning stoplight as a 4-way stop. I was pleased to see cars on the main road come to a stop to allow vehicles lined up on the side streets their chance to proceed.

The main roads had been cleared of debris, but some of the side streets were still littered with limbs, piles of greenery, parts of roofs and fences, and road signs.


Aftermath of the Tornado


After the tornado, something will benefit and grow after the wreckage has been removed. Shrubs and flowers shaded by the thickening canopy will be reinvigorated by brighter light. And, of course, more weeds will grace our gardens.

Sure, we’ll have to move the shade lovers to more appropriate locations, or plant a new tree. Residents whose homes border main thoroughfares will reestablish screening plants that provide a measure of privacy. The silver lining in this cloud could also mean more fruitful harvests from our blueberry bushes and vegetable gardens. But certainly, we’ll miss our trees.


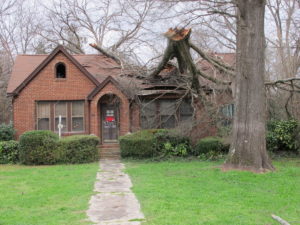
tree fell on house roof, tornado

Half the tree landed on this house in Matthews NC.


Roots or Consequences


Checking the NOAA (National Oceanic and Atmospheric Administration) website confirmed the presence of a few tornadoes in the Carolinas on February 6, 2020. Around 12:15 p.m., an EF1 tornado cut a swath 150 yards wide and 17½ miles long south of Charlotte, from Pineville to Matthews. It lasted 16 minutes, with winds that reached 95 miles per hour.

Warm moist air masses clashed with strong cooler fronts, setting this severe weather pattern into motion. Local media recorded some of the devastation.

There were no deaths in this area, although two casualties, unfortunately, were reported elsewhere in North Carolina. I spoke with a man in Matthews, who said his aunt and uncle were in the room right below where part of a tree trunk had crashed through the roof. They were not injured, thankfully, but the Fire Department declared the home unsafe to occupy (photo, above).


Pancakes

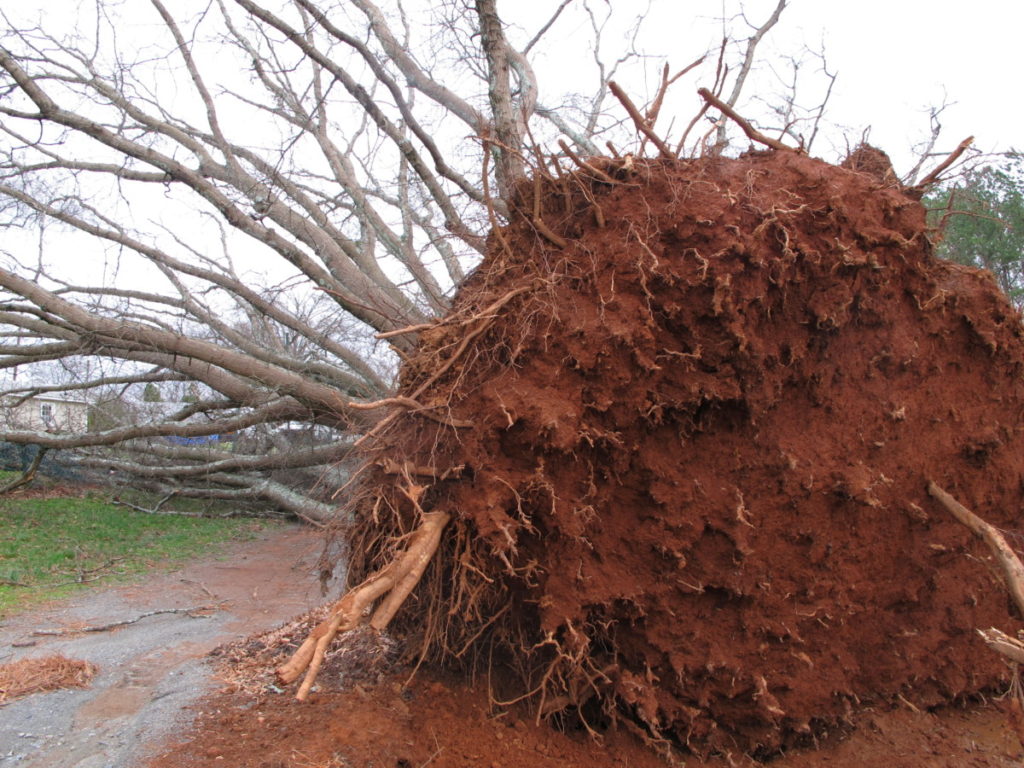
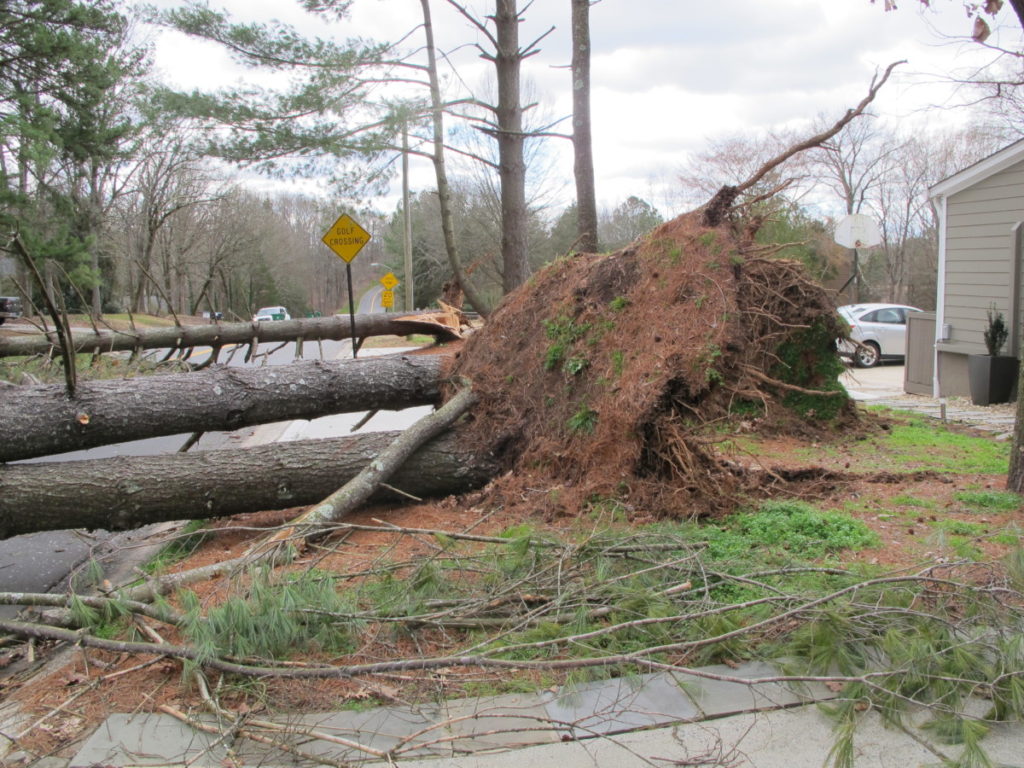
It’s incredible, when viewing the uprooted plants, that almost all the tree roots are in the top foot or 18″ of the soil. You’d think these 50′ or 80′ tall trees would have deep roots that anchor them to the ground, but most do not.

Compacted soil, bedrock, and natural growth patterns for the species keep the roots shallow. And there is more of the necessary oxygen, fertility, and microbial activity closer to the surface. So, tree roots spread out from the trunk in search of water and nutrients, extending beyond the drip line.

When the force of the wind is stronger than the ability of the tree’s roots to hold it in place against resistance, the tree will succumb. Plants might hold up at first, but, after a while, trees can begin to fall over.


Time for a Tree Check-Up


felled tree

A huge tree, at least 100 years old.


This might be a good time for a tree health check-up from a licensed arborist. Granted, there are no guarantees. But a trained specialist can see aspects of the tree’s growth that could indicate the likelihood of trouble in the future. Pruning trees properly when they’re young and as they grow, if they need pruning at all, will improve their branching structure for decades to come.

The arborist might find decay where a few trunks come together 30′ from the ground. This is where leaves and water might have been collecting for years, eventually rotting the bark. Decay then spreads deeper into the interior wood. Also, as trunks and large congested branches grow in girth, they compete with each other, compromising transport of water and nutrients, and, therefore, structure and strength. Many of the trees that came down in this tornado had rotten cores.


topped tree, sky

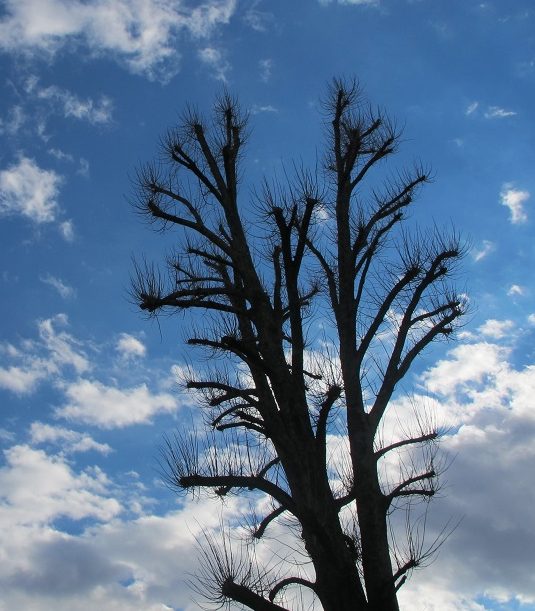
A topped tree, showing weak epicormic shoots.


Another weak point occurs where several stems grow as a result of topping or heading back the trunk or side branches. Those epicormic shoots (photo, above) have feeble connections to the wood and compete with each other. Most of them fall from the tree over time. Never top a tree! It’s a difficult decision to make, but you’re probably better off replacing large trees that have outlived their usefulness (too large, too close to the house, cracking the foundation) instead of topping them.

girdling root

Girdling root on maple tree and no trunk flare.

Another clue to look for is a missing flare. That part of the trunk looks flat (vertical) where it descends into the ground. This usually indicates a girdling root or some other obstruction underground, and possibly a sparse root system on that side. Rocks and soil discarded against a tree trunk can cause problems later.

Mother Nature does not issue guarantees. Sturdy trees that give no indication that anything is wrong can blow over in high winds, regardless of the care it has been receiving.


Trees for Shade

In areas with hot summers, such as here in the Carolinas, we love our trees. We value our family’s lives and the integrity of our homes, of course, so it makes sense to evaluate the plants on our properties, especially those standing close to structures.

Certainly, a mature tree canopy helps reduce energy bills and adds aesthetic value. But ignoring unhealthy trees or pruning them improperly can be very costly in the long run.


Alternatives to Towering Trees


Magnolia Flowers Plant Petals - ottawagraphics / Pixabay

Small to medium-sized cultivars of magnolia are suitable for most home landscapes.


Although you might be inclined to replace a dead tree with the same species, now is the perfect time to reconsider that choice. Visit a reputable garden center and ask the tree expert for recommendations. ‘Bradford’ pear? Silver maple? Weeping willow? No thanks!

There are many other options that will fit better in your landscape. Find species with strong branch attachments, and those that won’t litter the ground and fill the gutters with twigs or fruits every time a breeze blows through the neighborhood.


Landscape Considerations

Always look at the scale of the site, how your home fits into the local surroundings. A 3-story Victorian could look lovely framed by a natural stand of stately scarlet oaks. If they’re growing 15′ from the sunroom, you could enjoy the shade for 10 years or even 50. But a microburst or a tornado could send tons of wood hurtling toward Logan’s antique Firebird…or your home.

It’s safer to locate the tallest trees much farther from the house. Then you won’t have to deal with the oak trees’ acorns in the driveway every year.

Ask about native trees and shrubs, although there are so many beautiful exotic species I must have. Each species has many cultivars to choose from. If one tree doesn’t seem substantial enough, plant three or five of them in a raised bed, properly spaced. Perhaps large shrubs will work better for your situation or in tight spaces.

Add drifts of small shrubs, perennials, groundcovers, a patch of colorful annuals, and spring flowering bulbs for a complete garden. Mulch to suppress weeds, conserve moisture, and prevent erosion.


A Short List of Small to Medium-Sized Trees


Check with local garden centers, agricultural extension offices, botanical gardens, and native plant societies for suggestions. Here are several of the species (native and non-native) that grow in this part of North Carolina:

  • American hornbeam (Carpinus caroliniana)
  • Birch (Betula ‘Whitespire Senior’ and others)
  • Carolina silverbell (Halesia)
  • Chaste tree (Vitex)
  • Chinese pistache (Pistache chinensis)
  • Crape myrtle (Lagerstroemia indica)
  • Dwarf evergreen magnolia (Magnolia grandiflora ‘Little Gem’)
  • Eastern redbud (Cercis canadensis)
  • Flowering dogwood (Cornus spp.)
  • Fringe tree (Chionanthus spp.)
  • Full-moon maple (Acer japonicum)
  • Golden chain tree (Laburnum)
  • Japanese maple (Acer palmatum)
  • Japanese snowbell (Styrax japonica)
  • Lilac (Syringa)
  • Magnolia (Magnolia spp.)
  • Paperbark maple (Acer griseum)
  • Parrotia (Parrotia persica)
  • Peanut butter tree (Clerodendrum trichotomum, can be invasive)
  • Serviceberry (Amelanchier)
  • Sourwood (Oxydendrum arboreum)
  • Stewartia (Stewartia pseudocamellia)
  • Witch hazel (Hamamelis spp.)
  • Smaller varieties of oak, birch, maple, tupelo, plum, crabapple, cherry, conifers.


Do Your Research


Research cold/heat hardiness (USDA plant hardiness zones), disease resistance, forms and colors that enhance your property’s appearance, and seeds or fruits that feed wildlife. Include some natives in your garden to support diversity of local insect and animal species.


Severe weather events can cause considerable damage to our homes. Each year, they claim human lives. The cost for cleaning up and repairing the damage is quite high, but, of course, some of the losses we can’t recover.

The United States leads the world in the number of tornadoes, averaging more than 1,000 annually. North Carolina averages 22 per year. The states with the highest number of tornadoes, in descending order, are Texas (135/year), Kansas, Oklahoma, Nebraska, and Iowa.

Although a tornado will alter the look of our landscape, this is an opportunity to view it with a fresh perspective. Looking into the future, planting smaller trees and shrubs appropriate for the site might prevent the heartache of real loss.


Return to the top

10 Tips for Protecting Cool Season Vegetables

2019

Updated 9/24/2024


Here are 10 Tips for protecting cool season vegetables from freezing temperatures.


cool season vegetables in the garden

Cool season vegetables: from the top, broccoli, leeks, ‘Red Russian’ kale, light green mustard greens, and collards.


Ready For Fall?


Throughout parts of the United States, and in chilly climates everywhere, gardeners are scrambling to save their tender plants. Most of us have brought in all the houseplants. More laissez-faire gardeners do nothing special to extend the season, beyond harvesting the last of the cherry tomatoes and clearing out the frosted vines.

And there are those of us who strive to keep cool season vegetables growing even in winter. And we’ll plant more of them! Soon I’ll transplant ‘Monstrueux de Viroflay’ spinach seedlings into pots to grow on the deck through the winter. This French heirloom spinach has huge leaves with a milder flavor. It has lower levels of oxalates, so those who have been advised to avoid eating spinach might be able to eat this variety. Ask your doctor.

In early October, I planted 2 dozen onion sets (for green onions) in a 12″ pot on the deck. Green onions are ready for harvest, in mild weather, only a few weeks after planting the sets. To preserve them in the cold, I’ll cover them with plastic sheeting (Tip #2). Green and bunching onions grow more slowly in cold weather.

I planted more sets every couple of weeks and will soon plant the remaining bulbs before they dry up. A favorite bunching onion called ‘Nabechan’ has straight sides. Not having a bulb at the bottom makes it easier to harvest. Sets are not available for bunching onions, though, so they must be started from seeds.


Where There’s a Will, There’s a Way


2023 USDA plant hardiness zone map


Potted cool season vegetables will grow under a plastic covering in cold weather. To extend the season, strings of miniature incandescent Christmas lights (Tip #6) will raise the temperature to more comfortable levels. Later in this article, I will list all 10 Tips for protecting crops in winter.

Starting with the simplest ideas and progressing to the more advanced methods, find the level you’re most comfortable with this season. Your budget, your USDA plant hardiness zone (photo, above), and the types of crops themselves must factor into your decision.

As you gain confidence and become more motivated to keep the garden producingyou might decide to try the next level. Cost savings realized by growing your own fresh food might justify the expense of new materials.

It’s only through experimentation, by taking a chance, that you might discover all the opportunities—and the limits—of gardening challenges. This is how green thumbs are cultivated.

If you’ve never grown cool season vegetables, several articles at The Farm In My Yard provide detailed information to get you started. For a greater understanding of any issue, enter the term in the search bar or click it in the tag cloud.


The Advantage of This Latitude

I’ve been growing greens in winter for decades, for my customers and for my family. Fortunately for us, living in the southeast doesn’t present as difficult a winter hardship as would living in Montreal, Montana, or Scotland. But there are options for just about every climate.

There’s no substitute for stepping outside and collecting a green onion, a mild mustard leaf, and some kale and spinach for our Sunday morning omelet. We pick what we need when we need it.


Succession Planting: Warm, Then Cool Season Vegetables


Because our favorite greens love cool weather, they grow in the garden after the tomatoes, peppers, and cucumbers have been harvested. So, with some planning, you can schedule a succession of crops. When one crop finishes up, new transplants or seeds are ready to take its place. Now, that’s an efficient use of space!


cool season vegetables

Cool season vegetables and greens replace summer tomatoes and peppers. Plastic protects plants on very cold nights and the netting deters deer.


Radishes, beets, spinach, and other fast-growing plants can be sown directly into the garden in late summer to early autumn. After they’ve been harvested, there might be time for another quick fall crop.

Certain greens and root vegetables have a shorter window of time during which they retain the best quality. So don’t let them linger in the garden. On the other hand, some cool season vegetables can be harvested over many months of growing! That’s at a time when there are fewer weeds, fewer bugs, and less drought to worry about.

If the weather is still warm for the first round of seeds, look for varieties of cool season vegetables that are more heat tolerant. Some catalogs indicate the preferred soil temperature for each crop, or you can get that information from your agricultural extension office. Soil temperature can be lowered by irrigating during hot weather. Additionally, frames covered with knitted shade cloth, made from black polyethylene (available from Johnny’s Selected Seeds and others), provide consistent shade until the weather cools. That bit of shade can make the difference between seeds germinating in August or having to wait until late September to sow them.

Here in zone 7b (average lowest winter temperatures 5° to 10°F), we enjoy productive edible crops and herbs in the garden year-round…with some protection in winter, of course. But we’ve also grown them in colder Maryland winters.

Because I’ve been “advised” by the HOA to stop growing vegetables in the garden (photo, above), they’re now in pots (photo, below) on the fenced deck. (Note to self: next move, no HOA!) Young ‘Aspabroc’ miniature broccoli plants grow in a 20″ pot, where a tomato grew during in the summer. Italian parsley lasts all winter, and sharp-tipped pine cones discourage squirrels.

***Update***: In October, 2021, after my mother passed away, I moved to a small town in northern North Carolina. More property, more nature, woods in the back (where a bobcat and I came face-to-face!), no traffic, gorgeous topography, great friends, just a couple of degrees cooler than Charlotte, and no HOA to tell me what I must or can’t do on my property. 3/1/2024


potted broccoli

‘Aspabroc’ miniature broccoli and parsley.


Peas…Yummy!

Peas grow best in the garden’s “shoulder seasons”. That’s when temperatures can be cool to warm, and when frost is no surprise. So, before the end of tomato and pepper season, you can sow a pack of pea seeds next to a trellis and begin harvesting two months later.

Edible podded snap peas and snow peas are absolutely delicious. Many are eaten on the spot. And because they grow vertically, the vines take up little square footage. During the shoulder seasons, in moderate climates, they don’t normally require a protective covering.

pea vine

Peas growing next to the house, a warmer microclimate, in the Charlotte garden.

If you have facilities that can accommodate pea vines, such as a lean-to or a cool greenhouse (Tips #9, #10), this crop can be grown as the temperatures dip lower during the winter months. But there is a point below which the vines will be killed in unheated structures.

Last autumn’s loosely covered pea vines (photo, right) made it just fine through the mild winter and started bearing pods in late winter.

Look for disease resistant varieties when growing any vegetables or greens under cover. Plants are more susceptible to diseases when grown in humid conditions.


Gather Information

Get to know each crop, and how much cold it can tolerate with or without protection from freezing weather. I’ve researched calendars for scheduling vegetables in this zone and have found some of them, compared to my own experience, to be overly conservative. They restrict sowing and transplanting to a narrower period of the calendar than I’m willing to gamble with.

Gardening in a warmer microclimate offers more protection than growing plants out in the open. Planting against a sunny south-facing wall or in a protected corner out of the wind provides opportunities to extend the season.


bees and butterflies feed on nectar in winter

‘Red Russian’ kale in bud.


Kale, collards, spinach, Brussels sprouts, mustard spinach, arugula, leeks, and green onions can tolerate the coldest conditions, within reason. I cover the crops when temperatures dip below the mid 20’s. Even if they’re not covered, they will survive. But I want the plants to continue providing premium quality greens. If not stressed by very low temperatures all day and night, these crops will grow if daytime temperatures rise into the mid 40’s.

Cauliflower and ‘Bright Lights’ Swiss chard need to be covered earlier than other greens. Frost normally won’t kill the plants. But repeated freezing will damage the foliage, halting growth until warmer temperatures (or the protective coverings) return.

These crops and other cool season vegetables won’t need protection if grown farther south. Again, cold tolerance is variety specific, so try new cultivars now and then and see which ones work best for you. For example, ‘Green Magic’ broccoli does well when planted in early spring and again in early autumn. This variety needs a warmer temperature when forming its head. On the other hand, ‘Arcadia’ broccoli can mature in very cold weather, so this is the one I plant later in autumn. Another benefit is ‘Arcadia’s bumper crop of side shoots; in Charlotte, they produced for months.

For More Information

There is so much information online and in catalogs, books, and magazines. But, for local perspectives and information about other growing conditions, check with your agricultural extension office. And speak with helpful vendors at the neighborhood farmers’ market.

Garden clubs, botanical gardens, and garden centers selling seeds, supplies, and transplants sometimes offer classes covering various subjects. My “Cool Season Vegetables and Greens” presentations drew the most attendees. Many of my customers started with just one crop and then returned for more. A healthy addiction!

Keep Records

As you begin new garden projects, place labels with the plants, photograph progress, and take notes for future reference. Add some varieties you’ve never grown before to discover delightful new flavors. Observation of the varieties you’re growing in your garden is invaluable when planning future garden projects. There is no substitute for hands-on experience…and records of successes and failures!

Keeping detailed drawings of crop placement in the garden will help when considering crop rotation. Not growing plants from the same family in the same place every year helps decrease concentrations of pathogens and insects. But, because so many of the cool season vegetables are in the Brassicaceae family, it’s difficult to rotate these crops in our limited space.

Succession planting calls for sequential use of space, maximizing the amount of produce harvested through the seasons. It is especially important to prepare the soil before the fall or spring season, adding fresh compost, aged manure, or planting mix.

For optimal harvests, you’ll need to fertilize regularly as the plants grow. Instead of relying on memory, record the names of the products and when you applied them.

Have all underground utilities marked by your municipality before proceeding and keep a record of their locations. Call 8-1-1 to schedule an appointment.


Headings:

Page 1: Ready For Fall?, Where There’s a Will, There’s a Way (The Advantage Of This Latitude), and Succession Planting: Warm, Then Cool Season Vegetables (Peas, Yummy!, Gather Information)

Page 2: Seed or Transplant? (Seeds, Temperature, Transplants, More Favorites), Crops With Ornamental Edible Leaves (Tender Leaf Kales), Crops That Form Heads, Soil Fertility (The Importance of Microbes), Nutritional Benefits, and Ready For the 10 Tips?

Page 3: Tip #1: Move Tender Plants Indoors, Tip #2: “Quick! Cover Up!”, Tip #3: The Hot Water Bottle, Tip #4: Low Tunnels, Tip #5: Deal with the Wind, Tip #6: Add Christmas Lights, Tip #7: I’ll Have a Double

Page 4: Tip #8: A Simple Cold Frame For Cool Season Vegetables, Tip #9: A Lean-To, Tip #10: The Greenhouse, Finally!

Return to the top of Page 1

Potted Bulbs: Tips For Planting A Lasagna Pot


potted bulbs


“Good things come to those who wait.”


Everyone has heard this saying. Gardeners who plant spring-flowering bulbs in their gardens must necessarily agree. We’re a patient lot, and expect to wait for apples, for tomatoes, for fat mounds of ‘Great Expectations’ hosta. And we wait for spring.

We wait…and we watch. In fact, both of those words derive from the Anglo-French waiter, to watch over, and the earlier Old High German wahta, to watch.


snowdrops

Snowdrops (Galanthus).


And then, one day in January or February, maybe March where you live, the first of the early snowdrops’ nodding bells dare to defy ankle high snow. With the next break in the weather, snow crocuses reveal their sprightly blooms, followed by bold spears of early daffodils. When their cheery yellow trumpets open, they demand attention, proclaiming to the world, “We’re here!”

yellow daffodils

Yellow daffodils in the garden.

Daffodils bring life to a chilly landscape, and, at the same time, they assure us that spring is either here or near. Their warm colors—various shades of yellow, orange, salmon and peach—are a psychological cup of hot chocolate. But I also love the white and pink varieties. Fragrant ‘Bell Song’ is a favorite, with a light pink cup and white outer petals. ‘Mount Hood’ is a substantial and long-lasting variety, first creamy, then mostly white.

But, if digging in cold soil is not your cup of tea, perhaps another option will interest you. This alternative can be accomplished in the kitchen or the garage. Or on the back porch. And it won’t take long to do.


Potted Bulbs—The “Lasagna Pot”


This project involves growing spring-flowering bulbs in pots, planted close together. Blooms open in late winter, in some areas, and continue to please for weeks, or even months, afterward. Often called lasagna pots, they’re simply generously sized pots filled with layers of bulbs.

Because we don’t intend to keep the bulbs in the pots from year to year, it’s perfectly acceptable to space them so they’re almost touching. That’s how we get the most flowers. We do, however, want to place them close to the proper depth. Growth emerging from the bulbs is narrow and pointed, and it will easily find its way through the bulbs above them.


Suggestions For Types Of Bulbs To Use


Spring-flowering bulbs can be classified based on timing of bloom. Early, mid, and late spring bulbs keep the flowers coming for a long season of color. Snowdrops and snow crocuses are early, and larger Dutch crocuses bloom in early to mid spring. Hyacinth’s blooms scent the air in mid spring, followed by grape hyacinths, which continue to late spring. Many thousands of kinds of daffodils and tulips bloom early, mid, or late season, depending on variety.


puschkinia

Puschkinia libanotica, a spreader.


Don’t overlook the minor bulbs or unusual varieties. It’s always fun to try something new. Check out Allium, Chionodoxa, Ipheion, Ornithogalum, Puschkinia, and Scilla. They’ll add another dimension at less cost than the same number of tulips, hyacinths, or daffodils. And, due to their small size, you plant them only a few inches deep.

See what the garden center is stocking this year, or consider the vast offerings from mail order sources. Keep in mind that the longer the bulbs stay at comfortable shopper-friendly temperatures in the stores, the more they dry up. So, purchase them soon after they become available in autumn, and keep them cool (under 50°F), but not freezing, until you plant them. Feel the bulbs, choosing those that are plump and firm.


Perfect Timing…Or Not

You can orchestrate a perfectly sequential roll-out of flowers, timed so three of these will follow or coincide with 5 of those. Looks good on paper…but in real life, potted bulbs respond, more or less, to their own internal clocks.

Don’t obsess over the timing. Use catalog descriptions as somewhat vague guidelines. Just enjoy the process, the anticipation, the flowers.


The Process


The Pot

pottery

First choose a pot. The larger it is, the more bulbs will fit. It should be deep enough to accommodate large tulips or daffodils, which will be planted about 8″ below the soil surface. Plan on about an inch between the top of the soil and the pot’s rim.

Look for pots that are frost resistant, or use plastic pots. The pot needs to have a drainage hole.

I chose a decorative clay pot, 12″ wide and deep. And there’s algae growing on the sides, adding a rustic element.

Two 10″ or 12″ plastic pots that fit into your ceramic pots by the front door can be planted now, and kept cool over the winter. When they begin to sprout, simply slip them into the pretty pots. Add preserved moss, colorful twigs, and a few pine cones to the inserts for a finished look. In late winter, you can add small violas, if there’s room, for more color. They’ll take the cold weather, up to zone 5 on the USDA plant hardiness zone map.


Polyester Fiberfill


polyester fiberfill

Polyester fiberfill.


Use a small handful of this synthetic fluffy material to cover the drainage hole. Water will drain through it, but the soil will stay inside the pot. I use it for all potted plants to prevent erosion, from 2″ clay pots for dwarf succulents up to the largest pots.

Another advantage is that polyester fiberfill prevents ants, earthworms, sowbugs, and other critters from crawling inside the pot through the drainage hole. Because it doesn’t rot, it can be used again. You’ll find it at any hobby or craft store.

I never add rocks or gravel in the bottom of the pots.


Potting Soil

Rountree's potting soil

Potting soil with a high percentage of pine fines can be mixed with a more peaty soil.

Use fresh potting soil that drains well. Mix in pine fines or coarse sand if your soil is heavily composted and stays wet. Avoid using any kind of manure near the bulbs.

Add a few inches of soil to the bottom of the pot, and lightly firm it in. This is where the first of the bulbs will be planted, so measure the depth.

Not sure how deep to plant them? If in doubt, plant so the bottom of the bulb will be as deep in the soil as three times the height of the bulb. The small minor bulbs can be planted four or five times their height. But don’t stress over it; there’s some wiggle room when planting bulbs.


Headings

Page 1: “Good things come to those who wait.”, Potted Bulbs—The “Lasagna” Pot, Suggestions For Types Of Bulbs To Use (Perfect Timing…Or Not), and The Process (The Pot, Polyester Fiberfill, Potting Soil)

Page 2: Planting the Bulbs (Narcissus ‘Ice Follies’, N. ‘Pipit’, N. ‘Tête-à-Tête’, Brodiaea ‘Queen Fabiola’, Muscari ‘Dark Eyes’, and Crocus ‘Yellow Mammoth’), Mulch and Water, Caring for the Potted Bulbs, How Cold?, Can We Grow the Potted Bulbs Again?, and Update: Here’s How the Lasagna Pot Did This Spring

Return to the top


Tips For Planting A Potted Miniature Garden

2019


Down To Earth Garden Center, and Planting a Miniature Garden


On a recent drive to the mountains of North Carolina, I passed by Down To Earth Garden Center. Maybe it was the charming picket fence, or the need to save time and buy a few packs of vegetables for the deck pots. Either way, the inviting entrance lured me back.

Plus, when living in West Virginia, waaaay back in the 1970’s, I wholesaled potted houseplants to a popular shop called Down To Earth, in the downtown Morgantown retail district. Fond memories…


Down To Earth Garden Center is located at 1080 South Trade Street, in Tryon NC. Fran and Gary Garside are the owners, and Kiara and Dylan offered friendly greetings and help. After a quick turn around the yard, I asked permission to take a few photographs for the blog. Oliver, the friendly terrier, had no objections, either.

Here’s another small but meticulously maintained garden center.

Check out their facebook page, Down To Earth Garden Center, in Tryon NC.

Phone: 828 859-2283. Call for new hours.


The Newest Project


An empty blue ceramic pot sits in our front garden, begging for employment. A while ago, I sowed a pack of older zinnia seeds in it, but they didn’t germinate. So, the pot is looking for work. Construction on our home and others in the neighborhood this summer prohibited any large scale gardening, so I’m eager to exercise some creative horticulture before frost.


Thuja occidentalis 'Primo'

Thuja ‘Primo’, an arborvitae.


Seeing the dozen or so varieties of hardy dwarf evergreens at Down To Earth Garden Center, I instantly knew what my next project would be. The pot to be planted is roughly 16″ square and 8″ deep. There’s plenty of room for a collection of miniatures, some rocks and gravel, and driftwood with character.

The term “driftwood” is loosely applied here, referring to any piece of weathered wood or woody root. Most of the small pieces I’ve gathered have come from the woods, not from a body of water.


Fairy Gardens

In recent years, this style of garden has been called a “fairy garden”, but some gardeners simply refuse to call it that. Let’s just call them miniature gardens. If you or your grandchildren want to dress them up with happy gnomes and resin residences, go right ahead. But for me, a natural landscape is the way to go.

By the way, this is not a new trend in gardening. I remember planting terrariums for a florist in New Jersey, more than 4 decades ago. I used dwarf tropicals, driftwood, rocks and gravel, and life-like little “faux” mushrooms. Merchandisers, however, have captured attention from new audiences by calling them fairy gardens.

Any hobby shop you visit will be stocked with associated paraphernalia, from named fairies and cute cottages to stone staircases. This could be a fun introduction into gardening for our younger folks.


Tropicals For a Miniature Garden

Although I will be constructing a garden using cold-hardy species, you might prefer using tropicals for indoor gardens. Garden centers stock miniature plants in 1 1/2″ to 2″ pots for this purpose. You’ll find them as stores gear up for the busy fall (or spring) growing season, but many stock them year-round.

Some species stay small while others eventually will grow too large for a miniature garden. But for a year or so, they’ll do fine. You can find all sorts of ferns, Nephthytis, young palms, peperomia, pilea, baby tears, little succulents for sun, philodendron, and pothos. Young trees, such as Podocarpus, aralia (Polyscias), dracaena, Serissa, and Norfolk Island pine also are available.


Little Evergreens For the Miniature Garden


Picea and Thuja

dwarf evergreens

Some of the hardy dwarf evergreens at the garden center.

From Down To Earth, I selected Picea abies ‘Jana’, a Norway spruce, and Picea glauca ‘Blue Planet’, a white spruce. Each of these globular evergreens grows only 1″ to 2″ in a year when planted in the garden, and less than that in a pot. Their needles are a whopping 1/4″ to 1/3″ long!

Upright growing Thuja occidentalis ‘Primo’, an eastern arborvitae, grows 2″ to 4″ per year, and will serve as a vertical accent in the composition. Dwarf conifers are perfect for trough gardens, rock gardens, and also for outdoor railway layouts.

(***Update***: Each of the spruces grew less than 1″ this past year, and ‘Primo’ added only 1 1/2″ in height. All plants look great, although ‘Jana’ burned a bit at the top during a long stretch of hot weather—100°F heat index. 8/25/2020)

‘Primo’ could easily be mistaken for its cousin, Chamaecyparis, a well-loved genus which I often included in customers’ landscapes and in mine. This dwarf arborvitae has dense fans of tightly-packed foliage whorled around its stems—fabulous textural interest! ‘Primo’ was selected from a crop of seedlings at Iseli Nursery in 2004, and was released to the trade in 2017. Its foliage can take on deeper green to bronze tints in cold weather. When planted in the garden, this variety will grow to about 3′ tall and 1 1/2′ wide in 10 years.

A Holly Called ‘Jersey Jewel’

Down To Earth also had dwarf junipers, Cotoneaster, a ferny Chamaecyparis, and a holly with the cutest and tiniest round leaves. It was difficult narrowing down the choices to 3 plants. Hmmm…I might have to go back for that holly. (***Update***: A couple of months later, I did go back for that holly, Ilex crenata ‘Jersey Jewel’, when my visiting brother, Jeff, and I went for a drive in the mountains.)


The Cold Facts


All 3 dwarf evergreens are hardy to minus 30°F, or USDA zone 4. Because they will be kept above ground level, in the pot, their roots will not be insulated by surrounding garden soil. On an average winter night here in zone 7b (borderline 8a), however, the soil probably will freeze only an inch or two into the pot. I’m more concerned about summer heat in this area.

So, how, then, do spruces and firs survive way up in the frigid north? First, they evolved there, and their cellular chemistry has adapted to harsh conditions. Second, a blanket of snow and a layer of forest floor debris help protect plants’ roots, to a degree, even if air temperatures plummet to well below 0°. And those are the full-sized specimens, with roots that venture more deeply than the tiny evergreens I’ll be using in the pot.


Other Variables

Large pots in winter sunlight absorb more heat than small ones during the daytime, and release it to the atmosphere at night. And the more hours of sun, the better. You can see how a larger soil mass offers better protection from the cold than a smaller one. It takes more time for a greater volume of soil to release the warmth gathered during the daytime.

Consider, also, the color of the pot. Dark pots absorb more energy from the sun, sometimes making the difference between life and death for their inhabitants. In this case, I already have the blue pot, and it’s a light shade of blue at that. But later I’ll describe other tricks we can employ when dealing with harsh winter weather.

This container has survived many winters outdoors without cracking because it’s frost resistant. Still, there are no guarantees. For those pots that have great value to you, empty and clean them, and store them upside down in the shed or the garage.

Within reasonable limits, most of us in the U.S. can find something to grow in winter pots. Just look for the hardiest specimens you can find, and get some advice from an expert at your local garden center. If live plants are out of the question, consider berried stems, colorful twigs, cut greens, moss, pine cones, and other seasonal ornamentation for the decorative pots by the front door. Or you might choose to take the risk with live plants.


shallow pots

Low profile pottery, perfect for miniature gardens.


In Unusually Cold Conditions


Hardiness Zones

Each variety of tree, shrub, and perennial is assigned a winter hardiness zone. That zone represents the lowest temperatures it can tolerate when planted in the ground. It’s useful when labels include the range of tolerance, such as “USDA zones 4-7”.

Regions on the USDA plant hardiness zone map are divided in ten-degree increments. The additional “a” or “b” designation further narrows down each zone to slightly cooler or slightly warmer parts, respectively. So, zone 7b is 5° warmer in winter, on average, than zone 7a. The zone numbers increase as average winter temperatures increase from Canada to the southern U.S.

It’s not unusual in this area of North Carolina to see temperatures drop into single digits a few nights each winter. And, conversely, we sometimes have those glorious winters that rarely get below 25°! Normally, I recommend using plants for planters that are rated two zones hardier than the zone you’re living in. For example, a zone 5 Pieris japonica that should tolerate winter temperatures as low as -20° planted in the ground likely will survive a zone 7 winter (0° to 10°F) in a pot.


The Weather Report

The last weather report of the day will determine if anything needs to be done for the plants outside. I’ll probably move the miniature garden to the warmer back deck, which is protected by a fence. That’s where plants, including edibles in pots, will get the most hours of direct sun.

The corner between the shed and the back wall provides a cozy microclimate. And, if needed, I can move the miniature garden into the shed or indoors for the night. But I’d rather not; it’s rather heavy.


Cold Frames

Let’s say you live in the cold northern states, but you want to pot up a miniature conifer garden. You’ll need to provide some protection when temperatures drop so low that the plants are at risk. Here are a few suggestions for those areas where these conditions last for months.

Move the pot into a sunken cold frame, or one that is lightly heated by a heat mat or heat cables. Heeling (burying) the pot into the soil, inside the cold frame, will give more protection by insulating the root system. Or you could pile mulch around the pot up to the rim.

Where winter conditions are cold but not severe, heeling in the pot next to a south-facing wall might be all the protection required. Or move it to a covered sunny porch against the wall of the house. Avoid placing it where ice or snow from the roof might fall on the plants. Watch out for animals that like to dig. Surround the planting with deer netting or a wire barrier (chicken wire, hardware cloth) to prevent damage.

The cold side of a heated greenhouse, an unheated lean-to, a minimally heated sunroom, or a sunny garage window might work during the frigid winter months. The plants will need direct sun even though they’re dormant in winter, but keep them very cool. And don’t forget to water! When cold, the miniature garden will dry very slowly, but it still needs to be checked.

If it’s too warm, the plants will beak dormancy prematurely. But, without adequate sun, that new growth will be weak.

Here’s A Bright Idea

Another option is to surround the pot and soil with a string of indoor/outdoor miniature incandescent lights. Enclosing the whole thing, or just the pot, in plastic at night creates a “lightly” heated bubble of protection.

I’ll use this simplified version of a cold frame during periods of severe cold, meaning temperatures in single digits at night. But I probably won’t wait for the temperature to drop that low. These varieties are new to me, and I don’t want to lose them.

cold frame

Setting up the cold frame in autumn.

In the Maryland back yard, I assembled the cold frame (photo, right) every autumn. Succulents, geraniums, cyclamen, and other plants that tolerated cool temperatures, but not frost, spent the winters there. Edible cool season greens grew continuously under cover. And all received abundant sunlight in the back yard, on the south side of the house.

Cinderblocks and boards supported sheets of durable twinwall polycarbonate above the patio. Extra bricks on the north side (above cinder blocks) helped slope the cold frame toward the south for drainage and a better orientation toward winter sun. I used clear 4-mil plastic to cover the entire frame, sealing up the sides. And I weighed it down so it wouldn’t blow away.

The purpose of the strings of Christmas lights is to give gentle warmth, not light. So, use incandescent lights, not LED’s. The number of strings used in the cold frame varied with outdoor temperatures and with the amount of warmth needed for a particular group of plants. A string of 100 mini lights provides about the same warmth as a 40-watt light bulb.


Keeping Their Cool

These evergreens grow best when exposed to natural seasonal variations. But because the roots are above ground, they are more limited in what they can tolerate.

In any case, don’t keep hardy plants on display indoors or enclosed under plastic any longer than necessary. They might break dormancy, and could suffer cold damage when exposed to normal temperatures again. Open or remove the plastic covering every morning, before the sun heats the space.


Headings

Page 1: Down To Earth Garden Center, and Planting a Miniature Garden, The Newest Project (Fairy Gardens, Tropicals For a Miniature Garden, Little Evergreens For the Miniature Garden (Picea and Thuja, A Holly Called ‘Jersey Jewel’), The Cold Facts (Other Variables), and In Unusually Cold Conditions (Hardiness Zones, The Weather Report, Cold Frames, Here’s a Bright Idea, Keeping Their Cool)

Page 2: Tips for Potting Up the Miniature Garden (Double Potting), Plants For the Miniature Garden (Bloomers, Hardy Plants, Moss, Pruning), The Blue Pot, The Off-Centerpiece, More Plants For the Miniature Garden (Let’s Start Planting), The Little Fillers For the Miniature Garden (Acorus, Carex, and Ophiopogon, Eleocharis, A Welcome Weed and Viola), and The Small Stuff


Return to the top


How To Transplant Houseplants

2019

Updated 9/26/2024


Time To Transplant Houseplants?


potting soil, how to transplant houseplants


As the end of the growing season approaches, we need to prioritize all the chores that need attention. Do the houseplants require transplanting? The plants that summered outdoors must come back inside soon, before frost damages the foliage or kills the plants.

They’ve been luxuriating on the porch, in higher humidity and brighter light than they usually receive inside. It’s no wonder they look fabulous! So, reintroduce them to indoor conditions while the days are still somewhat long and before the furnace kicks on and dries the air.

Perennials that looked picture perfect in May now look a little stressed after those record high temperatures. And the tired vegetable garden needs fresh compost or aged manure before setting the fall crops.

In a few weeks, flowering bulbs will arrive at garden centers…with pansies, violas, snapdragons, dusty miller, and Heuchera, trailing ivy, and hardy grasses. You’ve been dreaming of those beautiful combination planters, like the ones you saw last autumn at the garden center. But first things first.


Should We Transplant Houseplants Now?


Let’s start with the houseplants. Exposing tropicals to cooling temperatures outdoors, as autumn takes hold, could stress your houseplants. And some of those plants are pleading for attention right now.

While certain plants can tolerate cooler temperatures (cyclamen, ferns, English ivy, succulents, ponytail palm), others can’t. The aroids (peace lily, Dieffenbachia, Anthurium, Philodendron, Alocasia, Chinese evergreen, pothos), prayer plants (Calathea, Maranta), and some of the begonias, for example, should come indoors before temperatures dip below 60°F.

Although they won’t be killed by a few nights in the 50’s, or even the 40’s, you don’t want to prolong their discomfort. Chilling stresses many of our tropical houseplants, and can rot roots and disfigure foliage.


Inspect Them First


You probably won’t need to transplant houseplants, summering on the porch, that were repotted in the spring. All you need to do now is to inspect them for insects and spider mites before bringing them indoors. Check the bottom of the pot for slugs and sowbugs hiding around the drainage hole.

Clean up the leaves, too, and remove any that are discolored, insect-eaten, or damaged. Peel away the entire leaf, so none of the leaf stems (petioles) remain that later will turn yellow or brown.

After the inspection, wipe down the pots, wash the saucers, and place the plants in front of the windows where they seemed to thrive last winter.


Horticultural Oil


scale insects on ficus neriifolia

Scale insects on Ficus neriifolia. Leaves are 7/16″ wide.


The dwarf Ficus neriifolia contracted a scale infestation, so I sprayed it with a horticultural oil solution. For insects and mites, horticultural oil works very well. It smothers the pests and is safe to use on most plants, including edibles.

Wiping the horticultural oil solution on smooth leaves (fiddle-leaf fig, pothos, peace lily) with a soft sponge removes dust, grime, and residue from water and fertilizers. It gives them a nice luster without appearing artificial. Read the label; I prefer to use less oil than is recommended on the label—to start with, anyway. Horticultural oil makes surfaces slippery, so be careful.


fiddle-leaf fig

The fiddle-leaf fig, Ficus lyrata.


Do Your Houseplants Actually Need Bigger Pots?


potted plant bonsai

Evergreen bonsai.

Knowing if the plant needs repotting, when to repot, and how large a pot to use is half the battle.

Does it wilt often? Perhaps instead of repotting, the plant needs to be deeply watered. Or maybe the roots have rotted in waterlogged soil, or the water rushes right through without moistening the soil.

I’ve seen a lot of dead plants over the years, and many simply were in pots that were too large. “Aren’t we supposed to transplant houseplants every year, just like our children outgrow their shoes every year?” No; once they have matured, plants can stay potbound for quite some time.

“If I transplant houseplants into bigger pots, won’t that make them grow faster and bigger?” No, another myth! If you transplant houseplants into pots twice the size they need, they more likely will die faster.

Large pots hold large quantities of soil and water. When the moisture is not used by the plant, the sodden mass just sits there, cutting off the oxygen supply and rotting the roots. So, if the entire volume is not tightly filled with roots, the plant doesn’t need to be repotted.

Many houseplants like being potbound. English ivy (Hedera helix), pothos (Epipremnum aureum), Philodendron, palm trees, Ficus trees, African violets, succulents, snake plants (formerly Sansevieria, now Dracaena), and bonsai prefer somewhat cramped quarters. Many potted herbs (rosemary, lavender, chives, sage, thyme) also fare better when potbound. But, in order to ensure good health, gardeners must provide nutrients according to the needs of the particular plant, and according to the time of year.

It’s helpful to know the habits and preferences for each kind of plant. For example, although the 4′ tall variegated snake plant (Dracaena trifasciata ‘Laurentii’) eventually will need a 10″ or 12″ pot, its cousin, the dwarf bird’s nest species (D. hahnii), can stay in a 4″ or 5″ pot for many years!


Fertilizing Houseplants

Most tropical plants spending the winter indoors won’t need fertilizer until late winter or early spring. If they continue to grow and look healthy, and they’re receiving good light, though, diluted solutions (1/4 to 1/2 strength) can be added every 4 to 6 weeks. Err on the side of using less fertilizer in winter.

As long as they’re properly watered and fertilized, your plants can remain perfectly happy while potbound. In fact, they’re easier to manage this way, since there’s less likelihood of overwatering. But you’ll have to water more frequently.

Look for products formulated for foliage houseplants or for flowering plants. They’re available in several forms: timed-release prills (use a low dose from fall through winter), liquids, granules, and soluble crystals. Read the label.


Fungus Gnats

Plants in smaller pots are less susceptible to diseases, root rot from overwatering, and fungus gnats. Ever have those annoying little “fruit flies” around your houseplants? The simplest remedy is to allow the soil surface to dry out.

Female fungus gnats lay eggs on moist soil. When the tiny larval worms emerge, they eat small roots, sap on cuttings, fungus, and organic matter in the top inch or two of the soil. Let the surface of the soil dry before watering again, and you’ll have fewer fungus gnats. See if adding a 1/2-1″ layer of pine fines as a mulch might prevent gnats from laying eggs.

Yellow sticky cards are good for catching flying insects. A card placed horizontally near the plants, on the pot’s rim, or in a sunny window attracts the most gnats.


Save the Spider!

spider plant

A green spider plant.

The spider plant in the 4″ pot that your girlfriend gave you two months ago is literally crawling out of the pot. She propagated it from one of her own plants, so it has sentimental value.

Spider plants, related to other strong-rooted Asparagaceae (formerly Liliaceae) family members, develop roots that circle around the inside of the pot. The vigorously growing roots raise the entire plant higher in the pot, opening up air spaces around the root ball. This dries out the finer roots, and water gushes immediately through the drainage holes without moistening the soil. Clearly, it’s time to work on this one.


When Should I Transplant Houseplants?


A good time to transplant houseplants is in spring to mid- or late summer. Plants that recover slowly (for example, succulents) should be repotted, if needed, by mid-summer. In autumn and winter, plants receive fewer hours of daylight, photosynthesizing at a reduced level. Our slower growing tropicals don’t grow much foliage in autumn and in winter. And roots also are reluctant to grow.

Cooler temperatures, compared to the balmy summer days spent on the porch, cause systems to slow down. So, trying to force plants to grow at a time when they’re entering semi-dormancy often does more harm than good. Plopping a plant’s almost dormant root system into wet soil and expecting it to grow is asking the plant to do something against its nature. It would rather stay semi-dormant.

greenhouseProviding a greenhouse atmosphere—warm, humid, and sunny—keeps your houseplants in much better condition, even through the shortest days of winter. Optimal light levels increase rates of photosynthesis, respiration, and transpiration. As a result, they might grow almost as fast as they did in June.

But most of us deal with dryer air, energy-saving chilly nights, and dim lighting (in the plants’ eyes) until the hyacinths bloom outside.

Plants, both indoors and out, take on renewed vigor once the days lengthen closer to springtime. Some of us humans do, too.


How Big Should the Pots Be?


succulent dish garden

Succulent dish garden in ceramic bonsai tray.

I’ve grown dwarf peperomias and miniature succulents, such as Echeveria minima and Haworthia truncata, in 2″ pots for many years. Since the succulents are prone to rot in wet soil, keeping them very potbound decreases the chances. There simply isn’t that much soil in the little clay pot, and it dries fast in direct sunlight.

Most of the succulents I enjoy growing are on the small side, anyway. Almost all are in 1½” to 4″ pots, and others have been planted in larger, but shallow, bonsai trays.

I brought with me from Maryland a 4½” pot of Drimiopsis kirkii, one of the African leopard lilies, and it has yet to be repotted into a larger pot, 6 years later. Its cousin, Drimiopsis maculata, however, grows from bulbs which multiply faster than those of D. kirkii. So, most of the D. maculata plants get divided more often, but they’re still in 4½” pots. Older plants are moved into 6″ pots, and remain crowded until divided.

Dracaena hahnii, the dwarf snake plant, lived happily for years in a 4½” pot. The small, glossy-leaved Spathiphyllum wallissii would have complained if it had been bumped up into anything larger than its 6½” plastic pot.


pink cyc.

We’ve had this miniature cyclamen for years.


A pink flowering miniature cyclamen stays in its 4½” pot (photo, above), year after year. Now, in late summer, it is coming out of dormancy and beginning to grow new foliage, contrary to what most other plants are doing. That’s because its growth cycle calls for cool to cold, but not freezing, temperatures in order to set flower buds. It will be fertilized accordingly, for a full canopy of marbled leaves.

The plant’s habit and its root structure help determine the required pot size. In general, transplant houseplants into pots that are only 1″ to 2″ wider, and only if they need it.


The Old Weeping Fig

weeping fig

Variegated weeping fig.

A weeping fig (Ficus benjamina), given time, will grow to the ceiling. Instead of raising the roof, its height can be managed by “aesthetically” cutting stems back in the spring, when it will respond faster.

I grew a variegated weeping fig in a 14″ pot for about 15 years, in front of a big window that received a few hours of morning sun. When the tree grew to almost 8′ tall, above the top of the window, I pruned it back a few feet. Then, when it regrew, all the foliage was once again in the sun and at eye level.


African Violets


African violet

A healthy African violet.


African violets (Saintpaulia ionantha) are happy to stay in 4″ pots for years. Miniature African violets need smaller pots than that.

A rule of thumb for pot size and an African violet is to plant it in a pot that is 1/3 the spread of the foliage. So, a 4″ pot will accommodate a plant that is 12″ wide. Plants in top condition might take a slightly larger pot, but you have to pay very close attention to moisture and soil drainage.

“What should I do with an African violet that has a long trunk?”

As these plants grow new leaves from the top of the rosette, older leaves lower on the stem die off. That’s part of their natural growth pattern. When the plant develops a trunk, it’s time to make an adjustment. But don’t do this if the plant is slowing its growth. Spring to mid-summer is a better time for this procedure.

Remove the plant from its pot and slice off the bottom third of the root ball. Shave off a small amount from the sides as well. Wash the pot, check the plant for insects (mealybugs, especially), and treat with horticultural oil if necessary.

Place a small wad of polyester fiberfill (from a craft shop) over the hole. Add a small amount of African violet potting soil in the bottom of the pot. These plants like peat moss in their mix. Set the plant in the pot, and fill in the sides with more soil, using a chop stick to firm soil in the gap.

Part of the trunk will now be loosely covered with soil, and it will grow new roots. The top of the root ball should be lower in the pot than it grew previously. (Yes, this is exactly what we don’t ordinarily recommend.) Water it in, using lukewarm (about 85°F) water. Keeping the soil too wet will rot the trunk and the roots.

If needed, use the kitchen sink sprayer to wash soil off the leaves, using lukewarm water. Towel off the water drops, and let the plant dry in a warm location.

It’s less stressful for these plants if this is done every year or two, before the trunk grows a few inches tall. But I have seen perfectly happy violets with long stems curling over the edge of their pots.

“What are those marks on the leaves?”

Water the soil—always lukewarm for African violets—and avoid wetting the leaves. If water splashes on the leaves, absorb it with a towel, and let the plant dry in a warm place. As drops of water chill on this plant’s leaves, unsightly tan or brown rings and lines will be left behind.

Grow African violets at 70 to 74°, and fertilize regularly with a product formulated for this genus.


Less Is More

stack of clay pots, transplant houseplantsMove miniature species of plants into something only 1/2″ to 1″ larger, if they need it. I know; that doesn’t seem like it could make much of a difference. But for the plant whose roots, in the wild, might be crammed between layers of sedimentary rock on a blustery cliff, 1/2″ is plenty.

Large-growing plants require new pots up to 2″ wider in diameter. Peace lily (robust varieties of Spathiphyllum), weeping fig (Ficus benjamina), Chinese evergreen (Aglaonema spp.), and larger palm species can be moved from 6″ starter pots into 8″ pots. And, importantly, this assumes that the roots tightly fill the smaller pot.

Many of the tropicals will survive and prosper over the next several months, even while very potbound. If they’re already in 8″ pots, they’ll likely be fine until spring, when they can be potted on if needed. The 6′ tall fiddle-leaf fig in an 8″ nursery pot, though, can go into a 10″ pot, since the heated sunroom has floor-to-ceiling windows. Sunny conditions encourage plants to grow new roots, but carefully monitor soil moisture. Avoid watering houseplants (especially succulents) on cloudy days.

If growing conditions in your home are not ideal, but plants absolutely need to be repotted, transplant them now, before fall, into slightly larger pots. Wait until spring to transplant large houseplants, if it’s needed at all.

Houseplants don’t require repotting every year. Once they have attained a mature size, they no longer need to be moved into progressively larger pots. Instead, regularly fertilizing with products formulated for houseplants will supply all the nutrients they need.


Headings:

Page 1: Should We Transplant Houseplants Now?, Inspect Them First, Do Your Plants Actually Need Bigger Pots? (Fertilizing Houseplants, Fungus Gnats, Save the Spider!), When Should I Transplant Houseplants?, How Big Should the Pots Be? (The Old Weeping Fig, African Violets, Less Is More)

Page 2: Prepare for Transplant (Root Insects, Speaking of Spider Plants, Roots-Air-Water-Light) and Potting Up (Score the Root Ball, Potting Soil, Begin Filling the Pot, Downsizing, Water It In)

Return to the top


Return To The Lake Lure Flowering Bridge

2019

Updated 10/28/2024


An Early Summer Visit To The Lake Lure Flowering Bridge


petunia's hideout, lake lure flowering bridge

“Petunia’s Hideout”

On Wednesday, I headed once again for the Lake Lure Flowering Bridge, hoping to find respite from this prolonged period of high humidity and temperatures in the mid 90’s. Yes, I could retreat to the air conditioned confines indoors. But that’s too close to the refrigerator. As usual…the mountains!

The first thing I noticed upon arrival was the missing huge maple (photo, right) at the end of the parking lot. It had a great rotten hollow at the base and was taken down as a precaution. It didn’t take long for someone to put a green roof on the stump and to invite The Bear to reside in the cozy void.

Another thing I noticed was that it wasn’t much cooler here than in Charlotte. Lake Lure sits at 1,000′ elevation, so I expected it to be a bit cooler. Regardless of the temperature, I needed pictures.


The New Information Station


The information station was stocked with all sorts of maps, diagrams, and mailboxes brimming with brochures since my last trip here. At that time, only the frame had been built. The volunteers at The Lake Lure Flowering Bridge do an excellent job informing the public.

It doesn’t matter whether you’re an avid gardener or a beginner; the flowering bridge is simply a wonderful place to enjoy plants or to walk through on your way to the lake or to lunch in Chimney Rock, just up the road half a mile or so. I met two friendly ladies here, in the shade—a volunteer who plants herbs in the garden and a visitor enjoying a private tour.


Daylilies Galore At the Flowering Bridge


I don’t recall ever seeing as many beautiful daylily hybrids (Hemerocallis) on the flowering bridge. Some flowers were enormous! (Missing were cultivar identification tags. Next time, I’ll look more closely.) These perennials have sturdy flower scapes, and some have high bud counts.

Although each flower lasts only a day, you can see from the photograph of the double orange daylily that many buds have yet to open, and several scapes grow on each plant.


Peak Bloom at The Lake Lure Flowering Bridge


True blue balloon flowers (Platycodon grandiflorus) and their round buds invite inspection. Pink and white cultivars also are available, and dwarf types, such as ‘Sentimental Blue’.

Several varieties of hydrangeas boldly proclaimed their presence throughout the garden. Those with cone-shaped inflorescences, Hydrangea paniculata, include ‘Pinky Winky’, ‘Strawberry Vanilla’, and the popular ‘Limelight’. A few smaller mopheads (H. macrophylla) also grow on the flowering bridge.

Crocosmia, grown from bulbs native to South Africa, was in full golden bloom. Crocosmia, sometimes called montbretia, is hardy in zones 5 to 9 and is a member of the iris family (Iridaceae).

Dwarf butterfly bush, Buddleia davidii ‘Pugster Blue’, has strong stems and grows only about 2′ tall. It’s hardy to zone 5, growing in full sun and well-drained soil. Other colors are available in this series of small butterfly bushes. Most of these perennials were humming with pollinators—bees, wasps, moths, and butterflies.


Roses


The roses were in full bloom, and some had wonderful fragrance.


Hibiscus


Growing to about 4′ in height, Hibiscus ‘Starry Starry Night’ is a stunner with flowers up to 8″ across! They appear from midsummer to fall. Leaves are dark burgundy-black, with the deepest color in full sun. This one likes moist, well-drained soil, as most hibiscus plants do.

Hardy hibiscus grows in zones 4 to 9, and stems die to the ground in the colder zones. Apply a few inches of mulch under young plants before winter. Hibiscus is native to North America and is said to be deer resistant, but…


More Native Perennials At the Flowering Bridge


goldenrod, buddleia at lake lure flowering bridge

Early goldenrod next to the dwarf butterfly bush.

Goldenrods (Solidago) were just beginning to open in the flowering bridge garden, and will continue all summer. Their bright yellow flowers and those of the ‘Pugster Blue’ butterfly bush played well off each other, a nice combination.

Stokesia laevis, native to the southern U.S., likes acidic soil and remains evergreen in warmer regions. It tolerates drought when well established. Stokes aster grows to 2′ tall and blooms over a long period of time, in full sun.

Tickseed (Coreopsis), with its canary yellow flowers and finely textured foliage is always so pretty. When choosing coreopsis varieties for your garden, check their hardiness zones. Some do not tolerate frost. But, among the annual tickseeds, breeding efforts have come up with some spectacular new colors. The family Asteraceae includes around 80 species of coreopsis, all native to the Americas.

Stately clumps of billowing garden phlox (family Polemoniaceae) showed off their peak bloom. Bees, butterflies, hummingbirds, and other pollinators are attracted to these plants. Most of the 67 species are native to North America.

Mountain mint (Pycnanthemum muticum), zones 4 to 8, spreads rather invasively by rhizomes. This plant is a member of the Lamiaceae family, along with many other herbs. Its small pink flowers sit above silvery bracts. This plant can be used to make a mild tea. Kind of understated with its unusual flowers, but a strong pollinator magnet.


Black-Eyed Susan

The widely adaptable black-eyed Susan, Rudbeckia fulgida var. fugida, was in top form. Among my favorites of the hardy Rudbeckias, this variety is perfect for meadow, prairie, mass plantings, or clustered among the shrubs. Use it to highlight a garden around a lamp post or off the patio. And they’re well-suited in combination with ornamental grasses.

Deer are not especially fond of this variety, but they might take a bite now and then. They came in for seconds in the Maryland garden. Give them full sun or sun for 2/3 of the day and well-drained soil that doesn’t stay wet. The best thing about “Ruff” is its incredibly long bloom period. Although it begins flowering a short time after Rudbeckia ‘Goldsturm’, it blooms until frost, weeks longer than ‘Goldsturm’. Deadheading helps maintain the display.


Annuals


Zinnia, lantana and ‘Bat Face’ Cuphea attracted pollinating insects. Although they will die with autumn frost, annuals give us the opportunity to plant different varieties each year. And they flower all summer. Although some varieties of lantana perennialize in zone 7, they’re usually planted only for the current season’s flowers. Coleus, grown for its colorful foliage, is another heat-tolerant annual.

Elephant ears (Colocasia) produce large tropical leaves from underground tubers. This garden had both the black and the green-and-black-mottled varieties. They’re perennial in warmer sections of zone 7, but I don’t know if they survive the winter in Lake Lure. Because cold winter air passes under the bridge, the soil is not as well insulated from temperature extremes as is garden soil.


Styrax 


styrax at flowering bridge

Styrax japonica seedpods.


A Japanese snowbell (Styrax japonica) that had been growing for 25 years in the Maryland garden was cut down by the family who bought the house from me. I loved that tree for it fragrant pendulous white flowers and for the umbrella-shaped canopy. It’s a great tree for shading a sunny patio. C’est la vie.

That tree in Maryland seeded heavily, but there never were many seedlings popping up in the bed below it. I did, however, gather a few, germinated them, and then brought them with me to North Carolina, where the grounds maintenance crew whisked them away with the loropetalum trimmings…

This species of styrax has many ornamental features in addition to the flowers and habit—the fruits will split open later in the season, revealing shiny brown seeds. The leaves and twigs are fine in texture, and it has a pleasing horizontal branching pattern. A perfect small tree!


Osmanthus


osmanthus hetero. 'Goshiki'

False holly, Osmanthus heterophyllus ‘Goshiki’.

Osmanthus heterophyllus ‘Goshiki’ has variegated leaves, with some pink at the tips of the stems. ‘Goshiki’ means “5 colors”—white, creamy yellow, gold, pink, and green—for the different hues that appear in the somewhat spiny leaves.

Plant in full sun, or in morning sun in hot zones, and in moist soil. Strong, hot sun will burn the tender new foliage or the white parts of the leaves.

This Asian native is hardy in zones 6 to 9. Use it in mass plantings or as a specimen, in borders or in a bright woodland setting. Small flowers are fragrant. This compact evergreen grows 5′ to 7′ tall.


Peanut Butter Tree


clerodendrum trichotomum at lake lure flowering bridge

Clerodendrum trichotomum, the Harlequin Glorybower.


What?! Yes, apparently, crushed leaves from this suckering tree from eastern Asia smell like peanut butter. Clerodendrum trichotomum (family Lamiaceae), more commonly called Harlequin Glorybower, grows in zones 7 to 10, and reaches 10′ to 20′ tall, and wider than that.

Hummingbirds and butterflies sip nectar from its flowers, which appear most of the summer. This large-leaved tree makes a bold statement in the landscape.


But If There’s Work To Do


A simple screen or workshop like this one can be constructed to hide the works of the garden—the compost pile, tools, and stacks of pottery. It defines the edge of the garden, and it also can hide the neighbor’s trash cans.

Incorporating structures into a landscape adds another dimension, enriching the experience. Finally, personalize with a green roof, interesting twigs and vines, and small hanging pots that express your whimsical side.


wood screen, plants


The Twig Chair


Here’s a great place to rest after the day’s transplanting and weeding, surrounded by peace and beauty. With iced tea, some magazines, and the family dog for company, it’s a great way to spend a summer afternoon. All that’s missing is the “Please do not disturb” sign.

Every time I visit the Lake Lure Flowering Bridge, something new is in bloom, or one of the sections has been completely replanted. It’s only about an hour and a half from Charlotte, and there are plenty of restaurants and mom-and-pop shops to make this area a delightful way to spend the day.

Bring the kids; a Merry-Go-Round and other children’s activities are only a mile away in the Village of Chimney Rock. There are lots of reasons for returning to the Lake Lure Flowering Bridge over and over again!


Hurricane Helene


Chimney Rock Village sign, after flood


This section added 10/7/2024:

***Update***: Hurricane Helene and the resulting floods and landslides scoured the western North Carolina mountains and other regions in the southern Appalachian Mountains for a few days on and after 9/27/2024. It destroyed small towns, roads, bridges, and people’s lives. Around 100 people died and many more are missing in NC alone. Heroic efforts are being made by individuals, churches, and charitable organizations to assess the damage, bring food, water, and communication to trapped families, and to begin the process of mitigating the damage and rebuilding.

Most shops and restaurants in Chimney Rock have been washed downstream to Lake Lure. From what I’ve seen in news coverage, the Lake Lure Flowering Bridge has been reduced to the only remaining feature: part of the concrete balustrade at the edge of the bridge (as in the photo at the top of this article).

Mark Huneycutt documented what he has seen, and here’s one of his videos:

I walked to Chimney Rock for answers… Hurricane Helene Aftermath – YouTube

Rescue operations request that you not venture to the area on your own, even if offering help and supplies. The ground is unstable, and you could end up being one of those needing rescue, so leave it to the professionals. Ask them if you can help.

Please, generously donate money and requested goods to legitimate rescue operations. I donated to Samaritan’s Purse and will forward a portion of my proceeds earned at the farmers’ markets. Samaritan’s Purse, headquartered in the area, has tractor trailers, machinery, supplies, and an army of dedicated volunteers. They are doing a fantastic job, so please help them in their efforts. Thank you.

Added 10/28/2024:

This video demonstrates hope, determination, and generosity in the face of a devastating life-changing event. I also have donated to hurricanehelenewnc.com from my revenues at Wellspring Gardens (Elkin NC farmers’ market):

Asheville is Worse than We Realized – Can They Rebuild?

Thank you again.


Return to the top

Fig Trees: How To Grow Edible Figs

2019

Updated 4/14/2024


Delectable, Edible Figs


The plant wish list grows longer each day. Within the next couple of years, I hope to move to a property with larger garden space, so I can shrink that list. First to be planted will be a couple of fig trees…blonde figs, purple figs…


figs


Many years ago, our local Derwood, Maryland grocery store brought in fresh figs. I couldn’t believe it. So, I indulged in the extravagance, and bought a small box, at $9.00 or $10.00 per pound. The last time I had had fresh figs was about 25 years earlier, in Oradell, New Jersey… …

As a young girl, my first introduction to the delectable fig was when my maternal grandfather picked them from trees growing in his Englewood garden, two towns over. A substantial brick wall surrounded the back yard, as I recall, just beyond the monstrous cast iron stove in the kitchen.

My grandfather’s figs grew on the right side of the garden. On the left were my grandmother’s tomatoes, herbs, and where she threw out bread for the birds. I can still hear them—sparrows, tons of sparrows!


sparrows


Papa’s Fig Trees


Salvatore and Catherina D’Arrigo married in Sicily, after, according to tradition, his sisters had been married and settled into their homes. Now, in 1906, they sailed across the Atlantic, to enjoy a new life of freedom and opportunity in the United States. After passing through Ellis Island, they settled near extended family members in Bergen County, New Jersey.

Nanny, Papa

Nanny and Papa D’Arrigo, before setting sail for America.

Industrious and self-sufficient, Nanny and Papa wasted no time getting down to business. They opened a tavern/restaurant and purchased a house. I imagine that, like Johnny Appleseed, wherever my grandfather landed, a fig tree grew. That part of the eastern seaboard, though, is quite cold in the winter, and not considered “fig country”.

But my grandfather had some tricks that worked, apparently, for his fig trees. In addition to his skills in business, Papa was also a landscape gardener. Must be in the DNA!

Every autumn, after the trees went dormant, he surgically severed part of the root system near the base of the tree. He bent over the trunk of the fig tree until it was just above the ground. Then he covered the trunk and branches with piles of leaves and burlap…all tucked in for the winter. In early spring, each fig tree was raised, pruned, and staked. (Other family members recall the standing trees simply being cloaked in layers of burlap, so he might have tried different methods.)

Recently I read that this was a common practice in Boston, New York City, Philadelphia, and other cold cities where the fig tree could not survive without a little manipulation.


Second Helping

It was a full half century after my grandparents had arrived on these shores when I had my first… fresh… fig from their garden. Papa passed away when I was 10 or 11, and Nanny, 5 years after that. So, we didn’t have too many years to enjoy those figs, but they certainly made an impression.

A quarter century after the last of Papa’s figs, those fresh figs showed up at the grocery store in Maryland. And yes! They tasted exactly as I had remembered them!


fig tree


Origins Of the Fig Tree


The common fig (Ficus carica) is native to Turkey. By 5,000 B.C., it had been distributed throughout the Middle East and the Mediterranean region by Greek and Roman traders. Fig trees readily adapted to hot, dry summers and mildly cool winters, and they also made their way to England and China. They grow from sea level up to over 5,000′ in elevation.

map, Turkey, Mediterranean

But its roots go back much further than that. At a Neolithic archaeological site called Gilgal I, in the Jordan Rift Valley, evidence shows that fig trees were cultivated 11,400 years ago.

Remains of a plant found in a home dating to that period indicate that early populations knew how to vegetatively propagate fig trees from cuttings. The parthenocarpic “mutant” they grew was a sterile form that bore fruit without pollination.

Cultivated for human consumption, figs are probably the oldest domesticated crop. Figs predate by a thousand years the earliest agricultural grains—wheat, barley, and rye.

Sumerian stone tablets from 2500 B.C. recorded culinary uses of the fruit. For thousands of years, before sugar gained widespread use, figs sweetened foods and desserts.

Legendary twins Romulus and Remus have been depicted under the bough of a fig tree as they were fed by the mother wolf. The forbidden fruit, of Bible fame, was probably the fig and not the apple. Figs have long figured in religious symbolism, associated with peace, prosperity, and fertility.

The term “fig” was first used in the English language in the 13th century. It is derived from the Old French figue, and the Romance fica (Ficus is the genus name for edible figs and for the hundreds of tropical species).


The Fig Moves To The New World

Early explorers brought fig trees to the New World as early as the 15th century. And the Spanish Franciscan missionaries are credited with planting figs in southern California from 1769. ‘Mission’ is a well-known variety, with excellent flavor and sweetness. It is parthenocarpic, not requiring pollination to set fruits.


Worldwide Production

Worldwide, Turkey produces the most figs, with 26% of the crop. Egypt, Algeria, Morocco, Iran, and the U.S. round out the rest of the top 6 producers. California, with a climate similar to the tree’s native land, grows almost the entire American commercial crop. Texas comes second.


Figs as Houseplants


weeping fig

Variegated weeping fig.


This article describes the edible fig, which grows outdoors. The weeping fig (Ficus benjamina), the creeping fig (Ficus pumila), the rubber plant (Ficus elastica), and the ever-popular fiddle-leaf fig (Ficus lyrata) are primarily tropical houseplants, but they don’t produce edible figs for humans.

The edible fig tree does not grow well or produce fruit indoors.


Inside the Box

My father’s career centered around food photography, mostly with the Nabisco cookie company. We kids were delighted when he brought home samples of Fig Newtons, first becoming available in 1891. In fact, as a teenager, I spent one summer at the Fair Lawn NJ Nabisco plant deftly packing boxes of chocolate chip cookies and Fig Newtons.

This explains not only my fondness for these cookies, but also my complete aversion to anything sticky. Dirt’s okay; sticky is not.


figs


If It’s Too Cold


Okay, I was determined to grow a fig tree. Most experts at the time said they wouldn’t survive Maryland’s cold winters. Much later, with a little research, I learned that there are several hardier varieties of fig trees. Most fig trees grow in USDA plant hardiness zones 7 through 9, with a few growing in zone 6, and several tolerating warmer zones. ‘Chicago Hardy’ is hardy to zone 5. Before choosing a particular variety, check its hardiness zone from a few sources. There are over 200 varieties to choose from.

A garden center called Behnke’s Nursery was the go-to place for plant nerds like me. But it was some distance around the clogged Beltway circling Washington, D.C., in Beltsville, Maryland. They retailed more species of plants than I had ever seen. Certainly, they’d have figs!

I bought a variety called ‘Brown Turkey’, one of two types available. The next year, I transplanted it into a bigger pot. Smaller varieties of figs can grow in 20-gallon pots or larger. The plan was to grow it outside in the summer, let it drop its leaves in the fall, and then move it into the unheated garage for the winter. There, it wouldn’t suffer from the lowest winter temperatures. And, because the fig tree bears fruit even when growing in a large container, this small effort would have fruitful dividends.

This routine served us well for several years, until that killer winter. One year, the temperatures dropped to lows we had rarely seen, and the wind blew its icy breath through the gaps around the garage door. My fault—I didn’t raise the fig tree off the floor or move it inside. Consequently, it froze solid and died. When the garage door was replaced, I went for the more expensive well-insulated model.


A Nod To Behnke’s

Just a few weeks ago, I read in one of the trade magazines that, sadly, Behnke’s is about to close its doors. Another pillar collapses. Many in the gardening world, it seemed, knew this company.

In fact, recently at the Hendersonville Garden Jubilee, Larry Morton, the bonsai vendor at Bella Bonsai Nursery, told me that he had worked there for a few years in the ’60’s. Small world… Here’s to Albert and Rose Behnke, German immigrants, who opened this nursery almost 90 years ago.


Headings

Page 1: Delectable, Edible Figs, Papa’s Fig Trees, Origins Of the Fig Tree (The Fig Moves To The New World, Worldwide Production, Figs as Houseplants, Inside the Box), and If It’s Too Cold (A Nod To Behnke’s)

Page 2: How To Plant and Grow Fig Trees, Hardiness, Sun, Soil Preparation For Fig Trees, Time To Plant (Mulch), Watering Fig Trees, Fertilizing, Pruning Fig Trees, Foliage, Fruits Of Fig Trees, That Little Fig Wasp, Problems, Types of Fig Trees, and Varieties of Fig Trees

Return to the top


Growing Basil In Pots: How and Why

2019

Updated 3/5/2024


Why Should We Grow Basil in Pots?


Valentino basil.

‘Valentino’, a lettuce leaf basil, normally is light green in color.


This year, I’ll grow basil in pots. It’s too early to grow basil outdoors, but I am starting seeds now for early sales (transplants and cut herbs) at the farmers’ markets.

Although summer thunderstorms are most welcome after a dry patch, that’s when Basil Downy Mildew becomes a real problem. In this article, I’ll describe the disease and offer tips for growing perfect basil once again.

Basil Downy Mildew was first described in Uganda in the 1930’s. It has been a serious problem in the United States since 2007, when it first appeared in Florida. The disease now has appeared in most of the U.S. and elsewhere around the globe. I lived in Maryland at the time of the first outbreak and was selling plants at farmers’ markets and garden shows.


How To Recognize Basil Downy Mildew


The leaves of affected plants become speckled in pale green or yellowish blotches, mostly bordered by the main veins. Eventually, entire leaves turn pale green.


A coating of grayish felt, visible at dawn, covers the bottom of the leaf. Soon afterward, small black dots appear. Those black dots (sporangia) released their spores, which will infect other basil plants. The plant looks sickly, as if it needs fertilizer…or something…and never again has that healthy basil look.


Do you recognize some of these symptoms? These characteristics are diagnostic for Basil Downy Mildew. (***Update***: Photograph above, left, was taken at a Charlotte garden center on May 20, 2019. BDM arrived early that year.)

Spores float on air currents, usually migrating north from infected southern-grown plants. They also can be carried on seeds or spread from overwintering local greenhouse plants.

Humidity that rises higher than 85% for a few hours is sufficient to initiate this infection on susceptible varieties. Other water molds affect coleus and seed-grown impatiens, but only basil (Ocimum basilicum) can catch this one. And its name is Peronospora belbahrii.

Can we do something for our beloved basil?…


Easy Solution: Basil In Pots


weather station…Yes we can! Growing basil in pots is the answer! Take the pots indoors in rainy weather to prevent spores from germinating.

But that’s not the only time basil is susceptible to this disease. Nighttime humidity levels can rise quite high even on a day that was perfectly clear and comfortable. When the temperature drops through the night, the lowest temperature usually occurs right around dawn. When the temperature drops to its lowest measurement, the relative humidity increases to the highest level.

Check your local weather report early in the morning. Look for the relative humidity measurement, which can be 85% or 95% at dawn. Rain doesn’t even have to be in the forecast. With spores in the air and basil exposed to high relative humidity, it will become infected. The spores need a few hours of these conditions to germinate. Fortunately, normal indoor conditions never come close to those levels of humidity.

Every year that I moved them indoors at night, the potted basil plants remained BDM free. And almost every year I grew basil outside, BDM was inevitable.

None of the relatively non-toxic sprays I tested worked well enough. But I prefer to not spray herbs at all. Some cultivars introduced over the past several years are recommended as having “some tolerance to Basil Downy Mildew”…but they still can develop the disease in humid areas.


New Varieties

Fortunately, new varieties promise “high tolerance to BDM”. Rutgers University and Van Drunen Farms developed resistant varieties that are available to growers, and, more recently, to retail customers. A huge demand for production of basil downy mildew resistant varieties is driving the research.

(***Update***: Basil ‘Obsession’, from Rutgers, has grown extremely well this summer, and with no BDM. I’ll take some cuttings for winter pots. Several seed suppliers stock these new resistant varieties, but demand might exceed supply, so order early. 9/2/2021)


Long-Time Favorite Herb


Since it was my customers’ favorite herb, I had to figure out a way to grow basil without using chemicals. I couldn’t afford to lose my best-seller. At that time, I started many varieties of basil from seed under fluorescent lights in the basement. They grew larger outside, after transplanting (2½”, 3½”, 4½” pots, and some that were larger), until they were sold at the markets.

tomato basil salad

Tomato-basil salad.

Knowing that high humidity provided the right conditions for this infection, I moved all the basil flats into the garage at night. Every day! Two small table fans kept the air moving around the plants, so the basil never caught BDM when handled this way.

My business infrastructure was very simple and did not include greenhouse space at that time. During the height of the market season, I grew several dozen flats of basil in various stages of growth at any one time.

These tips were passed along to my customers, who were glad to know how to stay ahead of the problem.

So, I always grow basil in pots, and take them indoors when the humidity is expected to rise high enough to cause trouble. It is a commitment, but the reward is freshly picked luscious basil for summer salads and lasagna. The disease often appears by mid- to late summer, but it can show up earlier.


mini purple basil

‘Miniature Purple’ basil for salads or trained as a tiny topiary standard.


Varieties Included:

  • sweet basil: ‘Genovese’, ‘Genovese Compact’, ‘Fino Verde’, ‘Italian Large Leaf’, ‘Aroma 2’, ‘Nufar’, ‘Marseillais Dwarf’, ‘Amethyst’, ‘Miniature Purple’, and others
  • lettuce-leaf sweet basil: ‘Napoletano’, ‘Tuscany’, ‘Valentino’
  • Greek basil: ‘Yevani’, ‘Minette’, and 2 ‘Columnar’ varieties
  • lemon basil: ‘Mrs. Burns Lemon’
  • Thai basil: ‘Siam Queen’, ‘Sweet Thai’
  • ‘Magical Michael’
  • lime (good with cucumbers)
  • holy: ‘Kapoor tulsi’ (O. americanum v. pilosum)
  • ‘Mexican Spice’
  • ‘African Blue’ (an ornamental basil and an excellent pollinator magnet)
  • ‘Cardinal’ (a cinnamon type; this one and the previous 3 basils have some or good resistance to BDM)

The few that showed any resistance to the disease, however, were not the varieties we prefer in the kitchen.

It wasn’t long before basil started disappearing from other growers’ booths at the markets. So, it was worth the effort to keep basil alive and growing.


Basil In Pots: Potting Up


Start with clean materials. If you’re reusing a 12″ wide pot, clean it out very well, including all the old soil. Don’t discard it, though; throw it under the shrubs or dig it into the flower garden. Even used potting soil has value in the garden. A pot this size will accommodate several stems of basil for the entire growing season.

Wipe down the inside and the outside of the pot with a 10% bleach solution. Allow it to sit for a few minutes before rinsing thoroughly.

Basil is susceptible to several air-, water-, and soil-borne pathogens. That’s why it’s important to begin with clean materials.


Shopping For Basil Transplants

Look for rich green uniform coloring in the foliage. Familiarize yourself with the normal coloring for the varieties you’re interested in growing. For example, ‘Siam Queen’ Thai basil has dark green foliage, while lettuce-leaf basils (top of page) have light green puckered leaves.

Avoid wilted plants and those with brown edges, yellow lower leaves, pale green foliage, splotchy surfaces of leaves, and black spotting on the stems or leaves. Turn the leaves over and look for the tiny black dots of BDM. Inspect purple-leaved varieties carefully. Avoid buying basil that has started flowering.

Underpotted (tightly potbound) and underfertilized basil is stressed and will not last all season. Leaves that are off-color taste awful!

Look for small pots (2½-4½”) with 2 or 3 seedlings in the pot. The plants should have foliage down to the soil or close to it.


Growing Basil From Seed

If you can’t find the varieties you’d like to grow, consider starting them from seed. This gives you an opportunity to try new flavors—maybe lemon or lime, or anise-flavored Thai basil.

Seeds that are kept cool and dry remain viable for a few years, so you won’t have to germinate the entire packet…unless you want to.


lemon basil seedlings in pots

Lemon basil sown in 4″ pots.


Pots and Seedling Mix

Have market packs or 4″ pots cleaned and ready. Use the same bleach solution recommended for larger pots, described above.

New peat pots are an option, and can be planted pot and all, without disturbance. Always pinch the bottom open in a few places before transplanting peat pots. This allows roots to quickly grow into the potting soil. Peel off the rim of the pot protruding above the soil level to prevent water from wicking away to the atmosphere. Roots will soon grow through the peat pot in moist soil.

Use pasteurized seedling mix. Most pathogens have been destroyed and its finer particles make better contact with the seeds. Fill containers with the seedling mix to within 1/2″ of the rim, tamping lightly. Fresh, fine-grained, high quality potting soil also works well.

Water gently, using lukewarm (around 85° F) water. Label the pots with the varieties of basil you’re growing and the date—for example, “Sweet basil ‘Genovese Compact’, 4/20/19”. Labels are easily fashioned from a clean, repurposed plastic milk jug.

Now, make a small depression in the center of the pot, about 1/4″ deep. Drop in a few seeds. Or make a few separate small depressions in the pot and drop a seed in each one. The latter is my preferred method; the separation gives each stem a little breathing room.

Cover with 1/4″ of soil. An exception is Thai Basil, which prefers to be sown on the surface of the soil and not covered.

Water

When moistened, basil seeds develop a grayish-white mucilaginous coating. This is normal. The gel holds water next to the seeds and it might attract insects, which help distribute seeds in the wild. And the stickiness helps seeds adhere to the soil.

Place the pots in a flat or a tray and give them warm sun indoors. Basil germinates within a week in damp soil at temperatures in the 70’s and 80’s F. If it’s too chilly, you can place the pots of basil on a heat mat. Seeds won’t germinate and young seedlings will fail in cold soil.

Keep the soil damp to moist but not wet. Never let water collect in the tray. Use lukewarm water, and water gently so the seeds won’t become dislodged. You could water from the bottom but pour off the excess once the soil surface has moistened.

Now That They’re Germinating

As soon as the seeds germinate, give them at least 6 hours of direct sunlight. This ensures shorter sturdy stems that are less susceptible to damping off disease. Use artificial light (see “Maintenance”, page 2) if you don’t have sunny windows.

stretching seedlings

Seedlings (not basil) stretching due to insufficient light.

With favorable outdoor conditions, young seedlings can be placed outside for at least part of the day. Don’t expose them to temperatures below 70°, or to wind or full hot sun if they have been indoors for a while. Check the weather forecast.

Basil needs warmer temperatures than most herbs and vegetables. Even if it’s frost-free and the garden is ready, don’t be tempted to plant basil until the soil has warmed up. Basil will either sit still or deteriorate in cool or wet soil.

Damping off is a fungal disease that appears as a narrowed, light brown section of the stem that causes the stem to bend over, killing the seedling. Avoid overly wet and humid conditions, stagnant air, low light, and cold temperatures. Young seedlings are more susceptible to damping off than older plants.


Return to the top

Headings

Page 1: Why Should We Grow Basil In Pots?, How To Recognize Basil Downy Mildew, Easy Solution: Basil In Pots (New Varieties), Long-Time Favorite Herb (Varieties Included), and Basil In Pots: Potting Up (Shopping for Basil Transplants, Growing Basil from Seed)

Page 2: Repotting Basil In Pots (The Soil, Score the Root Ball, Add Plants, A Small Pot of Dwarf Basil), Maintenance For Basil In Pots (Light For Basil In Pots, Temperature, Watering Basil In Pots, Dealing With Slugs and Snails (Caterpillars), Fertilizer For Basil In Pots, Harvesting and Hormones), and About That Basil Downy Mildew (Growing Basil Outdoors)

Lavender: History and How To Grow It

2019


Lavender’s Long History


old lavender


B.C.


For many centuries, lavender has enjoyed popularity for its alluring fragrance and for its medicinal qualities. Lavandula dentata was first cultivated on the Arabian peninsula, and other species spread from Greece across Europe. Lavender species might also have originated in the Cape Verde Islands and the Canary Islands off the west coast of Africa.

Thousands of years ago, Egyptians and Phoenicians used the herb in perfumes and during mummification. When Egyptian King Tutankhamen’s (1341-1323 B.C.) tomb was opened by Howard Carter in 1922, claims were made that the scent of lavender could be detected.


Greek islands


Greek traders introduced lavender around 600 B.C. to the Hyères Islands, off the southern coast of France, and to Europe from there. Ancient Greeks used it for insomnia and backache, and in public baths.

CleopatraOther healing qualities of lavender were recorded in the 3rd century B.C., when Greek physician/philosopher Theophrastus (c. 372-287 B.C.) wrote of them in Concerning Odours.

Cleopatra (69-30 B.C.), Queen of Egypt from 47-30 B.C., was able to temporarily preserve her kingdom from Roman rule. As the story goes, she used lavender to win the love of Roman generals Julius Caesar (100-44 B.C.) and Mark Antony (83-30 B.C.).

Upon defeat by Augustus Caesar (63 B.C.-14 A.D., first Roman emperor from 27 B.C.-14 A.D., and heir of Julius Caesar) and Cleopatra’s death by suicide, Egypt then became a Roman province.


Early A.D.


Mary is said to have used lavender when Jesus (4 B.C.-30 or 33 A.D.) was an infant and again when he was crucified. Both the Bible and, later, William Shakespeare’s (1564-1616) work The Winter’s Tale, refer to the herb as “spikenard”. Ancient Greeks called lavender “nard” or “nardus”, apparently after Naarda, a city in Syria where it was sold.

Pliny the Elder (23-79), Roman naturalist and encyclopedist, described relief from “women’s problems” attributed to lavender. His great work, Naturalis Historiae, is composed of 37 volumes, describing natural sciences from agriculture to mineralogy to zoology. Dioscorides, the Greek physician under Nero (37-68), collected herbs and, in 77, wrote about their uses in De Materia Medica.

When the Romans invaded England in 43, they used the lavender they brought with them for bathing, cooking, and giving scent to the air. The Romans and the early French believed in its antiseptic properties, and used it to treat infections and to heal wounds.

It is no surprise, then, that lavender derives from the Latin root lavare, meaning “to wash”. And when the Romans departed England around 410, this plant was left behind, growing in gardens around monasteries.


It’s Debatable

Much information online refers to the introduction of lavender to England as late as the 16th century. But as important as this herb was in Roman culture, and because other references claim that they did indeed bring it with them when they invaded England, I will leave it there…unless I find information that clarifies the debate.


From the Middle Ages Forward


old stone castle


During the Dark Ages, from the late 400’s to 1100, lavender wasn’t used much outside the monasteries. An edict issued by the Holy Roman Empire in 812 ordered monks to grow vegetables, medicinal herbs, trees, and flowers. Lavender was grown at Merton Abbey, near the center of production in Mitcham, in Surrey, England. According to records from 1301, Merton Priory sold lavender to raise money for King Edward I (1239-1307).

Medieval and Renaissance women who worked by taking in laundry used the herb to scent it when washing and also when drying the laundry on top of lavender shrubs. In 12th century England, washerwomen using the herb in this manner were called “lavenders”. Incidentally, the word “laundry” derives from the same root, the Latin lavare.

Monks cultivated it in monasteries as a medicinal herb during the Middle Ages (in European history, approximately 500-1350). A German nun named Hildegard of Bingen (1098-1179) used lavender water with vodka and gin for relief from migraine. And French King Charles VI (1368-1422) slept with lavender-filled pillows.


From the Renaissance


Fit For a Queen Or a King


King Henry VIII

King Henry VIII.


English King Henry VIII (1491-1547) destroyed the stone monasteries and their medicinal herb gardens in the 1500’s during the religious purges. Because this plant is not native to the area, remaining specimens of lavender were found primarily in private gardens.

King Henry’s daughter (with Anne Boleyn), Queen Elizabeth I (1533-1603), enjoyed fresh flowers every day and lavender conserve, a type of jam. She sought relief from migraines by drinking an herbal tisanne containing lavender.

King Louis XIV (1638-1715) of France bathed in scented water. Around this time, lavender was used to treat headaches, nervous conditions, insect bites, mad dogs, and snake bites. And if people needed their passions stirred, they just tied some stems to the bed post!


And For the Rest Of Us

Merchants traveling along the Silk Road, from central Asia to Europe, inadvertently carried the Black Death with them. Bubonic plague spread across Europe from 1346 to the early 1350’s, killing one-third to possibly 60% of the entire population.

Infected fleas on rats transmitted the Yersinia pestis bacterium to people initially through flea bites. But modern researchers now think transmission was airborne, particularly among crowded populations. Outbreaks of the plague were treated with lavender as an antiseptic, but its efficacy is questionable, especially against such a virulent microbe.

Lavender Makes Good Business Scents

Sixteenth century glove makers in Grasse, France, used lavender to scent their wares. I can’t judge the accuracy of the claim, but it was said that those who made or wore the gloves were spared the agony of plague and cholera.


lavender soap


In the 1600’s, the Shaker community was the first to commercially cultivate lavender in the area now known as the United States and Canada. They used it to treat hyperactivity, flatulence, insomnia, and to fight bacterial and fungal infections. Products sold in distant markets included candles, cleaning products, soaps, and treatments for bee stings, migraines, burns, restless sleep, and skittish horses.

In another European epidemic in 1664-5, many died from the Great Plague. Lavender sold for high prices and was in demand for its supposed ability to ward off infection and to repel insects. People wore bundles of the herb on their wrists. Burglars of the ill took precautions by washing in Four Thieves Vinegar, containing lavender, garlic, and vinegar, to prevent infection. Criminals who were caught and sentenced to digging graves also washed in the vinegar.

Seventeenth century herbalists John Gerard and Nicholas Culpeper wrote about the benefits of lavender. Gerard prescribed it for palsy. A few decades later, in 1652, Culpeper recommended it, in The English Physician, “for all the grief and pains of the head”.

Ornamental Use

In 17th century Ireland, lavender was planted as a low clipped lawn. Later, in the mid 1860’s in County Down, Sir Arthur Rawdon’s Moira Castle maintained an acre of lavender lawn. John Reid, in 1766, recommended lavender as an ornamental walkway edging in The Scots Gardener.


The Victorian Era


Queen Victoria

Queen Victoria.


Both Queen Victoria and Queen Elizabeth I, hundreds of years before her, used herbal products supplied by Yardley and Company of London.

Britain’s Queen Victoria (1819-1901) popularized lavender from its use as a deodorant and floor and furniture cleaners. The Queen appointed Miss Sarah Sprules “Purvey of Lavender Essence to the Queen” and used it everywhere and as a cure-all.

lavender productsAs a strewing herb on floors, it gave out a fresh scent when walked upon. Women sold bundles of lavender, called Tussie mussies, on the city streets. The scent became synonymous with purity and cleanliness.

In 19th century Provence, France, lavender treated dizziness, nerves, convulsions, stomach ailments, infections, palsy, and repelled fleas and other insects.

Lavender is still used in dried flower arrangements, pot pourri (flowers and buds), and sachets (for fragrance and to deter moths). Bath products, candles, and perfumes sold today attest to lavender’s enduring qualities.


Too Much Lavender?


Lavender’s overuse contributed, consequently, to loss of its popularity in the early 1900’s. It also became associated with “old ladies”, although during World War I, medics dressed soldiers’ wounds with it.

And then, in the 1920’s, French perfumer Rene Gattefosse severely burned his arm. He immediately plunged it into a vat of lavender oil, the story goes, and experienced immediate pain relief and, according to some, rapid healing. His book, Aromatherapie, describes applications for wounds and other uses derived from essential oils, and gave rise to…you guessed it…aromatherapy!


In the Medical Establishment


Whatever your beliefs—whether lavender’s popularity is due to its use as a panacea or as a wonderfully fragrant plant—it is beautiful in a sunny garden and it attracts bees, butterflies, and other pollinators.

There are only a few scents that come close to lavender on my list of favorites. But, on one of the “favorite smells” lists online, this scent rated #49! And “petrol” rated…#1! Bacon, freshly baked bread, rain, cookies in the oven, and mowed grass made the top 10 in some of those lists. But…49th?!


Caution!

test tubes, lab

The U.S. National Institutes of Health recommends that pregnant or lactating women not use lavender on their skin or take it internally, because the side effects are unknown. For sensitive people, it can cause skin irritations, and can be toxic if consumed.

In prepubertal boys, gynecomastia, an enlargement of the breasts due to hormonal imbalances, can be caused by topical lavender products.

One research study claimed that attaching a pad dipped in lavender oil to the neckline of clothing reduced the risk of falling by 43% among nursing home residents.

Testing for its use in treating canker sores and insomnia resulted in insufficient evidence for its efficacy…

…But let me tell you a little story 

One spring day at the garden center, I was working on lavender topiaries and large specimens—reshaping, cutting back, repotting, and removing all the dead leaves. The scent was just wonderful. It took a couple of hours to clean up all the plants, and then it was lunch time.

As always, I spent the time in my truck, reading and listening to the news while enjoying my lunch. Well…that day was the closest I had ever come, in the past 4 decades, to falling asleep while at work. I had to fight to stay awake!

Normally skeptical of proclaimed powers of plants, I believe this one—that the scent of lavender can induce sleep! No wonder it has been found in bath products for thousands of years.


Edible Lavender


Lavender has been used fairly extensively over the centuries, in conserves, teas, vinegars, and pastries. One of my herb books describes lavender as “an acquired taste”. I made lavender tea, once. Only once.

Apparently, L. a. ‘Munstead’ is the most popular variety for cooking and baking, for its sweeter fragrance and “citrusy notes”. Those seeking new culinary experiences might find lavender in salads, dressings, pasta, sauces, and desserts. If I remember correctly, it was at the Olney Farmers’ and Artists’ Market, in Maryland, where, years ago, I purchased a lavender bud and lemon poundcake that was delicious.


lavender

Lavender flowers.


The Lavender Genus


Lavender is a member of the mint family, Lamiaceae, and is related to basil, thyme, rosemary, Swedish ivy (Plectranthus), ajuga, Phlomis, and all the salvias, including sage. Their lipped flowers appear in whorls on spikes carried above the foliage. Flower colors range from white and pink, to blue, lilac, violet and blackish purple. Some species in the family have yellow flowers.

The stems of plants in this family are usually, but not always, square in cross-section. Lavender’s resemblance to rosemary has confused many gardeners, but the scent distinguishes one from the other.

There are 47 known species in the genus Lavandula. Leaves are generally simple (with a smooth or “entire” margin) or dentate (with a toothed margin), although some species have pinnate leaves (L. buchii, from the Canary Islands). Leaves and other parts are covered in trichomes, the fine hairs (the indumentum) from which essential oils are harvested. L. lanata (from Latin lanaius), the woolly lavender, is covered in woolly hairs.

Most gardeners associate this genus with silver or gray foliage, but it includes some green-leaved species as well. Also available are variegated cultivars, such as ‘Platinum Blonde’, whose leaves are edged in creamy white.


Lavender From Seed

transplanting lavender seedling

‘Ellagance Purple’ seedling.

Lavenders are small and shrubby in their growth habit, qualifying as woody perennials or as sub-shrubs.

Some will bloom in the first season when grown from seed, and, where they don’t survive the winter, would be considered annuals. I used to grow a variety called ‘Lady’, which had a powerful scent.

A new English lavender called ‘Blue Spear’ will sprout in 2 to 3 weeks from seed, after first being chilled for a week in the freezer. It will perennialize in zone 5 or 6, but can be grown as an annual flowering plant in colder regions. Seeds have to be started very early, though, or the previous fall, for blooms from late spring through summer. ‘Blue Spear’ is an upright plant, growing 11-14″ tall and a bit narrower than that.

***Update***: This summer, I’m growing a variety of lavender from seed that blooms the first year if the seeds are started early in the season. ‘Ellagance Purple’ has dense spikes of deep purple flowers. So far, they look healthy in their 2½” pots, but I’m not sure they’ll have enough time to bloom this year. Photo shows how long the roots are compared to the stem. 7/20/2022


moth on lavender


Perennial Species


Cross-pollination among the species and varieties gives rise to more variation. Cuttings taken from desirable plants (asexual or vegetative propagation), however, assure the grower that all the young cloned plants will look the same. Many newer cultivars are under plant patent protection and may not be propagated and sold without authorization from the patent holder.

Their common names also vary widely. The English types are well-defined, but when it comes to French or fringed, Greek, Italian, or Spanish, there doesn’t seem to be universally accepted agreement concerning the species they’re assigned to. When shopping for plants, refer to the name of the cultivar (‘Hidcote’, ‘Provence’, etc.) to avoid confusion.


Lavandula angustifolia

lavenderZones 5-8. Formerly L. officinalis. Commonly called English lavender, this species grows well there but is native to France, Spain, and Italy. It is used more often in cooking than other lavenders, due to its lower camphor content. This species’ essential oils are considered superior to those of other species. Earlier blooming than lavandins, generally.

Varieties include:

  • ‘Blue Spear’: zones 5 or 6 to 8 or 9. 11-14″ tall, upright growth; deep blue substantial flowers, will flower first year from seed.
  • ‘Ellagance Ice’: compact; large silver-white-light bluish flowers all summer.
  • ‘Ellagance Purple’: zones 5-7; 12-18″ tall, deep purple flowers on full spikes, blooming first year from seed.
  • ‘Hidcote’: 12-18″ tall; tightly budded stems; flowers deep purple.
  • ‘Jean Davis’: 18″ tall; light pink flowers.
  • ‘Melissa’: 24″ tall; pale pink to white flowers late spring to early summer.
  • ‘Munstead’: heat, sun, and humidity tolerant; 12-18″ tall; late spring to early summer flowers from pale blue to shades of purple.
  • ‘Platinum Blonde’ (‘Momparler’): zone 5b. To 18″ tall, culinary. Creamy white leaf margins.
  • ‘Royal Velvet’: 24-30″ stems; velvety purple/navy blue flowers that retain color when dried.
  • ‘Sweet Romance’: 12-18″ tall; purple flowers early summer to fall; a Proven Winners cultivar.


Lavandula x intermedia

provence lavender

Zones 5-8. Often called Lavandin or Dutch lavender, this species is a cross between English lavender (L. angustifolia) and spike lavender (L. latifolia). Flowers have abundant nectar, and contribute to the sought after monofloral honey. These interspecific hybrids, denoted by the lower case “x” in the species name, are sterile and cannot set viable seed.

Varieties include:

  • ‘Fred Boutin’: to 3 1/2′ tall. Late summer light blue blooms.
  • ‘Grosso’, also called ‘Fat Spike’: about 3′ tall and wide; very fragrant; medium violet blue flowers. Grower Pierre Grosso (1905-1989) discovered this variety in the Vaucluse district of France. It has a very high oil content and is disease resistant.
  • ‘Hidcote Giant’: to 3 1/2′ tall. Dense, dark purple flowers, dries well.
  • ‘Phenomenal’: zones 5-9; grows 2′ to 4′ tall and wide. ‘Phenomenal’ is more heat, humidity, and drought resistant than others. Introduced by Peace Tree Farms, 2012.
  • ‘Provence’: from southwest France; foliage grows 2′ tall with very tall spikes of pale purple flowers in early summer to early fall; culinary, and commercially grown for the perfume industry. One of my favorites for scent and for tall, see-through flower spikes.
  • ‘Seal’: 4′ to 5′ tall! Strong fragrance, late summer blooms.
  • ‘Thumbelina Leigh’: zones 5 or 6 to 9. A dwarf English lavender, growing only 6″ to 12″ tall, medium blue flowers. This selection comes from New Zealand.
  • ‘White Spike’: to 3 1/2′ tall. Nicely contrasting white flowers, mid-summer. Culinary.


Lavandula dentata

Zones 8-9. French or fringed lavender grows about 3′ tall; toothed edges (dentata, from Latin for tooth), light woolly texture; narrow spikes of long-lasting purple flowers beginning in late spring.

From the Mediterranean region, Atlantic islands, Arabian Peninsula.


Lavandula stoechas

lavender stoechasZones 8-9. (Pronounced stee′-kiss; [“oe” has long “e” sound, as in “amoeba”, and Greek “ch” has a hard “k” sound.] Derived from the Greek stoichas for “in rows”.) French, Italian, or Spanish lavender is a compact grower, feathery petals at tip of inflorescence. Sometimes called “Butterfly lavenders”.

From France, Spain, Portugal, Italy, Greece; considered invasive in Victoria, Australia since 1920. Can self-seed. This was probably the species commonly grown in ancient Rome and Greece. Eucalyptus fragrance.

Varieties include:

  • ‘Dark Eyes’: 2′ tall. Purple-red flowers May to autumn if deadheaded.
  • ‘Kew Red’: zones 8 to 11. Red-violet blooms with deep pink bracts at tip. From southern Spain. Introduced by Kew Gardens, 1999.
  • ‘Otto Quast’: 2′, prune for fullness. Reddish-purple flowers with deep pink bracts at tip.
  • ‘Silver Frost’ (L. angustifolia x lanata): 2-3′ tall, lax stems. Heavily felted silver foliage.


Lavandula pedunculata

Zones 9-10. Also known as Lavandula stoechas subspecies pedunculata. Spanish or French lavender has flowers high above the foliage, and long narrow petals on tip of flower. From Iberia, western Turkey, Morocco.


lavender field


Photograph above: field of lavender at Notre-Dame de Sénanque Abbey, southeast France, in the Vaucluse district of Provence near the village of Gordes. Established by Cistercian monks in 1148.


Return to the top

Headings

Page 1: Lavender’s Long History, B.C., Early A.D., From the Middle Ages Forward, From the Renaissance (Fit For a Queen or a King, And For the Rest of Us, Lavender Makes Good Business Scents), The Victorian Era, Too Much Lavender?, In the Medical Establishment (Caution!, …But let me tell you a little story), Edible Lavender, The Lavender Genus (Lavender From Seed), and Perennial Species (L. angustifolia, L. x intermedia, L. dentata, L. stoechas, L. pedunculata)

Page 2: How To Grow Lavender (On Location, Light, Soil, How To Improve Drainage, Lime and Gypsum, Shopping for Lavender, How To Plant Lavender, Watering, To Mulch Or Not To Mulch Lavender, Fertilizer, Pruning, Growing Lavender In Pots, Azalea and Standard Pots, Freezing Temperatures, Heeling In, Growing Lavender Indoors)

Hardening Off: Getting Ready To Plant


Plants Are In the Garden Centers, But Is It Warm Enough To Plant Them In the Garden?


blueberry 'Patriot'

Early spring flowers and leaves on the potted blueberry.


Our local garden centers are stocking up for early spring sales, and it’s great seeing all this color! Some of the plants can go into the garden soon, after hardening off.

Blueberries, redbuds, and pink dogwoods—nursery trees and shrubs that overwintered in local outdoor conditions—can be planted now. If there’s cold weather coming, that’s okay; these plants are used to it. If it’s severely cold and established plants have started leafing out, they’ll probably show some damage on the tender foliage. But they’ll recover.


Time For Tender Plants?


The tender warm-season types, such as basil, tomatoes, peppers, dahlia, cosmos, and caladium, can’t be planted until the weather has settled and the soil has warmed up. They must have frost-free weather. They also need to undergo a process known as “hardening off” before being subjected to the elements outdoors.

April 10 is the average date of our last spring frost (Charlotte NC, zone 7b/8a), but normally that’s still too early for peppers and basil. In most years, by that date, the soil hasn’t warmed up sufficiently for them.

snow, bird feeder

Snow on one of the bird feeders.

Tomatoes and many annuals can be planted around mid-April if the weather cooperates. They can tolerate cooler soil than peppers, but not frost or cold soil. Last year, in a mild spring, I planted a tomato in late March. A few cold nights necessitated covering it, but it survived.

It’s rare, but not unknown, for a snow squall to blow through Charlotte in April. Recent weather patterns sometimes indicate suitability for transplanting, but that doesn’t guarantee pleasant weather will continue.

(***Update*** April 2, 2019: Well, it snowed this morning! The 1/2″ of snow was the most we’ve seen here all winter. Other than placing the potted blueberry under an overhang next to the house, I didn’t protect any of the plants outside. The shrub is in bloom, waiting for the bees to pollinate it, but frost would have ruined the flowers. The temperature stayed several degrees above freezing next to the wall.)


Cold Soil


Soil might require more time to warm up after a cold, wet winter. And a prolonged stretch of cloudy skies, with no sun, will delay warming the soil. Maybe you’ve had a milder-than-average winter, as we’ve had here in the Carolinas. Still, pay close attention to the weather forecast.

Have protective covers (row covers, plastic sheets, old blankets) and maybe some strings of incandescent miniature lights handy, just in case.


Lobularia 'deep Lavender Stream'

Lobularia ‘Deep Lavender Stream’ likes cool weather, but cover during hard frost. Wonderful fragrance.


Hardening Off


snapdragon 'Snaptastic' strain, needs hardening off before planting

Snapdragons need hardening off before planting.

Most bedding plants and edibles begin life in greenhouses, shielded from cold temperatures and wind. Their leaves are quite tender in this protected environment. When these plants are suddenly exposed to outdoor conditions, though, the shock of full sun, colder temperatures, and a brisk breeze will cause them to wither. They might not recover.

Hardening off is the process of gradually toughening up the plants’ tissues to prevent wilt in the wind, scorch in the sun, or damage from the cold.

Each species or variety has a range of temperatures it can tolerate. So, even though acclimated dianthus can go outdoors here in mid-March or earlier, acclimated dahlias can’t. Dianthus can tolerate hard frost, but dahlia can’t.

Annuals are often categorized as being “half-hardy” or “tender”. Look for signage in garden center departments that indicate whether the plants can take some frost and cool temperatures, or none at all. Before purchasing all the plants your garden will need, find out which ones will tolerate cool weather or some frost, and plant those first.

Most greenhouses prepare their plants to some degree. Moved outdoors to tables exposed to the elements, these plants are hardening off naturally. Ask the salesperson if it’s safe to plant your selections or if they’ve been hardened off. Set them in the garden at the appropriate time; prepare to cover them at night if new foliage could be damaged by a late frost. The extent of damage depends on the species and on the severity of the weather.

Some garden centers display plants in lightly heated space, out of the wind. Frost-tolerant varieties with new growth emerging in these conditions will need hardening off before transplanting to the garden. Perennials that have fully leafed out in a greenhouse, compared to the same varieties established in the ground, might need protection if planted out. Delay planting or cover them on chilly nights.


Some Like It Quite Warm

Temperature-sensitive species, such as caladium, grown from tubers, will languish or re-enter dormancy in cool (not even frosty) weather. Cool to a caladium is anything below 65°F. Tender young plants can be killed by a light frost. Pepper plants and basil will suffer in cold soil, especially cold wet soil, even if the air temperature is above 50°.

We often see cold-sensitive annuals (caladium, vinca, zinnia, basil) at the big stores more than a month before it’s safe to plant them. That’s a gamble some are willing to take. They need warm weather and warm soil, so I’m not even tempted. Not yet.


The Process of Hardening Off


dusty miller, plant after hardening off

Dusty miller (Senecio) is a short-lived perennial.


Hardening off is a gradual process. Over a period of about a week, introduce home-grown seedlings and greenhouse plants to outdoor conditions. These plants need a period of adjustment if they have been pampered in a protective environment.

Start hardening off the plants by placing the flats or pots in a protected place outside, out of the wind. Give them 2 hours of gentle morning sun the first couple of days, and then dappled sun or light shade for the rest of the day. Strong sun, cold, and wind might be too harsh at this point, particularly for home-grown seedlings.

If the weather is especially inclement, you might have to delay placing them outside. Exercise caution with tender annuals (coleus, impatiens, zinnia), basil, and other plants that need warm temperatures.

Cool season vegetables and herbs (kale, broccoli, lettuce, parsley, cilantro), half-hardy annuals, and hardy perennials (Heuchera, Hosta, Sedum) can withstand chilly temperatures. But they still need hardening off if they’re coming directly from a heated greenhouse.

If the plants show no signs of stress (wilt or scorch), leave them outside a while longer. Give them direct sunlight. Be careful not to burn them in unusually high temperatures and strong sun. Don’t coddle the young plants by keeping them in the shade, though, unless shade is what they require. However, plants that need some shade in the summer usually tolerate or enjoy a few hours of direct sun on cool days in late winter through mid-spring.

Gradually lengthen the amount of time the plants spend outside in the sun and breeze. Keep the seedlings damp to moist, but not wet. Check them periodically for wilt. The plants will dry out much faster in warm sunshine and moving air. Finally, if the weather is suitable, plant them.


At the End Of the Day

Bring them inside in the afternoon if a drop in temperature is expected. Soon, the plants will be able to stay outside at night if the temperature is within their range of tolerance. Forgetting to bring the warmth-loving plants back inside is a sad story I’ve heard more than once.


If the Plants Are Really Tender…

plants under lights, plant outside after hardening off

…they might not be able to tolerate more than 30 minutes of gentle outdoor sun or dappled shade the first day. This is often the case with home-grown seedlings which didn’t receive enough direct sunlight indoors. Weak seedlings won’t tolerate any direct sunlight the first few days without withering and will take longer to adjust to outdoor conditions.

The root system of a seedling grown in inadequate light will be weak and won’t be able to supply enough water to the leaves. That’s one reason why it wilts so readily when placed outside. Also, the cuticle, the protective waxy surface layer of the leaf, is underdeveloped in low light.

Hardening off these frail plants might not be worth the effort. If they don’t improve in a few days, consider buying stronger transplants from the garden center or the farmers’ market. You might have enough time, though, to start new seedlings indoors. This time, give the seedlings stronger sunlight, place them closer to artificial light, or run the lights a few more hours each day.

Vigorous young tomatoes grow like weeds and can be planted lower in the ground. They’ll hardly skip a beat, so I’d consider keeping them as long as they have some good leaves and improve in outdoor conditions.


Plants Grown Under Lights Need Hardening Off

The photograph, above, shows a multi-tube light fixture positioned several inches above potted plants. As long as the lights are on 14-18 hours per day, the seedlings will grow into strong plants.

I used to start most seedlings indoors under 4′ long light fixtures (shop lights). I installed 2 daylight fluorescent tubes per fixture, before LED’s became commonplace. Flats were placed only 2-3″ below the tubes. Light intensity drops precipitously as distance from the lights increases. That’s why ceiling lights do almost nothing for sun-loving plants.

Plants grow beautifully under artificial light, close to the tubes. They’ll never see a cloudy day! But don’t place them so close that they could feel the heat. Old tubes decrease in efficiency and feel hotter.

Perhaps you have a south-facing bay window that gets natural sunlight all day, and the seedlings look sturdy and healthy. That’s great! However, they still require hardening off, gradually exposing them to wind and full sunshine. Otherwise, even these sturdy plants will wilt from the stress of sudden exposure to the elements. Outdoor sun is more intense than indoor sun because windows absorb and reflect much of the sun’s energy.


Do I Have To?

Now, it’s entirely possible that your plants will thrive without any hardening off whatsoever. Perhaps the garden center took care of that for you by keeping them outdoors, exposed to the elements. After all, many gardeners purchase their plants and have them in the garden within the hour.

That’s fine, if the weather is mild, and perhaps overcast, or if the plants have been fully hardened off. With a favorable forecast, consider planting in late afternoon or evening to lessen the shock.

If plants require hardening off, limit the process to as short a period of time as possible.


A Gamble In the Garden


USDA plant hardiness zone map

The USDA plant hardiness zone map, revised 2012.


As our average nighttime temperatures rise, the likelihood of frost diminishes. But we must be prepared for that dreaded surprise, when the temperatures plummet lower than the weather forecaster predicted.

Here in USDA plant hardiness zone 7b, a moderate part of the Southeast, we’re entering the “shoulder season”. This is when the weather can be delightful or it can be a little “iffy”. As in, “iffyou put that basil in the garden now, it will surely die!” Okay, seriously… March can bring us beautiful 75° days, and then we can have 3 drizzly days in the 40’s. Nighttime temperatures can be 42° or 22°. Okay for kale transplants, but not okay for okra or Thai basil.

Tokyo Bekana

Chinese cabbage ‘Tokyo Bekana’, coming into flower.

That’s currently the pattern in our location—warm and then cool. Edible greens don’t mind at all. Cool season greens and vegetables planted now should do very well, after hardening off. In fact, they could have been planted a month ago with no problem! But we didn’t have snow on the ground like our friends in the North.

The cool season vegetables already in the garden have been producing non-stop since autumn, after the tomatoes and peppers had been pulled out. I’m not in any hurry to see the end of the mustard greens, collards, and kale. Soon I’ll harvest collards for a big pot of soup. Love these mild winters!


Early Green Onions: No Hardening Off Needed

green onions

Green onions planted from onion sets.

A few weeks ago, I planted about 50 green onion sets, or young bulbs, and they’re already a few inches tall (photo, right). If cold weather comes for a visit, that’s no problem. Their little patch sits right against the south-facing wall of the house, in a comfortable microclimate.

Although we’ll still have some frosty nights, the onions won’t need to be covered. They can be gently tugged from the moist soil without damage, since they’re not yet heavily rooted.

Delicate young growth of onions and bunching onions grown from seed will require hardening off.


Headings

Page 1: Time For Tender Plants?, Cold Soil, Hardening Off (Some Like It Quite Warm, The Process of Hardening Off, At the End Of the Day, If the Plants Are Really Tender, Plants Grown Under Lights Need Hardening Off, Do I Have To?), and A Gamble In the Garden (Early Green Onions: No Hardening Off Needed)

Page 2: What Can I Plant After Hardening Off? (The Safest Bet: Pansies and Violas, Half-Hardy Annuals, Helleborus, Heuchera), The Warm Color Palette, The Cool Color Palette, and Spring: The Season of Rebirth

Return to the top


The USDA Plant Hardiness Zone Map

Updated 9/28/2024


Find Your USDA Plant Hardiness Zone


2023 USDA plant hardiness zone map


Throughout this blog and at other gardening sites, we often refer to a plant’s “hardiness zone”. Find your location on the map to identify your zone.

Since moving to northern North Carolina in 2021, I’m now in Zone 7b. Here, the average annual extreme minimum winter temperature is 5-10° F. My location is not far from the higher elevations of zone 6b (-5-0° F). According to the older 2012 map, where I live was clearly in zone 7a. Keep in mind, though, that this short snapshot in time doesn’t necessarily predict the trend in the timescale over the next thousand years.

At this USDA map website, enter your zip code to see if your area increased or decreased in the average extreme minimum temperature (the map loads slowly). Where I live, that temperature is 2° higher than it was in 2012. This does not mean that overall temperatures have increased an average of 2° F, just the lowest extreme minimum temperature.

Gardeners in other countries have similar systems of categorizing climate ratings.

Since I moved to North Carolina in 2013, we’ve had a few winters when the lowest temperatures fell almost to 0°F. We’ve also had a couple of seasons in the past few years when I rarely needed a winter jacket.

The 2023 map above replaces the 2012 map. Most zones of the country have been shifted upward a bit to reflect the slightly higher average extreme winter temperatures. But that won’t stop Mother Nature from testing the limits. These are averages, after all.


Microclimates


microclimate that raises the temperature just a few degrees, compared to out in the open, can make a huge difference. Place the winter garden close to the south side (in the northern hemisphere) of the house, a solid fence, or the shed. There’s a little wiggle room in your USDA plant hardiness zone if you take advantage of warmer microclimates.


seedings of early spring greens


In late February of 2024, I placed flats of the first cool season greens of the year on the south/southeast side of the enclosed porch (photo, above). Here, they can grow where the temperatures are up to 3 or 4 degrees warmer at night than 15′ from the house, and they’re protected from the wind. Now that they’re well rooted, the brassicas and lettuces will tolerate freezing temperatures, within limits, before they’re sold or set into the garden.


spinach Monstrueux de Viroflay, French heirloom

Potted spinach ‘Monstrueux de Viroflay’, a French heirloom.


The USDA Plant Hardiness Zone On the Label


Most vegetables, greens, annual flowers, and herbs are rated “cool season” or “warm (or main) season” plants. They are not generally assigned USDA plant hardiness zone numbers on their labels. Check with your local agricultural extension office for a planting timetable.

Parsley and cilantro, pansies and violas, kale and green onions are considered cool tolerant. Here, they thrive in cold autumn weather, and usually sail right through the winter in great condition. And some, such as collards, kale, and green onions, tolerate warm temperatures as well.

A particular variety of broccoli can be more cold tolerant than another, so choose varieties carefully. In this case, experience with a wide variety of named cultivars will guide you when choosing the best one to plant in March (‘Green Magic’, ‘Imperial’) or September (‘Arcadia’, ‘Kariba’). It all depends on your zone!

But basil, zinnias, and bell peppers are warm season plants and cannot tolerate frost or prolonged exposure to temperatures below 50°F. Depending on your climate zone, you’ll be able to grow tender sweet basil outdoors beginning somewhere between February and June.

Each tree, shrub, and perennial is given a zone number, an indication of how much cold it can tolerate in winter. A plant’s zone rating signifies the likelihood of its survival after an average winter. Some plants also are assigned heat zone ratings, which is helpful in hot climates.

Strawberries and raspberries, for example, are hardy in zones 3 or 4 to 7 or 8, depending on variety. Blueberries, as a group, have a wide range of temperature tolerance, growing in zones 3 to 10. Certain varieties, such as highbush and lowbush blueberries, grow toward the cooler end of the range, while rabbiteye blueberries are suited to the warmer southeastern U.S.


A Little More Protection


cold frame for cool season vegetables

Cold frame in Maryland.

With simple materials, there are a number of ways to protect cool season greens in winter. From wind barriers to low tunnels to a cool greenhouse, some of these tips will work for you.

On very cold nights, cover with clear plastic sheeting to retain the heat gained during the daytime. Adding a string of miniature incandescent lights or a heat mat will raise the temperature even higher in a cold frame. Don’t forget to open the cover in the morning. Temperatures rise quickly inside a closed frame.

During bitterly cold or icy weather, the clear plastic sheets stay in place in the daytime, without over-heating the plants beneath the cover. Loosely drape the plastic over the crops, allowing excess heat to escape when the sun shines. All of our winter crops bounce back after a night of below-freezing temperatures. I loosely cover them at 25° F to prevent an interruption in their progress and damage to the foliage.

In late afternoon, I’ll secure the plastic if the nighttime temperatures are expected to drop below the low 20’s. Many of the cool season greens can survive with no winter protection in warmer zones. Each variety of cabbage, broccoli, or cauliflower, for example, has a more defined range of tolerance, so choose cultivars carefully.

Another option is to plant a dense evergreen hedge on the north or northwest side of the garden, or wherever your prevailing winter winds come from. Evergreens help diffuse and divert frigid winter winds.


The Sun’s Path


The sun’s zenith rises in the sky as summer approaches and begins to fall again after the first day of summer. Although the shortest day and the first day of winter is December 21, our lowest winter temperatures occur around the third week of January. Similarly, the hottest part of summer occurs a few weeks after the first day of summer.

As you plan the location of your vegetable garden, remember that a winter garden receives fewer hours of light. Try to orient it toward due south for the best exposure.

If there are deciduous trees south of the garden, you might actually get more sun in the winter, when the trees are leafless, than in the summer.


the suns path

The sun’s path across the sky, in southern North Carolina.


As an avid vegetable gardener, I will find ways to grow a few rounds of greens and vegetables all through the year. I’ll never move to a colder zone if I can’t grow my favorite greens there in winter. The average extreme minimum temperature creeping a bit higher on the thermometer makes it just slightly easier to succeed.

In addition to the plant’s hardiness zone, other factors contribute to success or failure in your garden. Time of planting, general health of the plant, ongoing care, and soil condition all have an impact. Start your variety selection with the plant’s hardiness zone, though, because that’s the one factor we can’t control.


Return to the top

This Is Why Fall Color Happens

Updated 9/6/2024


forest, fall color


One of the most phenomenal transformations in nature occurs in autumn when leaves take on fall color.  


Deciduous tree canopies change from shades of green to the reds, oranges, yellows, browns, and purples associated with this time of year. A drive along the Blue Ridge Parkway, or even a glimpse out the window to the Japanese maple in the courtyard, elicits feelings of delight and wonder.

Equal to the spectacle unfolding in front of us, as we watch colors brighten from day to day, is the curiosity for an explanation. Why does fall color happen?


Plant Pigments and Fall Color


fall color

Looking up in Lincolnton NC.


It all starts with plant pigments, which give leaves their color.

Sandwiched between a leaf’s upper epidermis and the lower epidermis is a layer of cells called the mesophyll. The mesophyll is composed of the upright cells of the palisade layer, near the surface of a leaf, and the more loosely arranged spongy mesophyll. Both kinds of cells within the mesophyll contain chloroplasts, with chlorophylls “a” and “b”. Also present within the leaf is a network of vascular tubes—phloem and xylem—which carry water and nutrients between the leaves and the roots.

These chlorophylls absorb wavelengths from different parts of the spectrum. Chlorophyll a absorbs violet-blue and orange-red wavelengths, and chlorophyll b absorbs blue light. All plants have “a” but not all plants have “b”. In lower light levels, “b” more efficiently absorbs energy from available light and transfers that energy to “a”.

In autumn, as chlorophyll degrades into transparent compounds, the carotenoids become the dominant colors. Those pigments were there all along, but the green chlorophyll masked them. We don’t see the oranges and the yellows until the greens begin to die down.


tree leaves

Spring foliage on maple tree in the woods.


Chlorophyll


maple leaves, fall color

Oak leaves, at Mabry Mill, Meadows of Dan, VA (2020).

The green pigment is the familiar chlorophyll. We see it every day as plants grow and produce foliage. Chlorophyll, contained within a cell’s chloroplast, is responsible for manufacturing sugars during photosynthesis. Carbohydrates, made from oxygen and hydrogen in water, and carbon from carbon dioxide, permit growth and development of the plant. Chlorophyll is continually depleted and replenished throughout the season.

We see green leaves because most of the green wavelengths in light are not absorbed but are reflected instead. Chlorophyll pigments absorb primarily red and blue wavelengths.

Changes occur in late summer as days shorten and temperatures drop. Cells at the base of the leaf’s petiole, where it attaches to the stem, begin to cut off the vascular system. Water and nutrients no longer move freely between the leaves and the stems. Production of new chlorophyll stops, revealing the yellows and oranges. Sometimes the leaf veins are the last parts to change color and remain green as the rest of the leaf turns color (photo, above).


Carotenes and Xanthophylls


yellow fall color, maple in charlotte nc

A maple tree in Charlotte NC.


Carotenoids are composed of xanthophylls and carotenes. These are the yellow, orange, and brown shades seen in plants and animals—daffodils, corn, buttercups, bananas…and canaries, egg yolks, shrimp, fish, and flamingos. These pigments absorb wavelengths from the blue and some of the green parts of the light spectrum, which chlorophyll can’t absorb efficiently.

Xanthophylls and carotenes protect foliage from oxidative stress (cell damage) during photosynthesis. When the tree is exposed to strong sun, carotenoids absorb excess energy from excited chlorophyll molecules and release it as heat. In autumn, carotenes protect leaves as the nutrients are withdrawn from the leaves to the stems. The tree will re-use these nutrients when new foliage emerges in spring.

Beta-carotene, lycopene, lutein, and zeaxanthin are more carotenoids, present in leafy greens, fruits, and vegetables. These pigments are good for plants and for us, too—in squash, sweet potatoes, tomatoes, colorful ripe peppers, carrots, oranges, apricots, and grapefruit.

Between 15 and 30% of tree species have yellow or orange fall color. Trees that turn these colors include hickory, ash, redbud, yellow poplar, birch, aspen, black cherry, sycamore, maple, fringe tree, cottonwood, sassafras, Parrotia, pomegranate, alder, ginkgo, witch hazel, and Katsura.


orange fall color, lincolnton nc

Lincolnton NC.


Red twig dogwood ‘Arctic Fire’ and yellow-twig dogwood ‘Flaviramea’ stems turn color in cold weather and good sun. Cut back the plants in late winter, almost to the ground, to encourage a multitude of young twigs that will take on color later that fall.

Brown is often the color of cell walls and can appear in the absence of other pigments. Sometimes, leaves turn brown without turning color as a result of an early freeze. A Japanese maple that normally turns red in autumn, for example, can turn brown when the temperature suddenly plummets. Also, a tree that has been cut down in late summer or fall will turn brown instead of displaying its usual fall color. More on that later, under marcescence.


Anthocyanins


red fall color, crape myrtle

Fall color of crape myrtle, Cane Creek Park, Waxhaw NC.


What about the red colors? Unlike the yellows and oranges, the red pigments, called anthocyanins, are produced in the sap when sugars break down in bright light.

This happens after some of the chlorophyll has degraded in autumn and as phosphate levels decrease. Phosphates break down sugars manufactured by chlorophyll in the summer in order to carry out cell activities. However, in the fall, phosphates and other nutrients move from the leaves to the stems.

You might notice that in some years, the red colors are more vibrant than in other years. Rich red colors are visible when anthocyanins are produced in greater quantities. Bright sunny days, adequate soil moisture, and cool but not freezing temperatures foster the blazing displays we look forward to each year. 


berries

Edible berries with high levels of healthy anthocyanins.


Nutritionists encourage us to “eat all the colors” of vegetables, greens, and fruits. Anthocyanins, among the most powerful antioxidants, are found in many fruits and vegetables, including apples, cranberries, blueberries, strawberries, blackberries, cherries, grapes, plums, red cabbage, and red lettuce.

Carotenoids can combine with anthocyanins to form deep orange, scarlet red, and bronze fall colors.

In temperate regions, about 10% of the trees turn red or burgundy. But the percentage can be as high as 70% in areas such as New England. Some plants with predominantly anthocyanin pigments include maple, oak, sweet gum, tupelo, sourwood, dogwood, cherry, and persimmon. Purple-leaved cultivars of smokebush and redbud turn deep red in autumn.


Variety Selection in Your Landscape


burgundy fall color, Japanese maple with lantern

Certain varieties of Japanese maple display great color in summer and again in autumn.


When choosing shrubs and trees for your landscape, be sure to ask the nursery about fall color. There could be several cultivars within a species, each with a different color in autumn.

Japanese maple in fall color, new gardens

Japanese maple.

Japanese maple (Acer palmatum), for example, comes in many varieties. Red-leaved cultivars of this tree seem to be the preferred choices among customers. Foliage that remains mostly red all summer will gradually deepen to a rich reddish burgundy. And then it suddenly looks as though the plant is on fire, turning bright red. On the other hand, green-leaved cultivars can be multi-colored in the fall, or rich orange, or sunny yellow. It just depends on the cultivar.

If you’re looking for a specimen tree, and fall color is a factor, visit garden centers and public gardens in autumn when the trees show fall color. Research the full botanical names (Genus, specific epithet, and ‘Cultivar’) of the varieties you like.

This is not a guarantee, however, that young potted trees will have the same fall color as established trees. Plants in nursery pots can behave differently than plants in the garden, so take that into consideration.


Fall Color Might Depend on Weather


parrotia persica, reddish fall color in snow

Parrotia persica in the snow.


Seasonal weather conditions also affect a tree’s fall color. In the Maryland garden, a Parrotia persica grew in an island bed. The leaves of this witch hazel relative often turned a bright yellow color. In other years it was amber-gold, and, more rarely, salmon-red.

Prolonged mild fall weather also affects the display. That Parrotia (photo, above) occasionally held its leaves until December. Many oak species keep their orange, russet, rich red, or brown leaves through early winter before shedding them.

Red fall color is particularly dependent upon weather conditions. In 2018, trees that normally turned brilliant red were rather dull here in Charlotte. The heavy rains, high winds, and overcast weather did not promote the production of anthocyanins.


Hormones and Abscission


Abscisic acid (ABA), produced in terminal buds, slows growth and signals the plant to produce bud scales that protect the buds over winter. ABA is also produced in the root system and is translocated to the leaves during drought in the growing season, signaling the leaves’ stomates to close. This reduces transpiration, conserving water content in the plant.

Hormones produced in leaves and in the tips of twigs influence development of the abscission layer. This layer is a few cells thick, characterized by short cells with thin walls, and sits between the base of the leaf stem (petiole) and the twig. During the growing season, higher levels of auxin regulate the influence of ethylene, two hormones, resulting in the leaves’ ability to remain attached. Auxin levels fall in autumn, however, exposing cells in the abscission layer to the effects of ethylene, which promotes leaf detachment.

Cells between the petiole and the twig are differentiated, disintegrating on the leaf end and depositing lignin and suberin on the twig side. This layer of cells is weakened, causing the leaves to fall off by their own weight or with help from wind and rain. Enzymes, such as pectinases, help the process by breaking down cell walls.

Remaining on the twig is a leaf scar, with remnants of vascular strands. Over several days, lignin (tough woody tissue) and suberin (corky bark tissue) will seal the fresh leaf scar, protecting it from infection and desiccation.


Marcescence


beech tree, winter

Beech tree.


Oaks (Quercus spp.) sometimes remain in brown leaf until early spring. Beech trees (Fagus grandifolia) can be spotted in the winter forest by their tan leaves dangling from the branches. Leaf retention through winter is called marcescence. The reason for this trait is open to speculation.


Nutrient Release

One theory claims that, by holding onto its leaves until new foliage is about to sprout, those newly fallen leaves will stay near the tree’s root system instead of blowing away in the winter winds. Since they have yet to begin decomposition, the nutrients locked inside the leaves will be released at a time when they can benefit the tree—when growth resumes in spring.


Browsing Animals

Another theory indicates that browsing animals are less likely to feed on marcescent twigs. In studies where deer were presented with both marcescent twigs and leafless twigs, they chose the leafless twigs.


Weather Abatement

Maybe the dead leaves help slow down fierce winds, protecting the buds from drying out. Even better is the accumulation of snow, as in the photograph (above) of a beech tree, decreasing exposure even more.

Another possibility is the protective shade cast by marcescent twigs on thin-barked trees, such as beech (photo, below). Large differences in temperatures, between night and day, can damage tissues on the south or southwest side of the trunk. Frost cracks and sun scald can be minimized when the trunk is partially shaded by brown leaves during the warm hours of the day.

If cracks occur, callus tissue will seal them, and healthy bark will compartmentalize the wound. There’s no need to paint it with “wound sealer” products. And never fill the cracks or hollows with concrete or dump rocks and debris at the base of a tree!

When a severe early frost suddenly kills a tree’s foliage, the abscission layer would not have had enough time to mature. Consequently, leaves can cling until those cellular changes occur. Young oak trees might exhibit this feature, but it often disappears with maturity. Sometimes only parts of the tree have leaves that cling.

You might have noticed that trees felled in the summer often hold onto their brown leaves.


beech tree marcescence

Beech tree in winter, Charlotte NC.


Why Do Leaves Fall Off?


For a plant to keep its leaves all year long, resources would have to be consumed at a time when they are less efficiently gathered. When light levels are less than optimal, and cold temperatures suppress metabolic processes, it’s easier for the plant to reabsorb nutrients and drop leaves. Water loss, insect predation, foraging animals, and damage from ice, snow, and high winds are some reasons why it just isn’t worth staying in leaf through the winter. The cost is too great.

pine needles, in fall

Pine tree with aging needles.

Conifers, on the other hand, have adapted to those conditions, and are able to photosynthesize all year. But they do slow down in cold weather. And the sticky sap in some species (pines, spruce, fir, and others) effectively fends off animals and most insects.

Evergreens drop some of their foliage each year; needles don’t cling forever. Some homeowners are alarmed when they see a large percentage of brown needles fall to the ground. That’s normal, as long as the tips of the stems remain green. A pine needle carpet is an effective mulch.


Protective Red Fall Color


Scientists have long speculated on the merits of anthocyanins—the red, blue, and purple pigments. Those adhering to the Photoprotection Theory claim that anthocyanins protect leaves from harmful effects of light. This pigment also helps the tree absorb nutrients more efficiently in cooler conditions, before leaf drop.

mustard greens 'Miz America'

‘Miz America’ mustard greens and other brassicas.

Coevolution Theory claims that insects avoid feeding on leaves high in anthocyanins. The red fall foliage color signals them to stay away, but red berries signal birds to come and feast. (***Update***: Growing many flats of colorful fall greens illustrates this point. Among brassicas [mustard, kale, broccoli, cabbage], the deep reddish burgundy ‘Miz America’, one of the mustard greens, is entirely free of damage from caterpillars that ravage green varieties in this group. 10/7/2022)

Dogwood trees, hollies, barberry, and pyracantha have red berries that attract birds. After consuming them, the animals help distribute the seeds. Poison ivy has whitish berries that birds eat, but its foliage is fiery red, signaling birds to come around.


fall color in red berries of winterberry

Fall color in berries of a dwarf winterberry, Ilex verticillata, at Freedom Park, Charlotte NC.


Red colors in some species of maple trees are produced by a different metabolic process than through chlorophyll breakdown. These anthocyanins aid in preventing competition with the tree’s own offspring by stunting the growth of saplings trying to grow nearby. This is one type of allelopathy.


But Only Part of the Tree is Turning Color


fall color


You might have noticed that a portion of a tree is prematurely turning color while the rest of the tree is still green. I’m not referring to an even coloring at the ends of branches, but rather to the one branch that is conspicuously different in color from the rest of the canopy. That branch is stressed…

  • on the side of the tree where the roots are exposed to hot sun and poor, dry soil, such as on a south-facing slope (northern hemisphere).
  • from root compaction.
  • due to root disturbance, from working in the soil under the tree, severing roots.
  • because it’s heavily shaded and not contributing to photosynthesis.
  • from the tree being coppiced, or cut back to the ground. As several stems regrow, the dominant ones interfere with the others. Weaker stems will show early color and die.
  • due to girdling roots. Maple trees are notorious for this. Look for and sever a root that crosses over the base of the trunk. The trunk will try to grow over the root, but could end up being constricted. Look up from that point, and you might see branches that are developing early fall color. One indication of a girdling root is the absence of an even flare all around the base of the tree. One side of the trunk will look flat where it enters the ground.
  • from clotheslines, hammock ropes, or other items tied around the trunk or branches, eventually girdling the stem.
  • where lightning or physical damage stripped bark off the side of a trunk, killing parts of the tree above the damage which no longer receive water and nutrients.
  • from insects and diseases causing disruption in the flow of water and nutrients, affecting parts or all of the tree canopy. This can happen at the base of a leaf, a twig or branch, in the trunk, or in the roots.


Fall Color and Species Distribution


red fall color in maple tree

Red fall color in a maple tree, Lincolnton NC.


Some parts of the world are known for their fall color. Southern Canada, parts of the northern U.S., Scandinavia, northern and western regions of Europe north of the Alps, the Russian Caucasus region, Japan, parts of China, the Korean peninsula, Argentina, Chile, southern Brazil, and New Zealand’s South Island are some.

Certainly, there are pockets in millions of places around the world with absolutely dazzling fall displays! One option is to create your own by including in your landscape a few specimens with spectacular fall color.

In this country, changes in color begin as early as September in the higher elevations of the Rocky Mountains, far north Minnesota, and upper New England (far north New York state, Vermont, New Hampshire, and southwest Maine). Southern states, part of the Atlantic coast, and the California interior between mountain ranges begin their autumn displays in November. Check out this map, where you can see how fall color progresses throughout the country.


Speaking of Cold


North America is home to a diverse habitat of 800 species of trees, including 70 oaks. Northern Europe has fewer—51 species, 3 or which are oaks. These numbers do not include cultivars of the species. One thing scientists can agree on: they can’t agree on the number of tree species inhabiting the planet. Some say the number is 10,000, and others estimate over 100,000 species.

During the Ice Ages, North American tree species in southern regions and along the north-south mountain ranges were spared extinction caused by glaciers. As glaciers expanded from the north, trees were able to find refuge farther south of their original range. This took place over thousands of years. The last Ice Age occurred from 18,000 years ago to approximately 12,000 years ago.

However, in Europe, glaciers covered a larger area of land. The Alps acted as a massive barrier to species trying to retreat toward southern latitudes. Those trees were cornered, and then covered up by mile-thick sheets of ice, causing mass extinctions. This explains the disparity in the number of tree species between North America and Europe.

At the height of the last Ice Age, about 18,000 years ago, glacial ice covered one third of the planet’s land surface. Today, about 10% of the land is covered by ice.


Fall color is nature’s last hurrah of the season. 


I hope you’ll consider planting trees and shrubs that have brilliant autumn color. If you’re not planning to do any landscaping, you can still enjoy the colors of autumn by visiting parks and public gardens, or by taking a leisurely stroll through the neighborhood. Maybe it’s time for a road trip. Don’t forget the camera!


fall color

Love it.


Return to the top

The Lake Lure Flowering Bridge

2018

Updated 10/28/2024


A Trip To the Lake Lure Flowering Bridge


Yesterday, US 64/US 74-Alt/NC 9 delivered me to the Lake Lure Flowering Bridge. The weather forecast predicted a hot Saturday here in Charlotte. So, I decided to take another trip to the mountains of western North Carolina. There’s rarely a plan or an itinerary of any sort, but I always end up somewhere.

I have been there before, once a couple of years ago to walk the length of the bridge, and many times as a drive-by viewer on my way to…somewhere. If I had stayed home, I would have felt compelled to plant the potted vegetables that were quietly pleading, “Plant us…Plant us!


view from Lake Lure Flowering Bridge

View from the Lake Lure Flowering Bridge.


A Little History


This “Gateway to Somewhere Beautiful”, it’s called, opened in 2013, after a new bridge had been built 2 years earlier, right next to it. The original 1925 bridge and now this pedestrian walkway span the Rocky Broad River, which feeds Lake Lure, an easy stroll along the Town Center Walkway. (Parts of the movie “Dirty Dancing” and other movies were filmed here.) Stunning stone backdrops surround the lake, where you can enjoy water sports, dine, or simply sit back and take it all in.

The Visitor Center, between the lake and the garden, houses a small museum with artifacts and informative historical displays. You can trace the history of the Hickory Nut Gorge from the time of the Cherokee and Catawba Indians. Read about the area’s involvement in the Civil War and the Gold Rush, to today’s economy, centered around agriculture, industry, and tourism.

The garden has been designated a Monarch Way Station by Monarch Watch. And the National Wildlife Federation includes it in its Certified Wildlife Habitat program. It is known as “Historic Bridge Seven” in the Register of Historic Places.


path through the garden, lake lure

Path through the gardens, with scenic backdrop.


A short drive down the road is Chimney Rock State Park (“The Last of the Mohicans”) and the always bustling Chimney Rock Village. Here you can enjoy shopping and outdoor dining while being mesmerized by the sound of rushing water cascading down the rocky incline. Did I mention how scenic this area is? Spectacular!


Rocky Broad River

The beautiful Rocky Broad River.


Back to the Garden


A paved pathway takes visitors through a succession of gardens. There’s an herb garden, a fragrance garden, and one that highlights tropicals. And a miniature train garden, succulents, and roses. Annuals are planted here and there, providing vibrant color and nectar for the bees, butterflies, and other beneficial insects.

Perennials and woody plants are the backbone of this garden, and each section has a plant list to help identify individual specimens. This garden is open all year, inviting opportunities for new experiences every time I visit.

Expanding gardens spill out over the ends of the bridge span, offering more potential garden space. The parking lot is at one end, near the huge maple tree (2019—now a stump!). Planted near the other end of the garden is a Franklin tree, which no longer exists in the wild. You can stay on the level curvy paved path or explore several side pathways.


bricks, llfb, for a donation


There is no charge to visit, but do leave a donation in the box near the lake end of the walk. Contribute $200 (today=?) and have an engraved brick placed along the path. This garden is planted and maintained entirely by a group of hard-working volunteers.
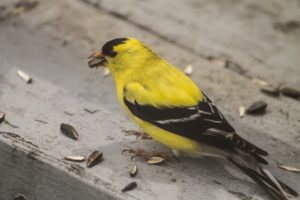
Everywhere you go, you will see whimsical additions to the landscape. There are bird baths with good-luck coins (cameras are watching, the signs say), and repurposed painted doors. That’s a nice touch along a path as the garden transitions into another style or simply to add a splash of color.

You’ll see metal sculptures from inconspicuous to the can’t-miss Opuntia, houses for birds and bees, and an old chair with the seat replaced with a sack of soil and succulents.


Wildlife


The bright orange butterfly is a Gulf Fritillary. Males are bright orange, and females are slightly browner. The caterpillars feed on passion flowers (Passiflora), and adults take nectar from butterfly bush (Buddleia), lantana, zinnia, and other flowers.

Where water drained from one of the raised beds, a butterfly called the Red-Spotted Purple paused for a mineral drink. The larvae of this butterfly feed on several species of trees, including amelanchier, aspen, birch, poplar, and wild cherry. Adults find sustenance from dripping tree sap, rotten fruit, carrion…and dung. Sometimes they sip nectar from spirea, viburnum, and privet flowers. Birds avoid the red-spotted purple because it mimics the poisonous pipevine swallowtail butterfly. But I wonder if that’s the only reason.

This chrysalis (photo, above) clings to the back of an elephant ear leaf. Tropical Colocasia plants add dramatic presence to a garden, with huge green or purplish-black arrowhead leaves.
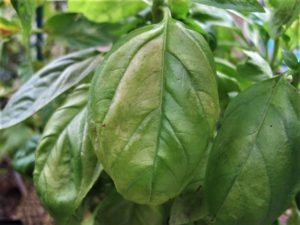
Another butterfly skipping around the lantana and the basil flowers was the Clouded Sulfur butterfly. Small lizards (green anoles) scurried off when disturbed. 


perennial sunflower, Helianthus

A tall perennial sunflower, Helianthus, for late blooms and bumble bees.


A cultivar of the perennial native sunflower (Helianthus) was a favorite of the bees. This stately plant grows to 7′ tall and offers bright color in sun to partial shade when little else flowers there at this time of year.

A water hose thoughtfully left on the edge of the sidewalk filled a bowl for thirsty dogs. It was a hot day! Heading back to the parking lot, the metal archway misted cool water on visitors who chose to take this route. That felt great.


So, What’s Blooming Now?


Perennials


solidago at Lake Lure Flowering Bridge

Pollinators at work on the goldenrod, Solidago. This is not the plant responsible for hay fever.


Camera in hand, I clicked away as others smiled hello or asked “What’s that?” There were visitors from New York, and several from other countries. A lovely woman from Hickory commented on the turquoise-winged wasps all over the goldenrods (Solidago) and was curious to know the name of another yellow flower. It was listed on the nearby clipboard as Rudbeckia fulgida, a small-leaved black-eyed Susan. It’s native to the eastern U.S.


rudbeckia fulgida var. fulgida

Rudbeckia fulgida var. fulgida.


A popular seller at the Maryland markets where I sold plants was Rudbeckia fulgida var. fulgida, a better choice, in my opinion, than the ubiquitous ‘Goldsturm’. I’m not sure if the specimens on the bridge were R. fulgida, as indicated on the plant list, or R. fulgida var. fulgida. The latter black-eyed Susan, a slightly glossy-leaved variety of the species, starts blooming a week or two later than ‘Goldsturm’, but it continues non-stop until frost.

And it is not susceptible to that unsightly black mildew that often covers leaves of ‘Goldsturm’. Sure, the flowers are smaller, but, to me, it is the superior variety.


Anemone

Anemone ‘Honorine Jobert’.


Reblooming bearded irises (“Update”, below) were budding up for an encore presentation, and chrysanthemums filled in the gaps. Tall, white Japanese Anemone ‘Honorine Jobert’ lit up the partly shaded recesses of the metal archway.


mum and glass sculpture, Lake Lure Flowering Bridge

Burgundy chrysanthemum echoes similar color in glass bead sculpture.


More Perennials

New England asters, Gaura, pink turtlehead (Chelone obliqua), garden phlox (Phlox paniculata), and Sedum ‘Autumn Joy’ were finishing up their blooms. Ripening seedheads of coneflowers (Echinacea) and black-eyed Susans attract hungry birds, especially the finches. Now there’s a lesson for visitors to the Lake Lure Flowering Bridge—keep the seedpods on the plants for the birds!

Heuchera, also called alumroot or coral bells, is bulking up foliage for what I’m sure will be an impressive display next year. Cooler temperatures bring out a vibrancy in the heuchera foliage that rivals fall tree color. Hummingbirds visit the airy flowers for their sweet nectar.

Also growing in part shade was toad lily (Tricyrtus), with orchid-like purple spotted flowers. It won’t grab your attention as other brightly colored flowers will, but, viewed up close, it has its charms. The fact that it blooms at the end of the growing season and in mostly shady conditions merits placement along a woodland path.


Annuals


Ruellia

Ruellia, sometimes called Mexican petunia.


There’s great botanical diversity on the Lake Lure Flowering Bridge. The brochure states there are over 700 species of plants in this garden!

A few heat-loving annuals are blooming overtime, such as lantana, scaevola (fanflower), ruellia, cuphea, and zinnia, attracting butterflies and bees. Coleus varieties, partly shaded by the maple tree, will stay in leaf until cold weather or frost claims them.

While perennial gardening offers many benefits, the annuals deliver an abundance of color and the opportunity to grow something different every year.


violas in the garden

Violas in our front yard flower through the winter.


In our front garden, near the sidewalk, I planted biennial violas a few weeks ago. Smaller cousins of the pansy, violas bloom all winter and spring in this USDA zone 7b location. They will succumb to late spring’s high temperatures.

The deer are fond of violas, so I spray the plants with a deer repellent every 3 or 4 weeks. These plants will “bridge the gap” in this garden between fall and spring.


Shrubs


Many of the plants on the Lake Lure Flowering Bridge have noteworthy features in the fall. When landscaping your property, look for not only flowers, but also ornamental bark, attractive twigginess or structure, fragrance, fall color, fruits, and benefits to wildlife.


Beautyberry


White Beautyberry

White Beautyberry, Callicarpa americana, overhanging Rudbeckia fulgida.


Beautyberry (Callicarpa americana), with branches gracefully bending under the weight of their fruits, is an easy shrub to grow. The birds feed on the ripe berries, distributing their seeds. Robins, mockingbirds, and thrashers will eat the berries when their favorite foods are no longer available.

There are both purple- and white-berried Callicarpa americana shrubs on the bridge. This beautyberry is a multi-stemmed shrub growing 4′ to 6′ tall.  It’s native to the southeastern U.S., from Texas to Virginia, in USDA zones 6 to 10. Cultivars of the related Callicarpa dichotoma and other Asian species range from 3′ to 10′ tall.


Purple beautyberry, Callicarpa americana.

Purple beautyberry, Callicarpa americana.


I used to cut back the purple beautyberry (C. dichotoma) in our Maryland garden to only 6″ or 12″. Because flowers, and therefore berries, form on new growth, this approach keeps it more manageable in the landscape. In fact, delaying the pruning until mid-spring (instead of late winter to early spring) will cause it to leaf out a bit later, keeping the plant even shorter and less “wild” looking.

Beautyberry is undemanding in a casual mixed border. This plant vigorously self-seeds, although birds consume many of the fruits.


Colchicum autumnale Waterlily

Colchicum autumnale ‘Waterlily’.


Planted near purple beautyberry in the Maryland garden, a fall-blooming bulb called Colchicum autumnale ‘Waterlily’ perfectly echoed the berries of the shrub. It is poisonous, so use with caution.

Mosquito Repellent

Fresh leaves of American beautyberry, Callicarpa americana, contain a substance that is said to repel mosquitoes and other biting insects.

I haven’t tried the beautyberry, but catnip (Nepeta cataria) always did an excellent job keeping mosquitoes away from me. Simply crush a leafy stem and rub it on your skin, adding a few drops of water to help distribute the natural repellent. If I reapply the solution soon after the first one dries, mosquitoes keep their distance all day. Prepare a concentrated solution a cup at a time and store it in the refrigerator, where it can last for a few weeks.


Strawberry Bush


strawberry bush, Euonymus americanus, at the Lake Lure Flowering Bridge

Native strawberry bush, Euonymus americanus.


Another shrub sporting curious-looking fruits is “hearts-a-bustin”, or strawberry bush. Euonymus americanus, native to the eastern U.S. (zones 6 to 9), is a suckering shrub, growing eventually to about 6′ by 6′. Inconspicuous flowers develop dark orange-red fruits in autumn, providing food for birds, but they’re toxic to us.

The untamed nature of this shrub is well suited to a wild native garden or on wooded slopes. Deer feed on the foliage and twigs.

This plant is susceptible to crown gall and, like other Euonymus species, to euonymus scale. But it does have interesting characteristics if you’re looking for a native plant to add to a woodland garden. Strawberry bush tolerates clay or sandy soil and growing near black walnut trees.


The Franklin Tree


Franklinia tree, F. alatamaha, at the Lake Lure Flowering Bridge

The Franklin tree, Franklinia alatamaha.


A Franklin tree (Franklinia alatamaha) grows near the lake end of the path. This medium sized tree is related to Camellia and Stewartia, in the family Theaceae. It has late season white flowers, vibrant red fall color, and ornamental striated bark. It needs well-drained, acidic soil, and dislikes compacted clay and wet conditions. Don’t plant it where cotton has been grown.

Franklinia has the reputation for being difficult to grow, but if you live within zones 5 to 8 and welcome a challenge…

Pennsylvania botanists John Bartram (1699-1777) and his son, William (1739-1823), “discovered” this plant in 1765. They collected specimens, saving the species from extinction, and named it in honor of their friend, Benjamin Franklin. All existing Franklin trees originated from specimens collected over 200 years ago, near the Altamaha River in Georgia. Unfortunately, it disappeared from the wild at about that time.


Styrax Japonica


Japanese snowbell

Japanese snowbell, Styrax japonica.

Another tree, one of my favorites, is the smooth-barked Japanese snowbell (Styrax japonica). This is a finely branched medium-sized tree with fragrant dangling delicate white flowers that appear after the spring rush is over. Some of the seedpods can be seen splitting open (photo taken Nov. 3), revealing brown seeds inside.

The species has a lovely broad umbrella-shaped canopy, but newer cultivars tend to be more upright. It grows in zones 5 to 8. A pink-flowering cultivar is available.


Time To Go


On the road again, Route 64 climbs to a cool 2500′ elevation as it continues winding through small towns and apple fields toward Hendersonville, where I sometimes have a hefty tuna sandwich on marbled rye before heading home.

I’d like to see the garden’s winter light display, so I might return to see that. But the fall color in the mountains of western North Carolina will probably draw me back in a month or two. Most likely, the trip will include a stop at the Lake Lure Flowering Bridge.


***Update: November 3, 2018***


painted penguin squashes

A pair of painted gourds.


On a quest for pictures of fall foliage in the foothills and lower elevation mountains of western North Carolina, I was reminded instead of the consequences of recent storms: broken limbs, toppled trees, and some rockslides…but no photo ops of fiery maples or golden hickories. The power of nature!

Today’s trip to the Lake Lure Flowering Bridge presented a few new subjects…

The rich purple reblooming irises didn’t disappoint. Several plants were in full flower, and some had more buds yet to unfurl. Blue fall-blooming asters welcomed busy honey bees, and purple coneflowers (Echinacea purpurea) still had some flowers. Clusters of yellow quilled petals crowned a robust Rudbeckia subtomentosa ‘Henry Eilers’.


Reblooming iris at the Lake Lure Flowering Bridge.

Reblooming iris.


Throughout the garden, seasonal decorations nestled in among the plants and structures. Pumpkins of various shapes and colors, painted squashes, sequined straw-stuffed figures… Soon these undoubtedly will give way to wintry themes and holiday lights.

A local company called Mark of Excellence, Inc., had just completed building this new information kiosk (photo, below). Mark, like all other contributors to this garden, volunteered his services for the enjoyment of all visitors.

Even though it’s November, you can see that the growing season is hardly at an end! Visiting public gardens, parks, farmers’ markets, and garden centers during off-peak times of the year will tempt you with some of these season-extenders.

It doesn’t take much to get me outdoors, but give me some plants to fuss over, admire, or photograph…and, well…dinner will be a little late.


Information station at the Lake Lure Flowering Bridge

The new information station.


Hurricane Helene


Chimney Rock Village sign, after flood


This section added 10/7/2024:

***Update***: Hurricane Helene and the resulting floods and landslides scoured the western North Carolina mountains and other regions in the southern Appalachian Mountains for a few days on and after 9/27/2024. It destroyed small towns, roads, bridges, and people’s lives. Around 100 people died and many more are missing in NC alone. Heroic efforts are being made by individuals, churches, and charitable organizations to assess the damage, bring food, water, and communication to trapped families, and to begin the process of mitigating the damage and rebuilding.
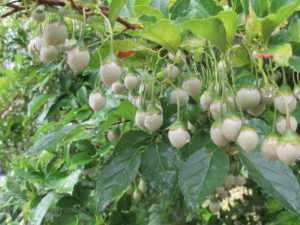
Most shops and restaurants in Chimney Rock have been washed downstream to Lake Lure. From what I’ve seen in news coverage, the Lake Lure Flowering Bridge has been reduced to the only remaining feature: part of the concrete balustrade at the edge of the bridge (as in the photo at the top of this article).
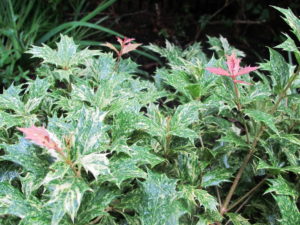
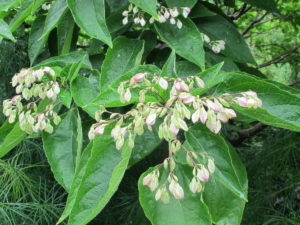
Mark Huneycutt documented what he has seen, and here’s one of his videos:

I walked to Chimney Rock for answers… Hurricane Helene Aftermath – YouTube

Rescue operations request that you not venture to the area on your own, even if offering help and supplies. The ground is unstable, and you could end up being one of those needing rescue, so leave it to the professionals. Ask them if you can help.

Please, generously donate money and requested goods to legitimate rescue operations. I donated to Samaritan’s Purse and will forward a portion of my proceeds earned at the farmers’ markets. Samaritan’s Purse, headquartered in the area, has tractor trailers, machinery, supplies, and an army of dedicated volunteers. They are doing a fantastic job, so please help them in their efforts. Thank you.

Added 10/28/2024:

This video demonstrates hope, determination, and generosity in the face of a devastating life-changing event. I also have donated to hurricanehelenewnc.com from my revenues at Wellspring Gardens (Elkin NC farmers’ market):

Asheville is Worse than We Realized – Can They Rebuild?

Thank you again.


Return to the top

Basil Downy Mildew: Symptoms and Solutions

2018


healthy green basil

Healthy basil.


Basil Downy Mildew In the U.S.


Basil downy mildew is a devastating disease caused by the pathogen Peronospora belbahrii. This disease has been active in the United States since 2007, and for several years before that in Europe. BDM is thought to have originated nearly 90 years ago in Africa.

This water mold targets a very specific host—basil. Just basil. There are related species that attack other members of the Lamiaceae family, such as coleus, but it’s basil I’ll concentrate on today.

I’m writing about it now because some of you might have given up growing basil. If you’ve struggled with it the last few years, I’m going to offer some tips so you can once again enjoy your home-grown basil. And then I’ll share my favorite Tomato-Basil Salad recipe, a summertime staple around here.


Symptoms Of Basil Downy Mildew


basil downy mildew

Yellowing between main veins.


Let me begin by describing the symptoms of BDM. The plants might start the season looking great, all green or purple and… oh, that fragrance!… You probably harvested several clippings, using them in salads, on pizza, in tomato sauce. What’s summer without fresh basil?!

And suddenly it went downhill from there. The leaves developed blotchy yellow or pale green sections between the main veins. The discoloration then spread over most of the leaf surface. The leaf reverse (the lower surface) was covered in a fuzzy gray film early the next morning, followed by little black dots.

Those tiny black specks are the fruiting structures (sporangia) of basil downy mildew. They puffed out microscopic spores that were carried on the breeze to infect other basils. The plants became spotty overall, and never regained their strength.

In only a few days, the affected leaves turned yellow. Some of the tips of the stems remained green, but, eventually, they, too, showed symptoms. And most of the leaves dropped off.

You fertilized, you spoke kind, encouraging words. And you commiserated with friends. Yet nothing helped. How disappointing!


Spores and Relative Humidity


All is not lost. With some insight into how this disease works, you might be able to stop the progression of BDM and get more mileage out of your plants. Another option is to start with healthy new transplants and take precautions so it doesn’t happen again.

You might have noticed that basil downy mildew started showing up and spreading quickly during wet or humid weather. Good observation! In fact, spores require around 85% relative humidity for a few hours in order to germinate.

Even if the weather is quite dry or only slightly humid, the basil still can become infected. How? As the nighttime temperature drops, the relative humidity climbs. After a period of high humidity, the spores begin to germinate on susceptible varieties of basil.

Let’s say the daytime temperatures are in the 80’s F, with comfortably low humidity around 40%. With no rain in the forecast, you might think you’re in the clear. The problem is that the period of time just before dawn is when the relative humidity is at its highest reading of the day. It could easily reach 90%! The lower the temperature drops during the night, the higher the relative humidity rises.

So…limiting humidity around basil can keep the plant just outside the reach of the disease. If you live in an area that gets extremely hot and dry in the summer, your basil might survive unscathed. That’s happened only 2 or 3 times in my gardens since BDM started showing up in the mid-Atlantic and southern states.


Reducing Humidity


no basil downy mildew on potted plants brought indoors at night

Potted sweet basil.

How do you limit the humidity? Simple! That’s why I’m writing this now, before everyone gets their basil plants into the garden. Here are some suggestions for you:

Basil grown in the garden should be situated in an area with excellent air circulation. Don’t plant it in the middle of a bed, with neighboring plants all around, or next to a fence.

Planting basil near a paved surface, or surrounded by paved surfaces, has the benefit of having less square footage that’s able to absorb moisture. The goal is to reduce as many sources of moisture as possible. And that includes overhead watering! If you’ve read the posts about tomatoes, you’ve learned the importance of keeping foliage dry.

BDM can show up in one neighborhood while entirely missing the next one. It might not appear at all if the summer is very hot and dry and if the nights don’t cool down very much. Or it might not show up until rain returns after a long, dry summer.

Certain weather conditions, such as frequent rainstorms and persistently high humidity, foster the widespread and enduring presence of basil downy mildew. Once the spores are in the air, growing basil is a lost cause… Or is it?


The Ultimate Solution: Potted Basil


herb garden, toad

This pot will come inside at night, after releasing the toad.

Basil grows well in containers. An airy exposure up on the deck could be a good spot for it. Or sitting on a brick patio, or under the umbrella when it’s especially hot. Check your plants every day for those tell-tale light-colored blotches, and remove those leaves immediately.

If it looks like a losing battle, move the pot indoors for the night. That’s right! Get used to it if you want to—no, must—have fresh basil.
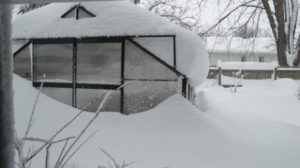
As long as you’re not living in the middle of a bog, the humidity indoors will never reach the levels required to grow BDM. And then place the basil back outside the next morning. On rainy days, keep the potted basil indoors, in a bright spot. Yes, it’s work, but worth the effort.

A few varieties of basil don’t get the disease, and plant breeders are working feverishly to bring more to market. Naturally, all of my favorites, including ‘Genovese’, ‘Yevani’, ‘Mrs. Burns’ Lemon’, ‘Tuscany’, and ‘Siam Queen’ DO get basil downy mildew. And, yes, I DO bring in the potted plants at night once the disease has reached the area or before rainy weather comes near.

Those that, in my experience, seem to be resistant are ‘Cardinal’, ‘Kapoor tulsi’ (holy basil), and ‘African Blue’ basil, but they’re not my favorites in the kitchen. ‘Eleonora’ is another that has been advertised as having “intermediate” resistance, but I have seen advanced cases of BDM on this variety.

(***Update***: New cultivars developed by Rutgers University will be worth trying. Look for ‘Rutgers Devotion DMR’, ‘Rutgers Obsession DMR’, ‘Rutgers Passion DMR’, and ‘Rutgers Thunderstruck DMR’. I grew ‘Rutgers’ Obsession DMR’ outdoors all summer, in 2021, and still have a cutting growing in the kitchen window. This variety did not develop any symptoms of BDM. Success! 1/22/2022)

Always remember: when you think about basil, think about how relative humidity can affect its health.


tomato basil salad

Tomato-basil salad.


Tomato-Basil Salad


Here’s a recipe for Tomato-Basil Salad, like Caprese salad, but with extra bits:

  • Ripe tomatoes, cut into chunks, juice included
  • Yellow or white onion, thinly sliced
  • Cucumber, alternately-peeled (no need to peel the thin-skinned ‘Diva’), halved and sliced
  • Mozzarella cheese, medium chunks
  • Sweet basil, usually ‘Genovese’ for us
  • Extra virgin olive oil
  • Red wine vinegar, or white wine vinegar if you prefer
  • Fresh Italian oregano, chopped; dried will work
  • Salt and pepper to taste

Measurements aren’t that important. Tomatoes are the main ingredient, and you can use all reds or mix the colors. Not too much onion. Certainly enough basil, and don’t use so much oregano that it overpowers the rest. Mother likes hers more vinegary. Oh, and get a nice loaf of bread for dunking. Enjoy!


Return to the top

Using Miniature Lights For Warmth


Miniature Lights for… Warmth?


miniature lights


Yes! You can use strings of miniature lights to prevent frost from damaging tender transplants in the garden.

This article originally was written for springtime applications. But read through, and you’ll see how the same principles work for cold weather gardening in many regions. These lights will keep greens in better condition, sometimes all the way through winter. Your cool season greens can produce for weeks or months beyond the early freezes!


Unpredictable


The weather has been so weird this spring. Some days it feels like June, and others skim the bird bath in ice. Lots of us already planted tender (easily damaged or killed by frost) vegetables and flowers. Without some protection, they will be injured by the cold nights that are still in our forecast.

If the nighttime temperatures are predicted to fall below 50°F, I’ll cover tomato and pepper transplants in the garden. A night or two in the 40’s probably won’t hurt most transplants if they’ve been properly hardened off. But consistently chilly weather will slowly rob the plants of their vigor. Peppers and basil are particularly sensitive to cold soil, and can be killed by it, even if temperatures aren’t close to freezing.

It’s amazing to see snow still flying in some of our northern states. It is beautiful…to watch on TV.


cold frame, with plants

Early winter in the cold frame. Light strings snake around the bottoms of the pots.


Miniature Lights


Incandescent lights, as opposed to LED’s, give off gentle heat. Those 100-bulb strings of miniature incandescent Christmas lights can increase the temperature under cold frames. They also protect tender plants in garden beds when covered with plastic sheets to hold the warmth.

mini lights under plastic cover

Potted plants under cover, warmed by miniature incandescent lights.

This is especially beneficial in those locations where an upside-down bushel basket will not sufficiently ward off the cold. And I’m not suggesting that you attempt to defy good garden sense by planting peppers in February in Minneapolis. There are limits!

When I calculated the wattages, square foot coverage, and costs, the miniature lights were the most economical option for my purposes. Each 100-bulb string provides warmth equivalent to a 40-watt incandescent bulb. I also considered heat mats and heat cables. Have a look around hardware stores and see what garden centers have available. Look for ideas online or with mail order companies selling farm, garden, horticultural, or greenhouse supplies.

Use “indoor/outdoor” products that are safe to use in humid environments. Space heaters designed for indoors are not good candidates outdoors. If you’re planning a project outside your comfort zone, check with licensed contractors, especially for electrical work.

(***Update***: Above average temperatures in the Carolinas carried into mid-fall, so the amaryllis bulbs refused to die down. Recent nighttime readings in the low to mid 20’s would have damaged the potted bulbs, so they’ve been enjoying temperatures in the mid 40’s, thanks to miniature lights and a plastic cover. Not forcing early dormancy on the plants gives them extra time to photosynthesize and, perhaps, an additional flower bud. Finally, the leaves are beginning to yellow, and soon they’ll come indoors to rest and to begin the bloom cycle. December, 2018)


And More Bright Ideas

Include snow loads and wind events (they will happen) in your plans. Slope the top of a cold frame away from the house to allow run-off. During the occasional heavy snowstorm in Maryland, I got up in the middle of the night to sweep off snow that had accumulated 8-12″. Toby, our second Rhodesian ridgeback, thought this was lots of fun. Although polycarbonate is very durable and will bend with weight, too much distortion will allow frigid air to enter and might collapse the frame.

There are more permanent alternatives to consider. Do-it-yourself greenhouse kits could be used specifically for fall and winter crops, heated or unheated. Familiarize yourself with local weather patterns to decide what’s feasible…or necessary. You might be able to convert a shed or construct a lean-to by adding a few materials readily available from the hardware store. Contact your local agricultural extension agent for practical suggestions or check out the numerous online videos.


Cold Frames With Miniature Lights


cold frame interior, miniature lights

Setting up cold frame with new strings of miniature lights.

Cold frames are simple glazed structures that give extra protection to plants when the weather is unsuitable for planting out. Young seedlings or transplants can be hardened off here until they’re ready for the garden. Also, plants that normally go dormant or die in winter can be kept green in a frame. And edible cool season vegetables can grow all winter in a cold frame where it’s too cold out in the open.
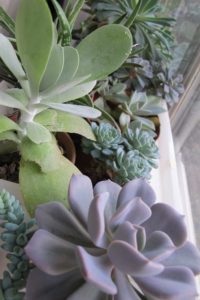
Try to orient the frame’s exposure toward the south (in the northern hemisphere), which will give the greatest benefit in terms of heat gain. Bricks on cinder blocks (photo, right) elevate the north edge of the glazing for rain run-off and a more favorable aspect to the sun.

Each hour of direct sunlight shining on the frame keeps the temperatures elevated and stores warmth in the ground. If possible, locate the cold frame out of the wind and in a warm microclimate on the south side of the house or shed.


Materials

Some gardeners use lengths of sturdy wire, arched and stuck in the ground, covered with clear plastic secured by fasteners. Or use long pieces of PVC tubing anchored over rebar sunk in the ground. Repurpose old storm windows or doors (without lead paint) propped on a support.

“Low tunnels” or “caterpillar tunnels” are available at garden centers or online, complete with supports and coverings.

For the large frame in Maryland (photos), I used rigid twinwall polycarbonate panels, covered with clear plastic film to close the sides. On very cold nights, I added more sheets of plastic, separated by “netted” plant flats that trapped air between the layers. This created dead air space and better insulation.


cold frame for cool season vegetables

Cold frame in MD, vented in the daytime.


Houseplants

Oxalis, succulents, stellar geraniums, a variegated fig tree, and other houseplants (photo, top) survived the winter, although I did not expect them to grow. When cyclamen plants went out of bloom in the house, I moved them to the cold frame, where they happily set buds once again.

Plants that do not tolerate the slightest chill, such as African violet, Alocasia, pothos, philodendron, and basil, would not survive very long at temperatures below 60°F. They stayed indoors for the winter.


“Frame to Table”

Without using miniature lights in Maryland’s colder winters, I would not have been able to harvest this assortment of greens. I grew lettuces, leeks, arugula, hon tsai tai, mustard spinach, dinosaur and ‘Red Russian’ kales, and spinach. And Swiss chard, tatsoi, pac choi, mini broccoli ‘Happy Rich’ in wide, shallow pots, about 6″ deep (such as those in photo). ‘Nabechan’ bunching onions and some greens grew in the ground on one end of the cold frame, while potted crops sat on the brick surface.

cool season vegetables

Greens growing in wide bowls.

Dense materials, such as brick and stone, absorb heat during the daytime and release it at night. I threaded strings of miniature lights between pots, on top of the brick patio. Broken light bulbs cause part or all of the string to fail, so be careful with them. Pots of greens and herbs placed close to the edge of the frame allowed easy access.

Herbs grew all winter in this cool but frost-free environment. Parsley, oregano, sweet marjoram, rosemary, thyme, chives, sage, French tarragon, and bronze fennel are a few of the herbs I grew in the frame. Cold frames are great for half-hardy species and those that normally stay dormant in winter. Italian oregano, tarragon, and chives, for example, retained their foliage instead of going fully dormant.

I added an adapter to the porch light socket near the patio door, and the lights’ extension cords plugged into that. With a simple flip of the switch from the cozy kitchen, the lights turned on or off. That’s one advantage of building your frames close to the house. 

Remember to vent the frame on sunny days, turning lights on or off as necessary. Close it up by mid- to late afternoon. 

Water as necessary, keeping the soil damp, but not wet. During mild periods of the season, add a dilute dose of fertilizer to those plants (mostly the greens) that are growing.

Power Outages

Have a contingency plan during power failures if you’re going to keep tender plants in your cold frame. Use old blankets (keep them dry), more layers of plastic, and gallon jugs filled with hot water. When this happened a few times in MD, I heated water on the wood stove for those hot water bottles and brought the most tender plants indoors.

Snow or straw piled up around the sides and a layer on top holds in a substantial amount of heat. Clear the top in the morning to allow sun to reach the plants. But if the weather is especially harsh and overcast, the plants won’t mind staying covered for a day or two.


The Maryland Greenhouse


greenhouse for cool season vegetables

The small greenhouse in Maryland.


I built this greenhouse from a kit purchased from a horticultural supply company. It was fairly easy to put together, although some of the pre-drilled holes didn’t quite match up and the instructions weren’t great. But the twinwall polycarbonate and sturdy framing were able to withstand considerable weight from ice and snow. The structure was attached to a foundation, which was optional but recommended.

This is where I kept more flats of tender succulents. Placed on 2 x 2″ x 8′ posts propped up on cinder blocks near the ends, the flats were heated from below with strings of miniature lights. They had the additional protection of 1 or 2 layers of clear plastic secured on the sides and suspended a few inches over the plants. When nighttime temperatures plummeted to single digits, I added a couple of old bedsheets and another layer of plastic, and then removed them once the sun hit the greenhouse. None of the plants froze.

A second heavy duty indoor/outdoor extension cord reached the porch light adapter near the cold frame, so I could turn all the lights (in the cold frame and in the greenhouse) on or off from indoors.


Double Bubble

This extra “bubble” of lightly warmed air made it possible for frost intolerant plants to survive our zone 6b winter. A bubble inside a tightly sealed unheated greenhouse (or other structure) feels up to 2 or 3 zones (up to 20-30°F) warmer at night than outside air, and even warmer with miniature lights. Keep in mind, though, that each layer reduces the amount of light reaching the plants.

Two or three rows of tender plants—all under a single bubble—occupied the center of the greenhouse. Near the perimeter sat frost tolerant cool season greens in large black nursery pots. Dark colors absorb the sun’s energy, keeping soil unfrozen for longer periods of time. Large pots work better than small pots because they store more warmth. Sometimes I stored bales of potting soil, wrapped in black plastic, on the north edge, where the winter sun would not be blocked.

States in the middle and northern parts of the U.S., in USDA zones 4-6, benefit greatly from an extra barrier of protection from frigid temperatures. Cold hardy plants are more likely to survive than tender species in spaces with no supplemental heat.


Here in North Carolina


Since moving to Charlotte, North Carolina (USDA zone 7b/8a) in 2013, I’ve used clear plastic and miniature lights to ripen up the last of the summer vegetables. And they keep cool season greens and vegetables growing through the worst of our winter weather. To avoid any surprises, check the weather forecast daily.
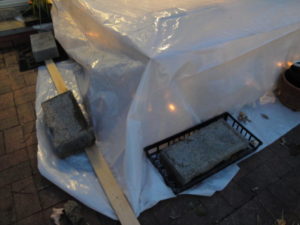
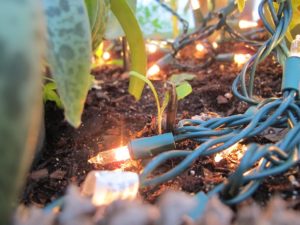
Succulents that moved with me from Maryland spend the winters in lighted cold frames after filling the sunny windows indoors (photo, right). Delicate species stay inside.

One year, an HVAC contractor came to check the heat pump, located near the lower patio. There were several flats of plants in a second cold frame down there, with miniature lights. That frame was not easily visible from the house. A couple of days later I discovered that the contractor had inadvertently disconnected the extension cord feeding power to those lights…and life to the plants! You know the rest of that story.

(***Update***: I just finished enclosing the sunny front porch at my new home in northern North Carolina, where I moved in October, 2021. This is where the succulents and other plants will spend the winter, aided by miniature Christmas lights. December, 2022)


Cautions


cold frame

Cold frame covered with clear plastic and weighed down.

Make sure the miniature lights are rated for indoor/outdoor use, and that extension cords are also safe to use outdoors. I’ve been warming up the cold frames and garden plants like this for decades without mishap, except as noted above.

The tender succulents and bowls of mixed greens and herbs covered during the winter survived without damage. On nights that fell below 15°F, the temperature in the cold frame stayed in the high 30’s or 40’s, depending on the number of lights used.

Plants survived single-digit temperatures, helped by the old quilts and extra plastic placed over the frame at night. When needed, I added another string of lights. Placing the frame cover fairly close to the tops of the plants limited the volume of air those lights needed to heat. Not too close, though, or the foliage will feel the cold.

This works like a charm, but only if there’s a power source nearby. Be careful; don’t use extension cords that can’t carry the demand for power. Don’t hook up more than 2 or 3 light strings together.

There are few products on the market that demonstrate the phenomenon of planned obsolescence as clearly as cheap imported miniature lights. Stock up on them when they’re plentiful. They don’t last more than a couple of years with frequent use, and they’re becoming increasingly scarce in favor of LED’s. Tread carefully!
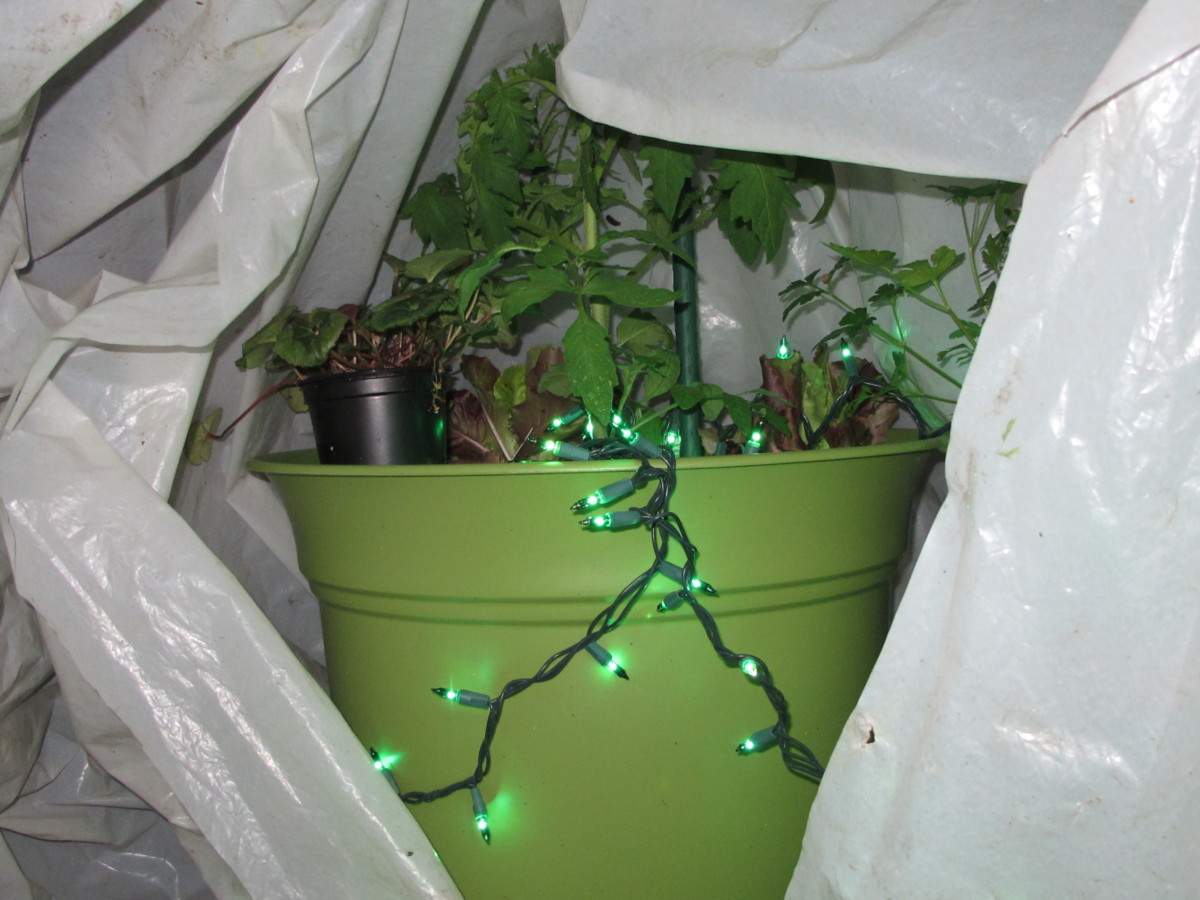

Lastly, instructions on the packaging recommend washing hands thoroughly after handling strings of lights. There might be some lead in the wire covering.


Miniature Lights Preferred


Christmas lights, plastic, cold frame

Mini lights warm up 2 large pots of young tomatoes.


There are other types of incandescents available but watch the wattage! If bulbs are hot to the touch, the plants will think so, too, so don’t place them close to the plants. The preferred miniature lights are barely warm, so they distribute the heat evenly and gently.

Make sure the bulbs are not in contact with the plastic covering or the leaves. Avoid letting the plastic cover touch the leaves; cold transfers through the plastic and will damage foliage.

It’s best to lay the strings on the ground, around—but not touching—the stem. The warmth will rise. For potted plants, wind some of the lights around the pots. Tall plants might require lights up into their branches.

If you’re not really trying to push the envelope, the plastic bag or old sheets probably will do the trick. It’s when that sudden blast of uncommonly cold weather comes around that prompts us to take extra measures.

(***Update***: In the photograph above, mini lights kept the young potted tomatoes [in 20″ pots] and a few other plants 15° warmer on an unusually cold spring night. I placed the miniature lights on the soil surface and wound them around the pots to keep the roots a bit warmer. Plastic was closed and secured with clips. April, 2019)


Out of Reach


Where lights are impractical, there is a solution. Use large plastic mulch or trash bags, and tuck in a hot water bottle. Seriously! A repurposed gallon milk jug filled with very hot water slowly gives off heat through the night. A little experimentation will tell you if the heat is given up too quickly (wrap the jug in an old towel to slow heat loss) or insufficiently (use 2 milk jugs or larger containers). Don’t place the hot water close to the foliage. Keep this in mind when the power goes out.

Those “water wall” products you see at garden centers work on the same principle. Water that heats up in the sunlight slowly gives up that heat to the plant at night.

Plastic bags that are nested, or layered, give better protection than a single layer. Spread the opening over a wide footprint (soil’s square footage) to capture heat rising from the ground. Or simply secure a large plastic sheet to a tall stake in the ground. Weigh down the covering with rocks or bricks to keep it in place and to seal out the cold. Remove the cover in the morning.


   *    *    *    *    *    *    *    *    *


I hope this information gets your garden successfully through the “shoulder” seasons, when temperatures can fluctuate wildly. Just a few readily available and inexpensive materials can prevent a total loss.

Later in the year, when autumn temperatures tumble, having materials ready for duty will extend the season. Rolls of 4-mil clear plastic—actually somewhat translucent—can be found in the hardware store’s paint department. This product (4- or 6-mil plastic) is less expensive than greenhouse film. If, however, you opt for permanent structures, the longer lasting film will be worth the investment.

If you’ve never grown cool season vegetables, these methods will open up a new world of growing opportunities. You can extend the season before and after the summer crops or protect tender ornamentals through the winter. No need to retire the trowel with the first fall frost!


potted broccoli

Young broccoli ‘Arcadia’ in 20″ pot, where a tomato grew in the summer. Sharp-tipped pinecones discourage squirrels.


Return to the top

A Microclimate and Frost Protection


Just when you thought it was safe to plant tomatoes!


Microclimate


thermometer

C and F.

Call it impulse or ignorance, the natural inclination for most of us gardeners is to push the season. I’ll admit it; I planted tomatoes and a sweet pepper here in North Carolina about 2 weeks ago, knowing very well that I might have to protect them at night.

But I’m ready, with plastic bags and bamboo stakes, and large sheets of clear plastic, if needed. Plus, the garden is located close to the warmer south side of the house. The sun’s warmth collects in the soil and in the wall, releasing it slowly over the nighttime hours. Peppers are more sensitive to chilly temperatures, so they get covered first.

Even though this cozy little microclimate gives a few degrees of protection, I’m not about to cause any discomfort to my new plants, nor to check their growth. So, I covered them when the nighttime temperature was predicted to fall below 50°F. That’s not even close to freezing, but that’s what I mean. I don’t want them to get close to freezing. And neither do they!

Incidentally, research indicates that tomatoes and peppers might yield more fruit if they have been exposed, when young, to temperatures in the high 40’s to low 50’s. But those plants will need to have been fully hardened off in order to withstand the less hospitable environment.


Microclimate: Where To Find It

Maybe your property has a warmer microclimate that will protect newly planted flowers or vegetables. Close to the south side of the house, a shed or garage could work. Or the sunny side of a solid fence. Perhaps your vegetable and cutting gardens are surrounded by massive stone walls…perfect. A dense hedge will cut wind speed and offer some protection.

A sunny porch, carport, or the protected corner of a patio might keep those young plants happier than if they were planted out in the garden just now. Who isn’t tempted by those first plants offered at garden centers, even though we know it’s way too early?

Direct sunlight warms the soil and surrounding structures. The area needs to be open to the southern sky (if you live in the northern hemisphere). A garden on the south side of a brick wall is great, but not if it’s shaded by a white pine tree. Dark colors absorb more of the sun’s energy, so they’ll release more warmth at night.

You can create a microclimate simply by covering sensitive plants with old bedsheets or sheets of plastic before the sun sets. Prop them up so the material is not touching the tender foliage. During the shoulder seasons, temperatures can fluctuate between seasonal and cruel. There are limits to the degree of protection afforded by microclimates.

Another option is to construct a temporary cold frame, with some sort of a support (bales of hay, cinderblocks, wooden boards) and a clear covering (lead-free old windows, patio door, clear rigid plastic, or plastic film). The cold frame can stay in place for as long as it serves your purpose, but you’ll need to open the covering to let cool, fresh air inside. Heat builds up quickly under clear glazing.


Always Check the Weather Forecast


In this Zone 7b location, April 15th is considered “safe” for most tender, main season edibles and flowers, but it is always advised to check the weather forecast daily. If the forecast had called for a long stretch of cold rainy weather, I would have delayed planting. No one wants to be planted in cold, wet soil.

More sensitive species, such as cucumber, zucchini, and basil, will not be planted until the soil has warmed up considerably.


Diascia flirtation pink

Diascia ‘Flirtation’ is one of my favorites for the shoulder seasons, when it could be warm or frosty.


Among flowers, caladium, scaevola, streptocarpella, zinnia, and vinca are a few that prefer warm soil before planting out. Their foliage will wilt or show damage even if the temperature hasn’t reached the freezing point.

The alyssum, snapdragon, and diascia, however, did just fine without protection, and even prefer cooler temperatures.

Frost occurs first out in the open—in the middle of the lawn or on the rooftops. Plants that can tolerate cool temperatures will be unharmed in a protective microclimate. They might be damaged, however, if they’re far from the house and subjected to a freeze. Just 5 or 10′ can make a difference!


Frost Last Night


frost on leaf


This morning I was surprised to see frost on the rooftops and ice in the puddles on top of the cold frame. It wasn’t “supposed” to get below 35°, but the temperature dropped well below freezing. The plants in the cold frame and in the garden are fine. Late yesterday afternoon, I covered the tomatoes and the pepper with large, heavy plastic bags (with more plastic bags layered inside for insulating dead air space) supported by a couple of sticks in the ground.

The larger the “footprint” of the covering, the better; the larger area of covered soil allows more heat stored in the ground to rise. And it was breezy yesterday, so a couple of bricks held the plastic in place.

Don’t forget to uncover the plants in the morning, as soon as sunlight reaches the area. It doesn’t take long for the inside air temperature to rise high enough to stress the plants.

There are some tricks you can use to fool…or assist…Mother Nature, and I’ll write about those in the future. You might want to adopt some common sense methods of protecting plants to stretch the season. In addition to taking advantage of microclimates, one of those tricks involves strings of miniature incandescent lights, like the ones you strung on the Christmas tree. So don’t pack them away in the attic just yet!


for a warm microclimate, add mini lights


Return to the top