Tag Archive | how to fertilize vegetables

Asparagus: Tips For Long-Term Production In Your Garden


2024


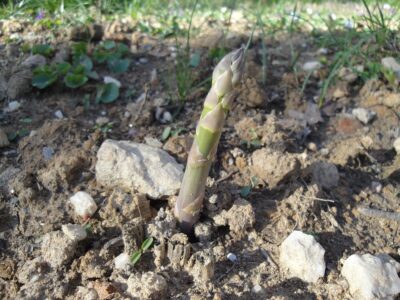
The Tip of the Spear


How exciting to see new asparagus spears emerging from the ground with warming spring weather! But, as with icebergs, most of what asparagus is all about happens below the surface (of the ground). This article provides tips for producing healthy crops in your own garden over a long period of time.

Asparagus is a herbaceous perennial grown in USDA zones 2 through 9. This spring, a 2-year-old bed produced beautiful thick spears for 2 dinners and 2 small freezer bags. Normally, we don’t start harvesting asparagus until the third year, but I couldn’t resist… Next year, it should produce a few weeks longer.

In the fourth year and thereafter, a healthy asparagus bed can be picked for up to 8 weeks. For the rest of the summer season, ferny growth stocks the root system with nutrients that will fuel next year’s growth.

Because these plants can last 15-20 years or longer in the garden, it’s worth paying special attention to soil preparation.

Cut asparagus is readily available in early spring, when it’s least expensive in grocery stores. After a few weeks, however, the price triples. For that reason and because I like harvesting unsprayed fruits and vegetables from my yard, it was time to plant an asparagus bed. Plus, I now have the space, and never turn down an opportunity to reduce mowing time.


Preparing the Asparagus Bed


I chose a spot that gets 10 hours of direct sun each day during the growing season.

Asparagus suffers less root disturbance if it’s grown in a bed of its own rather than mixed among other seasonal vegetables. The airy fernlike growth can reach over 5′ tall, so keep this in mind if planting shorter plants that need sun in the next bed. I live in the northern hemisphere, so tall plants (pole beans, ‘Sugar Snap’ peas, staked tomatoes) go on the northern end of each garden.

In early spring of 2023, I planted 10 robust crowns of 1-year-old Asparagus officinalis ‘Millennium’ from Johnny’s Selected Seeds. This variety comprises mostly male plants, reducing the chore of thinning out young seedlings that eventually crowd the bed. The crowns had multiple buds—dormant but visible—and the roots stretched about 12″ long.

There was no indication of fusarium, a disease that turns root interiors brown. Check a few roots by cutting them; they should be white inside. Destroy infected crowns. ‘Millennium’ has intermediate resistance to rust, another fungal disease.

For asparagus, thorough soil preparation results in highly productive harvests. I strongly believe in getting the soil in optimal condition for stress-free trees, shrubs, perennials, vegetables, and flowers. Robust growth, relatively few insect problems, and bountiful harvests attest to the extra effort. Amending heavy clay, sandy, or rocky soil is quite the challenge, but the payoff is always worth it.


Soil Testing

PH should be slightly acidic to neutral, in a range from 6.5 to 7.0. If in doubt about the pH of your soil, have it tested by your local agricultural extension service (the Master Gardeners). Do this a few months before planting, if possible, and add agricultural lime according to the results and your extension agent’s recommendations.


Clearing the Surface

The area where I originally planted the asparagus was grass and weeds. I stripped the top layer of soil, including all vegetation, from a plot measuring 4′ x 15′, setting it aside for later use.

The area is close to a vein of quartz running through the back yard, so a large quantity of rocks larger than 3/4″ was removed. You’ll notice in the photo at the top of the page that I missed a few! Over time, as more rocks work their way to the surface, they’ll be removed.


Excavating the Asparagus Bed
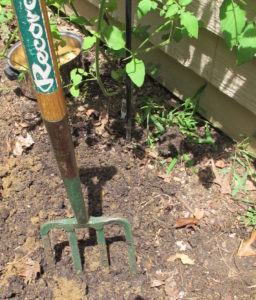
 

garden fork

A garden fork I’ve used for decades.


With a sturdy garden fork, I dug out almost 24″ of native clay and set it aside, separate from the surface vegetation. Then, in the bottom of the trench, the vegetation removed from the surface was mixed with small twigs, oak leaves, old potting soil, leaf litter from the woods, pine fines, and some of the excavated clay soil.

Weeds that low in the ground will die and decompose. But if they ended up within 6-12″ of the surface, dandelions and other long-rooted perennial weeds could grow back.


Continuing To Fill the Trench

I added more materials to the trench, including about 200 pounds of coarse (large-grained) sand, more oak leaves and leaf litter, purchased planting mix, and the excavated soil. Mixing the materials rather than layering them produces a medium that drains consistently through the soil profile.

Organic matter decomposes in the soil, thanks to the huge populations of microbes thriving in organically rich soil. Living microorganisms fare much better when we don’t regularly add chemical products.

Earthworms also help themselves to this bounty. They consume soil and organic matter, excreting nutrient-rich castings and beneficial microbes. As they tunnel through the ground, they improve percolation. Air, water, and roots can more easily penetrate the soil.

You’d think that adding all those oak leaves would acidify the soil, but once they begin to decompose, they’re slightly acidic or close to neutral. Cow manure helps nudge the pH a bit higher. Peat moss acidifies the soil, so I didn’t add any other than the small amount in the amendments.

With the surface of the bed almost level with the ground outside the bed, I incorporated 150 pounds of aged cow manure in the top 6-8″ of improved soil. Rain and irrigation move nutrients lower into the soil, where roots can absorb them. I lightly firmed the soil as I added materials to the trench.

All these amendments raised the surface of the bed several inches. It will settle somewhat as the organic materials compress and decompose.
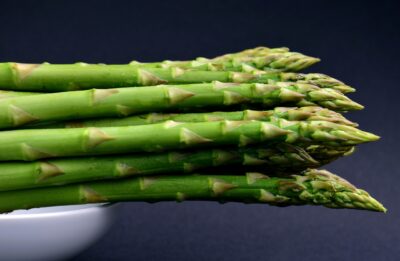


harvested asparagus spears


Planting the Asparagus Crowns


Laying Out the Bed

Once the trench had been almost filled and lightly firmed, I spaced out locations for the crowns. Catalogs recommend planting them 10-14″ apart. But I’ve read that more generous spacing can lead to a longer-lasting planting. Now in my 70’s, I want to be able to pick asparagus from this bed for the rest of my life, but 30 years will do!

The bed is wide to accommodate a zig-zag pattern for the crowns spaced about 24″ apart. An old native dogwood tree off the west end and a Japanese maple off the east end of the bed limited the length of the asparagus garden; hence, the zig-zag pattern.

I spread the long roots over a raised cone of soil in the trench, with the dormant stem buds at the top. Amended backfill was pulled over the roots, so only about 1″ of soil covered the crowns.

Suppliers sometimes recommend planting 10 plants per person.


The First Year

For the first summer of this planting, I watered heavily (1½”) when there was no rain for a week. The ferns grew well, although I didn’t pick any of the spears.

A thick layer of the previous autumn’s oak leaves covered the bed all summer. Much of it decomposed and was incorporated into the soil by earthworms. Mulch conserves moisture, suppresses weeds, cools the soil, and contributes organic matter. Oak leaves on the property are plentiful and free, so I collect white and willow oak leaves in autumn. They’re stockpiled near the woods or stored in large bags placed outside, against the basement wall.

In late April of 2023, high winds and hail from an F1 tornado flattened the 4′ tall ferns to the ground. Large hailstones battered the stems, leaving them pocked or broken and the greenery shredded. After a while, new stems grew from the ground. Using branches from the woods, I propped up any existing ferns that looked as though they could still photosynthesize. Dozens of flats of vegetable seedlings—destined for the farmers’ markets—growing near the asparagus bed were destroyed (photo, below).


young tomato plants damaged by tornado, 2023


The Second Year of the Asparagus Bed


Each plant grew an impressively vigorous root system in the first year. The reason I know this is because I needed to move the plants to make room for a small greenhouse.

The Japanese maple I’d brought from Maryland and kept potted for 10 years before planting it here needed a new location as well. Because the maple would soon begin leafing out, I dug it out first and replanted it in the front, near the street. It survived abnormally hot weather as it began growing leaves, but the uppermost twigs died off despite frequent watering. We’ve had a 6-week drought—with high heat, no less—but it finally rained a few days ago.
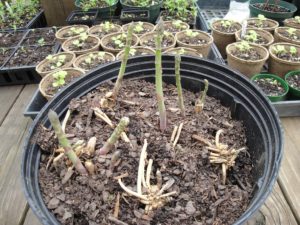
 

Young asparagus divisions beginning to grow.

When moving the asparagus plants, I made a few divisions and temporarily planted them in this pot.


Moving the Asparagus

The new location for the asparagus bed is about 25′ from the original plot, farther from the quartz deposit. I dug a new trench, of course, taking all the enriched soil from the old bed and moving it to the new excavation. And I supplemented with more aged cow manure, planting mix, and half-decomposed leaf litter from the woods to the north.

I dug each substantial clump and planted it after opening a hole in the new bed. This exposed the roots to the air for only a brief period of time. At the time of the transplant in late winter, the asparagus was still dormant. Again, I set the root ball so the crown would end up only 1″ below the surface, firmed the soil, and watered them in.

After the sun had started warming the soil and as weed seeds began germinating, I mulched with dry oak leaves saved from last autumn.

Every few weeks (three times), I pulled the mulch aside and added 1″ of compost, excavated soil, and cow manure over the early spears. This encourages the plants to grow thicker spears. Shallow planting results in thin spears. They won’t need more soil, but each year, I’ll add a few bags of aged cow manure and compost under the mulch.

Avoid burying the crown too deeply at the beginning. There might not be enough energy stored in the roots for the spears to grow to the surface before they fail.


Male Or Female Plants for Better Asparagus?
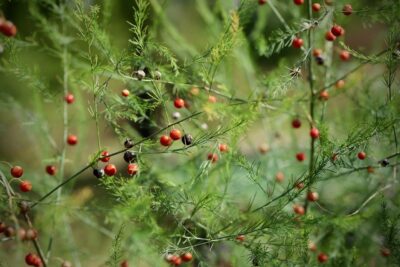


asparagus fruits and seeds

Asparagus berries, with seeds inside.


Asparagus is dioecious, meaning an individual plant is either male or female. Both male and female plants flower, but males lack the reproductive parts to make berries and seeds. Here in the Piedmont of North Carolina, the plants flower in late spring to early summer.

As new varieties become available, the preference among growers leans toward male plants. Females grow thicker stems, but males grow more of them. Male plants live longer, according to the University of Illinois. Some of the older varieties, such as the ‘Jersey’ series, are being retired by propagators.

Females have small green-to-red berries that need nourishment. They consume resources that instead could have contributed to foliage or root growth. When the seeds drop to the ground and germinate, they cause crowding within the bed. Consequently, extra effort is required to maintain adequate spacing between plants. The berries, by the way, are toxic to humans.

The ‘Millennium’ crowns I received last year and this year are about 75% male plants. I planted 10 last year (a few females) and potted up the rest to sell at the farmers’ markets. In the future, I’ll hold the confirmed female plants aside and plant them together in a bed of their own. Removing the berries would solve the problem of crowding.

I might experiment germinating the seeds. ‘Millennium’ is a hybrid, so the offspring could vary from each other, but I think the differences would be negligible. These plants will not be sold, but kept for my own use only.

Asparagus started from seed takes an additional year to grow before beginning the harvest. Seed suppliers offer seeds of named varieties.


White and Purple Asparagus?
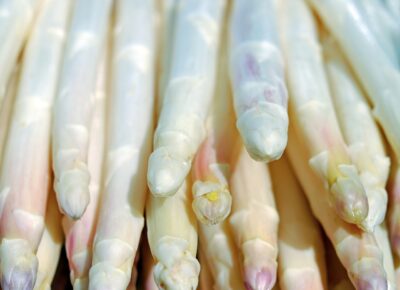


asparagus white white asparagus 2329467


White asparagus has been blanched, or covered with soil to prevent light from reaching emerging spears. Deprived of light, they can’t form chlorophyll, so they grow white. They are more tender but have slightly reduced nutrient levels.

Purple asparagus varieties are available. ‘Erasmus’ is 100% male, and ‘Purple Passion’ comprises 60% male plants.

Purples have the advantage of additional antioxidants—the anthocyanins. Anthocyanins (pigments that make leaves and fruits red, blue, or purple) can boost cardiovascular health, help prevent cancer, and help regulate blood pressure. Berries—strawberries, blueberries, blackberries, and raspberries—also have high levels of anthocyanins.


Asparagus Nutrients


Asparagus is a low-fat, low-calorie vegetable. Half a cup of plain asparagus contains:

  • 20 calories
  • 3.7 grams of carbohydrates
  • 1.8 g. fiber (mostly water insoluble, helping with regularity)
  • 2.2 g. protein
  • some vitamins A and C, iron, potassium, and phosphorus
  • 51% of the daily recommended amount of vitamin K. Because of the high vitamin K content, consult a registered dietician if you’re taking blood thinners.
  • 34% of the recommended folate
  • 11% of the recommended riboflavin (B2)


A Healthy Gut

Asparagus aids our digestive health by eliminating toxins from our large intestine. It’s a source of inulin, a prebiotic fermentable fiber consumed by beneficial gut bacteria, which, in turn, suppress harmful species of bacteria.

Several intestinal problems can be helped by consuming asparagus (check with your doctor or dietician). While not as effective as beets, okra, kale, and collard greens, asparagus does moderately well in binding bile acids in the intestine. Asparagus can help repair intestinal damage from Type 2 diabetes, obesity, and gastrointestinal diseases.

You’ve probably heard of the benefits of a “healthy gut”, and asparagus is among the best foods to achieve this. These advantages help prevent cancer and heart disease.

Consuming asparagus can produce the strong smell of sulfurous compounds excreted in urine. The odor is from amino acids (asparagusic acid). Some people have the genes that give them the ability to detect the smell, which is perfectly harmless. Asparagus is mildly diuretic, helping to regulate blood pressure.

Young, thin spears eaten raw can cause contact dermatitis in sensitive people.


Yearly Maintenance of the Asparagus Bed


Once the asparagus bed becomes established, there isn’t much you’ll need to do:

  • Provide water if there’s prolonged drought. Asparagus roots grow deep into the soil, taking moisture stored there. They store water in their fleshy roots and can overcome a couple of weeks of dry weather.
  • Address issues with insects early on to prevent widespread damage.
  • Fertilize with 8-8-8 or 10-10-10 (N-P-K), or similar organic fertilizer, after harvesting the spears, but not late in the season. If the soil test indicates sufficient phosphorus (P), find a fertilizer low in the middle number. Look for a higher percentage of nitrate nitrogen (N), rather than urea or ammoniacal N. That information is on the label. Urea and ammoniacal N slowly lower the pH, making the soil more acidic. Nitrate N slowly raises the pH over time, preferred by asparagus.
  • Topdress the bed once or twice a year, in spring and early summer, with aged manure and compost.
  • Weed the bed.
  • After a freeze kills the ferns, cut them at soil level and remove from the bed.
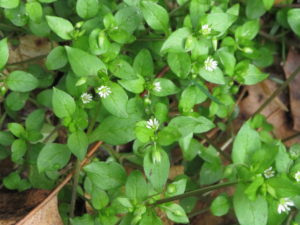
 

chickweed, a winter annual weed

Chickweed, an edible annual cool season weed.


Concluding


Doing extensive groundwork when planting this vegetable will reward you and your family long into the future.

How to cook it:

  • Enjoy your asparagus steamed, adding butter and a dash of salt.
  • Occasionally, I incorporate lightly cooked asparagus neatly lined up in an omelet (use thin spears or cut larger ones in half, lengthwise).
  • Grill or stir-fry it.
  • Steam it, adding butter and minced garlic, and garnish with grated Romano cheese.
  • Use it in pasta primavera with other spring vegetables.

No matter how you prepare it, asparagus is an elegant, delicious springtime vegetable. Something to look forward to for the next 20 years, or maybe 30…

Enjoy!
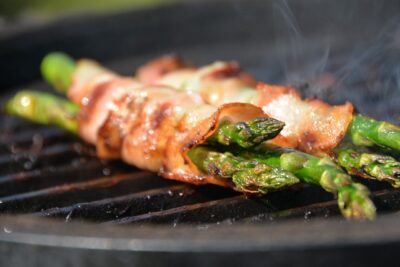
 

asparagus wrapped and grilled


Return to the top of the page

How To Grow Potatoes In 5 Simple Steps


Can we grow new potatoes from old potatoes?


grow potatoes


Yes!

So… those potatoes left in the pantry or the bottom of the refrigerator decided to sprout. Instead of throwing them into the trash or the compost bin, try growing them! You can grow potatoes in the home garden or in large pots, following a few simple guidelines.

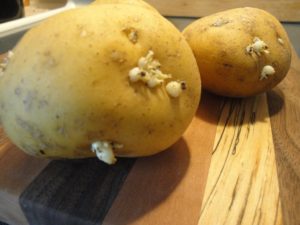
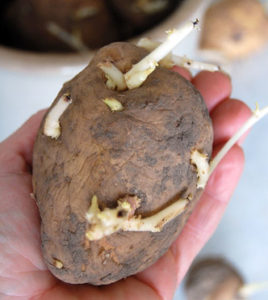
potato with eyes

Too withered for consumption, but fine for the garden.

We don’t recommend planting potatoes recently purchased from the grocery store because they’ve likely been treated with a sprout inhibitor. After the effect wears off, you’ll see the eyes begin growing. That, though, could take months.

Organic potatoes, if treated with sprout suppressors approved by the National Organic Program, sprout earlier than non-organic potatoes. Inhibitors, such as spearmint, peppermint, and clove oils, must be applied more frequently than chemicals used on traditionally treated potatoes.

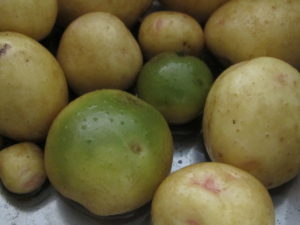
Spouting potatoes (like the ‘Yukon Gold’ in photo, top) are still edible, after removing the eyes. Discard moldy and rotting potatoes. But save for the garden the ones with well-developed sprouts and those that have withered beyond the point of palatability.

Carbohydrates stored in the tuber provide energy for the developing shoots. When green leaves begin growing, photosynthesis will sustain the plant.


When can we grow potatoes outside?

Potatoes can tolerate cool soil, but not cold, wet soil or freezing temperatures. I live in USDA plant hardiness zone 7, where we plant early maturing varieties 4-6 weeks before the last spring frost. Gardeners plant mid-season and late varieties after that.

Wait for the soil to warm up to at least 45°F before planting tubers. Long-range weather forecasts might indicate whether it’s safe to plant or prudent to delay.

A garden exposed to full direct sunlight warms up earlier in spring than one in partial sun. Grow potatoes in full sun, but avoid exposing them to searing summer heat. Gardeners living in higher elevations or in cooler summer regions can grow potatoes through the season.

If the weather forecast predicts temperatures below freezing, I’ll mulch the soil with several inches of oak leaves, never in short supply around here. A thick, airy mulch insulates the ground from a sudden drop in temperature. Plants benefit from mulch kept in place all season. Not only does it moderate temperature, suppress weeds, and keep moisture in the ground, but it also prevents disease spores from splashing onto the potato’s leaves. This is easier to do in small garden plots than in larger farming operations.

Emerging foliage can tolerate light frost. It could take a few weeks for growth to show above ground.


Seed Potatoes

For a wider selection of varieties offered to farmers and home gardeners, look for “seed potatoes”. Some garden centers and many seed suppliers stock seed potatoes. They’re not actually seeds, but certified young potatoes almost ready for planting. Although they’re certified disease-free when purchased, plants are susceptible to a few pathogens as they grow.

Favorable conditions and good management practices decrease the likelihood of problems. If you’ve had diseases in your potato crops, don’t save potatoes year to year, but purchase certified potatoes instead. Don’t grow potatoes where they’ve been planted any time in the past 4 years.

Botanically speaking, potatoes are classified as Solanum tuberosum. They belong to the Solanaceae family and call tomatoes, peppers, and eggplants their cousins. Tobacco, petunias, and deadly nightshade, a poisonous weed, also belong to the nightshade family.

Potatoes are native to the cool mountainous regions of South America. In the 1530’s, European explorers gathered them and introduced potatoes to their homeland. Irish immigrants brought them to North America in the early 1700’s. Approximately 4,000 varieties of potatoes have been bred. True seeds, as opposed to seed potatoes, are poisonous when eaten and are used only for breeding purposes.

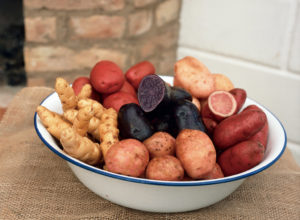
You can find potatoes with white, yellow, tan, red, blue, and purple skins and flesh. Thin-skinned potatoes, such as ‘Yukon Gold’, ‘Kennebec’, and ‘Red Pontiac’, grow well in the eastern parts of the U.S. The western states suit the thicker-skinned ‘Russet’ and other baking potatoes.


Crop Rotation

One of those good management practices involves rotating our crops. Related plants tend to be susceptible to the same pathogens and insect pests. When growing one crop in the same plot of land year after year, disease spores and insects can build up in that location. That’s why it’s recommended to move all members of a particular plant family to different plots over the next several growing seasons.

For example, if you grew potatoes, tomatoes, peppers, or eggplants in Plot A in any of the last 4 years, move your potatoes and other members of the Solanaceae family to Plot B this year, Plot C next year, and then Plot D the year after that.

Rotate among the various plant families, such as:

  • brassicas—arugula, broccoli, Brussels sprouts, cabbage, cauliflower, kale, etc., in the Brassicaceae family
  • cucurbits—cucumber, squash, zucchini, melons, in the Cucurbitaceae family
  • legumes—peas, beans, in the Fabaceae family
  • lettuces, in the Asteraceae family
  • onions, leeks, garlic, in the Amaryllidaceae family
  • Swiss chard, spinach, beets, in the Amaranthaceae family


Root Vegetables

Several varieties of potatoes.


How To Grow Potatoes In the Garden


Step 1: The First Cut


Before planting potatoes in the ground, cut them into pieces about 1½” long. Each piece should have 2-3 eyes. Let them sit in the open air for 1-2 days to seal the cut surface. This helps prevent rot in moist soil.

Small potatoes can be planted whole.


Step 2: Prepare the Soil If You Want To Grow Potatoes


grow potatoes


Thorough soil preparation serves the immediate purpose as well as plantings in years to come. After improving the soil with generous amounts of drainage materials, you’ll need to add nutrient-rich amendments a few times each year after that.

Not repeatedly disturbing the soil profile retains healthy populations of beneficial microbes. Farmers are increasingly using no-till methods and cover crops to preserve soil structure and prevent erosion of valuable topsoil. Frequent tilling also introduces high levels of oxygen between the particles of soil, so organic matter is broken down too quickly.

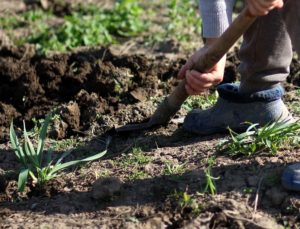
Vegetable plants need good drainage, and potatoes are no exception. Loosen the soil at least 12″ deep, breaking up the clods. Potatoes struggle in compacted clay and stony soils; tubers that do form are often misshapen. Potatoes grow very well in raised beds.

Incorporate a few inches of pine fines, soil conditioner, peat moss, and/or coarse sand to improve the tilth (or workability) of the soil. Avoid layering materials in the soil profile. Layers of coarse and fine materials, with differing air pore spaces from one material to another, obstruct water percolating through the soil. This could cause soggy layers that can rot roots. For that reason, I never place a layer of gravel under plantings.

In the top 5″ of loosened soil, mix in compost, leaf mold, or planting mixes. These materials contain a variety of nutrients required by vegetables, and they encourage rapid rooting.

Aged manure and mushroom compost are not recommended for root vegetables.


Soil PH

Potatoes love heavily composted soil. They also require acidic soil, with a pH between 5.0 and 6.0. (Various websites recommend a pH anywhere between 4.8 and 7.0.)

Low pH helps prevent scab, a disfiguring disease of potato skins. Soil pH outside the preferred range for potatoes limits nutrient absorption and might cause nutrient toxicities.

Contact your local agricultural extension agents for information on taking a soil test. They can recommend preferred fertilizers, methods to lower soil pH, and varieties appropriate for your area.


Step 3: Place the Seed Potatoes


In rich, organic soil, simply lay the potato pieces on top of moist, loosened soil or nestle them into the surface. The eyes should face upward. Then mulch over the seed potatoes.

They’ll also grow when planted 2″ deep. Space potatoes 6-12″ apart, depending on variety. Because potato plants grow 2-3′ tall and might sprawl a bit, allow 30-36″ between rows.

Mulch the bed with a few inches of leaf litter, shredded leaves, and pine needles to cover the planted potatoes. It’s important to adequately shade the surface of the ground from sunlight to protect growing tubers from greening…


“Greening”?

grow potatoes, but discard green ones

Potatoes with green skin needed deeper mulch.

Greening is caused by exposure to light, which, in itself, is not harmful. But the green pigment (chlorophyll) in potatoes is associated with the formation of a toxic glycoalkaloid called solanine.

Never eat green potatoes; if only the skin is green, cut off and discard that part before cooking. Never eat leaves, stems, or the berries that develop on potato plants. 

Solanine in potatoes is more concentrated when growing potatoes in high nitrogen soils and in soil that’s compacted or very sandy. Bruised potatoes, those held a long time in storage, and potatoes with large eyes are higher in this toxin. The greener the potato, the higher the level of solanine. This bitter substance is a natural repellent to insects and browsing animals.

Solanine can’t be boiled or cooked away. The level is somewhat lower in foods fried at very high temperatures, but that brings its own problems, described later in this article. I’m not intent on discouraging you from growing or eating potatoes, but moderate consumption of this popular vegetable and proper preparation make it a healthier indulgence.

Symptoms of solanine toxicity include vomiting, diarrhea, slow pulse or breathing, low blood pressure, and abdominal pain. It can cause coma and death in rare instances, so be very careful with green potatoes. If any of the flesh is green after removing the skin, I would discard the potato.


Step 4: Maintenance


Water

Water the garden thoroughly after planting and mulching. If rain is unreliable, water the garden every week, never letting the soil become dry. Provide 1-1½” of water each week if it doesn’t rain.

Avoid wetting the foliage, and water in the morning so the foliage is dry going into the night. This helps cut down on the incidence of disease. Some varieties are resistant to blight, scab, Rhizoctonia, and Verticillium wilt. Those that have not been bred with disease resistance often produce great yields when using good gardening practices.

Hollow Heart and Brown Center

Some large varieties, particularly ‘Atlantic’ (for potato chips) and ‘Yukon Gold’ (a personal favorite), might show hollow heart and/or brown center. These are physiological disorders characterized by a star-shaped cavity and a central area with dead brown tissue, respectively, in the center of the potato or near the ends.

These stress-related conditions often result from inconsistent soil moisture—for example, wet soil after a period of dry soil. In addition, a period of prolonged cold weather during tuber formation can cause brown center. Spacing seed potatoes too far apart and using small seed potatoes (with too few eyes) can be the cause. Low potassium and other nutrient deficiencies can initiate the disorders.

The potato’s skin shows no indication of a problem. Affected potatoes aren’t perfect but are still edible.


Hilling Up 

As the plants grow, hill up soil against the stems of the plants. Take soil from another part of the garden, adding a few inches up the stem and about 12″ out from it. This is an option—not necessary—but it should increase the yield.

Like tomatoes, potatoes root along buried stems. As they root, they’ll develop another layer of young potatoes at the ends of the stolons. Hill up around the stems 2 or 3 times during the growing season to maximize the harvest.

An alternative is to start potatoes in a moderately deep trench, reserving excavated soil on the side of the bed. Periodically fill in the trench with amended soil, a few inches at a time.


Fertilizer

Every few weeks, apply a complete fertilizer. The 3 numbers on the package representing nitrogen, phosphorus, and potassium (N-P-K) should be in a ratio of 1:1:1 or 1:2:2. Avoid fertilizers high in nitrogen. An analysis close to 10-10-10 or 5-10-10 is adequate.

Although you could use chemical fertilizers, they tend to damage populations of beneficial microbes. But, until the soil warms up, microbes aren’t sufficiently active to break down the organic components into molecules the plants can absorb. That’s when I use chemical fertilizers, and then switch to organic products when the soil warms.

To help prevent disorders in developing potatoes, it’s recommended to apply smaller concentrations of fertilizer more frequently.


Insect Pests

Colorado potato beetles can be especially bothersome as they consume significant amounts of foliage. Inspect the undersides of the leaves for yellow-orange egg masses and remove them. The beetles have 10 black stripes on their tan wings. Immature larvae are orangish-red with 2 rows of black dots down each side. Bacillus thuringiensis var. tenebrionis, a biological insecticide, kills this beetle.

Aphids might congregate in large numbers on the plants. A brisk spray of cool water from the hose takes care of most of them. Encourage ladybugs, braconid wasps, and green lacewings to populate your garden. For severe infestations, prepare a solution of horticultural oil and spray early in the morning. Apply the solution to the bottoms of the leaves as well. Read the label.

Cutworms feed on sprouts emerging from the ground. Since these C-shaped larvae become moths, treating the potatoes with Bacillus thuringiensis var. kurstaki effectively kills them. Keep in mind that they’ll have to eat some of the foliage in order to ingest the Bt.

Slugs and Deer

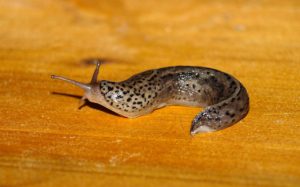
slug

A slug.

Slugs reproduce rapidly in moist conditions and where they can hide in crevices during the daytime.

Lay a board on moist ground, and slugs and snails will gather there after feeding through the night. You might notice those silvery slime trails on tender foliage. Early in the morning, take an old knife to the garden and… dispatch them forthwith! Or use organic Sluggo or similar product, which does not contain toxic chemicals. Except to slugs and snails. Read the label.

Although potato foliage is not the favorite choice of warm-blooded animals, deer and others will feed on it when not much else is available.

Other members of the nightshade family also host these pests. Row cover secured over the planting excludes most insects and browsing animals.


grow potatoes in pots or in the garden

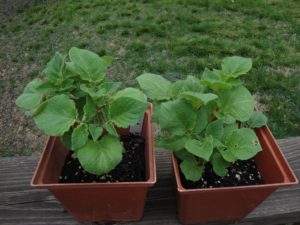
Potatoes that sprouted in storage are now growing new plants in 6″ pots. They’ll need protection from hard frost if planted, but I didn’t want to delay planting the deteriorating tubers.


Headings

Page 1: Can we grow new potatoes from old potatoes? (When can we grow potatoes outside?, Seed Potatoes, Crop Rotation), How To Grow Potatoes In the Garden, Step 1: The First Cut, Step 2: Prepare the Soil If You Want To Grow Potatoes (Soil PH), Step 3: Place the Seed Potatoes (“Greening”?), Step 4: Maintenance (Water, Hollow Heart and Brown Center, Hilling Up, Fertilizer, Insect Pests, Slugs and Deer)

Page 2: Step 5: Harvesting!, How To Grow Potatoes In Containers, Grow Potatoes For Their Nutrients (The Power Of the Purples, Potato Skins, Resistant Starch), The Problem With High Heat

Return to the top

Seedlings For Your Garden: 12 Tips


2022

Updated 5/21/2024


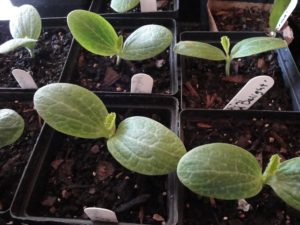
seedlings, zucchini


Starting Seedlings For Your Garden


Busy spring! This lengthy article focuses on starting and caring for seedlings and getting them established in the garden. If I’m not working on the seedlings, I’m working in the gardens, creating new beds and expanding those started last fall and winter. Winter weather was delightfully mild to allow planting right through the cold season. The weeds and I have come to an understanding, and in the next article, I’ll tell you how in “Patches for Pollinators”.

Foremost on the agenda has been starting plants to sell at our local Elkin Farmers’ Market. It’s been a challenge this year, keeping plants in good condition with high heat, heavy humidity, and frequent rainstorms. If I had a climate-controlled greenhouse, there might have been fewer losses. But, for the most part, my company, Wellspring Gardens, is producing more seedlings than I can sell at the market.

Some of that overproduction is destined for the vegetable gardens. It will yield small harvests of produce to sell at the market in addition to what’s needed in the kitchen. This is new territory for me, adding produce to the plants offered at the farmers’ market.

I might even consider canning, which I’ve never done…but let’s not get ahead of ourselves. That would be helpful, though, considering the rapidly rising prices at the grocery store. For that reason alone—the impact of rampant inflation on our wallets—it’s wise to learn how to grow at least a few vegetables.


sun's path

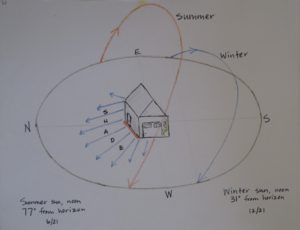
The sun’s path across the sky, Charlotte NC.


Watching how the sun tracks across the sky from month to month reveals good spots for the sun worshipers and areas where leafy greens should thrive in partial sun. This is my first summer in this house. The massive oak trees create shifting shade patterns that cause me to periodically rethink the plans.

So, let’s begin!


12 Tips For Starting Seeds


1. Start with clean materials for seedlings.


pepper 'Glow' seeds and cell pack

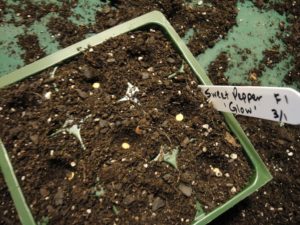
Sweet pepper ‘Glow’, started in 9-cell packs.


This calls for packaged seedling mix or fine-grained potting soil. Don’t use “dirt” from the garden, with its pathogens, insects, weed seeds, and worms that disrupt soil structure around tiny roots. In addition to the unknowns lurking in garden soil, its high clay content causes drainage issues in containers.

Potting soil that has a lot of coarse materials, such as pine fines (bits of pine bark), can be improved by sifting the soil. I use a clean plastic pot with small holes in the bottom. Fill the pot partway with the soil, and shake it vigorously up and down over the containers. Do the same thing when covering seeds.

Soil used previously for potted plants is not a good medium for your seedlings. It’s often depleted of nutrients, might contain pathogens, and the organic matter has partially decomposed. If it’s only one season old, it’s probably safe for transplanting potted annuals, when mixed with fresh potting soil, or incorporated into the backfill for that new sourwood tree. Or simply throw it under the shrubs or into the compost pile (never in the trash!).

Because seedlings are susceptible to soil-borne diseases, play it safe and start with pasteurized bagged seedling mix or potting soil. This, however, doesn’t guarantee a successful outcome, as many disease spores are air-borne. But we can increase the odds of success by using clean materials.

When reusing cell packs, pots, and flats for seeding, wash them in a 10% bleach solution, and rinse well before proceeding. Don’t smoke around plants, and wash hands thoroughly before working with them. Tobacco and other plants in the nightshade family (Solanaceae, including tomato, pepper, eggplant, and potato) can fall prey to the same disease organisms. Spores can transfer from tobacco products to your hands to the plants.


Pasteurizing Potting Soil

For bagged soil that’s questionable, you can pasteurize it in the oven. Don’t heat soil that contains timed release fertilizers. Use an oven-safe covered pot or baking dish, wet the soil, and heat the oven to 200°F. When the soil registers 140° on a meat thermometer, lower the oven temperature and maintain soil at that temperature for 30 minutes. This kills most pathogens. Wait for it to dry somewhat and to cool thoroughly before using. Various websites recommend different temperature levels from 140° to 300°. At the high end, however, beneficial microbes are killed off as well.

Let it cool down outdoors. Considering the pervasive “earthy” odor coming from hot soil, you might prefer buying a new bag of seedling mix or accept a small risk with the open bag in the garage.

Another method of pasteurizing (not sterilizing) soil is to place a heat-resistant container of soil in a black plastic bag. Place the bag in a sunny place outdoors on a warm day, and let the sun do the work for you. This is called solarization, and can raise the temperature inside the bag to 140-160°F. To prevent damage to the beneficial microbes, take the temperature, and maintain it at 140° for 30 minutes, opening the bag a bit to prevent overheating.

Most bagged potting soils and seedling mixes already have been heat-treated to eliminate pests. Close the bag securely and store in a cool dark place. The last and only time I pasteurized soil was nearly 50 years ago because that’s what the experts recommended.


2. Grow disease resistant varieties…


While fungicide and bactericide formulations—both organic and conventional—are available, I’d rather grow disease resistant varieties and not rely on spraying. Keep in mind that resistance is not 100% effective, particularly when plants are exposed to stressful weather or cultural conditions.

Certain varieties are more flavorful than others, but all well-grown fruits and vegetables from your own garden taste better than those purchased from grocery stores. Picked when vine-ripened perfect, anything coming from the garden will be superior to what’s found elsewhere except, perhaps, at farmers’ markets and farm stands. Freshly picked produce also has the highest nutrient content.

Digging in the garden is great exercise; proceed slowly at first. Working outside in nature feels good, and self-sufficiency is never amiss. A few steps from the back door gathering a green onion, spinach, dinosaur kale, and a little ripe sweet pepper for the veggie omelet is more rewarding than I can describe. You’ll see!

Those are just a few of the many benefits of growing our own vegetables. Using disease resistant varieties, if available, makes the job so much easier. Many new gardeners gave up after having suffered the disappointment of losing an entire crop to early blight or bacterial leaf spot. And we also have to deal with deer, rabbits, and insects!

Although this article concentrates primarily on edibles, flowering plants also have their own set of disease organisms. Again, look for resistant varieties, grow them in conditions that don’t favor infection, and look for remedies at the garden center.


…Especially Tomato Seedlings

tomato disease septoria?

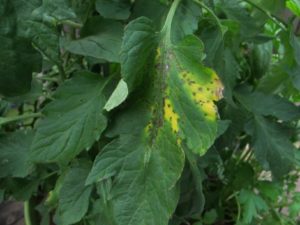
Disease beginning on ‘Rutgers’ tomato.

Tomatoes and peppers, two of the most popular crops for home vegetable gardens, are vulnerable to many diseases. They’re caused by fungal, bacterial, or viral pathogens. In some areas, nematodes also can be a problem. Usually, we can harvest some fruits before disease claims them, but resistant plants last longer in the garden. Plants infected with viruses should be removed and destroyed. For fungal and bacterial pathogens, products at garden centers will help. Always read the labels.

Tomato diseases include Alternaria stem canker, early blight, late blight (Phytophthora; very few varieties are resistant to this one), Fusarium wilt, grey leaf spot, leaf mold, tobacco mosaic virus, tomato mosaic virus, tomato spotted wilt virus, and Verticillium wilt. Catalog listings use initials to indicate disease resistance. For tomatoes, AS, EB, LB, F, GLS, LM, TMV, ToMV, TSWV, and V, respectively, represent those diseases.

Tomatoes are weedy plants and normally produce good crops, despite many organisms that target them. Peppers are susceptible to several races of bacterial leaf spot, and basil to basil downy mildew. Some zinnias are plagued by powdery mildew. Weather conditions, such as high humidity and frequent rain, exacerbate these disease problems.

Most hybrid (or “F1”) tomatoes have some resistance to one or more pathogens, but not to all of them. ‘Big Beef Plus’ is resistant to a wide variety of diseases. ‘Damsel’ and ‘Defiant PhR’ are resistant to late blight. Hybrid seeds carry a higher price than open pollinated varieties due to the cost of research that developed them and the extra steps needed to produce hybrid seeds each year.

It’s so hot out there!


shading tomato flowers


If you live in a hot climate, look for tomato varieties that have been bred to produce better at high temperatures. The pollen in tomatoes and peppers, and others, can die at high temperatures. While these plants are comfortable at 65-80°F, pollen dies above 88°, 90°, or 92°, depending on the cultivar. No pollination = no fruits! A reference to “heat” or to the “south” in the plant’s variety name indicates its higher tolerance for heat.

Researchers are investigating thermo-tolerant genetics in wild tomato species (Solanum pimpinellifolium) and incorporating them in tomato breeding programs.

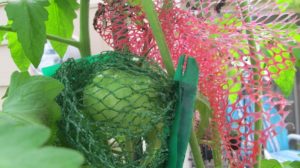
One trick to preserve viable pollen is lightly shading the plant in the hot afternoon hours. Attach shade fabric—a black woven mesh—to a support over and on the west side of the tomato or pepper plants. This provides a decrease of up to several degrees in hot climates or temporarily during a heat wave. In the photo, above, mesh bags from the grocery store protect fruits from squirrels and sun scald, and lightly shade new flowers and their pollen from high heat.

The young ‘Estiva’ tomato plants (“estiva” refers to summer), a hybrid bred for heat tolerance and great taste, lost most of their diseased bottom leaves in heavy rains, but those little fruits are still growing! I’ll plant them out this weekend, after the temperatures drop well below the 108° heat index value we have now. Recent weather has been in the record-breaking mid- to high 90’s F, with high humidity. Not my favorite conditions to dig in the garden…so I don’t.  I was not bred for heat tolerance!

***Update***: ‘Estiva’ tomatoes endured this hot summer and produced fruits past the first fall frosts. I covered them on chilly nights to ripen the last of the fruits. These were among the last tomatoes to succumb to the cold, in mid-November. Autumn 2022

A Few More Tomato Tips

Your best defense against tomato disease, in addition to growing disease resistant varieties, includes these tips:

  • Stake them. Tall indeterminate types need a 6-8′ tall stake, taller for some.
  • Space them farther apart, at least 3½-4′.
  • Thin the vines to 3 or 4 main stems by removing excess suckers.
  • Remove leaves on the bottom 12″ of the plants after they’ve become established.
  • Locate them where a breeze blows through the garden. These first 5 tips address increasing air circulation around and through the tomato plants.
  • Give them lots of direct sun—a minimum of 7 or 8 hours. The more sun they receive, the shorter the window of opportunity for pathogens to germinate on damp leaf surfaces.
  • Mulch the soil under the plants to prevent disease spores lying dormant in the soil from splashing onto and infecting the foliage. More on Page 4.
  • Water in the morning to early afternoon so all foliage is dry going into the night. Try to keep the foliage dry at all times and avoid handling wet foliage.
  • Water established plants heavily (1½”/week) when needed, but avoid giving little sips every day. Young seedlings need more frequent watering until their root systems expand.
  • Clip off leaves that show early symptoms (yellowing, spotting), and dip your pruners in alcohol when moving from plant to plant.
  • Don’t smoke near the garden, and wash hands thoroughly before working with plants.
  • Rotate your crops. Don’t plant a member of the Solanaceae family where any members have grown in the past 3-4 years. There’s more about crop rotation on Page 4.

All plants grown with good soil preparation, good air circulation, proper watering techniques, adequate sun, and appropriate fertilization are less stressed. Less stress equates to lower infection rates.

Growing Heirloom Seedlings


Heirloom tomatoes are always in demand because of their exceptionally good flavor. Heirlooms are open pollinated, which means gardeners can save seeds from fully ripened fruits each year for the next season’s garden. Because they’re not F1 hybrids but have been breeding true, for the most part, for many decades, heirlooms retain their traits from one generation to the next.

These varieties, however, don’t have much built-in disease resistance. Nevertheless, I’m growing a few heirlooms, and spacing them 4′ apart for improved air circulation. We’ll see what happens.

Commercially grown tomatoes must be able to survive long distance transportation and handling without damage. They’re picked early, when green or first showing color. Varieties of these tomatoes have skins that normally are tougher.

Heirloom tomatoes have more desirable thinner skins and, therefore, travel poorly. So, you won’t see them in grocery stores unless those stores buy from local farms. Heirloom tomatoes from the grocery store might cost $5.00/lb. or more! So, yes, it is worth growing a couple of heirloom tomato plants in our gardens.

A few prolonged and heavy rainy periods this spring almost wiped out certain tomato varieties, namely ‘Carmello’, ‘Brandywine’, and ‘German Johnson’. I still have a few that show less damage than others. ‘Black Krim’ and ‘Cherokee Purple’ are doing fairly well, although they are heirlooms. Most of the remaining plants will be set in the garden. There’s usually a breeze blowing through the property, and by spacing them appropriately, I should get plenty of fruits.


Basil Downy Mildew


basil downy mildew

First symptom of BDM: yellow blotches between the main veins.


Although this dreaded disease targets only basil, it hasn’t appeared yet this year. But I’m prepared.

Last year, I grew ‘Rutgers Obsession DMR’ (DMR = Downy Mildew Resistant), an acceptable substitute for our beloved ‘Genovese’ and other susceptible sweet basils. Last year’s ‘Obsession’ did not develop any basil downy mildew (BDM)—not one speck—although wet and humid weather presented a worthy challenge. Other basil varieties in the ground or in pots succumbed to the disease within a week of infection…even young seedlings.

This year, I’m growing ‘Rutgers Obsession DMR’ and also ‘Rutgers Devotion DMR’ outside all summer. In addition, I’m seeding the old favorites, including ‘Genovese’, ‘Italian Large Leaf’, Thai basil ‘Siam Queen’, ‘Marseillais Dwarf’, and ‘Tuscany’, a lettuce-leaf basil. A few non-resistant basil plants will come indoors at night when warranted, as described below. But I’ll stop seeding susceptible varieties, except for a few pots, and concentrate on the resistant ones for the farmers’ market if the disease appears in the neighborhood.

Several other BDM resistant varieties can be purchased as seeds or as started plants.

Avoid High Humidity

basil seedlings in clay pot

Healthy sweet basil, in a pot.

If you want to grow your favorite basil varieties that are not resistant to BDM, there is a way to prevent a total loss.

BDM spores move up from the south on the breeze or on infected plants shipped into the area. The spores don’t overwinter in cold climates. If spores land on a susceptible variety, they need a relative humidity above 80-85% for a couple of hours in order to germinate.

Even during pleasant weather, the relative humidity can reach 90% or higher in the 2-3 hours around dawn. That’s when the temperature is usually the coolest and, therefore, the relative humidity is the highest.

When plants show early symptoms of BDM, remove the affected leaves. Take potted basil plants indoors for the night, every night. Indoor conditions never reach those high humidity levels, so you can still grow your preferred basil varieties successfully with a little effort. Remember to place the plants back outdoors after the sun has been up for a couple of hours.

Follow this regimen during rainy weather, although the plants might need to spend a day or two inside. Find the brightest spot to keep them during their temporary stay indoors. If possible, provide some artificial light. Unless it’s wilting, avoid watering basil indoors. Less sunlight means the plant won’t be photosynthesizing optimally or using much water, and wet soil can initiate root rot.


Headings

Page 1: 1. Start with clean materials for seedlings. (Pasteurizing Potting Soil), 2. Grow disease resistant varieties… (…Especially Tomato Seedlings, It’s so hot out there!, A Few More Tomato Tips, Growing Heirloom Seedlings, Basil Downy Mildew, Avoid High Humidity)

Page 2: 3. Timing is important for seedlings. (The Fall Growing Season, Keeping Records, The Cooperative Extension Service, Starting Seedlings Outdoors, Don’t Start Seedlings Too Early, Cool Season Crops, Extending the Growing Season, Seedlings Transplanted Into Bigger Pots, Bunching Onions, The Brassicas, Brassicas In My Garden, Lettuce), 4. Is the temperature suitable for seedlings? (Miniature Incandescent Lights For Warmth, Water Temperature)

Page 3: 5. Start seedlings in small batches. (My Simple Infrastructure), 6. Seedlings need strong light. (Growing Seedlings Under Shop Lights), 7. Cull the weaklings and anomalies. 8. Prevent damping-off disease from killing your seedlings. (Actinovate), 9. Seedlings and plants need fertilizer. (The Elements, Read the Label)

Page 4: 10. Prepare the soil for your transplants. (Start With Good Drainage, Air Pore Space, Gypsum and Lime, Add Nutrient-Rich Amendments, Bury It), 11. Try succession planting for maximum yield. (Crop Rotation, Mulch), 12. Stop the pests before they ruin your garden. (Slugs and Snails, Larvae of Moths and Butterflies, Spider Mites and Thrips, Deer and Rabbits), Concluding

Return to the top of Page 1

Grow a Potted Tomato: A Step-By-Step Guide


How To Grow a Potted Tomato


young tomato plants

Young tomato plants.


This year’s plan is to grow two potted tomato plants on the deck, inside the fence and away from deer. But less than a week ago, it snowed! For the near future, we’ll be having temperatures in the 70’s F, and in the 50’s at night. It’s time!

Judging by the numbers of people shopping at the garden centers, I’m not the only optimist out there. Always check your local forecast to see if it’s safe to plant tender edibles. Our friends in the North are still shoveling snow. Sorry, guys. Here are today’s purchases, and the step-by-step guide on page 2.


potted tomato


Tomatoes


Warm temperatures turn thoughts to tomato plants, so off to the garden center I went. Since we rarely buy tomatoes from the grocery store in the winter, we’ve been looking forward to this moment.

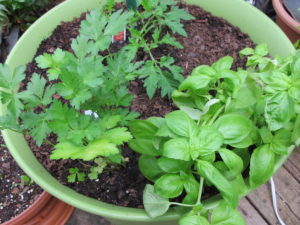
In one of the pots, I’ll include a young flat-leaf parsley and a sweet basil I bought at the grocery store a few weeks ago. The two herbs will be planted on the south side of the heirloom ‘Rutgers’ tomato, so they won’t be shaded. I’ll remove tomato leaves that interfere with the herbs. In case raccoons and squirrels set their sights on a lovely ripe fruit, bird netting wrapped around the fruiting plants will deter them.

Unfortunately, direct sunlight is decreasing in the vegetable garden, next to the house, as the trees to the south grow larger. Even so, the new ‘Sun Gold’ cherry tomato will go into the garden; if any tomato will produce a crop, ‘Sun Gold’ will. Besides, it did well enough last year. It produces loads of bright orange super sweet tomatoes, great for salads and snacking. Bet you can’t eat just one!


Basil


Tuscany basil

‘Tuscany’ basil.

The garden center also had ‘Tuscany’ basil, a light green lettuce-leaf type, with huge puckered leaves. It is wonderfully sweet and lightly spicy, with a hint of fresh anise flavor. ‘Genovese’ and lettuce-leaf basil are among my favorites for Tomato-Basil Salad.

And I added to the cart a pot of ‘Siam Queen’ Thai basil, for the baked salmon. Basil needs warmer temperatures, so they’ll stay in pots for a while, and come inside at night. Potted basil will come indoors even in summer, during rainy or humid weather. That’s when Basil downy mildew becomes a problem.

Curly parsley, a rogue seedling with last year’s flat-leaf parsley, and arugula survived the winter and still look good enough to hold onto for a while. The enclosed deck is a warmer microclimate, where winter temperatures are always higher than on the other side of the fence.

Although there’s some potting soil around, I’ll need more to fill those large pots and a few others. So, I bought the largest bag of soil the garden center carries. There’s enough packaged fertilizer left over from last year.


Caterpillars, Anyone?


I always keep a supply of Bt for battling the caterpillar invasions. Bacillus thuringiensis (Bt) is an organic alternative to substances I’d rather not consume, yet many people still consider it a “chemical”. It is not. Bt is a naturally occurring bacterium. An occasional spraying with Bt on the cole crops (kale, broccoli, cabbage, etc.) and on parsley and dill will save them from utter destruction!


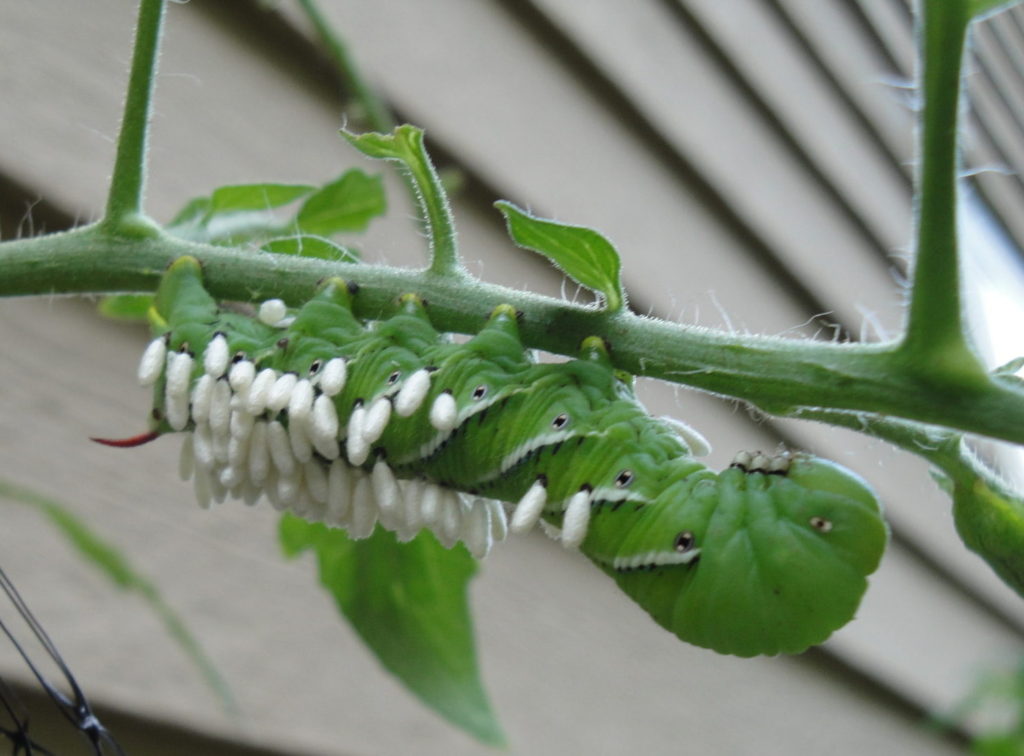
tobacco hornworm

The tobacco hornworm on a tomato leaf.


Sometimes, 1 or 2 tobacco hornworms attack our tomato plants. They look very similar to the tomato hornworm, which has V-shaped markings instead of the tobacco hornworm’s slashes (photo, above). They’re difficult to see because they blend so well with the foliage.

Left undisturbed, these larvae will develop into a type of hawk moth. But this very hungry caterpillar, as it grows, consumes large quantities of leaves, and leaves behind…well, you know what it leaves behind.

This nature nerd, as a young student, kept a tiny caterpillar indoors, and supplied daily rations of tomato leaves. Well, it grew enormous and wandered off to a secluded spot to pupate. My greatest fear was that my mother would find it. I finally found it, and donated it to a teacher’s Wardian case.

Spraying with Bt kills these hidden caterpillars if you can’t find them. It is more effective, however, when used on young caterpillars. But, if they have little things on their skin that look like grains of rice (photo, above), just pluck off the caterpillars and place them in the shrubs. A small female parasitic wasp laid eggs on or in the caterpillar, and the wasp larvae fed on and will soon kill the caterpillars. The “rice” grains are pupating wasps. And some little animal might appreciate a morsel such as this.


tomatoes


Big Pots


I bought two 7′ tall stakes and two 20″ diameter lime green pots, at first considered somewhat disagreeable, but now perfectly acceptable. This shade of green blends in with the greens and browns on the deck. When summer heat is a problem, light colors reflect some of the hot sun bearing down on the pots. This helps moderate soil temperature, which rises in a dark pot. Conversely, in the winter, black pots absorb warmth, keeping hardy herbs and cool season greens happy.

Discounted prices on vegetable transplants accomplished their intended effect: I bought more than I had planned. So, now there are 2 sweet peppers to plant, one a “green-to-red-when-ripe” bell, and the other a ‘Lunchbox’ orange.


Peppers


Lunchbox peppers

‘Lunchbox’ sweet peppers.


‘Lunchbox’ peppers are small and colorful (red, orange, or yellow—a separate color on each plant). I add them to omelets, salads, stir-fries, shrimp and vegetables with rice, and pizza.

They add great color accents as well as a higher vitamin C content than green peppers. In fact, one medium-large ripe lunchbox pepper has 100% of the RDA for Vitamin C.

It takes almost 3 weeks longer for a pepper to mature from the green stage to the colorful one. Normally, I would have waited a week or two for the pepper plants, but they were on sale…and it has been quite mild…

(“Weather Alert: severe thunderstorm watch, possible large hail, winds gusting to 60 miles per hour”. Time to move some things around outside.)


One More Tomato

The heirloom ‘Black Prince’ tomato is not as susceptible to cracking as some of the other black tomatoes. And the fruits are smaller. This one substitutes for the ‘Black Krim’ I was looking for.

If ‘Black Prince’ doesn’t do well enough, I’ll pull it out and plant something else. That’s one of the many advantages of living where the growing season is long. (***Update***: The ‘Black Prince’ has grown taller than the 7′ stake, and it is loaded with medium-sized fruits! I’ve already picked more than 20 richly flavored “black” tomatoes. Photo at end of Page 2. June 25, 2019)


And Zucchini

zucchini

Zucchini with fruits.

The fourth of the four-for-$10 deal is a zucchini called ‘Black Beauty’. The seedlings have barely grown beyond the seed leaf stage, and they, with the basil, come indoors at night.

A 50-pound bag of aged cow manure rounded out the purchase.

I’ll plant the zucchini into a nursery pot, and later into the garden. But for now, the garden is still packed with cool season vegetables and greens.


Headings

Page 1: How To Grow a Potted Tomato, Tomatoes, Basil, Caterpillars, Anyone?, Big Pots (Peppers, One More Tomato, And Zucchini)

Page 2: A Step-By-Step Guide To Planting a Potted Tomato, Maintaining Your Potted Tomato, Temperature, Watering a Potted Tomato, Fertilizing a Potted Tomato, (How Often?, Blossom End Rot), Limiting the Suckers On Your Potted Tomato

Return to the top

Vegetables in Containers: How To Grow Them

2018

Updated 10/16/2024


No Garden Space? No Problem!


Growing Vegetables in Containers


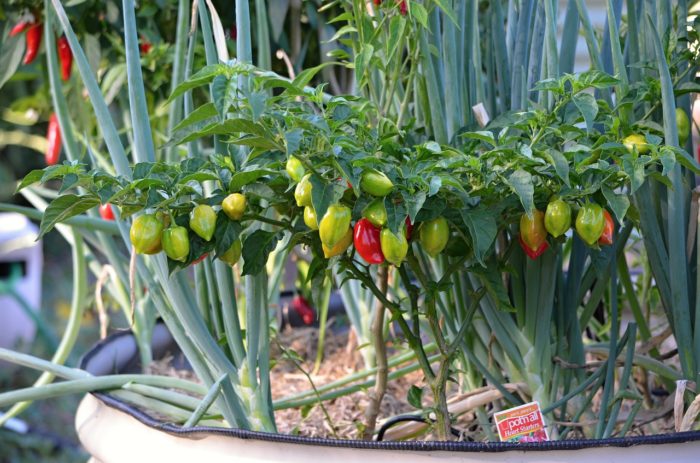
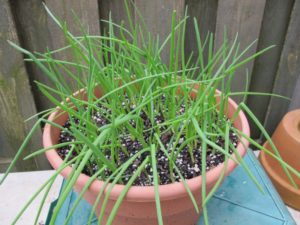
peppers and green onions in a pot

Peppers and onions.


Before I started this blog, I managed the Edibles Department for a few years at an independent garden center in Charlotte, North Carolina. As some of our customers downsized to apartment living or to a condo with a balcony, they didn’t want to give up growing their own herbs and vegetables. So, they were glad to hear that they could grow vegetables in containers…as long as the balcony was on the right side of the building. And the right side for vegetables is the sunny side of the building.

Lack of direct sunlight and adequate growing space are limiting factors. Look around, though, and you might come up with some ideas. For example, some of our customers were given permission from their condo associations to garden in common areas. Running for open association board positions yourselves is one way to garner support. I encourage you to attend board meetings, bringing your neighbors, a plan, and a promise to maintain the site.

Neighborhood community gardens are another possibility, although there often is a waiting list. With so much emphasis on eating healthy foods, little pocket parks and community gardens are popping up all over the country.


For Your Convenience

damaged tomato, squirrel

A young tomato damaged by a squirrel.

Another reason to grow vegetables in containers is simply to have them close at hand when they’re needed. A few steps out the kitchen door to a handful of cherry tomatoes and a ripe ‘Flavorburst’ sweet pepper for today’s salad has its charms.

Keeping the pots elevated on the deck prevents some animals, such as deer and rabbits, from making off with the fruits of your labor. Won’t stop the raccoons, though. (***Update***: Or the squirrels; one thought this little green tomato had something to offer. Discard any fruits that have been chewed on by animals. If needed, I’ll wrap the potted tomato plants, growing on the deck, in bird netting. June, 2019.)


Sun? Not So Much


The choices for edibles in a shady spot are limited. The ones that might succeed in bright shade are arugula, cilantro, parsley, lemon balm (interesting research with Alzheimer’s), French sorrel, and seasonal leafy greens. With just a bit more sun, basil, rosemary, oregano, and maybe a cucumber plant could grow for you.

Reflected light counts, to a degree, including light bouncing off light-colored walls. And a white surface under the pots reflects more light onto the vegetables in containers.

Remember to monitor the sun’s path throughout the seasons. Once trees drop their leaves in the fall, your balcony or patio might receive more direct sunlight than it did in the summer. This opens up all kinds of possibilities for potted cool-season greens and vegetables. Pay close attention to expected temperature changes for the duration of your crops.

Fruiting plants, such as tomatoes, peppers, eggplants, and squash need at least 6, and preferably 7 or 8 hours of direct sun. These vegetables also need warm summery weather.


Approaching Summer Solstice

Our vegetable garden is now receiving the maximum amount of light, with the sun directly overhead. In the springtime of the last two years, heavy rains caused the tree canopy up on the berm, to the south, to swell with heavy, overhanging branches. Trees now cast considerable shade early and late in the day for most of the growing season. So, I planted fewer tomato plants and more greens.

Two large ‘Big Beef’ tomatoes are beginning to ripen, and a whole lot of ‘Sun Gold’ and ‘Mexico Midget’ cherry tomatoes. So, even with less-than-ideal conditions, there will be something to harvest.


At Julia’s Request

Several family members from New Jersey and California recently visited us in North Carolina. I promised Julia this article about growing summer vegetables in containers.


Vegetables In Containers: Which Ones?


Sweet and hot peppers, tomatoes, and eggplants can be grown in containers, as well as zucchini, yellow summer and Patty Pan squashes, cucumbers, and green beans. Also, it’s easy to grow most herbs in pots. Green onions, carrots, potatoes, and peas can grow in pots!

It’s just a matter of the details. One of those details is to look for dwarf or bush varieties of the crops you want to grow. There’s even a variety of corn (‘On Deck’) that grows in large pots.

One of the popular combinations I used to sell included a sweet or a hot pepper planted with two herbs. Theme combinations (‘Jalapeño’ pepper/cilantro/Greek oregano; ‘Carmen’ frying pepper/Italian parsley/Italian oregano) grew in 14″ pots. Customers found them irresistible if they were bearing fruit.

Growing more varieties of leafy greens in containers has become a priority as our garden becomes more shaded. In addition, greens can grow all year in regions with moderate winters.


Starting With Tomatoes


Much of the information in “Starting With Tomatoes” also applies to other vegetables in containers.


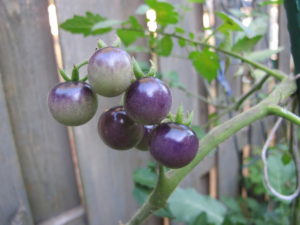
'Blueberry' tomato

Potted ‘Indigo Blue Berries’ cherry tomato ripens to orange and black.


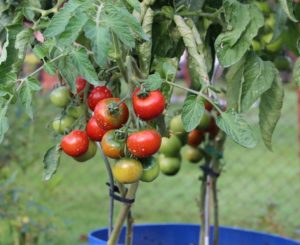
Beginning with America’s favorite, tomatoes grow well in pots. Will it be a beefsteak or a cherry? An heirloom or a modern hybrid? A slicer or a sauce-type? Determinate? Indeterminate (it keeps growing until frost, bearing fruit all summer)? Black, red, yellow, or orange? Striped or solid? There are many thousands of varieties of tomatoes to choose from!

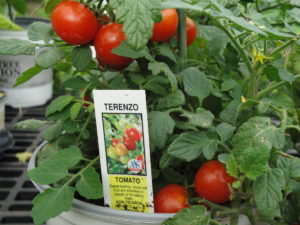
potted 'Terenzo' tomato, with red fruits

‘Terenzo’ tomato.

A dwarf tomato called ‘Terenzo’ (photo, right) can grow in a 10″ hanging basket, but a ‘Cherokee Purple’ heirloom or a ‘Big Beef’ needs something considerably larger. For the large varieties, I use pots at least 20″ in diameter.

The long-vining indeterminate cherry types (‘Sun Gold’, ‘Black Cherry’, ‘Mexico Midget’) can grow in a pot as small as 14″ in diameter, but they’d be happier in bigger pots. You’ll need to pay closer attention to water and fertility when using smaller pots.


Vegetables In Containers: Types Of Pots

Each kind of pot has both advantages and disadvantages.

Summer vegetables generally fare better in larger pots rather than smaller pots. Although the pot looks enormous compared to the transplant’s diminutive size, don’t be tempted to plant more than one tomato per pot.

You’ll be amazed how quickly that one tomato plant fills a 20″ pot. A new transplant in a large pot runs a greater risk of root rot during rainy weather. But, placing it under an overhang will prevent this loss. It’ll be different once more roots and foliage have grown.

An indeterminate tomato, such as ‘Cherokee Purple’, ‘Sun Gold’, or ‘Black Krim’, can share a 20″ diameter pot (photo, below) with a couple of herbs, such as parsley and oregano. Plant the tomato toward the back of the pot, on the north side (northern hemisphere), and plant the herbs near the southern rim.

Terra Cotta

Terra cotta looks good and has some weight. But clay is porous, so water vapor passes through the pot to the air outside, quickly drying the soil. If you want to use your large clay pots, you could line them with food-grade plastic and punch some holes in the bottom for drainage. This will slow down the evaporation process.

Certainly, use clay pots if you prefer, but prepare to water more often.

Ceramic Pots

Ceramics are beautiful and heavy, and they can be expensive. Soil temperature rises uncomfortably on the sunny side unless the pot is shaded. Try using light colored pots in the summer, which will reflect most of the heat.

If you’re unsure of the safety of the glaze, line the inside of the pot with food-grade plastic bags, poking several holes in the bottom for drainage. Choose a different pot if a sticker on the bottom warns “Not for direct contact with food”.

You could also plant the tomato in a large nursery pot, and then insert it into the decorative glazed container. Make sure both pots have drainage holes. This “double-potting” allows air circulation around the interior pot and eliminates concerns about questionable glazes.


vegetables in containers, green pot

Tomato ‘Rutgers’, sweet basil, and Italian parsley in a 20″ wide pot, April, 2019.


Plastic and Vinyl

These pots are inexpensive, readily available, and easily moved. They’re also the most likely to blow over in windy weather. But this is the first choice for most gardeners. Most of these pots last a few to several years in the sun, but, eventually, sunlight will degrade the material.

Wood Containers

Untreated cedar or redwood and half whiskey barrels are suitable for growing vegetables in containers. Check to make sure the pots drain freely.


Reservoirs and Other Considerations

Earth boxes and plastic pots often have built-in reservoirs or detachable saucers. And you can purchase caster kits and trellises for increased functionality. Some gardeners have the option to move their plants from the morning sun on one side of the deck to the afternoon sun on the other side; wheels make this so much easier.

Caution: some of the reservoirs are too deep before the water begins to exit the overflow hole. This can cause young plants to rot if the soil stays sodden all the time. You could drill a hole in the side, below the overflow hole, reducing the capacity of the reservoir. Or simply tilt the pot to allow excess water to drain. Older plants, full of foliage, will absorb water in the bottom of the planter, as long as it isn’t raining for several days straight.

Mosquitoes and Tree Roots

Add a piece of Mosquito Dunks to prevent mosquitoes from maturing in the secluded reservoir. They need only a few days in warm weather to complete their life cycle. Or tip the container to drain all excess water.

A pot sitting directly on soil anywhere near trees or shrubs will invite their roots to invade. Believe me, they will try to grow in that beautiful composted soil. Elevate the pot off the ground. This also facilitates drainage from the pot.

A few pieces of broken flagstone or “pot feet” raise the pots above the surface of the deck, helping to preserve the deck’s finish.

Saucers

Use saucers under the pots, but don’t let water remain in them for more than an hour. Plant roots need oxygen as much as they need water. Water in the saucer prevents air from entering the bottom of the pot.

Saucers aren’t absolutely necessary, but help if the soil has gone too dry. Just keep filling them until no more water is absorbed by the soil. In tall pots, though, the force of gravity will prevail over capillary action, preventing water from reaching the top of the root ball. So, you’ll also need to water the top portion of soil.

During long periods of rainy weather, I remove the saucers, or turn them upside down and keep them under the containers. This is impractical, however, if the pot weighs 50 pounds. Consider removing the saucer and using a few pieces of broken flagstone or brick to elevate the pots, if necessary.


Potting Soil

pot for new chives division

Reused polyester fiberfill covers the drainage hole.

Before filling the pot, place a small handful of polyester fiberfill (from a hobby store) over the drainage hole. This prevents soil from eroding through the hole, and prevents earthworms and other critters from entering. If you pull some of it through the hole to a point at the bottom, excess water will continue to drain if there’s soil in the little cone. This is helpful for potted plants that rot easily during long stretches of rainy weather (succulents, lavender, thyme, sage). This synthetic material doesn’t rot, so it’s reusable.

Use a good quality potting soil that drains well, but has peat moss to hold moisture. In addition to the peat moss, the mixture will have perlite (white particles that help drainage), pine bark chips (drainage), lime (to adjust the pH), compost or a starter charge of fertilizer, and often a wetting agent (to help the soil absorb water).

Amending the Potting Soil

Feel free to experiment with mixtures of different materials. Soils with a lot of bark (pine fines, wood products) in the mix tend to dry out faster. You can mix in smaller-particle loamy topsoil, spongy peat moss, aged manure, or compost to help slow water loss. Water-absorbing crystals might help, too. But moisten them before you add them to the soil. If you don’t, you’ll understand why I italicized the word “before”.

Adding a layer of undyed mulch on top of the soil helps conserve water and keeps the soil a bit cooler.

While some gardeners add rocks to the bottom of the pot, I never do. It was thought the rocks increased drainage, but the opposite is true; they create a perched water table in the layer of soil right above the rocks. Water percolating through the soil profile is held in this layer by capillarity, and often rots roots trying to grow there, limiting the useful volume of soil.


Headings

Page 1: Growing Vegetables In Containers, Sun? Not So Much, Vegetables In Containers: Which Ones?, and Starting With Tomatoes (Vegetables In Containers: Types Of Pots, Reservoirs and Other Considerations, Mosquitoes and Tree Roots, Saucers, Potting Soil (Amending the Potting Soil)…

Page 2: Transplanting the Tomato, Water, Going Away?, Staking, Fertilizing Vegetables In Containers, Blossom End Rot, On PH, Pollination), Peppers and Eggplants, Cucumbers, Squash (Squash Vine Borers), Green Onions (Bunching Onions from Seed), Leafy Greens, and Picking Vegetables In Containers

Return to the top