Tag Archive | hardening off plants

Enclosing the Porch For Winter Growing

 2022

Updated 11/5/2024


Enclosing the Porch for Growing Plants In Winter


Average Temperatures

Winter weather is in a rush to make its presence known here in northern North Carolina. Average nighttime low temperatures in October are in the 50’s F falling to the 40’s by the end of the month. In 2022, though, many nights were frosty. In this article, I’ll describe how enclosing the porch can add more growing space for sun-loving tender plants—those killed by freezing temperatures.

I moved to this beautiful acre outside Elkin, in USDA plant hardiness zone 7b, in October, 2021. The average lowest extreme temperatures in winter are 5-10° F, with January the coldest month. That won’t stop most gardeners from finding ways to extend the growing season, and, in fact, encourages us to do so.

Abnormally cold weather prompted me to gather all plants that would have been damaged or killed by frost. Both daytime and nighttime temperatures have fallen 10-20° below average on many days in October and November. On the other hand, we’ve also enjoyed a few shorts-and-tee-shirt days hovering well above average.


Priority: Plants
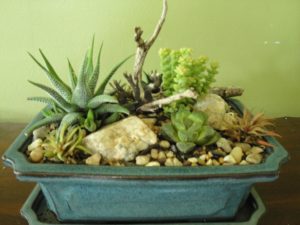
 

succulent dish garden

Succulents in this dish garden can begin stretching toward the light after less than a week in insufficient sunlight.


Priority went to succulents and tropical plants intolerant of cooling temperatures. Some I’ve had for decades and don’t want to lose. A collection that started in spring as 12 flats of tender plants blossomed to 40 by autumn.

Miniature succulents, succulent gardens in bonsai trays (photo, above), bromeliads, aroids (Alocasia, pothos, philodendron), amaryllis, leopard lilies (Drimiopsis, Ledebouria), tradescantias, ferns, ficus, begonias… I propagated all these houseplants for the farmers’ market, where I’ve been a vendor (“Wellspring Gardens”) since April, 2022.

Plants requiring warm temperatures fill every sunny window indoors. In the basement, more plants snuggle close to the 4′ fluorescent shop lights.

From autumn to spring, I carried many flats of houseplants outdoors to the sunny porch when it was warm enough, above 50° or 60°F. And later in the day, I brought them back indoors again. Almost every day. Winter ’21-’22 was quite mild.

That’s in addition to the dozens of flats of herbs and cool season greens (lettuce, spinach, arugula, broccoli, kale, etc.) started for the farmers’ markets and my own gardens. After 3-4 weeks of growth, they could safely be hardened off outdoors, exposed to colder temperatures—even frost—before planting or selling them.

The Best Option

I need an easier way to accommodate all these plants. A greenhouse is prohibitively expensive for now. Another option is to keep them in the porch, after enclosing it. In winter, this south-southwest-facing porch receives full sun from morning until sunset. Perfect!

How hard could it be to tack a big sheet of clear plastic to the structure? That will work in the daytime, when the sun’s out. But during cold overcast weather and at night, supplemental heat will be needed. Later in this article, you’ll see what I did to keep the tender plants comfortable.


Preliminary Plans


The goal was to create an inexpensive makeshift greenhouse environment from readily available materials, employing rudimentary carpentry skills. Winter winds, primarily from the west, can be fierce at times. This necessitated strong bracing for the structure to prevent the plastic from breaking loose.

At the hardware store, I bought a 12 x 100′ roll of clear 4-mil plastic for enclosing the porch and creating low tunnels in the garden for winter greens. You can find sheets and rolls of clear plastic in the paint department. Although it won’t last as long as greenhouse film, it is less expensive. A more attractive alternative is clear acrylic film, but I’m looking for the most economical solution for now.

Plastic degrades in sunlight, and faster in hot sunlight. So, if used on the porch only during the cold months, it should last 3-4 years. That’s based on many years’ experience using plastic to protect plants from cold winter weather.

The plan is to leave the wooden support grid in place all year. After weather warms up in spring, I’ll remove the plastic panels, still stapled to their 1 x 2 x 8′ posts, clean them, and store them in the basement. In the future, enclosing the porch in permanent materials (floor-to-ceiling operable windows) is a strong possibility.


***Updates***:

***Plastic used in the garden lasts longer than the plastic used to enclose the porch. After 2 full seasons, the porch plastic is showing signs of weakening in the hottest spots because the enclosed space heats up significantly, shortening the life of the plastic. If I don’t vent the plastic or open the front door and use a fan to blow the heat into the house, the porch heats up to 90-105° F on a sunny winter day. The air under plastic in the garden doesn’t get that hot because the plastic is removed or vented to prevent overheating the greens. January 14, 2024

***Recently, I bought a large roll of 6-mil greenhouse film that was on sale. It should last 3-4 years, and there’s plenty to cover other structures which are in the planning stage for now. I used the same staple gun and 1″ x 2″ x 8′ posts for the new plastic. Because this product is clearer than the hardware store’s plastic, it transfers more of the sun’s energy to the inside of the porch…so it gets hotter in the sun. That’s probably okay in the dead of winter when it gets very cold, but in autumn, some plants show a bit of sunscald. If it stays unusually warm over the next month as it did in October, I’ll tack up some of the old plastic on the inside to filter the sun. 11/5/2024


Enclosing the Porch: First, the Support System


Before cutting the plastic, I had to figure out how to put this whole thing together, preferably without piercing the aluminum siding. Where to start? How to seal it from drafts? What about a door?

The front porch measures approximately 20′ x 8′, so the 1 x 2″ x 8′ wood posts from the hardware store fit well. I used a hand saw for a few cuts. Posts with large knots, not visible when purchased in bundles, were returned to the store. Those are weak spots that could break in high winds. These posts have a smoother side—the side in contact with the plastic.
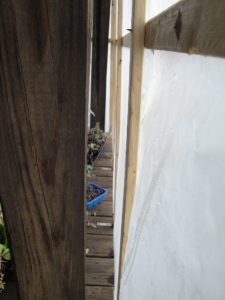
enclosing the porch

6 x 6″ timbers with 1 x 2″ x 8′ posts across the front of the porch.

Four 6 x 6″ timbers support the roof along the front edge of the porch, and the attic above is insulated. The timbers are secured 3″ inside the outer edge of the decking. Because the 1 x 2’s are attached at the top of the timbers and extend 8′ down, past the edge of the decking, the posts are slightly off vertical when viewed from the side.

I didn’t attach plastic directly to the bottom of the timbers because I wanted it to fall all the way to the ground on the 3 sides. That would help warm up the concrete block foundation and the ground underneath the decking. The goal was to retain the maximum amount of heat in the enclosed porch.

The porch is elevated 2 steps up from the ground. That made my time on the ladder somewhat less daunting. I took my time and was very careful. Safety first.


Brace Yourselves

Hardware included:

  • Hillman Red Exterior 8 x 1 5/8″ deck screws, with a special drill bit in the package
  • 3″ galvanized corner braces with smaller screws
  • a few nails

Although the deck screws are supposed to require “no pre-drilling”, a few of the 1 x 2’s split. I used a couple of nails to hold them together.
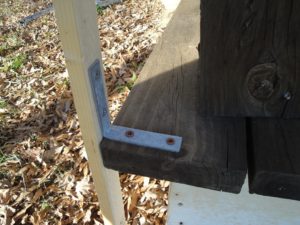
 

corner brace screwed to decking and post

Brace was placed with the edge of the post flush with the front edge of the floor.


Holding a 1 x 2 post firmly against the house and the edge of the floor, I positioned a brace, then marked where the first screw would go. The west and east sides would have five 1 x 2’s each.

I used a reversible drill to screw braces to the floor. For each of the east and west sides, one brace went next to the house, one on the outside corner, and one in the middle. The other 2 posts on each side were screwed to the edge of the decking without braces.

I used 2 longer deck screws—instead of the smaller screws in the package—for the horizontal half of the brace attached to the floor. This made a stronger attachment. Because the long screws would have gone through the 1 x 2’s and pierced the plastic, I used shorter screws on the vertical part of the brace (photo, above).


Next Up: The Vertical Posts

Once the braces had been secured on the west and east sides, the vertical 1 x 2″ posts were next. I attached five 1 x 2″ posts to the decking—about every 2′—on the west side and 5 more on the east side. Each post was screwed on at the bottom securely enough for it to stand straight. A carpenter’s level established true vertical and horizontal before I tightened the screws.

Then I fastened the middle horizontal post, and the top horizontal post as close to the ceiling (overhang) as possible. I can add more supports at any time, if necessary.

Where the ground level was higher near the house, I cut the posts so they stopped right above the soil. In other areas, the 8′ length doesn’t extend that close to the soil, but that’s okay. The excess plastic made a flange over the ground, on which I placed heavy pots and cinder blocks to block air infiltration. I haven’t trimmed any of the 12′ wide plastic, but I can play with that later. Incidentally, the flange helped keep the basement drier during a recent rainstorm. For now, it stays.
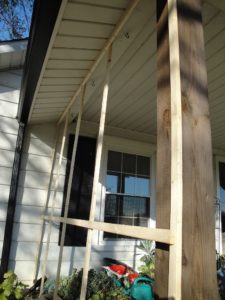
 

enclosing the porch, west side wood supports

The west side with 5 vertical and 2 horizontal 1 x 2″ x 8′ posts.


The braces and posts were sturdy, but there was too much play in the sides. So, I drilled another 3″ brace inside each of the upper 2 corners adjacent to the house, through the siding in the ceiling and into the vertical 1 x 2 (photo, below). A wooden beam hides under the siding. First, I hammered a nail through the aluminum, then replaced it with a deck screw, stabilizing the sides.
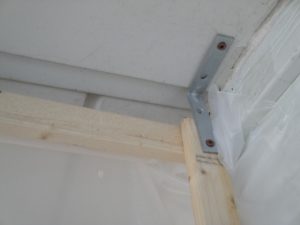
 

brace between ceiling and 1 x 2" post

Brace secures vertical post to the ceiling, near house. Clear tape, barely visible on the right, seals plastic to siding.


On the South Face
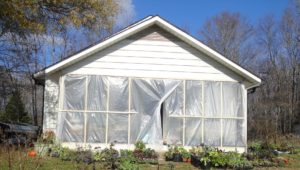
 

enclosing the porch, south side

Posts:                1        2        3        4            door            5        6        7        8


Here’s the 20′ south face of the porch. Imagine the vertical posts are numbered, from #1 at the left (west) corner to #8 at the right corner, with a larger gap in the middle for the “door”. The numbers don’t exactly correlate with the posts, but you get the idea. The door has not been finalized. Posts #1 and 8 were added previously to the corner timbers, when I worked on the east and west sides.

Across the front, I fastened braces to the floor and then added 2 middle posts on each side of the door (#2, 3, 6, 7). The other 2 new posts were fastened to the top of the inner 6 x 6″ timbers (#4, 5), and screwed directly to the edge of the decking. All 1 x 2″ x 8′ posts angled out slightly, below the edge of the floor.

Then the horizontal members went up: top and middle. Later, I had to remember to leave some extra plastic at the top of the outside corners to accommodate the slightly angled vertical posts (and longer dimension at the floor). Some of the posts were a bit bowed, so I’ll tape the gaps at the top from inside the porch.

At this point, all braces and support posts are in place. Progress!


Headings

Page 1: Enclosing the Porch for the Winter (Average Temperatures, Priority: Plants, The Best Option), Preliminary Plans, ***Updates***, Enclosing the Porch: First, The Support System (Brace Yourselves, Next Up: The Vertical Posts, On the South Face)

Page 2: Enclosing the Porch: Second, Wrapping It Up (The West Side, The East and South Sides, How?), Warming Up to This, Enclosing the Porch: A Winter Retreat for Succulents (An Arctic Blast, and I Don’t Mean Fun Times with Santa, Blown Away Or Not?, Why Not LED’s?, Enclosing the Porch for Edible Plants, Potted Herbs and Tender Plants, Enclosing the Porch for Me, Too!)
Return to the top

Starting Seeds for Cool Season Greens


Starting Seeds for Cool Season Greens 


dinosaur kale, 7/18/19


The coldest part of winter has passed for most of us, and it’s time to start seeds for cool season greens. Late winter transitioning to spring is my favorite time of the year. That’s when I start seeds for early harvests. This article covers details for growing some of the early greens, particularly spinach and the brassicas. On Page 3 is a recipe for a veggie omelet, an easy way to get more greens into the diet.

If the garden were bare, I would have started seeds a few weeks ago. But the greens in the vegetable garden continue to offer harvests. Unfortunately, the “list of wants” from the seed catalog is far more extensive than the garden’s square footage can accommodate! It’s time for the last harvest of collards for soup; that’ll open up some space.

While we’re harvesting established cool season greens, I’ll start several new crops indoors. These plants will be plugged into the garden as space opens up. But the seedlings will not be kept in their little pots very long; this stresses the plants and causes them to bolt, or to flower prematurely. (Photo, above: dinosaur kale germinated at night; it will green up in the sunlight.)


The First of the Cool Season Greens: Spinach


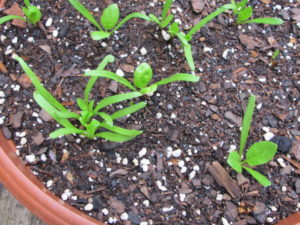
spinach 'Monstrueux de Viroflay' in pot

Young spinach ‘Monstrueux de Viroflay’.


I would have sown spinach directly into the garden by now, but we’ve had a long run of chilly rain. The soil is so wet that it’s doubtful any seedlings would even be tempted to germinate. At this time of the year, pay close attention to the weather forecasts. Conditions could deviate considerably from the averages.

It’s not good to dig in soil this wet anyway. That would drive out air spaces and ruin the tilth of the soil by compacting it. 

As temperatures begin to moderate, slugs come out in force and will decimate any seedlings that dare to grow in this weather. Rain: good for slugs. Sluggo: bad for slugs! Organic Sluggo pellets attract and kill slugs and snails. This version of the product contains materials (iron phosphate) that add nutrients to the soil. Check the label, though; Sluggo has other products with added ingredients. The organic option is safe to use around the edibles.


Spinach From Seed Is Easy!

Spinach germinates readily, from 50°F up to the mid 70’s (soil temperature), as soon as the ground can be worked in late winter or early spring. For better chances of success, choose varieties that are disease resistant and slow-bolting. In well-prepared soil, spinach is one of the easiest crops to seed directly into the garden.

Prepare the bed by incorporating 2″ to 3″ of compost and/or aged manure into the top 5″ of soil. Spinach prefers soil pH near neutral, from 6.5 to 7.3. A soil test will indicate how much lime, if any, should be added to raise the pH.

For baby leaf harvest, sow the seeds thickly in a patch, about 1″ apart. For full-size leaves, space the seeds a few inches apart, with rows 8-10″ apart. Crowding the seeds too closely or poor soil will result in a disappointing crop.

‘Monstrueux de Viroflay’

There’s a wonderful variety called ‘Monstrueux de Viroflay’ (photos, above and below), a French heirloom dating to 1866. It grows very large for spinach, up to 20″ tall with 10″ leaves, and should be spaced several inches apart.

Viroflay, or Monster, as it is often called, is lower in oxalic acid, or oxalates, than other spinach varieties. It might be acceptable for people with health concerns that prohibit spinach consumption. Check with your doctor.

Keep the soil moist and add organic fertilizers, such as fish emulsion, Sea-Plus, or earthworm castings, every 2 weeks. In cold soil, however, liquid synthetic fertilizers high in nitrogen work better than the organics. Microbes in the soil break down organic material and make those nutrients available to plant roots. But microbes are dormant in cold soil, so they can’t perform this vital service. They’ll become more active as the soil warms up in late winter or early spring.


spinach seedlings

‘Monstrueux de Viroflay’ spinach seedlings.

Spinach Bowl

Another option is to sow seeds directly into a 14″ wide, 6″ deep bowl filled with fresh potting soil (photo, above). The pot has drainage holes. Portability allows me to bring the pot indoors on especially cold nights while the cool season greens are beginning to germinate. And moisture levels can be carefully monitored.

Since the sappy crooked pine tree that shaded the deck from afternoon sun has been cut down, conditions on the fenced-in deck are more favorable to growing vegetables in containers.

Fill the pot with potting soil to within an inch of the rim. Simply scatter seeds on the surface, a couple of inches apart for smaller varieties and a few inches apart for Viroflay. Cover with another 1/3″ to 1/2″ of soil. Water…and wait… Spinach’s two seed leaves, the cotyledons, are easily differentiated from other seedlings by their long narrow shape. Thin as necessary; you can eat the culls.

Don’t neglect fertilizing potted greens. Rain and irrigation quickly wash nitrogen out of the soil.


Harvesting Spinach

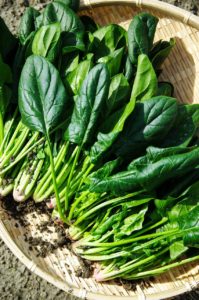
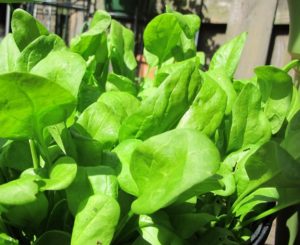
Spinach.

Harvesting the crowns begins within 4 or 5 weeks, depending on weather and soil fertility. Pick individual leaves at any age, allowing the central growing tip to continue producing new leaves. Or cut the entire plant at the soil line before flower buds begin to grow.

By sowing new crops of spinach every week or two, you’ll have continuous harvests of spinach, as long as the weather favors growth.

Spinach quickly bolts, or goes to flower, at temperatures above 75°. Dry or nutrient-poor soil stresses the plants. And spinach will flower prematurely if the plants are stressed by growing too close together.

Harvest the entire plant if you notice flower buds forming. Cutting off the flowers will not stimulate spinach to grow a new bunch of leaves. Instead, start more seeds.

Use spinach steamed as a side dish, or in sauces, soups, smoothies, salads, pasta dishes, or an omelet.


And Then the Brassicas


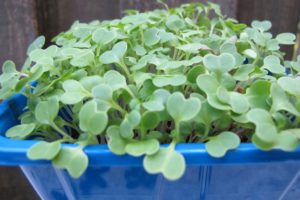
cool season greens grown as microgreens

These microgreens are mostly brassicas.


The Brassicaceae family is a huge group of edibles. It includes arugula, broccoli, Brussels sprouts, cabbage, cauliflower, collards, kale, komatsuna, mizuna, mustard greens, pac choi, radish, tatsoi, turnip, and others.

All members have similarly notched seed leaves, or cotyledons. Those are the first two heart-shaped leaves to emerge from the seeds (photo, above). Because the seed leaves are already formed inside the seed, the little plant can begin photosynthesizing—and feeding itself—immediately upon germination. True leaves, which develop after the seed leaves, are also similar for most of the cruciferous vegetables. That’s why it’s important to label your pots so you can distinguish “this” seedling from “this other similar looking” seedling.


Include On the Label:

  • the name of the crop (dinosaur kale)
  • the name of the cultivar (‘Black Magic’)
  • the date of sowing (brassicas germinate in less than a week if sown indoors)

Store leftover seeds in their original packets, and make sure the cultivar name is included on the label. Store in a cool, dry place, such as the refrigerator. Most seeds of cool season greens are viable for 2 years or so. If not already indicated, mark the year of purchase on the packet.

It’s helpful to keep a record of the varieties you’ve tried and liked or disliked. Include how you started the seeds (in 4″ pots or cell-packs, under lights, directly in the garden), the dates you seeded and transplanted, and the weather conditions. Include notes on what was successful and what wasn’t, and possible explanations. Did the seeds germinate and then keel over and die (damping-off disease)? Did critters eat your cool season greens as soon as they started growing? Should the seeds have been started earlier? Or later?

There are successes and failures in every gardener’s life. Being able to pinpoint the reasons for a disappointing crop will enable you to be more watchful or to try a different approach next time. Check with your local cooperative extension office, through state land-grant colleges and universities, for advice. Failure is a learning experience, not a reason to stop trying!


Damping-Off

Damping-off disease can appear soon after germination. Sometimes, diseased seedlings don’t even appear above the soil, looking as though the seeds didn’t sprout at all. The small seedling develops a narrowed brown spot on the stem. Then the top of the plant falls over, and the seedling dies. This is caused by several species of fungus, whose spores are in the air, in the soil, in the water, or on the seeds themselves.

Damping-off often accompanies:

  • poor air circulation
  • high humidity
  • crowding
  • low light
  • low temperatures
  • reusing old soil
  • and overwatering

Space the seeds farther apart, run a small fan nearby, water in the morning, and increase the temperature and light levels if they’re low.

The first time I used the organic biological fungicide called Actinovate, life became a bit sweeter. It is costly, but a much safer option than chemical fungicides. And, with the number of seedlings I grow each year, a wise investment. Make up a small amount of the solution when needed and apply from a spray bottle or a small watering can when sowing the seeds and as soon as the seeds germinate. Always exercise caution when using sprays, and read the labels.


Caterpillars on Cool Season Greens

When the weather warms up in mid- or late spring, you’ll notice butterflies and moths flying around your cool season greens. How nice, you might think. But those lovely insects are on a mission, and that mission is to find suitable plants on which to lay their eggs.


Most of the brassicas are targeted by the female:

  • Cabbage Moth (or Diamondback Moth)
  • Cabbage Looper
  • the velvety green Imported Cabbageworm (also called the Small White Butterfly or Cabbage White Butterfly—white with black markings). Look for them lined up on the leaf’s midrib.
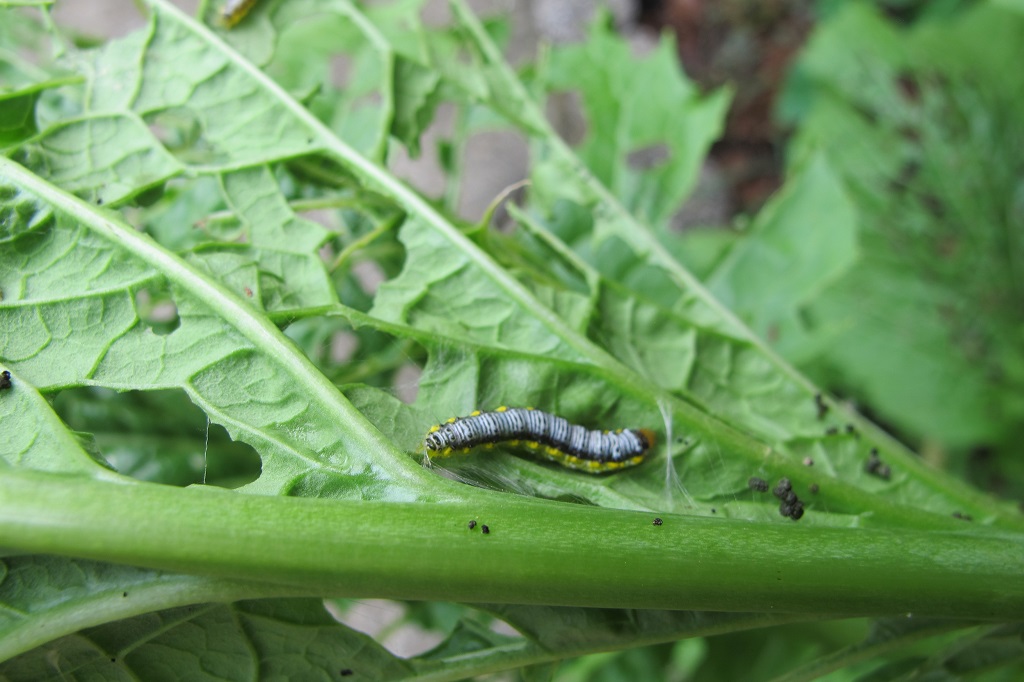
  • Cross-striped Cabbageworm (fine black stripes across the back, yellow stripe on the sides).
  • A few other species target particular brassicas or are limited geographically.

Here in my North Carolina garden, the 1¼” long Imported Cabbageworm has been the most commonly seen caterpillar on the brassicas. It is well-camouflaged in the green foliage. But for the past couple of years, populations of the Cross-striped Cabbageworm have been increasing. They’re especially pesky when lodged among the broccoli florets. Sometimes I don’t see them until I begin cutting the broccoli (just remove them). Inspecting the produce and spraying Bt regularly takes care of that.

Eggs hatch in a few days to a week, and immediately get to work chewing little holes and then bigger holes in your broccoli, kale, and other brassicas.


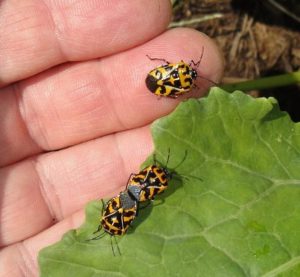
Harlequin bugs on cabbage


Another insect feeding on brassicas is the black and orange harlequin bug (photo, above). I squish them when I see them, although they’ll see you approaching them and will try to hide. They cause whitish blotches and distortions in the foliage.

Bacillus Thuringiensis (Bt)

As soon as you notice the white moths and butterflies flitting near the brassicas, it’s time to get the sprayer bottle ready. The imported cabbageworm is the larval stage of a butterfly and the one you’ll see in the daytime. The other caterpillars are moth larvae and are active at dusk or at night.

Mix up a solution of Bt, Bacillus thuringiensis, available from the garden center. Dipel and Thuricide are brand names for Bt. It doesn’t take long for these voracious little caterpillars to inflict considerable damage to your plants, so don’t delay.

Spray both the upper and lower surfaces of the foliage, occasionally agitating the solution. Begin spraying a few days after first seeing the moths, or certainly when you see holes appearing. Set the sprayer nozzle to a very fine spray; larger drops of water will bead off the waxy foliage. One or two drops of dish soap in the sprayer will help the solution stick to the foliage if you can’t get a fine spray.

It washes off in the rain, but any Bt clinging on the reverse (bottom leaf surface) might be enough for the current batch of caterpillars. Spray the brassicas every 5 to 10 days, as long as the insects are active.


sprayer


How Does Bt Work?

Bt is a naturally occurring bacterium that disrupts the caterpillar’s digestive system when ingested. The insects stop feeding immediately and die within a day or two. Spray as soon as you notice them because young caterpillars are more susceptible to Bt than older caterpillars.

Bt effectively rids the garden of moth and butterfly larvae, including swallowtails that eat parsley. Although they won’t bother your broccoli, black swallowtail larvae feed on parsley and its relatives in the Apiaceae family, including dill, cilantro, and bronze fennel.

The tradeoff? Fewer moths and butterflies, but more undamaged produce. I enjoy watching the black swallowtail butterflies, though, so I plant the large perennial bronze fennel for the caterpillars picked off the parsley and dill. Bt targets larvae of moths and butterflies, and nothing else.

After picking the crops, I sometimes let the caterpillars feast on the remains. Those caterpillars might feed another brood of baby birds or green anoles at that time of year. Once cold autumn weather has settled into the area, these caterpillars will no longer be around to bother the fall crop. Autumn is another delightful time to garden.

Bt is perfectly safe to use on edibles. Use up the diluted solution within a few days. Store Bt in a cool location out of the sun. Buy a small fresh bottle every couple of years, as this is a live organism, not a chemical.


Headings

Page 1: Starting Seeds for Cool Season Greens, The First of the Cool Season Greens: Spinach (Spinach from Seed Is Easy!, ‘Monstrueux de Viroflay’, Spinach Bowl, Harvesting Spinach), And Then the Brassicas (Include On the Label, Damping-Off, Caterpillars on Cool Season Greens, Bacillus Thuringiensis [Bt], How Does Bt Work?)

Page 2: Broccoli (Improve the Soil for Cool Season Greens, Harvesting and Side Shoots, When the Brassicas Bloom), Mini Broccoli (Early Sprouting Broccoli and ‘Spring Raab’, Broccoli ‘Happy Rich’, Who’s My Favorite?, Gai Lan and ‘De Cicco’, Sowing Seeds, Late Sprouting Broccoli)

Page 3: Dinosaur Kale, Hardening Off Cool Season Greens (Gradual Changes), Growing Plants Under Lights (More Tips Using Artificial Light), Getting More Cool Season Greens Into Your Diet, A Veggie Omelet Recipe Using Cool Season Greens

Return to the top

Cilantro: Love It Or Hate It, And How To Grow It

Updated 6/18/2024


Why We Either Love Or Hate Cilantro


Cilantro is one of those herbs that can elicit memories of mouth-watering foodie forays to Mexico, China, and India, or… maybe not! People who know it either love it or hate it. Count me among those in the latter category. But, as a grower, I included it in my farmers’ market inventory, displaying it downwind from where I stood.


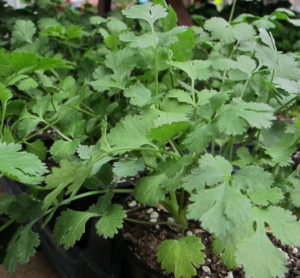
young potted cilantro

Young potted cilantro.


Those who dislike cilantro have a spot in their genotype resulting in taste and olfactory receptors that can detect aldehyde compounds. This substance reminds us of soap or something metallic. About 15% to 20% are not keen to keep it in the kitchen, although in those countries where it is a dietary staple, a greater percentage of the population like it. Closer to 25% of my customers did not use cilantro.

Cilantro originated in Iran, and spread to southern Europe, northern Africa, and southeast Asia. It has been cultivated for several thousand years. In fact, the oldest remains of coriander were discovered in pottery found in a dry Israeli cave. They were dated to approximately 8,000 years ago!

This article describes some of the problems gardeners face when growing this plant and offers some solutions.


The Nature of Cilantro


bee on cilantro flower

Cilantro flowers.

The difference between cilantro and coriander (Coriandrum sativum) is based simply on which part of the plant you’re referring to. Cilantro refers to the leaves and coriander refers to the seed.

Cilantro is a short-lived annual that prefers cool weather. All parts are edible, including the roots, although leaves and seeds are consumed most often. Other parts might be bitter.

As a member of the Apiaceae family, its flowers are umbel-shaped, as indicated in the former name for the family, Umbelliferae. This family of plants also includes parsley, dill, chervil, celery, fennel, and carrot—all characterized by their umbrella-shaped flowers. The current family name is a clue that bees (such as the honey bee, Apis mellifera) are attracted to the flowers.


Cilantro Substitutes

Another plant with similar flavor grows better in the summer than most varieties of cilantro. Mexican coriander (Eryngium foetidum), also in the family Apiaceae, from Mexico to South America and the Caribbean, is popular in the cuisine of the area. Slow to grow from seed, culantro (with a “u”) develops leaves with raspy edges, so use the younger foliage in cooking.

Vietnamese coriander, Persicaria odorata, a perennial native to southeast Asia, also has cilantro-like flavor. It’s in the Polygonaceae family and is related to the smartweeds and knotweeds.

Papalo (Porophyllum ruderale or P. tagetoides, in the Asteraceae family) is a herbaceous annual found in Central and South America. It has cilantro flavor, apparently with mint and arugula mixed in.

Although these herbs can substitute for cilantro, this article describes the plant we’re more familiar with—Coriandrum sativum.


Consider Climate


In the moderate climates of the southern U.S., cilantro planted in the autumn grows beautifully, but slows down as cold weather approaches. It often survives winter conditions with a little protection or with none at all. From the end of winter into spring, it resumes growth.

Before long, warm temperatures signal the plant to flower. When the new leaves become small and finely dissected, flowering soon follows. Pull the whole plant and use the harvested leaves. Time to start a new crop! It is best used fresh; most flavor is lost when dried.

Successive crops of cilantro grow from spring through fall in the northern half of the country. A prolonged summertime heat wave, though, even far into the north, is the beginning of the end for this crop of cilantro. Try shading young plants during hot weather, and water with cold water to prolong the harvest.


Winter Protection


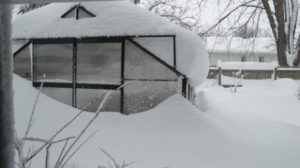
greenhouse for cool season vegetables

The small greenhouse in Maryland.


Cilantro is not likely to survive severely cold winters without the protection of a cold frame, a greenhouse, or a sunroom. Don’t coddle it with indoor temperatures that are comfortable for you. Grow it very cool, even cold (40’s to low 60’s F), for longevity and the best quality.

An unheated greenhouse offers adequate conditions for continued growth through the winter in the southern half of the country. Farther north, cilantro will grow in such a structure with minimal heating. Remember to open vents to prevent overheating in the daytime, and close them in mid to late afternoon.


Coriander


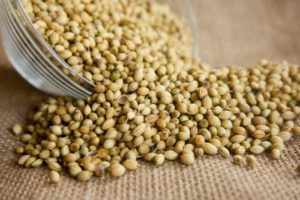
coriander (cilantro seeds)

Cilantro seedpods, or coriander.

If you’re growing cilantro for the seeds (coriander), let the plant mature naturally. Small white flower clusters will develop fruits, each of which contains 2 seeds. The round seedpods are fairly large and can be harvested when they are light brown and dry, but don’t wait until they start rolling away! Consider loosely wrapping the flower clusters with a fine mesh bag in order to catch the seeds.

Another way to harvest the seeds is to pull the plant and hang it upside down, in a mesh bag or a paper bag that permits air flow. Just make sure there are seeds already developing before you uproot the plant.

Or, let Mother Nature do her thing. Let the plant stay in the garden, go to flower, and set seed. The varieties of cilantro I’ve grown are open pollinated and not hybrids, so the next generation will look and taste like the parent generation. Ripened seeds will fall to the ground and germinate. But you might see young seedlings growing a few feet away, or at the end of the sidewalk. Maybe the critters that reside in your garden will be the only ones to reap this harvest.


What Cilantro Likes


cilantro

Cilantro leaves.


When growing cilantro, remember these 5 things: cool, young, fertile, moist, and fast. I’ll call them “Cilantro’s 5 Needs”. Customers often complained that the transplants they’d just bought from the garden center immediately went to seed. The following tips will help you grow a great crop of cilantro.

Keep a supply of seeds on hand, in case nurseries in your area don’t have the plants. Cilantro seeds germinate and grow rapidly. Starting cilantro from seed is one of the easiest projects for beginning gardeners. Seeds remain viable for a few years if they’re kept cool and dry.


1. Cool

Ask for cilantro in February or March, or whenever the “shoulder season” occurs where you live. Although that’s weeks before the last spring frost, that’s precisely what cilantro likes.

Make sure the plants are properly hardened off. That’s a process that gradually introduces cooler, sunnier, and breezier conditions to a greenhouse-grown plant. Any plant that is coddled in the warm, almost still environment inside a greenhouse is very likely to suffer stress or even death when suddenly exposed to the rigors of the outdoors.

During the cooler months of the year and during the transitional shoulder seasons, grow cilantro in full sun. At higher temperatures, provide direct sun in the morning hours, and light shade the rest of the day. You might have better results growing cilantro in the summer if it is planted in dappled sun or light afternoon shade cast by a tomato plant.

Because garden soil is cooler than soil in a pot, summer-grown cilantro will last longer if it’s planted in the ground. A thin layer of mulch will keep the soil a bit cooler.

Pot Color

herb pot.If your only option is growing cilantro in a pot, choose a light-colored pot during the warm months and a dark pot in the cooler months. Why? Because the color of the pot reflects or absorbs energy from the sun.
Summer sun beating down on a lovely cobalt blue ceramic pot can heat the soil to over 100°F. Conversely, a dark pot absorbs the sun’s energy in winter, and keeps the soil unfrozen a while longer.

If you want to include cilantro in a combination planter, plant the cilantro on the east or north side (in the northern hemisphere) of the pot. The soil there will be cooler than that on the south or west side.


2. Young

When purchasing plants from a grower, look for the youngest ones you can find. However, they shouldn’t be so young that the root system is too fragile to survive the transplant. Unless you need fresh cilantro now, avoid large plants in small pots.

If the plants are potbound, where roots tightly fill the pot, they are stressed. They should not stay in their little pots so long that the cramped quarters check their growth. If they have not been fertilized, or if they are showing signs that even a young plant’s leaves are getting finer in texture, they are stressed. And stressed cilantro plants bolt, or flower prematurely. 

I’ve seen cilantro with one seed per pot and I’ve seen it sown with 50 seeds in a pot. You want to find the happy medium, the right number of seeds to give lots of leaves to pick, but not so many that they intensely compete with each other. When I grow cilantro for sale, I sow 3 to 5 seeds in a pot. 

Since cilantro is a short-lived plant to begin with, its days are numbered with any of those warning signs: tight pot, too many seeds, finely dissected leaves, poor color. And if they’re already in flower, plant them, pick what you can, and let the bees collect nectar and pollen…for a little while. You can try cutting them back hard. If weather is favorable, you might get some regrowth out of them, but not usually.


3. Fertile        

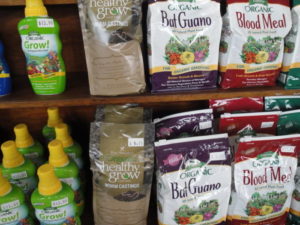
organic fertilizers

Organic fertilizers, including worm castings, bat guano, blood meal.

Dark green leafy herbs, such as parsley, basil, arugula, mint, and cilantro, need rich, fertile soil. Nitrogen, one of the primary macronutrients, is needed on a regular basis and in larger amounts than other nutrients.

Nitrogen is highly mobile, so it is easily washed through the soil by rain or irrigation. Potted leafy herbs should be fertilized every 1½ to 3 weeks, depending on soil quality, frequency of irrigation, temperature, and pot size.

Without enough nitrogen, plants lose their rich green color and become pale. New growth slows down, and older leaves turn yellow and eventually die. More importantly, poorly colored leaves taste bitter or, at least, off-flavor.

Many plant experts recommend not fertilizing herbs, but I disagree. And, no, fertilizer doesn’t make cilantro toxic! Fertilizers break down into simpler molecules, and the plant recombines these molecules into compounds needed to carry out cellular processes.

N-P-K

For cilantro, use fertilizer that has a higher first number on the package. Examples: 10-6-4, 24-8-16, and fish emulsion’s 5-1-1. Those 3 numbers on the product label refer to the percentage content of Nitrogen, Phosphorus (phosphate), and Potassium (potash) in the formula. They always appear in that order on any label: N-P-K. 

Nitrogen is essential for building chlorophyll, the green pigment in foliage and stems. Phosphorus stimulates flower and fruit production, and root development. Potassium affects cell wall strength and hardiness. This is a simplified depiction of the roles these 3 major nutrients play; there are many other ways they contribute to plant growth and function.


4. Moist

Keep soil evenly moist—not too dry, which causes wilt, and not too wet, which rots the roots. Once root rot has claimed the root system, it will not recover. Make sure the soil drains well, and don’t let the plant sit in a saucer of water. A well-established potted plant likes a thorough watering—that is, until water begins to exit the drainage hole.

Sometimes water rushes out the drainage hole immediately after application. This occurs when the soil has dried too much, causing the root ball to shrink from the inside of the pot. The next time the plant is watered, the water will find the path of least resistance, which is the air gap between the inside of the pot and the root ball. Most of the root ball will miss the opportunity to absorb water. Fill the gap with potting soil and use a wooden dowel or chop stick to firm the soil, filling the space. This will slow down percolation, allowing the entire root system to pick up moisture.

Potting soils with a large percentage of coarse material, such as perlite and pine fines (or “wood products”), drain and dry quickly. Products with finer particles, such as peat moss, compost, and loam, tend to hold water better.

Garden soil well-enriched with compost, aged manure, or planting mix encourages deep rooting. Lower levels of soil, 8-12″ down, are cooler and have more moisture, contributing to a longer life for this herb. Cilantro is less susceptible to root damage in freezing weather when grown in the ground.

Cilantro doesn’t mind cool water from the tap or even refrigerated water, but never use warm or hot water. Check the temperature of water coming from a hose that has been sitting in the sun; it might be too hot for any plant!


5. Fast

An herb that completes its life cycle in a short period of time, like cilantro, can’t be forced to live as long as other plants do. It’s not in its nature! You can have cilantro almost year-round, though, if you start seeds every few weeks or purchase new transplants, if they’re available.

Weather permitting, sow a few seeds 4″ apart in a row, about 1/2″ deep. If the soil isn’t too cold, seeds should germinate in a week to 10 days. As the seedlings grow, thin to 1 or 2 plants per 4″ of row; thinnings can go right to the kitchen.

Another option is to experiment, sowing a few seeds in each of several spots around the garden. You’ll soon notice where they grow best in any particular season.

In soils with high clay content, loosen the bed to a depth of 12-14″, incorporating (not layering) pine fines or grit to increase drainage. Amending the top 6-8″ of the garden bed with lots of organic matter encourages roots to grow quickly. Apply fertilizer every few weeks to encourage leaf production.

You can begin harvesting some of the leaves soon after transplanting, or a month or so after seeding. Pick mature outer leaves first but allow the young leaves in the center of the rosette to continue growing.


Food Curry Indian Cuisine Asian - tortugadatacorp / Pixabay


Return to the top

Headings

Page 1: Why We Either Love Or Hate Cilantro, The Nature of Cilantro, Cilantro Substitutes, Consider Climate, Winter Protection, Coriander, and What Cilantro Likes (Cool, Young, Fertile, N-P-K, Moist, Fast)

Page 2: What Is Eating My Cilantro? (Rabbits and Deer, The Black Swallowtail Butterfly, Safe Haven, Raising Caterpillars, At The Olney Farmers’ and Artists’ Market), More Insects and Diseases (Insects and Nematodes, Diseases), and The Best Variety I’ve Grown