Tag Archive | grow vegetables in containers

How To Grow Potatoes In 5 Simple Steps


Can we grow new potatoes from old potatoes?
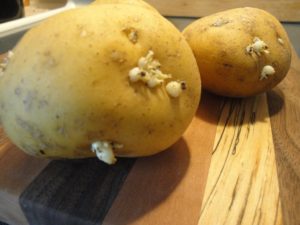


grow potatoes


Yes!

So… those potatoes left in the pantry or the bottom of the refrigerator decided to sprout. Instead of throwing them into the trash or the compost bin, try growing them! You can grow potatoes in the home garden or in large pots, following a few simple guidelines.
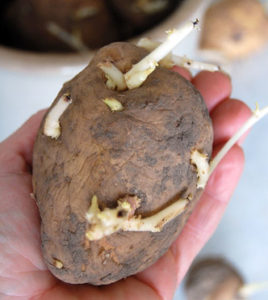
potato with eyes

Too withered for consumption, but fine for the garden.

We don’t recommend planting potatoes recently purchased from the grocery store because they’ve likely been treated with a sprout inhibitor. After the effect wears off, you’ll see the eyes begin growing. That, though, could take months.

Organic potatoes, if treated with sprout suppressors approved by the National Organic Program, sprout earlier than non-organic potatoes. Inhibitors, such as spearmint, peppermint, and clove oils, must be applied more frequently than chemicals used on traditionally treated potatoes.

Spouting potatoes (like the ‘Yukon Gold’ in photo, top) are still edible, after removing the eyes. Discard moldy and rotting potatoes. But save for the garden the ones with well-developed sprouts and those that have withered beyond the point of palatability.

Carbohydrates stored in the tuber provide energy for the developing shoots. When green leaves begin growing, photosynthesis will sustain the plant.


When can we grow potatoes outside?

Potatoes can tolerate cool soil, but not cold, wet soil or freezing temperatures. I live in USDA plant hardiness zone 7, where we plant early maturing varieties 4-6 weeks before the last spring frost. Gardeners plant mid-season and late varieties after that.

Wait for the soil to warm up to at least 45°F before planting tubers. Long-range weather forecasts might indicate whether it’s safe to plant or prudent to delay.

A garden exposed to full direct sunlight warms up earlier in spring than one in partial sun. Grow potatoes in full sun, but avoid exposing them to searing summer heat. Gardeners living in higher elevations or in cooler summer regions can grow potatoes through the season.

If the weather forecast predicts temperatures below freezing, I’ll mulch the soil with several inches of oak leaves, never in short supply around here. A thick, airy mulch insulates the ground from a sudden drop in temperature. Plants benefit from mulch kept in place all season. Not only does it moderate temperature, suppress weeds, and keep moisture in the ground, but it also prevents disease spores from splashing onto the potato’s leaves. This is easier to do in small garden plots than in larger farming operations.

Emerging foliage can tolerate light frost. It could take a few weeks for growth to show above ground.


Seed Potatoes

For a wider selection of varieties offered to farmers and home gardeners, look for “seed potatoes”. Some garden centers and many seed suppliers stock seed potatoes. They’re not actually seeds, but certified young potatoes almost ready for planting. Although they’re certified disease-free when purchased, plants are susceptible to a few pathogens as they grow.

Favorable conditions and good management practices decrease the likelihood of problems. If you’ve had diseases in your potato crops, don’t save potatoes year to year, but purchase certified potatoes instead. Don’t grow potatoes where they’ve been planted any time in the past 4 years.

Botanically speaking, potatoes are classified as Solanum tuberosum. They belong to the Solanaceae family and call tomatoes, peppers, and eggplants their cousins. Tobacco, petunias, and deadly nightshade, a poisonous weed, also belong to the nightshade family.

Potatoes are native to the cool mountainous regions of South America. In the 1530’s, European explorers gathered them and introduced potatoes to their homeland. Irish immigrants brought them to North America in the early 1700’s. Approximately 4,000 varieties of potatoes have been bred. True seeds, as opposed to seed potatoes, are poisonous when eaten and are used only for breeding purposes.

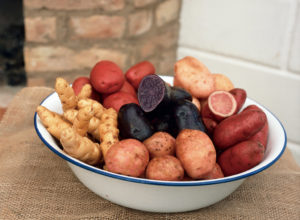
You can find potatoes with white, yellow, tan, red, blue, and purple skins and flesh. Thin-skinned potatoes, such as ‘Yukon Gold’, ‘Kennebec’, and ‘Red Pontiac’, grow well in the eastern parts of the U.S. The western states suit the thicker-skinned ‘Russet’ and other baking potatoes.


Crop Rotation

One of those good management practices involves rotating our crops. Related plants tend to be susceptible to the same pathogens and insect pests. When growing one crop in the same plot of land year after year, disease spores and insects can build up in that location. That’s why it’s recommended to move all members of a particular plant family to different plots over the next several growing seasons.

For example, if you grew potatoes, tomatoes, peppers, or eggplants in Plot A in any of the last 4 years, move your potatoes and other members of the Solanaceae family to Plot B this year, Plot C next year, and then Plot D the year after that.

Rotate among the various plant families, such as:

  • brassicas—arugula, broccoli, Brussels sprouts, cabbage, cauliflower, kale, etc., in the Brassicaceae family
  • cucurbits—cucumber, squash, zucchini, melons, in the Cucurbitaceae family
  • legumes—peas, beans, in the Fabaceae family
  • lettuces, in the Asteraceae family
  • onions, leeks, garlic, in the Amaryllidaceae family
  • Swiss chard, spinach, beets, in the Amaranthaceae family


Root Vegetables

Several varieties of potatoes.


How To Grow Potatoes In the Garden


Step 1: The First Cut


Before planting potatoes in the ground, cut them into pieces about 1½” long. Each piece should have 2-3 eyes. Let them sit in the open air for 1-2 days to seal the cut surface. This helps prevent rot in moist soil.

Small potatoes can be planted whole.


Step 2: Prepare the Soil If You Want To Grow Potatoes
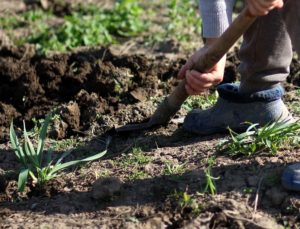


grow potatoes


Thorough soil preparation serves the immediate purpose as well as plantings in years to come. After improving the soil with generous amounts of drainage materials, you’ll need to add nutrient-rich amendments a few times each year after that.

Not repeatedly disturbing the soil profile retains healthy populations of beneficial microbes. Farmers are increasingly using no-till methods and cover crops to preserve soil structure and prevent erosion of valuable topsoil. Frequent tilling also introduces high levels of oxygen between the particles of soil, so organic matter is broken down too quickly.

Vegetable plants need good drainage, and potatoes are no exception. Loosen the soil at least 12″ deep, breaking up the clods. Potatoes struggle in compacted clay and stony soils; tubers that do form are often misshapen. Potatoes grow very well in raised beds.

Incorporate a few inches of pine fines, soil conditioner, peat moss, and/or coarse sand to improve the tilth (or workability) of the soil. Avoid layering materials in the soil profile. Layers of coarse and fine materials, with differing air pore spaces from one material to another, obstruct water percolating through the soil. This could cause soggy layers that can rot roots. For that reason, I never place a layer of gravel under plantings.

In the top 5″ of loosened soil, mix in compost, leaf mold, or planting mixes. These materials contain a variety of nutrients required by vegetables, and they encourage rapid rooting.

Aged manure and mushroom compost are not recommended for root vegetables.


Soil PH

Potatoes love heavily composted soil. They also require acidic soil, with a pH between 5.0 and 6.0. (Various websites recommend a pH anywhere between 4.8 and 7.0.)

Low pH helps prevent scab, a disfiguring disease of potato skins. Soil pH outside the preferred range for potatoes limits nutrient absorption and might cause nutrient toxicities.

Contact your local agricultural extension agents for information on taking a soil test. They can recommend preferred fertilizers, methods to lower soil pH, and varieties appropriate for your area.


Step 3: Place the Seed Potatoes


In rich, organic soil, simply lay the potato pieces on top of moist, loosened soil or nestle them into the surface. The eyes should face upward. Then mulch over the seed potatoes.

They’ll also grow when planted 2″ deep. Space potatoes 6-12″ apart, depending on variety. Because potato plants grow 2-3′ tall and might sprawl a bit, allow 30-36″ between rows.

Mulch the bed with a few inches of leaf litter, shredded leaves, and pine needles to cover the planted potatoes. It’s important to adequately shade the surface of the ground from sunlight to protect growing tubers from greening…


“Greening”?
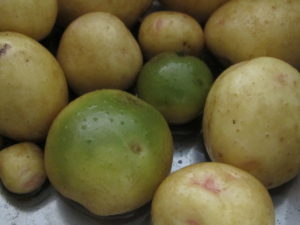
grow potatoes, but discard green ones

Potatoes with green skin needed deeper mulch.

Greening is caused by exposure to light, which, in itself, is not harmful. But the green pigment (chlorophyll) in potatoes is associated with the formation of a toxic glycoalkaloid called solanine.

Never eat green potatoes; if only the skin is green, cut off and discard that part before cooking. Never eat leaves, stems, or the berries that develop on potato plants. 

Solanine in potatoes is more concentrated when growing potatoes in high nitrogen soils and in soil that’s compacted or very sandy. Bruised potatoes, those held a long time in storage, and potatoes with large eyes are higher in this toxin. The greener the potato, the higher the level of solanine. This bitter substance is a natural repellent to insects and browsing animals.

Solanine can’t be boiled or cooked away. The level is somewhat lower in foods fried at very high temperatures, but that brings its own problems, described later in this article. I’m not intent on discouraging you from growing or eating potatoes, but moderate consumption of this popular vegetable and proper preparation make it a healthier indulgence.

Symptoms of solanine toxicity include vomiting, diarrhea, slow pulse or breathing, low blood pressure, and abdominal pain. It can cause coma and death in rare instances, so be very careful with green potatoes. If any of the flesh is green after removing the skin, I would discard the potato.


Step 4: Maintenance


Water

Water the garden thoroughly after planting and mulching. If rain is unreliable, water the garden every week, never letting the soil become dry. Provide 1-1½” of water each week if it doesn’t rain.

Avoid wetting the foliage, and water in the morning so the foliage is dry going into the night. This helps cut down on the incidence of disease. Some varieties are resistant to blight, scab, Rhizoctonia, and Verticillium wilt. Those that have not been bred with disease resistance often produce great yields when using good gardening practices.

Hollow Heart and Brown Center

Some large varieties, particularly ‘Atlantic’ (for potato chips) and ‘Yukon Gold’ (a personal favorite), might show hollow heart and/or brown center. These are physiological disorders characterized by a star-shaped cavity and a central area with dead brown tissue, respectively, in the center of the potato or near the ends.

These stress-related conditions often result from inconsistent soil moisture—for example, wet soil after a period of dry soil. In addition, a period of prolonged cold weather during tuber formation can cause brown center. Spacing seed potatoes too far apart and using small seed potatoes (with too few eyes) can be the cause. Low potassium and other nutrient deficiencies can initiate the disorders.

The potato’s skin shows no indication of a problem. Affected potatoes aren’t perfect but are still edible.


Hilling Up 

As the plants grow, hill up soil against the stems of the plants. Take soil from another part of the garden, adding a few inches up the stem and about 12″ out from it. This is an option—not necessary—but it should increase the yield.

Like tomatoes, potatoes root along buried stems. As they root, they’ll develop another layer of young potatoes at the ends of the stolons. Hill up around the stems 2 or 3 times during the growing season to maximize the harvest.

An alternative is to start potatoes in a moderately deep trench, reserving excavated soil on the side of the bed. Periodically fill in the trench with amended soil, a few inches at a time.


Fertilizer

Every few weeks, apply a complete fertilizer. The 3 numbers on the package representing nitrogen, phosphorus, and potassium (N-P-K) should be in a ratio of 1:1:1 or 1:2:2. Avoid fertilizers high in nitrogen. An analysis close to 10-10-10 or 5-10-10 is adequate.

Although you could use chemical fertilizers, they tend to damage populations of beneficial microbes. But, until the soil warms up, microbes aren’t sufficiently active to break down the organic components into molecules the plants can absorb. That’s when I use chemical fertilizers, and then switch to organic products when the soil warms.

To help prevent disorders in developing potatoes, it’s recommended to apply smaller concentrations of fertilizer more frequently.


Insect Pests

Colorado potato beetles can be especially bothersome as they consume significant amounts of foliage. Inspect the undersides of the leaves for yellow-orange egg masses and remove them. The beetles have 10 black stripes on their tan wings. Immature larvae are orangish-red with 2 rows of black dots down each side. Bacillus thuringiensis var. tenebrionis, a biological insecticide, kills this beetle.

Aphids might congregate in large numbers on the plants. A brisk spray of cool water from the hose takes care of most of them. Encourage ladybugs, braconid wasps, and green lacewings to populate your garden. For severe infestations, prepare a solution of horticultural oil and spray early in the morning. Apply the solution to the bottoms of the leaves as well. Read the label.

Cutworms feed on sprouts emerging from the ground. Since these C-shaped larvae become moths, treating the potatoes with Bacillus thuringiensis var. kurstaki effectively kills them. Keep in mind that they’ll have to eat some of the foliage in order to ingest the Bt.

Slugs and Deer
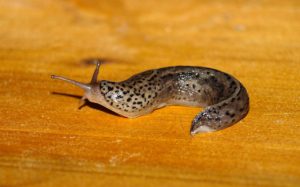
slug

A slug.

Slugs reproduce rapidly in moist conditions and where they can hide in crevices during the daytime.

Lay a board on moist ground, and slugs and snails will gather there after feeding through the night. You might notice those silvery slime trails on tender foliage. Early in the morning, take an old knife to the garden and… dispatch them forthwith! Or use organic Sluggo or similar product, which does not contain toxic chemicals. Except to slugs and snails. Read the label.

Although potato foliage is not the favorite choice of warm-blooded animals, deer and others will feed on it when not much else is available.

Other members of the nightshade family also host these pests. Row cover secured over the planting excludes most insects and browsing animals.
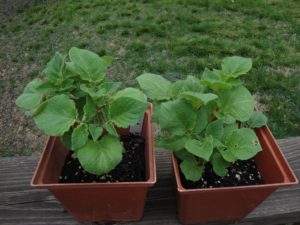
 

grow potatoes in pots or in the garden

Potatoes that sprouted in storage are now growing new plants in 6″ pots. They’ll need protection from hard frost if planted, but I didn’t want to delay planting the deteriorating tubers.


Headings

Page 1: Can we grow new potatoes from old potatoes? (When can we grow potatoes outside?, Seed Potatoes, Crop Rotation), How To Grow Potatoes In the Garden, Step 1: The First Cut, Step 2: Prepare the Soil If You Want To Grow Potatoes (Soil PH), Step 3: Place the Seed Potatoes (“Greening”?), Step 4: Maintenance (Water, Hollow Heart and Brown Center, Hilling Up, Fertilizer, Insect Pests, Slugs and Deer)

Page 2: Step 5: Harvesting!, How To Grow Potatoes In Containers, Grow Potatoes For Their Nutrients (The Power Of the Purples, Potato Skins, Resistant Starch), The Problem With High Heat
Return to the top

Early Spring: Wrens, The Wire Basket, And Edibles

2021


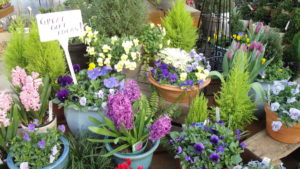
early spring offerings at garden center, potted bulbs, violas, lemon cypress

Early spring offerings at the garden center where I worked for a few years.


Early Spring Activities


This is my favorite time of the year…when winter transitions into spring. In this USDA zone 7b location, in southern North Carolina, warm spring weather might alternate with cold rainy days, but the trend, at least, is going in the right direction.

Give the gardens some time to dry somewhat before working in the soil. Walking on wet soil will collapse the minute air tunnels that help the soil drain. We’ve had so much rain through the winter that gardening activities might best be limited to growing plants in pots for now.


For the Birds


Yesterday, after working on the potted plants outdoors, I sat for a few minutes just to listen to the songbirds calling to each other. Cardinals, goldfinches, Carolina wrens, chipping sparrows, tufted titmice, and robins are communicating with their mates or looking for new ones. A delightful soundtrack!

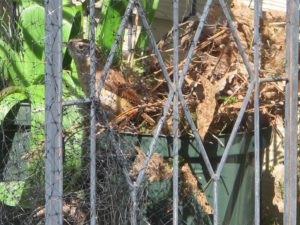
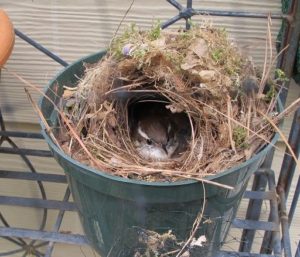
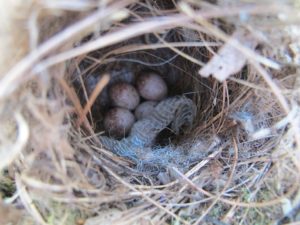
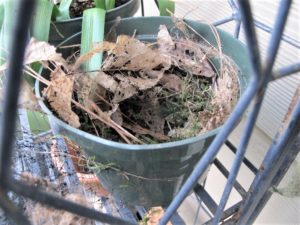
In early spring of last year, a pair of wrens built their nest in an empty 6″ pot (photos, below), sitting on a plant stand. This location is under an overhang and faces south, creating a warm microclimate. The deer netting stopped raccoons from climbing the stand, but it didn’t deter the birds.

The wrens and nuthatches, in particular, normally come to the feeders only a few feet away from where I pot up plants. Unfortunately, the wrens abandoned the nest after laying eggs, even though they were comfortable having me around. It appeared that a snake must have scared them off. Occasional disappointments are par for the course in the natural world. The eggs were cold when I found them and wouldn’t have hatched.

The wrens are now investigating the pots stored under the potting table, so I moved one to the plant stand.


Replanting the Wire Hanging Basket


The Basket and the Liner 

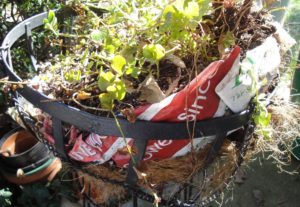
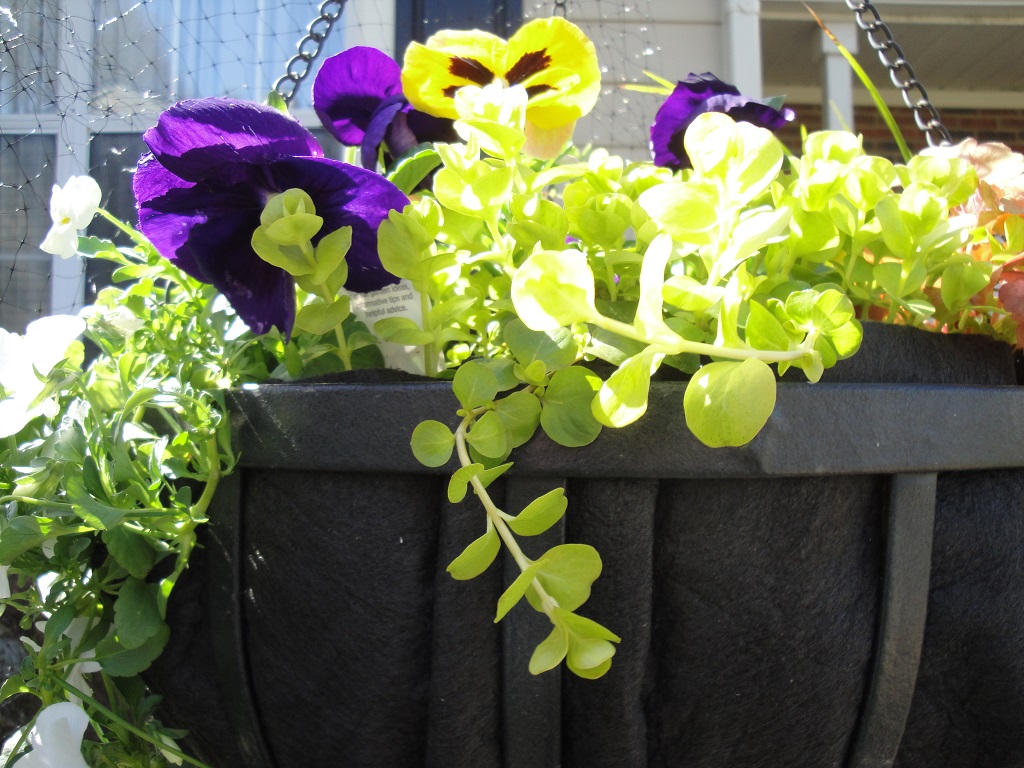
A 16″ wire hanging basket has hung on the shepherd’s hook in the front garden for 5 or 6 years. It’s planted with a few perennials and a rotating cast of colorful characters. For fall through mid-spring, I add pansies and violas, and then replace them with heat tolerant annuals for the summer.

This time, instead of buying another coco liner that the birds will instantly pick to shreds, I used a large fabric pot that had been idly hanging around the shed for years. After planting and installing it on the hook, I wrapped the completed basket with deer netting to prevent the kind of damage they can do.

The heavy synthetic material was cut and shaped, and the excess was later trimmed to just above the rim. The material is similar to landscape fabric, but sturdier. So, I wasn’t concerned about the liner slumping through the wires. Nor am I concerned that the birds would steal it! Water will drain through without taking any soil with it. It doesn’t look bad, after smoothing the sides. In fact, I now prefer it over coco liner!

More Options

So, maybe you have something that can be repurposed to use in your wire baskets. A couple of layers of porous landscape fabric or heavy burlap probably would work as well. I was prepared to tie black deer netting inside the basket to support the liner, but it wasn’t needed.

When planting wire baskets, I always add a layer of plastic inside the liner to help slow evaporation. It also delays decomposition when using a coco liner. Poke several holes in the lower third of the plastic to allow for drainage. But keeping the lowest 1″ to 1 1/2″ intact will provide a small reservoir of water for thirsty plants on a hot summer day.


Add Some Color For Early Spring Plantings

On one of my daytrips to northern North Carolina last autumn, I bought a few packs of pansies and violas from Beautiful Earth Garden Shop on NC 704 in Lawsonville, North Carolina. (Phone 336 593-1083; call for hours.) Well, I never got around to planting them, so they overwintered on the covered porch. Rabbits helped themselves to the flowers as they opened. But the plants look fine, and it was time to give them a proper home.


wire basket, planting

Help wanted!


I replaced about 1/3 of the soil in the basket with fresh potting soil. The new soil contains a fair amount of peat moss, which provides the acidity these plants need. The pansies and violas will fill the spaces between the existing heuchera, variegated pachysandra, and acorus.

Golden creeping jenny (Lysimachia nummularia ‘Aurea’) replaces the English ivy that the deer yanked out of the pot. Chartreuse foliage spreads wherever it wants and will trail over the sides. These existing perennials already have started growing during this early spring weather. Creeping jenny spreads rapidly in moist soil, so take care if you prefer not letting it escape to the garden.

I’ll enjoy this arrangement until warm weather settles in, and when summer annuals will be planted in all new potting soil. Violas and pansies die in hot temperatures but can be grown again in late summer/autumn. In this climate, they’ll survive the winter and flower most of that time.


And Edibles for Early Spring


Spinach ‘Monstrueux de Viroflay’


spinach 'Monstrueux de Viroflay' in pot, early spring

Last year’s spinach ‘Monstrueux de Viroflay’.


Also called ‘Monster of Viroflay’, this is my favorite spinach to grow in pots. A few plants sown last fall remain in a 14″ wide bowl (6″ deep), so I added more seeds and some fresh potting soil around them. The seeds are 4 years old, so they might germinate…but they might not (…they didn’t).

Spinach, lettuce, and other greens are among the easiest crops to grow from seed, either in pots or in the garden. All seeded pots outside must be covered with deer netting to protect them from perpetually hungry chipmunks, mice, birds, and squirrels.

Oxalates and Kidney Stones

This spinach, a French heirloom dating back to 1866, has huge leaves and a milder flavor than the smaller-leaved varieties. It also has lower levels of oxalates, which, for some, are a concern. If you get kidney stones, ask your doctor, and also ask about kidney pH levels.

A diet high in animal proteins tends to lead to an acidic (or low) pH. On the other hand, those consuming a primarily plant-based diet have higher (more alkaline) pH levels. People with acidic systems are more likely to develop kidney stones.

We’re all different, of course. And to further complicate matters, our bodies make oxalates, some absorb more than others, and certain gut bacteria consume them!


Broccoli


early spring, broccoli


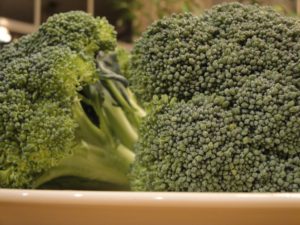
This year, I bought a variety called ‘Lieutenant’. It was the only one the garden center had. The label says “few side shoots”, which is a disadvantage since those smaller side shoots can prolong the harvest for weeks or months. But I’ll try it. I planted 4 of them in a 20″ wide pot, in soil well enriched with composted manure.

As broccoli grows, I’ll harvest a lower leaf now and then to add to soup or a stir-fry. Super nutritious.

(***Update***: Although I’ve grown broccoli twice a year in these pots for a few years, this crop of ‘Lieutenant’ was rather disappointing. May 2021)


Lettuce


lettuce 'Red Sails'

Lettuce ‘Red Sails’.


I planted a few ‘Red Sails’ from the cell pack into a 12″ wide pot. This red and green leaf lettuce is more heat tolerant than many and should keep producing for quite a long time. Even so, lettuce prefers cool weather and can be planted in late winter in southeastern U.S. Red-leaved lettuces have more beneficial antioxidants, such as anthocyanins, than green lettuces.

Pick the outer leaves and let the center of the plant continue growing. When it turns bitter or goes to flower, that’s the end of lettuce in the garden until the weather cools again in autumn. Regularly fertilizing all greens with fish emulsion or some other high nitrogen product provides nutrients for steady growth.

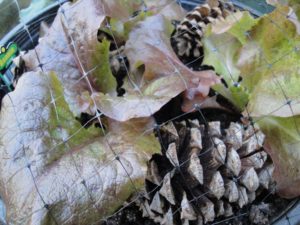
Sharp-tipped pine cones and deer netting discourage animals from burying seeds from the bird feeder.


Strawberries For Early Spring Planting


The garden center also had strawberry plants, which looked very healthy. I planted all 4 ‘Ozark Beauty’ plants in a 12″ pot. Yes, that is tight. There’s limited space where I currently live, so this is just a fun experiment. Later, a larger garden will be planted with lots of berries and other perennial edibles.

When transplanting strawberries, be sure to keep the crown at or slightly above the soil surface (photo, above), not buried. Before long, big ripe berries will join me for breakfast, even though the first few weeks of flowers should be removed. This is another plant that will need to be netted. Everyone wants ripe strawberries.

***Update***: I harvested about 15 yummy strawberries this season. The first few were delicious and large, followed by smaller berries. It’s recommended to remove all flowers during the early weeks, but, for this pot, I just let them grow…and set fruit. June 2021


strawberries

No, these did not grow on the potted plant.

*    *    *    *    *    *    *    *    *

I need a good-sized pot to grow snap peas on a trellis, and another for dinosaur kale. Maybe I’ll find them under the potting table, before they’re claimed by our local wrens.

This is just the beginning. There are so many cool season crops, from seeds or transplants, that can be grown in containers. Ask your local agricultural extension agent for early spring recommendations tailored to your climate.


Return to the top


Did She Say Sustainable Bunching Onions?

Updated 3/8/2024


The Onion Patch


In a patch of soil under the cold frame in the old Maryland garden, I grew several dozen Japanese bunching onions. Although the frame was cold in the winter, it didn’t freeze, and those little plants provided us with all the green onions we needed for 5 or 6 years without replanting!

So, how do you get sustainable bunching onions? After describing two species of onions and sowing seeds, I’ll explain the “sustainable” part.


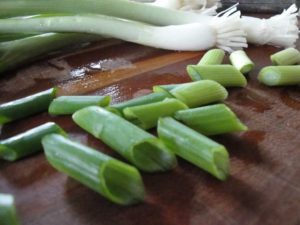
sliced bunching onions

Bunching onions purchased from the grocery store.


Two Species of Onions


Allium Cepa, the Bulbing Onion

Allium cepa is the commonly grown bulbing onion. Onion sets, small immature bulbs, can be purchased from garden centers in late winter and sometimes in autumn. Plant onion sets a few inches underground, and pull them as green onions before they form bulbs. Planting sets every couple of weeks will provide a continuous harvest.

Left longer in the garden and spaced properly, though, the bulbs will grow larger. Your garden’s latitude, which affects day length in the growing season, will determine which onion varieties will successfully form bulbs. Short-day onions are grown in the southern United States, and long-day or intermediate varieties are grown farther north.

Check with your local agricultural extension office for names of varieties that will mature as bulbs in your region. Bulbing onions also can be grown from seed or purchased in bunches of young seedlings, but most varieties require more than 110 days to mature.


Allium Fistulosum, the Bunching Onion

The variety I grew in the cold frame was called ‘Nabechan’. This variety is a member of the species, Allium fistulosum. Japanese bunching onions, or scallions, don’t grow bulbs. Several varieties are available, and all remain straight-sided, with minor swelling at the base. Bunching onions are available as seeds for home gardeners. 

Bunching onions are the ones usually sold in small bunches at the grocery store (photo, above). I use them in salads, omelets, stir-fries, and soups. Once or twice a week, I add a green onion to the spinach, mushrooms, a colorful lunchbox pepper, and kale in the veggie omelet. It’s really good with cheese and microgreens or slices of avocado in the fold…maybe some bacon on the side, and rye toast.

Although both species of onions can be harvested as green onions, the ones I sold at farmers’ markets were ‘Nabechan’ bunching onions. They were ready for the market when the 15 or 20 seedlings in 6″ or 6½” pots approached a harvestable size. Here’s how to grow them, if you’d like to give it a try.


Starting Seeds For Bunching Onions


Sow the seeds 1/4″ deep and about 1/4″ apart in 6″ pots filled with seedling mix. Water gently, so the seeds aren’t dislodged. They germinate well at temperatures around 70° to 80° F.

When the seeds germinate, give them full direct sunlight (6 hours at least), and lower the temperature. They thrive with cool to moderate temperatures, but avoid subjecting them to frost at this early stage. Inadequate light creates weak seedlings and feeble roots.

Keep the soil moist. Onions have shallow roots, and fail when grown too dry. Fertilize every 2 weeks with fish emulsion, Sea-Plus, or any complete fertilizer.


Transplanting Seedlings Of Bunching Onions

Once they’ve grown a few inches tall and are easier to handle, the seedlings will need to be spaced farther apart.

First, fill the new pot or pots with dampened potting soil to within 4-5″ of the rim. Yes, that seems too low, but more potting soil will be added as the seedlings grow. Firm it in lightly.


Where To Place the Crown

Now, gently ease the young plants and the soil mass out of the pot. Don’t let exposed roots dry out during this process. Cover them with a damp towel as you work.

You’ll see the 3 main parts of the onion: the green leaves, the white roots, and the region between the leaves and the roots, called the crown.

Hold up the seedling’s leaves and transplant it into the new pot. Space seedlings 3/4-1″ apart. It might be easier using a pencil to poke a hole into the soil for the roots. Plant with the crown at the soil surface, and lightly firm the soil around its roots. Add a small amount of potting soil over the bases of the stems to stabilize them. Plant them in wider nursery pots, if you choose, where they can remain until harvested. But they won’t require a deep pot.

Water the seedlings and place the pot in direct sun. But avoid harsh hot sun for a couple of days while the roots recover.


Growing Long White Stems


whole bunching onions


The trick to getting those long white stems is simply to plant the seedlings lower in the soil. Excluding light prevents chlorophyll from developing, blanching the stem. Leeks, another member of the Amaryllidaceae family, get their long white stems in the same way.

Every 10-14 days, add soil between the seedlings, an inch or so at a time, while holding the leaves upright. Although this sounds contrary to normal horticultural practices, the onions will recover. Chlorophyll in the covered stems will be reabsorbed by the plants.

Older leaves will turn brown and can be removed. But strong new foliage will emerge while the underground stem continues to thicken. It’s important to give seedlings full sun for optimal photosynthesis.

The pot is finished when the soil surface is about 1″ below the rim of the pot. The bunching onions will have 4″ or 5″ of white stem below the green leaves (longer than in the photo of store-bought onions, above).

Introduce the seedlings to stronger sun and cooler temperatures outside in the daytime. Protect them from frost while they’re hardening off. With good growing conditions (direct sun, moderate to cool temperatures, moist soil, and fertilizer every 2 weeks), the onions can remain in pots until they’re harvested.


Here’s Another Method of Seeding Bunching Onions


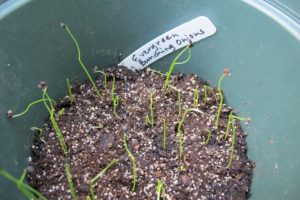
'Evergreen' bunching onions, seedlings in a pot

‘Evergreen’ bunching onions.


In the photo above, I started seeds about 1½” above the bottom of a 6½” pot, and spaced them farther apart. Adding soil every couple of weeks blanched the stems. Spacing them farther apart from the beginning obviates the need for transplanting.

I tilted the pot on the plant stand outside so the seedlings could catch the rays of the low sun during the shortest days of the year. On cold nights, the pot came indoors. These are seedlings of a variety called ‘Evergreen’.


Planting Bunching Onions Outdoors in the Garden


If you want to grow bunching onions in the ground, plant the pot of seedlings as a unit, covering the stems with 1″ to 2″ of soil. With good soil preparation and careful monitoring, young seedlings can be transplanted into the garden at this stage, weather permitting.

Seeding directly into prepared garden soil is another option if you can monitor progress and keep pests away. Remove weeds when they’re small; onions’ roots can be damaged even with shallow cultivation. By the way, deer and rabbits don’t eat onions.

As the seedlings grow, occasionally hill up soil around the base of the plants to lengthen the white stems. Within about 2 months of seeding, the bunching onions are ready to pull as needed in the kitchen. Younger plants are especially delicate and tender as a garnish. If they’re spaced an inch apart, the seedlings won’t need to be thinned.

Non-bulbing onions are easier to pull from the soil than other types of green onions that have begun to form bulbs. That’s why I prefer growing Japanese bunching onions for green onions. If needed, use a narrow trowel or a butter knife to help pry them from the soil if you want to harvest the whole plant or if bulbs have started forming when using onion sets.


Negi Onions

Bunching onions traditionally are sown in cell packs with several seeds per cell. Later, they’re planted out without separating the seedlings, allowing them to grow and be harvested as a “bunch”. But, in order to grow “sustainable” bunching onions, they need to be grown separately from each other.

In the popular “Negi” method of growing bunching onions, seedlings are spaced farther apart from the beginning and hilled deeply over time. These scallions are older and larger than the ones I grow, resembling leeks.


Here’s the Sustainable Part


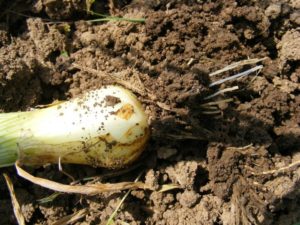
green onion root


This is where bunching onions become sustainable bunching onions.

Instead of pulling out the entire plant when harvesting, insert a knife into the soil a few inches, making a cut through the stem 1/2″ to 2/3″ above the root system. By leaving the bottom of the stem and the roots intact, the plant will regenerate and give you another green onion after 2 or 3 weeks of favorable weather! 

Experience will sharpen your aim, but whether the stem was cut too high or too low, it doesn’t matter. It’s all edible. If you removed the whole stem accidentally, just cut off the bottom 1/2″, with roots, and replant 2″ below ground. It’ll take longer to grow, but it probably will survive.

With some protection in colder climates, it’s possible to harvest mature bunching onions all winter long. That’s why I grew them in a cold frame. Just be sure to plant enough of them. Depending on the temperature, they might remain semi-dormant and not regrow until the soil warms up. And what a surprise to see them vigorously re-emerge in the spring to provide another year of harvests!


“Can I Plant Bunching Onions From the Store?”


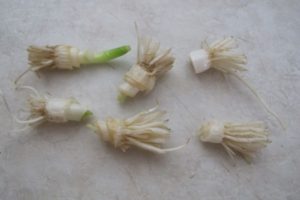
bunching onion, green onion rooting

Cut stems from the grocery store, later planted into a pot.


Sure can! Buy a bunch of green onions (as in the photo at the top), looking for those with clean white roots. Choose the stems you intend to use in cooking, and cut 1/2″ above the crown. Don’t let them dry out, and plant 2″ deep into a pot of lightly moist soil as soon as possible. Adding more soil later will lengthen the white part of the stem. Cut stems initially planted too deeply might exhaust themselves before reaching the light.

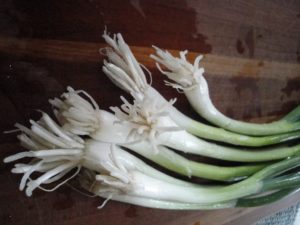
In the photo above, I cut these bunching onions over a period of a few days, and placed them in a clear plastic bag with 2 drops of water. Until a pot of soil had been prepared, the bag sat on the counter, in bright indirect light. You can see the older ones already sprouting. Growing onions in water, even short term, can turn them mushy and really smelly. That’s why planting them directly in soil is preferred.

Keep the pot moist and sunny, and you’ll see a green onion growing probably within 7 to 10 days during the growing season. In the middle of cold winter weather, though, keep the pot in a cool but sunny window indoors or in a cold frame. Soil that freezes could kill the root at this stage. Pick the entire plant or cut the stem when it has grown to the desired size.


Bottoms Up!


If you’re growing green onions from onion sets, this is one of the easiest crops to grow. Seedlings take a little more patience. Because they retain good flavor and substance for a long time, you can harvest what you need and let the rest of the bunching onions continue to grow. Sometimes, all I need is a single green leaf for a small omelet or a garnish.

Here’s to sustainability! Oh, and the reason why those ‘Nabechan’ bunching onions in Maryland failed after several years: contractors replacing the siding on the house trampled them to mush.


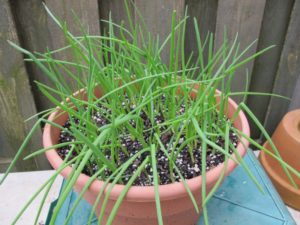
green onions in a pot

These were planted as onion sets in late winter, before starting seeds of bunching onions. They’ll be harvested as green onions or when they have small bulbs.


Return to the top