Tag Archive | English ivy

New Gardens For a New Property: What To Do First


2021

Updated 8/26/2024


A New Home and New Gardens!


new gardens

View from the front porch.


As you might know from reading The Farm In My Yard, I moved from Rockville, Maryland to Charlotte, North Carolina in 2013. I worked for a few years, while watching over my elderly mother. After she passed away in 2020, the search was on for a larger property in a smaller town. Must-haves included reasonably quiet surroundings, lots of nature, room to play in new gardens, and no HOA. This article includes information from a landscaper’s perspective that might help first-time property owners.

Success! In late October, I moved to a new home in northern North Carolina. A few obstacles didn’t stop my tireless realtor, Erika, from finding this (almost) perfect little house. There was Covid, for one, and the reluctance on the part of homeowners to list their homes for sale. Very few livable offerings in my price range came to the market. As soon as they did, they immediately went under contract.

As many buyers have done in this tight market, I made an offer on the property sight unseen. Well, truthfully, I did drive by the house before submitting an offer, and liked what I saw. Trees, woods, space, and sunlight—perfect for a gardener! The previous owners made some major improvements, saving me the trouble and the expense. But I had no idea what the interior looked like.


Inspections

When buying a house, have all the inspections done before closing, as recommended by your realtor or for your own peace of mind. Estimate the cost of necessary upgrades and repairs.

Particularly for older homes, check the roof and electrical, plumbing, and HVAC systems. Look for water damage and mold, pests and wood rot, foundation issues, adequate insulation, storage space, and evidence of ongoing maintenance.

Negative findings could nullify a contract or provide a basis for negotiation between your realtor and the listing agent.


The Lay of the Land


Small towns, farms, and independent businesses dot the landscape in this part of Wilkes County. Several vineyards and state parks attract visitors to these lovely rolling hills, and rivers offer lots of sporting opportunities. Drive along any of the scenic roads, and new vistas open at every turn; the Blue Ridge Parkway is only half an hour away. Beautiful countryside!

looking east

The big oaks frame a sunrise.

My new home, a one-story house built in the 1940’s, sits on 1¼ acres of mostly level land. The view from the front porch looks over a field, a few houses, and downslope toward a small stream. Stunning sunrises greet me from that direction almost daily.

Most of the trees’ leaves have fallen from the massive limbs of the native white and willow oaks (Quercus alba and Q. phellos). A few of these trees tower over the eastern border of the property. In the summer, those toward the west will shade the house from hot afternoon sun.

The mighty oaks came first, judging by their size, and then the house. If I were to name the property, Quercus Magnus would seem fitting.


Preliminary Plans for New Gardens

There’s plenty of space for the berries and the vegetables to bask in the sun. Plenty of space to raise shade-loving perennials in the fenced enclosure north of the great oaks. And plenty of space for gardens that will support birds, bugs, bees, and butterflies.

Also, importantly, there’s room to grow plants to sell at the local farmers’ markets, as I did in Maryland for 25 years.


After Moving In


Deciding what to do first depends on the season, your climate, and the condition of the house and gardens. Priorities often reflect our occupations or interests, so artists might first set up a studio while contractors organize tools in the outbuildings. Growing families might rank bicycle storage, a big kitchen, and an extra bathroom at the top of the list.

And gardeners? Well, we look at soil quality, existing gardens, and sunlight. This gardener prefers a large, mostly blank slate. Others call it a lawn.

In April, I’d be concerned about starting seeds for the market, getting the summer vegetables and flowers planted, and cutting grass. But it’s December now. The yard needs tidying, houseplants need to find their homes, and, of course, we must bake Christmas cookies. Not to mention, those boxes won’t unpack themselves!

Moving into a house that doesn’t need major repairs eases the stress. To be sure, there are some improvements that can and will be made, but nothing that needs immediate attention. Wouldn’t mind a new kitchen with a dishwasher, Santa. (Chocolate chip or almond crescents?)


Trees and Shrubs


Poor Pruning Practices

Walking around the property will highlight issues that need attention. Check the trees and shrubs for dead or broken branches or call a licensed arborist for a professional assessment. There are some dead twigs way up in these oaks. A brisk wind shakes them loose, so the truck stays parked under the carport. Fortunately, that debris falls short of the house.


I’ll hire an arborist to clean up the trees and remove branches that have been headed back. Heading back, or bluntly cutting off the end of a branch, causes many epicormic shoots to form. Those are new growing tips emerging from buds concentrated close to the cut. The shoots also can cover the length of the branch. Epicormic shoots have weak connections to the branch, and, over time, most will fail and fall from the plant (photos, above).

Similarly, topping trees is, in my opinion, not recommended. Yes, it reduces the height, temporarily, but topped trees in winter are hardly natural-looking and not attractive (photo, below). They, too, drop twigs over an extended period of time.

An expert arborist might be able to undo the damage from heading back or topping. However, removing the tree might be the most economical solution. Research appropriate tree species for your property and where to plant them. Keep in mind that plants almost always achieve dimensions larger than those indicated on the label. Your local agricultural extension office can help. Check with botanical gardens and sources such as your state’s native plant societies.


topped tree, sky

A topped tree.


The Root of the Problem

Trees planted close to the foundation can threaten its structural integrity. Consider having them removed.

The same ruthlessness applies to the wrong tree in any space. Keeping silver maples or weeping willows close to the house, septic system, or underground utilities begs for trouble. This is where an arborist or a well-informed landscaper can recommend more fitting species and a pleasing design for better curb appeal. Call 8-1-1 to have underground utility lines marked.


Constricted

Look for old stakes and wires still looped around trunks or branches. Wooden posts rot, but wire and synthetic rope from clotheslines, fences, and hammocks persist.

As trunks and branches grow in girth, they attempt to grow around the obstruction, usually cutting off the vascular system inside the bark. This results in the death of those parts of the tree that cannot receive water from the roots. Early fall color on isolated branches might indicate trouble, such as pests or physical constriction.

In the Maryland garden, a dogwood tree died for no apparent reason. After cutting it down and opening the bark in several places, I found plastic rope deeply embedded in the trunk a few feet from the ground. Although the damage appeared several years after I had moved there, it eventually killed a beautiful dogwood.


Flares and Girdling Roots


Most trees flare out where the trunk descends into the ground. If this flare is missing, see if soil has been piled up against the trunk, and remove it.

Construction around unprotected trees can deposit soil that cuts off the oxygen supply to the roots, resulting in the plant’s decline. As little as an additional 1-2″ can damage trees. Also, parking vehicles over the root system compacts the soil, impeding air and water penetration. Keep in mind that tree roots extend well beyond the dripline, or the edge of the canopy.

Check for a girdling root crossing over the trunk at the soil line or below it. As it grows, the root will hinder growth of that section of the trunk, making the trunk look straight-sided where it enters the ground. Cut it out before the tree tries to grow around it. Maples and other surface-rooting trees are notorious for this.

There’s no flare at the base of this maple tree (photo, above) and at least one large girding root is constricting the flow of water and nutrients from the soil. I noticed large dead limbs in the canopy, so the tree might be removed.


English Ivy


english ivy growing up a white oak

English ivy growing up an oak tree.


Vining English ivy (Hedera helix) is growing up a white oak’s trunk, using rootlets to cling to the bark. All the vines will be removed for 4 main reasons.

red-shouldered hawk dec 2021First, English ivy is a woody vine, so its stems will grow in girth just as a tree branch does. As they wrap around the tree trunk or the limbs and thicken over the years, the ivy stems will constrict tree growth, killing limbs and possibly the tree.

Second, the evergreen ivy holds moisture and debris close to the bark, and could encourage insects and diseases.

Third, as ivy scampers over the ground and up the trees, it provides safe haven for rodents. Birds of prey and other predators cannot see them. Here’s a red-shouldered hawk perched in a dogwood tree, looking for dinner.

Fourth, ivy competes with small native plants, crowding them out.

So, the ivy must go.


Headings

Page 1: A New Home and New Gardens! (Inspections), The Lay of the Land (Preliminary Plans for New Gardens), After Moving In, Trees and Shrubs (Poor Pruning Practices, The Root of the Problem, Constricted, Flares and Girdling Roots, English Ivy)

Page 2: The Lawn (Safety First, Less Grass to Mow, Grass Clippings, Spontaneous Combustion), Drainage (Hold the Water), New Gardens for Old Plants (Virginia Sweetspire), More New Gardens and Less Lawn (The Black Walnut, The Ravine and the Woodland, Passionflower and Phlox ‘Minnie Pearl’)

Page 3: Planting a Few Trees (The Rule of Thirds, Too Cold to Plant New Gardens?, Viola, Different Players—Same Script, All Those Leaves), A Welcome Surprise (A Firm Foundation, Heeling In, Iris, Chores Indoors), Christmas Already?, and Concluding

Return to the top of Page 1

What Is Wrong With My Houseplants?


2019: HAPPY NEW YEAR!


Does your list of New Year’s Resolutions include paying more attention to your houseplants? Now that the busy holidays are over, we’re almost back to our routines. The plants look forward to returning to their normal locations. They missed those bright windows!

If you’re dissatisfied with your plants’ appearance, today might be a good day to give all the houseplants a thorough examination and a good cleanup.


 Philodendron selloum, easy houseplants

Philodendron selloum adds a tropical element to the indoor environment.


What Is Wrong With My Houseplants?


Let’s begin with some easily recognized problems:

  • the plant has collapsed into a sad-looking heap of wilted foliage
  • leaf tips are brown
  • leaves are turning yellow
  • many of the leaves are dropping off
  • the flowers are gone

But your houseplants have sentimental value, so they’re not going into the trash…or into the compost pile. And you know they probably will recover with a little attention. After all, the same thing happened last year.

A home without houseplants looks sterile—to me, anyway—so there will always be indoor plants wherever we live. They rid the air of benzene, formaldehyde, and other pollutants. In return, we get a small boost in the humidity and oxygen content of the air we breathe.

And we enjoy living with nature. Many studies point to the psychological benefits of living with plants at home, at the office, in school, and in the community.

With the renewed interest in growing houseplants, a huge number of species and varieties are available. Popular plants, such as Fiddle-leaf fig (Ficus lyrata), are in such high demand at garden centers that supply is often difficult to maintain.

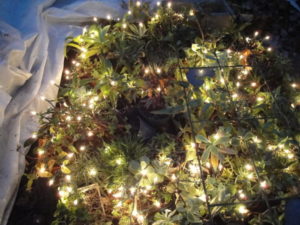
cold frame before covering, with mini lights

Several dozen plants are protected here, and will be covered with plastic for the night.

There are hundreds of plants in my collection, from 1″ tall miniature Haworthias to a 6′ tall 40-year-old ponytail palm (Beaucarnea recurvata).

Many succulents and half-hardy perennials spend the winter in the cold frame outdoors, heated with a few strings of miniature incandescent Christmas lights and covered with 2 or 3 sheets of clear plastic (photo, right). There’s just not enough room inside for everyone!

We often have warm winter days in the Carolinas. This gives some houseplants the opportunity to spend a few afternoon hours on the enclosed deck, basking in the mild sunshine.


My Peace Lily Is Wilting


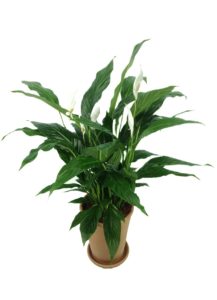
Spathiphyllum, or peace lily, popular houseplants

Peace lily, Spathiphyllum.

Wilt in peace lilies due to underwatering is a common problem. There are few plants that exemplify wilt more clearly than this one. A dry but still living peace lily, once watered thoroughly, will recover. But a few leaves might turn yellow, and they won’t green up again.

Peace lily (Spathiphyllum spp.) is commonly available and a good choice for beginning gardeners. You see them in malls and offices all over the country, where lush foliage lends a tropical flair to indoor spaces. Garden centers sell cultivars ranging from robust five-foot-tall specimens to table-top varieties less than 10″ tall.

They like soil that stays lightly moist all the time. But roots that stay wet all the time (from overwatering, overpotting, sitting in a wet saucer, or poorly-drained soil) are unable to “breathe”. Air and water are equally important to root health. Tiny root hairs that absorb moisture rot in wet soil, so the plant can’t get water to the leaves, causing the familiar wilt. A plant can wilt from either dry or constantly wet soil.


Keeping the Peace Lily Tidy

Strelitzia

Bird of paradise.

When yellow leaves appear, remove the entire leaf—both the blade (the wide part) and the petiole (the narrow leaf stem). The petiole is connected to the crown, stem, or the main trunk of a plant by a thin layer of cells. That layer of cells, the abscission layer, helps the petiole separate from the main part of the plant if the leaf is no longer useful.

After cutting off most of the yellow leaf, peel off the last bit of the yellow or brown petiole. If it is difficult to remove, as in large cultivars, cut the base of the petiole longitudinally down the center, toward the stem or the crown. Now you can easily peel off each half of the remaining petiole.

This works on other species with strong leaf attachments, such as Bird of paradise (Strelitzia, photo, above), yucca, palm, and dracaena. Removing all those dead fragments greatly improves the plant’s appearance.

Easy to Grow

Peace lilies are not demanding when it comes to light. Provide bright indirect light or morning sun for continuous growth. Disregard the advice that they thrive in “low light”. Sure, they’ll survive for a while, but brighter light toughens the tissues. New growth emerges thicker and stronger.

Plants photosynthesize and grow faster and often bloom in those locations, sometimes emitting a trace of scent soon after the white spathe flowers open. During the shorter days of the year, peace lilies welcome a few hours of direct sun.


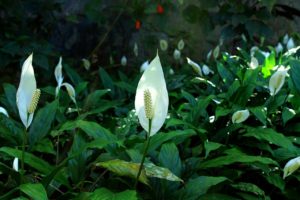
peace lily, flowers. easy houseplants

Peace lilies in bloom.


When the flower turns brown, snip off most of the stalk, wait a few days, and then pull out the remaining part of the shrinking brown stalk. You could remove it earlier, but sometimes a few green leaves are inadvertently removed at the same time. Once again, this keeps the plant tidy, with no lingering dead remnants.


How Often Should I Water My Peace Lily?

The Environmental Variables

diagram, wilted plantTemperature, light, humidity, fullness of the plant (number of leaves), pot size and type (porous or non-porous), soil composition, and air circulation affect moisture in the soil. A furnace cycling on more often during cold weather necessitates frequent watering of thirsty plants. Knowing how these variables work in conjunction with each other, for each species, will determine how often your plant needs water.

A full and potbound (roots tightly filling the pot) peace lily, in morning sun at 72°F, and in potting soil that drains fast (has a lot of bark chips), for example, might need water every 2 or 3 days. On the other hand, one that was recently transplanted into soil with mostly peat moss and kept in a room at 65°, in indirect light, with 15 other plants nearby (higher humidity) might need water every 5 or 10 days. That’s why it’s so difficult to answer the question, “How often should I water it?”

Most varieties of peace lily are potted into 6″ to 10″ diameter pots. Stick your finger into the soil an inch or two down from the surface. If the surface of the soil feels dry, but there’s damp soil below that, the plant does not need water.

Waiting to water your plants until they begin to wilt is not a good idea. Delaying for only one day could cause another leaf to turn yellow. Or the plant will refuse to produce new foliage.

How Can I Tell When To Water?

A better course of action is to feel the moisture in the soil and the weight of the plant and pot. Eventually, you’ll learn to recognize that when it feels “this” dry or light in weight, it’s time to water. Some gardeners rely on inexpensive soil moisture meters, but I don’t consider them to be very accurate.

And water your peace lily thoroughly! Not just a little bit that moistens the top 2″ of soil. Instead, give it enough to moisten the entire root ball. Some water will drain into the saucer, and a dry pocket of soil might soak up that excess. Drain off any excess that remains in the saucer after 15 minutes.

Many of us conserve energy in winter by keeping the thermostat in the mid to high 60’s F during the daytime and in the low 60’s at night. If you’re growing plants from the tropics, they appreciate being given lukewarm water, about 85° or 90°. This includes ficus, philodendron, pothos, African violet, Alocasia, Aglaonema, and spathiphyllum. Dry soil absorbs lukewarm water more readily than it does cold water.


Upon Careful Examination

Place a fully wilted peace lily in a bucket filled with lightly warmed water up to the pot’s rim. You might have to weigh down the pot. Keep it there for an hour or two, then let it drain. If it doesn’t revive after a few hours, remove the plant from its pot and examine the roots.

Certain materials used at the wholesale nursery, once dry, can resist absorbing water. It’s possible that, even though the plant had been transplanted into better quality potting soil, the plant’s original root ball stayed dry and was unable to produce new roots. When transplanting any plant, tease out some of the roots on the surface of the root ball, especially one that is solidly filled with roots. This helps stimulate the formation of new roots that will quickly grow into fresh potting soil.

I’ve worked on plants that seemed to have moist soil, yet remained in a wilted state. One of these conditions was usually the cause:

  • The plant was repotted too deeply, rotting the petioles and the crown of the plant. The crown should remain at soil level, where the green top growth meets the roots. Very few plants survive being planted lower in the soil. Rule of thumb: the original soil surface should be visible after repotting.
  • Over time, the organic matter (peat moss, wood products) in soil breaks down and loses most of its volume. Consequently, the soil surface drops lower in the pot. If roots are visible under the crown and are exposed to the air, add fresh potting soil to cover the roots. You might have to remove the plant from the pot and add soil under the roots to raise the crown to the proper level. Either way, don’t bury the crown.
  • The roots were not teased out from the root ball, and remained within the tight confines of the original root ball. The root ball dried out before new roots could grow into the moist new soil.
  • New potting soil was loosely added around the root ball, and not firmed in next to the roots. Moderate pressure against the roots helps develop a healthy root system, and fills any voids in the pot that could dry out delicate root hairs. It also prevents water from rushing through the pot, following the path of least resistance, and not soaking in.
  • The plant’s soil was wet for too long, and the rotted roots couldn’t regrow. Fungal and bacterial pathogens build up in wet soil and cause more problems.
  • The temperature in the room or of the water was too low. 
  • The plant was overfertilized, burning the roots. Many people think that fertilizing more often or using more than the recommended concentration makes plants grow faster. It doesn’t. Overfertilizing makes plants die faster. High salt concentrations draw water out of the roots, killing them.

Many of the problems we have with houseplants can be avoided if we keep them potbound in the winter. Cooler soil temperatures and shorter days do not favor root growth at this time of the year. It’s better to delay repotting houseplants into larger containers, if they need it, until spring to mid summer.


Headings:

Page 1: What Is Wrong With My Houseplants?, My Peace Lily Is Wilting, How Often Should I Water My Peace Lily? (The Environmental Variables, How Can I Tell When To Water?, Upon Careful Examination)

Page 2: How Often Should I Water Houseplants?, Should I Fertilize My Houseplants?, Brown Tips On Houseplants (Overwatering, Underwatering, Overfertilization, Disease, Guttation, Fluorine), Yellow Leaves, and My Houseplants Are Dropping Leaves

Page 3: Succulents (Porous Pots, Repotting and Refreshing), Ferns (Raise the Humidity), Pothos and Philodendron, Snake Plant (What is CAM?), English Ivy (Spider Mites), Will They Flower Some More?, and Before You Know It


Return to the top


Create a Porch Planter Made for Shade

2018


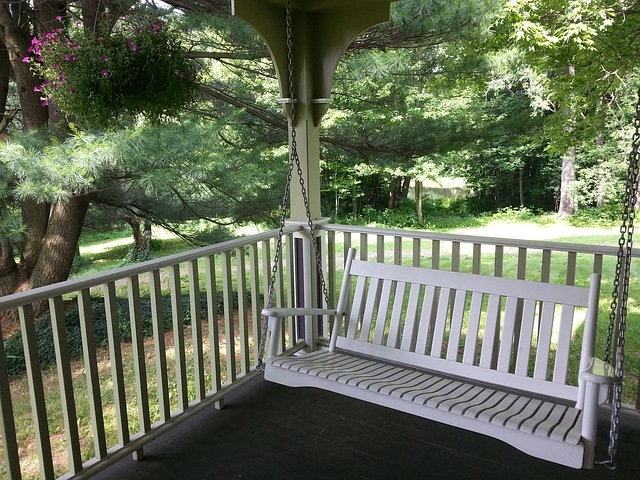
good spot for a shady porch planter


A Shady Porch Planter


It is hot outside! This week’s temperatures are soaring well above normal. Throw in the (dis)comfort level, and it feels like it’s over 100 degrees out there! I refreshed the bird bath a few minutes ago. Three cardinals and a Carolina wren less than 15 feet away waited for me to leave.

We haven’t had rain for…well, the grass already is brown, and the trees’ leaves are beginning to flag…

We retreat to air-conditioned spaces, emerging in the evening to collect mail, pull some weeds, or feed the birds. A welcoming porch offers shade and a tall pitcher of iced tea shared with a friend. But, for a gardener like me, something is missing from this setting. That something would be plants!

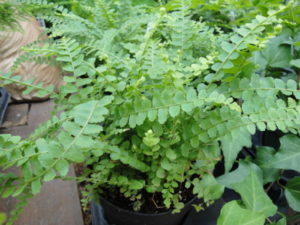
Although a shady porch planter won’t support the blaze of color we see in our flower gardens, there are lots of plants that will grow there. Here in the Carolinas, a 12″ hanging basket filled with a well-tended Boston fern is a classic. It will require daily watering and fertilizing every 2 or 3 weeks. During cooler weather, in spring and fall, it will take some direct sunlight. Sitting on Grandma’s antique fern stand or hanging between posts, the Boston fern is beautiful in its simplicity. There’s something “cool” in that lush greenery, a calm repose…


Boston ferns for porch planter


But If It Goes Too Dry…


If the soil dries, there will be hundreds of little reminders shed from the older fronds. I’m talking about the pinnae, the small leaflets that line the midrib of the fern frond. Pull up the foliage and snip, down to soil level, the older, yellowing fronds. A certain amount of this shedding is expected, due to heavy shade on the lower fronds.

Soil that runs too dry will result in accelerated loss of foliage. And the edges of tender new fronds will turn crispy brown. I’ve seen ferns that looked dead from lack of water. But with a severe trim, down to soil level, and improved watering practices, the plants can recover. In a week or so, you’ll notice new growth emerging from the crown of the plant if the root system hasn’t been entirely killed off.

Plastic hanging baskets often have a 1″ deep reservoir in the bottom of the pot. Water your fern heavily enough to fill the reservoir. The plant will soon soak up that excess, so usually there is no need to empty it. I don’t recommend this for all plants, however–just the thirsty ones.

Under a porch that gets some direct sun, look for a fern variety called ‘Kimberly Queen’. Its habit is more upright, so it looks best sitting on the porch or on a low plant stand. Where conditions are too sunny for a Boston fern, ‘Kimberly Queen’ should do well. 


Following the Path of Least Resistance


One note about all potted plants: if water gushes out the holes immediately after watering, there’s empty space between the outside of the root ball and the inside of the pot. This space will need to be filled with potting soil, using a tool of some sort. Firm the soil all around, filling in the gaps, or the water will find that one air channel that remains unfilled. This will cause some or much of the root system to remain dry.

Why this happens:

  • letting the soil go too dry, causing the soil mass to shrink.
  • bumpy transportation, shifting loose soil around the pot, causing air pockets to form.
  • heavy roots or fern rhizomes (underground stems) growing along the sides of the root ball or coiled around the bottom of the pot (Bear’s-foot fern rhizomes, or the massive root systems of asparagus fern and spider plant). Strong roots can raise the whole plant higher in the pot. Most pots taper (become narrower) toward the bottom of the pot, so a gap will open as the root ball rises up.
  • loosely-packed soil. Firm the soil–not too hard and not too soft. Avoid piling new soil on top of the root ball. You might have to remove the plant in order to add soil under the root ball.


Ferns and Friends—Made for Shade


ferns and a dinosaur


I love ferns. A combination of different species planted together in a rustic planter, an aged clay pot, or a hollowed-out birch log speaks to my appreciation of the Permian aesthetic. Add a piece of driftwood, live moss, and some rocks collected from who-knows-where, and you’ve got a simple prehistoric scene straight out of Jurassic Park. Maybe you could borrow one of the kids’ toy dinosaurs…

bird bath mini garden

Miniature garden in a cracked birdbath.

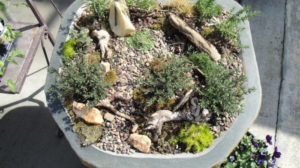
Another “pot” that makes a cool miniature garden is a leaky birdbath. I turned a cracked granite birdbath into a tiny campsite, complete with shelter, a forest of prostrate rosemary, a firepit, and pebble pathways between clipped thyme plants (photo, right). Irish and Scottish mosses (Sagina subulata) served as the “lawn”, with driftwood logs for seating. (This one grew in direct sun most of the day.)

Look around; there might be something in the basement, at Good Will, or at a Habitat for Humanity Restore that can be transformed into something special.

Keep the fern arrangement in the shade. Two hours of direct sunlight on a hot summer day might prove fatal to these delicate denizens of the underbrush. And even though ferns like moist conditions, planting them in pots without drainage holes can result in a smelly anaerobic bog, suffocating their roots.

Avoid placing your porch planter in a windy location; ferns prefer the humidity and stillness of calm, close quarters.


So Many Choices

There are many ferns to choose from:

  • maidenhair ferns (Adiantum),
  • variegated brake ferns (Pteris),
  • lemon button fern and dwarf Boston ferns (Nephrolepis),
  • rabbit’s-foot fern (Davallia), with its fuzzy rhizomes,
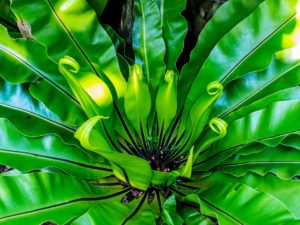
  • the less fern-like bird’s nest fern (Asplenium) and Hart’s tongue fern (Phyllitis, a perennial),
  • fern allies, such as Selaginella, available in several colors and forms.

Among their numerous cultivars are smaller specimens, growing up to 12″ or 14″ tall, easily accommodated indoors when autumn approaches. Indoors, give them cool morning sun or very bright indirect light. I don’t recommend “low light” for anything, not even ferns. Stronger light makes stronger tissues, which will better tolerate indoor conditions.


Small Scale Gardening In a Porch Planter


With the popularity of miniature gardens, or fairy gardens, tiny 2″ pots of young plants are popping up all over the gardening world. You can find young ferns in a wide variety of foliage colors and textures.

Garden centers also sell assortments of succulents, flowering plants, houseplants, and terrarium plants, but not all are suitable for a shady porch planter or indirect light indoors. And get some information on the growth habits of the plants. Different varieties of ferns might grow only 2″ tall or over 4 feet tall! I grew the little 2″ fern 30 years ago; it was called New Zealand something…I’ll have to see if I can find it again. So cute!

miniature garden

For many years, I grew tiny plants under lights, including miniature strawberry begonia (Saxifraga cuscutaeformis), miniature African violets and their 1″ tall cousin Sinningia pusilla. And there was SonerilaPilea species, and dwarf Peperomia, many of which are available from specialty growers. There are miniature philodendrons, and I once had a dwarf Caladium that grew only 5″ or 6″ tall.

These little plants can be tucked in at the base of a hollowed “tree stump”, emerging from a patch of emerald green moss, or planted next to a “boulder”. Go ahead; make a scene! A tiny slice of the natural world…as mesmerizing as a well-appointed aquarium…   …   …


Little Plants for Sun

Some of my customers in Maryland were serious small-scale train enthusiasts. They looked for little plants to spruce up their outdoor displays. I turned twiggy forms of French thyme, Japanese maples, dwarf rosemary ‘Blue Boy’, and Juniper seedlings into bonsai. Their natural forms fit right into the smaller dimensions of their gardens. Miniature purple basil was trained into a tiny topiary, for one season.

And then there are the miniature evergreens, of course. That’s another post. But you get the idea. Check out all the departments in well-stocked garden centers; there are all sorts of small-scale plants that can be used in porch planters.


aerial view miniature garden

Miniature garden with dwarf evergreens.

Return to the top

Headings

Page 1: A Shady Porch Planter, But If It Goes Too Dry…, Following the Path of Least Resistance, Ferns and Friends—Made for Shade (So Many Choices), and Small Scale Gardening In a Porch Planter (Little Plants for Sun)

Page 2: Perennials for Your Shady Porch Planter (Some Possibilities), Color For a Porch Planter, Getting the Whole Picture, Year-Round Gardening In a Porch Planter (Warm Weather, Cool Weather, Evergreens), and Ready-Made or DIY Porch Planter?