Tag Archive | artificial light

Potted Peppers For A Winter Harvest: 5 Easy Tips

2024

Updated 12/9/2024


Potted Peppers for Growing—in the Winter?
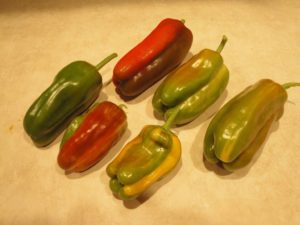


'Candy Cane' peppers

‘Candy Cane’ sweet peppers.


Autumn Has Arrived!


With cool weather approaching, our attention shifts from harvesting heirloom tomatoes to preparing our gardens for winter. Some gardeners clean the shed, weed the beds, and pile fallen leaves onto bare soil or dig them into the ground. Others continue growing greens and vegetables outdoors. In this article, I’ll show you why and how to grow potted peppers through the winter!


Why would we grow potted peppers in winter?

Peppers are warm-climate perennials that, with proper care, can live for a few years. Here’s the key: these frost-tender plants must stay indoors through the colder seasons. Left outdoors, they’ll die with the first freeze of early autumn.

For the coming months, you’ll be able to enjoy moderate harvests for salads, frying, stir-fries, dips, and veggie omelets. They’ll bear fruit over most of the cool season, from mid-autumn through spring, although not as heavily as they would in summer.

During the short days of January and into February, the plants might stop flowering, although fruits that have already set will continue developing. As days lengthen, the plants begin blooming and fruiting again.

Earlier this year, I retired the potted peppers—‘Aura’, ‘Glow’, and ‘Candy Cane’—I’d been growing for 3 years. But several others now fruiting in pots will take their place indoors for the winter.

With good sunlight and proper temperatures, I’ll harvest dozens of peppers from a few moderately sized plants. I’ve been doing this for years at other residences, but now the sunny enclosed porch makes it much easier.

As the temperature drops, warm season crops outdoors will succumb to seasonal changes. Pepper plants begin to decline when temperatures dip below 50°F. If you decide to proceed with this project, you’ll need to watch the weather very carefully.

Early Fruits Next Summer
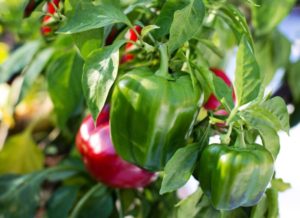
bell pepper

Peppers take quite a while to grow and mature. Most cultivars of peppers require around 2 months of growing time after transplanting into the garden for fruits to form. Since they must have warm soil and air temperatures, they can’t be planted too early. Even if frosts are over, the ground might still be too cold—from a few days of rain or cloudy weather—to plant sensitive crops, such as peppers and basil. They sulk or die in cold, wet soil.

If your last spring frost date is May 1, for example, you’ll pick your first bell pepper from a new transplant from early to mid-July. For a colorful ripe fruit, you’ll need to wait another 3 weeks. In contrast, potted peppers begin bearing fruits months earlier than new transplants set in the spring garden. You’ll enjoy a significant head start by overwintering these plants indoors. For that reason alone, you might decide to give this a try.

Many of my farmers’ market customers complained of poor flowering and fruit set due to extreme heat and drought this past summer (2024). Each variety of pepper and tomato has a threshold above which the pollen denatures, or dies. No living pollen = no pollination = no fruits. Some gardeners harvested no peppers at all! Growing potted pepper plants indoors could be the solution to poor harvests. Because they’ll be in flower and fruiting by the time they go outdoors for the summer, you’ll have harvested several peppers before the hottest months settle in. Covering tomato and pepper plants with shade fabric can prevent non-fruiting during the hottest weeks of summer.

Are you ready to expand your horticultural experience? If so, here are the 5 tips describing how to grow potted peppers:


Tip #1: Start with Healthy Transplants 


pepper seedlings

Young pepper seedlings in spring.


When planning your summer garden, consider keeping one or a few vegetable plants in pots. Keep in mind that some pepper varieties grow large while others attain only half that size. This information is often found in the catalog. Because roots are restricted, potted vegetables normally won’t grow as large as healthy plants in the garden.

A grower in your area might have kept some pepper plants from an early sowing. I ordinarily grow more than I can sell, so I keep a few dozen potted peppers well into the summer for customers who regretted not planting them earlier.

Another option is to start seeds in early summer. Raised in containers all season and properly fertilized, these plants grow fruits from late summer and continue as long as outdoor conditions favor growth. It helps to let the plants root into garden soil under the pots. This way, their roots can explore the soil for moisture and nutrients.

Later, you’ll sever the roots from each of the drainage holes, one at a time, giving the plant time to adjust before autumn arrives. The leaves probably will wilt somewhat as you cut the roots at the drainage holes, but less severely if you remove some of the foliage. For vigorously growing plants, it would be a good idea to cut back some of the stems by mid to late summer.

Look for plants without symptoms of disease, including wilt and heavily spotted or discolored leaves. Remove old pale or insect-eaten foliage. Potted peppers in winter might not have perfect foliage, but if the leaves are green and photosynthetic, they can remain on the plant.

Inadvertently, a few small peppers hang around here in their market packs, undernourished and barely alive, with some reduced to just a few leaves. Plants often can be restored to a healthier state with proper potting and pampering, as long as the roots have not been severely compromised.


Tip #2: Transplanting Potted Peppers
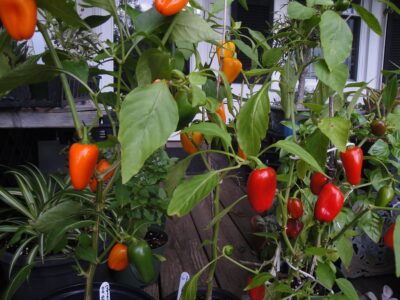


ripe peppers

Orange and red ‘Lunchbox’ peppers.


The Pots

I transplant plants that prefer warmer conditions, particularly sweet or hot peppers, into black nursery pots. You can buy them or ask a landscaper or a local nursery if they can spare a few pots that they might otherwise discard or recycle. Black pots absorb more of the sun’s energy, helping to warm up the soil in cooler months.

Conversely, try to shade the pot so the soil doesn’t overheat in the summer. In hot climates, the sun bakes the soil on the sunny side and damages the roots. I either shade the black pots with other plants or drop them into larger white nursery pots. All pots must have drainage holes.

Avoid planting a young seedling directly into a 2-gallon pot. Instead, transplant the small plant into a 6″ pot and let it thoroughly root into that pot. A few weeks later, move it into the larger pot. This helps the plant develop roots with a more extensive branching structure.

Moisture in a pot behaves differently than moisture in the ground. New soil (with no roots growing through it) in a large pot stays saturated after a day of rain and could suffocate the roots. Even though much of the excess water drains through the holes, a layer of wetter soil remains in the bottom of the pot before it is absorbed by the roots. But in the ground, water is pulled through the soil by gravity and capillary action. As water drains, air is pulled into the soil. Roots need oxygen in the soil as much as they need water.


The Potting Soil

Potting soil should drain well, but it also should be able to hold some moisture and nutrients. Most potting soils today contain large amounts of wood products (bark, wood), which cause them to quickly drain and dry out. A few brands offer excellent soils, but they’re quite expensive.

I tailor the potting soil for each plant species by amending it with ingredients that improve either drainage or moisture retention. Clean garden loam, peat moss, compost, finely ground coir, and aged cow manure have smaller particles and, therefore, help hold water in the air pore spaces.

On the other hand, perlite, pine fines, pieces of wood, coarse coir, and expanded rock products introduce larger air pores spaces, facilitating drainage and drying the soil.

Information on the bag of soil usually indicates whether it’s best used in pots (“potting soil”, “raised beds”, or “container gardening”) or for planting in the garden (“planting mix”, “garden beds”, or “in-ground gardening”). Potting soils tend to have a finer texture than planting mixes.

Amend potting soil that seems coarse (has lots of large particles) with some of the components that hold moisture, as mentioned above. If you’re using more than a small amount of peat moss, which is very acidic, mix in a teaspoon of pulverized limestone. The soil pH should be around 6.0-6.5 for peppers, which is slightly acidic.

If in doubt, have the soil tested for pH and nutrients through your local cooperative extension service. Lime can take a while to work on the pH, so test your soil before adding lime.


The Process
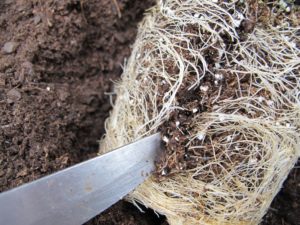
 

scoring the root ball

Scoring the root ball encourages rapid re-rooting.


Most nursery pots have large drainage holes which can cause erosion of the soil. To prevent loss of soil, line the pot on the bottom and partway up the sides with a piece of landscape fabric, polyester fiberfill, or similar material. Water can still drain from the pot, but soil particles won’t wash though the holes. This compromises the plant’s ability to root into the ground beneath the pot, however, so you’ll need to carefully monitor soil moisture levels.

Fill the new pot almost to the rim with lightly dampened potting soil, firming gently. Before setting the plant into the new soil, score the outside of the root ball or use a fork to tease some of the roots out from the root ball. This slight damage stimulates the root system to branch out, helping new roots establish quickly in the soil.

Set the transplant into a hole in the center, and firm the soil around the root ball. Don’t bury the stem with new potting soil when transplanting peppers. If space is a consideration, 2 plants might comfortably fit into a pot that’s a bit larger than you’d use for just one plant. This works better for cultivars that normally grow into small or medium-sized plants.

The finished soil surface should be 1-2″ below the rim of the pot. A pot completely filled with soil can be quite messy when applying a thorough watering.

After planting the pepper, insert a stake (2-3′ long bamboo, a tomato cage, vinyl-clad metal, or a twig) all the way to the bottom of the pot. Secure the stem with twine, but not tightly, to keep the stem upright. The main stem or side branches heavy with fruits will slump over and might need additional support as the plant grows.

The First Watering
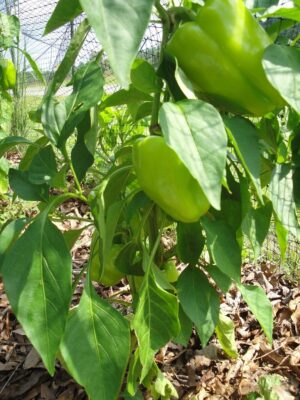
'Flavorburst' sweet bell pepper

High yielding ‘Flavorburst’ pepper in the summer garden.

Water the plant. Apply enough water to soak the original root ball and some of the soil surrounding it. Thoroughly watering a new transplant needlessly leaches nutrients out through the drainage holes.

As roots grow into the soil, you’ll need to moisten more of the soil volume. If you begin this process by midsummer, the pot will have filled with roots by late summer to early autumn.

Plants slow their growth as days shorten, so they might struggle to fully root into their pots if you delay transplanting until autumn. If you transplant them at that time, be very careful not to overwater.

Keep the potted peppers outdoors in full sun (7-8+ hours/day) through the summer and early fall, or until nighttime temperatures drop below 55°F. While pepper plants can tolerate colder conditions than that once in a while—but not close to freezing—exposing them to low temperatures on consecutive nights weakens them.


Varieties of Potted Peppers I’m Growing This Year

‘Flavorburst’ is a medium-large sweet bell pepper (photo, above) that starts out lime green and matures to a golden orange color. The flavor is milder than the deep green bells. The plant is a medium-large grower, so it’s in a 3-gallon pot.

‘Olympus’ is a medium-sized plant growing in a 2-gallon pot. This large, deep green bell pepper turns red when fully ripe. I’ll harvest most ‘Olympus’ peppers, however, in the mature green stage when preparing curried tuna or sweet-and-sour chicken. (Photo, bottom of this page.)

‘Lunchbox’ peppers are medium-sized plants. They grow very well in 1-2-gallon pots over the winter. The red fruits on some plants are a bit smaller, so most of the ones I’m saving ripen to orange. Each plant develops fruits that start green and ripen to just one color: red, orange, or yellow. (Photo, bottom of this page.)

‘Aura’ and ‘Gourmet’, in 1- or 2-gallon pots, are orange-when-ripe bell peppers on small plants. Sweet bell peppers that ripen to orange contain extremely high levels of zeaxanthin—10 times more than ripe red peppers. The antioxidants zeaxanthin and lutein help preserve eyesight. (Spinach, pistachios, goji berries, and egg yolks also boast high levels of these antioxidants.) If I need bell peppers when my plants aren’t producing, I usually buy orange bells. I’ve read that orange hot peppers do not contain those elevated levels of zeaxanthin.
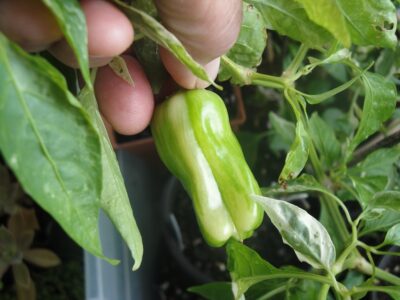
 

'Candy Cane', a variegated pepper, white splotches in leaves, striped fruits.

‘Candy Cane’ variegated pepper.


‘Candy Cane’, a sweet pepper with green and white variegated leaves, is among the potted peppers I’ll grow again this winter. The thin-walled fruits grow irregularly striped green and creamy-white, ripening to bright red (photos, top of article and above). This cultivar needs full direct sun to maintain good variegation in both the foliage and the fruits. Even if it loses its white splotches, it will yield good peppers.

‘Jimmy Nardello’, an heirloom Italian frying pepper, has long, curved, red, sweet fruits when mature. At the last minute, before cool weather moved in, I literally yanked a few young plants out of the ground and potted them into 6-8″ pots. (Photo, next page.)

You can dig up peppers that aren’t very big but try to keep the root system intact. Removing half of the foliage (by cutting back the stems) and lightly shading them for a couple of days prevents severe wilt. Misting a few times a day for a few days should help. Then, with good sunlight and careful watering, they’ll recover.

I don’t eat hot peppers and will sell the rest of the potted habaneros, cayennes, and jalapeños. ‘Helios’ habanero is so cute with its bright orange lanterns (photo, below) hanging on small glossy-leaved plants. It’s ornamental qualities merit keeping it around during the autumn holidays.


Headings

Page 1: Autumn Has Arrived! (Why would we grow potted peppers in winter?, Early Fruits Next Summer), Tip #1: Start with Healthy Transplants, Tip #2: Transplanting Potted Peppers (The Pots, The Potting Soil, The Process, The First Watering, Varieties of Potted Peppers I’m Growing This Year)

Page 2: Tip #3: Caring for Your Potted Peppers (Direct Sunlight and Temperature, Artificial Light, Water for Potted Peppers, Fertilizer, Timed Release Fertilizer, “Should I use organic fertilizer?”, Insects and Spider Mites), Tip #4: Pollinating Your Potted Peppers, Tip #5: Fruits from Your Potted Peppers (No New Fruits?)

Return to the top

Herb Gardens: How To Grow Herbs In Pots


2021

Updated 3/14/2024


Herb Gardens: The Scents and Flavors of Summer


herb gardens


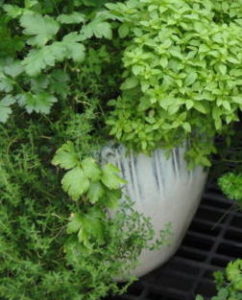
Fresh ‘Genovese’ basil for the garden salad…savory French thyme on grilled fish…chives and flat parsley to enliven the egg salad and browned potatoes. Yummy! This lengthy article describes how you can plant and enjoy growing herb gardens in containers. Growing potted herbs on the balcony or the sunny patio is the perfect solution if you have no garden space.

Potted herb gardens can be moved around to get just the right amount of sunlight the plants need. They can enjoy the morning sun on one side of the deck, and a few additional hours of afternoon sun on the other. As the sun’s arc changes from one season to the next, you can reposition the plants to capture the most light.

Several years ago, a gentleman asked me to pot herbs into a large strawberry jar. He traveled frequently between his residence and a summer home at the beach. Because he was a keen cook, he planned to take this herb garden with him to the next kitchen, wherever it was. So, if not prohibited where you’ll be traveling, consider taking your herb garden with you on your next road trip!


The Gift That Keeps On Giving

Place herb gardens on the picnic table for family and guests to sample as they enjoy the day’s barbecue. And then, in autumn, you can continue the harvest by growing them in sunny windows indoors.

Using herbs to flavor foods might help you kick the salt habit, or at least decrease its consumption. In addition to their wonderful flavors, herbs have high concentrations of beneficial antioxidants, which contribute to our well-being. In decreasing order, oregano, rosemary, parsley, basil, and thyme contain the most antioxidants among the common herbs.

I’ve sold herb gardens as wedding or birthday presents, for Mother’s Day, Father’s Day, Christmas, and as housewarming gifts. Families purchased herb gardens for retiring parents, who planned to devote more time to gardening. Over decades of selling potted plants, I estimate that about half of these delightful combinations were given as gifts.


Choosing the Right Containers for Herb Gardens


clay pots


Style and Size

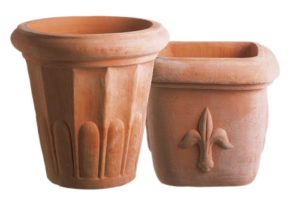
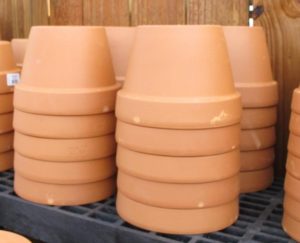
Visit any well-stocked garden center and you’ll see an extensive selection of terra cotta (clay), stoneware, ceramic, wood, and inexpensive plastic pots. Containers are available in all sizes and shapes. Plain or ornate finishes reflect modern, rustic, or classic styles. You’ll also find containers specially fitted for deck railings or for hanging on a wall. Plant a half whiskey barrel with one or more mint varieties, and let them take over…in the pot, that is.

Some ceramics are glazed with materials that should not be used with edible plants. There might be a sticker on the bottom indicating this.

rabbit

Rabbits are cute, but…

Small clay pots dry out faster than large non-porous pots. Just one day too many in direct sun without water could kill the plants. Lining a clay pot with food-grade plastic and poking a few holes in the bottom will slow the evaporation to a degree. To be sure, your herb gardens—especially small ones—will need daily checking.

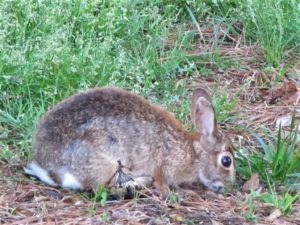
Potting herbs in hanging baskets is a great solution if you live where deer and rabbits are waiting for the instant you turn your back. They’re particularly attracted to parsley, cilantro, and dill.

Herbs need excellent drainage, so always choose pots that have holes in the bottom. Other than that requirement, just select the pots that appeal to you. Many gardeners look for a consistent style, favoring pots that harmonize with each other and with the setting.


Window Boxes


clay pots for herb gardens

Clay pots for herb gardens.


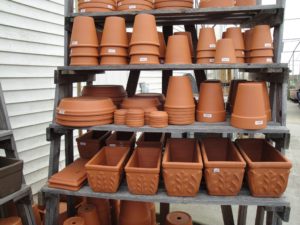
A popular container for herb gardens is the window box. Window boxes come in many styles, from quite simple to highly ornate. They’re available in terra cotta (lower shelf in photo, above), plastic, and lined or unlined wood. Plastic containers often have plugs in the drainage holes; remove them to ensure proper drainage.

You can hang them outside windows in securely anchored frames; lighter weight containers are a safer bet. Or simply place them on a brick wall, along a sidewalk, or at the edge of a sunny patio. Several herbs in clay pots look charming clustered together on a table. Where wind is a concern, use heavier pots, but don’t place them where they could blow off the balcony to the sidewalk and harm someone.

Cracking

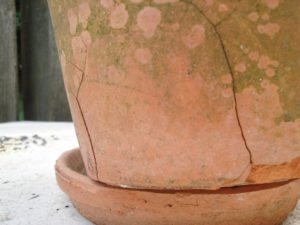
Handle clay pots carefully so they won’t crack. Clay pots might tolerate one or a few seasons of freezing weather; eventually most will begin to spall or crack. When clay absorbs water, and the water expands as it freezes, the clay degrades. Denser terra cotta (Italian for “baked earth”) survives more winters than softer clay.

This clay pot (photo, right) spent almost a decade outside, and it cracked this past winter. Until it crumbles, it will serve some purpose in the garden. I usually used Italian clay pots for my plant business and acknowledge that even better-quality pottery has limits.

Switching herbs into frost-resistant pots where winters are cold is one option. Other options include growing them indoors, in a cold frame, or in a conservatory—in other words, where the pots won’t freeze.

Tuscan Style

Years ago, I planted two herb gardens for a customer in Potomac, Maryland. They sat on a low stone wall surrounding a sunny Mediterranean-style garden. The Italian clay window boxes were over 4′ long and weighed more than 50 pounds empty. They were beautiful when finished—all those shades of green, purple, gray, variegated white and yellow—and the fragrances!

Even without flowers, potted herb gardens have their own unmistakable charm. Green algae and that white coating (efflorescence, from mineral salts) building up on clay pots won’t harm the plants but will amplify the rustic factor. And, yes, you can clean it off if you prefer.


Long Toms

Long toms, also called rose pots, are taller than they are wide (top shelf and part of next one, in photo under “Window Boxes”). Variegated lemon thyme or prostrate rosemary cascading over the side are perfect choices.

These pots are available in tiny sizes only 2″ wide, but 4″, 5″, and 6″ pots are more useful. Offer small herb containers as party favors for special occasions or use them to assign seating around the table.

While in Maryland, I potted herbs into 3″ stainless steel long toms for the tables at a popular seafood restaurant. I switched them out every couple of weeks.

I used to purchase clay long toms from a wholesale supplier in Baltimore. They normally came without drainage holes, so I added them, using a reversible drill and a masonry bit. Easy.


Plain Pots

azalea pots for herb gardens

“Azalea” pots are 3/4 as tall as they are wide.

Reusing what you have sitting around the garage is most economical.

Clean out those 12″ hanging baskets that held annuals last year, and repurpose them for herb gardens, with or without the wires. Green plastic pots last longer than white ones, which degrade faster in direct sun.

Empty the tired old soil into the shrub gardens and purchase new potting soil for your project. Some plants, particularly basil, are susceptible to several soil borne diseases. Starting with clean materials, therefore, is critical for their success. Wipe down used pots with a 10% bleach solution, rinse, and air-dry…for basil, at least.

Azalea pots are a bit shorter than they are wide and lend a more anchored look to potted plants. I prefer azalea pots over standard pots (height = width). It’s a personal choice, of course. You can pot them up with one plant or use a larger pot for a few plants.

Topiary

Rosemary and lavender topiary standards (the lollipop shape) look great in clay azalea pots, with some moss growing on the soil surface. Grow them indoors, in full sun, where they’re protected from hard winter freezes. But keeping them outdoors—even in chilly weather—ensures they get enough direct sunlight.

Try training the woody herbs “quasi-bonsai” style, with knobby stems, a few little weeds, and a fallen “log” embedded in the moss. Allowing the clay to mellow with algae and efflorescence, and those pots aren’t so plain after all.


Strawberry Pots


herbs in a strawberry jar

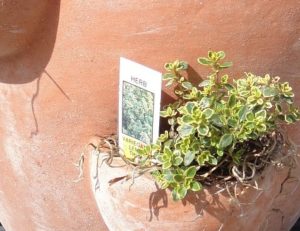
Lemon thyme in a clay strawberry jar.


Planting a strawberry jar is a bit more complicated, so it deserves a post of its own. If your attempts at planting a strawberry pot have been less than successful, refer to this article for solutions.


Pot Color

A fine point often overlooked in container gardening is the color of the pot. In summer, with scorching sun bearing down on a dark pot, that heat transfers to the soil. Consequently, the root system will be sparse on the hot side of the pot. Plants are happier without this stress.

You can alleviate their discomfort by shading the root system in summer with smaller pots of heat tolerant plants, such as dwarf zinnias or vinca. Or use white pots in hot weather to lower the temperature.

In autumn, I plant cool season greens and herbs in black nursery pots. Dark colors absorb more energy from the sun. Warming the soil a moderate amount helps limit the deep freeze in winter. The longer the roots can function, the more foliage I’ll be able to pick.

Curiously, clay pots with moist soil can feel cooler to the touch. This is due to evaporative cooling, where the temperature decreases as water evaporates from the surface. So, even in hot weather, a clay pot won’t feel as hot as most other pots. Your skin performs the same function.

Choosing pot colors might not be an option. Alternatively, plant herbs that dislike heat (such as cilantro) on the cooler north (northern hemisphere) or east side of the pot.


Choosing the Right Plants for Herb Gardens


A Proper Fit

First, decide which herbs you want to grow. Look for smaller varieties of the herbs you use in cooking, choosing young but well-rooted transplants. These will adapt better to containers than full size varieties. Sometimes there’s not much choice; maybe only ‘Italian Large Leaf’ basil is available. Okay, I’d rather have it than no basil at all, so there are 4 options when using large-growing herbs:

  1. use fewer herbs in the herb garden to make room for the big basil
  2. keep the basil in the combination pot, but cut it back more frequently
  3. find a larger pot for the herb garden
  4. grow this large basil by itself

We need to find a balance between plant size and available space relative to what other plants need. You can fit a few plants together, but they suffer when cramming all the herbs you like into too small a container. Plants growing in pots, however, don’t grow as large as those in the ground.


Seeds and Transplants

Seeds can be sown directly in the pots, but thin them once they sprout. Remember that some species are very slow to germinate, and you most likely will have better success with transplants. For new gardeners, I suggest buying young plants for now, and perhaps experimenting with seeds during the summer. But if the herbs you need are available only as seed, go for it.

Garden centers and farmers’ markets offer a wide variety of herbs grown as transplants. Some growers start them from seed, cuttings, or plugs (very young plants) several times a year. In one growing season, you might find dozens of varieties of basil alone! So, shop around for the local herb lady, and request certain plants she might grow for you.

I included a section on Propagating Herbs, which you’ll find on Page 5.


What’s the Difference Between Herbs and Spices?


Although we use the two terms interchangeably, there is a difference between them. Herbs are leaves of edible plants, and the focus of this article. Spices comprise all other parts of edible plants—bark, seeds, roots, fruits, and flower parts.

Cilantro leaves and coriander seeds come from the same plant, but those interested in this minor technicality differentiate between the herb and the spice.

Turmeric, ginger, vanilla extract, nutmeg, cinnamon, and black pepper are spices that we keep in the pantry. Saffron, the world’s most expensive spice, comes from the 3 threadlike female parts in a fall-blooming Crocus sativus flower.


Return to the top of Page 1

Headings:

Page 1: The Gift That Keeps On Giving, Choosing the Right Containers for Herb Gardens (Style and Size, Window Boxes, Long Toms, Plain Pots, Pot Color), Choosing the Right Plants for Herb Gardens (A Proper Fit, Seeds and Transplants, What’s the Difference Between Herbs and Spices?)

Page 2: Which Herbs Are Annuals? Biennials? Perennials?

Page 3: Herb Gardens Close To the Kitchen, Combination Pots, Potting Up Herb Gardens, How To Maintain Herb Gardens (Light, Natural Sunlight, Artificial Light)

Page 4: Tips For Watering Herb Gardens (Transpiration, Why Plants Wilt, Testing for Moisture, From Season To Season, Water Temperature), Fertilizing Herb Gardens (Organic or Synthetic?, Macronutrients and Micronutrients, How Often To Fertilize Herbs, When We Don’t Fertilize, The Taste Test), Temperature (As Temperatures Change)

Page 5: Common Pests (Better Options To Eradicate Pests, Bacillus Thuringiensis, Horticultural Oil, Organic Sluggo, Plain Water), Girth Control (It’s Thyme For Drying, Which Herbs Dry Well?), Renovating Herb Gardens (Propagating Herbs)


Starting Seeds for Cool Season Greens


Starting Seeds for Cool Season Greens 


dinosaur kale, 7/18/19


The coldest part of winter has passed for most of us, and it’s time to start seeds for cool season greens. Late winter transitioning to spring is my favorite time of the year. That’s when I start seeds for early harvests. This article covers details for growing some of the early greens, particularly spinach and the brassicas. On Page 3 is a recipe for a veggie omelet, an easy way to get more greens into the diet.

If the garden were bare, I would have started seeds a few weeks ago. But the greens in the vegetable garden continue to offer harvests. Unfortunately, the “list of wants” from the seed catalog is far more extensive than the garden’s square footage can accommodate! It’s time for the last harvest of collards for soup; that’ll open up some space.

While we’re harvesting established cool season greens, I’ll start several new crops indoors. These plants will be plugged into the garden as space opens up. But the seedlings will not be kept in their little pots very long; this stresses the plants and causes them to bolt, or to flower prematurely. (Photo, above: dinosaur kale germinated at night; it will green up in the sunlight.)


The First of the Cool Season Greens: Spinach


spinach 'Monstrueux de Viroflay' in pot

Young spinach ‘Monstrueux de Viroflay’.


I would have sown spinach directly into the garden by now, but we’ve had a long run of chilly rain. The soil is so wet that it’s doubtful any seedlings would even be tempted to germinate. At this time of the year, pay close attention to the weather forecasts. Conditions could deviate considerably from the averages.

It’s not good to dig in soil this wet anyway. That would drive out air spaces and ruin the tilth of the soil by compacting it. 

As temperatures begin to moderate, slugs come out in force and will decimate any seedlings that dare to grow in this weather. Rain: good for slugs. Sluggo: bad for slugs! Organic Sluggo pellets attract and kill slugs and snails. This version of the product contains materials (iron phosphate) that add nutrients to the soil. Check the label, though; Sluggo has other products with added ingredients. The organic option is safe to use around the edibles.


Spinach From Seed Is Easy!

Spinach germinates readily, from 50°F up to the mid 70’s (soil temperature), as soon as the ground can be worked in late winter or early spring. For better chances of success, choose varieties that are disease resistant and slow-bolting. In well-prepared soil, spinach is one of the easiest crops to seed directly into the garden.

Prepare the bed by incorporating 2″ to 3″ of compost and/or aged manure into the top 5″ of soil. Spinach prefers soil pH near neutral, from 6.5 to 7.3. A soil test will indicate how much lime, if any, should be added to raise the pH.

For baby leaf harvest, sow the seeds thickly in a patch, about 1″ apart. For full-size leaves, space the seeds a few inches apart, with rows 8-10″ apart. Crowding the seeds too closely or poor soil will result in a disappointing crop.

‘Monstrueux de Viroflay’

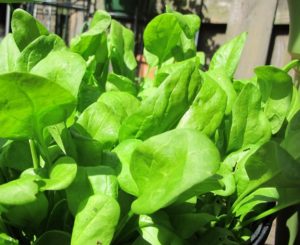
There’s a wonderful variety called ‘Monstrueux de Viroflay’ (photos, above and below), a French heirloom dating to 1866. It grows very large for spinach, up to 20″ tall with 10″ leaves, and should be spaced several inches apart.

Viroflay, or Monster, as it is often called, is lower in oxalic acid, or oxalates, than other spinach varieties. It might be acceptable for people with health concerns that prohibit spinach consumption. Check with your doctor.

Keep the soil moist and add organic fertilizers, such as fish emulsion, Sea-Plus, or earthworm castings, every 2 weeks. In cold soil, however, liquid synthetic fertilizers high in nitrogen work better than the organics. Microbes in the soil break down organic material and make those nutrients available to plant roots. But microbes are dormant in cold soil, so they can’t perform this vital service. They’ll become more active as the soil warms up in late winter or early spring.


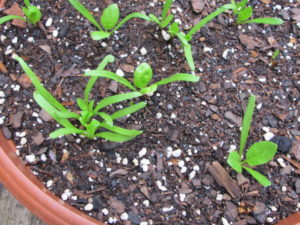
spinach seedlings

‘Monstrueux de Viroflay’ spinach seedlings.

Spinach Bowl

Another option is to sow seeds directly into a 14″ wide, 6″ deep bowl filled with fresh potting soil (photo, above). The pot has drainage holes. Portability allows me to bring the pot indoors on especially cold nights while the cool season greens are beginning to germinate. And moisture levels can be carefully monitored.

Since the sappy crooked pine tree that shaded the deck from afternoon sun has been cut down, conditions on the fenced-in deck are more favorable to growing vegetables in containers.

Fill the pot with potting soil to within an inch of the rim. Simply scatter seeds on the surface, a couple of inches apart for smaller varieties and a few inches apart for Viroflay. Cover with another 1/3″ to 1/2″ of soil. Water…and wait… Spinach’s two seed leaves, the cotyledons, are easily differentiated from other seedlings by their long narrow shape. Thin as necessary; you can eat the culls.

Don’t neglect fertilizing potted greens. Rain and irrigation quickly wash nitrogen out of the soil.


Harvesting Spinach

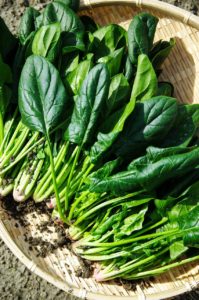
Spinach.

Harvesting the crowns begins within 4 or 5 weeks, depending on weather and soil fertility. Pick individual leaves at any age, allowing the central growing tip to continue producing new leaves. Or cut the entire plant at the soil line before flower buds begin to grow.

By sowing new crops of spinach every week or two, you’ll have continuous harvests of spinach, as long as the weather favors growth.

Spinach quickly bolts, or goes to flower, at temperatures above 75°. Dry or nutrient-poor soil stresses the plants. And spinach will flower prematurely if the plants are stressed by growing too close together.

Harvest the entire plant if you notice flower buds forming. Cutting off the flowers will not stimulate spinach to grow a new bunch of leaves. Instead, start more seeds.

Use spinach steamed as a side dish, or in sauces, soups, smoothies, salads, pasta dishes, or an omelet.


And Then the Brassicas


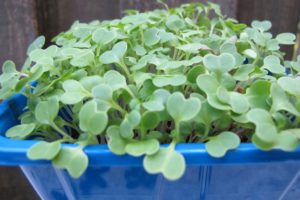
cool season greens grown as microgreens

These microgreens are mostly brassicas.


The Brassicaceae family is a huge group of edibles. It includes arugula, broccoli, Brussels sprouts, cabbage, cauliflower, collards, kale, komatsuna, mizuna, mustard greens, pac choi, radish, tatsoi, turnip, and others.

All members have similarly notched seed leaves, or cotyledons. Those are the first two heart-shaped leaves to emerge from the seeds (photo, above). Because the seed leaves are already formed inside the seed, the little plant can begin photosynthesizing—and feeding itself—immediately upon germination. True leaves, which develop after the seed leaves, are also similar for most of the cruciferous vegetables. That’s why it’s important to label your pots so you can distinguish “this” seedling from “this other similar looking” seedling.


Include On the Label:

  • the name of the crop (dinosaur kale)
  • the name of the cultivar (‘Black Magic’)
  • the date of sowing (brassicas germinate in less than a week if sown indoors)

Store leftover seeds in their original packets, and make sure the cultivar name is included on the label. Store in a cool, dry place, such as the refrigerator. Most seeds of cool season greens are viable for 2 years or so. If not already indicated, mark the year of purchase on the packet.

It’s helpful to keep a record of the varieties you’ve tried and liked or disliked. Include how you started the seeds (in 4″ pots or cell-packs, under lights, directly in the garden), the dates you seeded and transplanted, and the weather conditions. Include notes on what was successful and what wasn’t, and possible explanations. Did the seeds germinate and then keel over and die (damping-off disease)? Did critters eat your cool season greens as soon as they started growing? Should the seeds have been started earlier? Or later?

There are successes and failures in every gardener’s life. Being able to pinpoint the reasons for a disappointing crop will enable you to be more watchful or to try a different approach next time. Check with your local cooperative extension office, through state land-grant colleges and universities, for advice. Failure is a learning experience, not a reason to stop trying!


Damping-Off

Damping-off disease can appear soon after germination. Sometimes, diseased seedlings don’t even appear above the soil, looking as though the seeds didn’t sprout at all. The small seedling develops a narrowed brown spot on the stem. Then the top of the plant falls over, and the seedling dies. This is caused by several species of fungus, whose spores are in the air, in the soil, in the water, or on the seeds themselves.

Damping-off often accompanies:

  • poor air circulation
  • high humidity
  • crowding
  • low light
  • low temperatures
  • reusing old soil
  • and overwatering

Space the seeds farther apart, run a small fan nearby, water in the morning, and increase the temperature and light levels if they’re low.

The first time I used the organic biological fungicide called Actinovate, life became a bit sweeter. It is costly, but a much safer option than chemical fungicides. And, with the number of seedlings I grow each year, a wise investment. Make up a small amount of the solution when needed and apply from a spray bottle or a small watering can when sowing the seeds and as soon as the seeds germinate. Always exercise caution when using sprays, and read the labels.


Caterpillars on Cool Season Greens

When the weather warms up in mid- or late spring, you’ll notice butterflies and moths flying around your cool season greens. How nice, you might think. But those lovely insects are on a mission, and that mission is to find suitable plants on which to lay their eggs.


Most of the brassicas are targeted by the female:

  • Cabbage Moth (or Diamondback Moth)
  • Cabbage Looper
  • the velvety green Imported Cabbageworm (also called the Small White Butterfly or Cabbage White Butterfly—white with black markings). Look for them lined up on the leaf’s midrib.
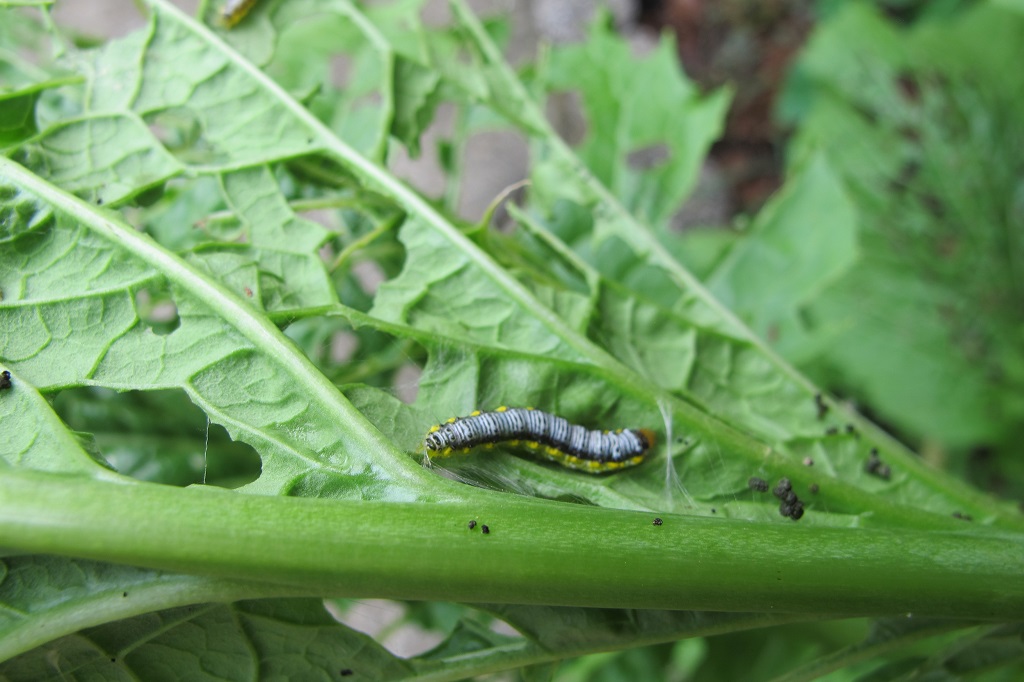
  • Cross-striped Cabbageworm (fine black stripes across the back, yellow stripe on the sides).
  • A few other species target particular brassicas or are limited geographically.

Here in my North Carolina garden, the 1¼” long Imported Cabbageworm has been the most commonly seen caterpillar on the brassicas. It is well-camouflaged in the green foliage. But for the past couple of years, populations of the Cross-striped Cabbageworm have been increasing. They’re especially pesky when lodged among the broccoli florets. Sometimes I don’t see them until I begin cutting the broccoli (just remove them). Inspecting the produce and spraying Bt regularly takes care of that.

Eggs hatch in a few days to a week, and immediately get to work chewing little holes and then bigger holes in your broccoli, kale, and other brassicas.


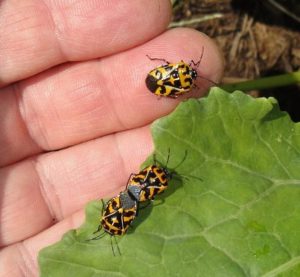
Harlequin bugs on cabbage


Another insect feeding on brassicas is the black and orange harlequin bug (photo, above). I squish them when I see them, although they’ll see you approaching them and will try to hide. They cause whitish blotches and distortions in the foliage.

Bacillus Thuringiensis (Bt)

As soon as you notice the white moths and butterflies flitting near the brassicas, it’s time to get the sprayer bottle ready. The imported cabbageworm is the larval stage of a butterfly and the one you’ll see in the daytime. The other caterpillars are moth larvae and are active at dusk or at night.

Mix up a solution of Bt, Bacillus thuringiensis, available from the garden center. Dipel and Thuricide are brand names for Bt. It doesn’t take long for these voracious little caterpillars to inflict considerable damage to your plants, so don’t delay.

Spray both the upper and lower surfaces of the foliage, occasionally agitating the solution. Begin spraying a few days after first seeing the moths, or certainly when you see holes appearing. Set the sprayer nozzle to a very fine spray; larger drops of water will bead off the waxy foliage. One or two drops of dish soap in the sprayer will help the solution stick to the foliage if you can’t get a fine spray.

It washes off in the rain, but any Bt clinging on the reverse (bottom leaf surface) might be enough for the current batch of caterpillars. Spray the brassicas every 5 to 10 days, as long as the insects are active.


sprayer


How Does Bt Work?

Bt is a naturally occurring bacterium that disrupts the caterpillar’s digestive system when ingested. The insects stop feeding immediately and die within a day or two. Spray as soon as you notice them because young caterpillars are more susceptible to Bt than older caterpillars.

Bt effectively rids the garden of moth and butterfly larvae, including swallowtails that eat parsley. Although they won’t bother your broccoli, black swallowtail larvae feed on parsley and its relatives in the Apiaceae family, including dill, cilantro, and bronze fennel.

The tradeoff? Fewer moths and butterflies, but more undamaged produce. I enjoy watching the black swallowtail butterflies, though, so I plant the large perennial bronze fennel for the caterpillars picked off the parsley and dill. Bt targets larvae of moths and butterflies, and nothing else.

After picking the crops, I sometimes let the caterpillars feast on the remains. Those caterpillars might feed another brood of baby birds or green anoles at that time of year. Once cold autumn weather has settled into the area, these caterpillars will no longer be around to bother the fall crop. Autumn is another delightful time to garden.

Bt is perfectly safe to use on edibles. Use up the diluted solution within a few days. Store Bt in a cool location out of the sun. Buy a small fresh bottle every couple of years, as this is a live organism, not a chemical.


Headings

Page 1: Starting Seeds for Cool Season Greens, The First of the Cool Season Greens: Spinach (Spinach from Seed Is Easy!, ‘Monstrueux de Viroflay’, Spinach Bowl, Harvesting Spinach), And Then the Brassicas (Include On the Label, Damping-Off, Caterpillars on Cool Season Greens, Bacillus Thuringiensis [Bt], How Does Bt Work?)

Page 2: Broccoli (Improve the Soil for Cool Season Greens, Harvesting and Side Shoots, When the Brassicas Bloom), Mini Broccoli (Early Sprouting Broccoli and ‘Spring Raab’, Broccoli ‘Happy Rich’, Who’s My Favorite?, Gai Lan and ‘De Cicco’, Sowing Seeds, Late Sprouting Broccoli)

Page 3: Dinosaur Kale, Hardening Off Cool Season Greens (Gradual Changes), Growing Plants Under Lights (More Tips Using Artificial Light), Getting More Cool Season Greens Into Your Diet, A Veggie Omelet Recipe Using Cool Season Greens

Return to the top