Archives

An Evergreen Swag In 7 Simple Steps


How To Make a Festive Evergreen Swag 

 

evergreen swag, gold bow


As the holidays approach and the to-do list grows ever longer, quickly pulling together a swag or two before guests arrive is so easy. Would you like to try this? In this article, I’ll describe making an evergreen swag in 7 simple steps.


What is a swag, exactly?


An evergreen swag is a hanging cluster of ornamental greens—with or without embellishments—used primarily during the holiday seasons. It can have one point of attachment, or it could span between two or more supports. Personalize it with ribbon, ornaments, and other items that reflect your family’s style.

Hang swags on walls, porch posts, doors, fences, and gates. Attach one to the mailbox or the lamppost. Although the greens last longer in cold conditions outdoors, you can hang them indoors. Certain evergreens, particularly freshly cut Fraser and balsam firs and some of the cedars, smell absolutely wonderful for a while.


Step #1: Gather Materials For the Evergreen Swag


Using Evergreens From Your Gardens


When searching for a new home in northern North Carolina, I noticed the southern magnolias (Magnolia grandiflora) and boxwoods (Buxus sempervirens) on this property. (“Great! Materials for swags and wreaths!”) Look for evergreens, twigs and buds with character, pine cones, and seedpods around your property. Perhaps you and your friends and neighbors can get together and trade materials…over hot chocolate and Christmas cookies, of course.
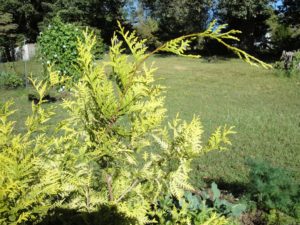
 

Chamaecyparis 'Vintage Gold' for an evergreen swag

Chamaecyparis ‘Vintage Gold’.


A small Chamaecyparis pisifera ‘Vintage Gold’ (USDA zones 5-8) planted last winter provides threadlike sprays of golden-yellow foliage. Bright yellow adds a great spark of color and shows up brilliantly against darker greens. Chamaecyparis—the false cypresses—are among my favorite evergreens for the landscape. Hinoki cypresses add soft texture and deep green swirled foliage for swags, wreaths, and table centerpieces.

Variegated English holly for evergreen swag

Variegated English Holly has yellow or white margins.

In the future, I’ll plant shrubs and conifers not only to enhance my surroundings, but also for the birds and as cut greens. The long, soft needles of white pine (Pinus strobus) add textural contrast to arrangements. The native species grows to huge proportions, so I’ll look for smaller cultivars.

When choosing varieties to add to your landscape, consider your plant hardiness zone. Some love the cold and will fail in hot summers.

Other evergreens, such as juniper, spruce, cedar, and cypress, can supply clippings for seasonal projects. Variegated English holly (Ilex Aquifolium) and some of the dwarf hollies are on that growing wish list. Although traditional at Christmastime, holly leaves and berries don’t cling for a long time. I sometimes use small artificial berries when those little details would add to the design.

Buy a Taller Christmas Tree For More Greens

Fraser fir branches are one of the best greens to begin the project. Since there aren’t any growing here, I used bottom branches from a freshly cut Christmas tree purchased at Hawk’s Market in Elkin. Fraser fir lasts a fairly long period of time without much shedding. Trees are pruned while they’re growing, causing very dense growth. To make ornaments hang freely, you can thin out some of the branches and use them in your evergreen swags.

Garden centers, farmers’ markets, florists, and craft shops stock various cut greens and supplies for creating swags, start to finish.

Experiment with unconventional sources of material, such as eucalyptus, bay leaves, and red- or yellow-twig dogwood stems. I’ve used a few leaves of variegated liriope or acorus tied in bunches and wired into arrangements.

You might prefer artificial materials, including the greens. Fresh poinsettias or magnolia blooms wouldn’t last on a swag, of course, but craft shops have “picks” in a wide range of styles and colors. They might or might not hold up to outdoor conditions, depending on what they’re made of. Handled carefully, silks and flocked picks can last for a few seasons.


Berries and Seedpods

 

holly with red berries

One of many hollies.


Use rosehips, holly berries, nandina berriesacorns from oak trees, nuts, and small fruits for ornamentation. Birds might help themselves to the berries.

Seedpods offer another dimension in decorating your evergreen swag. Siberian iris grows woody seedpods on strong stems. Use them in their natural state or spray paint them in the color of your choice.

Grow everlastings (several species of flowers whose dry seedpods hold up in winter arrangements) in the garden during the summer season. Scabiosa stellata and strawflower are flowering annuals with stiff papery seedheads.

Although rather delicate, seedpods of biennial money plant, also called honesty (Lunaria annua), can be used in protected locations or with indoor arrangements. Clean the seedpods by gently rubbing between your fingers, removing the outer coverings and revealing the shimmering membrane inside.


Cones

Gather pine cones from your property, or perhaps you have some tucked away in your craft corner. They last for years if kept dry. This year, I used the ones that had been in storage for a decade.

Various evergreen species grow cones in different sizes, shapes, and shades of brown. Some have cute little cones ½-2″ long (hemlock, cypress) for smaller projects. Many pine species are 3-8″ long, and one—Coulter pine—has gigantic pine cones around 14″ long. Some have needle-sharp tips or sticky sap, so handle carefully.

Pine cones are the female reproductive parts of pine trees; the males generally are smaller and shed all that wind-blown pollen many months before pine cones mature. Seeds provide food for wildlife, and delicious pine nuts (“pignoli”) are harvested from about 20 species growing around the world.

When pine cones get wet, their scales close tightly. As they dry out, they begin opening up once again (photo, above).


Other Materials For the Evergreen Swag

In addition to the plant materials, you’ll need:

  • a protected work surface
  • pruners
  • scissors
  • pliers
  • old scissors or wire cutters
  • Wilt-Pruf, a biodegradable antidesiccant (optional, but recommended)
  • a sprayer bottle
  • a bucket for preparing a large quantity of greens
  • a large plastic trash bag or an old towel
  • florist’s paddle wire—I use 26 gauge and the thicker 22 gauge (wire will break down in the environment). Use pipe cleaners or zip ties for the loop and the bow, if you prefer.
  • ribbon with wired edges. Outdoor ribbon holds up to the weather.
  • sap/adhesive remover (Goo Gone or Goof Off). Read the label.
  • ornaments, bells, or other embellishments



Step #2: Prepare the Greens


For the swags I made to sell at the farmers’ market, the longest stems from the Fraser fir Christmas tree measured about 30″. Use short stems for smaller swags and centerpieces. Trim off any unusable parts.

During mild weather, set up an area outdoors, if possible, to cut the greens and when using Wilt-Pruf. Prepare a sprayer bottle by adding Wilt-Pruf to the water (read the label.) The dilution rate for Wilt-Pruf to water is 1:10. Although the solution looks like diluted milk, it will dry clear. When it dries, it coats foliage with a waxy film which holds water in the plant tissues. This helps the greens last longer, especially when used indoors. (I’ve used it in a colder climate for evergreens planted in autumn to protect them from drying winds.)

Place the greens in a single layer on the plastic, and spray thoroughly. Turn them over and spray again. Agitate the solution periodically. The goal is to cover all surfaces with the solution. Let the greens dry outside on the plastic or the towel (or the lawn), and shade them from warm sun.

If you’re making a few arrangements, fill the bucket partway with the Wilt-Pruf solution. Dip the greens a few times into the solution. Let them drip, then lay them out to dry.

I’ll spray leftover solution on the tree itself, letting it dry before bringing it indoors and adding lights and ornaments. Wilt-Pruf kept in the sprayer will gum up the works, so rinse thoroughly with soap and hot water. Wash soapy water and then clear water through the sprayer.

If you don’t use Wilt-Pruf, soak the greens in cool water for a few minutes before working with them. It’s a good idea to mist the greens now and then, even after completing the project.


Step #3: Layer the Greens


Reserve the fullest, longest fir stem for the base of the evergreen swag. Then layer on 2-4 more stems, each one a little shorter than the previous one. This gives the appearance of depth rather than looking two dimensional.

Adjust the stems so the swag doesn’t show large gaps when you look through it. Leave some of the smaller twigs near the base of the stem out of the loop (next paragraph), so the swag doesn’t look so constricted. Look for a balance of foliage on the left side and the right side. If needed, add another stem or two, or cut off a wayward twig.

Cut a piece of the 22-gauge (thicker) wire about 12-14″ long. Wrap it very tightly 1 or 2 times around the base of the stems, 2-3″ from the ends. Twist the wire ends tightly together 5-6 times to secure it. Use the ends to create a loop and twist the ends again several times to hold it together. Give the loop a tug to test it.

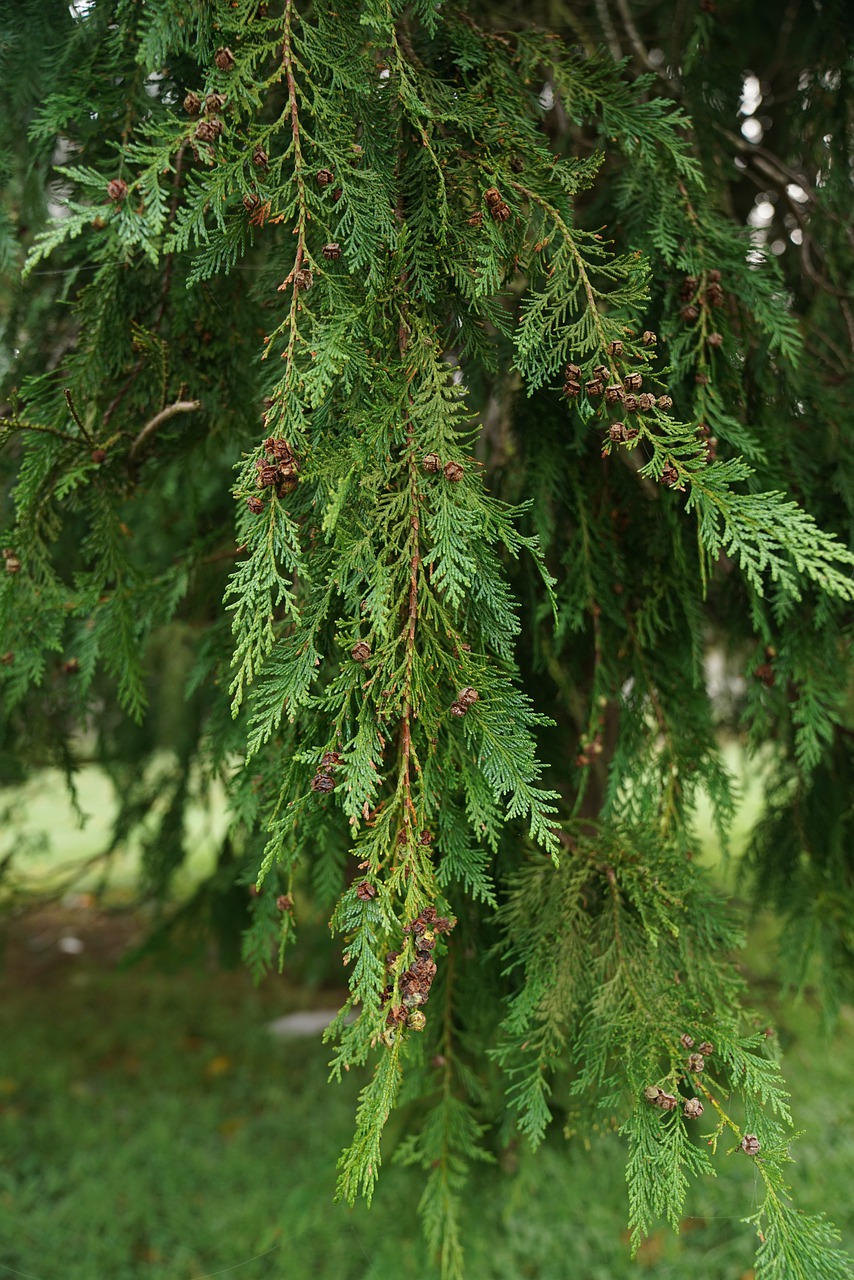
An alternative to using fir is to substitute long, softly flowing branches of cedar. Port Orford cedar (Chamaecyparis lawsoniana), and incense cedar (Calocedrus decurrens) with its tiny yellowish cones, are elegant, fragrant greens. Add a bow with long tails for a simple arrangement.


Step #4: Add More Layers Of Greens On the Swag

 

evergreen swag featuring golden chamaecyparis

Colorful foliage of Chamaecyparis ‘Vintage Gold’ with boxwood and Fraser fir.


Adding greens with different textures or colors brings complexity to your design. Add one or a few sprigs of white pine, cypress, or cedar, and bushy boxwood stems near the top. Use the 26-gauge wire to secure the new greens near the top of the fir stems.

Consider color echoes when designing your swag. For example, a piece of yellow conifer can pick up the gold in the ribbon or the ornaments you plan to use. Red berries echo the red in the bow.

Once all the greens have been secured, trim the cut ends to the same length, if desired.


Step #5: A Beautiful Bow For Your Evergreen Swag


Do you like the Victorian style, an organic woodsy design, or modern glitz? You can find ribbon to reflect any style for this year’s decorations. Look for a ready-made bow at the florist shop or garden center if your skills are not so advanced. Maybe someone can offer suggestions and make one for you while you wait.

Use either gauge wire to tie the bow tightly together and onto the evergreen swag near the top. After the rest of the elements have been added, you can fluff open the loops of the bow. Wired edges in the ribbon help everything stay in place, and sturdy ribbon (more substantial wire) is required in the breezy outdoors. Save your favorite bows by stuffing the loops with tissue paper (optional) and carefully placing them in a plastic bin during the off-season.

There are plenty of YouTube videos showing how to make bows. With a little practice, you can master this part of the project, too. Here are 2 of them, from Welcome to the Woods and Maymay Made It Crafts:


Step #6: Pine Cones 


Choose 3 similar pine cones, and place them on the swag below the big bow at different levels.  It’s okay if they’re not exactly the same size. I prefer an uneven number of elements, but that’s a personal choice. You might prefer 2 pine cones or none at all.

If you like the placement, cut a 12-16″ piece of the thinner wire for each pine cone. It might be easier to poke the wire through from the back of the swag, around a sturdy stem. Then, pull the ends together around the pine cone, between the scales, about 1/3 of the way from the top of the cone. Pull the wire tightly and twist the ends together to secure it. Cut off the excess wire or tuck it into the greens. The other option involves wrapping the wire around the pine cone and then wiring it onto the swag.

Does it all feel pretty stable? If it doesn’t, it might not hold together in the wind and rain. See if you can pull the wires tighter, twisting the excess at the back of the swag. Using pliers to tightly twist the wire might help.

If the swag swings around in the wind, shorten the loop or wire the lower part of the swag to the support. If necessary, screw 2 thin pieces of wood together (like a “T”), and build the swag on that.

Evergreens have sticky sap. Some gardeners use gloves when working with greens. Although it’s not recommended to use on the skin, I use sap remover to clean my hands and tools. Wash with soap and water immediately afterward.


Step #7: Finishing Touches For the Evergreen Swag
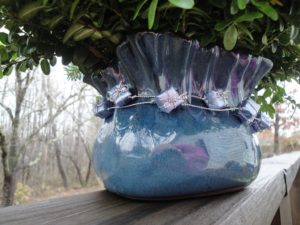
 

centerpiece with tiny gift box garland

Little gift boxes on a table centerpiece. So cute.


This is the time for adding those finishing touches that individualize your project. Whether it’s a small brass horn, inexpensive Christmas balls or bells, small red “faux” apples or berries—or real ones. Get creative! In the photo above, I used a garland of tiny light blue gift boxes on the neck of this blue ceramic pot for an indoor centerpiece. These are made of paper and would not last long in the rain.

Deep, rich colors are best observed up close. From a distance, though, deep green evergreens and a burgundy bow look very dark. If you want to keep it there, you can lighten up the swag with bright red bow or a colorful plaid. Add frosted pine cones (painted white on the tips of the scales) or shiny ornaments. Some variegated English holly could do the trick or shine a spotlight on the area.

Maybe you’d like to remember your trip to Mardi Gras and drape some colorful beads on the swag. A string of battery-operated tiny fairy lights. Laminated bits of photographs or Christmas cards. Sea shells, painted acorns, a cool piece of driftwood… See what’s offered in craft shops and stores specializing in Christmas decorations. There are so many fabulous materials available for your evergreen swag! Get the family or friends involved and have fun with this easy project.


Celebrate the Winter Solstice, Merry Christmas, Happy Holidays!


Return to the top

New Gardens For a New Property: What To Do First


2021

Updated 8/26/2024


A New Home and New Gardens!


new gardens

View from the front porch.


As you might know from reading The Farm In My Yard, I moved from Rockville, Maryland to Charlotte, North Carolina in 2013. I worked for a few years, while watching over my elderly mother. After she passed away in 2020, the search was on for a larger property in a smaller town. Must-haves included reasonably quiet surroundings, lots of nature, room to play in new gardens, and no HOA. This article includes information from a landscaper’s perspective that might help first-time property owners.

Success! In late October, I moved to a new home in northern North Carolina. A few obstacles didn’t stop my tireless realtor, Erika, from finding this (almost) perfect little house. There was Covid, for one, and the reluctance on the part of homeowners to list their homes for sale. Very few livable offerings in my price range came to the market. As soon as they did, they immediately went under contract.

As many buyers have done in this tight market, I made an offer on the property sight unseen. Well, truthfully, I did drive by the house before submitting an offer, and liked what I saw. Trees, woods, space, and sunlight—perfect for a gardener! The previous owners made some major improvements, saving me the trouble and the expense. But I had no idea what the interior looked like.


Inspections

When buying a house, have all the inspections done before closing, as recommended by your realtor or for your own peace of mind. Estimate the cost of necessary upgrades and repairs.

Particularly for older homes, check the roof and electrical, plumbing, and HVAC systems. Look for water damage and mold, pests and wood rot, foundation issues, adequate insulation, storage space, and evidence of ongoing maintenance.

Negative findings could nullify a contract or provide a basis for negotiation between your realtor and the listing agent.


The Lay of the Land


Small towns, farms, and independent businesses dot the landscape in this part of Wilkes County. Several vineyards and state parks attract visitors to these lovely rolling hills, and rivers offer lots of sporting opportunities. Drive along any of the scenic roads, and new vistas open at every turn; the Blue Ridge Parkway is only half an hour away. Beautiful countryside!

looking east

The big oaks frame a sunrise.

My new home, a one-story house built in the 1940’s, sits on 1¼ acres of mostly level land. The view from the front porch looks over a field, a few houses, and downslope toward a small stream. Stunning sunrises greet me from that direction almost daily.

Most of the trees’ leaves have fallen from the massive limbs of the native white and willow oaks (Quercus alba and Q. phellos). A few of these trees tower over the eastern border of the property. In the summer, those toward the west will shade the house from hot afternoon sun.

The mighty oaks came first, judging by their size, and then the house. If I were to name the property, Quercus Magnus would seem fitting.


Preliminary Plans for New Gardens

There’s plenty of space for the berries and the vegetables to bask in the sun. Plenty of space to raise shade-loving perennials in the fenced enclosure north of the great oaks. And plenty of space for gardens that will support birds, bugs, bees, and butterflies.

Also, importantly, there’s room to grow plants to sell at the local farmers’ markets, as I did in Maryland for 25 years.


After Moving In


Deciding what to do first depends on the season, your climate, and the condition of the house and gardens. Priorities often reflect our occupations or interests, so artists might first set up a studio while contractors organize tools in the outbuildings. Growing families might rank bicycle storage, a big kitchen, and an extra bathroom at the top of the list.

And gardeners? Well, we look at soil quality, existing gardens, and sunlight. This gardener prefers a large, mostly blank slate. Others call it a lawn.

In April, I’d be concerned about starting seeds for the market, getting the summer vegetables and flowers planted, and cutting grass. But it’s December now. The yard needs tidying, houseplants need to find their homes, and, of course, we must bake Christmas cookies. Not to mention, those boxes won’t unpack themselves!

Moving into a house that doesn’t need major repairs eases the stress. To be sure, there are some improvements that can and will be made, but nothing that needs immediate attention. Wouldn’t mind a new kitchen with a dishwasher, Santa. (Chocolate chip or almond crescents?)


Trees and Shrubs


Poor Pruning Practices

Walking around the property will highlight issues that need attention. Check the trees and shrubs for dead or broken branches or call a licensed arborist for a professional assessment. There are some dead twigs way up in these oaks. A brisk wind shakes them loose, so the truck stays parked under the carport. Fortunately, that debris falls short of the house.


I’ll hire an arborist to clean up the trees and remove branches that have been headed back. Heading back, or bluntly cutting off the end of a branch, causes many epicormic shoots to form. Those are new growing tips emerging from buds concentrated close to the cut. The shoots also can cover the length of the branch. Epicormic shoots have weak connections to the branch, and, over time, most will fail and fall from the plant (photos, above).

Similarly, topping trees is, in my opinion, not recommended. Yes, it reduces the height, temporarily, but topped trees in winter are hardly natural-looking and not attractive (photo, below). They, too, drop twigs over an extended period of time.

An expert arborist might be able to undo the damage from heading back or topping. However, removing the tree might be the most economical solution. Research appropriate tree species for your property and where to plant them. Keep in mind that plants almost always achieve dimensions larger than those indicated on the label. Your local agricultural extension office can help. Check with botanical gardens and sources such as your state’s native plant societies.


topped tree, sky

A topped tree.


The Root of the Problem

Trees planted close to the foundation can threaten its structural integrity. Consider having them removed.

The same ruthlessness applies to the wrong tree in any space. Keeping silver maples or weeping willows close to the house, septic system, or underground utilities begs for trouble. This is where an arborist or a well-informed landscaper can recommend more fitting species and a pleasing design for better curb appeal. Call 8-1-1 to have underground utility lines marked.


Constricted

Look for old stakes and wires still looped around trunks or branches. Wooden posts rot, but wire and synthetic rope from clotheslines, fences, and hammocks persist.

As trunks and branches grow in girth, they attempt to grow around the obstruction, usually cutting off the vascular system inside the bark. This results in the death of those parts of the tree that cannot receive water from the roots. Early fall color on isolated branches might indicate trouble, such as pests or physical constriction.

In the Maryland garden, a dogwood tree died for no apparent reason. After cutting it down and opening the bark in several places, I found plastic rope deeply embedded in the trunk a few feet from the ground. Although the damage appeared several years after I had moved there, it eventually killed a beautiful dogwood.


Flares and Girdling Roots


Most trees flare out where the trunk descends into the ground. If this flare is missing, see if soil has been piled up against the trunk, and remove it.

Construction around unprotected trees can deposit soil that cuts off the oxygen supply to the roots, resulting in the plant’s decline. As little as an additional 1-2″ can damage trees. Also, parking vehicles over the root system compacts the soil, impeding air and water penetration. Keep in mind that tree roots extend well beyond the dripline, or the edge of the canopy.

Check for a girdling root crossing over the trunk at the soil line or below it. As it grows, the root will hinder growth of that section of the trunk, making the trunk look straight-sided where it enters the ground. Cut it out before the tree tries to grow around it. Maples and other surface-rooting trees are notorious for this.

There’s no flare at the base of this maple tree (photo, above) and at least one large girding root is constricting the flow of water and nutrients from the soil. I noticed large dead limbs in the canopy, so the tree might be removed.


English Ivy


english ivy growing up a white oak

English ivy growing up an oak tree.


Vining English ivy (Hedera helix) is growing up a white oak’s trunk, using rootlets to cling to the bark. All the vines will be removed for 4 main reasons.

red-shouldered hawk dec 2021First, English ivy is a woody vine, so its stems will grow in girth just as a tree branch does. As they wrap around the tree trunk or the limbs and thicken over the years, the ivy stems will constrict tree growth, killing limbs and possibly the tree.

Second, the evergreen ivy holds moisture and debris close to the bark, and could encourage insects and diseases.

Third, as ivy scampers over the ground and up the trees, it provides safe haven for rodents. Birds of prey and other predators cannot see them. Here’s a red-shouldered hawk perched in a dogwood tree, looking for dinner.

Fourth, ivy competes with small native plants, crowding them out.

So, the ivy must go.


Headings

Page 1: A New Home and New Gardens! (Inspections), The Lay of the Land (Preliminary Plans for New Gardens), After Moving In, Trees and Shrubs (Poor Pruning Practices, The Root of the Problem, Constricted, Flares and Girdling Roots, English Ivy)

Page 2: The Lawn (Safety First, Less Grass to Mow, Grass Clippings, Spontaneous Combustion), Drainage (Hold the Water), New Gardens for Old Plants (Virginia Sweetspire), More New Gardens and Less Lawn (The Black Walnut, The Ravine and the Woodland, Passionflower and Phlox ‘Minnie Pearl’)

Page 3: Planting a Few Trees (The Rule of Thirds, Too Cold to Plant New Gardens?, Viola, Different Players—Same Script, All Those Leaves), A Welcome Surprise (A Firm Foundation, Heeling In, Iris, Chores Indoors), Christmas Already?, and Concluding

Return to the top of Page 1

Plant Trees To Transform Your Landscape, Part 1


2021


It’s Time To Plant Trees!


As summer’s sizzling temperatures begin to cool off, our thoughts turn to new gardening projects. Fall is a great time to plant trees and shrubs. At that time, garden centers bring in fresh plant material, so you’ll have a wide variety to choose from.

After leaves drop from deciduous plants, roots no longer need to provide water to foliage, making fall the perfect time for landscaping. New roots, though, continue to grow well into autumn, while soil temperature remains above 40°F. By springtime, new leaves will draw water from a more extensive root system, so you won’t have to water as often as you would when planting trees in leaf.

Although you can plant trees and shrubs in full foliage, they will need frequent irrigation to get them established. The warmer the temperature, the more water the plant will require. Summer sun bearing down a dark nursery pot stresses the root system and can prevent root growth on the hottest side of the pot. It follows that during the summer months, roots would rather be in the cool earth than exposed to hot sun. Planting leafy trees just requires more attention from the gardener.

Most evergreens also can be planted in autumn. Their foliage at that time transpires less water to the atmosphere as temperatures cool down and day length shortens.


trees and sky


Room For Improvement


During my search for a new home, what always attracts my attention first is the presence of mature trees. The absence of trees means more grass to mow, for a while, anyway. Not my cup of tea.

Because the Covid-19 pandemic has kept us closer to home, we can’t help but notice areas that could use improvement. Is the sunroom or the shed a bit too toasty in the afternoon? Gazing at the computer screen hour after hour? Now that you’re working from home, looking upon a pretty garden outside the office or pulling a few weeds would provide a needed break. Perhaps you’ve discovered that connecting with nature relieves stress and gives you a feeling of calm and comfort.

Those are just a few reasons to plant trees and spruce up our gardens. Converting high maintenance lawns into gardens with colorful trees, shrubs, and flowers not only enhances aesthetics, but also increases the value of our homes. And with all this talk of carbon footprints and deforestation, perhaps you’re eager to participate in the solution.


Plant Trees To Transform Your Landscape, In Two Parts


Part 1 of “Plant Trees To Transform Your Landscape” addresses seasonal changes, drawing a landscape plan, reasons for planting trees and shrubs, slope, and practical considerations.

Part 2 of “Plant Trees To Transform Your Landscape” details soil preparation and the process of planting trees in the landscape. I also write about native plants vs. the non-natives, and how they affect populations of insects and animals.


The Sun’s Path


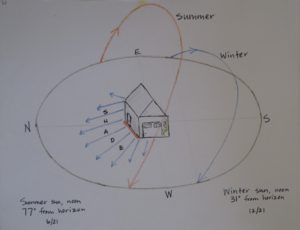
sun's path

The sun’s path across the sky in North Carolina, summer and winter.


Start thinking about your landscape now, before summer’s discomfort fades from memory. Notice how the sun’s arc changes from month to month, and how, by mid- to late summer, it’s already lower in the sky. My little succulents lining the south-facing bay windows get more direct sunlight now than they did a month ago, when the sun was directly overhead.

You can block much of the heat and sunlight falling on the south (northern hemisphere) or west side of the house with a deciduous tree or a group of trees. If you want maximum sunlight coming indoors during the winter, however, avoid planting trees right outside south-facing windows. Instead, shift the trees toward the southwest or the west, which will give you more sun in winter and shade on a hot summer afternoon.

Although deciduous trees drop leaves in autumn, bare branches and twigs will cast some shade. But with carefully placed trees—not directly south—shade will come from smaller twigs on the canopy’s periphery rather than from stout trunks and limbs.

Large evergreens block winter sun at a time when it is most welcome if they’re planted near south-, southeast-, or southwest-facing windows. Consider planting them farther out into the landscape and where they can reduce winter wind from the north or the west. Or use shorter evergreens that mature below windowsill height. Thick borders of twiggy deciduous plant material can decrease wind speed, but not as effectively as evergreens.


For the Record

It helps to keep a record of these seasonal changes. Visualize how tree placement will affect sunlight falling on your house or coming through the windows. Knowing a tree’s mature height and spread will help determine where to place it for maximum solar gain in winter and shade in summer.

Avoid planting trees too close to the house, where leaves, flowers, and fruits will litter the sidewalk and clog the gutters…not just in year 1, but also in year 31. Realistically, though, debris will get into uncovered gutters and leaves will swirl around paved areas, but planting trees far enough from the house will obviate the need for annoyingly frequent maintenance. In addition, limbs growing toward the house will require trimming, and the result often falls short of appealing.

These are merely guidelines that I’m suggesting, but, ultimately, it’s your property and your choice.

Let’s not forget the advantages of planting evergreens for winter protection. A dense planting of evergreen trees and shrubs can mitigate the brutal impact of winter’s fury. That can make living in and working around your home more comfortable, while lowering energy bills at the same time. Remember that winter shade on an icy driveway will delay rapid melting.

Try to recall the direction of prevailing winter winds, which usually varies from the direction of summer breezes. You can research local data from the National Weather Service.


Drawing Up the Plans


sketch to scale when planting trees


Tools Of the Trade

For accurate and detailed drawings, use an architect’s scale, a triangle (for straight edges and right angles), graph paper (for the base plan), tracing paper, a mechanical pencil, and an eraser. A plastic template with round holes of varying widths can be useful for extensive landscape projects.

The final design can be drawn on the more substantial vellum, if you wish, using colored pencils and markers. But, for those homeowners intent on planting a few trees and extending a garden, paper and pencil might more than suffice.

Community colleges and, sometimes, botanical gardens offer classes in landscape design. They might have sources for these tools, or you can find them at art supply companies.


Start the Sketch

Draw a sketch of your home’s footprint and property lines on graph paper. Use dimensions from a copy of the plat plan, if you received one when you bought the house. Pencil in existing vegetation, hardscape (structures and solid surfaces), prevailing wind directions, drainage patterns, slope, and a north arrow.

The 1/4″ scale, where 1/4″ on paper equals 1′ in the landscape, was satisfactory for almost all residential designs. For the largest projects, though, I used the 1/8″ scale. I measured the property, copied the plat plan, and drew, to scale and in permanent ink, all features that were to remain. This base plan depicted an aerial view of the property’s features, including locations of doors and windows in the home’s outline.

Then I drew preliminary plans, in pencil, on tracing paper taped (with removable drafting tape) to the base plan. You might go through several sheets of paper as different ideas take hold. That’s why it’s available in rolls!

Sketch ideas for how your family will use the property. You might include spaces for a sunny vegetable garden, shrubs and trees for butterflies and nesting birds, or a pond. In that case, pencil in the tallest plants either far from those areas or to the north, where they won’t cast shade for many years. Trees that grow less than 15′ or 25′ tall at maturity fit more comfortably in tightly clustered neighborhoods. Consider your neighbors, too, when including trees in the plan.

Now, of course, many landscape designers use software programs that cut short the labor involved in drawing plans by hand.

Also, keep in mind that the actual layout of the plants might necessitate shifting them somewhat from the locations drawn on paper. Before planting, place the potted trees and shrubs in their intended locations, and double-check the placement from all angles.


Elevating Your Skills

Drawing elevations, or vertical perspectives of the house as it sits in the landscape, supplies a more complete picture of your property. We plant trees, shrubs, and other plants around the house to anchor the structure to the land. Keep in mind that 10′ indoors looks much smaller outdoors, so expanding the beds will impart more appropriately scaled proportions.

An elevation of the front of the house will help you envision how the plantings will look from the street. Likewise, views from the back windows could be improved by adding a tree, or 3 trees, and masses of colorful shrubs and perennials near the fence. Remember to include hardscape and windows, doors, and the roof in your sketches. Then pencil in the existing plants from near to far, to scale, and see how they layer against each other. Additional drawings might depict tentative designs starting with no plants or having the biggest offenders removed.

This extra step could illustrate the need for some relief from all the short plants on one side of the property, or how the other side is too heavy with evergreens. If you add color to the elevation, you’ll see where you could repeat a cluster of flowering plants or where there’s too much yellow.

Maybe there are too many mounded forms, and the composition could benefit from a bold upright specimen or a fine texture, such as ornamental grass. Details in the elevation drawings help illustrate where contrast, color, height, repetition, or depth might be missing. Be sure to consider the color of the house and the trim when designing your landscape.

Simple Might Work Better

Perhaps the elevations reveal how busy or spotty the landscape appears, and how it could benefit from a simpler menu with fewer types of plants. The elements in the home’s landscape, when viewed from the street or from a distance, look more harmonious when the garden has only a few specimen varieties and masses of supporting plants.

This doesn’t rule out all those fascinating little plants tucked in here and there. But use those smaller plants along a path or by the patio to appreciate up close.

Symmetry vs. Balance

Planting symmetrical gardens on both sides of the front door might be your go-to style. Sure—that’s easy! But to give your landscape that something extra, try to achieve balance without symmetry. Balance requires using some of the same or similar plants on both sides, but not necessarily in the same quantities.

Symmetry is more difficult to maintain when one arborvitae grows faster than the other due to differences in sun exposure. Or one bed of reblooming daylilies grows better than the one that’s closer to the neighbor’s Norway maple. And most homes simply aren’t symmetrical.

Depth Perception

Imagine your front yard with taller plant material in a raised bed near a streetside corner. Maybe a spacious area could use a few large beds, which remove even more of the lawn. Dimensions of the property and existing features will determine the most appropriate placement of these islands. The plans I drew incorporated irregularly shaped beds, with broad, naturally curved edges instead of straight lines.

Adding a small tree or an uneven number of shrubs with drifts of perennials and ground covers introduces the concept of depth, partially hiding the front of the house from full view. Some open space—a void—near the center, showing the front entrance, creates a contrast. This sense of mystery—where not everything is revealed in one glimpse—adds a dimension that’s hard to describe. But you’ll know it when you see it…or don’t see it.

One tip about planting a tree: don’t plant it dead center in the yard or in a bed! Use the “Rule of Thirds” when locating the tree. Place it closer to the edge of the property, framing the view, or about one-third of the distance from the far end of a bed. A tree in the center abruptly bisects a view, which is uneasy on the eyes. Similarly, I prefer not to plant an upright evergreen between 2 windows.
If space is limited between your house and the neighbor’s, consider planting a generous bed—the full width—on your property. Then add a mulch, brick, or flagstone path from the front yard to the side yard, and plantings on both sides. Given ample room, place the tree on the outside of the path. This gives you that nice feeling of walking through a park.

Perhaps you and the neighbor can develop a landscape together for a more harmonious setting. When I lived in Maryland, a neighbor and I planted the entire area between our driveways, but the man who bought my neighbor’s house replaced all the plants on his side with sod. “Just in case”, I had planted a monarch birch on my side of the property line before he tore out blooming shrubs and perennials. Nevertheless, the see-through character of the finely-twigged birch tree lent that feeling of depth to our front yards.


House Wood Family Driveway - paulbr75 / Pixabay


Take This Photo, For Example

Taking advantage of the depth of the front yard gives opportunities for repeating plant material without having to rely on symmetry. Research shows that people attach greater value to properties with attractively orchestrated plantings comprising wider beds and curved edges.

Enlarging the foundation plantings by bringing in a specimen and groups of plant material is usually more appealing. Try adding large curved beds in your drawings rather than narrow beds lined up against the wall. Curves soften rigid straight edges.

In the photograph, above, this landscape would gain depth by adding a new curved bed in the corner between the near side of the sidewalk and the driveway. I’d plant a small tree, several small flowering shrubs or evergreens, and flowers in this bed. Lastly, repetition, using the same ground cover on both sides of the sidewalk, not necessarily lined up, completes the picture. (Well, I might rethink those ornamental grasses…and…)

When installing a new sidewalk near the house, place it farther from the house, if possible, to accommodate more creative plantings.


Options For Cooling


Diagonally off the northeast corner of my last house in Rockville, Maryland, I planted a sourwood tree (Oxydendrum arboreum). This deciduous tree has spectacular red fall color. Although the tree is a slow grower, I selected it for its ornamental features: multi-stem trunk (usually sold with a single trunk), fine twigs, flowers after the peak spring season, pest-free foliage, and long-lasting fall color. With all those desirable features, I forgave its persistent seedpods.

During the growing season, the sourwood blocked morning sun, from the east-northeast, and helped cool the living room and the master bedroom upstairs. But, with winter’s sun rising in the east-southeast, the leafless tree did not affect light entering those rooms. In regions where the temperature climbs quickly early in the day, consider planting a tree to shade the morning sun.

styrax snow charm

Japanese snowbell.

On the west side of the property, monarch birches (Betula maximowicziana) provided afternoon shade. The fine texture of their leaves and branches cast a delicate shade, and those beautiful chalky white trunks contributed year-round interest. This species can be quite variable in trunk color, from white to gray to brown. I also planted the species Japanese snowbell (Styrax japonica), a small umbrella-shaped tree, off the west side of the brick patio.

When we first moved into the house, there was no relief from intense summer sun. Planting trees made good sense for this house with little insulation, original single-pane windows, and an inefficient HVAC system.

Over the next three decades, I renovated the entire house, insulated the attic and under new siding, planted a woodland, and greatly reduced our energy bills. Replacement double-pane windows, with that heat-reflective coating, were expensive, but worth it.


Headings:

Page 1: It’s Time To Plant Trees! (Room For Improvement), The Sun’s Path (For the Record), Drawing Up the Plans (Tools Of the Trade, Start the Sketch, Elevating Your Skills, Simple Might Work Better, Symmetry vs. Balance, Depth Perception, Take This Photo, For Example), and Options For Cooling

Page 2: Beautiful Trees In the Garden (Lessons From Well-Designed Gardens), First, Call 8-1-1, Establish the Hardscape, Dealing With Slope, Why Should We Plant Trees and Shrubs? (Planting Trees and Shrubs Can:, Finding Help), Choosing Plant Material, and Next: Part 2

Return to the top of Page 1

Northern Cardinals: Flashes of Brilliance


Welcome the Northern Cardinals


Whose heart is not warmed by the sight of brilliant red cardinals feasting at backyard feeders? Add a fresh snowfall and the birds’ familiar calls as they defend their territory, and you’ve got some delightful moments on a cold winter day. I almost wrote a “dreary winter day”, but living close to nature precludes this dismal perception; every day is a lovely day.

This commonly seen favorite songbird normally remains in the area, both winter and summer, as long as food is plentiful. Now doesn’t that just lift your spirits!


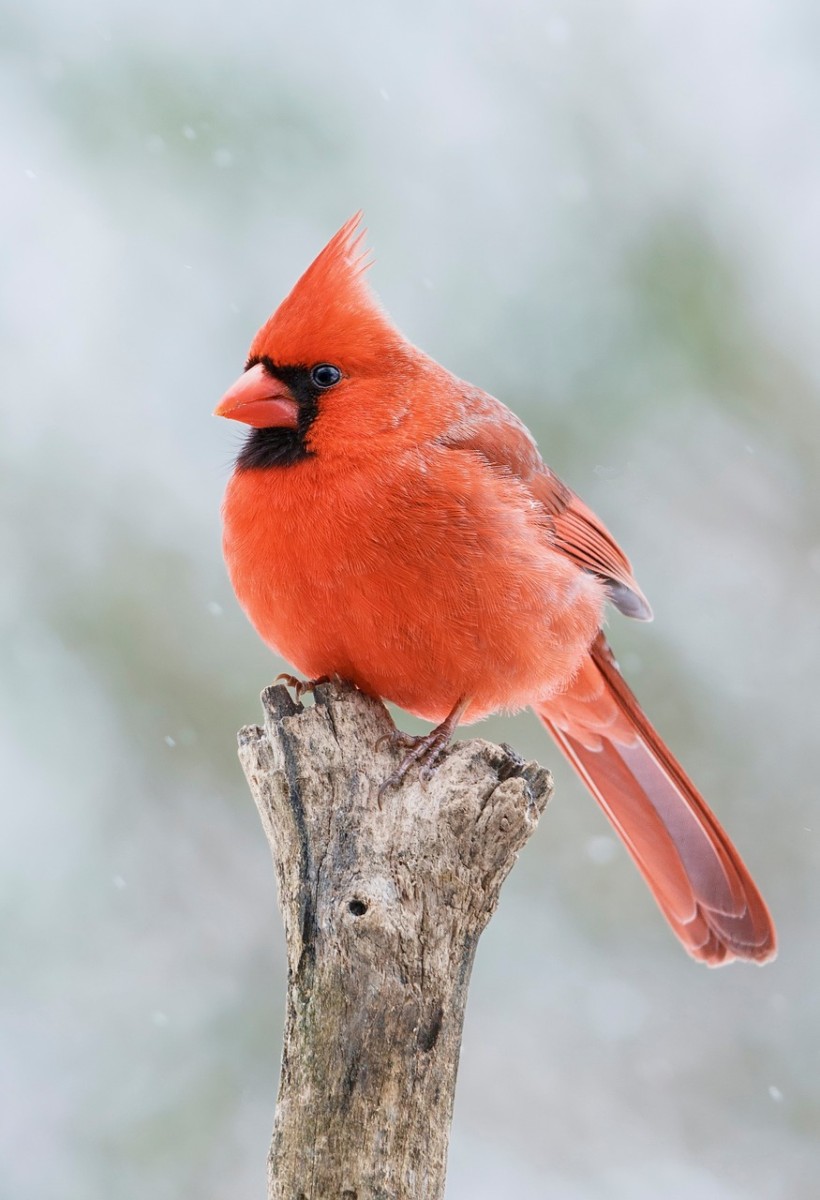
cardinals are one of our favorite birds

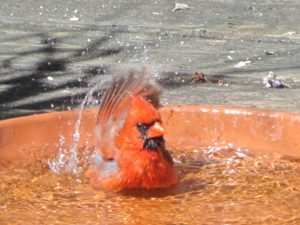
A male northern cardinal.


Where Cardinals Live


Other species of cardinals live in Central and South America, and there are many subspecies within their range. This article is about the northern cardinal, Cardinalis cardinalis, whose name derives from the red vestments worn by Catholic cardinals.

Cardinals are abundant throughout most of the United States: in the area from the Atlantic coast west to eastern Montana and eastern New Mexico, including all of Texas and parts of the deep southwest. They also live in Mexico, but not commonly in higher elevations.

Fortunately, the cardinal’s population has remained stable while the numbers of many other songbirds have decreased dramatically. Some songbirds no longer live in areas where they used to be abundant.


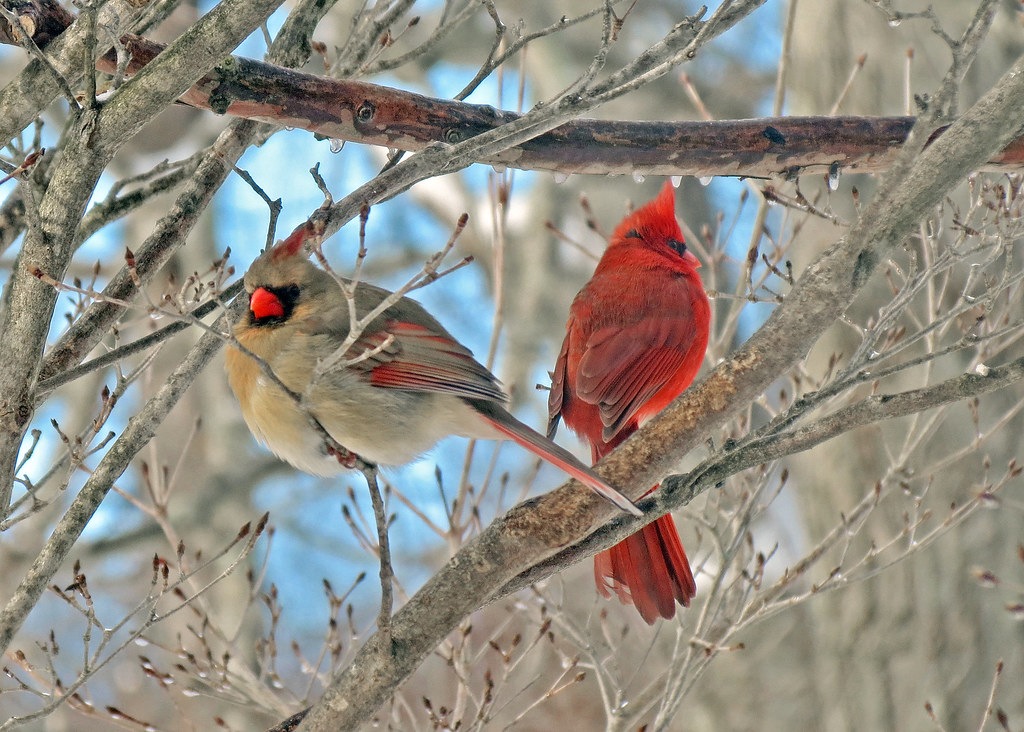
a pair of cardinals

Female and male cardinals.


The cardinal’s range, in fact, has expanded northward, to include areas in Canada north and east of the Great Lakes. Although the cardinal has been seen in Canada for many years, it’s only since about 1980 that proof of nesting activity has taken place there. The prevalence of well-stocked feeders is considered the primary explanation for this expansion.

Border regions close to their usual ranges see cardinals settling into those areas. They’re not yet commonly found in those border regions, but populations are increasing.


Habitat


Part of the cardinal’s success lies in the species’ adaptability to various environments. They reside in woodlands, shrubby thickets, swamps, and forest edges and clearings. Northern cardinals in the desert southwest live near streams and washes, in tall brushy growth and mesquite groves.

City parks and suburban residential gardens often host these beautiful birds, as long as it’s fairly quiet. They retreat to the security of thick undergrowth if disturbed but will return soon afterward. Cardinals are usually the first to arrive and the last to leave the backyard bird feeders. When I rise, before it’s light, inevitably it is the cardinal that comes first to the feeder, unless the opossum is having a late night out.


northern cardinal and wren on back fence

Northern cardinal and wren on back fence.


Plant a Garden for the Birds


You can encourage birds and other wildlife to make your property their home. Contact the local Audubon Society or other birding experts and find out which plants attract birds. One option is to have a landscape plan drawn up, incorporating features that will bring in the wildlife.

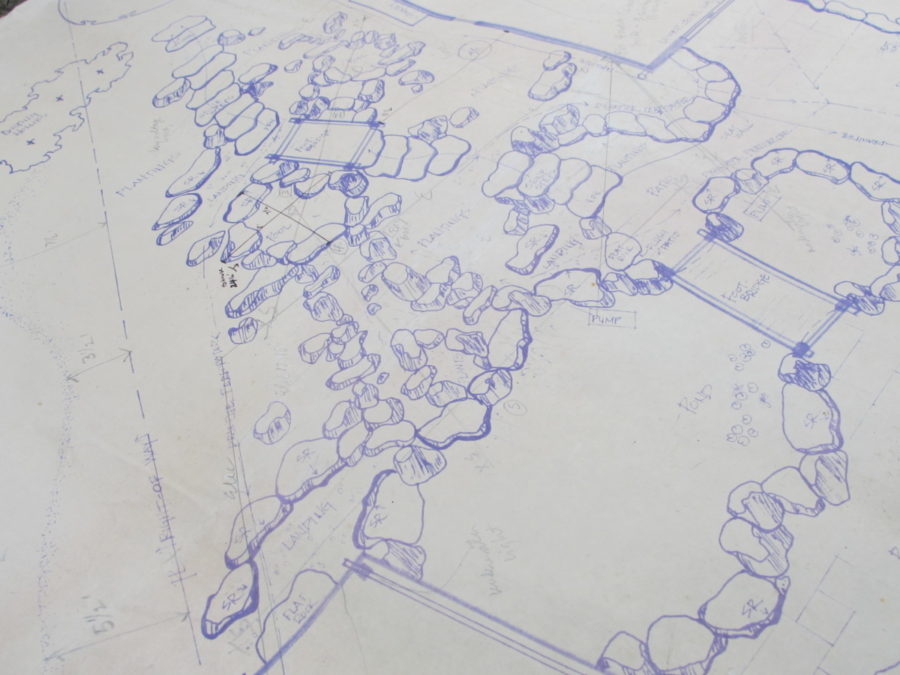
The garden depicted in the blueprint below shows the hardscape for a water garden I planted in the 1990’s: paths, stonework, pond, footbridges, and the underground wiring and plumbing. This new garden replaced all the lawn on the slope with a series of 5 waterfalls and a 35′ pond, stone steps, and layered plantings all around. Over time, my clients asked me to expand the gardens and remove more lawn, incorporating plants that offered berries, seeds, perches, and protection for birds.

The year-round availability of water attracted all sorts of wildlife, including dragonflies, frogs and toads, turtles, songbirds and birds of prey, and snakes. Occasionally, the owners added inexpensive feeder goldfish, after the great blue herons had picked off the ones that couldn’t hide fast enough.


Plant a lush landscape—less grass to mow!—that provides food, water, shelter, and nesting options. Include trees (small ones if your space is limited), evergreen and deciduous shrubs, and flowers that produce edible seeds or berries. Trees planted where they can shade the house and windows from hot afternoon sun will lower your energy bills.


Native Plants

Native plant species attract insects and offer food for birds and much of the rest of the food chain. Caterpillars will eat the leaves, and that’s a good thing. Resist the temptation to spray the “bugs”, which will feed many kinds of birds, lizards, and frogs. Although adult cardinals consume primarily seeds and fruits, they feed mostly insects to their nestlings. Pesticides will harm not only the insects but also the birds and other animals that feed on them.

Group together several trees and shrubs in the landscape. Birds prefer density of growth rather than a tree here and a couple of shrubs over there. If they can quickly retreat to dense undergrowth, they’ll feel more secure in your garden.

Walk through a local botanical garden and note the native species you might be able to use in your garden. Observe how the taller species are underplanted with masses of shrubs and perennials, giving a layered and full appearance. Keep these principles in mind when landscaping your property.


State Bird


This beloved bird has achieved state bird status in Illinois, Indiana, Kentucky, North Carolina (Mother’s favorite!), Ohio, Virginia, and West Virginia. In some areas, they’re called “redbirds”.


Headings

Page 1: Welcome the Northern Cardinals, Where Cardinals Live, Habitat, Plant a Garden for the Birds (Native Plants), and State Bird

Page 2: The Cardinal’s Diet (The Problem with Seed Husks), Live Cam (links), The Yellow Northern Cardinal, Water, Growing Sunflowers, Nesting Cardinals (Sexual Dimorphism, Courtship, Longevity, The Nest and Eggs), Predators, and Bird Watching

Return to the top

Tips For Planting A Potted Miniature Garden

2019


Down To Earth Garden Center, and Planting a Miniature Garden


On a recent drive to the mountains of North Carolina, I passed by Down To Earth Garden Center. Maybe it was the charming picket fence, or the need to save time and buy a few packs of vegetables for the deck pots. Either way, the inviting entrance lured me back.

Plus, when living in West Virginia, waaaay back in the 1970’s, I wholesaled potted houseplants to a popular shop called Down To Earth, in the downtown Morgantown retail district. Fond memories…


Down To Earth Garden Center is located at 1080 South Trade Street, in Tryon NC. Fran and Gary Garside are the owners, and Kiara and Dylan offered friendly greetings and help. After a quick turn around the yard, I asked permission to take a few photographs for the blog. Oliver, the friendly terrier, had no objections, either.

Here’s another small but meticulously maintained garden center.

Check out their facebook page, Down To Earth Garden Center, in Tryon NC.

Phone: 828 859-2283. Call for new hours.


The Newest Project


An empty blue ceramic pot sits in our front garden, begging for employment. A while ago, I sowed a pack of older zinnia seeds in it, but they didn’t germinate. So, the pot is looking for work. Construction on our home and others in the neighborhood this summer prohibited any large scale gardening, so I’m eager to exercise some creative horticulture before frost.


Thuja occidentalis 'Primo'

Thuja ‘Primo’, an arborvitae.


Seeing the dozen or so varieties of hardy dwarf evergreens at Down To Earth Garden Center, I instantly knew what my next project would be. The pot to be planted is roughly 16″ square and 8″ deep. There’s plenty of room for a collection of miniatures, some rocks and gravel, and driftwood with character.

The term “driftwood” is loosely applied here, referring to any piece of weathered wood or woody root. Most of the small pieces I’ve gathered have come from the woods, not from a body of water.


Fairy Gardens

In recent years, this style of garden has been called a “fairy garden”, but some gardeners simply refuse to call it that. Let’s just call them miniature gardens. If you or your grandchildren want to dress them up with happy gnomes and resin residences, go right ahead. But for me, a natural landscape is the way to go.

By the way, this is not a new trend in gardening. I remember planting terrariums for a florist in New Jersey, more than 4 decades ago. I used dwarf tropicals, driftwood, rocks and gravel, and life-like little “faux” mushrooms. Merchandisers, however, have captured attention from new audiences by calling them fairy gardens.

Any hobby shop you visit will be stocked with associated paraphernalia, from named fairies and cute cottages to stone staircases. This could be a fun introduction into gardening for our younger folks.


Tropicals For a Miniature Garden

Although I will be constructing a garden using cold-hardy species, you might prefer using tropicals for indoor gardens. Garden centers stock miniature plants in 1 1/2″ to 2″ pots for this purpose. You’ll find them as stores gear up for the busy fall (or spring) growing season, but many stock them year-round.

Some species stay small while others eventually will grow too large for a miniature garden. But for a year or so, they’ll do fine. You can find all sorts of ferns, Nephthytis, young palms, peperomia, pilea, baby tears, little succulents for sun, philodendron, and pothos. Young trees, such as Podocarpus, aralia (Polyscias), dracaena, Serissa, and Norfolk Island pine also are available.


Little Evergreens For the Miniature Garden


Picea and Thuja

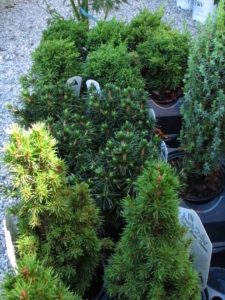
dwarf evergreens

Some of the hardy dwarf evergreens at the garden center.

From Down To Earth, I selected Picea abies ‘Jana’, a Norway spruce, and Picea glauca ‘Blue Planet’, a white spruce. Each of these globular evergreens grows only 1″ to 2″ in a year when planted in the garden, and less than that in a pot. Their needles are a whopping 1/4″ to 1/3″ long!

Upright growing Thuja occidentalis ‘Primo’, an eastern arborvitae, grows 2″ to 4″ per year, and will serve as a vertical accent in the composition. Dwarf conifers are perfect for trough gardens, rock gardens, and also for outdoor railway layouts.

(***Update***: Each of the spruces grew less than 1″ this past year, and ‘Primo’ added only 1 1/2″ in height. All plants look great, although ‘Jana’ burned a bit at the top during a long stretch of hot weather—100°F heat index. 8/25/2020)

‘Primo’ could easily be mistaken for its cousin, Chamaecyparis, a well-loved genus which I often included in customers’ landscapes and in mine. This dwarf arborvitae has dense fans of tightly-packed foliage whorled around its stems—fabulous textural interest! ‘Primo’ was selected from a crop of seedlings at Iseli Nursery in 2004, and was released to the trade in 2017. Its foliage can take on deeper green to bronze tints in cold weather. When planted in the garden, this variety will grow to about 3′ tall and 1 1/2′ wide in 10 years.

A Holly Called ‘Jersey Jewel’

Down To Earth also had dwarf junipers, Cotoneaster, a ferny Chamaecyparis, and a holly with the cutest and tiniest round leaves. It was difficult narrowing down the choices to 3 plants. Hmmm…I might have to go back for that holly. (***Update***: A couple of months later, I did go back for that holly, Ilex crenata ‘Jersey Jewel’, when my visiting brother, Jeff, and I went for a drive in the mountains.)


The Cold Facts


All 3 dwarf evergreens are hardy to minus 30°F, or USDA zone 4. Because they will be kept above ground level, in the pot, their roots will not be insulated by surrounding garden soil. On an average winter night here in zone 7b (borderline 8a), however, the soil probably will freeze only an inch or two into the pot. I’m more concerned about summer heat in this area.

So, how, then, do spruces and firs survive way up in the frigid north? First, they evolved there, and their cellular chemistry has adapted to harsh conditions. Second, a blanket of snow and a layer of forest floor debris help protect plants’ roots, to a degree, even if air temperatures plummet to well below 0°. And those are the full-sized specimens, with roots that venture more deeply than the tiny evergreens I’ll be using in the pot.


Other Variables

Large pots in winter sunlight absorb more heat than small ones during the daytime, and release it to the atmosphere at night. And the more hours of sun, the better. You can see how a larger soil mass offers better protection from the cold than a smaller one. It takes more time for a greater volume of soil to release the warmth gathered during the daytime.

Consider, also, the color of the pot. Dark pots absorb more energy from the sun, sometimes making the difference between life and death for their inhabitants. In this case, I already have the blue pot, and it’s a light shade of blue at that. But later I’ll describe other tricks we can employ when dealing with harsh winter weather.

This container has survived many winters outdoors without cracking because it’s frost resistant. Still, there are no guarantees. For those pots that have great value to you, empty and clean them, and store them upside down in the shed or the garage.

Within reasonable limits, most of us in the U.S. can find something to grow in winter pots. Just look for the hardiest specimens you can find, and get some advice from an expert at your local garden center. If live plants are out of the question, consider berried stems, colorful twigs, cut greens, moss, pine cones, and other seasonal ornamentation for the decorative pots by the front door. Or you might choose to take the risk with live plants.


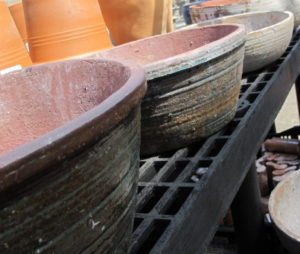
shallow pots

Low profile pottery, perfect for miniature gardens.


In Unusually Cold Conditions


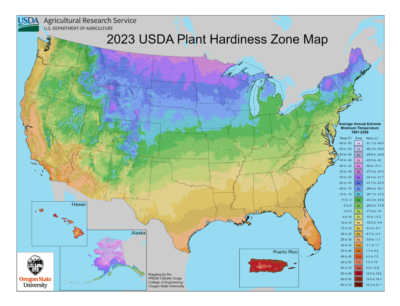
Hardiness Zones

Each variety of tree, shrub, and perennial is assigned a winter hardiness zone. That zone represents the lowest temperatures it can tolerate when planted in the ground. It’s useful when labels include the range of tolerance, such as “USDA zones 4-7”.

Regions on the USDA plant hardiness zone map are divided in ten-degree increments. The additional “a” or “b” designation further narrows down each zone to slightly cooler or slightly warmer parts, respectively. So, zone 7b is 5° warmer in winter, on average, than zone 7a. The zone numbers increase as average winter temperatures increase from Canada to the southern U.S.

It’s not unusual in this area of North Carolina to see temperatures drop into single digits a few nights each winter. And, conversely, we sometimes have those glorious winters that rarely get below 25°! Normally, I recommend using plants for planters that are rated two zones hardier than the zone you’re living in. For example, a zone 5 Pieris japonica that should tolerate winter temperatures as low as -20° planted in the ground likely will survive a zone 7 winter (0° to 10°F) in a pot.


The Weather Report

The last weather report of the day will determine if anything needs to be done for the plants outside. I’ll probably move the miniature garden to the warmer back deck, which is protected by a fence. That’s where plants, including edibles in pots, will get the most hours of direct sun.

The corner between the shed and the back wall provides a cozy microclimate. And, if needed, I can move the miniature garden into the shed or indoors for the night. But I’d rather not; it’s rather heavy.


Cold Frames

Let’s say you live in the cold northern states, but you want to pot up a miniature conifer garden. You’ll need to provide some protection when temperatures drop so low that the plants are at risk. Here are a few suggestions for those areas where these conditions last for months.

Move the pot into a sunken cold frame, or one that is lightly heated by a heat mat or heat cables. Heeling (burying) the pot into the soil, inside the cold frame, will give more protection by insulating the root system. Or you could pile mulch around the pot up to the rim.

Where winter conditions are cold but not severe, heeling in the pot next to a south-facing wall might be all the protection required. Or move it to a covered sunny porch against the wall of the house. Avoid placing it where ice or snow from the roof might fall on the plants. Watch out for animals that like to dig. Surround the planting with deer netting or a wire barrier (chicken wire, hardware cloth) to prevent damage.

The cold side of a heated greenhouse, an unheated lean-to, a minimally heated sunroom, or a sunny garage window might work during the frigid winter months. The plants will need direct sun even though they’re dormant in winter, but keep them very cool. And don’t forget to water! When cold, the miniature garden will dry very slowly, but it still needs to be checked.

If it’s too warm, the plants will beak dormancy prematurely. But, without adequate sun, that new growth will be weak.

Here’s A Bright Idea

Another option is to surround the pot and soil with a string of indoor/outdoor miniature incandescent lights. Enclosing the whole thing, or just the pot, in plastic at night creates a “lightly” heated bubble of protection.

I’ll use this simplified version of a cold frame during periods of severe cold, meaning temperatures in single digits at night. But I probably won’t wait for the temperature to drop that low. These varieties are new to me, and I don’t want to lose them.

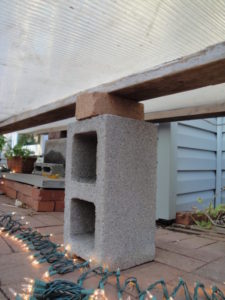
cold frame

Setting up the cold frame in autumn.

In the Maryland back yard, I assembled the cold frame (photo, right) every autumn. Succulents, geraniums, cyclamen, and other plants that tolerated cool temperatures, but not frost, spent the winters there. Edible cool season greens grew continuously under cover. And all received abundant sunlight in the back yard, on the south side of the house.

Cinderblocks and boards supported sheets of durable twinwall polycarbonate above the patio. Extra bricks on the north side (above cinder blocks) helped slope the cold frame toward the south for drainage and a better orientation toward winter sun. I used clear 4-mil plastic to cover the entire frame, sealing up the sides. And I weighed it down so it wouldn’t blow away.

The purpose of the strings of Christmas lights is to give gentle warmth, not light. So, use incandescent lights, not LED’s. The number of strings used in the cold frame varied with outdoor temperatures and with the amount of warmth needed for a particular group of plants. A string of 100 mini lights provides about the same warmth as a 40-watt light bulb.


Keeping Their Cool

These evergreens grow best when exposed to natural seasonal variations. But because the roots are above ground, they are more limited in what they can tolerate.

In any case, don’t keep hardy plants on display indoors or enclosed under plastic any longer than necessary. They might break dormancy, and could suffer cold damage when exposed to normal temperatures again. Open or remove the plastic covering every morning, before the sun heats the space.


Headings

Page 1: Down To Earth Garden Center, and Planting a Miniature Garden, The Newest Project (Fairy Gardens, Tropicals For a Miniature Garden, Little Evergreens For the Miniature Garden (Picea and Thuja, A Holly Called ‘Jersey Jewel’), The Cold Facts (Other Variables), and In Unusually Cold Conditions (Hardiness Zones, The Weather Report, Cold Frames, Here’s a Bright Idea, Keeping Their Cool)

Page 2: Tips for Potting Up the Miniature Garden (Double Potting), Plants For the Miniature Garden (Bloomers, Hardy Plants, Moss, Pruning), The Blue Pot, The Off-Centerpiece, More Plants For the Miniature Garden (Let’s Start Planting), The Little Fillers For the Miniature Garden (Acorus, Carex, and Ophiopogon, Eleocharis, A Welcome Weed and Viola), and The Small Stuff


Return to the top


Tips For Planting a Wire Hanging Basket


2019


Tips For Planting a Wire Hanging Basket


hanging basket, zinnia, calibrachoa, yellow, purple

The 16″ wire hanging basket with purple calibrachoa, yellow and white zinnias, and yellow mecardonia.


Now that the weather has settled, it’s time to plant the hanging basket. Okay, it’s 43°F in Helena, Montana, so you’ll have to wait a while. But here in Charlotte, it’s already 90°. We’ve had beautiful spring weather for weeks now, and gardens all over town are showing new life.

It is confirmed once again that I could never move back to a colder winter climate. Picking tomatoes here in early June is commonplace rather than a rarity. In the past, I’ve lived where a ripe tomato for a Fourth of July barbecue won neighborhood kudos! It’s not the summer heat I look forward to but rather the longer growing season and greens that grow through the winter.

I bought several pots of annuals two weeks ago but haven’t planted them. The plan is to refresh the wire hanging basket, and to fill the front beds with color. Complicating matters, though, is when the new siding will be installed. Our building has been rescheduled to a much earlier date, so no gardening will take place until the work has been completed.


A Few Preliminaries


Can I Reuse Old Potting Soil In the New Hanging Basket?

The hanging basket that held blooming violas and a few perennials over the winter will be emptied. The old soil, which still has value in the garden, will be dug into one of the flower beds. Organic components (peat moss and fine pine bark, primarily) break down, enriching the soil.

Used potting soil can be broken up and thrown under the shrubs or topdressed in a thin layer on the lawn. More options include adding it to the compost pile and using it in the backfill when planting trees and shrubs. I never throw away old potting soil, and, of course, I’ll save the perennials. But for new hanging baskets, use fresh potting soil for the best results.

Soil in large planters can be used again if it still has good tilth and hasn’t been waterlogged. It’s good idea, however, to replace the top third of soil. If diseased plants grew in it, I would discard the soil.


Refresh/Reuse

paint colors

If the metal frame looks a bit tattered, now is the time to clean and dry it. Buy a can of spray paint, in the color of your choice, and freshen it up. Look for one that will stick to the finish on the frame. Some are metal; others are vinyl-covered metal.

Maybe your mother the artist has some ideas about color. Jazz it up a little in a shady spot, or color-coordinate the paint color with the flower colors. If you prefer classic black or bright white, those are fine, too. By the way, wire hanging baskets are also called “English Garden” baskets.

For a frame that looks only a little scuffed, try using a solution of horticultural oil (more concentrated than you would use for insects) wiped over the frame. I’ve used the oil to freshen used plastic pots, which often looked like new again. Be careful—horticultural oil makes surfaces slippery.


Line the Liner

Wire baskets are available with reinforced green sheet moss, but more often with a coconut fiber liner. I’ve used both, and have found the coco liners to be more durable, although I prefer the color of the moss.

If you need a new liner, garden centers stock both pre-formed liners and bulk rolls that can be cut to the length desired. Before shopping, measure the curve of your hanging basket, adding a bit extra, for a proper fit.

A Simple Trick

Here’s a trick I’ve used for many years: line the inside of the coco liner with a sheet of plastic. Reuse an empty mulch or potting soil bag, cut so it extends above the rim. The excess will be trimmed after planting. Now, punch several holes around the bottom third of the plastic to allow for drainage. In hot or dry climates, consider leaving the bottom 1″ to 1 1/2″ of the plastic intact. The soil and plants will absorb water that collects in the reservoir.

coconut

Coconut: source of coir for potting soils and coco liners for baskets.

This offers a few advantages. First, the plastic prevents soil contact with the coco fiber, delaying decomposition. A thick liner, made from coconut husks, will last an additional year or two.

Second, plastic prevents rapid evaporation of moisture from the soil. Plastic stops the hot dry wind from reaching the soil.

Third, plastic slows down infiltration of icy cold wind, delaying chilling of the soil in winter combinations.

And, fourth, soil won’t be lost through the thin, loosely woven spots in the liner. See if you can double up on the coco liner in those spots. And face the dark side of the plastic, if there is one, outward. This is less conspicuous than a bright yellow beacon peering out from the between the fibers.

Other Options

Perhaps you have other materials hanging around the shed that can substitute for a coco liner. A few layers of burlap, landscape fabric, an old blanket, or that unused fiber grow pot could work for this growing season. Still, I would line it with a plastic sheet for the reasons stated above.


wire basket, fabric liner

A repurposed grow pot, now used as a liner for the hanging basket.


Where To Place the Hanging Basket


bracket for hanging basket

Notice how weight is distributed along the vertical part on the left, pushing bracket against the wall.


Have you decided where the shepherd’s hook will be placed? Have you already installed a sturdy bracket on the fence or deck post? Well-constructed wrought iron is costly, but it lasts a long time. Look for the thicker, heavier hooks and brackets. Visit the hardware store for special anchors and instructions if attaching the bracket to a brick surface.

Make sure the bracket or the hook is large enough to accommodate your hanging basket. This isn’t a concern with smaller baskets but is often overlooked for the large ones. Hardware is available in different sizes, so measure first, or you might find that the large hanging basket you want to use won’t fit onto the shepherd’s hook you already have.

Sometimes it’s hard to determine whether the vertical part of the bracket should be placed above or below the horizontal part. Securing the vertical side below the horizontal arm, as in the image above, helps direct the force against the wall. The bracket is less likely to pull away from the wall or post.


Sun Or Shade?


House, tree in front


Pay close attention to the number of hours of direct sunlight the chosen location will receive. As the sun changes its path across the sky from one month to the next, the amount of sunlight will vary. A location near the front door might get lots of sun in April but could be in almost full shade once the trees leaf out.

Don’t expect a blazing burst of color from plants that need 7 or 8 hours of sun if you place the hanging basket under the semi-shady deck. Plant tags often erroneously indicate “partial sun/full sun” for plants that really need full sun. Partial sun to us gardeners, by the way, is 4 hours of sun.

Ask salespeople at the garden center for advice about light requirements. Petunia, verbena, calibrachoa, lantana, zinnia, and scaevola need full sun. Lobelia, bacopa, browallia, torenia, and some of the begonias will do well in morning sun and bright afternoon shade in this hot climate. Caladium, anthurium, ‘Non-Stop’ tuberous begonias, ferns, and foliage plants can take various levels of shade.


Choosing Plants For Your Hanging Basket


Plants have upright, mounding, or trailing habits. For smaller baskets, perhaps only mounding and trailing plants will fit. If single-variety monoculture is your preference (for example, a 12″ pot of purple Wave petunias or a 10″ pot of sky blue lobelias), go for it.


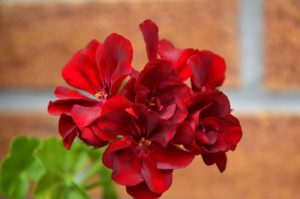
Geranium flower.


If you want a pot of zonal geraniums, avoid hanging it so high that all you see is the bottoms of the leaves and the pot. Place it with the flowers at eye level or enhance it with some trailing vinca vine and a few mounding white or yellow calibrachoas. Adding a trailing element creates greater interest.

salvia black and bloom

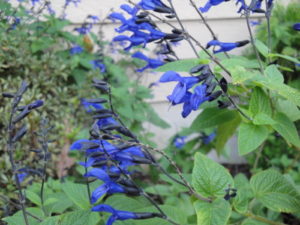
Stately Salvia ‘Black and Bloom’ attracts hummingbirds, butterflies, and bees.

The 16″ wire hanging basket, for the shepherd’s hook in the front garden, can hold 6 to 10 plants. A large perennial Salvia ‘Black and Bloom’ (photo, right; hummingbirds visit every morning!) grows in the bed behind the basket, next to a yellow-tipped arborvitae.

So, the color scheme will include blue ‘Laguna’ (heat-tolerant) Lobelia, purple calibrachoa (million bells, a small cousin of petunia), little yellow Mecardonia, and a few golden yellow and white (powdery mildew resistant) Zinnia angustifolia.

A Heuchera with orange-ish foliage might remain in the pot, if the color plays nicely with others. (A passionflower I had bought earlier in Hendersonville survived the summer in a tiny 2″ pot.)

I use this color combination in the fall, sometimes, when planting violas. It borrows from both the warm and the cool color palettes. When in doubt, combine colors next to each other on the color wheel (for example, red-orange-yellow [warm colors], or pink-blue-purple [cool colors]) or opposite each other (red-green, blue-orange, purple-yellow). Adding white calms everything down when using several colors.

(***Update***: While the annuals awaited completion of the siding installation, a few of them perished. It happens. I plugged the survivors into the basket and fertilized them. Six weeks later, you can see how nicely it filled out. That’s the basket, at the top of this article. And I planted the passionflower, a vigorous vine, in the garden for the gulf fritillary butterflies. Autumn, 2019.)


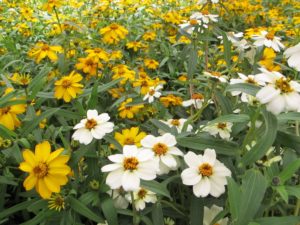
zinnia ang.

Zinnia angustifolia ‘Star’ series, disease resistant.


Consider These Color Combinations:

  • red-white
  • yellow-white. These first two options make clean, crisp combinations.
  • chartreuse, green, orange, and white look good together
  • shades of yellow-orange-cream
  • blue-yellow-white
  • red-white-yellow
  • silver or gray and shades of pink
  • purple-blue-silver-pink-white
  • lavender-purple-white
  • warm maroon-peach-coral-cream-sky blue

Generally, I avoid using gray/silver with pale yellow. Orange and pink together don’t do anything for me.

We tend to gravitate toward our favorite colors, so try adding varieties you haven’t tried before. See if you can introduce foliage color (caladium, coleus, lysimachia, heuchera, sweet potato vine, begonia) that echoes the color of a flower.

A contrast between flower and foliage forms might also bring greater interest. Adding fine foliage or delicate flowers (nierembergia, diascia, bacopa, lobelia, alyssum, euphorbia ‘Diamond Frost’, mondo grass) contrasts effectively with bolder textures.


Headings

Page 1: Tips For Planting a Wire Hanging Basket, A Few Preliminaries (Can I Reuse Old Potting Soil In the New Hanging Basket?, Refresh/Reuse, Line the Liner), Where To Place the Hanging Basket (Sun Or Shade?), and Choosing Plants For Your Hanging Basket (Consider These Color Combinations)

Page 2: Ready to Start?, Time To Play In the “Dirt”, Timed-Release Fertilizer, and Maintaining the Hanging Basket (Water, Soluble Fertilizer, Deadheading, New Varieties, Pruning Your Hanging Basket, Insects and Spider Mites, Slugs, Deer!)

Return to the top

Hardening Off: Getting Ready To Plant


Plants Are In the Garden Centers, But Is It Warm Enough To Plant Them In the Garden?


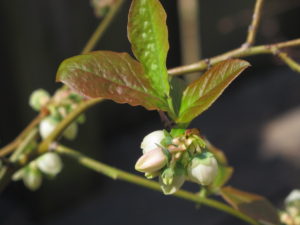
blueberry 'Patriot'

Early spring flowers and leaves on the potted blueberry.


Our local garden centers are stocking up for early spring sales, and it’s great seeing all this color! Some of the plants can go into the garden soon, after hardening off.

Blueberries, redbuds, and pink dogwoods—nursery trees and shrubs that overwintered in local outdoor conditions—can be planted now. If there’s cold weather coming, that’s okay; these plants are used to it. If it’s severely cold and established plants have started leafing out, they’ll probably show some damage on the tender foliage. But they’ll recover.


Time For Tender Plants?


The tender warm-season types, such as basil, tomatoes, peppers, dahlia, cosmos, and caladium, can’t be planted until the weather has settled and the soil has warmed up. They must have frost-free weather. They also need to undergo a process known as “hardening off” before being subjected to the elements outdoors.

April 10 is the average date of our last spring frost (Charlotte NC, zone 7b/8a), but normally that’s still too early for peppers and basil. In most years, by that date, the soil hasn’t warmed up sufficiently for them.

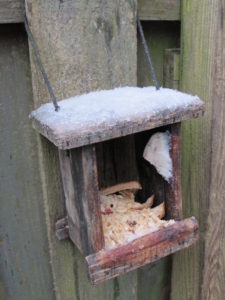
snow, bird feeder

Snow on one of the bird feeders.

Tomatoes and many annuals can be planted around mid-April if the weather cooperates. They can tolerate cooler soil than peppers, but not frost or cold soil. Last year, in a mild spring, I planted a tomato in late March. A few cold nights necessitated covering it, but it survived.

It’s rare, but not unknown, for a snow squall to blow through Charlotte in April. Recent weather patterns sometimes indicate suitability for transplanting, but that doesn’t guarantee pleasant weather will continue.

(***Update*** April 2, 2019: Well, it snowed this morning! The 1/2″ of snow was the most we’ve seen here all winter. Other than placing the potted blueberry under an overhang next to the house, I didn’t protect any of the plants outside. The shrub is in bloom, waiting for the bees to pollinate it, but frost would have ruined the flowers. The temperature stayed several degrees above freezing next to the wall.)


Cold Soil


Soil might require more time to warm up after a cold, wet winter. And a prolonged stretch of cloudy skies, with no sun, will delay warming the soil. Maybe you’ve had a milder-than-average winter, as we’ve had here in the Carolinas. Still, pay close attention to the weather forecast.

Have protective covers (row covers, plastic sheets, old blankets) and maybe some strings of incandescent miniature lights handy, just in case.


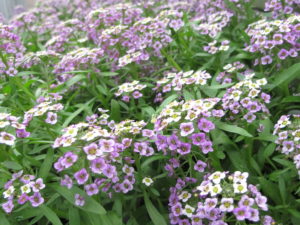
Lobularia 'deep Lavender Stream'

Lobularia ‘Deep Lavender Stream’ likes cool weather, but cover during hard frost. Wonderful fragrance.


Hardening Off


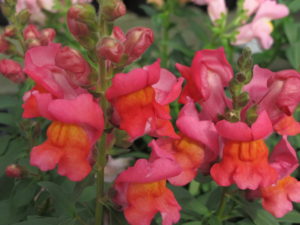
snapdragon 'Snaptastic' strain, needs hardening off before planting

Snapdragons need hardening off before planting.

Most bedding plants and edibles begin life in greenhouses, shielded from cold temperatures and wind. Their leaves are quite tender in this protected environment. When these plants are suddenly exposed to outdoor conditions, though, the shock of full sun, colder temperatures, and a brisk breeze will cause them to wither. They might not recover.

Hardening off is the process of gradually toughening up the plants’ tissues to prevent wilt in the wind, scorch in the sun, or damage from the cold.

Each species or variety has a range of temperatures it can tolerate. So, even though acclimated dianthus can go outdoors here in mid-March or earlier, acclimated dahlias can’t. Dianthus can tolerate hard frost, but dahlia can’t.

Annuals are often categorized as being “half-hardy” or “tender”. Look for signage in garden center departments that indicate whether the plants can take some frost and cool temperatures, or none at all. Before purchasing all the plants your garden will need, find out which ones will tolerate cool weather or some frost, and plant those first.

Most greenhouses prepare their plants to some degree. Moved outdoors to tables exposed to the elements, these plants are hardening off naturally. Ask the salesperson if it’s safe to plant your selections or if they’ve been hardened off. Set them in the garden at the appropriate time; prepare to cover them at night if new foliage could be damaged by a late frost. The extent of damage depends on the species and on the severity of the weather.

Some garden centers display plants in lightly heated space, out of the wind. Frost-tolerant varieties with new growth emerging in these conditions will need hardening off before transplanting to the garden. Perennials that have fully leafed out in a greenhouse, compared to the same varieties established in the ground, might need protection if planted out. Delay planting or cover them on chilly nights.


Some Like It Quite Warm

Temperature-sensitive species, such as caladium, grown from tubers, will languish or re-enter dormancy in cool (not even frosty) weather. Cool to a caladium is anything below 65°F. Tender young plants can be killed by a light frost. Pepper plants and basil will suffer in cold soil, especially cold wet soil, even if the air temperature is above 50°.

We often see cold-sensitive annuals (caladium, vinca, zinnia, basil) at the big stores more than a month before it’s safe to plant them. That’s a gamble some are willing to take. They need warm weather and warm soil, so I’m not even tempted. Not yet.

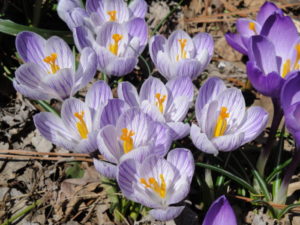
 

The Process of Hardening Off


dusty miller, plant after hardening off

Dusty miller (Senecio) is a short-lived perennial.


Hardening off is a gradual process. Over a period of about a week, introduce home-grown seedlings and greenhouse plants to outdoor conditions. These plants need a period of adjustment if they have been pampered in a protective environment.

Start hardening off the plants by placing the flats or pots in a protected place outside, out of the wind. Give them 2 hours of gentle morning sun the first couple of days, and then dappled sun or light shade for the rest of the day. Strong sun, cold, and wind might be too harsh at this point, particularly for home-grown seedlings.

If the weather is especially inclement, you might have to delay placing them outside. Exercise caution with tender annuals (coleus, impatiens, zinnia), basil, and other plants that need warm temperatures.

Cool season vegetables and herbs (kale, broccoli, lettuce, parsley, cilantro), half-hardy annuals, and hardy perennials (Heuchera, Hosta, Sedum) can withstand chilly temperatures. But they still need hardening off if they’re coming directly from a heated greenhouse.

If the plants show no signs of stress (wilt or scorch), leave them outside a while longer. Give them direct sunlight. Be careful not to burn them in unusually high temperatures and strong sun. Don’t coddle the young plants by keeping them in the shade, though, unless shade is what they require. However, plants that need some shade in the summer usually tolerate or enjoy a few hours of direct sun on cool days in late winter through mid-spring.

Gradually lengthen the amount of time the plants spend outside in the sun and breeze. Keep the seedlings damp to moist, but not wet. Check them periodically for wilt. The plants will dry out much faster in warm sunshine and moving air. Finally, if the weather is suitable, plant them.


At the End Of the Day

Bring them inside in the afternoon if a drop in temperature is expected. Soon, the plants will be able to stay outside at night if the temperature is within their range of tolerance. Forgetting to bring the warmth-loving plants back inside is a sad story I’ve heard more than once.


If the Plants Are Really Tender…

plants under lights, plant outside after hardening off

…they might not be able to tolerate more than 30 minutes of gentle outdoor sun or dappled shade the first day. This is often the case with home-grown seedlings which didn’t receive enough direct sunlight indoors. Weak seedlings won’t tolerate any direct sunlight the first few days without withering and will take longer to adjust to outdoor conditions.

The root system of a seedling grown in inadequate light will be weak and won’t be able to supply enough water to the leaves. That’s one reason why it wilts so readily when placed outside. Also, the cuticle, the protective waxy surface layer of the leaf, is underdeveloped in low light.

Hardening off these frail plants might not be worth the effort. If they don’t improve in a few days, consider buying stronger transplants from the garden center or the farmers’ market. You might have enough time, though, to start new seedlings indoors. This time, give the seedlings stronger sunlight, place them closer to artificial light, or run the lights a few more hours each day.

Vigorous young tomatoes grow like weeds and can be planted lower in the ground. They’ll hardly skip a beat, so I’d consider keeping them as long as they have some good leaves and improve in outdoor conditions.


Plants Grown Under Lights Need Hardening Off

The photograph, above, shows a multi-tube light fixture positioned several inches above potted plants. As long as the lights are on 14-18 hours per day, the seedlings will grow into strong plants.

I used to start most seedlings indoors under 4′ long light fixtures (shop lights). I installed 2 daylight fluorescent tubes per fixture, before LED’s became commonplace. Flats were placed only 2-3″ below the tubes. Light intensity drops precipitously as distance from the lights increases. That’s why ceiling lights do almost nothing for sun-loving plants.

Plants grow beautifully under artificial light, close to the tubes. They’ll never see a cloudy day! But don’t place them so close that they could feel the heat. Old tubes decrease in efficiency and feel hotter.

Perhaps you have a south-facing bay window that gets natural sunlight all day, and the seedlings look sturdy and healthy. That’s great! However, they still require hardening off, gradually exposing them to wind and full sunshine. Otherwise, even these sturdy plants will wilt from the stress of sudden exposure to the elements. Outdoor sun is more intense than indoor sun because windows absorb and reflect much of the sun’s energy.


Do I Have To?

Now, it’s entirely possible that your plants will thrive without any hardening off whatsoever. Perhaps the garden center took care of that for you by keeping them outdoors, exposed to the elements. After all, many gardeners purchase their plants and have them in the garden within the hour.

That’s fine, if the weather is mild, and perhaps overcast, or if the plants have been fully hardened off. With a favorable forecast, consider planting in late afternoon or evening to lessen the shock.

If plants require hardening off, limit the process to as short a period of time as possible.


A Gamble In the Garden


USDA plant hardiness zone map

The USDA plant hardiness zone map, revised 2012.


As our average nighttime temperatures rise, the likelihood of frost diminishes. But we must be prepared for that dreaded surprise, when the temperatures plummet lower than the weather forecaster predicted.

Here in USDA plant hardiness zone 7b, a moderate part of the Southeast, we’re entering the “shoulder season”. This is when the weather can be delightful or it can be a little “iffy”. As in, “iffyou put that basil in the garden now, it will surely die!” Okay, seriously… March can bring us beautiful 75° days, and then we can have 3 drizzly days in the 40’s. Nighttime temperatures can be 42° or 22°. Okay for kale transplants, but not okay for okra or Thai basil.

Tokyo Bekana

Chinese cabbage ‘Tokyo Bekana’, coming into flower.

That’s currently the pattern in our location—warm and then cool. Edible greens don’t mind at all. Cool season greens and vegetables planted now should do very well, after hardening off. In fact, they could have been planted a month ago with no problem! But we didn’t have snow on the ground like our friends in the North.

The cool season vegetables already in the garden have been producing non-stop since autumn, after the tomatoes and peppers had been pulled out. I’m not in any hurry to see the end of the mustard greens, collards, and kale. Soon I’ll harvest collards for a big pot of soup. Love these mild winters!


Early Green Onions: No Hardening Off Needed

green onions

Green onions planted from onion sets.

A few weeks ago, I planted about 50 green onion sets, or young bulbs, and they’re already a few inches tall (photo, right). If cold weather comes for a visit, that’s no problem. Their little patch sits right against the south-facing wall of the house, in a comfortable microclimate.

Although we’ll still have some frosty nights, the onions won’t need to be covered. They can be gently tugged from the moist soil without damage, since they’re not yet heavily rooted.

Delicate young growth of onions and bunching onions grown from seed will require hardening off.


Headings

Page 1: Time For Tender Plants?, Cold Soil, Hardening Off (Some Like It Quite Warm, The Process of Hardening Off, At the End Of the Day, If the Plants Are Really Tender, Plants Grown Under Lights Need Hardening Off, Do I Have To?), and A Gamble In the Garden (Early Green Onions: No Hardening Off Needed)

Page 2: What Can I Plant After Hardening Off? (The Safest Bet: Pansies and Violas, Half-Hardy Annuals, Helleborus, Heuchera), The Warm Color Palette, The Cool Color Palette, and Spring: The Season of Rebirth

Return to the top


Plan Now for Spring-Flowering Bulbs

2018


Time For Spring-Flowering Bulbs


colorful tulips, daffodils, muscari

Spring-flowering bulbs in a public garden.


In a few days, we finally will see some almost normal temperatures in this part of the southeast. It’s time to think about spring-flowering bulbs that will be planted over the next 2 or 3 months. Get comfortable; this is a long essay on the big topic of spring-flowering bulbs.

It often happens: when the daffodils, tulips, and wonderfully fragrant hyacinths bloom in February, March, and April, that’s when many customers ask for the bulbs. But most bulbs are planted in the fall and into early winter. Their roots develop as the soil cools in late summer and autumn, but growth above ground is delayed until months later.

It is no longer uncommon for garden centers to sell potted bulbs in spring. So, if you missed out on the fall planting season, or if you want to see the flower colors before planting, inquire with the growers. Vendors at spring home and garden shows and farmers’ markets also sell pots of budded or blooming bulbs.


yellow daffodils, cane creek park

Daffodils are reliable, easy to grow, and not eaten by animals.


Many thousands of varieties of bulbs are available to gardeners. Each region of the country has its favorites, based on ease of culture, resistance to hungry animals, and familiarity with what people “usually” grow there.

If you want something more unusual but your local sources don’t carry it, you can probably find it online or through mail order catalogs. Find out what the bulbs require before investing in 2,000 pink tulips that can’t take the heat in your back yard.


On the Subject of Tulips


pink tulips

Tulips are not deer-proof.

Large-flowering hybrid tulips grow in the cooler northern half of the United States, down to Zone 7. A few will perennialize in slightly warmer climates. The smaller species tulips will grow a bit farther into the South.

Tulip bulbs planted among the roots of trees and shrubs might work slightly better than those in open beds. The soil there is somewhat cooler and dryer. They’re not fond of warm temperatures and high moisture levels.

Many gardeners here in the piedmont of North Carolina plant tulips with the expectation of only one glorious show, and then tear them out when flowers fade. Beautiful as they are, tulips in zone 8 or warmer usually do not come back for an encore performance the next year. Even zone 7 is a challenge for them.

And that’s okay with a lot of people, including designers of public parks and municipal common spaces. But, wow, what a show...if you can keep the deer and rabbits away from them! They are especially fond of tulips, and I highly recommended using deer repellents. When using a solution in a sprayer, set the nozzle to a fine mist. A coarse droplet will simply bead off the waxy foliage and flowers without sticking.

Voles, too, eat tulip bulbs. Planting tulips with PermaTill (small, expanded gravel used for drainage) around them usually deters the voles. Stainless steel mesh planting baskets will exclude burrowing animals from the root zone. And squirrels have been known to do a little transplanting of their own. Products are available to help prevent these problems.


How Bulbs Work


crocus pickwick, white with purple stripes

Striped ‘Pickwick’ and purple ‘Remembrance’ crocus, in the Maryland garden.


A bulb is a shortened stem, with roots that emerge from the basal plate when the temperature cools in the fall. The basal plate, clearly visible on hyacinths, is a rounded disc of tissue at the bottom of the bulb. Tightly folded undeveloped leaves surrounding the flower shoot contain food for the plant during dormancy. A bulb has all the parts necessary to complete its life cycle: root initials in the basal plate, a growing tip, leaves, stems, and flowers.

daffodil and beeThe rooting bulbs remain safely tucked underground until the soil begins to warm up in spring. That signals the plants to burst from the ground with their beautiful, cheerful flowers. We bid another winter adieu! Hungry bees and other pollinators emerging on warm spring days feed on pollen and nectar from spring-flowering bulbs, when little else is in bloom.

The foliage must be given enough time to photosynthesize and to store carbohydrates in the bulbs. This food will sustain the plant during dormancy, and ensure that more buds will develop for next year’s flowers. So, after the flowers finish up, let the plants wither naturally. Foliage can be removed after at least half of it has yellowed.


First, a few words on summer- and fall-blooming bulbs


Garden centers stock most of the summer-blooming bulbs in spring to early summer. You can find bulbs, corms, tubers, and rhizomes of lilies, gladiolus, canna, caladium, iris, and calla at that time of the year. Nurseries also offer potted specimens as they come into growth.


Elephant Ears

For dramatic foliage plants, look for elephant ears (Alocasia and Colocasia spp.), which grow only a foot tall to over 6′ tall. These are tropical plants and will die with frost, unless the tubers are dug and stored over winter. Planted in the ground in regions where frost doesn’t penetrate the soil, they usually survive the winter.


Caladium

caladium

Caladium, in late spring.

The colorful caladiums are tropical and need warmer soil temperatures in winter in order to survive, even when dormant. Some gardeners dig up and save the tubers every year, but most purchase new tubers or potted plants in spring to mid summer.

Foliage colors include green, white, chartreuse, pink, peach, and red, and can be mottled, edged in a contrasting color, streaked, or spotted. Their spathe-like flowers are not showy and usually removed.

For the past four years, I’ve kept a large Italian terra cotta pot outdoors in the summer. It contains a white caladium, a few kinds of brake (Pteris) ferns, and trailing clumps of Pilea ‘Aquamarine’, with its reddish stems and incredible pewter-blue, rounded leaves. It’s also home to whatever else dropped in. This year: some bulbs of tender Ledebouria socialis (leopard lily), a miniature African violet, and Dendrobium kingianum, a small orchid that has lived in a 3″ clay pot for over 4 decades.

Dormant Caladium

When the weather cools, the whole pot comes indoors to the sunny kitchen, where the caladium goes dormant. One by one, the leaves turn yellow, and the caladium sleeps through the winter. At average indoor temperatures, it remains dormant.

Instead of digging out the tubers, I leave them in the soil, caring for the rest of the plants as needed. Every couple of years, some potting soil is added under the plants, and the pot goes outdoors to light shade. And each year, the caladium comes back after about a month of warm weather. It’s a heavy feeder, so fertilize caladium every 2-3 weeks while it’s in leaf.

Dormant caladium tubers that remain surrounded by soil over the winter are more likely to return the next year than dry, loose tubers kept in a bag. Keep them dry if by themselves in a pot; damp is okay, if in company with other plants.


amaryllis

This variety is always the first amaryllis to bloom.


Amaryllis

Amaryllis (photo, above) is a beautiful late fall to spring flowering plant. Dormant bulbs can be found at garden centers at this time of year, alongside the spring-flowering bulbs. Potted in the fall, Amaryllis bulbs begin blooming indoors around the holidays.


Colchicum Autumnale


This is one of my favorites partly because the plant is animal-proof and partly because it blooms in the fall. Sometimes slugs can be a problem. Scattering Sluggo granules near the Colchicum will take care of that.

The bulbs will appear in some, but not many, garden centers, along with the daffodils and other spring-flowering bulbs. Left on a windowsill, the bulb produces flowers with no encouragement necessary! But I prefer to plant these hardy bulbs in the garden. Colchicum is the source of a potentially toxic pharmaceutical component, so grow with care.

Only the flowers make an appearance in autumn; colchicum foliage arrives in spring and lasts a short period of time.

Placed near a shrub called Purple Beautyberry (Callicarpa dichotoma or C. americana), the Colchicum ‘Waterlily’ flowers perfectly echo the color of the shrub’s berries (photo, above).

Once planted, they soon begin blooming in white (‘Alba’) and shades of lavender-pink. ‘Waterlily’, available from Wayside Gardens, has many petals, pale in color until exposed to light. It has the appearance of a water lily, but it is not an aquatic plant. After 2 years in the ground, one bulb will produce dozens of flowers. This plant is sometimes called “fall crocus”, but it is not to be confused with…


…Fall Crocus

Species crocus bulbs, with saffron on the left.


A few hardy crocuses bloom in the fall. One is saffron crocus, Crocus sativus, which gives us our most expensive spice, harvested from the female flower part, the red style and stigma. Only 3 threads of saffron are laboriously harvested from each flower, explaining its very high cost. Incidentally, saffron has been used as a spice for 3500 years. And for more trivia–saffron crocus is a sterile triploid whose ancestry is open to speculation.

There are other bluish (C. speciosus ‘Cartwrightianus’) and white (C. kotschyanus) fall crocuses available. The lavender-blue color positively glows in the setting sun. This color is rare in the garden at this time of the year, and a welcome surprise when the flowers emerge through the Liriope and other short groundcovers.

Crocus, technically, grows from a corm, but, for simplicity, is often called a bulb.


Return to the top

Headings

Page 1: Time For Spring Flowering Bulbs, On the Subject of Tulips, How Bulbs Work, and First, a few words on summer- and fall-blooming bulbs (Elephant Ears, Caladium, Amaryllis, Colchicum Autumnale, Fall Crocus)

Page 2: Color Effects, Formal and Informal, Naturalizing in Lawns, Naturalizing in Meadows, If You’re New To Spring-Flowering Bulbs, When Planting Drifts of Bulbs (Microclimates and Timing, Laying Out the Beds), and Aftercare

Page 3: Galanthus, Crocus (Snow Crocus, Giant Dutch Crocus), Eranthis, Muscari, and Puschkinia

Page 4: Hyacinthoides, Tulipa (Tulips In Zones 7 and South, Species Tulips), Hyacinthus, Narcissus (Buying Daffodil Bulbs, Linnaeus, the RHS, and the ADS, Planting Daffodils, Fragrant Daffodils), and Allium

Page 5: Maintenance, Tricks to Hide Maturing Foliage, Stinzenplanten, Forcing Spring-Flowering Bulbs, Rock Gardens, and Don’t Overlook the Little Ones


Improving the Landscape Is Like Painting a Picture


A Landscape Primer


Now that you and your family have enjoyed a few months of outdoor activities, you’ve noticed a few changes you’d like to make. Summer is a good time to start thinking about improving the landscape, but many gardeners wait until the cooler days of early autumn before starting the work. The weather at that time is more favorable for establishing most plants than it is during the hot—and often dry—conditions of summer.

This is not to say that you can’t successfully plant at other times of the year. With careful maintenance, plants will survive a summer installation.

Before the first time a shovel goes into the ground, get the underground utilities and cables marked. Call your municipal authorities (8-1-1, in the U.S.) to have it done.


Lake Geneva Lakeshore Path - islandworks / Pixabay

A fine example of framing the house.


Check All That Apply


  • Is the patio too small for family gatherings?
  • Are you tired of spending your weekends pruning shrubs?
  • Are you putting your house on the market within a few years?
  • Does retirement allow more time for vegetable gardening?
  • Is it time for the greenhouse you’ve always wanted?
  • Where will I put the cold frame the kids gave me last Christmas?
  • Now that the trees are mature, is it time to get rid of the struggling lawn (and the mower)?
  • Are the children showing an interest in butterfly gardening or a goldfish pond? Are you?


child watering tulips


Walk around the property, clipboard in hand, and note all the issues that need improvement. Go ahead; dream a little! Start to visualize how you could use different areas of the property.


A Little Research


Visit public gardens and parks at different times of the year, taking notes and pictures. Notice how the interplay among trees, shrubs, ground covers, flowering plants, and structures creates a harmonious picture. Don’t ignore how you got from point A to point B; pathways are practical and are among the most important features of the landscape.

Books, magazines, online sites, and classes offered by Master Gardeners’ programs and community colleges are excellent sources of information. Record the names of plants you can’t live without as well as those that do nothing for you. And get all the information, so you can avoid asking, after the planting, “What did I ever see in you?”

Cupressus arizonica blue ice

Cupressus arizonica ‘Blue Ice’.

Take a look at the trees, shrubs, and flowering plants offered by your local garden centers, and ask about winter hardiness and susceptibility to disease and insects. Find out what they do in every season of the year, what kind of maintenance they require, and how they can contribute to improving the landscape.

If low maintenance is important, look for dwarf varieties of plants that don’t need to be sheared every other month. Copy the full name of the plant: the botanical name (Genus and specific epithet), the ‘Cultivar’, and the common name. Then research them. “Japonica”, “Holly” and “White Splendor” refer to dozens of plants!

In the spring, and sometimes in the fall, landscape contractors set up full-size exhibits at home and garden shows. See which displays appeal to you the most. Personnel are available to answer questions and to set up consultations, but first find out how they will be compensated.

Compile a list of likes and dislikes (colors, materials, styles), which will guide the designer (or you!) in planning a garden that will give you the greatest pleasure. Decide what’s realistic financially and in terms of time and effort required to maintain your project.


Using Native Plants When Improving the Landscape

Plants that are native to your area adapt more readily to local environmental conditions. Seasonal temperatures, precipitation, and soil composition are a few factors that contribute to a species’ evolution. So, if the sourwood tree (Oxydendrum arboreum) evolved in the Carolinas, then the one planted in a North Carolina garden is likely to survive without being pampered.

Plant breeders have introduced “new and improved” versions that you might find more appealing than the original species. Cultivars of trees, shrubs, and perennials native to a region are available in a wide variety of plant heights or foliage and flower colors. Look for these “nativars” at your local garden centers.

cardinals bathe, watching while Coronavirus keeps us home.

Cardinals come for a daily dip.

If you want to attract more butterflies to your garden, find out which plants will feed the larval stage of a particular insect. Many species of butterflies have declined significantly in numbers, and it’s up to us gardeners to make an attempt at reversing that trend. Remember that insects, birds, and other animals evolved alongside a unique set of plant species, and that they’re all interdependent for long-term survival. If holes in the leaves bug you, perhaps confining those unsprayed plants to the back yard is a good compromise.

My mother and I enjoy watching the northern cardinals and other birds visiting the bird feeders. To make them feel at home in your garden, incorporate shrubbery that provides nesting opportunities and shelter. And don’t forget the bird bath! There’s nothing like a beautiful cardinal to enliven a winter landscape.

Speaking of shelter, consider constructing a simple brush pile to protect overwintering insects and other small animals. All that garden debris hauled off to the recycling center includes many insects in their pupal stage. Keeping cocoons and chrysalises on your property will ensure greater numbers of butterflies and other insects that might feed the next brood of bluebirds or wrens.


Leave It To the Professionals


landscape plan, improving the landscape


Perhaps the scope of this kind of work is beyond your comfort zone and you’d rather employ a landscaper to install it. If you hire a contractor, try to accommodate him or her by confining the family pets, removing children’s toys, and providing easy access for the workers.

Improving the landscape and transforming it from blah to beautiful requires a fair amount of disruption. Expect dust, mud, noise, and possible delays.

Identify existing plants that are special to you and ask the contractor early in the process if they can be worked into the plan. Some might be too large and unlikely to survive the transplant. Dig up dormant bulbs, if you can find them, and replant later in areas suggested by the designer.

If you’re an experienced gardener or an avid beginner, you might wish to participate in some aspects of the project. Maybe you’d prefer to have the contractor deal with permits, inspections, hardscape (utilities, paths, structures), and large specimens, while you plant the annuals, vegetables, and bulbs. All details should be spelled out in the contract. Open communication prevents most misunderstandings.

You might prefer to have the first phase installed this year, with additions made over the next few years. Ask the contractor which parts should go in first.


Headings

Page 1: A Landscape Primer, Check All That Apply, A Little Research (Using Native Plants When Improving the Landscape), Leave It To the Professionals

Page 2: Design Considerations For Improving the Landscape (The Right Size, Getting the Picture, But I’m Repeating Myself, One Garden in Derwood, Add Some Rocks), Improving Curb Appeal (Under the Parrotia Tree (Surprise!), Raise It Up, Only the Beginning

Return to the top

Create a Porch Planter Made for Shade

2018


good spot for a shady porch planter


A Shady Porch Planter


It is hot outside! This week’s temperatures are soaring well above normal. Throw in the (dis)comfort level, and it feels like it’s over 100 degrees out there! I refreshed the bird bath a few minutes ago. Three cardinals and a Carolina wren less than 15 feet away waited for me to leave.

We haven’t had rain for…well, the grass already is brown, and the trees’ leaves are beginning to flag…

We retreat to air-conditioned spaces, emerging in the evening to collect mail, pull some weeds, or feed the birds. A welcoming porch offers shade and a tall pitcher of iced tea shared with a friend. But, for a gardener like me, something is missing from this setting. That something would be plants!

Although a shady porch planter won’t support the blaze of color we see in our flower gardens, there are lots of plants that will grow there. Here in the Carolinas, a 12″ hanging basket filled with a well-tended Boston fern is a classic. It will require daily watering and fertilizing every 2 or 3 weeks. During cooler weather, in spring and fall, it will take some direct sunlight. Sitting on Grandma’s antique fern stand or hanging between posts, the Boston fern is beautiful in its simplicity. There’s something “cool” in that lush greenery, a calm repose…


Boston ferns for porch planter


But If It Goes Too Dry…


If the soil dries, there will be hundreds of little reminders shed from the older fronds. I’m talking about the pinnae, the small leaflets that line the midrib of the fern frond. Pull up the foliage and snip, down to soil level, the older, yellowing fronds. A certain amount of this shedding is expected, due to heavy shade on the lower fronds.

Soil that runs too dry will result in accelerated loss of foliage. And the edges of tender new fronds will turn crispy brown. I’ve seen ferns that looked dead from lack of water. But with a severe trim, down to soil level, and improved watering practices, the plants can recover. In a week or so, you’ll notice new growth emerging from the crown of the plant if the root system hasn’t been entirely killed off.

Plastic hanging baskets often have a 1″ deep reservoir in the bottom of the pot. Water your fern heavily enough to fill the reservoir. The plant will soon soak up that excess, so usually there is no need to empty it. I don’t recommend this for all plants, however–just the thirsty ones.

Under a porch that gets some direct sun, look for a fern variety called ‘Kimberly Queen’. Its habit is more upright, so it looks best sitting on the porch or on a low plant stand. Where conditions are too sunny for a Boston fern, ‘Kimberly Queen’ should do well. 


Following the Path of Least Resistance


One note about all potted plants: if water gushes out the holes immediately after watering, there’s empty space between the outside of the root ball and the inside of the pot. This space will need to be filled with potting soil, using a tool of some sort. Firm the soil all around, filling in the gaps, or the water will find that one air channel that remains unfilled. This will cause some or much of the root system to remain dry.

Why this happens:

  • letting the soil go too dry, causing the soil mass to shrink.
  • bumpy transportation, shifting loose soil around the pot, causing air pockets to form.
  • heavy roots or fern rhizomes (underground stems) growing along the sides of the root ball or coiled around the bottom of the pot (Bear’s-foot fern rhizomes, or the massive root systems of asparagus fern and spider plant). Strong roots can raise the whole plant higher in the pot. Most pots taper (become narrower) toward the bottom of the pot, so a gap will open as the root ball rises up.
  • loosely-packed soil. Firm the soil–not too hard and not too soft. Avoid piling new soil on top of the root ball. You might have to remove the plant in order to add soil under the root ball.


Ferns and Friends—Made for Shade


ferns and a dinosaur


I love ferns. A combination of different species planted together in a rustic planter, an aged clay pot, or a hollowed-out birch log speaks to my appreciation of the Permian aesthetic. Add a piece of driftwood, live moss, and some rocks collected from who-knows-where, and you’ve got a simple prehistoric scene straight out of Jurassic Park. Maybe you could borrow one of the kids’ toy dinosaurs…

bird bath mini garden

Miniature garden in a cracked birdbath.

Another “pot” that makes a cool miniature garden is a leaky birdbath. I turned a cracked granite birdbath into a tiny campsite, complete with shelter, a forest of prostrate rosemary, a firepit, and pebble pathways between clipped thyme plants (photo, right). Irish and Scottish mosses (Sagina subulata) served as the “lawn”, with driftwood logs for seating. (This one grew in direct sun most of the day.)

Look around; there might be something in the basement, at Good Will, or at a Habitat for Humanity Restore that can be transformed into something special.

Keep the fern arrangement in the shade. Two hours of direct sunlight on a hot summer day might prove fatal to these delicate denizens of the underbrush. And even though ferns like moist conditions, planting them in pots without drainage holes can result in a smelly anaerobic bog, suffocating their roots.

Avoid placing your porch planter in a windy location; ferns prefer the humidity and stillness of calm, close quarters.


So Many Choices

There are many ferns to choose from:

  • maidenhair ferns (Adiantum),
  • variegated brake ferns (Pteris),
  • lemon button fern and dwarf Boston ferns (Nephrolepis),
  • rabbit’s-foot fern (Davallia), with its fuzzy rhizomes,
  • the less fern-like bird’s nest fern (Asplenium) and Hart’s tongue fern (Phyllitis, a perennial),
  • fern allies, such as Selaginella, available in several colors and forms.

Among their numerous cultivars are smaller specimens, growing up to 12″ or 14″ tall, easily accommodated indoors when autumn approaches. Indoors, give them cool morning sun or very bright indirect light. I don’t recommend “low light” for anything, not even ferns. Stronger light makes stronger tissues, which will better tolerate indoor conditions.


Small Scale Gardening In a Porch Planter


With the popularity of miniature gardens, or fairy gardens, tiny 2″ pots of young plants are popping up all over the gardening world. You can find young ferns in a wide variety of foliage colors and textures.

Garden centers also sell assortments of succulents, flowering plants, houseplants, and terrarium plants, but not all are suitable for a shady porch planter or indirect light indoors. And get some information on the growth habits of the plants. Different varieties of ferns might grow only 2″ tall or over 4 feet tall! I grew the little 2″ fern 30 years ago; it was called New Zealand something…I’ll have to see if I can find it again. So cute!

miniature garden

For many years, I grew tiny plants under lights, including miniature strawberry begonia (Saxifraga cuscutaeformis), miniature African violets and their 1″ tall cousin Sinningia pusilla. And there was SonerilaPilea species, and dwarf Peperomia, many of which are available from specialty growers. There are miniature philodendrons, and I once had a dwarf Caladium that grew only 5″ or 6″ tall.

These little plants can be tucked in at the base of a hollowed “tree stump”, emerging from a patch of emerald green moss, or planted next to a “boulder”. Go ahead; make a scene! A tiny slice of the natural world…as mesmerizing as a well-appointed aquarium…   …   …


Little Plants for Sun

Some of my customers in Maryland were serious small-scale train enthusiasts. They looked for little plants to spruce up their outdoor displays. I turned twiggy forms of French thyme, Japanese maples, dwarf rosemary ‘Blue Boy’, and Juniper seedlings into bonsai. Their natural forms fit right into the smaller dimensions of their gardens. Miniature purple basil was trained into a tiny topiary, for one season.

And then there are the miniature evergreens, of course. That’s another post. But you get the idea. Check out all the departments in well-stocked garden centers; there are all sorts of small-scale plants that can be used in porch planters.


aerial view miniature garden

Miniature garden with dwarf evergreens.

Return to the top

Headings

Page 1: A Shady Porch Planter, But If It Goes Too Dry…, Following the Path of Least Resistance, Ferns and Friends—Made for Shade (So Many Choices), and Small Scale Gardening In a Porch Planter (Little Plants for Sun)

Page 2: Perennials for Your Shady Porch Planter (Some Possibilities), Color For a Porch Planter, Getting the Whole Picture, Year-Round Gardening In a Porch Planter (Warm Weather, Cool Weather, Evergreens), and Ready-Made or DIY Porch Planter?