2019
Updated 3/5/2024
Why Should We Grow Basil in Pots?
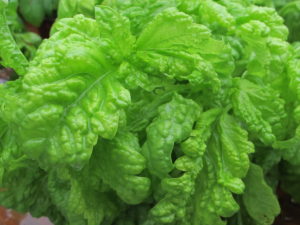
‘Valentino’, a lettuce leaf basil, normally is light green in color.
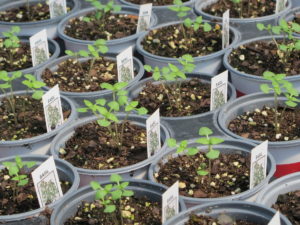
This year, I’ll grow basil in pots. It’s too early to grow basil outdoors, but I am starting seeds now for early sales (transplants and cut herbs) at the farmers’ markets.
Although summer thunderstorms are most welcome after a dry patch, that’s when Basil Downy Mildew becomes a real problem. In this article, I’ll describe the disease and offer tips for growing perfect basil once again.
Basil Downy Mildew was first described in Uganda in the 1930’s. It has been a serious problem in the United States since 2007, when it first appeared in Florida. The disease now has appeared in most of the U.S. and elsewhere around the globe. I lived in Maryland at the time of the first outbreak and was selling plants at farmers’ markets and garden shows.
How To Recognize Basil Downy Mildew
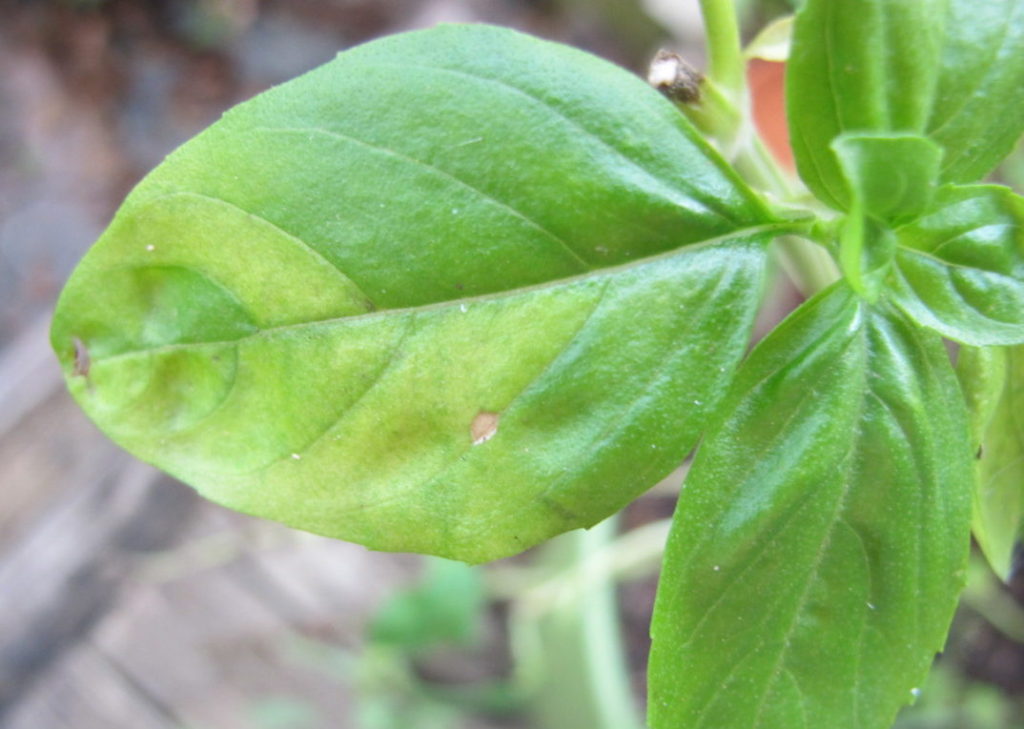
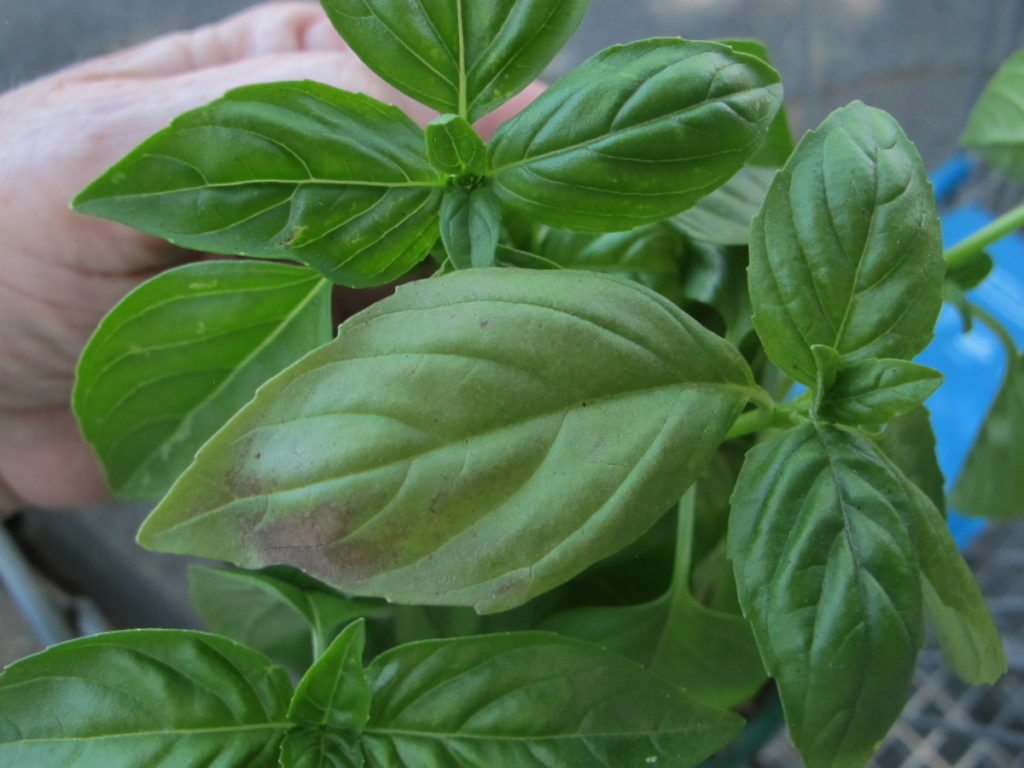
The leaves of affected plants become speckled in pale green or yellowish blotches, mostly bordered by the main veins. Eventually, entire leaves turn pale green.
- Yellow areas between the veins.
- Center leaf beginning to grow pale.
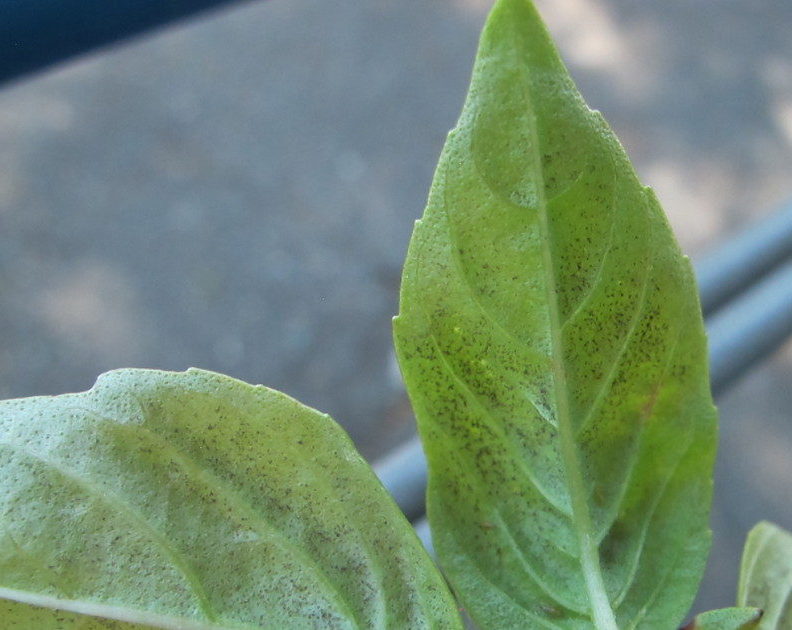
A coating of grayish felt, visible at dawn, covers the bottom of the leaf. Soon afterward, small black dots appear. Those black dots (sporangia) released their spores, which will infect other basil plants. The plant looks sickly, as if it needs fertilizer…or something…and never again has that healthy basil look.
- Black sporangia on reverse.
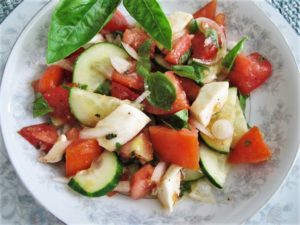
- Advanced BDM.
Do you recognize some of these symptoms? These characteristics are diagnostic for Basil Downy Mildew. (***Update***: Photograph above, left, was taken at a Charlotte garden center on May 20, 2019. BDM arrived early that year.)
Spores float on air currents, usually migrating north from infected southern-grown plants. They also can be carried on seeds or spread from overwintering local greenhouse plants.
Humidity that rises higher than 85% for a few hours is sufficient to initiate this infection on susceptible varieties. Other water molds affect coleus and seed-grown impatiens, but only basil (Ocimum basilicum) can catch this one. And its name is Peronospora belbahrii.
Can we do something for our beloved basil?…
Easy Solution: Basil In Pots
 …Yes we can! Growing basil in pots is the answer! Take the pots indoors in rainy weather to prevent spores from germinating.
But that’s not the only time basil is susceptible to this disease. Nighttime humidity levels can rise quite high even on a day that was perfectly clear and comfortable. When the temperature drops through the night, the lowest temperature usually occurs right around dawn. When the temperature drops to its lowest measurement, the relative humidity increases to the highest level.
Check your local weather report early in the morning. Look for the relative humidity measurement, which can be 85% or 95% at dawn. Rain doesn’t even have to be in the forecast. With spores in the air and basil exposed to high relative humidity, it will become infected. The spores need a few hours of these conditions to germinate. Fortunately, normal indoor conditions never come close to those levels of humidity.
Every year that I moved them indoors at night, the potted basil plants remained BDM free. And almost every year I grew basil outside, BDM was inevitable.
None of the relatively non-toxic sprays I tested worked well enough. But I prefer to not spray herbs at all. Some cultivars introduced over the past several years are recommended as having “some tolerance to Basil Downy Mildew”…but they still can develop the disease in humid areas.
New Varieties
Fortunately, new varieties promise “high tolerance to BDM”. Rutgers University and Van Drunen Farms developed resistant varieties that are available to growers, and, more recently, to retail customers. A huge demand for production of basil downy mildew resistant varieties is driving the research.
(***Update***: Basil ‘Obsession’, from Rutgers, has grown extremely well this summer, and with no BDM. I’ll take some cuttings for winter pots. Several seed suppliers stock these new resistant varieties, but demand might exceed supply, so order early. 9/2/2021)
Long-Time Favorite Herb
Since it was my customers’ favorite herb, I had to figure out a way to grow basil without using chemicals. I couldn’t afford to lose my best-seller. At that time, I started many varieties of basil from seed under fluorescent lights in the basement. They grew larger outside, after transplanting (2½”, 3½”, 4½” pots, and some that were larger), until they were sold at the markets.
Knowing that high humidity provided the right conditions for this infection, I moved all the basil flats into the garage at night. Every day! Two small table fans kept the air moving around the plants, so the basil never caught BDM when handled this way.
My business infrastructure was very simple and did not include greenhouse space at that time. During the height of the market season, I grew several dozen flats of basil in various stages of growth at any one time.
These tips were passed along to my customers, who were glad to know how to stay ahead of the problem.
So, I always grow basil in pots, and take them indoors when the humidity is expected to rise high enough to cause trouble. It is a commitment, but the reward is freshly picked luscious basil for summer salads and lasagna. The disease often appears by mid- to late summer, but it can show up earlier.
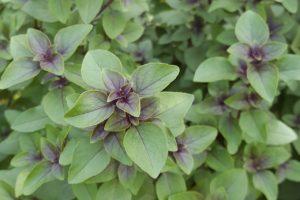
‘Miniature Purple’ basil for salads or trained as a tiny topiary standard.
Varieties Included:
- sweet basil: ‘Genovese’, ‘Genovese Compact’, ‘Fino Verde’, ‘Italian Large Leaf’, ‘Aroma 2’, ‘Nufar’, ‘Marseillais Dwarf’, ‘Amethyst’, ‘Miniature Purple’, and others
- lettuce-leaf sweet basil: ‘Napoletano’, ‘Tuscany’, ‘Valentino’
- Greek basil: ‘Yevani’, ‘Minette’, and 2 ‘Columnar’ varieties
- lemon basil: ‘Mrs. Burns Lemon’
- Thai basil: ‘Siam Queen’, ‘Sweet Thai’
- ‘Magical Michael’
- lime (good with cucumbers)
- holy: ‘Kapoor tulsi’ (O. americanum v. pilosum)
- ‘Mexican Spice’
- ‘African Blue’ (an ornamental basil and an excellent pollinator magnet)
- ‘Cardinal’ (a cinnamon type; this one and the previous 3 basils have some or good resistance to BDM)
The few that showed any resistance to the disease, however, were not the varieties we prefer in the kitchen.
It wasn’t long before basil started disappearing from other growers’ booths at the markets. So, it was worth the effort to keep basil alive and growing.
Basil In Pots: Potting Up
Start with clean materials. If you’re reusing a 12″ wide pot, clean it out very well, including all the old soil. Don’t discard it, though; throw it under the shrubs or dig it into the flower garden. Even used potting soil has value in the garden. A pot this size will accommodate several stems of basil for the entire growing season.
Wipe down the inside and the outside of the pot with a 10% bleach solution. Allow it to sit for a few minutes before rinsing thoroughly.
Basil is susceptible to several air-, water-, and soil-borne pathogens. That’s why it’s important to begin with clean materials.
Shopping For Basil Transplants
Look for rich green uniform coloring in the foliage. Familiarize yourself with the normal coloring for the varieties you’re interested in growing. For example, ‘Siam Queen’ Thai basil has dark green foliage, while lettuce-leaf basils (top of page) have light green puckered leaves.
Avoid wilted plants and those with brown edges, yellow lower leaves, pale green foliage, splotchy surfaces of leaves, and black spotting on the stems or leaves. Turn the leaves over and look for the tiny black dots of BDM. Inspect purple-leaved varieties carefully. Avoid buying basil that has started flowering.
Underpotted (tightly potbound) and underfertilized basil is stressed and will not last all season. Leaves that are off-color taste awful!
Look for small pots (2½-4½”) with 2 or 3 seedlings in the pot. The plants should have foliage down to the soil or close to it.
Growing Basil From Seed
If you can’t find the varieties you’d like to grow, consider starting them from seed. This gives you an opportunity to try new flavors—maybe lemon or lime, or anise-flavored Thai basil.
Seeds that are kept cool and dry remain viable for a few years, so you won’t have to germinate the entire packet…unless you want to.
Pots and Seedling Mix
Have market packs or 4″ pots cleaned and ready. Use the same bleach solution recommended for larger pots, described above.
New peat pots are an option, and can be planted pot and all, without disturbance. Always pinch the bottom open in a few places before transplanting peat pots. This allows roots to quickly grow into the potting soil. Peel off the rim of the pot protruding above the soil level to prevent water from wicking away to the atmosphere. Roots will soon grow through the peat pot in moist soil.
Use pasteurized seedling mix. Most pathogens have been destroyed and its finer particles make better contact with the seeds. Fill containers with the seedling mix to within 1/2″ of the rim, tamping lightly. Fresh, fine-grained, high quality potting soil also works well.
Water gently, using lukewarm (around 85° F) water. Label the pots with the varieties of basil you’re growing and the date—for example, “Sweet basil ‘Genovese Compact’, 4/20/19”. Labels are easily fashioned from a clean, repurposed plastic milk jug.
Now, make a small depression in the center of the pot, about 1/4″ deep. Drop in a few seeds. Or make a few separate small depressions in the pot and drop a seed in each one. The latter is my preferred method; the separation gives each stem a little breathing room.
Cover with 1/4″ of soil. An exception is Thai Basil, which prefers to be sown on the surface of the soil and not covered.
Water
When moistened, basil seeds develop a grayish-white mucilaginous coating. This is normal. The gel holds water next to the seeds and it might attract insects, which help distribute seeds in the wild. And the stickiness helps seeds adhere to the soil.
Place the pots in a flat or a tray and give them warm sun indoors. Basil germinates within a week in damp soil at temperatures in the 70’s and 80’s F. If it’s too chilly, you can place the pots of basil on a heat mat. Seeds won’t germinate and young seedlings will fail in cold soil.
Keep the soil damp to moist but not wet. Never let water collect in the tray. Use lukewarm water, and water gently so the seeds won’t become dislodged. You could water from the bottom but pour off the excess once the soil surface has moistened.
Now That They’re Germinating
As soon as the seeds germinate, give them at least 6 hours of direct sunlight. This ensures shorter sturdy stems that are less susceptible to damping off disease. Use artificial light (see “Maintenance”, page 2) if you don’t have sunny windows.
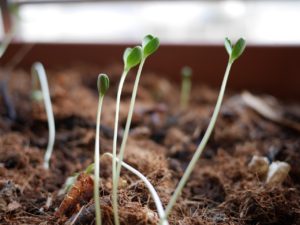
Seedlings (not basil) stretching due to insufficient light.
With favorable outdoor conditions, young seedlings can be placed outside for at least part of the day. Don’t expose them to temperatures below 70°, or to wind or full hot sun if they have been indoors for a while. Check the weather forecast.
Basil needs warmer temperatures than most herbs and vegetables. Even if it’s frost-free and the garden is ready, don’t be tempted to plant basil until the soil has warmed up. Basil will either sit still or deteriorate in cool or wet soil.
Damping off is a fungal disease that appears as a narrowed, light brown section of the stem that causes the stem to bend over, killing the seedling. Avoid overly wet and humid conditions, stagnant air, low light, and cold temperatures. Young seedlings are more susceptible to damping off than older plants.
Headings
Page 1: Why Should We Grow Basil In Pots?, How To Recognize Basil Downy Mildew, Easy Solution: Basil In Pots (New Varieties), Long-Time Favorite Herb (Varieties Included), and Basil In Pots: Potting Up (Shopping for Basil Transplants, Growing Basil from Seed)
Page 2: Repotting Basil In Pots (The Soil, Score the Root Ball, Add Plants, A Small Pot of Dwarf Basil), Maintenance For Basil In Pots (Light For Basil In Pots, Temperature, Watering Basil In Pots, Dealing With Slugs and Snails (Caterpillars), Fertilizer For Basil In Pots, Harvesting and Hormones), and About That Basil Downy Mildew (Growing Basil Outdoors)
