Page 2
Design Considerations For Improving the Landscape
The Right Size
One of the most important considerations when choosing material is the mature size of the plant you want to use. A large tree planted too close to the house looks out of scale and will soon detract from a harmonious landscape. Fast-growing shrubs lined up next to the driveway or obscuring the windows will become more of a nuisance than an asset.
It’s safe to assume that trees and shrubs will grow larger than the size indicated on their labels. Add another 10-35% to those figures.
Getting the Picture
Look at the landscape as a whole, and not at each individual component. Stand close to the street for a better perspective, so you can define what the front yard needs to make it more inviting, charming, colorful, or private. Maybe there are too many different kinds of plants or pot colors, and you’d like the garden to look less fussy.
If you want to highlight that spectacular new front door, then planting a tree or a large shrub in front of it will defeat the purpose. Instead, keep most of the area open between the door and the street. You want to “frame” the main entrance. Open “voids” are just as important as “filled” space.
Be sure to include in the picture the masses of trees behind the house, or on the sides, even if they belong to your neighbors. Although it isn’t necessary to have symmetry on the property, you do want to achieve balance. A garden heavily planted with evergreens on one side of the yard will look unbalanced if the other side does not also carry a similar weight.
A house becomes anchored to the ground by using wide, sweeping beds along the foundation and around the corners. Plant a small or medium-sized tree, depending on the scale of the area, diagonally off the corner of the house to visually lengthen it. Then, create additional layers of greenery by filling in with shrubs and perennials.
Research shows that home buyers perceive greater value in a property with wide, curving beds and pathways than in one with straight edges or narrow plantings. Keep this in mind when improving the landscape. Avoid the temptation to go back to old habits and, instead, think big.
But I’m Repeating Myself
Let’s imagine a wide flagstone walkway that leads from the driveway to the front door. It has straight edges, and the space between the walkway and the house is filled with groups of plants. You can soften the linear appearance—and complement it—by creating another bed on the outside of the sidewalk, with a curving edge. People approaching or leaving the house will be treated to beautiful plantings on both sides.
I don’t recommend mirror images (symmetry), except in certain garden styles, such as parterres. And you don’t have to use the same number of plants on each side of the sidewalk or the door. But do repeat some of the plants: the same ground cover, such as liriope, or ajuga, and the same variety of azalea on both sides.
Repetition is an important design element. Those plants can also be used on the other side of the driveway, and in the island at the curb. Repetition helps unite the different areas of the front yard. For example…
One Garden in Derwood
…A Maryland property that I worked on for more than 20 years had large planting beds throughout the front yard. This garden included:
- a garden on the left side of the driveway, with a path that guided people to the back yard and the small ponds
- a wide foundation planting on both sides of the front door, out to the flagstone walkway leading to the door
- a garden bed all along the outside of that walkway
- a roadside raised planting incorporating the mailbox
- and a garden on the right side of the house, with a fieldstone path that took visitors to the big pond down the slope.
Sounds busy, doesn’t it?
I used only a few specimens (Kousa dogwood, laceleaf Japanese maple, Enkianthus), and repeated groups of the remaining plants (Deutzia ‘Nikko’, dwarf Nandina, Hosta, autumn ferns, ‘Blue Star’ junipers, hollies, Pieris, etc.). The repetition helped relate one garden in the front yard to another. The mass and the shade provided by existing oak trees also had to be considered.
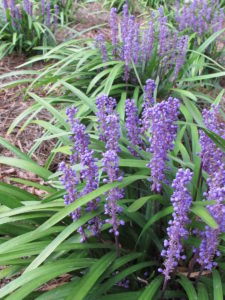
Here’s what tied it all together: I planted hundreds of grassy leaved Liriope muscari ‘Royal Purple’ (photo, right) as a ground cover. It was quite a sight when it flowered in mid-summer! My point is that, with help from the liriope, all of those separate gardens looked as if they belonged to one orchestrated entirety. That’s an effective way to achieve harmony.
‘Royal Purple’ is not the invasively spreading Liriope spicata, but rather one that grows in controlled clumps. The clumps will enlarge slowly over time, but they won’t creep into every sidewalk crack or bully every occupied piece of earth. The “blue” varieties of clumping lilyturf often sold in garden centers have pale ho-hum flowers, but ‘Royal Purple’ flowers are a deep, rich color…stunning in masses. Ask for it by name.
Add Some Rocks
Our goal with this garden was to make it feel part of the natural landscape. Parkland bordered the property, with a forest as background. And, since I used a lot of stonework around the big pond and on the slope, I carried this feature to the front yard by using more boulders (3′ to 5′ wide) in the gardens. Again, the garden was unified by the use of natural-looking stone in the gardens. And the stone added character in the winter when it was beautifully dusted with snow.
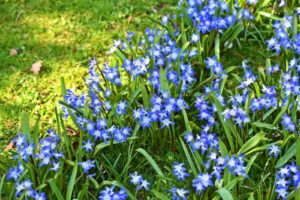
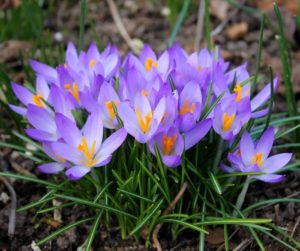
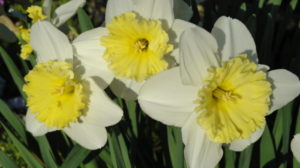
For early color, I planted spring-flowering bulbs in large numbers, repeating them throughout the property. We chose primarily deer-proof daffodils in drifts of color, and I tucked in some minor bulbs, such as Scilla siberica and species crocus.
Kudos to the owners, who did most of the maintenance themselves!
- Chionodoxa. All these spring flowers grow from bulbs.
- Snow crocus, from bulbs
- Snowdrops (Galanthus).
- Narcissus ‘Mount Hood’ opens with a yellow cup, which later turns ivory white.
Improving Curb Appeal
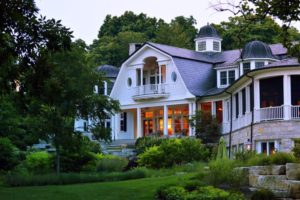
Imagine your front yard as a painting. The house is the subject, and the landscape is the frame. Major components, such as trees and large shrubs, are more effective when they’re located at the edges of the house and toward the property line, thus framing the house. A tree planted right in the middle of the front yard bisects the view and is less appealing.
Consider planting large beds, perhaps kidney-shaped or broadly S-shaped, in the street-side corners of the front yard. Here you can use a small tree to anchor the bed, planted about 1/3 of the way into the bed (the “Rule of Thirds”) from the property line, but not in the middle. Add a cluster of small-to-medium-sized shrubs and ground cover, and it’s done…although you can add a drift of flowers and a few dozen ‘Tête-à-Tête’ daffodils nestled among the ground cover.
Plantings close to the street that partially obscure the house provide both depth and a sense of mystery. And they fill part of the void in the center of the yard. Don’t underestimate the value of depth in creating that indefinable quality that gives the garden dimension.
When seen from the street, a garden composed of many disparate varieties, colors, and forms loses focus and is less satisfying. It looks spotty. For better curb appeal, limit the number of varieties used when improving landscape open to public view. Except for strategically positioned specimens (one-of-a-kind plants), masses of the same plant material create a unified and attractive display in the front yard.
Under the Parrotia Tree
At my Maryland residence, some of the gardens were permanent. Others occupied space that I used for the horticultural business, so their contents changed out frequently.
I created a raised garden at the curb that included several purple ‘Encore’ azaleas (off to the left, out of the photo, above) and a Parrotia persica. This is a beautifully branched and underused relative of witch hazel. I planted about 150 Liriope ‘Royal Purple’ in a few sections on the perimeter of the garden. This liriope was repeated in other beds in the front garden. And 15 or 20 Hosta ‘Glory’ snuggled in a curving drift between the liriope and the tree. This was a beautiful sight when the vivid purple liriope bloomed against the taller gold-leaved hostas.
A cluster of Farfugium, with huge leaves and yellow flowers in October, commanded the territory between the azaleas and the Parrotia.
This raised garden was an effective way of improving the landscape. It also created some natural screening between the front yard and the street.
Surprise!
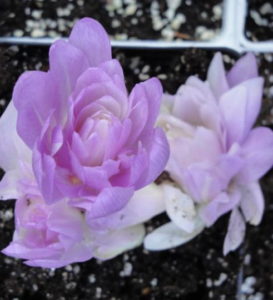
Colchicum ‘Waterlily’.
I enjoy adding plants that contribute interest at different times of the year. These ephemerals highlight a window of time in this gardener’s calendar. And they indulge my inclination to try new plants.
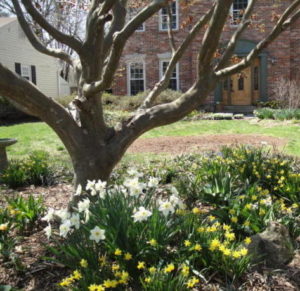
Two or three varieties of daffodils flowered in early to mid-spring (photo, above), before the liriope and other plants showed new growth. Large clusters of the same daffodils appeared elsewhere in the front yard.
A few dozen luminescent blue fall crocuses peeked out from among the liriope near the mailbox and next to the flagstone sidewalk. These small plants are appreciated up close.
A plain concrete bird bath (left edge of photo, above) adds a contrasting element of something man-made, and gives height and interest to that section of the garden.
Colchicum ‘Waterlily’ bulbs (photo, above) brought fall color next to the sidewalk, echoing the fruits of the purple beautyberry growing above them. Colchicum is poisonous and, therefore, not eaten by deer.
Raise It Up
Garden beds benefit aesthetically when they’re raised above the surrounding lawn or paved surfaces. Sculpting the gardens, instead of gardening on flat land, adds spatial dimension to the area. This is accomplished by incorporating organic matter and drainage material into the existing soil. You also can bring in good quality screened topsoil in order to raise the berm about a foot above the surrounding area.
- First, and this is the hardest part, dig and break up the clods of soil in the top 8″ to 20″ of the new bed. Depth is determined by the types of plants you’ll be planting–annuals (8″ to 12″), a perennial garden (12″ to 15″), or mixed woody plants and understory species (12″ to 20″). This procedure greatly improves compacted clay soil, and I highly recommend it.
- Second, add a few inches of pine fines and sharp sand, and incorporate (don’t layer) these drainage materials into the loosened soil.
- Third, incorporate 2″ or 3″ of organic matter, such as compost, peat moss, aged manure, or planting mix into the top 5″ to 8″, depending on the species being planted. If your new plants need acidic soil (rhododendrons, azaleas), use peat moss, but not manure.
- Rake smooth, and gradually ease the edge down to the lawn or the sidewalk.
Plants display so much better in raised beds. If possible, avoid walking on the newly improved soil. This would drive out the air spaces that allow roots and rainfall to penetrate the soil.
Be careful not to plant trees or shrubs too deeply. In fact, it’s best to allow the top of the root ball to protrude an inch above the soil level. A two-inch layer of mulch and a thorough watering complete the project. Continue watering, of course, until plants become established or as needed.
Only the Beginning
This is just an introduction to improving the landscape. Take notes on the little details that you like or dislike about your property. Periodically, I’ll add more articles about landscaping. But now it’s time for you to take the next step. Grab a notebook and pen, maybe another pair of eyes, and take a walk!
Headings
Page 1: A Landscape Primer, Check All That Apply, A Little Research (Using Native Plants When Improving the Landscape), Leave It To the Professionals
Page 2: Design Considerations For Improving the Landscape (The Right Size, Getting the Picture, But I’m Repeating Myself, One Garden in Derwood, Add Some Rocks), Improving Curb Appeal (Under the Parrotia Tree (Surprise!), Raise It Up, Only the Beginning
