Potted Peppers For A Winter Harvest: 5 Easy Tips

2024


Potted Peppers for Growing—in the Winter?
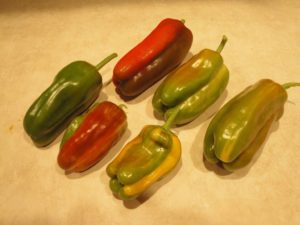


'Candy Cane' peppers

‘Candy Cane’ sweet peppers.


Autumn Has Arrived!


With cool weather approaching, our attention shifts from harvesting heirloom tomatoes to preparing our gardens for winter. Some gardeners clean the shed, weed the beds, and pile fallen leaves onto bare soil or dig them into the ground. Others continue growing greens and vegetables outdoors. In this article, I’ll show you why and how to grow potted peppers through the winter!


Have You Ever Considered Growing Potted Peppers?

Peppers are warm-climate perennials that, with proper care, can live for a few years. Here’s the key: these frost-tender plants must stay indoors through the colder seasons.

For the coming months, you can enjoy moderate harvests for salads, stir-fries, dips, and veggie omelets. They’ll bear fruit over most of the cool season, from mid-autumn through spring, although not as heavily as they would in summer.

During the short days of January and February, the plants usually stop flowering, although fruits that have already set will continue developing. As days lengthen, the plants begin blooming and fruiting again.

Earlier this year, I retired the potted peppers—‘Aura’, ‘Glow’, and ‘Candy Cane’—I’d been growing for 3 years. But several others now fruiting in pots will take their place indoors for the winter.

With good sunlight and proper temperatures, I’ll harvest dozens of peppers from a few moderately sized plants. I’ve been doing this for years at other residences, but now the sunny enclosed porch makes it much easier.

As the temperature drops, warm season crops outdoors will not survive. Pepper plants begin to decline when temperatures dip below 50°F. If you decide to proceed with this project, you’ll need to watch the weather very carefully.


Early Fruits Next Summer
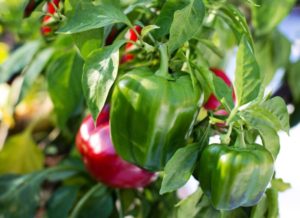
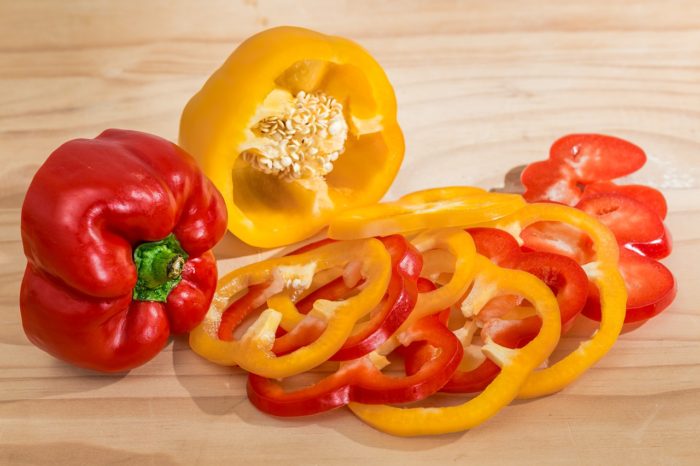
bell pepper

Peppers take quite a while to grow and mature. Most cultivars of peppers require around 2 months of growing time after transplanting into the garden for fruits to form. Since they must have warm soil and air temperatures, they can’t be planted too early. Even if frosts are over, the ground might still be too cold—from a few days of rain or cloudy weather—to plant sensitive crops, such as peppers and basil. They sulk or die in cold, wet soil.

If your last spring frost date is May 1, for example, you’ll pick your first bell pepper from a new transplant by mid-July. For a colorful ripe fruit, you’ll need to wait another 3 weeks. In contrast, potted peppers begin bearing fruits months earlier than new transplants set in the spring garden. You’ll enjoy a significant head start by overwintering these plants indoors. For that reason alone, you might decide to give this a try.

Many of my farmers’ market customers complained of poor flowering and fruit set due to extreme heat and drought this past summer (2024). Each variety of pepper and tomato has a threshold above which the pollen denatures, or dies. No living pollen = no pollination = no fruits. Some gardeners harvested no peppers at all! Growing potted pepper plants indoors could be the solution to poor harvests. Because they’ll be in flower and fruiting by the time they go outdoors for the summer, you’ll have harvested several peppers before the hottest months settle in.

Are you ready to expand your horticultural experience? If so, here are the 5 tips for growing potted peppers:


Tip #1: Start with Healthy Transplants 


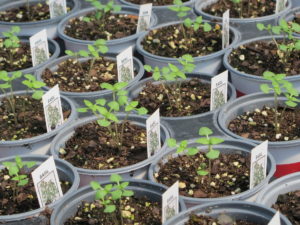
pepper seedlings

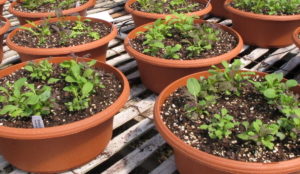
Young pepper seedlings in spring.


When planning your summer garden, consider keeping one or a few vegetable plants in pots. Keep in mind that some pepper varieties grow large while others attain only half that size. This information is often found in the catalog. Because roots are restricted, potted vegetables normally won’t grow as large as healthy plants in the garden.

A grower in your area might have kept some pepper plants from an early sowing. I ordinarily grow more than I can sell, so I keep a few dozen potted peppers well into the summer for customers who regretted not planting them earlier.

Another option is to start seeds in early summer. Raised in containers all season and properly fertilized, these plants grow fruits during the summer and continue as long as outdoor conditions favor growth. It helps to let the plants root into garden soil under the pots. This way, their roots can explore the soil for moisture and nutrients.

Later, you’ll sever the roots from each of the drainage holes, one at a time, giving the plant time to adjust before autumn arrives. The leaves probably will wilt somewhat as you cut the roots at the drainage holes, but less severely if you remove some of the foliage. For vigorously growing plants, it would be a good idea to cut back some of the stems by mid to late summer.

Look for plants without symptoms of disease, including wilt and heavily spotted or discolored leaves. Remove old pale or insect-eaten foliage. Potted peppers in winter might not have perfect foliage, but if the leaves are green and photosynthetic, they can remain on the plant.

Inadvertently, a few small peppers hang around here in their market packs, undernourished and barely alive, with some reduced to just a few leaves. Plants often can be restored to a healthier state with proper potting and pampering, as long as the roots have not been severely compromised.


Tip #2: Transplanting Potted Peppers
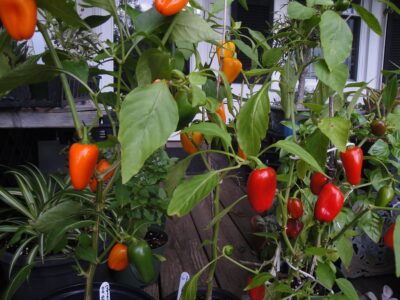


ripe peppers

Orange and red ‘Lunchbox’ peppers.


The Pots

I transplant plants that prefer warmer conditions, particularly sweet or hot peppers, into black nursery pots. You can buy them or ask a landscaper or a local nursery if they can spare a few pots that they might otherwise discard or recycle. Black pots absorb more of the sun’s energy, helping to warm up the soil in cooler months.

Conversely, try to shade the pot so the soil doesn’t overheat in the summer. In hot climates, the sun bakes the soil on the sunny side and damages the roots. I either shade the black pots with other plants or drop them into larger white nursery pots. All pots must have drainage holes.

Avoid planting a young seedling directly into a 2-gallon pot. Instead, transplant the small plant into a 6″ pot and let it thoroughly root into that pot. A few weeks later, move it into the larger pot. This helps the plant develop roots with a more extensive branching structure.

Moisture in a pot behaves differently than moisture in the ground. New soil (with no roots growing through it) in a large pot stays saturated after a day of rain and could suffocate the roots. Even though much of the excess water drains through the holes, a layer of wetter soil remains in the bottom of the pot before it is absorbed by the roots. But in the ground, water is pulled through the soil by gravity and capillary action. As water drains, air is pulled into the soil. Roots need oxygen in the soil as much as they need water.


The Potting Soil

Potting soil should drain well, but it also should be able to hold some moisture and nutrients. Most potting soils today contain large amounts of wood products (bark, wood), which cause them to quickly drain and dry out. A few brands offer excellent soils, but they’re quite expensive.

I tailor the potting soil for each plant species by amending it with ingredients that improve either drainage or moisture retention. Clean garden loam, peat moss, compost, finely ground coir, and aged cow manure have smaller particles and, therefore, help hold water in the air pore spaces.

On the other hand, perlite, pine fines, pieces of wood, coarse coir, and expanded rock products introduce larger air pores spaces, facilitating drainage and drying the soil.

Information on the bag of soil usually indicates whether it’s best used in pots (“potting soil”, “raised beds”, or “container gardening”) or for planting in the garden (“planting mix”, “garden beds”, or “in-ground gardening”). Potting soils tend to have a finer texture than planting mixes.

Amend potting soil that seems coarse (has lots of large particles) with some of the components that hold moisture, as mentioned above. If you’re using more than a small amount of peat moss, which is very acidic, mix in a teaspoon of pulverized limestone. The soil pH should be around 6.0-6.5 for peppers, which is slightly acidic.

If in doubt, have the soil tested for pH and nutrients through your local cooperative extension service. Lime can take a while to work on the pH, so test your soil before adding lime.


The Process
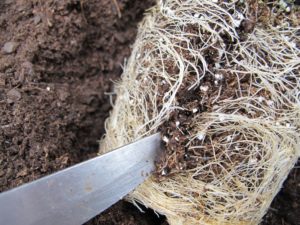
 

scoring the root ball

Scoring the root ball encourages rapid re-rooting.


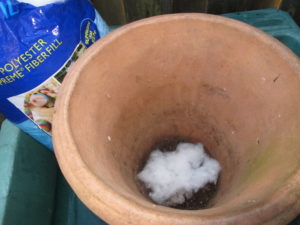
Most nursery pots have large drainage holes which can cause erosion of the soil. To prevent loss of soil, line the pot on the bottom and partway up the sides with a piece of landscape fabric, polyester fiberfill, or similar material. Water can still drain from the pot, but soil particles won’t wash though the holes. This compromises the plant’s ability to root into the ground beneath the pot, however, so you’ll need to carefully monitor soil moisture levels.

Fill the new pot almost to the rim with lightly dampened potting soil, firming gently. Before setting the plant into the new soil, score the outside of the root ball or use a fork to tease some of the roots out from the root ball. This slight damage stimulates the root system to branch out, helping new roots establish quickly in the soil.

Set the transplant into a hole in the center, and firm the soil around the root ball. Don’t bury the stem with new potting soil when transplanting peppers. If space is a consideration, 2 plants might comfortably fit into a pot that’s a bit larger than you’d use for just one plant. This works better for cultivars that normally grow into small or medium-sized plants.

The finished soil surface should be 1-2″ below the rim of the pot. A pot completely filled with soil can be quite messy when applying a thorough watering.

After planting the pepper, insert a stake (1-3′ long bamboo, a tomato cage, vinyl-clad metal, or a twig) all the way to the bottom of the pot. Secure the stem with twine, but not tightly, to keep the stem upright. The main stem or side branches heavy with fruits will slump over and might need additional support as the plant grows.

The First Watering
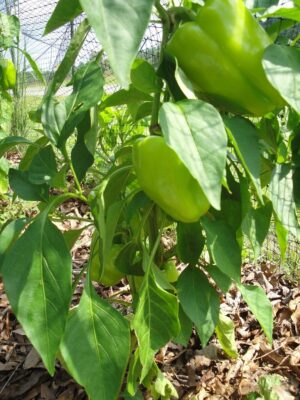
Water the plant. Apply enough water to soak the original root ball and some of the soil surrounding it. Thoroughly watering a new transplant needlessly leaches nutrients out through the drainage holes.

As roots grow into the soil, you’ll need to moisten more of the soil volume. If you begin this process by midsummer, the pot will have filled with roots by late summer to early autumn.

Plants slow their growth as days shorten, so they might struggle to fully root into their pots if you delay transplanting until autumn. If you transplant them at that time, be very careful not to overwater.

Keep the potted peppers outdoors in full sun (7-8+ hours/day) through the summer and early fall, or until nighttime temperatures drop below 55°F. While pepper plants can tolerate colder conditions than that once in a while—but not close to freezing—exposing them to low temperatures on consecutive nights weakens them.


Varieties of Potted Peppers I’m Growing This Year

‘Flavorburst’ is a medium-large sweet bell pepper that starts out lime green and matures to a golden orange color. The flavor is milder than the deep green bells. The plant is a medium-large grower, so it’s in a 3-gallon pot.

‘Olympus’ is a medium-sized plant growing in a 2-gallon pot. This large, deep green bell pepper turns red when fully ripe. I’ll harvest most ‘Olympus’ peppers, however, in the mature green stage when preparing curried tuna or sweet-and-sour chicken.


red 'Lunchbox' pepper

Red ‘Lunchbox’ pepper.


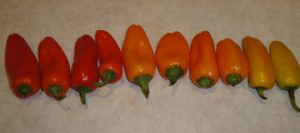
‘Lunchbox’ peppers are medium-sized plants. They grow very well in 1-2-gallon pots over the winter. The red fruits on some plants are rather small, so most of the ones I’m saving ripen to orange.

‘Aura’ and ‘Gourmet’, in 1- or 2-gallon pots, are orange-when-ripe bell peppers on small plants. Sweet bell peppers that ripen to orange contain extremely high levels of zeaxanthin—10 times more than ripe red peppers. The antioxidants zeaxanthin and lutein help preserve eyesight. (Spinach, pistachios, goji berries, and egg yolks also boast high levels of these antioxidants.) If I need bell peppers when my plants aren’t producing, I usually buy orange bells. I’ve read that orange hot peppers do not contain those elevated levels of zeaxanthin.
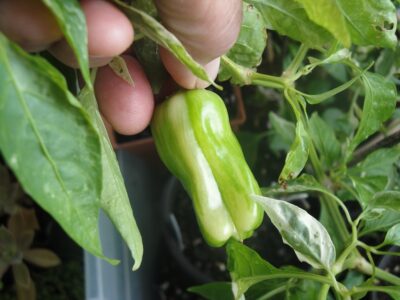
‘Candy Cane’, a sweet pepper with green and white variegated leaves, is among the potted peppers I’ll grow again this winter. The fruits grow irregularly striped green and creamy-yellow, ripening to bright red (photo, top). This cultivar needs full direct sun to maintain good variegation in both the foliage and the fruits. Even if it loses its white splotches, it will yield good peppers.

‘Jimmy Nardello’s Italian Frying Pepper’ has long, curved, red, sweet fruits when mature. At the last minute, before cool weather moved in, I literally yanked 2 young plants out of the ground and potted them into 6″ pots for now.

You can dig up peppers that aren’t very big but try to keep the root system intact. Removing half of the foliage (by cutting back the stems) and light shade for a couple of days can help prevent severe wilt. Then, with good sunlight and careful watering, they can recover.

I don’t eat hot peppers and will sell the rest of the potted habaneros, cayennes, and jalapeños. ‘Helios’ habanero is so cute with its bright orange lanterns hanging on small glossy-leaved plants. It’s ornamental qualities merit keeping it around during the autumn holidays.


Habanero 'Helios' hot pepper

Habanero pepper ‘Helios’.


Headings

Page 1: Autumn Has Arrived! (Have You Ever Considered Growing Potted Peppers?, Early Fruits Next Summer), Tip #1: Start with Healthy Transplants, Tip #2: Transplanting Potted Peppers (The Pots, The Potting Soil, The Process, The First Watering, Varieties of Potted Peppers I’m Growing This Year)

Page 2: Tip #3: Caring for Your Potted Peppers (Direct Sunlight and Temperature, Artificial Light, Water for Potted Peppers, Fertilizer, Timed Release Fertilizer, “Should I use organic fertilizer?”), Tip #4: Pollinating Your Potted Peppers, Tip #5: Fruits from Your Potted Peppers (No New Fruits?)

Return to the top

Asparagus: Tips For Long-Term Production In Your Garden


2024


The Tip of the Spear


How exciting to see new asparagus spears emerging from the ground with warming spring weather! But, as with icebergs, most of what asparagus is all about happens below the surface (of the ground). This article provides tips for producing healthy crops in your own garden over a long period of time.

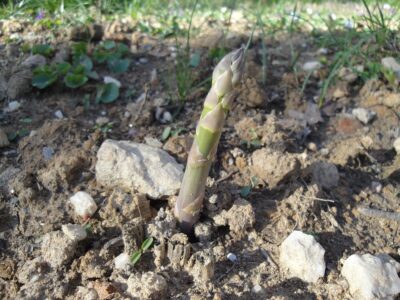
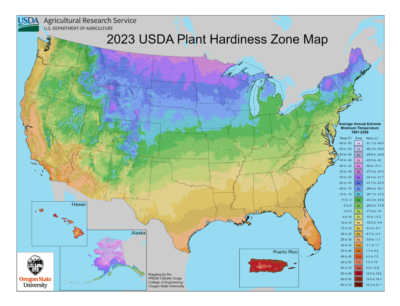
Asparagus is a herbaceous perennial grown in USDA zones 2 through 9. This spring, a 2-year-old bed produced beautiful thick spears for 2 dinners and 2 small freezer bags. Normally, we don’t start harvesting asparagus until the third year, but I couldn’t resist… Next year, it should produce a few weeks longer.

In the fourth year and thereafter, a healthy asparagus bed can be picked for up to 8 weeks. For the rest of the summer season, ferny growth stocks the root system with nutrients that will fuel next year’s growth.

Because these plants can last 15-20 years or longer in the garden, it’s worth paying special attention to soil preparation.

Cut asparagus is readily available in early spring, when it’s least expensive in grocery stores. After a few weeks, however, the price triples. For that reason and because I like harvesting unsprayed fruits and vegetables from my yard, it was time to plant an asparagus bed. Plus, I now have the space, and never turn down an opportunity to reduce mowing time.


Preparing the Asparagus Bed


I chose a spot that gets 10 hours of direct sun each day during the growing season.

Asparagus suffers less root disturbance if it’s grown in a bed of its own rather than mixed among other seasonal vegetables. The airy fernlike growth can reach over 5′ tall, so keep this in mind if planting shorter plants that need sun in the next bed. I live in the northern hemisphere, so tall plants (pole beans, ‘Sugar Snap’ peas, staked tomatoes) go on the northern end of each garden.

In early spring of 2023, I planted 10 robust crowns of 1-year-old Asparagus officinalis ‘Millennium’ from Johnny’s Selected Seeds. This variety comprises mostly male plants, reducing the chore of thinning out young seedlings that eventually crowd the bed. The crowns had multiple buds—dormant but visible—and the roots stretched about 12″ long.

There was no indication of fusarium, a disease that turns root interiors brown. Check a few roots by cutting them; they should be white inside. Destroy infected crowns. ‘Millennium’ has intermediate resistance to rust, another fungal disease.

For asparagus, thorough soil preparation results in highly productive harvests. I strongly believe in getting the soil in optimal condition for stress-free trees, shrubs, perennials, vegetables, and flowers. Robust growth, relatively few insect problems, and bountiful harvests attest to the extra effort. Amending heavy clay, sandy, or rocky soil is quite the challenge, but the payoff is always worth it.


Soil Testing

PH should be slightly acidic to neutral, in a range from 6.5 to 7.0. If in doubt about the pH of your soil, have it tested by your local agricultural extension service (the Master Gardeners). Do this a few months before planting, if possible, and add agricultural lime according to the results and your extension agent’s recommendations.


Clearing the Surface

The area where I originally planted the asparagus was grass and weeds. I stripped the top layer of soil, including all vegetation, from a plot measuring 4′ x 15′, setting it aside for later use.

The area is close to a vein of quartz running through the back yard, so a large quantity of rocks larger than 3/4″ was removed. You’ll notice in the photo at the top of the page that I missed a few! Over time, as more rocks work their way to the surface, they’ll be removed.


Excavating the Asparagus Bed


garden fork

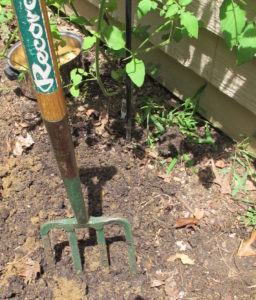
A garden fork I’ve used for decades.


With a sturdy garden fork, I dug out almost 24″ of native clay and set it aside, separate from the surface vegetation. Then, in the bottom of the trench, the vegetation removed from the surface was mixed with small twigs, oak leaves, old potting soil, leaf litter from the woods, pine fines, and some of the excavated clay soil.

Weeds that low in the ground will die and decompose. But if they ended up within 6-12″ of the surface, dandelions and other long-rooted perennial weeds could grow back.


Continuing To Fill the Trench

I added more materials to the trench, including about 200 pounds of coarse (large-grained) sand, more oak leaves and leaf litter, purchased planting mix, and the excavated soil. Mixing the materials rather than layering them produces a medium that drains consistently through the soil profile.

Organic matter decomposes in the soil, thanks to the huge populations of microbes thriving in organically rich soil. Living microorganisms fare much better when we don’t regularly add chemical products.

Earthworms also help themselves to this bounty. They consume soil and organic matter, excreting nutrient-rich castings and beneficial microbes. As they tunnel through the ground, they improve percolation. Air, water, and roots can more easily penetrate the soil.

You’d think that adding all those oak leaves would acidify the soil, but once they begin to decompose, they’re slightly acidic or close to neutral. Cow manure helps nudge the pH a bit higher. Peat moss acidifies the soil, so I didn’t add any other than the small amount in the amendments.

With the surface of the bed almost level with the ground outside the bed, I incorporated 150 pounds of aged cow manure in the top 6-8″ of improved soil. Rain and irrigation move nutrients lower into the soil, where roots can absorb them. I lightly firmed the soil as I added materials to the trench.

All these amendments raised the surface of the bed several inches. It will settle somewhat as the organic materials compress and decompose.


harvested asparagus spears


Planting the Asparagus Crowns


Laying Out the Bed

Once the trench had been almost filled and lightly firmed, I spaced out locations for the crowns. Catalogs recommend planting them 10-14″ apart. But I’ve read that more generous spacing can lead to a longer-lasting planting. Now in my 70’s, I want to be able to pick asparagus from this bed for the rest of my life, but 30 years will do!

The bed is wide to accommodate a zig-zag pattern for the crowns spaced about 24″ apart. An old native dogwood tree off the west end and a Japanese maple off the east end of the bed limited the length of the asparagus garden; hence, the zig-zag pattern.

I spread the long roots over a raised cone of soil in the trench, with the dormant stem buds at the top. Amended backfill was pulled over the roots, so only about 1″ of soil covered the crowns.

Suppliers sometimes recommend planting 10 plants per person.


The First Year

For the first summer of this planting, I watered heavily (1½”) when there was no rain for a week. The ferns grew well, although I didn’t pick any of the spears.

A thick layer of the previous autumn’s oak leaves covered the bed all summer. Much of it decomposed and was incorporated into the soil by earthworms. Mulch conserves moisture, suppresses weeds, cools the soil, and contributes organic matter. Oak leaves on the property are plentiful and free, so I collect white and willow oak leaves in autumn. They’re stockpiled near the woods or stored in large bags placed outside, against the basement wall.

In late April of 2023, high winds and hail from an F1 tornado flattened the 4′ tall ferns to the ground. Large hailstones battered the stems, leaving them pocked or broken and the greenery shredded. After a while, new stems grew from the ground. Using branches from the woods, I propped up any existing ferns that looked as though they could still photosynthesize. Dozens of flats of vegetable seedlings—destined for the farmers’ markets—growing near the asparagus bed were destroyed (photo, below).


young tomato plants damaged by tornado, 2023


The Second Year of the Asparagus Bed


Each plant grew an impressively vigorous root system in the first year. The reason I know this is because I needed to move the plants to make room for a small greenhouse.

The Japanese maple I’d brought from Maryland and kept potted for 10 years before planting it here needed a new location as well. Because the maple would soon begin leafing out, I dug it out first and replanted it in the front, near the street. It survived abnormally hot weather as it began growing leaves, but the uppermost twigs died off despite frequent watering. We’ve had a 6-week drought—with high heat, no less—but it finally rained a few days ago.


Young asparagus divisions beginning to grow.

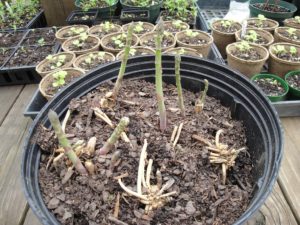
When moving the asparagus plants, I made a few divisions and temporarily planted them in this pot.


Moving the Asparagus

The new location for the asparagus bed is about 25′ from the original plot, farther from the quartz deposit. I dug a new trench, of course, taking all the enriched soil from the old bed and moving it to the new excavation. And I supplemented with more aged cow manure, planting mix, and half-decomposed leaf litter from the woods to the north.

I dug each substantial clump and planted it after opening a hole in the new bed. This exposed the roots to the air for only a brief period of time. At the time of the transplant in late winter, the asparagus was still dormant. Again, I set the root ball so the crown would end up only 1″ below the surface, firmed the soil, and watered them in.

After the sun had started warming the soil and as weed seeds began germinating, I mulched with dry oak leaves saved from last autumn.

Every few weeks (three times), I pulled the mulch aside and added 1″ of compost, excavated soil, and cow manure over the early spears. This encourages the plants to grow thicker spears. Shallow planting results in thin spears. They won’t need more soil, but each year, I’ll add a few bags of aged cow manure and compost under the mulch.

Avoid burying the crown too deeply at the beginning. There might not be enough energy stored in the roots for the spears to grow to the surface before they fail.


Male Or Female Plants for Better Asparagus?


asparagus fruits and seeds

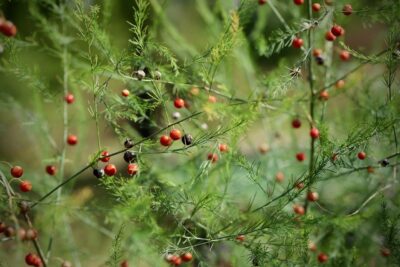
Asparagus berries, with seeds inside.


Asparagus is dioecious, meaning an individual plant is either male or female. Both male and female plants flower, but males lack the reproductive parts to make berries and seeds. Here in the Piedmont of North Carolina, the plants flower in late spring to early summer.

As new varieties become available, the preference among growers leans toward male plants. Females grow thicker stems, but males grow more of them. Male plants live longer, according to the University of Illinois. Some of the older varieties, such as the ‘Jersey’ series, are being retired by propagators.

Females have small green-to-red berries that need nourishment. They consume resources that instead could have contributed to foliage or root growth. When the seeds drop to the ground and germinate, they cause crowding within the bed. Consequently, extra effort is required to maintain adequate spacing between plants. The berries, by the way, are toxic to humans.

The ‘Millennium’ crowns I received last year and this year are about 75% male plants. I planted 10 last year (a few females) and potted up the rest to sell at the farmers’ markets. In the future, I’ll hold the confirmed female plants aside and plant them together in a bed of their own. Removing the berries would solve the problem of crowding.

I might experiment germinating the seeds. ‘Millennium’ is a hybrid, so the offspring could vary from each other, but I think the differences would be negligible. These plants will not be sold, but kept for my own use only.

Asparagus started from seed takes an additional year to grow before beginning the harvest. Seed suppliers offer seeds of named varieties.


White and Purple Asparagus?


asparagus white white asparagus 2329467


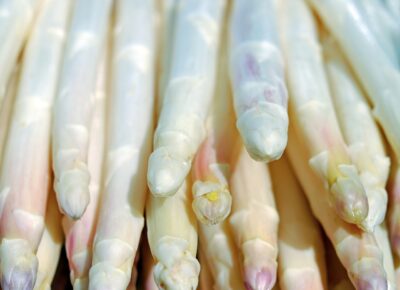
White asparagus has been blanched, or covered with soil to prevent light from reaching emerging spears. Deprived of light, they can’t form chlorophyll, so they grow white. They are more tender but have slightly reduced nutrient levels.

Purple asparagus varieties are available. ‘Erasmus’ is 100% male, and ‘Purple Passion’ comprises 60% male plants.

Purples have the advantage of additional antioxidants—the anthocyanins. Anthocyanins (pigments that make leaves and fruits red, blue, or purple) can boost cardiovascular health, help prevent cancer, and help regulate blood pressure. Berries—strawberries, blueberries, blackberries, and raspberries—also have high levels of anthocyanins.


Asparagus Nutrients


Asparagus is a low-fat, low-calorie vegetable. Half a cup of plain asparagus contains:

  • 20 calories
  • 3.7 grams of carbohydrates
  • 1.8 g. fiber (mostly water insoluble, helping with regularity)
  • 2.2 g. protein
  • some vitamins A and C, iron, potassium, and phosphorus
  • 51% of the daily recommended amount of vitamin K. Because of the high vitamin K content, consult a registered dietician if you’re taking blood thinners.
  • 34% of the recommended folate
  • 11% of the recommended riboflavin (B2)


A Healthy Gut

Asparagus aids our digestive health by eliminating toxins from our large intestine. It’s a source of inulin, a prebiotic fermentable fiber consumed by beneficial gut bacteria, which, in turn, suppress harmful species of bacteria.

Several intestinal problems can be helped by consuming asparagus (check with your doctor or dietician). While not as effective as beets, okra, kale, and collard greens, asparagus does moderately well in binding bile acids in the intestine. Asparagus can help repair intestinal damage from Type 2 diabetes, obesity, and gastrointestinal diseases.

You’ve probably heard of the benefits of a “healthy gut”, and asparagus is among the best foods to achieve this. These advantages help prevent cancer and heart disease.

Consuming asparagus can produce the strong smell of sulfurous compounds excreted in urine. The odor is from amino acids (asparagusic acid). Some people have the genes that give them the ability to detect the smell, which is perfectly harmless. Asparagus is mildly diuretic, helping to regulate blood pressure.

Young, thin spears eaten raw can cause contact dermatitis in sensitive people.


Yearly Maintenance of the Asparagus Bed


Once the asparagus bed becomes established, there isn’t much you’ll need to do:

  • Provide water if there’s prolonged drought. Asparagus roots grow deep into the soil, taking moisture stored there. They store water in their fleshy roots and can overcome a couple of weeks of dry weather.
  • Address issues with insects early on to prevent widespread damage.
  • Fertilize with 8-8-8 or 10-10-10 (N-P-K), or similar organic fertilizer, after harvesting the spears, but not late in the season. If the soil test indicates sufficient phosphorus (P), find a fertilizer low in the middle number. Look for a higher percentage of nitrate nitrogen (N), rather than urea or ammoniacal N. That information is on the label. Urea and ammoniacal N slowly lower the pH, making the soil more acidic. Nitrate N slowly raises the pH over time, preferred by asparagus.
  • Topdress the bed once or twice a year, in spring and early summer, with aged manure and compost.
  • Weed the bed.
  • After a freeze kills the ferns, cut them at soil level and remove from the bed.


chickweed, a winter annual weed

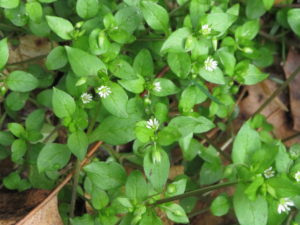
Chickweed, an edible annual cool season weed.


Concluding


Doing extensive groundwork when planting this vegetable will reward you and your family long into the future.

How to cook it:

  • Enjoy your asparagus steamed, adding butter and a dash of salt.
  • Occasionally, I incorporate lightly cooked asparagus neatly lined up in an omelet (use thin spears or cut larger ones in half, lengthwise).
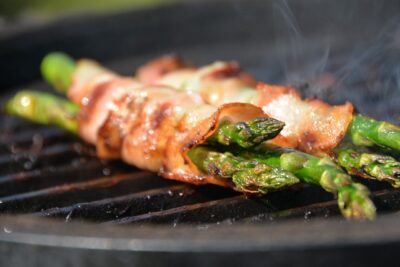
  • Grill or stir-fry it.
  • Steam it, adding butter and minced garlic, and garnish with grated Romano cheese.
  • Use it in pasta primavera with other spring vegetables.

No matter how you prepare it, asparagus is an elegant, delicious springtime vegetable. Something to look forward to for the next 20 years, or maybe 30…

Enjoy!


asparagus wrapped and grilled


Return to the top of the page

Sowing Seeds For Early Crops

2024


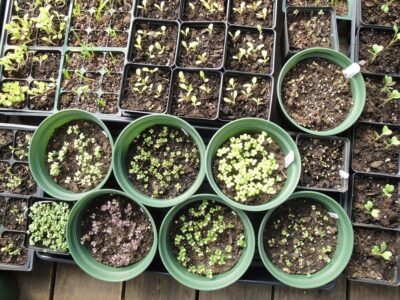
A few days after sowing brassica seeds.

Brassicas germinated 3 days after sowing seeds in these round 6″ pots.


Sowing Seeds For The First Crops: Too Early?


The calendar is approaching my favorite part of the year—warming temperatures… birds singing their special songs… starting seeds for the garden. New crops of brassicas—arugula, broccoli, cabbage, cauliflower, collards, kale, mustard greens, pac choi—top the list. I also grow lettuce, spinach, Swiss chard, peas, bunching onions, and others. In this article, I’ll describe an easy step-by-step process for sowing seeds you can do right now.

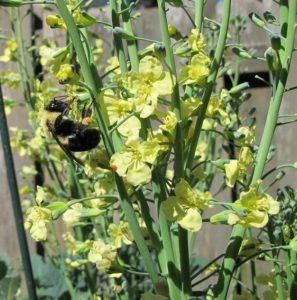
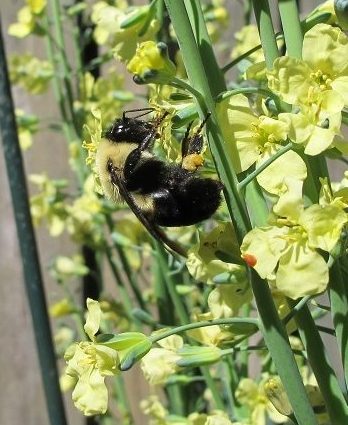
bumble bee on flowering broccoli

Bumble bee on ‘Arcadia’ broccoli in spring.

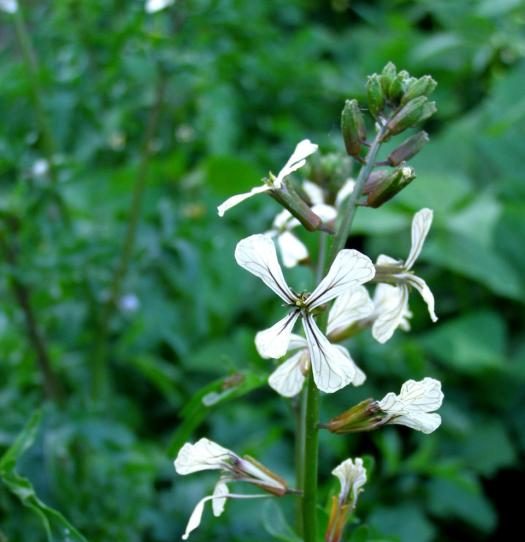
Some varieties of leafy greens are productive from early autumn through spring here in zone 7b, in the Piedmont of North Carolina. Last fall’s crops will flower in late winter or spring (photo, right), and are then replaced with young transplants. With cooperative weather, cool season crops offer a fantastic return on investment!

Starting in early March, I’ll sell transplants at local farmers’ markets or plant them into my own gardens. In preparation for the season, though, growers have nurtured these plants for 4-6 weeks before they’re offered for sale.

It’s important to plant young plants; heading crops, such as broccoli and cauliflower, confined in cell packs only 1 or 2 weeks too long will not properly head up. So, it’s important to start sowing seeds at the proper time—not too early and not too late.

Gardeners living in colder climates need to adjust their gardening calendar accordingly. Yes, at this time, it might be too early for some. Leafy greens prefer chilly weather. Many fail in the heat of high summer, although they might succeed in northern gardens (northern hemisphere) at that time. With careful variety selection and placement (light shade during the hottest hours of the day), we can stretch the season for these healthy greens.


“How do I use these greens?”

Although I’m not a vegetarian, cool season greens are the foundation of my diet. I can’t tell you how satisfying it is to pick fresh greens for salads, sauces, veggie omelets, soups, sandwiches, and stir-fries in winter. And as a side dish, on pizza, with pasta, and in smoothies, if you like them. It never gets old!

Cool season greens are versatile in the kitchen but curiously underrepresented in our gardens. Considering the fact that many contain the highest levels of vitamins, minerals, fiber, and beneficial antioxidants among edible foods, it’s a wonder more gardeners aren’t growing them! The brassicas (Brassicaceae family, formerly Cruciferae) are particularly nutrient-dense, and this family of plants is the only one with measurable amounts of the sulforaphanes. Sulforaphanes are antioxidants that help prevent cancer, type 2 diabetes, cardiovascular disease, and inflammatory illnesses. They also help maintain eyesight, brain function, and heathy skin.

Growing your own produce from seed saves money in these times of high inflation. You can harvest what you need for the day, so nothing goes to waste. And most crops can be grown cleanly, without pesticides, before the insects move in. Furthermore, there are hundreds of varieties to choose from that never appear in garden centers or grocery stores.

Maybe you’d enjoy experimenting with new varieties each year, as I do. Some have become my favorite foods, so they’re planted in my gardens each year. Among cool season greens, those include my favorite vegetable—mini broccoli ‘Happy Rich’—as well as ‘Nabechan’ bunching onions, Johnny’s AllStar Gourmet Lettuce mix, a butterhead lettuce called ‘Skyphos’, arugula ‘Astro’, ‘Arcadia’ broccoli (in autumn), dinosaur kale, and ‘Sugar Snap’ and ‘Oregon Giant’ peas.

Ready to begin?


Preparing To Sow Seeds


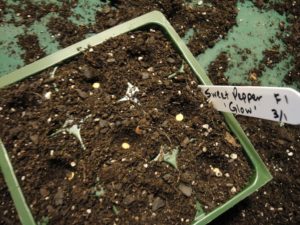
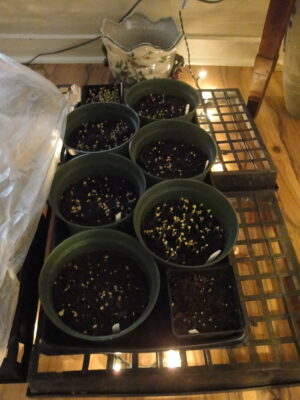
9-cell market pack with pepper seeds

Pepper seeds sown in a 9-cell market pack.


It’s helpful to read this entire article before proceeding so you can gather materials and plan your setup. You will need:

  • supplies (cell packs or pots, flats, labels, soil, seeds, vegetable fertilizer)
  • warmth to start the seeds
  • a waterproof surface
  • adequate light to keep seedlings healthy and strong
  • timely transplanting to prevent crowded plants
  • detailed records for future reference

Perhaps you’ve chosen lettuce, arugula, and ‘Black Magic’ kale seeds for your first project. You’ll need clean cell packs or pots, fresh seedling mix, and at least one flat to keep them in. You might already have used pots and flats lying around somewhere. Clean them first with a 10% bleach solution to kill pathogens.

Instead of trashing the failing window blinds, I cut the plastic slats, which make perfect plant labels. You can also use a plastic milk jug. Sharpie pens write smoothly, but the ink eventually fades in bright sun. Placing the label below ground or on the shady side of the plant keeps it legible for a while longer. A journal or a computer log is recommended as a backup and for additional notes.

I recently bought a few inexpensive heavy gauge flats from a big box store. Made by Ferry-Morse, they have no holes in the bottom and measure 10 x 20½” (inside diameter). They’ve proven their usefulness for holding pots of germinating seeds, so I’ll go back for several more.


Temperature For Sowing Seeds

Successful germination depends on a source of warmth if your home is on the cool side, as mine is. Although lettuce can sprout at 40-50° F, it germinates erratically or not at all above 70-75°. Other greens will get off to a better start when the soil temperature is in the 70’s to low 80’s. After germination, these seedlings will need cooler temperatures.

What are the options? Heat mats are available. One that measures 21 x 21″ consumes 45 watts of electricity and costs about $40-60. Larger commercial sizes, for 8-10 flats, cost over $125.

Maybe the top of the water heater provides suitable temperatures for starting a few pots of seeds. You might need to moderate the heat by raising the pots above the warm surface. Check them daily!

Miniature Incandescent Christmas Lights


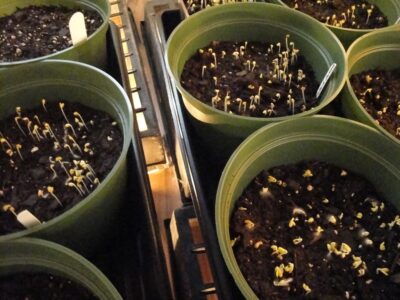
mini lights under flats of seedlings

These brassica seeds germinated overnight, above the mini lights.


I use indoor/outdoor miniature incandescent Christmas lights for warmth—not light—under the seeded flats. One 100-bulb string of lights (approximately 40 watts) on the hard floor of the spare bedroom and covered with 6 upside-down mesh flats (photo, above) works for me. Their gentle warmth is distributed over a large area, so I can start many flats of seeded pots at one time.

Be careful not to crush any bulbs, as this can cause remaining bulbs to burn hotter or to go out entirely. Don’t use higher wattage bulbs. Safety first!

You might want to test this layout before proceeding. Perhaps you have a folding table or counter space in the utility room that could serve this purpose.

When that greenhouse kit gets built, I’ll probably start seeds out there. Indoor space is very limited, and plants fill every bright window. Now that the knee replacement has improved mobility, I’ll work on a more efficient infrastructure for sowing seeds and transitioning them to outdoor growing. Maybe I’ll start seeds indoors and grow them on in the minimally heated greenhouse; it all depends on the severity of the weather and electric rates.


Preparing Pots For Sowing Seeds


sowing seeds in pots

A flat of seeds over mini lights, with plastic to hold the warmth until seeds germinate.


I start over 200 varieties of plants for the farmers’ markets, so many of the flats are shifted around almost daily. After the first round of seedlings has been transplanted, I start another. Some varieties need more time to sprout, while others, such as arugula, germinate in just 2 days.

A sheet of clear plastic over the flats holds in humidity and warmth from the mini lights. Labels identifying each variety hold the plastic above the soil. For good air circulation and to let condensation evaporate, keep the plastic open on the edges.


Light For Germinating Seeds


sun and clouds


Your seedlings must receive direct sunlight or strong artificial light as soon as they emerge from the soil. One or two days in inadequate light will cause the seedlings to weaken and stretch toward the light, so don’t delay getting them into the sun.

From horticultural supply companies, you can find ready-to-assemble light stands with shelves and LED fixtures. There’s one with 3 shelves, six 4′ LED tubes, and an attractive powder-coated aluminum frame that costs $1,000. Smaller units for 1-3 flats are more affordable at $100-400. They might give off enough warmth to satisfy the need for warm soil. One advantage in using this setup is that the light fixture above each shelf sustains transplanted seedlings for 2-3 weeks as long as the temperature is at acceptable levels. Cool season greens do best with a drop in temperature (below 60-65°) after germination.

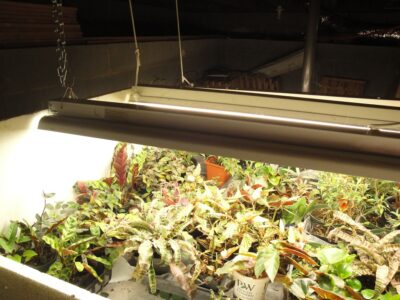
You won’t need advanced carpentry skills to put something together yourself. One or two 4′ long shop lights each fitted with 2 daylight (full spectrum) tubes (LED or fluorescent) cost $30-70. Use 2 x 4’s for the supporting framework or suspend the fixture under a table. Chains and S-hooks raise or lower the fixture, or simply elevate the seed trays to get them closer to the light.


artificial light and plants


In My Basement

In the basement and over two 6′ tables, I nailed chains and rope to the floor joists and positioned the lights as needed (photo, above). I’ve used these fixtures for decades to start seeds and root cuttings, to rehabilitate plants, and to grow delicate species and stock plants.

Plants that need strong light (vegetables, herbs, succulents) grow only 3-4″ below the tubes; 12″ below the tubes, however, is too far away. Light intensity drops precipitously with each inch of distance from the light source. Running the fixtures for 16-18 hours per day should supply enough energy for the plants to grow normally.

Seedlings won’t mind 24/7 lighting over the short term. Not turning the lights on and off every day adds to their longevity.

I prefer to start seeds without relying on electricity, using just the sun. But, at times, starting seeds under these light fixtures is convenient, particularly when they can grow there for a week or two before I’m able to transplant them.


Natural Sunlight And Temperature


sowing seeds, small transplanted seedlings

Seedlings and fresh transplants enjoy the protected space on the porch.


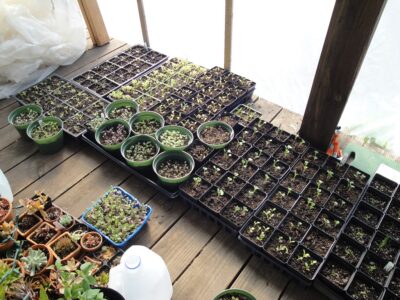
Newly transplanted seedlings go out to the sunny enclosed porch (photo, above), which faces south. I usually keep them there, in bright but filtered sun, for their first 1-2 days. On an overcast, calm day, new transplants can go outside if the temperature is above 50°. When the wind’s blowing, though, I keep the flats on the porch and vent the plastic to admit cool air. The enclosed porch—when the plastic “door” is closed—heats up to 90° or higher on a sunny winter day.

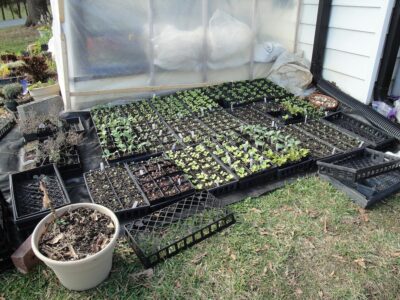
For a few nights when the porch was too cold for young plants, I brought them back indoors. Now, at the end of February, dozens of flats stay outside on woven ground cover (a durable polypropylene fabric), hugging the wall of the porch. That’s on the south side of my house, a warm microclimate. There’s less wind here and nighttime temperatures rise a few degrees above areas farther from the house.

Success depends on temperature, so I check expected hourly temperatures daily and the forecast for the coming week. I cover the flats with plastic or an old sheet when they need a little protection. But, at this stage, they’re becoming more resilient to temperature fluctuations.

In the morning, I’ll remove the plastic and let them bask in the sunshine. Those little seedlings double in size in a week, and roots are filling the pots. Almost ready for the market!

How Low Can They Go?

Maturing seedlings of cool season greens tolerate temperatures in the high 20’s and 30’s. They’ll take temperatures lower than that when they’re a bit older and planted in the garden. Remember, this regimen applies to cool season greens and vegetables, not to main (summer) season crops, which need a frost-free environment.

In this part of northern North Carolina, elevation 1200′, late February temperatures range from the mid- to high 50’s in the daytime to the mid-30’s at night. Keep in mind that those are averages and that actual temperatures can vary considerably from the average.

As an experiment, I left 3 containers of newly transplanted ‘Freckles’ lettuce seedlings outside, exposed to 21-22° on 2 nights. They’re fine! Lettuce resists damage better than some of the other crops.

One Step At A Time

We don’t want to subject tender seedlings only a few days old to the rigors of outdoor conditions, especially freezes and wind. Indoor-grown seedlings that received less than adequate sunlight will need a more gradual transition. Some will thrive, while others—the spindly, weak ones—will sulk or die.

When in doubt, proceed in incremental steps—gradually lowering the temperature and introducing seedlings to increasing sun and wind speeds. (For summer vegetables, harsh sunlight is another factor to consider.) This is called hardening off. Assuming the weather cooperates, vegetable plants can be hardened off within one week.

Root systems grow quite fast in order to supply water to foliage and stems. Leaves adapt to prevailing outdoor conditions, growing a thicker cuticle. The cuticle is a protective waxy outer layer over the epidermis, designed to slow moisture loss from within the leaves.


Growing On To Transplant Size


brassica seedlings hardening off outdoors

Broccoli, turnip greens, cabbage, and arugula seedlings hardening off next to the porch.


Choose a location where your plants can grow for another 2-3 weeks before they’re planted out. Maybe that’s a sheltered patio or the sunny side of a carport. You might need to take them indoors for the night if it’s too cold.

Check local weather reports, paying close attention to nighttime temperatures. If the cool season greens have been properly hardened off, they shouldn’t be damaged by temperatures around 30°F. After the first week, they’ll tolerate temperatures down to the mid-20’s, and some even lower.

Research the varieties you’re growing. A few cool season vegetables, such as ‘Tokyo Bekana’ Chinese cabbage, tatsoi, and Swiss chard exposed to extended periods of cold weather might bolt (flower prematurely) before reaching full size. Have an old sheet or floating row fabric available to cover them on cold nights. I’d rather plant these crops and take a chance with the weather than let them get potbound in their cell packs.

Soil warmed by the sun lends some protection to plants in the ground. Or you could repot them into 1-2″ larger containers and protect them indoors at night if it’s still too cold.

Alternatively, a caterpillar tunnel or similar clear covering placed over the garden row can protect transplants during a stretch of freezing weather. Vent it in the daytime to prevent overheating. A cold frame helps plants transition to outdoor conditions.

Good planning includes preparing garden soil so it will be ready to receive your transplants when that moment arrives.

Agricultural extension offices print spreadsheets online that indicate when to plant seeds or transplants into the garden. This guideline for sowing seeds helps keep North Carolina gardeners on track, although we need to heed local weather forecasts.


Fertilizer

lack of fertilizer in lettuce

Lack of fertilizer in ‘Freckles’ lettuce compared to 2 pots that were fertilized.

Potting soil normally doesn’t remain fertile for more than 2 or 3 weeks unless timed-release fertilizer is included in the mix. The package’s ingredients label should indicate whether or not fertilizer has been added. To maintain steady growth of seedlings, fertilize with a product formulated for greens or vegetables every 2 weeks starting 2-3 weeks after germination.

Rain and frequent irrigation rapidly leach the primary nutrient needed for greens—nitrogen—through the soil. Running low in nitrogen stresses plants, and they might not recover when they’re planted. Always keep these seedlings evenly moist—but not wet—to prevent checking their growth. Heavy rain necessitates more frequent fertilization (photo, above).

From speaking with my customers over the years, it appears that many are hesitant to use any kind of fertilizer on edible plants. Fertilizer is not toxic! Organic sources and chemical (or synthetic) sources of fertilizer break down to the same molecules, and the plant, to a large degree, decides which ones to absorb. Organics add other beneficial nutrients to the soil.

In cold soil, microbes that break down fertilizer into usable forms are not active. So, using a synthetic fertilizer in winter supplies the needed nutrients until the ground warms up. Otherwise, I do prefer organic fertilizers in all my gardens. Used frequently, chemical fertilizer kills microbes and earthworms living in the soil.

Continued on Page 2.


Headings:

Page 1: Sowing Seeds For The First Crops: Too Early? (“How do I use these greens?”), Preparing To Sow Seeds (Temperature For Sowing Seeds, Miniature Incandescent Christmas Lights, Preparing Pots For Sowing Seeds, Light For Germinating Seeds, In My Basement, Natural Sunlight And Temperature, How Low Can They Go?, One Step At A Time), Growing On To Transplant Size (Fertilizer)

Page 2: Sowing Seeds: The Process, Transplanting Into Larger Containers (The Process, Sowing Seeds and Transplanting In Multiples)


Return to the top of Page 1


The ‘Cherokee Purple’ Tomato

Updated 10/22/2024


cherokee purple tomato

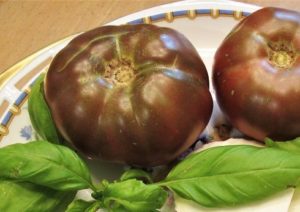
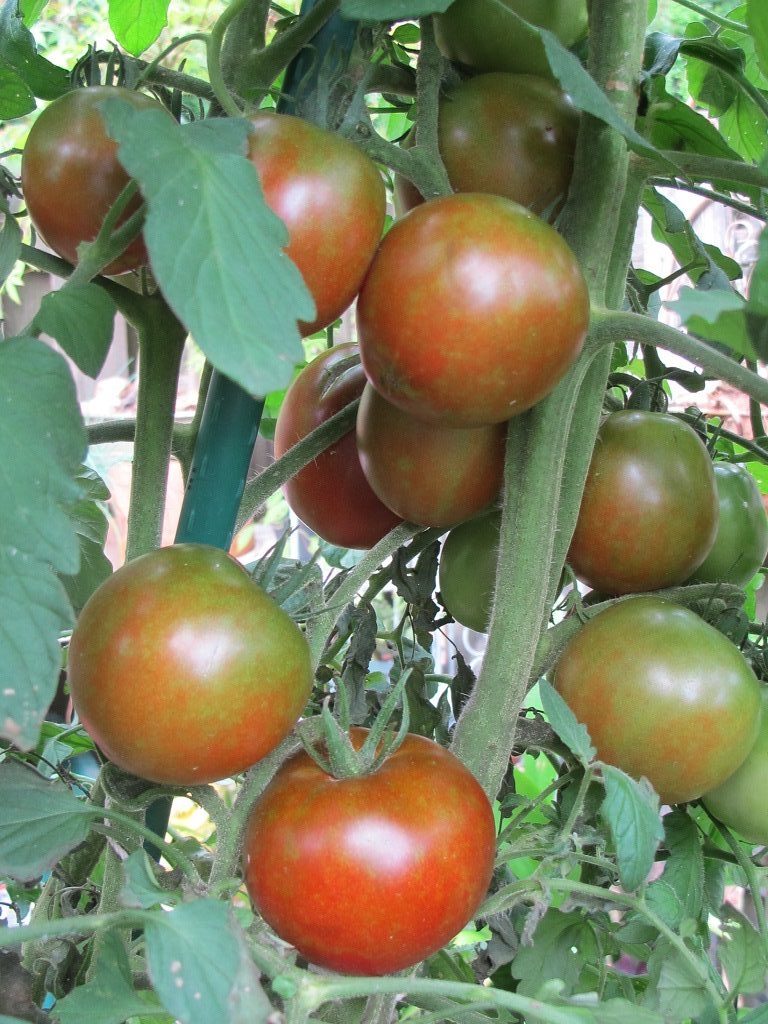
‘Cherokee Purple’ tomatoes from my garden.


The Last of the ‘Cherokee Purple’ 


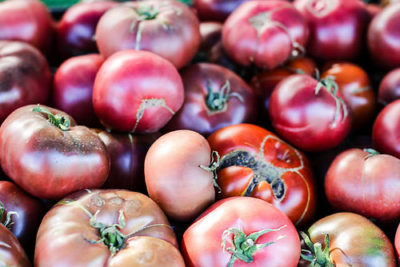
One of the most popular tomatoes offered at farmers’ markets is an heirloom called ‘Cherokee Purple’. We rarely see them in grocery stores because they don’t travel well over long distances. At the markets where I sell several heirloom tomato transplants, customers request this one most often.

In 1990, Craig LeHoullier, chemist and grower of hundreds of heirloom tomatoes near Raleigh NC, received unnamed tomato seeds and a note in the mail. John D. Green, of Sevierville TN, sent the material. Green received seeds that had been saved and passed among a few generations of local gardeners. His note said the Cherokee Indians in the area had been growing this lobed variety since the late 1800’s.

LeHoullier planted the seeds in 1991. Confident in this tomato’s marketable qualities—and naming it—he distributed seeds saved from the trial to Jeff McCormack of Southern Exposure Seed Exchange and to Rob Johnston of Johnny’s Selected Seeds. Beginning in 1993, these seed suppliers included the ‘Cherokee Purple’ tomato in their catalogs.

LeHoullier continued selecting variants of this variety, coming up with ‘Cherokee Green’ in 1997. This tomato is striped green and yellow, and has some orange tints at the blossom end of fully ripe fruits. After trialing a batch of seeds sent from another grower, Lehoullier named this one ‘Cherokee Chocolate’ in 1995. This variety is mahogany brown.


Attributes of the ‘Cherokee Purple’ Tomato


Often called “ugly” by some (no, not me), their flavor, nevertheless, is outstanding! The 8-12-ounce tomatoes might appear lumpy due to asymmetrical ribbing, but they’re often shaped like regular tomatoes.

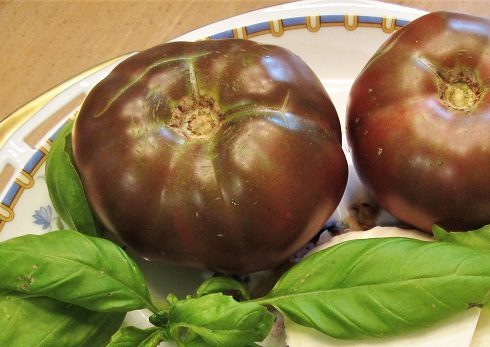
The skin color is uniquely brick red to maroon, perhaps brownish, and often with green shoulders. The interior is also variably red to purple, sometimes with green.

When exposed to dappled sunlight, the fruits darken. The deeper “black” color indicates higher levels of beneficial antioxidants called anthocyanins. I prefer these super-nutrient fruits and vegetables, from red lettuces to blueberries to black tomatoes. A diet rich in antioxidants can help protect us from many kinds of cancer, inflammation, and cardiovascular illnesses.

‘Cherokee Purple’ is shorter than most indeterminate tomatoes, staying around 5′ in height when staked. For tomato lovers without gardens, try growing it in a large container. It doesn’t bear as many fruits as some, such as ‘Black Prince’, but yields—and flavor— are sufficient to merit including it in your garden.

Because this variety developed in a naturally humid region of eastern United States, it probably has some disease resistance built into its genetics. In my experience, it’s less susceptible to disease than many other heirlooms.

As an heirloom tomato and not a hybrid, ‘Cherokee Purple’ is open-pollinated. So, you can save seeds from ripe fruits for next year’s garden. The offspring will be identical—or nearly so—to the parent plant.


Foodlander: Cherokee Purple Heirloom Tomatoes


“Mmmm… BLT”

There is no sandwich, burger, or salad that isn’t enhanced by adding this richly flavored tomato. Some call it smoky, while others consider it sweet, complex, or balanced. Try a “sloppy BLT” on lightly toasted rye with a fair amount of Duke’s mayonnaise (on both slices), bacon, lettuce, and this tomato, of course, but also with cheese and ripe avocado.

It is juicier than many other tomatoes and, therefore, is not recommended for sauce. But, if I have some ripe fruits, I’ll add them to the stock pot when making sauce, which simmers on low heat for 2 hours or longer.

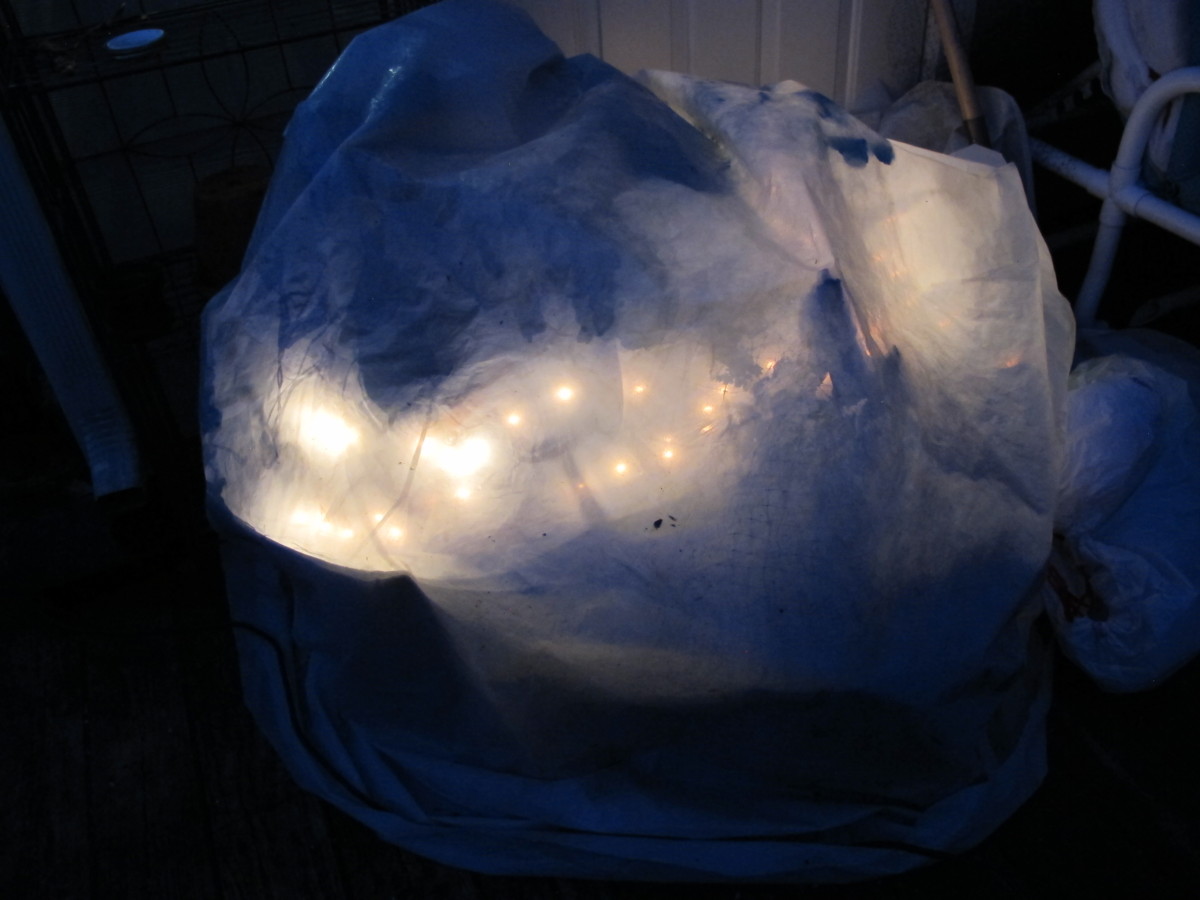
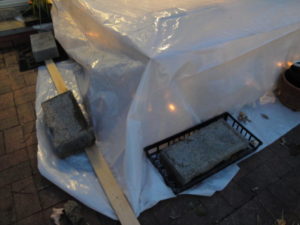
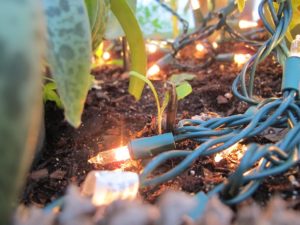
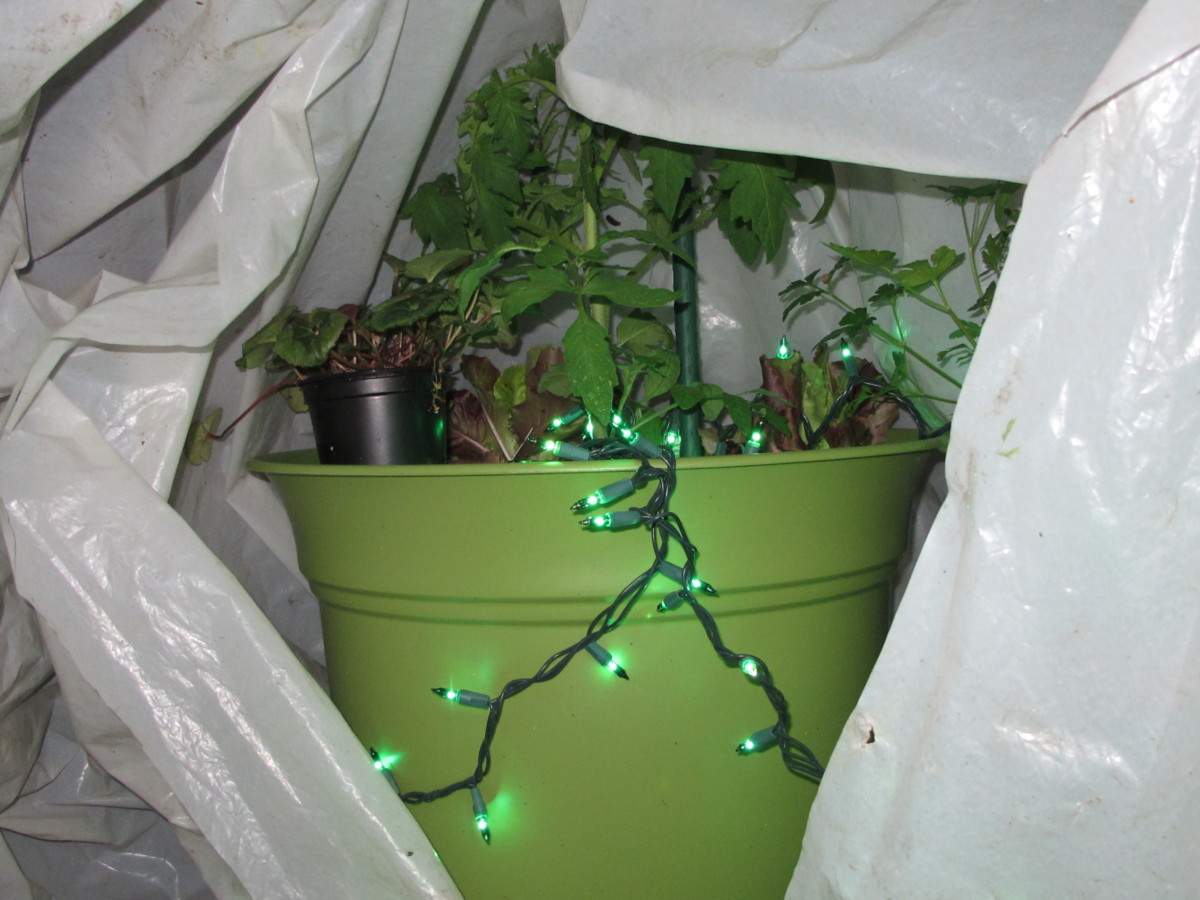
Regardless how it’s described, the ‘Cherokee Purple’ tomato always has a place in my garden. In fact, when cool weather arrives in autumn, I place large pieces of clear plastic raised over the plants to protect them from frost. For a little extra warmth, add a hot water bottle or a string of miniature incandescent Christmas lights to extend the season for a few more ripe fruits.

When a freeze threatens, pick all remaining full-sized or nearly full-sized tomatoes and let them ripen on the kitchen counter. Be careful not to bruise them.

A few other varieties also get covered in the garden to give the fruits additional time to ripen, but it’s these last ‘Cherokee Purple’ tomatoes that wrap up the season.


Return to the top

The Rose-Breasted Grosbeak: A Brief Visit


2023


The Rose-Breasted Grosbeak


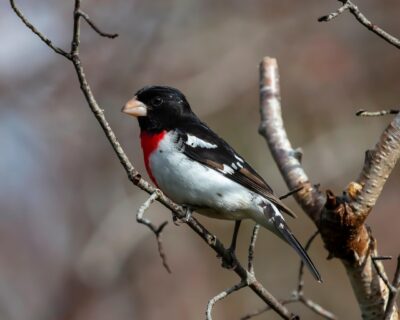
rose-breasted grosbeak

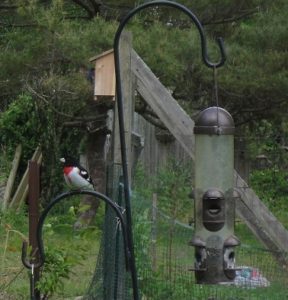
A rose-breasted grosbeak at the feeder.


Something special is happening in the yard, and you reach for the camera only to find there’s no remaining memory. So, you quickly delete a few old photos, rush back to the window…and sadly discover the moment has passed.

Has that ever happened to you? I use a digital camera because I’m old-school, you might say, and haven’t yet activated the cell phone. Mea culpa.

But I learned my lesson the last time I tried to catch a fleeting moment. So, I regularly go through the camera’s photos and delete most that already have been stored on the computer. When one of those special moments happens, I’m prepared! (Oh, you thought I was going to say that I had finally activated the cell phone? Some day.)

Two days after a low-ranking tornado and hailstorm blew through Elkin on 4/28/2023, a couple of strange birds showed up at the feeders. They looked like a cross between a cardinal and a towhee. Bold beak, about the same size (8″ long), black with sharply contrasting white patches on the wings, and a bright red bib. Never saw them before.


mangled canopy

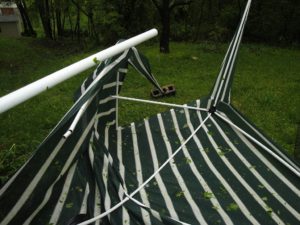
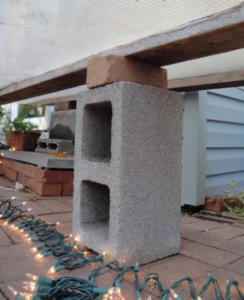
70+ mph winds gusting to ?? blew this canopy with 200 lbs. of cinderblocks, some still attached, 40′ from its original location.


A Delightful Visit


The triangular red patch is diagnostic for a mature male of this species. It’s the rose-breasted grosbeak (French gros = large), or Pheucticus ludovicianus. No surprise, rose-breasted grosbeaks are related to cardinals in the family Cardinalidae, and also to buntings.

The female is less colorful, resembling a female purple finch but 2″ larger. Her eyebrow stripe (supercilium) is white, her plumage is predominantly rich brown with white bars, and she has a spotted buff-colored chest. Male grosbeaks have a white bill, while the female’s is dull pink.

Two colorful males visited the feeders, apparently unaccompanied by females. Their song resembles that of a robin and the callnote is a sharp pink.

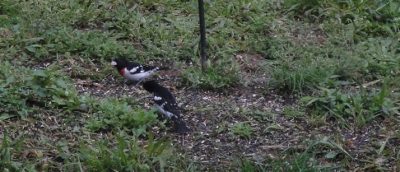
Aiming through the kitchen window, I took a few pictures of these beautiful birds. They hopped from one feeder to the other and to the ground, and sometimes flew into the high branches of a tall oak tree near the edge of the woods. After 15 minutes, they left.

I wonder if the high winds from the storm might have pushed them off course. Regardless, their presence in my garden provided one of the most delightful surprises this bird watcher has ever seen.


Where Rose-Breasted Grosbeaks Live


Their paths of migration in spring and autumn take them through the southeast quadrant of the U.S. Migration routes extend west from Montana to central Texas. After overwintering in Mexico, the Caribbean islands, and northwestern South America, they fly north through this part of North Carolina around early May.

These grosbeaks settle in their summer breeding grounds around deciduous forest edges and suburbs. Their summer range includes the Mid-Atlantic region and New England, west to the Dakotas and as far south as southern Missouri. They also travel farther north to the area around the Great Lakes, along the U.S./Canada border, and into central Canada.

According to the maps, rose-breasted grosbeaks might breed as far as Wilkes County in NC, where I live. The birds are more commonly spotted during the breeding season, however, farther north and in the higher elevations of a narrow strip of habitation extending through the Appalachian Mountains as far south as northern Georgia.

These birds often visit feeding stations as they migrate and throughout the year. Sunflower and safflower seeds, raw peanuts, and clean water might attract them to your garden. They also eat insects, so not spraying pesticides—but letting nature “happen”—might give you that photo op you’ve been hoping for.


Feeding and Breeding Habits of the Rose-Breasted Grosbeak


Rose-breasted grosbeaks feed on a wide assortment of insects and plant parts. In one study of dead birds, their stomach contents comprised 52% invertebrates (mostly beetles, also caterpillars, grubs, sawflies, bees, moths, ants, snails, and spiders), 20% wild fruits, 16% weed seeds, 6% cultivated plants, and 6% tree buds and flowers. They can catch insects in flight and occasionally sample nectar. For their young, these grosbeaks provide mostly protein-rich insects.

Both male and female rose-breasted grosbeaks select the nest site, usually located in an elevated position in tree crotches or tall shrubs. They prefer nesting and feeding near openings in a woodland.

The nest is a rather flimsy collection of twigs, leaves, roots, and animal hair. These birds lay between 1 and 5 eggs, with 3-4 being the average. Eggs are pale bluish green with reddish brown spots. Although the female does most of the nest-building and incubation, the male does participate and also helps feed the chicks. Chicks hatch after 11-14 days, fledge after 9-13 days, and gain their independence at 3 weeks of age. They have 1, sometimes 2, broods in a season.

Rose-breasted grosbeaks live an average of about 7 years in the wild. In captivity, they’ve been documented to live as long as 24 years.

They don’t winter in the piedmont of North Carolina but will again pass through the area in autumn on their way to southern lowlands and foothills. I hope to catch them on their return route to their winter grounds—with better camera shots, of course.


rose-breasted grosbeak

Two male rose-breasted grosbeaks searching for sunflower seeds.


Return to the top

How To Grow Potatoes In 5 Simple Steps


Can we grow new potatoes from old potatoes?


grow potatoes


Yes!

So… those potatoes left in the pantry or the bottom of the refrigerator decided to sprout. Instead of throwing them into the trash or the compost bin, try growing them! You can grow potatoes in the home garden or in large pots, following a few simple guidelines.

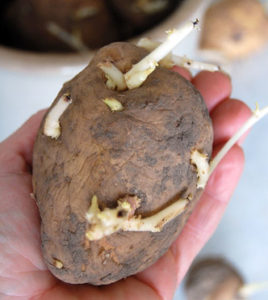
potato with eyes

Too withered for consumption, but fine for the garden.

We don’t recommend planting potatoes recently purchased from the grocery store because they’ve likely been treated with a sprout inhibitor. After the effect wears off, you’ll see the eyes begin growing. That, though, could take months.

Organic potatoes, if treated with sprout suppressors approved by the National Organic Program, sprout earlier than non-organic potatoes. Inhibitors, such as spearmint, peppermint, and clove oils, must be applied more frequently than chemicals used on traditionally treated potatoes.

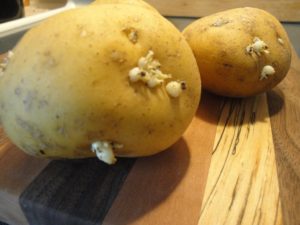
Spouting potatoes (like the ‘Yukon Gold’ in photo, top) are still edible, after removing the eyes. Discard moldy and rotting potatoes. But save for the garden the ones with well-developed sprouts and those that have withered beyond the point of palatability.

Carbohydrates stored in the tuber provide energy for the developing shoots. When green leaves begin growing, photosynthesis will sustain the plant.


When can we grow potatoes outside?

Potatoes can tolerate cool soil, but not cold, wet soil or freezing temperatures. I live in USDA plant hardiness zone 7, where we plant early maturing varieties 4-6 weeks before the last spring frost. Gardeners plant mid-season and late varieties after that.

Wait for the soil to warm up to at least 45°F before planting tubers. Long-range weather forecasts might indicate whether it’s safe to plant or prudent to delay.

A garden exposed to full direct sunlight warms up earlier in spring than one in partial sun. Grow potatoes in full sun, but avoid exposing them to searing summer heat. Gardeners living in higher elevations or in cooler summer regions can grow potatoes through the season.

If the weather forecast predicts temperatures below freezing, I’ll mulch the soil with several inches of oak leaves, never in short supply around here. A thick, airy mulch insulates the ground from a sudden drop in temperature. Plants benefit from mulch kept in place all season. Not only does it moderate temperature, suppress weeds, and keep moisture in the ground, but it also prevents disease spores from splashing onto the potato’s leaves. This is easier to do in small garden plots than in larger farming operations.

Emerging foliage can tolerate light frost. It could take a few weeks for growth to show above ground.


Seed Potatoes

For a wider selection of varieties offered to farmers and home gardeners, look for “seed potatoes”. Some garden centers and many seed suppliers stock seed potatoes. They’re not actually seeds, but certified young potatoes almost ready for planting. Although they’re certified disease-free when purchased, plants are susceptible to a few pathogens as they grow.

Favorable conditions and good management practices decrease the likelihood of problems. If you’ve had diseases in your potato crops, don’t save potatoes year to year, but purchase certified potatoes instead. Don’t grow potatoes where they’ve been planted any time in the past 4 years.

Botanically speaking, potatoes are classified as Solanum tuberosum. They belong to the Solanaceae family and call tomatoes, peppers, and eggplants their cousins. Tobacco, petunias, and deadly nightshade, a poisonous weed, also belong to the nightshade family.

Potatoes are native to the cool mountainous regions of South America. In the 1530’s, European explorers gathered them and introduced potatoes to their homeland. Irish immigrants brought them to North America in the early 1700’s. Approximately 4,000 varieties of potatoes have been bred. True seeds, as opposed to seed potatoes, are poisonous when eaten and are used only for breeding purposes.

You can find potatoes with white, yellow, tan, red, blue, and purple skins and flesh. Thin-skinned potatoes, such as ‘Yukon Gold’, ‘Kennebec’, and ‘Red Pontiac’, grow well in the eastern parts of the U.S. The western states suit the thicker-skinned ‘Russet’ and other baking potatoes.


Crop Rotation

One of those good management practices involves rotating our crops. Related plants tend to be susceptible to the same pathogens and insect pests. When growing one crop in the same plot of land year after year, disease spores and insects can build up in that location. That’s why it’s recommended to move all members of a particular plant family to different plots over the next several growing seasons.

For example, if you grew potatoes, tomatoes, peppers, or eggplants in Plot A in any of the last 4 years, move your potatoes and other members of the Solanaceae family to Plot B this year, Plot C next year, and then Plot D the year after that.

Rotate among the various plant families, such as:

  • brassicas—arugula, broccoli, Brussels sprouts, cabbage, cauliflower, kale, etc., in the Brassicaceae family
  • cucurbits—cucumber, squash, zucchini, melons, in the Cucurbitaceae family
  • legumes—peas, beans, in the Fabaceae family
  • lettuces, in the Asteraceae family
  • onions, leeks, garlic, in the Amaryllidaceae family
  • Swiss chard, spinach, beets, in the Amaranthaceae family


Root Vegetables

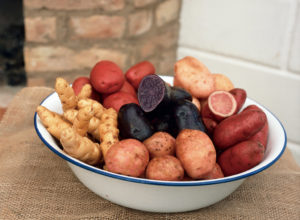
Several varieties of potatoes.


How To Grow Potatoes In the Garden


Step 1: The First Cut


Before planting potatoes in the ground, cut them into pieces about 1½” long. Each piece should have 2-3 eyes. Let them sit in the open air for 1-2 days to seal the cut surface. This helps prevent rot in moist soil.

Small potatoes can be planted whole.


Step 2: Prepare the Soil If You Want To Grow Potatoes


grow potatoes


Thorough soil preparation serves the immediate purpose as well as plantings in years to come. After improving the soil with generous amounts of drainage materials, you’ll need to add nutrient-rich amendments a few times each year after that.

Not repeatedly disturbing the soil profile retains healthy populations of beneficial microbes. Farmers are increasingly using no-till methods and cover crops to preserve soil structure and prevent erosion of valuable topsoil. Frequent tilling also introduces high levels of oxygen between the particles of soil, so organic matter is broken down too quickly.

Vegetable plants need good drainage, and potatoes are no exception. Loosen the soil at least 12″ deep, breaking up the clods. Potatoes struggle in compacted clay and stony soils; tubers that do form are often misshapen. Potatoes grow very well in raised beds.

Incorporate a few inches of pine fines, soil conditioner, peat moss, and/or coarse sand to improve the tilth (or workability) of the soil. Avoid layering materials in the soil profile. Layers of coarse and fine materials, with differing air pore spaces from one material to another, obstruct water percolating through the soil. This could cause soggy layers that can rot roots. For that reason, I never place a layer of gravel under plantings.

In the top 5″ of loosened soil, mix in compost, leaf mold, or planting mixes. These materials contain a variety of nutrients required by vegetables, and they encourage rapid rooting.

Aged manure and mushroom compost are not recommended for root vegetables.


Soil PH

Potatoes love heavily composted soil. They also require acidic soil, with a pH between 5.0 and 6.0. (Various websites recommend a pH anywhere between 4.8 and 7.0.)

Low pH helps prevent scab, a disfiguring disease of potato skins. Soil pH outside the preferred range for potatoes limits nutrient absorption and might cause nutrient toxicities.

Contact your local agricultural extension agents for information on taking a soil test. They can recommend preferred fertilizers, methods to lower soil pH, and varieties appropriate for your area.


Step 3: Place the Seed Potatoes


In rich, organic soil, simply lay the potato pieces on top of moist, loosened soil or nestle them into the surface. The eyes should face upward. Then mulch over the seed potatoes.

They’ll also grow when planted 2″ deep. Space potatoes 6-12″ apart, depending on variety. Because potato plants grow 2-3′ tall and might sprawl a bit, allow 30-36″ between rows.

Mulch the bed with a few inches of leaf litter, shredded leaves, and pine needles to cover the planted potatoes. It’s important to adequately shade the surface of the ground from sunlight to protect growing tubers from greening…


“Greening”?

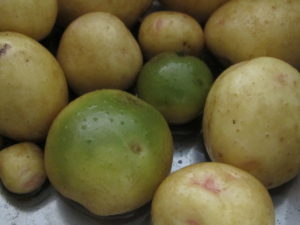
grow potatoes, but discard green ones

Potatoes with green skin needed deeper mulch.

Greening is caused by exposure to light, which, in itself, is not harmful. But the green pigment (chlorophyll) in potatoes is associated with the formation of a toxic glycoalkaloid called solanine.

Never eat green potatoes; if only the skin is green, cut off and discard that part before cooking. Never eat leaves, stems, or the berries that develop on potato plants. 

Solanine in potatoes is more concentrated when growing potatoes in high nitrogen soils and in soil that’s compacted or very sandy. Bruised potatoes, those held a long time in storage, and potatoes with large eyes are higher in this toxin. The greener the potato, the higher the level of solanine. This bitter substance is a natural repellent to insects and browsing animals.

Solanine can’t be boiled or cooked away. The level is somewhat lower in foods fried at very high temperatures, but that brings its own problems, described later in this article. I’m not intent on discouraging you from growing or eating potatoes, but moderate consumption of this popular vegetable and proper preparation make it a healthier indulgence.

Symptoms of solanine toxicity include vomiting, diarrhea, slow pulse or breathing, low blood pressure, and abdominal pain. It can cause coma and death in rare instances, so be very careful with green potatoes. If any of the flesh is green after removing the skin, I would discard the potato.


Step 4: Maintenance


Water

Water the garden thoroughly after planting and mulching. If rain is unreliable, water the garden every week, never letting the soil become dry. Provide 1-1½” of water each week if it doesn’t rain.

Avoid wetting the foliage, and water in the morning so the foliage is dry going into the night. This helps cut down on the incidence of disease. Some varieties are resistant to blight, scab, Rhizoctonia, and Verticillium wilt. Those that have not been bred with disease resistance often produce great yields when using good gardening practices.

Hollow Heart and Brown Center

Some large varieties, particularly ‘Atlantic’ (for potato chips) and ‘Yukon Gold’ (a personal favorite), might show hollow heart and/or brown center. These are physiological disorders characterized by a star-shaped cavity and a central area with dead brown tissue, respectively, in the center of the potato or near the ends.

These stress-related conditions often result from inconsistent soil moisture—for example, wet soil after a period of dry soil. In addition, a period of prolonged cold weather during tuber formation can cause brown center. Spacing seed potatoes too far apart and using small seed potatoes (with too few eyes) can be the cause. Low potassium and other nutrient deficiencies can initiate the disorders.

The potato’s skin shows no indication of a problem. Affected potatoes aren’t perfect but are still edible.


Hilling Up 

As the plants grow, hill up soil against the stems of the plants. Take soil from another part of the garden, adding a few inches up the stem and about 12″ out from it. This is an option—not necessary—but it should increase the yield.

Like tomatoes, potatoes root along buried stems. As they root, they’ll develop another layer of young potatoes at the ends of the stolons. Hill up around the stems 2 or 3 times during the growing season to maximize the harvest.

An alternative is to start potatoes in a moderately deep trench, reserving excavated soil on the side of the bed. Periodically fill in the trench with amended soil, a few inches at a time.


Fertilizer

Every few weeks, apply a complete fertilizer. The 3 numbers on the package representing nitrogen, phosphorus, and potassium (N-P-K) should be in a ratio of 1:1:1 or 1:2:2. Avoid fertilizers high in nitrogen. An analysis close to 10-10-10 or 5-10-10 is adequate.

Although you could use chemical fertilizers, they tend to damage populations of beneficial microbes. But, until the soil warms up, microbes aren’t sufficiently active to break down the organic components into molecules the plants can absorb. That’s when I use chemical fertilizers, and then switch to organic products when the soil warms.

To help prevent disorders in developing potatoes, it’s recommended to apply smaller concentrations of fertilizer more frequently.


Insect Pests

Colorado potato beetles can be especially bothersome as they consume significant amounts of foliage. Inspect the undersides of the leaves for yellow-orange egg masses and remove them. The beetles have 10 black stripes on their tan wings. Immature larvae are orangish-red with 2 rows of black dots down each side. Bacillus thuringiensis var. tenebrionis, a biological insecticide, kills this beetle.

Aphids might congregate in large numbers on the plants. A brisk spray of cool water from the hose takes care of most of them. Encourage ladybugs, braconid wasps, and green lacewings to populate your garden. For severe infestations, prepare a solution of horticultural oil and spray early in the morning. Apply the solution to the bottoms of the leaves as well. Read the label.

Cutworms feed on sprouts emerging from the ground. Since these C-shaped larvae become moths, treating the potatoes with Bacillus thuringiensis var. kurstaki effectively kills them. Keep in mind that they’ll have to eat some of the foliage in order to ingest the Bt.

Slugs and Deer

slug

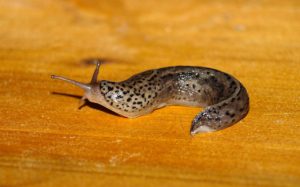
A slug.

Slugs reproduce rapidly in moist conditions and where they can hide in crevices during the daytime.

Lay a board on moist ground, and slugs and snails will gather there after feeding through the night. You might notice those silvery slime trails on tender foliage. Early in the morning, take an old knife to the garden and… dispatch them forthwith! Or use organic Sluggo or similar product, which does not contain toxic chemicals. Except to slugs and snails. Read the label.

Although potato foliage is not the favorite choice of warm-blooded animals, deer and others will feed on it when not much else is available.

Other members of the nightshade family also host these pests. Row cover secured over the planting excludes most insects and browsing animals.


grow potatoes in pots or in the garden

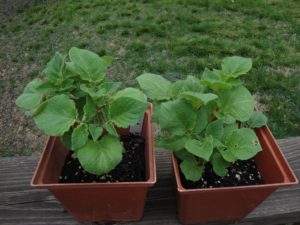
Potatoes that sprouted in storage are now growing new plants in 6″ pots. They’ll need protection from hard frost if planted, but I didn’t want to delay planting the deteriorating tubers.


Headings

Page 1: Can we grow new potatoes from old potatoes? (When can we grow potatoes outside?, Seed Potatoes, Crop Rotation), How To Grow Potatoes In the Garden, Step 1: The First Cut, Step 2: Prepare the Soil If You Want To Grow Potatoes (Soil PH), Step 3: Place the Seed Potatoes (“Greening”?), Step 4: Maintenance (Water, Hollow Heart and Brown Center, Hilling Up, Fertilizer, Insect Pests, Slugs and Deer)

Page 2: Step 5: Harvesting!, How To Grow Potatoes In Containers, Grow Potatoes For Their Nutrients (The Power Of the Purples, Potato Skins, Resistant Starch), The Problem With High Heat

Return to the top

The Resilience of Plants

Updated 7/11/2024


resilience of plants

Drimiopsis maculata.


It happens to everyone. We’re busy with the kids’ activities, our jobs, or the weather isn’t convenient. Sometimes we just can’t get to all those chores on the list. These cool drizzly days before the gardening season kicks into gear provide the opportunity to tend some of those plants I’ve neglected for months or, admittedly, for years. The fact that they survived attests to the resilience of plants.

It’s rare when any of them actually die; that’s not a good look for someone who’s in her 51st year of professional horticulture! But, after growing these plants for decades, I know how far they can go before reaching the point of no return. Not the best way to garden, but that’s reality for many of us.

This article describes several examples of the adaptability and the resilience of plants.


The Resilience of Plants: Confined Spaces


Drimiopsis Maculata

Drimiopsis maculata is one of the leopard lilies native to Africa. This species (photo, above) and 2 other leopard lilies that I grow (Ledebouria socialis and Drimiopsis kirkii) are perennials where winters don’t approach the freezing point. The specific epithet, maculata, refers to the deep green, sometimes purplish, spots on new spring growth. Foliage grows from bulbs on or just below the soil surface. These 3 species are classified in the Asparagaceae family.

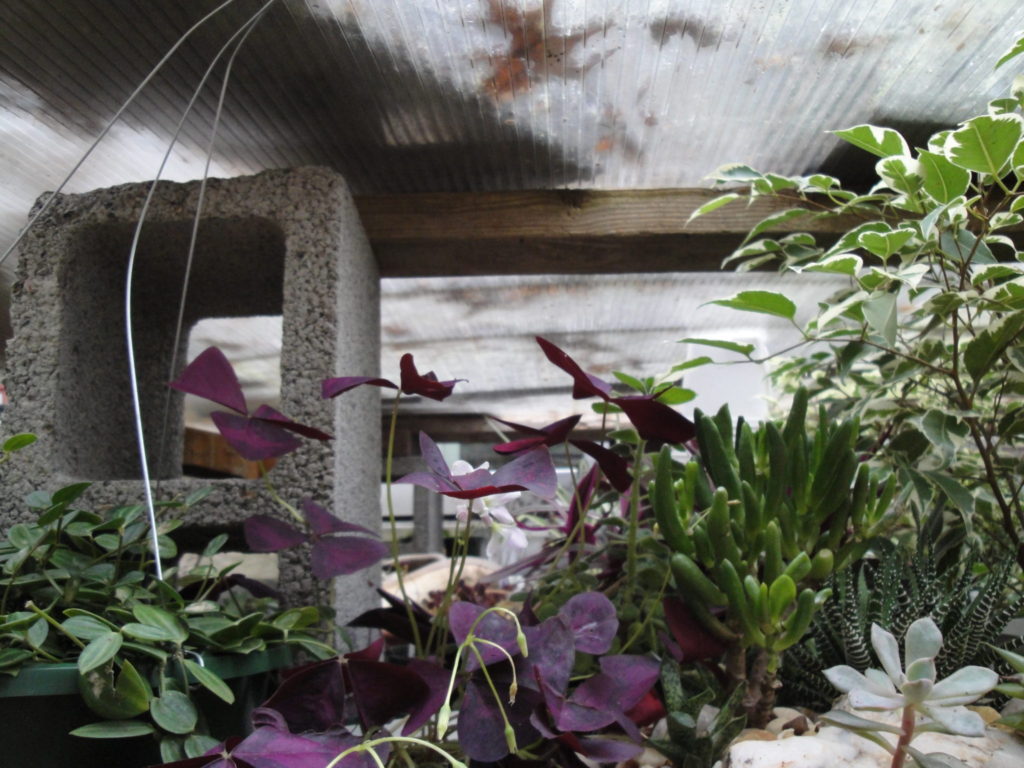
They prefer average to cool temperatures indoors from fall to spring, and often shed some of the previous year’s foliage. Leopard lilies tolerate temperatures down into the 40’s F, so they’re spending the winter on the enclosed porch with only the sun, an additional plastic bubble, and miniature incandescent Christmas lights for warmth. Although it might drop into the teens outside the porch, nighttime temperatures won’t get below 45° under the bubble.

I simply don’t have enough direct sunlight inside for hundreds of small plants. Anticipating that Arctic Blast (down to 4°F) on December 24, 2022, I moved all the tender plants indoors the night before. Good thing, because the power went out for a few hours at the coldest time of day, around dawn. No power, no lights, no plants! It’s only when outdoor temperatures drop below 12° that I move the tropicals indoors.

Repotting Drimiopsis

This clump and a few others stayed in 4½” pots for over a decade, since I last potted them up in Maryland. (I moved to North Carolina in 2013 and to this house in 2021.) They grew in only an inch of soil before I divided them in late summer, 2022. Because most of the organic matter had decomposed over that period of time, the level of the soil surface dropped a few inches lower in the pot.

In late winter or spring, the bulbs sprout shortly after repotting (photo, below). Drimiopsis maculata starts fresh every year after removing all old foliage and dividing the plant in late winter. Normally, I repot plants in spring to mid-summer, but this species is amenable to transplanting at other times, given good growing conditions. Don’t overpot or keep it too moist, though, or it will rot.


resilience of plants, drimiopsis after dividing

New growth and flower buds on Drimiopsis maculata.


Classification Confusion

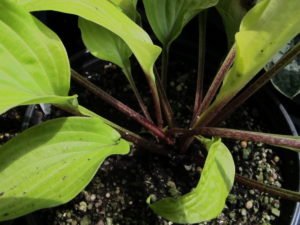
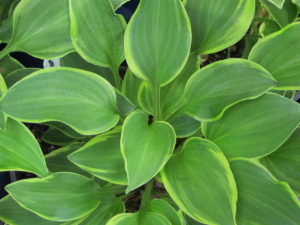
The lily family and related families include many species that demonstrate the resilience of plants. These are some of the toughest plants for problem spots in the garden. I also brought from Maryland several hostas (Asparagaceae family) that had stayed in 4½” pots for over a decade. They leafed out nicely every spring, but never attained a good size until after I’d planted them at this rural North Carolina property in the autumn of 2021.

Cousins of drimiopsis that tolerate some neglect include ponytail palm (Beaucarnea recurvata), daylilies (Hemerocallis spp.), liriope, grape hyacinth (Muscari spp.), agave, and asparagus fern.

Nomenclature in the huge lily family (Liliaceae) has undergone adjustments over recent decades. Genera of the original Liliaceae family have been redistributed among 10 families, all of which remain members of the same order, Liliales.

The new taxonomy is based on modern studies of molecular biology (genetics) rather than on the number of tepals or the placement of the ovary in the flowers (i.e., physical characteristics). Liliaceae hasn’t been entirely disbanded, according to the APG, the Angiosperm Phylogeny Group; fifteen genera are still classified in the Liliaceae family.

Binomial Nomenclature

Swedish botanist, physician, and taxonomist Carl Linnaeus (1707-1778), later Carl von Linné, categorized thousands of plant species in his 2-volume 1753 work, Species Plantarum. Incorporating some of the discoveries of Georg Eberhard Rumphius (German-born botanist) from the 1600’s, Species Plantarum is considered the first attempt at organizing plant species according to a hierarchical system of binomial nomenclature.

Briefly, binomial nomenclature is a system of identifying organisms by assigning them 2 names: a genus and a specific epithet. Together, the 2 terms represent a species. For example, Liriope muscari ‘Royal Purple’ is the scientific or botanical name for a certain variety of the species. “Lilyturf” is the common name that also can refer to other species of liriope and Ophiopogon. The genus (Liriope) is always capitalized, while the specific epithet (muscari) almost always begins with a lower-case letter. The species is italicized, but the variety (‘Royal Purple’) is not.

Everywhere around the world, gardeners and scientists use the same Latinized scientific name to identify a particular plant. On the other hand, its common name might refer to several different unrelated species. The genus name is often used as a common name, as in liriope, hosta, and drimiopsis, as long as the reference is clear.

The taxonomical hierarchy after species proceeds to family, order, class, phylum, and kingdom. Genetic similarities and differences determine whether 2 plants are related closely enough to group them in the same genus or separately. The closer 2 species appear on the phylogenetic tree, the more likely they’re able to interbreed.

With modern genetic research, taxonomists have reworked several other plant families, including Lamiaceae (many of the herbs we use daily) and Asteraceae (the composites, perhaps the largest family of plants).


Swiss Chard


resilience of plants, Swiss chard in 2" pot

Swiss chard ‘Bright Lights’.


Here’s a little cutie that sits on the kitchen windowsill, right behind the sink. This Swiss chard ‘Bright Lights’ gets several hours of direct sunlight in the morning and early afternoon, and bright indirect light the rest of the day. Chilly nighttime temperatures don’t bother it. The tiny seedling found a temporary home in the nearest empty pot (the one in the photo) when I thinned it from a cluster of vegetable seedlings. And there it stayed.

What makes this plant special is the fact that I potted it up in March of 2022! And it has been in its 2¼” clay pot all this time! The other seedlings planted last spring grew to their normal 18″ height. This one stands a diminutive 3″ tall.

I’m not keeping it for the purpose of harvesting leaves; there’s not much to pick, after all. It looks perfectly healthy, as long as it gets watered every 1-3 days, depending on temperature. Every 3 weeks, I add a tablespoon of dilute fertilizer, such as Sea-Plus or fish emulsion—just enough to keep it in good color, but no more than that.

I’m curious to see how long this orange-stemmed miniaturized plant will last. Short-season (spinach, lettuce) or fast-growing (tomato) plants would not last long in such tiny quarters. Swiss chard is a foliage plant for almost a year before it flowers. Maybe that’s why it has shown this resilience over time. Now and then, a leaf turns yellow and is pinched off, but new foliage continues to grow. (***Update***: it looked great for almost 20 months. Then I placed a taller plant in front of it for a few days, obscuring the Swiss chard from view…  …   It dried out and died. 7/11/2024)


Agave


resilience in plants, agave


Another cousin of the lily family and a desert dweller, agave (in the Agavaceae family) is a very forgiving plant. I brought 2 varieties from Maryland. They slowly grew new leaves and strong stems with adventitious roots. Although confined in deteriorating 9-cell market packs for a long, long time (~15 years), they rooted into anything near them that stayed still for a year.

In the photo, above, the last of the agaves rooted into a nearby clay pot and unoccupied cells of the (removed) market pack. The resilience of plants once again has been demonstrated by this plant’s ability to survive.

I buried most of the long stem into a taller clay pot with barely damp potting soil and no additional water. I’ll water this one very sparingly until it shows signs of new growth. (***Update***: it rooted in, grew very well, and was purchased a few months later at the farmers’ market. 7/11/2024)

Succulents and other plants native to dry, harsh climates are masters of survival. They store water in stems, roots, and swollen leaves protected by a thick, waxy epidermis. Species needing constant moisture would not have endured this neglect.


The Old Orchid


resilience of plants, mini orchid in 3" pot for 45 years

Dendrobium kingianum.


When I lived in Morgantown, West Virginia in the 1970’s, a friend and I drove out to The Glasshouse Works, over the border in Ohio. This nursery carried a dazzling assortment of plant species and varieties.

One of my purchases was a small orchid called Dendrobium kingianum. After returning home, I planted it in a 3″ clay pot. Every few years, I refresh the medium, using pine fines, long-fibered sphagnum moss, perlite, and a bit of potting soil.

It rarely blooms, and I propagate it when rooted plantlets form on the stems. An aerial plantlet is called a keiki, Hawaiian for “the little one”. It has been over 45 years now, and the orchid still resides in that 3″ pot.


Bonsai


Bonsai Plant Pot Tree Leaves - 20706085 / Pixabay


Bonsai are the ultimate in meticulous care, incredible beauty, and sometimes astonishing age. Many large botanical gardens have collections that truly are worth visiting. Specimens can be several hundred years old and grow in pots only a couple of inches deep. Or they might be trained on a carefully chosen slab of rock.

Plants trained as bonsai usually are woody perennials, either deciduous or evergreen shrubs and trees. Successful bonsai require very specific care in trimming, root pruning, watering, and fertilizing according to seasonal cycles. Most important is the degree of artistry that contributes to credibility, expressing the appearance of an exquisitely aged specimen.

Bonsai exemplify the resilience of plants, considering the means by which they’re maintained over decades or centuries. Each specimen requires a tailored set of precise horticultural skills to keep it alive and healthy.

(No, that’s not my plant in the photo, but this style of gardening deserves a mention.)


Headings

Page 1: The Resilience of Plants: Confined Spaces (Drimiopsis Maculata, Classification Confusion, Binomial Nomenclature, Swiss Chard, Agave, The Old Orchid, Bonsai)

Page 2: The Resilience of Plants: Opportunity (A Plant In a Strange Place, Young Lavender, Another Surprise Seedling), The Resilience of Plants: Recovery (Cryptanthus, Propagating Bromeliads, The Petunia, Giant Redwoods Define the Resilience of Plants, Wildfires)

Return to the top

An Evergreen Swag In 7 Simple Steps


How To Make a Festive Evergreen Swag 


evergreen swag, gold bow


As the holidays approach and the to-do list grows ever longer, quickly pulling together a swag or two before guests arrive is so easy. Would you like to try this? In this article, I’ll describe making an evergreen swag in 7 simple steps.


What is a swag, exactly?


An evergreen swag is a hanging cluster of ornamental greens—with or without embellishments—used primarily during the holiday seasons. It can have one point of attachment, or it could span between two or more supports. Personalize it with ribbon, ornaments, and other items that reflect your family’s style.

Hang swags on walls, porch posts, doors, fences, and gates. Attach one to the mailbox or the lamppost. Although the greens last longer in cold conditions outdoors, you can hang them indoors. Certain evergreens, particularly freshly cut Fraser and balsam firs and some of the cedars, smell absolutely wonderful for a while.


Step #1: Gather Materials For the Evergreen Swag


Using Evergreens From Your Gardens


When searching for a new home in northern North Carolina, I noticed the southern magnolias (Magnolia grandiflora) and boxwoods (Buxus sempervirens) on this property. (“Great! Materials for swags and wreaths!”) Look for evergreens, twigs and buds with character, pine cones, and seedpods around your property. Perhaps you and your friends and neighbors can get together and trade materials…over hot chocolate and Christmas cookies, of course.


Chamaecyparis 'Vintage Gold' for an evergreen swag

Chamaecyparis ‘Vintage Gold’.


A small Chamaecyparis pisifera ‘Vintage Gold’ (USDA zones 5-8) planted last winter provides threadlike sprays of golden-yellow foliage. Bright yellow adds a great spark of color and shows up brilliantly against darker greens. Chamaecyparis—the false cypresses—are among my favorite evergreens for the landscape. Hinoki cypresses add soft texture and deep green swirled foliage for swags, wreaths, and table centerpieces.

Variegated English holly for evergreen swag

Variegated English Holly has yellow or white margins.

In the future, I’ll plant shrubs and conifers not only to enhance my surroundings, but also for the birds and as cut greens. The long, soft needles of white pine (Pinus strobus) add textural contrast to arrangements. The native species grows to huge proportions, so I’ll look for smaller cultivars.

When choosing varieties to add to your landscape, consider your plant hardiness zone. Some love the cold and will fail in hot summers.

Other evergreens, such as juniper, spruce, cedar, and cypress, can supply clippings for seasonal projects. Variegated English holly (Ilex Aquifolium) and some of the dwarf hollies are on that growing wish list. Although traditional at Christmastime, holly leaves and berries don’t cling for a long time. I sometimes use small artificial berries when those little details would add to the design.

Buy a Taller Christmas Tree For More Greens

Fraser fir branches are one of the best greens to begin the project. Since there aren’t any growing here, I used bottom branches from a freshly cut Christmas tree purchased at Hawk’s Market in Elkin. Fraser fir lasts a fairly long period of time without much shedding. Trees are pruned while they’re growing, causing very dense growth. To make ornaments hang freely, you can thin out some of the branches and use them in your evergreen swags.

Garden centers, farmers’ markets, florists, and craft shops stock various cut greens and supplies for creating swags, start to finish.

Experiment with unconventional sources of material, such as eucalyptus, bay leaves, and red- or yellow-twig dogwood stems. I’ve used a few leaves of variegated liriope or acorus tied in bunches and wired into arrangements.

You might prefer artificial materials, including the greens. Fresh poinsettias or magnolia blooms wouldn’t last on a swag, of course, but craft shops have “picks” in a wide range of styles and colors. They might or might not hold up to outdoor conditions, depending on what they’re made of. Handled carefully, silks and flocked picks can last for a few seasons.


Berries and Seedpods


holly with red berries

One of many hollies.


Use rosehips, holly berries, nandina berriesacorns from oak trees, nuts, and small fruits for ornamentation. Birds might help themselves to the berries.

Seedpods offer another dimension in decorating your evergreen swag. Siberian iris grows woody seedpods on strong stems. Use them in their natural state or spray paint them in the color of your choice.

Grow everlastings (several species of flowers whose dry seedpods hold up in winter arrangements) in the garden during the summer season. Scabiosa stellata and strawflower are flowering annuals with stiff papery seedheads.

Although rather delicate, seedpods of biennial money plant, also called honesty (Lunaria annua), can be used in protected locations or with indoor arrangements. Clean the seedpods by gently rubbing between your fingers, removing the outer coverings and revealing the shimmering membrane inside.


Cones

Gather pine cones from your property, or perhaps you have some tucked away in your craft corner. They last for years if kept dry. This year, I used the ones that had been in storage for a decade.

Various evergreen species grow cones in different sizes, shapes, and shades of brown. Some have cute little cones ½-2″ long (hemlock, cypress) for smaller projects. Many pine species are 3-8″ long, and one—Coulter pine—has gigantic pine cones around 14″ long. Some have needle-sharp tips or sticky sap, so handle carefully.

Pine cones are the female reproductive parts of pine trees; the males generally are smaller and shed all that wind-blown pollen many months before pine cones mature. Seeds provide food for wildlife, and delicious pine nuts (“pignoli”) are harvested from about 20 species growing around the world.

When pine cones get wet, their scales close tightly. As they dry out, they begin opening up once again (photo, above).


Other Materials For the Evergreen Swag

In addition to the plant materials, you’ll need:

  • a protected work surface
  • pruners
  • scissors
  • pliers
  • old scissors or wire cutters
  • Wilt-Pruf, a biodegradable antidesiccant (optional, but recommended)
  • a sprayer bottle
  • a bucket for preparing a large quantity of greens
  • a large plastic trash bag or an old towel
  • florist’s paddle wire—I use 26 gauge and the thicker 22 gauge (wire will break down in the environment). Use pipe cleaners or zip ties for the loop and the bow, if you prefer.
  • ribbon with wired edges. Outdoor ribbon holds up to the weather.
  • sap/adhesive remover (Goo Gone or Goof Off). Read the label.
  • ornaments, bells, or other embellishments


Step #2: Prepare the Greens


For the swags I made to sell at the farmers’ market, the longest stems from the Fraser fir Christmas tree measured about 30″. Use short stems for smaller swags and centerpieces. Trim off any unusable parts.

During mild weather, set up an area outdoors, if possible, to cut the greens and when using Wilt-Pruf. Prepare a sprayer bottle by adding Wilt-Pruf to the water (read the label.) The dilution rate for Wilt-Pruf to water is 1:10. Although the solution looks like diluted milk, it will dry clear. When it dries, it coats foliage with a waxy film which holds water in the plant tissues. This helps the greens last longer, especially when used indoors. (I’ve used it in a colder climate for evergreens planted in autumn to protect them from drying winds.)

Place the greens in a single layer on the plastic, and spray thoroughly. Turn them over and spray again. Agitate the solution periodically. The goal is to cover all surfaces with the solution. Let the greens dry outside on the plastic or the towel (or the lawn), and shade them from warm sun.

If you’re making a few arrangements, fill the bucket partway with the Wilt-Pruf solution. Dip the greens a few times into the solution. Let them drip, then lay them out to dry.

I’ll spray leftover solution on the tree itself, letting it dry before bringing it indoors and adding lights and ornaments. Wilt-Pruf kept in the sprayer will gum up the works, so rinse thoroughly with soap and hot water. Wash soapy water and then clear water through the sprayer.

If you don’t use Wilt-Pruf, soak the greens in cool water for a few minutes before working with them. It’s a good idea to mist the greens now and then, even after completing the project.


Step #3: Layer the Greens


Reserve the fullest, longest fir stem for the base of the evergreen swag. Then layer on 2-4 more stems, each one a little shorter than the previous one. This gives the appearance of depth rather than looking two dimensional.

Adjust the stems so the swag doesn’t show large gaps when you look through it. Leave some of the smaller twigs near the base of the stem out of the loop (next paragraph), so the swag doesn’t look so constricted. Look for a balance of foliage on the left side and the right side. If needed, add another stem or two, or cut off a wayward twig.

Cut a piece of the 22-gauge (thicker) wire about 12-14″ long. Wrap it very tightly 1 or 2 times around the base of the stems, 2-3″ from the ends. Twist the wire ends tightly together 5-6 times to secure it. Use the ends to create a loop and twist the ends again several times to hold it together. Give the loop a tug to test it.

An alternative to using fir is to substitute long, softly flowing branches of cedar. Port Orford cedar (Chamaecyparis lawsoniana), and incense cedar (Calocedrus decurrens) with its tiny yellowish cones, are elegant, fragrant greens. Add a bow with long tails for a simple arrangement.


Step #4: Add More Layers Of Greens On the Swag


evergreen swag featuring golden chamaecyparis

Colorful foliage of Chamaecyparis ‘Vintage Gold’ with boxwood and Fraser fir.


Adding greens with different textures or colors brings complexity to your design. Add one or a few sprigs of white pine, cypress, or cedar, and bushy boxwood stems near the top. Use the 26-gauge wire to secure the new greens near the top of the fir stems.

Consider color echoes when designing your swag. For example, a piece of yellow conifer can pick up the gold in the ribbon or the ornaments you plan to use. Red berries echo the red in the bow.

Once all the greens have been secured, trim the cut ends to the same length, if desired.


Step #5: A Beautiful Bow For Your Evergreen Swag


Do you like the Victorian style, an organic woodsy design, or modern glitz? You can find ribbon to reflect any style for this year’s decorations. Look for a ready-made bow at the florist shop or garden center if your skills are not so advanced. Maybe someone can offer suggestions and make one for you while you wait.

Use either gauge wire to tie the bow tightly together and onto the evergreen swag near the top. After the rest of the elements have been added, you can fluff open the loops of the bow. Wired edges in the ribbon help everything stay in place, and sturdy ribbon (more substantial wire) is required in the breezy outdoors. Save your favorite bows by stuffing the loops with tissue paper (optional) and carefully placing them in a plastic bin during the off-season.

There are plenty of YouTube videos showing how to make bows. With a little practice, you can master this part of the project, too. Here are 2 of them, from Welcome to the Woods and Maymay Made It Crafts:


Step #6: Pine Cones 


Choose 3 similar pine cones, and place them on the swag below the big bow at different levels.  It’s okay if they’re not exactly the same size. I prefer an uneven number of elements, but that’s a personal choice. You might prefer 2 pine cones or none at all.

If you like the placement, cut a 12-16″ piece of the thinner wire for each pine cone. It might be easier to poke the wire through from the back of the swag, around a sturdy stem. Then, pull the ends together around the pine cone, between the scales, about 1/3 of the way from the top of the cone. Pull the wire tightly and twist the ends together to secure it. Cut off the excess wire or tuck it into the greens. The other option involves wrapping the wire around the pine cone and then wiring it onto the swag.

Does it all feel pretty stable? If it doesn’t, it might not hold together in the wind and rain. See if you can pull the wires tighter, twisting the excess at the back of the swag. Using pliers to tightly twist the wire might help.

If the swag swings around in the wind, shorten the loop or wire the lower part of the swag to the support. If necessary, screw 2 thin pieces of wood together (like a “T”), and build the swag on that.

Evergreens have sticky sap. Some gardeners use gloves when working with greens. Although it’s not recommended to use on the skin, I use sap remover to clean my hands and tools. Wash with soap and water immediately afterward.


Step #7: Finishing Touches For the Evergreen Swag


centerpiece with tiny gift box garland

Little gift boxes on a table centerpiece. So cute.


This is the time for adding those finishing touches that individualize your project. Whether it’s a small brass horn, inexpensive Christmas balls or bells, small red “faux” apples or berries—or real ones. Get creative! In the photo above, I used a garland of tiny light blue gift boxes on the neck of this blue ceramic pot for an indoor centerpiece. These are made of paper and would not last long in the rain.

Deep, rich colors are best observed up close. From a distance, though, deep green evergreens and a burgundy bow look very dark. If you want to keep it there, you can lighten up the swag with bright red bow or a colorful plaid. Add frosted pine cones (painted white on the tips of the scales) or shiny ornaments. Some variegated English holly could do the trick or shine a spotlight on the area.

Maybe you’d like to remember your trip to Mardi Gras and drape some colorful beads on the swag. A string of battery-operated tiny fairy lights. Laminated bits of photographs or Christmas cards. Sea shells, painted acorns, a cool piece of driftwood… See what’s offered in craft shops and stores specializing in Christmas decorations. There are so many fabulous materials available for your evergreen swag! Get the family or friends involved and have fun with this easy project.


Celebrate the Winter Solstice, Merry Christmas, Happy Holidays!


Return to the top

Enclosing the Porch For Winter Growing

 2022

Updated 11/5/2024


Enclosing the Porch for Growing Plants In Winter


Average Temperatures

Winter weather is in a rush to make its presence known here in northern North Carolina. Average nighttime low temperatures in October are in the 50’s F falling to the 40’s by the end of the month. In 2022, though, many nights were frosty. In this article, I’ll describe how enclosing the porch can add more growing space for sun-loving tender plants—those killed by freezing temperatures.

I moved to this beautiful acre outside Elkin, in USDA plant hardiness zone 7b, in October, 2021. The average lowest extreme temperatures in winter are 5-10° F, with January the coldest month. That won’t stop most gardeners from finding ways to extend the growing season, and, in fact, encourages us to do so.

Abnormally cold weather prompted me to gather all plants that would have been damaged or killed by frost. Both daytime and nighttime temperatures have fallen 10-20° below average on many days in October and November. On the other hand, we’ve also enjoyed a few shorts-and-tee-shirt days hovering well above average.


Priority: Plants


succulent dish garden

Succulents in this dish garden can begin stretching toward the light after less than a week in insufficient sunlight.


Priority went to succulents and tropical plants intolerant of cooling temperatures. Some I’ve had for decades and don’t want to lose. A collection that started in spring as 12 flats of tender plants blossomed to 40 by autumn.

Miniature succulents, succulent gardens in bonsai trays (photo, above), bromeliads, aroids (Alocasia, pothos, philodendron), amaryllis, leopard lilies (Drimiopsis, Ledebouria), tradescantias, ferns, ficus, begonias… I propagated all these houseplants for the farmers’ market, where I’ve been a vendor (“Wellspring Gardens”) since April, 2022.

Plants requiring warm temperatures fill every sunny window indoors. In the basement, more plants snuggle close to the 4′ fluorescent shop lights.

From autumn to spring, I carried many flats of houseplants outdoors to the sunny porch when it was warm enough, above 50° or 60°F. And later in the day, I brought them back indoors again. Almost every day. Winter ’21-’22 was quite mild.

That’s in addition to the dozens of flats of herbs and cool season greens (lettuce, spinach, arugula, broccoli, kale, etc.) started for the farmers’ markets and my own gardens. After 3-4 weeks of growth, they could safely be hardened off outdoors, exposed to colder temperatures—even frost—before planting or selling them.

The Best Option

I need an easier way to accommodate all these plants. A greenhouse is prohibitively expensive for now. Another option is to keep them in the porch, after enclosing it. In winter, this south-southwest-facing porch receives full sun from morning until sunset. Perfect!

How hard could it be to tack a big sheet of clear plastic to the structure? That will work in the daytime, when the sun’s out. But during cold overcast weather and at night, supplemental heat will be needed. Later in this article, you’ll see what I did to keep the tender plants comfortable.


Preliminary Plans


The goal was to create an inexpensive makeshift greenhouse environment from readily available materials, employing rudimentary carpentry skills. Winter winds, primarily from the west, can be fierce at times. This necessitated strong bracing for the structure to prevent the plastic from breaking loose.

At the hardware store, I bought a 12 x 100′ roll of clear 4-mil plastic for enclosing the porch and creating low tunnels in the garden for winter greens. You can find sheets and rolls of clear plastic in the paint department. Although it won’t last as long as greenhouse film, it is less expensive. A more attractive alternative is clear acrylic film, but I’m looking for the most economical solution for now.

Plastic degrades in sunlight, and faster in hot sunlight. So, if used on the porch only during the cold months, it should last 3-4 years. That’s based on many years’ experience using plastic to protect plants from cold winter weather.

The plan is to leave the wooden support grid in place all year. After weather warms up in spring, I’ll remove the plastic panels, still stapled to their 1 x 2 x 8′ posts, clean them, and store them in the basement. In the future, enclosing the porch in permanent materials (floor-to-ceiling operable windows) is a strong possibility.


***Updates***:

***Plastic used in the garden lasts longer than the plastic used to enclose the porch. After 2 full seasons, the porch plastic is showing signs of weakening in the hottest spots because the enclosed space heats up significantly, shortening the life of the plastic. If I don’t vent the plastic or open the front door and use a fan to blow the heat into the house, the porch heats up to 90-105° F on a sunny winter day. The air under plastic in the garden doesn’t get that hot because the plastic is removed or vented to prevent overheating the greens. January 14, 2024

***Recently, I bought a large roll of 6-mil greenhouse film that was on sale. It should last 3-4 years, and there’s plenty to cover other structures which are in the planning stage for now. I used the same staple gun and 1″ x 2″ x 8′ posts for the new plastic. Because this product is clearer than the hardware store’s plastic, it transfers more of the sun’s energy to the inside of the porch…so it gets hotter in the sun. That’s probably okay in the dead of winter when it gets very cold, but in autumn, some plants show a bit of sunscald. If it stays unusually warm over the next month as it did in October, I’ll tack up some of the old plastic on the inside to filter the sun. 11/5/2024


Enclosing the Porch: First, the Support System


Before cutting the plastic, I had to figure out how to put this whole thing together, preferably without piercing the aluminum siding. Where to start? How to seal it from drafts? What about a door?

The front porch measures approximately 20′ x 8′, so the 1 x 2″ x 8′ wood posts from the hardware store fit well. I used a hand saw for a few cuts. Posts with large knots, not visible when purchased in bundles, were returned to the store. Those are weak spots that could break in high winds. These posts have a smoother side—the side in contact with the plastic.

enclosing the porch

6 x 6″ timbers with 1 x 2″ x 8′ posts across the front of the porch.

Four 6 x 6″ timbers support the roof along the front edge of the porch, and the attic above is insulated. The timbers are secured 3″ inside the outer edge of the decking. Because the 1 x 2’s are attached at the top of the timbers and extend 8′ down, past the edge of the decking, the posts are slightly off vertical when viewed from the side.

I didn’t attach plastic directly to the bottom of the timbers because I wanted it to fall all the way to the ground on the 3 sides. That would help warm up the concrete block foundation and the ground underneath the decking. The goal was to retain the maximum amount of heat in the enclosed porch.

The porch is elevated 2 steps up from the ground. That made my time on the ladder somewhat less daunting. I took my time and was very careful. Safety first.


Brace Yourselves

Hardware included:

  • Hillman Red Exterior 8 x 1 5/8″ deck screws, with a special drill bit in the package
  • 3″ galvanized corner braces with smaller screws
  • a few nails

Although the deck screws are supposed to require “no pre-drilling”, a few of the 1 x 2’s split. I used a couple of nails to hold them together.


corner brace screwed to decking and post

Brace was placed with the edge of the post flush with the front edge of the floor.


Holding a 1 x 2 post firmly against the house and the edge of the floor, I positioned a brace, then marked where the first screw would go. The west and east sides would have five 1 x 2’s each.

I used a reversible drill to screw braces to the floor. For each of the east and west sides, one brace went next to the house, one on the outside corner, and one in the middle. The other 2 posts on each side were screwed to the edge of the decking without braces.

I used 2 longer deck screws—instead of the smaller screws in the package—for the horizontal half of the brace attached to the floor. This made a stronger attachment. Because the long screws would have gone through the 1 x 2’s and pierced the plastic, I used shorter screws on the vertical part of the brace (photo, above).


Next Up: The Vertical Posts

Once the braces had been secured on the west and east sides, the vertical 1 x 2″ posts were next. I attached five 1 x 2″ posts to the decking—about every 2′—on the west side and 5 more on the east side. Each post was screwed on at the bottom securely enough for it to stand straight. A carpenter’s level established true vertical and horizontal before I tightened the screws.

Then I fastened the middle horizontal post, and the top horizontal post as close to the ceiling (overhang) as possible. I can add more supports at any time, if necessary.

Where the ground level was higher near the house, I cut the posts so they stopped right above the soil. In other areas, the 8′ length doesn’t extend that close to the soil, but that’s okay. The excess plastic made a flange over the ground, on which I placed heavy pots and cinder blocks to block air infiltration. I haven’t trimmed any of the 12′ wide plastic, but I can play with that later. Incidentally, the flange helped keep the basement drier during a recent rainstorm. For now, it stays.


enclosing the porch, west side wood supports

The west side with 5 vertical and 2 horizontal 1 x 2″ x 8′ posts.


The braces and posts were sturdy, but there was too much play in the sides. So, I drilled another 3″ brace inside each of the upper 2 corners adjacent to the house, through the siding in the ceiling and into the vertical 1 x 2 (photo, below). A wooden beam hides under the siding. First, I hammered a nail through the aluminum, then replaced it with a deck screw, stabilizing the sides.


brace between ceiling and 1 x 2" post

Brace secures vertical post to the ceiling, near house. Clear tape, barely visible on the right, seals plastic to siding.


On the South Face


enclosing the porch, south side

Posts:                1        2        3        4            door            5        6        7        8


Here’s the 20′ south face of the porch. Imagine the vertical posts are numbered, from #1 at the left (west) corner to #8 at the right corner, with a larger gap in the middle for the “door”. The numbers don’t exactly correlate with the posts, but you get the idea. The door has not been finalized. Posts #1 and 8 were added previously to the corner timbers, when I worked on the east and west sides.

Across the front, I fastened braces to the floor and then added 2 middle posts on each side of the door (#2, 3, 6, 7). The other 2 new posts were fastened to the top of the inner 6 x 6″ timbers (#4, 5), and screwed directly to the edge of the decking. All 1 x 2″ x 8′ posts angled out slightly, below the edge of the floor.

Then the horizontal members went up: top and middle. Later, I had to remember to leave some extra plastic at the top of the outside corners to accommodate the slightly angled vertical posts (and longer dimension at the floor). Some of the posts were a bit bowed, so I’ll tape the gaps at the top from inside the porch.

At this point, all braces and support posts are in place. Progress!


Headings

Page 1: Enclosing the Porch for the Winter (Average Temperatures, Priority: Plants, The Best Option), Preliminary Plans, ***Updates***, Enclosing the Porch: First, The Support System (Brace Yourselves, Next Up: The Vertical Posts, On the South Face)

Page 2: Enclosing the Porch: Second, Wrapping It Up (The West Side, The East and South Sides, How?), Warming Up to This, Enclosing the Porch: A Winter Retreat for Succulents (An Arctic Blast, and I Don’t Mean Fun Times with Santa, Blown Away Or Not?, Why Not LED’s?, Enclosing the Porch for Edible Plants, Potted Herbs and Tender Plants, Enclosing the Porch for Me, Too!)

Return to the top

Patches For Pollinators: Less Grass To Mow

2022


patches for pollinators


Patches For Pollinators


In this article, I’ll describe how new garden spaces and “Patches for Pollinators” have decreased mowing time, while providing nectar and pollen for pollinators and seeds for songbirds. Also included is information about several insects found in the gardens this summer.

A common theme running through The Farm In My Yard is my goal of replacing much of the lawn with layered gardens, including trees, shrubs, perennials, bulbs, and annuals. Flowers and more natural surroundings attract bees and butterflies, toads and birds.

All the rest of the animal kingdom are showing up as well. Mice, moles, and voles…snakes and rabbits…foxes and deer. Lots of praying mantises, five-lined skinks, ladybugs, fireflies, and many insects I’ve never seen before. Occasionally, a cat sits patiently under the bird feeder until he’s shooed off. And some pests, too, such as…


…Japanese Beetles

lettuce-leaf basil, Japanese beetles

Lettuce-leaf basil ‘Tuscany’, with Japanese beetles.

Japanese beetles (Popillia japonica), accidentally imported into the U.S., were first spotted in New Jersey in 1916. They’re present here (northern NC) in enormous numbers this year and demonstrate a particular fondness for my lettuce-leaf basil, marigolds, blueberries, and raspberries. But they will feed on hundreds of species, including linden, cherry, plum, birch, rose, grape, and hollyhock.

To prevent “skeletonized” foliage on farmers’-market-bound basil, I cover the plants with an old sheer curtain to exclude the beetles. Future plans include growing berries and other susceptible plants under insect screening, with allowances made for bumble bees to pollinate the flowers.

Although a few birds eat them, the damage these beetles do to the landscape and to my inventory far outweighs their benefit.

Japanese Beetle Life Cycle

With regular rainstorms, soil stays softer, allowing female beetles to repeatedly lay eggs deeper into the soil in July and August. There, the eggs and young grubs are not stressed by hot, dry soil. White C-shaped grubs feed voraciously on healthy roots (particularly those of lawn grasses), and, in autumn, descend deeper into the ground, protected from severe cold.

In spring, grubs rise closer to the surface to continue feeding. In late spring, well-fed larvae pupate in the ground, and adult beetles emerge in early summer. Moist soil—from rain or irrigation—contributes to this beetle’s success. Where the ground is soft and moist in summer and fall, you can count on large populations of Japanese beetles the following year.

Incidentally, chewed plant tissues emit certain scents which attract even more beetles. That’s why we find them congregating in large numbers in the tops of blueberry bushes or in rose flowers.

Applying Milky Spore powder, a bacterium, to the property (grass and gardens) in early autumn kills grubs feeding on roots. This remedy isn’t 100% effective because beetles fly in from quite a distance—miles, in fact. At the very least, there will be fewer grubs devouring roots in your landscape. If you can encourage the entire neighborhood to apply Milky Spore, everyone will benefit. Except Japanese beetles. Moles, by the way, feed on these grubs. Plenty of those around, as well.

Other than that, I’m not fertilizing the lawn, applying any chemicals, or reseeding. In the future, I might work on a limited amount of presentable lawn close to the house. But for now, since the lawn comprises about 75% weeds and undesirable grasses, I’m just cutting it. Besides, much of that ground will be turned over, amended, and planted with something other than grass.


Less Grass To Mow With Patches For Pollinators


New Gardens

When I bought the house in late 2021, the lawn covered about half the property, taking 5½-6 hours to cut with a walk-behind self-propelled mulching mower. Part of the lawn’s square footage has been taken up by the many plants installed last fall and winter. They’re the beginnings of new gardens, which will expand as I propagate perennials, seed the annuals, and plant drifts of new shrubs. Space taken up by low-maintenance gardens will decrease the time required to cut grass.


foxglove

Foxglove.


Several white oaks (Quercus alba) tower over the property, providing a high canopy for proposed shady gardens underneath. About 200 tiny foxgloves just began germinating from seeds sown in a pot. Some will be sold at the market, and many will be planted in morning sun or under the trees’ dappled shade.

Foxglove (Digitalis purpurea) is toxic to most warm-blooded animals, including rabbits and deer. (It is a source of pharmaceuticals, but only under a doctor’s care.) The greatest risk to these plants is from dead twigs falling from the old oak trees.

Foxglove is a biennial, and, if happy, drops seeds at the end of its growth cycle for a self-sustaining colony of plants with stately flower spikes, from cream and pink, and rose to purple. It blooms in spring to early summer, then sheds seeds and dies. After those tiny seeds germinate in summer, young plants will remain dormant in winter. They’ll bloom the following spring, thus repeating the cycle. Insects and hummingbirds gain sustenance from the flowers.

From Crape Myrtle To Virginia Sweetspire


patches for pollinators, garden bed with flowers and edible greens

‘Red Russian’ kale, komatsuna, and tiny itea, foreground, plus kales, collards, cosmos, and crape myrtle, toward the back, after planting and mulching.


Growing plants from seed is one way to economically fill a large garden bed. I started a new garden last fall, close to the street, where I planted a pink crape myrtle (Lagerstroemia indica) and 2 tiny Virginia sweetspires (Itea virginica ‘Henry’s Garnet’) brought from Charlotte.

Early this year, I turned over the ground to a depth of 10″ between the shrubs and beyond, and added leaf mold and black topsoil from the woods. Also incorporated into the soil was a generous portion of chopped oak leaves stored in trash bags since the previous autumn.

All this loosening of the soil and the additional materials created a raised bed about 22′ long and 6-8′ wide. It’s an irregular shape with a curved outline. And, naturally, it will be enlarged over the years.

purslane, pink and white flowers

Purslane and ‘Red Russian’ kale.

This garden is where I’d planned to have a mass of large light pink cosmos. So, I grew ‘Cupcakes Blush’ from seed and planted about 40 of them in 2 groups. Between them, I added dozens of blue-gray ‘Lacinato’ kale, the similar but more purple ‘Dazzling Blue’ dinosaur kale, and the frilly ‘Red Russian’ kale. Behind the crape myrtle, I planted 10 collards, with rounded light grayish-green leaves. On the end, near the itea, I added a few clumps of komatsuna ‘Green Giant’, with broadly rounded dark green leaves. These plants complement each other in both color and form, and all the greens (kale, collards, komatsuna) are edible.

I picked up a purslane at a local roadside stand. It had solid deep pink flowers on a low, spreading plant. But the heat, apparently, turned the new flowers pink and white striped. So, I stuck that into the “pink garden”, and put a few cuttings near it, which are now growing.

Not In the Pink

I won’t grow ‘Cupcakes Blush’ cosmos again because it took too long to grow and fill out. It didn’t have the number of flowers hyped in the catalog, and fewer than half were light pink!

The fast-growing greens are winners in both vegetable and flower gardens. They’ll look even better when paired with blooming violas in fall and winter. The fact that they survived at all during this overheated summer is a marvel. Adding ‘Scarlet Frills’ mustard greens (edible) will echo the burgundy fall color of the iteas and crape myrtle.


Marigolds.


***Update***: Close to 2½-3 months of frost-free weather is just too long to put up with plants that aren’t delivering. So, all the “pink” cosmos were taken out in early August, and replaced with dwarf marigolds (photo, above), dwarf ‘Cosmic Orange’ cosmos, and coppery-leaved coleus. Much better. But the pink purslane will have to move. The crape myrtle bloomed very lightly this first season in the garden. 8/6/2022


Vegetable Gardens

This property includes a sizable fenced garden, partially shaded by the oaks on the east side of the house. As the sun’s arc shifts through the year, the garden receives more or less sun than it did the previous month.

Last autumn, I stuffed oak leaves into large trash bags, and stored them next to the foundation over the winter. In early February, I incorporated a few of those bags of leaves into the top 12″ of this garden’s soil, along with aged cow manure. After planting the greens, a thick layer of oak leaves was applied as a mulch, keeping soil moist, cooler, and weed-free. By late spring, the greatly improved soil was well-populated by earthworms, and the organic matter will continue to break down for months to come.

I’ll dig and amend more of this garden and add cool season greens, such as spinach, Swiss chard, green onions, and leeks. And peas, of course—the edible-podded ‘Sugar Snap’ and a variety of snow pea called ‘Oregon Giant’. It’ll receive more hours of sun after the trees defoliate. The brassicas (arugula, broccoli, miniature broccoli ‘Happy Rich’, Brussels sprouts, cabbage, cauliflower, collards, kale, mustard greens, pac choi, and others), or cruciferous crops, figure prominently in autumn and winter gardens and in the kitchen.

Hostas brought from Maryland a decade ago grow plump in the composted soil on the shadiest end of the garden. I’ll add more varieties of hostas here, safe from deer, until it’s time to pot them up for the market.

Miniature Broccoli ‘Happy Rich’


mini broccoli 'Happy Rich'

Miniature broccoli ‘Happy Rich’ planted 14-16″ apart, with peas behind them.


Brassicas (plants in the Brassicaceae family) appreciate moist, well-composted soil, generous portions of aged cow manure, and neutral pH. Here in USDA zone 7, many types of greens can grow in cold weather, even through the winter. I plant several kinds of brassicas every fall. During severely cold periods, a loose covering of clear plastic keeps the foliage in good condition.

Late last winter and in spring, I set out about 30 plants of miniature broccoli ‘Happy Rich’ on the north end of the garden, farthest from the oaks. While the trees were leafless, the plants grew in full sun. Now, in summer, these brassicas enjoy a couple of hours of mid-day shade from the hot sun.

This is one of my all-time favorite vegetables. Maybe even the favorite. I eat this versatile broccoli a few times a week, sell some at the Elkin Farmers’ Market, and donate a bunch when the market hosts cooking demonstrations. Great sweet flavor, and super healthy!

(***Update***: These same plants produced small harvests into mid-November. Then, with cooler weather, leaves grew larger. Unusually cold fall weather—up to 20 degrees colder than average—has caused them to decline earlier than expected. However, after the oaks dropped their leaves, the broccoli grew more vigorously, almost until Christmas, 2022. That’s why ‘Happy Rich’ is my favorite vegetable—9 months of harvests!)

‘Happy Rich’ and Insects


harlequin bugs on cabbage

Harlequin bugs on cabbage.


‘Happy Rich’ branches out after each cut, producing more stems, leaves, and small heads to harvest. Four species of caterpillars (from 3 species of moths and 1 butterfly) prove quite troublesome all season long, even beyond the first frosts. To prevent them from ruining the brassicas, I spray every 7-10 days with Bt (Bacillus thuringiensis). This isn’t a chemical, but a naturally occurring bacterium that kills larvae of moths and butterflies.

Bright orange and black harlequin bugs (photo, above) also feed on brassicas, spotting and distorting the heads and leaves. I squish them when I see them.


patches for pollinators, bumble bee on broccoli flowers

Broccoli ‘Arcadia’ and a bumble bee in spring.


As the plants finish up their last harvests now and in spring, some of the stems will bloom. Beneficial insects, especially bumble bees, honey bees, sweat bees, and tiny braconid wasps, collect nectar and pollen from the flowers. Heading broccoli has yellow flowers, but ‘Happy Rich’ has pure white flowers on stems up to 5′ tall.

Tomatoes

After warm weather had settled into the area, I planted several tomatoes and peppers among the mini broccoli plants.


tomatoes protected from deer

A small garden for cherry tomatoes.


Another section, north of the garden, gets sunlight longer into the season. There, I secured posts and strung deer netting between them (photo, above). It’s a narrow space, so deer won’t jump into it. This small area has a few cherry tomatoes, which can lean against the stronger existing fence, where edible-podded peas grew from late winter to early summer. You can see the pea vines growing through the fence.

Tobacco Hornworms

Tomato plant denuded by tobacco hornworm.

If one of your tomato plants seems a lot less leafy than it did yesterday, it might have a tobacco hornworm (slash markings) or a tomato hornworm (V-shaped markings). This very hungry caterpillar is the larval stage of a hawkmoth. A few weeks after a ‘German Johnson’ tomato went into the garden, it suddenly lost all its foliage. I’ve seen this before and knew to search for a 4″-long green caterpillar.

Several hornworms were found munching on the tomatoes this season. Most were carrying the pupae of a parasitic wasp and had stopped feeding. These pupae look like small grains of white rice. A female wasp lays eggs on or in the caterpillar. The eggs hatch into tiny larvae, which eat the inner tissues of the caterpillar, weakening or killing their host. Those should be left alone.

The few that hadn’t been parasitized lived out their lives on old tomato plants tossed behind the gardens. Birds or other animals might eat them.

Two dozen tomato plants that weren’t good enough to sell found homes in a few other areas around the property. Most are surrounded by posts and deer netting, although the deer did find—and destroy—90% of the big sunflowers meant for the winter songbirds… …


***Tomato Update***:

(This section added 9/4/2022.)

Tomatoes generally are underproducing. Those getting just an hour more sun are yielding fairly well, but not abundantly. Gardeners in this region experienced devastating blights on tomatoes from frequent rainstorms and persistent humidity.

After planting cleaned up not-quite-dead tomato plants, I sprayed them with a solution of dissolved aspirin. Here’s another link. They recovered better than I had any hope of expecting. Although not receiving the recommended biweekly spraying, they’re still producing fruits.

Later in the season, tomatoes had sun scald due to the sparse foliage, so I shaded new fruits with mesh bags, old peat pots, or large cucumber leaves. Sun scald causes tomatoes to rot.


tomato shaded with peat pot to prevent sun scald

Tomato shaded by old peat pot.


Headings

Page 1: Patches For Pollinators (Japanese Beetles, Japanese Beetle Life Cycle), Less Grass To Mow With Patches For Pollinators (New Gardens, From Crape Myrtle To Virginia Sweetspire, Not In the Pink, Vegetable Gardens, Miniature Broccoli ‘Happy Rich’, ‘Happy Rich’ and Insects, Tomatoes, Tobacco Hornworms, Tomato Update)

Page 2: Long Vines That Might Smother the Grass (Next To the Tree Stumps), Patches For Pollinators: Don’t Mow Here (Weeds To Watch, Early Patches For Pollinators, Late Spring and Summer Patches For Pollinators, Patches For Pollinators: Living Proof, The Saddleback Caterpillar), The Pretty Moths and Butterflies

Return to the top

Seedlings For Your Garden: 12 Tips


2022

Updated 5/21/2024


seedlings, zucchini


Starting Seedlings For Your Garden


Busy spring! This lengthy article focuses on starting and caring for seedlings and getting them established in the garden. If I’m not working on the seedlings, I’m working in the gardens, creating new beds and expanding those started last fall and winter. Winter weather was delightfully mild to allow planting right through the cold season. The weeds and I have come to an understanding, and in the next article, I’ll tell you how in “Patches for Pollinators”.

Foremost on the agenda has been starting plants to sell at our local Elkin Farmers’ Market. It’s been a challenge this year, keeping plants in good condition with high heat, heavy humidity, and frequent rainstorms. If I had a climate-controlled greenhouse, there might have been fewer losses. But, for the most part, my company, Wellspring Gardens, is producing more seedlings than I can sell at the market.

Some of that overproduction is destined for the vegetable gardens. It will yield small harvests of produce to sell at the market in addition to what’s needed in the kitchen. This is new territory for me, adding produce to the plants offered at the farmers’ market.

I might even consider canning, which I’ve never done…but let’s not get ahead of ourselves. That would be helpful, though, considering the rapidly rising prices at the grocery store. For that reason alone—the impact of rampant inflation on our wallets—it’s wise to learn how to grow at least a few vegetables.


sun's path

The sun’s path across the sky, Charlotte NC.


Watching how the sun tracks across the sky from month to month reveals good spots for the sun worshipers and areas where leafy greens should thrive in partial sun. This is my first summer in this house. The massive oak trees create shifting shade patterns that cause me to periodically rethink the plans.

So, let’s begin!


12 Tips For Starting Seeds


1. Start with clean materials for seedlings.


pepper 'Glow' seeds and cell pack

Sweet pepper ‘Glow’, started in 9-cell packs.


This calls for packaged seedling mix or fine-grained potting soil. Don’t use “dirt” from the garden, with its pathogens, insects, weed seeds, and worms that disrupt soil structure around tiny roots. In addition to the unknowns lurking in garden soil, its high clay content causes drainage issues in containers.

Potting soil that has a lot of coarse materials, such as pine fines (bits of pine bark), can be improved by sifting the soil. I use a clean plastic pot with small holes in the bottom. Fill the pot partway with the soil, and shake it vigorously up and down over the containers. Do the same thing when covering seeds.

Soil used previously for potted plants is not a good medium for your seedlings. It’s often depleted of nutrients, might contain pathogens, and the organic matter has partially decomposed. If it’s only one season old, it’s probably safe for transplanting potted annuals, when mixed with fresh potting soil, or incorporated into the backfill for that new sourwood tree. Or simply throw it under the shrubs or into the compost pile (never in the trash!).

Because seedlings are susceptible to soil-borne diseases, play it safe and start with pasteurized bagged seedling mix or potting soil. This, however, doesn’t guarantee a successful outcome, as many disease spores are air-borne. But we can increase the odds of success by using clean materials.

When reusing cell packs, pots, and flats for seeding, wash them in a 10% bleach solution, and rinse well before proceeding. Don’t smoke around plants, and wash hands thoroughly before working with them. Tobacco and other plants in the nightshade family (Solanaceae, including tomato, pepper, eggplant, and potato) can fall prey to the same disease organisms. Spores can transfer from tobacco products to your hands to the plants.


Pasteurizing Potting Soil

For bagged soil that’s questionable, you can pasteurize it in the oven. Don’t heat soil that contains timed release fertilizers. Use an oven-safe covered pot or baking dish, wet the soil, and heat the oven to 200°F. When the soil registers 140° on a meat thermometer, lower the oven temperature and maintain soil at that temperature for 30 minutes. This kills most pathogens. Wait for it to dry somewhat and to cool thoroughly before using. Various websites recommend different temperature levels from 140° to 300°. At the high end, however, beneficial microbes are killed off as well.

Let it cool down outdoors. Considering the pervasive “earthy” odor coming from hot soil, you might prefer buying a new bag of seedling mix or accept a small risk with the open bag in the garage.

Another method of pasteurizing (not sterilizing) soil is to place a heat-resistant container of soil in a black plastic bag. Place the bag in a sunny place outdoors on a warm day, and let the sun do the work for you. This is called solarization, and can raise the temperature inside the bag to 140-160°F. To prevent damage to the beneficial microbes, take the temperature, and maintain it at 140° for 30 minutes, opening the bag a bit to prevent overheating.

Most bagged potting soils and seedling mixes already have been heat-treated to eliminate pests. Close the bag securely and store in a cool dark place. The last and only time I pasteurized soil was nearly 50 years ago because that’s what the experts recommended.


2. Grow disease resistant varieties…


While fungicide and bactericide formulations—both organic and conventional—are available, I’d rather grow disease resistant varieties and not rely on spraying. Keep in mind that resistance is not 100% effective, particularly when plants are exposed to stressful weather or cultural conditions.

Certain varieties are more flavorful than others, but all well-grown fruits and vegetables from your own garden taste better than those purchased from grocery stores. Picked when vine-ripened perfect, anything coming from the garden will be superior to what’s found elsewhere except, perhaps, at farmers’ markets and farm stands. Freshly picked produce also has the highest nutrient content.

Digging in the garden is great exercise; proceed slowly at first. Working outside in nature feels good, and self-sufficiency is never amiss. A few steps from the back door gathering a green onion, spinach, dinosaur kale, and a little ripe sweet pepper for the veggie omelet is more rewarding than I can describe. You’ll see!

Those are just a few of the many benefits of growing our own vegetables. Using disease resistant varieties, if available, makes the job so much easier. Many new gardeners gave up after having suffered the disappointment of losing an entire crop to early blight or bacterial leaf spot. And we also have to deal with deer, rabbits, and insects!

Although this article concentrates primarily on edibles, flowering plants also have their own set of disease organisms. Again, look for resistant varieties, grow them in conditions that don’t favor infection, and look for remedies at the garden center.


…Especially Tomato Seedlings

tomato disease septoria?

Disease beginning on ‘Rutgers’ tomato.

Tomatoes and peppers, two of the most popular crops for home vegetable gardens, are vulnerable to many diseases. They’re caused by fungal, bacterial, or viral pathogens. In some areas, nematodes also can be a problem. Usually, we can harvest some fruits before disease claims them, but resistant plants last longer in the garden. Plants infected with viruses should be removed and destroyed. For fungal and bacterial pathogens, products at garden centers will help. Always read the labels.

Tomato diseases include Alternaria stem canker, early blight, late blight (Phytophthora; very few varieties are resistant to this one), Fusarium wilt, grey leaf spot, leaf mold, tobacco mosaic virus, tomato mosaic virus, tomato spotted wilt virus, and Verticillium wilt. Catalog listings use initials to indicate disease resistance. For tomatoes, AS, EB, LB, F, GLS, LM, TMV, ToMV, TSWV, and V, respectively, represent those diseases.

Tomatoes are weedy plants and normally produce good crops, despite many organisms that target them. Peppers are susceptible to several races of bacterial leaf spot, and basil to basil downy mildew. Some zinnias are plagued by powdery mildew. Weather conditions, such as high humidity and frequent rain, exacerbate these disease problems.

Most hybrid (or “F1”) tomatoes have some resistance to one or more pathogens, but not to all of them. ‘Big Beef Plus’ is resistant to a wide variety of diseases. ‘Damsel’ and ‘Defiant PhR’ are resistant to late blight. Hybrid seeds carry a higher price than open pollinated varieties due to the cost of research that developed them and the extra steps needed to produce hybrid seeds each year.

It’s so hot out there!


shading tomato flowers


If you live in a hot climate, look for tomato varieties that have been bred to produce better at high temperatures. The pollen in tomatoes and peppers, and others, can die at high temperatures. While these plants are comfortable at 65-80°F, pollen dies above 88°, 90°, or 92°, depending on the cultivar. No pollination = no fruits! A reference to “heat” or to the “south” in the plant’s variety name indicates its higher tolerance for heat.

Researchers are investigating thermo-tolerant genetics in wild tomato species (Solanum pimpinellifolium) and incorporating them in tomato breeding programs.

One trick to preserve viable pollen is lightly shading the plant in the hot afternoon hours. Attach shade fabric—a black woven mesh—to a support over and on the west side of the tomato or pepper plants. This provides a decrease of up to several degrees in hot climates or temporarily during a heat wave. In the photo, above, mesh bags from the grocery store protect fruits from squirrels and sun scald, and lightly shade new flowers and their pollen from high heat.

The young ‘Estiva’ tomato plants (“estiva” refers to summer), a hybrid bred for heat tolerance and great taste, lost most of their diseased bottom leaves in heavy rains, but those little fruits are still growing! I’ll plant them out this weekend, after the temperatures drop well below the 108° heat index value we have now. Recent weather has been in the record-breaking mid- to high 90’s F, with high humidity. Not my favorite conditions to dig in the garden…so I don’t.  I was not bred for heat tolerance!

***Update***: ‘Estiva’ tomatoes endured this hot summer and produced fruits past the first fall frosts. I covered them on chilly nights to ripen the last of the fruits. These were among the last tomatoes to succumb to the cold, in mid-November. Autumn 2022

A Few More Tomato Tips

Your best defense against tomato disease, in addition to growing disease resistant varieties, includes these tips:

  • Stake them. Tall indeterminate types need a 6-8′ tall stake, taller for some.
  • Space them farther apart, at least 3½-4′.
  • Thin the vines to 3 or 4 main stems by removing excess suckers.
  • Remove leaves on the bottom 12″ of the plants after they’ve become established.
  • Locate them where a breeze blows through the garden. These first 5 tips address increasing air circulation around and through the tomato plants.
  • Give them lots of direct sun—a minimum of 7 or 8 hours. The more sun they receive, the shorter the window of opportunity for pathogens to germinate on damp leaf surfaces.
  • Mulch the soil under the plants to prevent disease spores lying dormant in the soil from splashing onto and infecting the foliage. More on Page 4.
  • Water in the morning to early afternoon so all foliage is dry going into the night. Try to keep the foliage dry at all times and avoid handling wet foliage.
  • Water established plants heavily (1½”/week) when needed, but avoid giving little sips every day. Young seedlings need more frequent watering until their root systems expand.
  • Clip off leaves that show early symptoms (yellowing, spotting), and dip your pruners in alcohol when moving from plant to plant.
  • Don’t smoke near the garden, and wash hands thoroughly before working with plants.
  • Rotate your crops. Don’t plant a member of the Solanaceae family where any members have grown in the past 3-4 years. There’s more about crop rotation on Page 4.

All plants grown with good soil preparation, good air circulation, proper watering techniques, adequate sun, and appropriate fertilization are less stressed. Less stress equates to lower infection rates.

Growing Heirloom Seedlings


Heirloom tomatoes are always in demand because of their exceptionally good flavor. Heirlooms are open pollinated, which means gardeners can save seeds from fully ripened fruits each year for the next season’s garden. Because they’re not F1 hybrids but have been breeding true, for the most part, for many decades, heirlooms retain their traits from one generation to the next.

These varieties, however, don’t have much built-in disease resistance. Nevertheless, I’m growing a few heirlooms, and spacing them 4′ apart for improved air circulation. We’ll see what happens.

Commercially grown tomatoes must be able to survive long distance transportation and handling without damage. They’re picked early, when green or first showing color. Varieties of these tomatoes have skins that normally are tougher.

Heirloom tomatoes have more desirable thinner skins and, therefore, travel poorly. So, you won’t see them in grocery stores unless those stores buy from local farms. Heirloom tomatoes from the grocery store might cost $5.00/lb. or more! So, yes, it is worth growing a couple of heirloom tomato plants in our gardens.

A few prolonged and heavy rainy periods this spring almost wiped out certain tomato varieties, namely ‘Carmello’, ‘Brandywine’, and ‘German Johnson’. I still have a few that show less damage than others. ‘Black Krim’ and ‘Cherokee Purple’ are doing fairly well, although they are heirlooms. Most of the remaining plants will be set in the garden. There’s usually a breeze blowing through the property, and by spacing them appropriately, I should get plenty of fruits.


Basil Downy Mildew


basil downy mildew

First symptom of BDM: yellow blotches between the main veins.


Although this dreaded disease targets only basil, it hasn’t appeared yet this year. But I’m prepared.

Last year, I grew ‘Rutgers Obsession DMR’ (DMR = Downy Mildew Resistant), an acceptable substitute for our beloved ‘Genovese’ and other susceptible sweet basils. Last year’s ‘Obsession’ did not develop any basil downy mildew (BDM)—not one speck—although wet and humid weather presented a worthy challenge. Other basil varieties in the ground or in pots succumbed to the disease within a week of infection…even young seedlings.

This year, I’m growing ‘Rutgers Obsession DMR’ and also ‘Rutgers Devotion DMR’ outside all summer. In addition, I’m seeding the old favorites, including ‘Genovese’, ‘Italian Large Leaf’, Thai basil ‘Siam Queen’, ‘Marseillais Dwarf’, and ‘Tuscany’, a lettuce-leaf basil. A few non-resistant basil plants will come indoors at night when warranted, as described below. But I’ll stop seeding susceptible varieties, except for a few pots, and concentrate on the resistant ones for the farmers’ market if the disease appears in the neighborhood.

Several other BDM resistant varieties can be purchased as seeds or as started plants.

Avoid High Humidity

basil seedlings in clay pot

Healthy sweet basil, in a pot.

If you want to grow your favorite basil varieties that are not resistant to BDM, there is a way to prevent a total loss.

BDM spores move up from the south on the breeze or on infected plants shipped into the area. The spores don’t overwinter in cold climates. If spores land on a susceptible variety, they need a relative humidity above 80-85% for a couple of hours in order to germinate.

Even during pleasant weather, the relative humidity can reach 90% or higher in the 2-3 hours around dawn. That’s when the temperature is usually the coolest and, therefore, the relative humidity is the highest.

When plants show early symptoms of BDM, remove the affected leaves. Take potted basil plants indoors for the night, every night. Indoor conditions never reach those high humidity levels, so you can still grow your preferred basil varieties successfully with a little effort. Remember to place the plants back outdoors after the sun has been up for a couple of hours.

Follow this regimen during rainy weather, although the plants might need to spend a day or two inside. Find the brightest spot to keep them during their temporary stay indoors. If possible, provide some artificial light. Unless it’s wilting, avoid watering basil indoors. Less sunlight means the plant won’t be photosynthesizing optimally or using much water, and wet soil can initiate root rot.


Headings

Page 1: 1. Start with clean materials for seedlings. (Pasteurizing Potting Soil), 2. Grow disease resistant varieties… (…Especially Tomato Seedlings, It’s so hot out there!, A Few More Tomato Tips, Growing Heirloom Seedlings, Basil Downy Mildew, Avoid High Humidity)

Page 2: 3. Timing is important for seedlings. (The Fall Growing Season, Keeping Records, The Cooperative Extension Service, Starting Seedlings Outdoors, Don’t Start Seedlings Too Early, Cool Season Crops, Extending the Growing Season, Seedlings Transplanted Into Bigger Pots, Bunching Onions, The Brassicas, Brassicas In My Garden, Lettuce), 4. Is the temperature suitable for seedlings? (Miniature Incandescent Lights For Warmth, Water Temperature)

Page 3: 5. Start seedlings in small batches. (My Simple Infrastructure), 6. Seedlings need strong light. (Growing Seedlings Under Shop Lights), 7. Cull the weaklings and anomalies. 8. Prevent damping-off disease from killing your seedlings. (Actinovate), 9. Seedlings and plants need fertilizer. (The Elements, Read the Label)

Page 4: 10. Prepare the soil for your transplants. (Start With Good Drainage, Air Pore Space, Gypsum and Lime, Add Nutrient-Rich Amendments, Bury It), 11. Try succession planting for maximum yield. (Crop Rotation, Mulch), 12. Stop the pests before they ruin your garden. (Slugs and Snails, Larvae of Moths and Butterflies, Spider Mites and Thrips, Deer and Rabbits), Concluding

Return to the top of Page 1

Rocks For Drainage In Pots: Do They Really Help?

Updated 6/10/2024


Should We Add Rocks for Drainage?


Rocks for drainage?


This issue of adding gravel or rocks for drainage in pots has been debated for generations by amateur as well as professional gardeners. Gardening programs from decades ago recommended adding a few inches of gravel or broken clay pottery to the bottom of a pot before filling with potting soil.

That method has been put to the test and soundly debunked. It doesn’t work. In fact, the soil can retain even more water close to the plant’s roots!

Many gardeners are eager to start filling their patio pots with flowers and herbs. Or perhaps vegetable gardening in containers is on the agenda. For some, it has been a long, cold winter, and this activity signals the beginning of a new growing season. But, before buying that big bag of gravel for your pots, look over this information and see if you might consider doing things differently.


Ingredients In Potting Soil


Potting soils are composed of a few or several ingredients in various proportions. Certain components absorb and retain moisture around plant roots while others help the soil drain faster. Some materials do both, depending on how finely they were milled.

This article describes how components behave in potting soil, and how gravity and other forces exert their influence on drainage and water retention. I’ll also suggest why it’s better to exclude rocks for drainage in pots.

Here are some of the ingredients commonly found in potting soils, in addition to water and air:


Materials Which Help Retain Water:

  • peat moss, which holds water between its fibers
  • coconut coir, chopped into fine particles (for water retention)
  • pine fines, which decompose quite slowly; most often used to facilitate drainage in potting soil and in gardens, but finely milled pine fines hold water
  • compost, a nutrient-rich material
  • aged manure, composted to kill pathogens
  • clean topsoil


Potting soils might contain other types of materials, including ground shellfish, kelp, alfalfa meal, rice hulls, sawdust, charcoal, blood meal, bone meal, earthworm castings, and bat guano. Some manufacturers add various species of beneficial microbes.

Although not organic matter, fine clay holds water between its particles. Most potting soils contain no soil and are, in fact, soilless. A few include loam in the mix.

“Sinking Soil Syndrome”

You might have noticed the surface of the soil dropping lower in an old potted houseplant. The soil probably isn’t eroding through the drainage hole in the bottom of the pot, so where is it going?

Organic matter in the soil decomposes. As it oxidizes, and gets “used up”, its volume reduces considerably. Over time, you’ve seen the soil level dropping an inch or two, maybe more. On the contrary, sand and other gritty materials hold their volume.

The remedy for this sinking soil syndrome is to take the plant out of the pot and to refresh the potting soil. Pack new soil firmly around the roots to prevent settling. Don’t cover the stems or the crown of the plant with soil—just the roots. After that, the plant should be fine for another few years.


Elefantenfuß (Beaucarnea recurvata)

Beaucarnea recurvata, ponytail palm.


Several years ago, I was about to transplant a severely potbound ponytail palm (like the one in photo, above) into a larger clay pot. That plant came with me from Maryland and had been in its 4½” pot for close to a decade. It’s a very durable plant!

After removing it from the plastic pot, all that remained under the thick trunk were the roots, perlite, and sand clinging to the roots. It looked like a wire sculpture—a tracery of root and grit and mostly air taking the shape of the pot, but no peat moss or other organic matter. It transplanted successfully, and now sits on the back deck in mild weather.

Reusing Potting Soil

Many customers have asked about potting new plants into potting soil that has been used before. If there is still a substantial organic component and the soil has good tilth, then it can be used again. But, first, fluff up the soil and supplement with compost, potting soil, or some of the other amendments.

Rather than risk infecting new plants, toss old soil that held diseased plants into an active compost pile or the woods. Plants known to be vulnerable to soil-borne diseases (basil, in particular) are best planted in fresh potting soil and a thoroughly cleaned pot. When I lost an heirloom tomato to a fungal disease a few years ago, I removed the plant and the top layer of soil. After adding fresh potting soil, I planted a disease-resistant tomato, which grew fine for the rest of the season.


Materials Which Increase Drainage:

  • perlite, a heat-expanded mineral, those little white particles
  • expanded rock, such as PermaTill, another heat-expanded mineral
  • horticultural grit
  • vermiculite, not used as often today because it can compress and lose its drainage capacity
  • coarse or sharp sand and gravel—angular-edged particles, as opposed to rounded particles, can help drainage if they aren’t too small
  • pine fines (partially composted bits of pine bark)
  • coarsely processed coconut coir


Chunky expanded clay and rock, often found in succulent and orchid mixes (photo, above), provide fast drainage and excellent air circulation around the roots.

Qualities such as tilth, water retention, nutrient capacity, and aeration of the soil are determined by the particular combination of materials and the sizes of their particles. Larger particles tend to facilitate aeration and drainage. Tiny particles (especially clay soil) retain water in the tight spaces between them, giving water molecules more surfaces to cling to.


Air Pore Space and Gravity


Air pore spaces occupy the voids between soil particles when they’re not taken up by water. Water flows through the soil profile, following the force of gravity. As water drains away and as the roots absorb it, air infiltrates the medium, providing oxygen for the roots. Plant cells use oxygen in respiration, as they oxidize the products of photosynthesis (glucose) and expel carbon dioxide as a waste product.

“Wait, what?” Yes, plants give off carbon dioxide during respiration. The net effect in each 24-hour period, however, is more oxygen given off during photosynthesis than is consumed during respiration. This process creates energy needed by plants to make new cells and to carry out thousands of cellular activities.

wilt, marjoram 'Compactum'

Wilted marjoram ‘Compactum’.

Plants continually grow tiny new root hairs right behind the expanding root tips. Oxygen is critical to respiration and, therefore, to new root growth. These short-lived root hairs do most or all of the water absorption and interact with beneficial fungal mycorrhizae in almost all species of plants.

Brassicas (broccoli, cabbage, kale, etc.) do not participate in this mycorrhizal/root relationship. A few other groups of plants (ericaceous plants, orchids, sedges, spinach, and beets) have rare or no forms of mycorrhizae colonizing in or around their roots.

Saturated soil kills root hairs. If this condition persists, the roots themselves will die and not regrow. If roots and root hairs can’t supply water to the leaves, the foliage wilts. The plant’s wilted appearance looks the same as when the plant has been deprived of water. Either overwatering or underwatering prevents water from reaching the leaves once the roots have been suffocated or dehydrated.


Feel the Soil

An extended period of wilt and wet soil is a common reason for plant failure. Even if the soil surface feels dry, there’s usually adequate moisture deeper into the pot. That’s why we recommend feeling the soil an inch or two into the pot.

Soil texture, pot size, sunlight, temperature, the plant’s leaf surface area, and, of course, frequency of watering influence how quickly potting soil drains and dries.


Capillarity

The force that works in opposition to gravity is capillary action. Water drains between soil particles, thanks to gravity, allowing most of the excess to pass through the holes in the bottom of the pot. But water also can move upward or sideways in the pot due to capillary action.

Capillarity is part cohesion and part adhesion, two kinds of forces between molecules. Cohesion is the attraction of water molecules to each other. Adhesion is the attraction of water molecules to other substances, such as particles of potting soil or the xylem tubes in a plant’s vascular system. In capillary attraction, adhesion is a stronger force than cohesion, so water molecules will stick to and be drawn between particles or along the inside surfaces of xylem.

As water molecules on the soil surface evaporate, they’re replaced by water molecules below them because of capillarity.

So, there’s a constant battle waged between gravity and capillarity. Water moves toward the bottom of the pot, but is limited by capillarity, which pulls it upward. What does this have to do with using rocks for drainage in a pot? I’ll explain in a moment. But first…

A Simple Experiment

Here’s an experiment that illustrates these points. Because organic soils often don’t contain wetting agents, which help the soil absorb water more readily, look for fresh potting soil that is not certified organic. Fill a short pot and a tall pot with dry or barely damp potting soil, using no rocks for drainage. Pack it in evenly and moderately firmly.

Now, place each pot in a shallow bowl of warm water. Why warm? Because soil absorbs warm water faster than it absorbs cold water. If the water disappears into the soil, add more to the bowl.

Wait an hour or so. In the short pot, you’ll see moisture on the surface. It might take longer for the larger pot to absorb water. If water remains in the bowl without moving all the way to the surface in the tall pot, the force of gravity has exceeded the ability for capillarity to pull the water farther upward. Moisture can wick into the soil by capillarity only up to a certain point.

If the tall pot is moist on the surface, the soil might have more water-retentive components than drainage materials. Tiny clay particles also can absorb water and hold it tightly. Try using a taller pot. Watering a plant in a very tall pot from the saucer usually necessitates additional water applied to the surface when capillarity fails to moisten the soil all the way to the top. Nevertheless, the plant probably will survive if the lower roots can absorb enough water.

Movement of moisture within the medium depends on the dimensions of the container and the texture of the soil. Soil with larger air pore spaces will have more difficulty absorbing water all the way to the surface of the pot.


Headings

Page 1: Should We Add Rocks for Drainage?, Ingredients in Potting Soil (Materials Which Help Retain Water, “Sinking Soil Syndrome”, Reusing Potting Soil, Materials Which Increase Drainage), Air Pore Space and Gravity (Feel the Soil, Capillarity, A Simple Experiment)

Page 2: Water Tables and Rocks for Drainage (The Perched Water Table, How Soil Drains in the Garden, Remember the Wet Sponge Experiment?, The Water Table, In Saturated Soil, Rocks for Drainage and Weight)

Return to the top of Page 1


New Gardens For a New Property: What To Do First


2021

Updated 8/26/2024


A New Home and New Gardens!


new gardens

View from the front porch.


As you might know from reading The Farm In My Yard, I moved from Rockville, Maryland to Charlotte, North Carolina in 2013. I worked for a few years, while watching over my elderly mother. After she passed away in 2020, the search was on for a larger property in a smaller town. Must-haves included reasonably quiet surroundings, lots of nature, room to play in new gardens, and no HOA. This article includes information from a landscaper’s perspective that might help first-time property owners.

Success! In late October, I moved to a new home in northern North Carolina. A few obstacles didn’t stop my tireless realtor, Erika, from finding this (almost) perfect little house. There was Covid, for one, and the reluctance on the part of homeowners to list their homes for sale. Very few livable offerings in my price range came to the market. As soon as they did, they immediately went under contract.

As many buyers have done in this tight market, I made an offer on the property sight unseen. Well, truthfully, I did drive by the house before submitting an offer, and liked what I saw. Trees, woods, space, and sunlight—perfect for a gardener! The previous owners made some major improvements, saving me the trouble and the expense. But I had no idea what the interior looked like.


Inspections

When buying a house, have all the inspections done before closing, as recommended by your realtor or for your own peace of mind. Estimate the cost of necessary upgrades and repairs.

Particularly for older homes, check the roof and electrical, plumbing, and HVAC systems. Look for water damage and mold, pests and wood rot, foundation issues, adequate insulation, storage space, and evidence of ongoing maintenance.

Negative findings could nullify a contract or provide a basis for negotiation between your realtor and the listing agent.


The Lay of the Land


Small towns, farms, and independent businesses dot the landscape in this part of Wilkes County. Several vineyards and state parks attract visitors to these lovely rolling hills, and rivers offer lots of sporting opportunities. Drive along any of the scenic roads, and new vistas open at every turn; the Blue Ridge Parkway is only half an hour away. Beautiful countryside!

looking east

The big oaks frame a sunrise.

My new home, a one-story house built in the 1940’s, sits on 1¼ acres of mostly level land. The view from the front porch looks over a field, a few houses, and downslope toward a small stream. Stunning sunrises greet me from that direction almost daily.

Most of the trees’ leaves have fallen from the massive limbs of the native white and willow oaks (Quercus alba and Q. phellos). A few of these trees tower over the eastern border of the property. In the summer, those toward the west will shade the house from hot afternoon sun.

The mighty oaks came first, judging by their size, and then the house. If I were to name the property, Quercus Magnus would seem fitting.


Preliminary Plans for New Gardens

There’s plenty of space for the berries and the vegetables to bask in the sun. Plenty of space to raise shade-loving perennials in the fenced enclosure north of the great oaks. And plenty of space for gardens that will support birds, bugs, bees, and butterflies.

Also, importantly, there’s room to grow plants to sell at the local farmers’ markets, as I did in Maryland for 25 years.


After Moving In


Deciding what to do first depends on the season, your climate, and the condition of the house and gardens. Priorities often reflect our occupations or interests, so artists might first set up a studio while contractors organize tools in the outbuildings. Growing families might rank bicycle storage, a big kitchen, and an extra bathroom at the top of the list.

And gardeners? Well, we look at soil quality, existing gardens, and sunlight. This gardener prefers a large, mostly blank slate. Others call it a lawn.

In April, I’d be concerned about starting seeds for the market, getting the summer vegetables and flowers planted, and cutting grass. But it’s December now. The yard needs tidying, houseplants need to find their homes, and, of course, we must bake Christmas cookies. Not to mention, those boxes won’t unpack themselves!

Moving into a house that doesn’t need major repairs eases the stress. To be sure, there are some improvements that can and will be made, but nothing that needs immediate attention. Wouldn’t mind a new kitchen with a dishwasher, Santa. (Chocolate chip or almond crescents?)
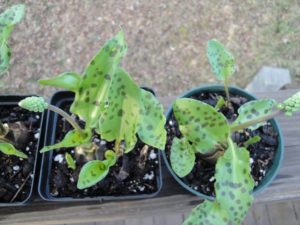


Trees and Shrubs


Poor Pruning Practices

Walking around the property will highlight issues that need attention. Check the trees and shrubs for dead or broken branches or call a licensed arborist for a professional assessment. There are some dead twigs way up in these oaks. A brisk wind shakes them loose, so the truck stays parked under the carport. Fortunately, that debris falls short of the house.


I’ll hire an arborist to clean up the trees and remove branches that have been headed back. Heading back, or bluntly cutting off the end of a branch, causes many epicormic shoots to form. Those are new growing tips emerging from buds concentrated close to the cut. The shoots also can cover the length of the branch. Epicormic shoots have weak connections to the branch, and, over time, most will fail and fall from the plant (photos, above).

Similarly, topping trees is, in my opinion, not recommended. Yes, it reduces the height, temporarily, but topped trees in winter are hardly natural-looking and not attractive (photo, below). They, too, drop twigs over an extended period of time.

An expert arborist might be able to undo the damage from heading back or topping. However, removing the tree might be the most economical solution. Research appropriate tree species for your property and where to plant them. Keep in mind that plants almost always achieve dimensions larger than those indicated on the label. Your local agricultural extension office can help. Check with botanical gardens and sources such as your state’s native plant societies.


topped tree, sky

A topped tree.


The Root of the Problem

Trees planted close to the foundation can threaten its structural integrity. Consider having them removed.

The same ruthlessness applies to the wrong tree in any space. Keeping silver maples or weeping willows close to the house, septic system, or underground utilities begs for trouble. This is where an arborist or a well-informed landscaper can recommend more fitting species and a pleasing design for better curb appeal. Call 8-1-1 to have underground utility lines marked.


Constricted

Look for old stakes and wires still looped around trunks or branches. Wooden posts rot, but wire and synthetic rope from clotheslines, fences, and hammocks persist.

As trunks and branches grow in girth, they attempt to grow around the obstruction, usually cutting off the vascular system inside the bark. This results in the death of those parts of the tree that cannot receive water from the roots. Early fall color on isolated branches might indicate trouble, such as pests or physical constriction.

In the Maryland garden, a dogwood tree died for no apparent reason. After cutting it down and opening the bark in several places, I found plastic rope deeply embedded in the trunk a few feet from the ground. Although the damage appeared several years after I had moved there, it eventually killed a beautiful dogwood.


Flares and Girdling Roots


Most trees flare out where the trunk descends into the ground. If this flare is missing, see if soil has been piled up against the trunk, and remove it.

Construction around unprotected trees can deposit soil that cuts off the oxygen supply to the roots, resulting in the plant’s decline. As little as an additional 1-2″ can damage trees. Also, parking vehicles over the root system compacts the soil, impeding air and water penetration. Keep in mind that tree roots extend well beyond the dripline, or the edge of the canopy.

Check for a girdling root crossing over the trunk at the soil line or below it. As it grows, the root will hinder growth of that section of the trunk, making the trunk look straight-sided where it enters the ground. Cut it out before the tree tries to grow around it. Maples and other surface-rooting trees are notorious for this.

There’s no flare at the base of this maple tree (photo, above) and at least one large girding root is constricting the flow of water and nutrients from the soil. I noticed large dead limbs in the canopy, so the tree might be removed.


English Ivy


english ivy growing up a white oak

English ivy growing up an oak tree.


Vining English ivy (Hedera helix) is growing up a white oak’s trunk, using rootlets to cling to the bark. All the vines will be removed for 4 main reasons.

red-shouldered hawk dec 2021First, English ivy is a woody vine, so its stems will grow in girth just as a tree branch does. As they wrap around the tree trunk or the limbs and thicken over the years, the ivy stems will constrict tree growth, killing limbs and possibly the tree.

Second, the evergreen ivy holds moisture and debris close to the bark, and could encourage insects and diseases.

Third, as ivy scampers over the ground and up the trees, it provides safe haven for rodents. Birds of prey and other predators cannot see them. Here’s a red-shouldered hawk perched in a dogwood tree, looking for dinner.

Fourth, ivy competes with small native plants, crowding them out.

So, the ivy must go.


Headings

Page 1: A New Home and New Gardens! (Inspections), The Lay of the Land (Preliminary Plans for New Gardens), After Moving In, Trees and Shrubs (Poor Pruning Practices, The Root of the Problem, Constricted, Flares and Girdling Roots, English Ivy)

Page 2: The Lawn (Safety First, Less Grass to Mow, Grass Clippings, Spontaneous Combustion), Drainage (Hold the Water), New Gardens for Old Plants (Virginia Sweetspire), More New Gardens and Less Lawn (The Black Walnut, The Ravine and the Woodland, Passionflower and Phlox ‘Minnie Pearl’)

Page 3: Planting a Few Trees (The Rule of Thirds, Too Cold to Plant New Gardens?, Viola, Different Players—Same Script, All Those Leaves), A Welcome Surprise (A Firm Foundation, Heeling In, Iris, Chores Indoors), Christmas Already?, and Concluding

Return to the top of Page 1

Plant Trees To Transform Your Landscape, Part 2


Autumn Lake Tree Nature Leaf - pasja1000 / Pixabay


After reading Part 1 of “Plant Trees to Transform Your Landscape”, you’ve located the best spot where a tree will shade the house from brutal summer sun. Recommendations and practices presented here are based on climate and soil in the eastern part of the United States, where I live and garden, but the basic principles apply everywhere.

If your main objectives are shade, attracting wildlife, and less grass to mow, include masses of shrubs and perennials in the landscape plan as well. This article concentrates on planting trees, the dominant features in the landscape.


Native Plants vs. the Non-Natives


The choices offered in garden centers can be narrowed down to native species and non-native, or exotic, species. Within each of those groups are the original species and the cultivars (cultivated varieties). Developed by plant breeders, cultivars exhibit more ornamental or desirable—or just different—characteristics than the species.

Japanes maple Red Filigree Lace

‘Red Filigree Lace’, a delicate cultivar of Japanese maple.

Non-native plants originated in a different country or perhaps only a few hundred miles away. If the plant doesn’t occur naturally in your geographic region, it’s non-native, although some gardeners restrict use of the term to plants evolving in another country.

There are many beautiful plants, exotic to our shores, which we’ve enjoyed in our gardens. Japanese snowbell (Styrax japonica), Stewartia pseudocamellia, and the dizzying assortment of Japanese maples (Acer palmatum) are just too hard to pass up. You can compromise, if you wish, by including both natives and exotics.

To most garden center visitors, none of this matters. We buy plants that solve problems and look pretty in our yards. But, to explain the relevance of native species, I’d like to expand the subject.


The Benefits of Native Species

First, native plants require less pampering to get them established.

Species that evolved locally can tolerate fluctuations in weather patterns. Temperature extremes, rainfall, humidity, soil types, altitude, wind patterns, and local fauna shaped today’s ecosystems.

Second, gardeners concerned about local pollinators choose plants that foster bees, butterflies, and other animals that pollinate farm crops and wild vegetation.

Every third bite of food we consume is attributable to pollinators. But, you might make the case that since most crops are alien to this country, it shouldn’t matter whether we use native or non-native trees. But we need to consider what larval insects consume, and that’s foliage and other plant parts. Thousands of species—not just bees—pollinate our farms, orchards, fields, and forests.

Egg-laying female moths and butterflies, beetles, and other insects are very selective and seek the natives they evolved with to supply sustenance for the following generation.

Incidentally, honey bees are not native to this part of the world. They will, however, forage from plants grown here, many of which are related to the plants they evolved with.

Making a Case For Single Flowers


Flowers attract pollinators, which reap the harvest of nectar and pollen. But many double- and triple-petaled flowers have lost their nectaries, stigmas, and/or pollen-tipped stamens. Photos above clearly illustrate the loss of reproductive parts in a double amaryllis cultivar. If these hybridized doubles and triples have lost the ability to reproduce sexually, they can’t make seeds. They must instead be propagated asexually, or vegetatively, by cuttings, division, grafts, or tissue culture.

The anthers, supported by filaments, bear the pollen; the male portion of the flower, collectively, is called the stamen. Female parts comprise the stigma, supported by the style, and the ovary, with its ovules, deeper within the receptacle; the female portion is called the pistil.

Not all dense flower heads are pollinator wastelands, though. Species in the Asteraceae family, for example, have flowers that normally look full. This family includes all the composites, such as aster, coneflower, daisy, dandelion, rudbeckia, and sunflower. Their dense inflorescences are composed of small florets arranged in a head, called a capitulum. But the original species also have the necessary reproductive parts. The composites are one of the most successful groups of plants and are found on every continent except Antarctica.

At a local garden center last year, I watched bumble bees that were quick to land on thickly-petaled hybrid red coneflowers (Echinacea). They were equally hasty in their departure! The bees stayed on the red flowers for a fraction of a second, while they lingered on the less frilly flowers of other cultivars, mining several florets in each flower for their treasure.

Pollinators waste precious energy visiting barren double-flowered hybrids. True, not all doubles lack nectar and pollen. For the pollinators’ sake, though, select more species or varieties with simple flowers. Natural selection favors plants that set seed, of course, which is why most native plants have simpler flowers.

Photos below show examples of single-flowering cultivars. If you see a boss of stamens and pistils in the flowers, those plants can probably supply pollen and nectar to the pollinators. This is a fine point, granted, but one that is critically important to populations of pollinators, given the preponderance of double-flowering hybrids at garden centers.


Third, planting a multitude of native species helps secure the future of threatened or endangered insects and animals.

In many regions, songbird populations have declined by half due to human intervention. Some have disappeared entirely. Trees and shrubs that provide shelter, nesting sites, berries or seeds, and which host insects, can help bring back the birds. Abundant biodiversity is a valid protection against the domino collapse of interdependent species.

Civilization has claimed much of the insects’ natural environments, so each of us can play a small part in rebuilding habitats. Annual butterfly counts show drastic declines. Monarch butterflies, in particular, now have less territory available in Mexico, a major overwintering site, than in the past, when they migrated by the millions.

Maintaining brush piles for overwintering insects and animals will help repopulate your landscape early in the season. Hauling those materials off to the recycling center, however, is sure death for the insects tucked inside. Fewer insects = fewer birds and other animals.

Fourth, incorporating native plants into the landscape helps keep the entire food chain intact.

anole lizard

A green anole basking in morning sun.

Insects feeding on plants become food for frogs, lizards, birds, and mammals. They, in turn, become food for snakes, hawks, foxes, and other predators. In many ecosystems, insects native to the region are the foundation on which the entire food chain is based.

A rich diversity of plant material supports an enormous number of insect and animal species. Left undisturbed, populations find a balance among themselves. On the other hand, life in monoculture, such as a lawn, is sparse. Unfortunately, countless urban and suburban neighborhoods have become dead zones with all their natural vegetation bulldozed to the ground.

As we spray, mow, burn, or build in natural environments, species will continue their rapid decline. Certainly, we need places to live and work, but we can also “give back” by planting for wildlife instead of continually killing it off.

Check with your state’s native plant society, native plant finders, BeeCity USA, and the local agricultural extension service for information. In addition to these sources, find a knowledgeable salesperson at the garden center for practical advice and sources of plant material. Garden shows might feature vendors specializing in native plants as this branch of horticulture grows.


Native Species and Nativars


trees, red leaves in fall, native white oak

Red fall color in a native white oak tree.


Plant breeders have brought to the marketplace many cultivars of our native species. These nativars might have purple or red foliage instead of green, or double flowers instead of single. Perhaps they mature at a shorter height than the original species, making them a better fit for small properties.

Garden centers often stock varieties of native species, although those selling native plants might also stock the original species. By a comfortable margin, though, most of the trees and shrubs in U.S. garden centers are cultivars of non-native species. Many originated in Asia, a treasure trove of tempting horticultural novelties.

Red Leaves and Wildlife


native trees, dogwood, red leaves, flower buds

Red fall color and flower buds on native flowering dogwood.


Many trees develop red or burgundy fall foliage. Species native to the eastern U.S. with red fall foliage include sourwood (Oxydendrum arboreum), flowering dogwood (Cornus florida), black gum (Nyssa sylvatica), red maple (Acer rubrum), sugar maple (Acer saccharum), red oaks (Quercus rubra, Q. coccinea), and white oak (Quercus alba).

Beautiful fall color lures camera-toting visitors each year to the mountains, to New England, and to the Blue Ridge Parkway. The U.S. National Park Service provides an interactive map which tracks the progression of fall color.

Red- or purple-leaved cultivars sporting this color all summer are in high demand at garden centers. But if the point of planting trees and shrubs is for wildlife, we want to be sure the plants we choose will attract them. Each plant species has a particular menu of chemical compounds in their tissues that either attract or repel insects and animals. Organisms evolved a tolerance for these compounds…or they didn’t!

Purple and red leaves often repel insects due to their high levels of anthocyanins, the red pigments in the foliage. So, that defeats the purpose, doesn’t it? Not necessarily; these trees might have had green leaves that hosted insects before leaves turned red. Or insects simply tolerate the red pigments.

Oak trees support huge numbers of insects, birds, and mammals at various times during the year. This one genus, Quercus, hosts hundreds of species of moths and butterflies, although they often turn red in the fall.

Before planting a cultivar that stays red all season, though, find out if insects, such as mature caterpillars, will eat the leaves. This indicates that it could host insects for their entire life cycle. If all the larvae are tiny, however, when some larger individuals are expected, most might have crawled off to greener pastures.

If bees spend time working a flower and don’t fly off immediately after landing, that plant could be a good choice. Similarly, holes in the leaves indicate that the plant can host insects. Resources at the local university’s entomology department or botanical garden might have information that could help you choose plants that support wildlife.

The Untold Story

I’ve been packing the past couple of weeks, preparing to move to a rural location in northern North Carolina. I took a break from the work and sat on the deck, listening to the birds and insects.

One of those sounds was the hum of an approaching ruby-throated hummingbird, the only species summering in this area. Four feet away, and less than 4″ long, this tiny bird landed on a twig of the potted native dogwood tree, sitting right next to me. He then hovered near the flower buds (photo, above, with last year’s fall color), and I could see his tongue working the buds, one after another. These buds are tightly closed, yet he found something worth gathering, despite the presence of other flowers nearby.

Within a minute, another hummingbird arrived for the same reason, apparently. The two tiny birds fought for feeding rights, and the second one flew away after some impressive aerial maneuvering among the twigs. The first hummingbird continued searching for hidden sustenance held inside those buds. I’ve never seen this behavior.

My point is this: there’s much about the natural world that remains unobserved—a mystery to us—perhaps lending more credibility to the importance of using native plants in our gardens. (This section added 10/6/21.)


Deciduous Trees For the Eastern U.S.


Here’s a partial list of native and non-native trees that support wildlife. Large deciduous shrubs can substitute for trees in smaller spaces. Many other species might suit your purpose, so visit a few nurseries to see what’s available.

Most trees are sold in large plastic nursery pots, although you might also see freshly dug trees with their roots wrapped in burlap (“b&b”, or balled and burlapped).

  • American hop hornbeam (Ostrya)
  • basswood (Tilia)
  • birch (Betula)
  • black gum (Nyssa)
  • Carolina silverbell (Halesia)
  • chaste tree (Vitex)
  • cherry and plum (Prunus)
  • crabapple (Malus)
  • crape myrtle (Lagerstroemia)
  • dogwood (Cornus)
  • franklin tree (Franklinia)
  • fringe tree (Chionanthus)
  • hornbeam (Carpinus)
  • magnolia (Magnolia)
  • maple (Acer)
  • oak (Quercus)
  • poplar, cottonwood (Populus)
  • redbud (Cercis)
  • serviceberry (Amelanchier)
  • sourwood (Oxydendrum)
  • willow (Salix)
  • winterberry (Ilex verticillata)
  • witch hazel (Hamamelis)


maple trees fall color

Native red maple can have yellow, orange, or red fall color.


Most of the trees listed above have small- or medium-sized species or varieties. Compare suitability of native and non-native species within the genus. The familiar weeping willow, for example, is non-native and quite messy in the landscape. But smaller native willows behave better and host a large number of moths and butterflies.

Research disease resistance, flowers for pollinators, fruits for animals, sun or shade preferences, and soil types. Consider planting species that drop excessive amounts of fruit, acorns, or seedpods farther from the house and paved surfaces.

Also look into the tree’s habit of growth. A specimen with horizontal branches softens the strong vertical lines of a house. Pay close attention to utility poles and wires. Don’t plant trees near them that the utility company will butcher in future years.

Trees with invasive surface roots should be reserved for areas far from structures, pipes, and vegetable gardens. Find out from your town how close to the street or the property line you’re permitted to plant trees. Don’t forget to call 8-1-1 to locate underground utilities before digging.

Chionanthus, the fringe tree (photo, below), is a beautiful bloomer for gardens. This multi-stem plant has 2 species commonly available (C. virginicus, C. retusus), one native and the other from Asia. Male plants have larger flowers, but females set deep blue fruits for birds. The plants, however, are rarely sexed at the nursery.


fringe tree with white flowers

Fringe tree.


The Hollies

Gardeners have used hollies in gardens for centuries. We can choose among deciduous and evergreen species.

Holly Red Christmas Winter Berry - 165106 / PixabayThe hollies (Ilex spp.) are another genus of primarily dioecious (Latin for “two houses”) plants that fruit on female plants. They ordinarily require a male plant, or pollenizer, to set fruit, although holly pollenizers (the males) themselves do not set fruit. Modern breeding techniques have yielded several cultivars that can make berries without pollination.

Ask your nursery salesperson for specifics regarding the need for pollenizers and how close they should be planted to female hollies. Choose the male hollies carefully; they must be closely related to the female holly and bloom at the same time. Incidentally, holly flowers are often nicely fragrant, and the bees love them! Just don’t shear them off after the buds have formed. Pruning should be minimal if you want flowers and fruits. And bees.


The Curious Case of Crape Myrtle

imperial moth

The Imperial moth.

Lagerstroemia indica is an extremely popular landscape tree or shrub in USDA zones 7-9. Crape myrtle, from China and Korea, was first introduced to the southeastern U.S. over 200 years ago. Adapting readily to our hot, humid summers and sometimes drought, it blooms for months despite the adversity.

What makes this non-native plant peculiar is a native moth’s preference for its leaves even when offered a multitude of its local favorites. Last year, I raised caterpillars of the huge Imperial moth. They went for the crape myrtle every time, ignoring all the others. Unless female moths instinctively target this species to host their young, the caterpillars will not likely eat these trees to the bone any time soon.

Several songbirds, including American goldfinches and juncos, feed on the seedpods.


Evergreens

You might prefer an evergreen specimen instead of a tree that drops its leaves in autumn. Look into arborvitae, chamaecyparis, hemlock, certain holly species, juniper, pine, rhododendron, spruce, and yew. Consider the shade evergreens will cast in winter, and whether sunlight might be blocked from entering windows or melting ice on the driveway.

Although not all evergreens are native to this part of the country, they make suitable nesting places and provide shelter in inclement weather. A dense border of evergreens can block fierce winter wind for a considerable distance downwind.

Soon after moving into the Maryland house in the 1980’s, I planted a chamaecyparis with deep green whorled foliage. Although it was supposed to get only 6′ tall according to the nursery, it grew to about 20′, when it was cut down by the people who bought the house from me. I left it in the front yard because birds raised a few families among its evergreen branches every year. And it looked gorgeous in the snow.


trees in the snow, my house in Maryland

Chamaecyparis on the right, after 2010 blizzard. Sourwood on the left.


Good Looks


If you’re landscaping purely for aesthetics, plant a tree with characteristics that appeal to you. It’s your property, after all. Besides, all trees provide cover and nesting opportunities, even if they’re passed up by caterpillars.

Perhaps elsewhere you could grow perennials that offer food to wildlife. Planting a bed of milkweeds among the shrubs, for example, will help the monarch butterflies (photo, below).

While you might not consider insects important in your landscape, and, in fact, have invested considerable time and expense eradicating them, they are primary links in the food chain. A healthy landscape hosts a complex assortment of insects and animals. And with the rate at which natural habitats are losing out to development, it’s no wonder we see fewer ladybugs, butterflies, and songbirds in our neighborhoods.

Creating welcoming landscapes provides resting places for migrating birds. But they need natural corridors all along their path in order to find food and perching opportunities. We can help by planting at least part of our property with them in mind—every one of us! Provide food, water, and trees to rest in, and you might catch a glimpse of a bird you’ve never seen before.

I urge you to adopt a new attitude toward welcoming wildlife. You don’t need 10 acres to make a difference. A well-planted fraction of an acre will encourage many kinds of insects and animals to reside there. If you let them eat your plants and the sprayer hasn’t been used once this year, well done!


Monarch Butterfly Laying An Egg - Chesna / Pixabay

Monarch butterfly on milkweed.


Before Planting Trees


Let’s imagine a 2-story house and an appropriately proportional medium-sized tree. Your landscape plan calls for locating this tree off the southwest corner in the front of the house.

To prevent branches from rubbing against the siding in the future, you’ll want to plant the tree far enough from the house. Divide the mature spread of the tree by 2. Because plants tend to grow larger than the dimensions printed on the label, add a few feet to the measurement. So, a tree with a mature spread of 25-30′ should be planted 15′ or more from the corner.

While that little tree might look lonely out there, it will grow. Maybe that’s the extent of your garden project this fall. Or perhaps you’d like to develop a full garden on that side of the house with an underplanting of shrubs, perennials, and ground covers.

Walking a pathway through the garden to the side yard will feel like a walk through a park. This is a good solution where space is limited between your house and the neighbor’s. Consider your neighbor, though, and don’t plant too close to the property line. Perhaps the two of you could create an appealing garden that fills the space between both houses.


But first, it’s soil prepplease turn to page 2…


Headings:

Page 1: Are You Ready To Plant Trees?, Native Plants vs. the Non-Natives (The Benefits of Native Species, Native Species and Nativars, Red Leaves and Wildlife, The Untold Story), Deciduous Trees For the Eastern U.S. (The Hollies, The Curious Case of Crape Myrtle, Evergreens), Good Looks, and Before Planting Trees

Page 2: Soil Preparation For Trees (Slope, Outline the Bed, Heavy Clay, “How Deep?”, Adding Amendments, Organic Matter, and Time To Plant Trees (Trees In Pots, B&B Trees, Backfill, Edge, Mulch, And Water)

Return to the top

Plant Trees To Transform Your Landscape, Part 1


2021


It’s Time To Plant Trees!


As summer’s sizzling temperatures begin to cool off, our thoughts turn to new gardening projects. Fall is a great time to plant trees and shrubs. At that time, garden centers bring in fresh plant material, so you’ll have a wide variety to choose from.

After leaves drop from deciduous plants, roots no longer need to provide water to foliage, making fall the perfect time for landscaping. New roots, though, continue to grow well into autumn, while soil temperature remains above 40°F. By springtime, new leaves will draw water from a more extensive root system, so you won’t have to water as often as you would when planting trees in leaf.

Although you can plant trees and shrubs in full foliage, they will need frequent irrigation to get them established. The warmer the temperature, the more water the plant will require. Summer sun bearing down a dark nursery pot stresses the root system and can prevent root growth on the hottest side of the pot. It follows that during the summer months, roots would rather be in the cool earth than exposed to hot sun. Planting leafy trees just requires more attention from the gardener.

Most evergreens also can be planted in autumn. Their foliage at that time transpires less water to the atmosphere as temperatures cool down and day length shortens.


trees and sky


Room For Improvement


During my search for a new home, what always attracts my attention first is the presence of mature trees. The absence of trees means more grass to mow, for a while, anyway. Not my cup of tea.

Because the Covid-19 pandemic has kept us closer to home, we can’t help but notice areas that could use improvement. Is the sunroom or the shed a bit too toasty in the afternoon? Gazing at the computer screen hour after hour? Now that you’re working from home, looking upon a pretty garden outside the office or pulling a few weeds would provide a needed break. Perhaps you’ve discovered that connecting with nature relieves stress and gives you a feeling of calm and comfort.

Those are just a few reasons to plant trees and spruce up our gardens. Converting high maintenance lawns into gardens with colorful trees, shrubs, and flowers not only enhances aesthetics, but also increases the value of our homes. And with all this talk of carbon footprints and deforestation, perhaps you’re eager to participate in the solution.


Plant Trees To Transform Your Landscape, In Two Parts


Part 1 of “Plant Trees To Transform Your Landscape” addresses seasonal changes, drawing a landscape plan, reasons for planting trees and shrubs, slope, and practical considerations.

Part 2 of “Plant Trees To Transform Your Landscape” details soil preparation and the process of planting trees in the landscape. I also write about native plants vs. the non-natives, and how they affect populations of insects and animals.


The Sun’s Path


sun's path

The sun’s path across the sky in North Carolina, summer and winter.


Start thinking about your landscape now, before summer’s discomfort fades from memory. Notice how the sun’s arc changes from month to month, and how, by mid- to late summer, it’s already lower in the sky. My little succulents lining the south-facing bay windows get more direct sunlight now than they did a month ago, when the sun was directly overhead.

You can block much of the heat and sunlight falling on the south (northern hemisphere) or west side of the house with a deciduous tree or a group of trees. If you want maximum sunlight coming indoors during the winter, however, avoid planting trees right outside south-facing windows. Instead, shift the trees toward the southwest or the west, which will give you more sun in winter and shade on a hot summer afternoon.

Although deciduous trees drop leaves in autumn, bare branches and twigs will cast some shade. But with carefully placed trees—not directly south—shade will come from smaller twigs on the canopy’s periphery rather than from stout trunks and limbs.

Large evergreens block winter sun at a time when it is most welcome if they’re planted near south-, southeast-, or southwest-facing windows. Consider planting them farther out into the landscape and where they can reduce winter wind from the north or the west. Or use shorter evergreens that mature below windowsill height. Thick borders of twiggy deciduous plant material can decrease wind speed, but not as effectively as evergreens.


For the Record

It helps to keep a record of these seasonal changes. Visualize how tree placement will affect sunlight falling on your house or coming through the windows. Knowing a tree’s mature height and spread will help determine where to place it for maximum solar gain in winter and shade in summer.

Avoid planting trees too close to the house, where leaves, flowers, and fruits will litter the sidewalk and clog the gutters…not just in year 1, but also in year 31. Realistically, though, debris will get into uncovered gutters and leaves will swirl around paved areas, but planting trees far enough from the house will obviate the need for annoyingly frequent maintenance. In addition, limbs growing toward the house will require trimming, and the result often falls short of appealing.

These are merely guidelines that I’m suggesting, but, ultimately, it’s your property and your choice.

Let’s not forget the advantages of planting evergreens for winter protection. A dense planting of evergreen trees and shrubs can mitigate the brutal impact of winter’s fury. That can make living in and working around your home more comfortable, while lowering energy bills at the same time. Remember that winter shade on an icy driveway will delay rapid melting.

Try to recall the direction of prevailing winter winds, which usually varies from the direction of summer breezes. You can research local data from the National Weather Service.


Drawing Up the Plans


sketch to scale when planting trees


Tools Of the Trade

For accurate and detailed drawings, use an architect’s scale, a triangle (for straight edges and right angles), graph paper (for the base plan), tracing paper, a mechanical pencil, and an eraser. A plastic template with round holes of varying widths can be useful for extensive landscape projects.

The final design can be drawn on the more substantial vellum, if you wish, using colored pencils and markers. But, for those homeowners intent on planting a few trees and extending a garden, paper and pencil might more than suffice.

Community colleges and, sometimes, botanical gardens offer classes in landscape design. They might have sources for these tools, or you can find them at art supply companies.


Start the Sketch

Draw a sketch of your home’s footprint and property lines on graph paper. Use dimensions from a copy of the plat plan, if you received one when you bought the house. Pencil in existing vegetation, hardscape (structures and solid surfaces), prevailing wind directions, drainage patterns, slope, and a north arrow.

The 1/4″ scale, where 1/4″ on paper equals 1′ in the landscape, was satisfactory for almost all residential designs. For the largest projects, though, I used the 1/8″ scale. I measured the property, copied the plat plan, and drew, to scale and in permanent ink, all features that were to remain. This base plan depicted an aerial view of the property’s features, including locations of doors and windows in the home’s outline.

Then I drew preliminary plans, in pencil, on tracing paper taped (with removable drafting tape) to the base plan. You might go through several sheets of paper as different ideas take hold. That’s why it’s available in rolls!

Sketch ideas for how your family will use the property. You might include spaces for a sunny vegetable garden, shrubs and trees for butterflies and nesting birds, or a pond. In that case, pencil in the tallest plants either far from those areas or to the north, where they won’t cast shade for many years. Trees that grow less than 15′ or 25′ tall at maturity fit more comfortably in tightly clustered neighborhoods. Consider your neighbors, too, when including trees in the plan.

Now, of course, many landscape designers use software programs that cut short the labor involved in drawing plans by hand.

Also, keep in mind that the actual layout of the plants might necessitate shifting them somewhat from the locations drawn on paper. Before planting, place the potted trees and shrubs in their intended locations, and double-check the placement from all angles.


Elevating Your Skills

Drawing elevations, or vertical perspectives of the house as it sits in the landscape, supplies a more complete picture of your property. We plant trees, shrubs, and other plants around the house to anchor the structure to the land. Keep in mind that 10′ indoors looks much smaller outdoors, so expanding the beds will impart more appropriately scaled proportions.

An elevation of the front of the house will help you envision how the plantings will look from the street. Likewise, views from the back windows could be improved by adding a tree, or 3 trees, and masses of colorful shrubs and perennials near the fence. Remember to include hardscape and windows, doors, and the roof in your sketches. Then pencil in the existing plants from near to far, to scale, and see how they layer against each other. Additional drawings might depict tentative designs starting with no plants or having the biggest offenders removed.

This extra step could illustrate the need for some relief from all the short plants on one side of the property, or how the other side is too heavy with evergreens. If you add color to the elevation, you’ll see where you could repeat a cluster of flowering plants or where there’s too much yellow.

Maybe there are too many mounded forms, and the composition could benefit from a bold upright specimen or a fine texture, such as ornamental grass. Details in the elevation drawings help illustrate where contrast, color, height, repetition, or depth might be missing. Be sure to consider the color of the house and the trim when designing your landscape.

Simple Might Work Better

Perhaps the elevations reveal how busy or spotty the landscape appears, and how it could benefit from a simpler menu with fewer types of plants. The elements in the home’s landscape, when viewed from the street or from a distance, look more harmonious when the garden has only a few specimen varieties and masses of supporting plants.

This doesn’t rule out all those fascinating little plants tucked in here and there. But use those smaller plants along a path or by the patio to appreciate up close.

Symmetry vs. Balance

Planting symmetrical gardens on both sides of the front door might be your go-to style. Sure—that’s easy! But to give your landscape that something extra, try to achieve balance without symmetry. Balance requires using some of the same or similar plants on both sides, but not necessarily in the same quantities.

Symmetry is more difficult to maintain when one arborvitae grows faster than the other due to differences in sun exposure. Or one bed of reblooming daylilies grows better than the one that’s closer to the neighbor’s Norway maple. And most homes simply aren’t symmetrical.

Depth Perception

Imagine your front yard with taller plant material in a raised bed near a streetside corner. Maybe a spacious area could use a few large beds, which remove even more of the lawn. Dimensions of the property and existing features will determine the most appropriate placement of these islands. The plans I drew incorporated irregularly shaped beds, with broad, naturally curved edges instead of straight lines.

Adding a small tree or an uneven number of shrubs with drifts of perennials and ground covers introduces the concept of depth, partially hiding the front of the house from full view. Some open space—a void—near the center, showing the front entrance, creates a contrast. This sense of mystery—where not everything is revealed in one glimpse—adds a dimension that’s hard to describe. But you’ll know it when you see it…or don’t see it.

One tip about planting a tree: don’t plant it dead center in the yard or in a bed! Use the “Rule of Thirds” when locating the tree. Place it closer to the edge of the property, framing the view, or about one-third of the distance from the far end of a bed. A tree in the center abruptly bisects a view, which is uneasy on the eyes. Similarly, I prefer not to plant an upright evergreen between 2 windows.

If space is limited between your house and the neighbor’s, consider planting a generous bed—the full width—on your property. Then add a mulch, brick, or flagstone path from the front yard to the side yard, and plantings on both sides. Given ample room, place the tree on the outside of the path. This gives you that nice feeling of walking through a park.

Perhaps you and the neighbor can develop a landscape together for a more harmonious setting. When I lived in Maryland, a neighbor and I planted the entire area between our driveways, but the man who bought my neighbor’s house replaced all the plants on his side with sod. “Just in case”, I had planted a monarch birch on my side of the property line before he tore out blooming shrubs and perennials. Nevertheless, the see-through character of the finely-twigged birch tree lent that feeling of depth to our front yards.


House Wood Family Driveway - paulbr75 / Pixabay


Take This Photo, For Example

Taking advantage of the depth of the front yard gives opportunities for repeating plant material without having to rely on symmetry. Research shows that people attach greater value to properties with attractively orchestrated plantings comprising wider beds and curved edges.

Enlarging the foundation plantings by bringing in a specimen and groups of plant material is usually more appealing. Try adding large curved beds in your drawings rather than narrow beds lined up against the wall. Curves soften rigid straight edges.

In the photograph, above, this landscape would gain depth by adding a new curved bed in the corner between the near side of the sidewalk and the driveway. I’d plant a small tree, several small flowering shrubs or evergreens, and flowers in this bed. Lastly, repetition, using the same ground cover on both sides of the sidewalk, not necessarily lined up, completes the picture. (Well, I might rethink those ornamental grasses…and…)

When installing a new sidewalk near the house, place it farther from the house, if possible, to accommodate more creative plantings.


Options For Cooling


Diagonally off the northeast corner of my last house in Rockville, Maryland, I planted a sourwood tree (Oxydendrum arboreum). This deciduous tree has spectacular red fall color. Although the tree is a slow grower, I selected it for its ornamental features: multi-stem trunk (usually sold with a single trunk), fine twigs, flowers after the peak spring season, pest-free foliage, and long-lasting fall color. With all those desirable features, I forgave its persistent seedpods.

During the growing season, the sourwood blocked morning sun, from the east-northeast, and helped cool the living room and the master bedroom upstairs. But, with winter’s sun rising in the east-southeast, the leafless tree did not affect light entering those rooms. In regions where the temperature climbs quickly early in the day, consider planting a tree to shade the morning sun.

styrax snow charm

Japanese snowbell.

On the west side of the property, monarch birches (Betula maximowicziana) provided afternoon shade. The fine texture of their leaves and branches cast a delicate shade, and those beautiful chalky white trunks contributed year-round interest. This species can be quite variable in trunk color, from white to gray to brown. I also planted the species Japanese snowbell (Styrax japonica), a small umbrella-shaped tree, off the west side of the brick patio.

When we first moved into the house, there was no relief from intense summer sun. Planting trees made good sense for this house with little insulation, original single-pane windows, and an inefficient HVAC system.

Over the next three decades, I renovated the entire house, insulated the attic and under new siding, planted a woodland, and greatly reduced our energy bills. Replacement double-pane windows, with that heat-reflective coating, were expensive, but worth it.


Headings:

Page 1: It’s Time To Plant Trees! (Room For Improvement), The Sun’s Path (For the Record), Drawing Up the Plans (Tools Of the Trade, Start the Sketch, Elevating Your Skills, Simple Might Work Better, Symmetry vs. Balance, Depth Perception, Take This Photo, For Example), and Options For Cooling

Page 2: Beautiful Trees In the Garden (Lessons From Well-Designed Gardens), First, Call 8-1-1, Establish the Hardscape, Dealing With Slope, Why Should We Plant Trees and Shrubs? (Planting Trees and Shrubs Can:, Finding Help), Choosing Plant Material, and Next: Part 2

Return to the top of Page 1

How To Plant a Strawberry Jar


How To Grow Plants In a Strawberry Jar


blue glazed strawberry jar planted with violas

A glazed strawberry jar planted with violas.


Have you ever wanted to plant a strawberry jar but just weren’t sure how to do it? In this article, I’ll provide lots of tips that will ensure a successful outcome.

Strawberry jars (or strawberry pots), those with pockets on the sides, make fascinating container gardens. You can find jars made of terra cotta or plastic, and ceramics with beautiful glazed finishes.

Over the past several years, the stackable plastic sorts have become popular. They are less expensive, true, but it’s hard to walk away from that ceramic strawberry jar that caught your eye (and your heart) at the garden show.

Yes, strawberry plants can be grown in strawberry jars. But, there are many other options, including succulents, herbs, annuals, and even houseplants.


Planting Succulents In a Strawberry Jar


Hen And Chicks in a strawberry jar

A clay strawberry jar with hens and chicks.


Terra cotta jars dry out fast because the material is porous, so we must manage them carefully. The succulents, however, love terra cotta!

Dwarf succulents, such as hens and chicks (Sempervivum tectorum, S. arachnoideum), are perfect candidates for strawberry pots. A related genus, Jovibarba, grows in a similar fashion. Both need full sun and don’t mind drying out now and then. Excess growth is easily plucked off and planted elsewhere. The little “chicks”—offsets growing from stolons—cluster close to the “hen”.

To add a little variety to the hens and chicks, include other hardy succulents, such as the small growing Sedum dasyphyllum, S. makinoi ‘Ogon’, S. spurium, and S. ‘Angelina’. Plant Sedum ‘Ogon’ on the north side to avoid sun scald. Most of these sedums are less winter hardy than the hens and chicks, so check their hardiness zones.

Sempervivum varieties grow rosettes of foliage (photo, above) and are available in many colors and bicolors, including green, gray, red, and burgundy. More recent introductions include colors of the sunset in their leaves (‘Gold Nugget’, ‘Orange Glow’). Some varieties have spider webbing, with fine white hairs connecting one leaf tip to another. The leaves of a variety called ‘Oddity from Albidum’ look as though they’ve been rolled into tubes.


When It Gets Cold

Hens and chicks are hardy to USDA zone 3 or 4 when they’re planted in the ground. Because roots are exposed to colder air temperatures, however, potted hens and chicks are hardy probably up to the warmer zone 5 or 6.

I’ve seen clay strawberry pots filled with hens and chicks that had been left out all winter in zone 6 Maryland. Because hens and chicks are hardy perennials, they normally survive winter weather. To avoid damaging the pot, though, it’s best to prevent it from repeatedly freezing and thawing. Clay absorbs water, and water expands when it freezes, so, eventually clay pots will weaken.

Keeping the pot quite dry or protected in a sunny shed during freezing weather will help it last longer. Another option is to remove plants from the strawberry jar and heel them into the garden for the winter. Then you can clean the pot, store it dry over the winter, and replant the same plants, or parts of them, in spring.

Gardeners living where winters are moderate to mild can leave hardy succulents outdoors, but others living in cold regions risk losing their terra cotta strawberry pots. You can use plastic strawberry pots instead. Ceramic pots labeled “frost resistant” probably will survive winter weather.

For non-porous pots (plastic and ceramic) that will be planted with succulents, mix a large quantity of extra pine fines, coarse sand, and/or perlite into the soil for faster drainage. Because clay strawberry jars dry out much faster than non-porous pots, they’re the better choice for succulents. However, with enough drainage material, succulents should do well in any pot.


The Tender Succulents

For the summer growing season, add rooted cuttings from tender (non-hardy) succulents (Echeveria, Haworthia, Gasteria, miniature burro’s tail, dwarf aloe, small cacti, etc.) for their unique coloring and form. Use small, clustering types of plants in the side pockets. Plant a few larger or taller types in the top of the pot. Avoid plants that grow too large because they’ll make the pot appear top-heavy.

All the tender succulents will perish if left outside to freeze. If you want to save them, place the pot in a sunny greenhouse. If you don’t have one, transplant the plants into clay pots at the end of the summer. You could also take cuttings in mid- to late summer so they’ll be rooted by early autumn. Keep tender succulents in sunny windows indoors.


Planting Herbs In a Strawberry Jar


herbs in a clay strawberry jar

Herbs newly planted in a clay strawberry jar (waiting for basil for the top.)


Strawberry jars planted with flavorful herbs were sure sellers at the garden shows. When using ceramic containers, check to see if they have non-toxic glazes. Sometimes you’ll see a sticker indicating that the pot is “not suitable for contact with food”, so I would not use those pots for herbs.

Violas planted in the glazed strawberry jar (photo, top of article) sold years ago, in late winter, at the Maryland Home and Garden Show. The manufacturer guaranteed that their pots were resistant to cracking in freezing weather and safe for edible plants. Win-win!

If the root ball doesn’t quite fit the shape of the pocket, a little molding will be necessary. Smaller divisions, younger seedlings, and rooted cuttings fit better into tight pockets. Look for plants in 2-2½” pots or cell packs, or grow your own from seed.

Planting mint with other herbs in a strawberry jar will result in mint growing from every opening! Therefore, it’s best to leave mint and lemon balm to themselves or construct an iced tea pot for the current season.

All plants will get adequate sunlight when growing outdoors in summer, especially if you turn the pot periodically. However, with limited sun indoors, it’s very difficult for all plants in a strawberry pot to get enough sun. This kind of pot will grow well in a sunny lean-to or a greenhouse. But, for growing herbs indoors in winter, choose a pot with a single growing plane. A window box planted with herbs or a simple pot will work better.


Which Herbs?

Dwarf and creeping varieties of herbs do well in strawberry jars. Use what you like, but trim the larger varieties more often to keep them in scale and for new foliage. Potted plants generally grow to a more restrained size compared to those planted in the garden. Look for herbs at local garden centers or farmers’ markets.

Here’s a sampling, with habit of growth:

  • Basil—small growing ‘Boxwood’, ‘Fino Verde’, ‘Marseillais Dwarf’, miniature purple, ‘Yevani’, ‘Spicy Globe’; the larger ‘Genovese Compact’, ‘Mrs. Burns’ Lemon’, ‘Obsession’ (or other basil downy mildew resistant varieties), ‘Siam Queen’ Thai. Upright, shrubby.
  • Chives—look for the finer-leaved variety ‘Dolores’, but any will work. Upright, tufted.
  • Cilantro—‘Calypso’ and ‘Cruiser’ seem to be the sturdiest, but all are short-lived. Clumping, tufted.
  • Dill—use small varieties, such as ‘Fernleaf’, ‘Teddy’. Upright.
  • Oregano—Greek, ‘Hot ‘n’ Spicy’, Italian. Clumping when young, then trailing.
  • Parsley—curly or flat-leaf varieties, try to find the dwarf flat-leaf ‘Titan’. Upright, tufted.
  • Roman chamomile—fragrant foliage but few flowers. Clumping, creeping.
  • Rosemary—‘Blue Boy’ (dwarf), ‘Chef’s Choice’ (intermediate), ‘Irene’ and ‘Mrs. Howard’s Creeping’ (prostrate varieties), ‘Golden Rain’ (variegated), ‘Hill Hardy’, ‘Salem’. Upright shrubby or trailing.
  • Sage—‘Berggarten’, dwarf silver sage, ‘Icterina’ (gold-variegated), purple, ‘Tricolor’ (mildest flavor). Upright, shrubby.
  • Savory—creeping dwarf savory. Clumping, spreading.
  • Sweet marjoram—‘Compactum’ (my favorite) and others, similar to oregano. Upright shrubby or trailing.
  • Thyme—‘Caraway’, French, ‘Golden Variegated’ (variegated lemon), ‘Hi Ho Silver’ (variegated), ‘Lemonade’, ‘Silver Edge’, ‘Transparent Yellow’, ‘Wedgewood’, and many others. Plant pots with several kinds of thyme for an “All Thyme High”. Clumping, trailing.
  • Viola—a smaller cousin of the pansy, edible flowers and leaves, needs cool weather. Clumping.

Herbs have different life cycles. The annuals (basil, cilantro, dill) need to be replaced once or twice each year. Parsley and viola are biennials. The rest of the listed plants are perennials, but check their USDA hardiness zone ratings to see how much cold they’ll tolerate.


Other Plants For a Strawberry Jar


Colorful annuals spilling out of a large strawberry pot is a lovely sight. For a garden that gets shade or dappled shade, look for the newer ‘Imara’ impatiens, which is impatiens downy mildew resistant. Wax begonias and miniature fuchsias are more possibilities for morning sun or dappled shade.

Dwarf vinca (annual and perennials varieties), bacopa, fanflower (Scaevola), calibrachoa, miniature petunia, diascia, nemesia, alyssum, small varieties of coleus, and plants used in miniature gardens brighten sunny spots. Grow small varieties of scented geraniums for their wonderful fragrances.

Try planting a strawberry pot with houseplants, such as Ceropegia (string of hearts), wandering Jew (Tradescantia spp.), Pilea ‘Aquamarine’, creeping Charlie (Pilea depressa), Peperomia, baby tears (Helxine), moses-in-the-boat (Rhoeo), and dwarf ferns. Small-leaved cultivars of variegated English ivy and rex or rhizomatous begonias add foliage color. Summering outdoors results in vigorous growth, so cut back overgrown plants.

Use plants that need the same conditions, either moist or somewhat dry, sunny or shady. I’ve included photographs of a few candidates, but there are many more worth considering:


Headings

Page 1: How To Grow Plants In a Strawberry Jar, Planting Succulents In a Strawberry Jar (When It Gets Cold, The Tender Succulents), Planting Herbs In a Strawberry Jar (Which Herbs?), and Other Plants for a Strawberry Jar

Page 2: Planting a Strawberry Jar (The Process), and Maintaining the Strawberry Jar (Light, Water, Fertilizer, Pruning)

Return to the top


Herb Gardens: How To Grow Herbs In Pots


2021

Updated 3/14/2024


Herb Gardens: The Scents and Flavors of Summer


herb gardens


Fresh ‘Genovese’ basil for the garden salad…savory French thyme on grilled fish…chives and flat parsley to enliven the egg salad and browned potatoes. Yummy! This lengthy article describes how you can plant and enjoy growing herb gardens in containers. Growing potted herbs on the balcony or the sunny patio is the perfect solution if you have no garden space.

Potted herb gardens can be moved around to get just the right amount of sunlight the plants need. They can enjoy the morning sun on one side of the deck, and a few additional hours of afternoon sun on the other. As the sun’s arc changes from one season to the next, you can reposition the plants to capture the most light.

Several years ago, a gentleman asked me to pot herbs into a large strawberry jar. He traveled frequently between his residence and a summer home at the beach. Because he was a keen cook, he planned to take this herb garden with him to the next kitchen, wherever it was. So, if not prohibited where you’ll be traveling, consider taking your herb garden with you on your next road trip!


The Gift That Keeps On Giving

Place herb gardens on the picnic table for family and guests to sample as they enjoy the day’s barbecue. And then, in autumn, you can continue the harvest by growing them in sunny windows indoors.

Using herbs to flavor foods might help you kick the salt habit, or at least decrease its consumption. In addition to their wonderful flavors, herbs have high concentrations of beneficial antioxidants, which contribute to our well-being. In decreasing order, oregano, rosemary, parsley, basil, and thyme contain the most antioxidants among the common herbs.

I’ve sold herb gardens as wedding or birthday presents, for Mother’s Day, Father’s Day, Christmas, and as housewarming gifts. Families purchased herb gardens for retiring parents, who planned to devote more time to gardening. Over decades of selling potted plants, I estimate that about half of these delightful combinations were given as gifts.


Choosing the Right Containers for Herb Gardens


clay pots


Style and Size

Visit any well-stocked garden center and you’ll see an extensive selection of terra cotta (clay), stoneware, ceramic, wood, and inexpensive plastic pots. Containers are available in all sizes and shapes. Plain or ornate finishes reflect modern, rustic, or classic styles. You’ll also find containers specially fitted for deck railings or for hanging on a wall. Plant a half whiskey barrel with one or more mint varieties, and let them take over…in the pot, that is.

Some ceramics are glazed with materials that should not be used with edible plants. There might be a sticker on the bottom indicating this.

rabbit

Rabbits are cute, but…

Small clay pots dry out faster than large non-porous pots. Just one day too many in direct sun without water could kill the plants. Lining a clay pot with food-grade plastic and poking a few holes in the bottom will slow the evaporation to a degree. To be sure, your herb gardens—especially small ones—will need daily checking.

Potting herbs in hanging baskets is a great solution if you live where deer and rabbits are waiting for the instant you turn your back. They’re particularly attracted to parsley, cilantro, and dill.

Herbs need excellent drainage, so always choose pots that have holes in the bottom. Other than that requirement, just select the pots that appeal to you. Many gardeners look for a consistent style, favoring pots that harmonize with each other and with the setting.


Window Boxes


clay pots for herb gardens

Clay pots for herb gardens.


A popular container for herb gardens is the window box. Window boxes come in many styles, from quite simple to highly ornate. They’re available in terra cotta (lower shelf in photo, above), plastic, and lined or unlined wood. Plastic containers often have plugs in the drainage holes; remove them to ensure proper drainage.

You can hang them outside windows in securely anchored frames; lighter weight containers are a safer bet. Or simply place them on a brick wall, along a sidewalk, or at the edge of a sunny patio. Several herbs in clay pots look charming clustered together on a table. Where wind is a concern, use heavier pots, but don’t place them where they could blow off the balcony to the sidewalk and harm someone.

Cracking

Handle clay pots carefully so they won’t crack. Clay pots might tolerate one or a few seasons of freezing weather; eventually most will begin to spall or crack. When clay absorbs water, and the water expands as it freezes, the clay degrades. Denser terra cotta (Italian for “baked earth”) survives more winters than softer clay.

This clay pot (photo, right) spent almost a decade outside, and it cracked this past winter. Until it crumbles, it will serve some purpose in the garden. I usually used Italian clay pots for my plant business and acknowledge that even better-quality pottery has limits.

Switching herbs into frost-resistant pots where winters are cold is one option. Other options include growing them indoors, in a cold frame, or in a conservatory—in other words, where the pots won’t freeze.

Tuscan Style

Years ago, I planted two herb gardens for a customer in Potomac, Maryland. They sat on a low stone wall surrounding a sunny Mediterranean-style garden. The Italian clay window boxes were over 4′ long and weighed more than 50 pounds empty. They were beautiful when finished—all those shades of green, purple, gray, variegated white and yellow—and the fragrances!

Even without flowers, potted herb gardens have their own unmistakable charm. Green algae and that white coating (efflorescence, from mineral salts) building up on clay pots won’t harm the plants but will amplify the rustic factor. And, yes, you can clean it off if you prefer.


Long Toms

Long toms, also called rose pots, are taller than they are wide (top shelf and part of next one, in photo under “Window Boxes”). Variegated lemon thyme or prostrate rosemary cascading over the side are perfect choices.

These pots are available in tiny sizes only 2″ wide, but 4″, 5″, and 6″ pots are more useful. Offer small herb containers as party favors for special occasions or use them to assign seating around the table.

While in Maryland, I potted herbs into 3″ stainless steel long toms for the tables at a popular seafood restaurant. I switched them out every couple of weeks.

I used to purchase clay long toms from a wholesale supplier in Baltimore. They normally came without drainage holes, so I added them, using a reversible drill and a masonry bit. Easy.


Plain Pots

azalea pots for herb gardens

“Azalea” pots are 3/4 as tall as they are wide.

Reusing what you have sitting around the garage is most economical.

Clean out those 12″ hanging baskets that held annuals last year, and repurpose them for herb gardens, with or without the wires. Green plastic pots last longer than white ones, which degrade faster in direct sun.

Empty the tired old soil into the shrub gardens and purchase new potting soil for your project. Some plants, particularly basil, are susceptible to several soil borne diseases. Starting with clean materials, therefore, is critical for their success. Wipe down used pots with a 10% bleach solution, rinse, and air-dry…for basil, at least.

Azalea pots are a bit shorter than they are wide and lend a more anchored look to potted plants. I prefer azalea pots over standard pots (height = width). It’s a personal choice, of course. You can pot them up with one plant or use a larger pot for a few plants.

Topiary

Rosemary and lavender topiary standards (the lollipop shape) look great in clay azalea pots, with some moss growing on the soil surface. Grow them indoors, in full sun, where they’re protected from hard winter freezes. But keeping them outdoors—even in chilly weather—ensures they get enough direct sunlight.

Try training the woody herbs “quasi-bonsai” style, with knobby stems, a few little weeds, and a fallen “log” embedded in the moss. Allowing the clay to mellow with algae and efflorescence, and those pots aren’t so plain after all.


Strawberry Pots


herbs in a strawberry jar

Lemon thyme in a clay strawberry jar.


Planting a strawberry jar is a bit more complicated, so it deserves a post of its own. If your attempts at planting a strawberry pot have been less than successful, refer to this article for solutions.


Pot Color

A fine point often overlooked in container gardening is the color of the pot. In summer, with scorching sun bearing down on a dark pot, that heat transfers to the soil. Consequently, the root system will be sparse on the hot side of the pot. Plants are happier without this stress.

You can alleviate their discomfort by shading the root system in summer with smaller pots of heat tolerant plants, such as dwarf zinnias or vinca. Or use white pots in hot weather to lower the temperature.

In autumn, I plant cool season greens and herbs in black nursery pots. Dark colors absorb more energy from the sun. Warming the soil a moderate amount helps limit the deep freeze in winter. The longer the roots can function, the more foliage I’ll be able to pick.

Curiously, clay pots with moist soil can feel cooler to the touch. This is due to evaporative cooling, where the temperature decreases as water evaporates from the surface. So, even in hot weather, a clay pot won’t feel as hot as most other pots. Your skin performs the same function.

Choosing pot colors might not be an option. Alternatively, plant herbs that dislike heat (such as cilantro) on the cooler north (northern hemisphere) or east side of the pot.


Choosing the Right Plants for Herb Gardens


A Proper Fit

First, decide which herbs you want to grow. Look for smaller varieties of the herbs you use in cooking, choosing young but well-rooted transplants. These will adapt better to containers than full size varieties. Sometimes there’s not much choice; maybe only ‘Italian Large Leaf’ basil is available. Okay, I’d rather have it than no basil at all, so there are 4 options when using large-growing herbs:

  1. use fewer herbs in the herb garden to make room for the big basil
  2. keep the basil in the combination pot, but cut it back more frequently
  3. find a larger pot for the herb garden
  4. grow this large basil by itself

We need to find a balance between plant size and available space relative to what other plants need. You can fit a few plants together, but they suffer when cramming all the herbs you like into too small a container. Plants growing in pots, however, don’t grow as large as those in the ground.


Seeds and Transplants

Seeds can be sown directly in the pots, but thin them once they sprout. Remember that some species are very slow to germinate, and you most likely will have better success with transplants. For new gardeners, I suggest buying young plants for now, and perhaps experimenting with seeds during the summer. But if the herbs you need are available only as seed, go for it.

Garden centers and farmers’ markets offer a wide variety of herbs grown as transplants. Some growers start them from seed, cuttings, or plugs (very young plants) several times a year. In one growing season, you might find dozens of varieties of basil alone! So, shop around for the local herb lady, and request certain plants she might grow for you.

I included a section on Propagating Herbs, which you’ll find on Page 5.


What’s the Difference Between Herbs and Spices?


Although we use the two terms interchangeably, there is a difference between them. Herbs are leaves of edible plants, and the focus of this article. Spices comprise all other parts of edible plants—bark, seeds, roots, fruits, and flower parts.

Cilantro leaves and coriander seeds come from the same plant, but those interested in this minor technicality differentiate between the herb and the spice.

Turmeric, ginger, vanilla extract, nutmeg, cinnamon, and black pepper are spices that we keep in the pantry. Saffron, the world’s most expensive spice, comes from the 3 threadlike female parts in a fall-blooming Crocus sativus flower.


Return to the top of Page 1

Headings:

Page 1: The Gift That Keeps On Giving, Choosing the Right Containers for Herb Gardens (Style and Size, Window Boxes, Long Toms, Plain Pots, Pot Color), Choosing the Right Plants for Herb Gardens (A Proper Fit, Seeds and Transplants, What’s the Difference Between Herbs and Spices?)
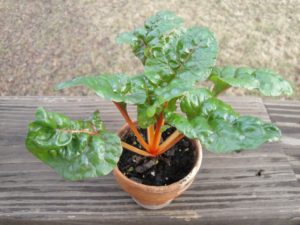
Page 2: Which Herbs Are Annuals? Biennials? Perennials?

Page 3: Herb Gardens Close To the Kitchen, Combination Pots, Potting Up Herb Gardens, How To Maintain Herb Gardens (Light, Natural Sunlight, Artificial Light)

Page 4: Tips For Watering Herb Gardens (Transpiration, Why Plants Wilt, Testing for Moisture, From Season To Season, Water Temperature), Fertilizing Herb Gardens (Organic or Synthetic?, Macronutrients and Micronutrients, How Often To Fertilize Herbs, When We Don’t Fertilize, The Taste Test), Temperature (As Temperatures Change)

Page 5: Common Pests (Better Options To Eradicate Pests, Bacillus Thuringiensis, Horticultural Oil, Organic Sluggo, Plain Water), Girth Control (It’s Thyme For Drying, Which Herbs Dry Well?), Renovating Herb Gardens (Propagating Herbs)


Pothos: An Easy Houseplant for Beginners

2021


Of Pothos and Pandemics


The Year 2020 was one like no other. The threat of catching Covid-19 or the fear of passing it to others altered our lifestyles as nothing before had ever done.

Restaurants closed, schools closed, parking lots and streets were empty. People lost their jobs, businesses failed, and many tried to remotely fulfill the demands of work while caring for children at home. The U.S. Centers for Disease Control claims that over 500,000 people died, as of this writing, of or with Covid-19 since the pandemic began just over a year ago. Tragically, many of us lost friends or family members.

As vaccinations increase and infection rates decrease, some schools are opening their doors and life is inching back to normal. The pent-up demand for things we denied ourselves will heat up the economy this year—travel, lunches out with friends, shopping at brick and mortar stores…


The Joys of Gardening

Horticultural trade magazines report anywhere from 15 million to 30 million newcomers, last year, to the joys of gardening in the U.S. That’s huge!

Most garden centers got off to a dismal start last spring. But they more than made up for it as online ordering and curbside pick-ups became the new norm. Those where states deemed these companies “essential” were permitted to stay open.

Since we were spending more time at home, many chose to make their living spaces more comfortable. So, they upgraded kitchen counters or replaced drafty windows with a super-energy-saving model. Maybe you painted the family room one of those modern colors you’ve been wanting.


Psychological Well-Being

We also spruced up the landscape and brought home a few houseplants to brighten our indoor spaces. A strong connection between nature and our psychological well-being has been reported for decades. You don’t think so? Take a couple of your houseplants to work, if your desk is bare (of living things). Or buy an easy-going pothos and a pretty pot to put it in and see if your mood lightens.

A School Experiment

In 1999, while in Maryland, I planted a new landscape near the main entrance of a public middle school. No, this was not your run-of-the-mill row of sheared yews and a shade tree. Instead, I planted dwarf evergreens (varieties of cedar, chamaecyparis, and pine), a few ornamental grasses, and other plants in a large garden surrounded by paving. This garden surely would welcome the addition of a bronze timberwolf, the school’s mascot, if it shows up. Boulders and sculpted ground enhanced the impression, embellished with a few drifts of seasonal color. No need to water, as Hurricane Floyd moved in as I was finishing up!

The school’s principal enjoyed it so much that she asked me to plant an area near the teachers’ entrance, in the back of the building.

For the new garden, I dug out the old grass and weeds, and mounded up the improved soil for a gorgeous laceleaf Japanese maple, masses of ground covers and perennials, daffodils, and easy flowering shrubs. This new landscape covered large areas on both sides of the sidewalk leading to the entrance.

A young teacher approached me, and freely expressed his opinion that this project was “a complete waste of money”. I asked him to let me know if he felt the same way after the installation had been completed.

A few weeks later, while I was inspecting the garden, he spotted me and shared a few thoughts. Not only had he changed his mind, but he also started projects in his own garden. He said he wasn’t sure why, but that he “just liked walking through the garden” at the school—gently embraced by something beautiful and soothing. This is why parks and botanical gardens are so inviting.

We might not be able to define the effect, but it certainly leaves an impression. That’s the power of living with nature, and one gold star for Kim!


4 kinds of pothos

Four kinds of pothos, clockwise from top left: golden, ‘Marble Queen’, ‘Pearls and Jade’, and satin.


Getting Back To Work


Try starting with an inexpensive plant that every garden center sells. A small pothos (poe’ thoss) costs only a few dollars. It used to be known as Scindapsus aureus, but the botanical name has been changed to Epipremnum aureum.

Several varieties can be found in garden centers or from specialty nurseries. The adaptable golden pothos and white-variegated ‘Marble Queen’ have been around for a long time. Two others with gray-green and white markings, ‘N’Joy’ and ‘Pearls and Jade’, are more recent introductions. ‘Neon’, with brilliant yellow-green leaves, is aptly named. And there’s ‘Harlequin’, with starkly contrasting deep green and crisp white foliage.

Philodendron Silva Container Plant - leoleobobeo / Pixabay

Silver pothos.

Variegation appears as streaks, spots, and margins in colors that contrast with the background.

Among the satin pothos (also called silver pothos) in the species Scindapsus pictus, several varieties sport glittery sliver markings (photo, right). ‘Argyraeus’, ‘Exotica’, and ‘Silver Ann’ have varying amounts of silver in their leaves. This species exhibits “reflective variegation”, where the silvery parts glimmer in the light due to air spaces below the upper layer of the leaf.


Family Traits


Pothos is related to philodendron, peace lily (Spathiphyllum), Chinese evergreen (Aglaonema), Alocasia, Anthurium, dieffenbachia, nephthytis, and many other aroids. Caladium and Colocasia, the elephant ears, are popular outdoor foliage plants for warm summers.

Species in the Araceae family evolved as vines and understory plants in primarily tropical and subtropical latitudes of southeast Asia, the western Pacific islands, Africa, Australia, and the Americas.

peace lily, flowers

Spathe and spadix of peace lily.

All have characteristic spadix flowers. The vining species must climb in order to develop adult foliage. At that stage, the large leaves are often lobed rather than heart-shaped. It’s only then—when plants mature—that pothos can flower. The inflorescence is composed of a spadix, with true flowers, surrounded by a leaf-like bract, called a spathe.

Although pothos rarely flowers indoors, other aroids will bloom if given good care. Their flowers are attractive and might be lightly scented, as in Spathiphyllum and anthurium. For most species, though, we ordinarily snip off the blooms to conserve energy. Flowers of certain members of the arum family, including early blooming skunk cabbage, are thermogenic; they can produce heat to melt snow and attract pollinators.

Aroids are toxic to animals, so exercise caution with children and pets. Calcium oxalate crystals in the cells irritate membranes. In natural habitats, this helps fend off animals.


Caring For Pothos Indoors


While living in Maryland, I kept a ‘Marble Queen’ pothos under a table lamp in a north-facing and fairly dim family room. This white-variegated plant grew in a 6″ pot sitting inside a decorative basket. A 12-watt compact fluorescent bulb, switched on for 4 or 5 hours in the evening, provided enough additional light for the plant to thrive in that spot for many years.

The plant received some indirect light from the windows several feet away. But, during the shortest days of winter, I kept the lamp on longer for this plant. For variegated plants, the more hours of light or the greater the intensity, the more vibrant the variegation. 

Pothos is often recommended for areas with low light, but not by me. It often declines when grown in low light because it is more susceptible to problems associated with overwatering. Plants are less photosynthetically active at lower light levels, so they won’t use as much water. Try to give them direct sunlight in the morning or filtered sun for a few hours a day, particularly from fall to spring. Plants that don’t like too much sun in summer love it in the winter, and that helps dry the soil. Increasing your plants’ light levels should result in more robust growth, a stronger root system, thicker stems, and brighter color.

In a room with skylights, large unobstructed windows, and light-colored surfaces, enough indirect light will reflect around the room to keep pothos happy. Aim for at least very bright indirect light for optimal growth and health. A brightly lit office should be fine for pothos.


Leaves Turn Toward the Light

A plant’s leaves naturally turn toward a source of light in a response called phototropism. This occurs when hormones on the shady side of the stem cause those cells to elongate, rotating the leaf or turning the stem toward the light.

Turning the pot every week or so encourages even growth. A thriving plant growing against a wall or on a shelf doesn’t need to be turned, however, if you’re satisfied with its appearance. But a plant that keeps facing its pretty leaves away from you and toward a bright window might need to be turned for a more pleasing presentation.


When Leaves Turn All Green


pothos

These leaves are losing the white variegation.


New foliage can turn solid green, either temporarily or permanently losing the variegation, depending on the cause.

Stems with all green leaves grow more vigorously than variegated-leaved stems. The reason is simple. Deep green leaves have more chlorophyll, which steps up the amount of carbohydrate (food) formed during photosynthesis. And that means faster growth.

In a pot of pothos with several rooted stems, the solid green ones will compete more successfully than the slower growing variegated stems. Although a few green stems add contrast, I limit the number allowed to grow.

Loss of Variegation

In the photo above, only a small amount of variegation remains in this stem. If plant cells can no longer reproduce the white parts of the leaf, the rest of the stem will have all-green leaves. In this case, I chose to cut back the stem. The plant gets plenty of light, so that stem was going to stay green. If the stump sprouts solid green leaves, I’ll remove the entire stem down to the root.

Another case where leaves lose variegation is when the plant is growing in low light. The plant will try to make up for reduced photosynthesis from lower light levels by adjusting the amount of chlorophyll produced in the foliage. At some point, the plant will sacrifice older growth in order to feed its younger leaves. Nitrogen and certain other nutrients are mobile and can move to the new leaves at the tip, keeping it alive. Brighter light should improve variegation in new foliage.


Headings

Page 1: Of Pothos and Pandemics (The Joys of Gardening, Psychological Well-Being, A School Experiment), Getting Back To Work, Family Traits, and Caring For Pothos Indoors (Leaves Turn Toward the Light, When Leaves Turn All Green, Loss of Variegation)

Page 2: Watering Pothos (“How can I tell when pothos needs water?”, Let It Wilt, Feel the Weight, When Water Can’t Drain, Water Temperature, Guttation), Potting Up (Why the Soil Surface Drops Lower, Insects and Spider Mites, Time For a Bigger Pot, When To Repot, The Process: How To Repot Pothos), Pruning Pothos (Prune the Stems Short, Pinning Down Long Stems), Propagating Pothos (In Water, In Soil), and Fertilizing Pothos


Return to the top

Strawberries From Your Own Garden


2021

Updated 7/14/2024


Strawberries


 Strawberries!


Do you have an empty plot in the garden where you’ve wanted to plant something but aren’t sure what to plant? It’s too small for blueberries or raspberries. Tall plants will shade vegetables in the other raised beds, so you need something that stays rather short on this south side of the garden.

Here’s an option: strawberries! 

Now that spring is in the air—and in your local garden centers—this is the perfect time to plant young strawberry plants. Nurseries are filling up with all sorts of temptations—hardy annuals, trees and shrubs, early greens and vegetables, and budded spring-flowering bulbs in pots. You might find young, well-rooted strawberry plants already leafing out.

Strawberry plants can be purchased from neighborhood nurseries, farmers’ markets, and specialty mail order companies. Some varieties are available as seeds, but most are bare-root plants sold in bundles or rooted plants in pots. Bare-root crowns are less expensive than potted plants but need to be planted right away. I’ve been selling ‘Seascape’ strawberry plants at local farmers’ markets.

Strawberries, by the way, are not berries at all, but aggregate accessory fruits. Those little brown spots on the outside of the strawberry are the achenes, or ovaries of the flower, each containing a seed. The achenes are the true berries. The colorful part is an enlarged receptacle, the flower part that normally holds the ovary. But I’m quite sure no one will warm up to the term “strawreceptacle”.

U.S. per capita consumption of strawberries was 7.6 pounds in 2020, and that number is growing. North Carolina is third in the nation for strawberry production, after California and Florida. Among nations, top producers include the United States, China, Mexico, Turkey, and Egypt.


Types of Strawberries


Strawberry species are native to the Americas, Europe, and Asia. In the 1700’s, French botanists crossed the strawberry native to the eastern U.S. (Fragaria virginiana) with a Chilean species (F. chiloensis), yielding, eventually, most of today’s cultivars. That explains the “x”, representing an interspecific cross, in the name Fragaria x ananassa. Breeding efforts using genetics from several species have resulted in hundreds of varieties available today.


2023 USDA plant hardiness zone map


Strawberries grow within USDA zones 3 to 9. Some varieties prefer the cooler end of that range, and others need somewhat warmer climates. Most require at least 200 to 300 chill hours, when plants are exposed to cool temperatures between 32° and 45° F. Most strawberry plants stop fruiting above 75° or 80°. (Above: the newer edition of the USDA plant hardiness zone map.)

Planting varieties that mature at different times prolongs the harvest, but place them in separate beds for ease of maintenance. Keep track of the varieties you’ll be growing in your garden.

There are 4 main groups of strawberries, with many varieties within each category. Look for disease resistance, and consider other characteristics, such as color, fruit size, and time of harvest.


1. June-Bearing

These large-fruiting varieties bear heavily over a period of two weeks to a month in mid to late spring. They respond to a short daylength, having formed flower buds the previous autumn. The buds, though, stay dormant through winter, safely tucked inside the mulched plants.

For gardeners living in areas with a limited growing season, June-bearing strawberries are a good choice. Those who wish to preserve the fruits often select varieties from this group.

June-bearers develop many runners, or stolons, which root at the tips and grow new plants from there. The “matted row system” is commonly used on farms and in home gardens for this group of berries. Runners are permitted to roam about and root in at will, within the confines of the bed. Each year, the beds are thinned or renovated immediately following the harvest.

Because flowers will be snipped off over the first 4 to 6 weeks after a new planting, as recommended, June-bearers will have no fruits the first year. You can avoid this task by planting crowns of June-bearers later in the season, after they flower. They will bear fruits in the next spring season.

Although strawberries are short-lived herbaceous perennials, some commercial operations renew their stock every year, establishing young plants in a new location.


2. Everbearing

Everbearing strawberries have a large first crop, a smaller late crop (especially in areas with warm summers), and sometimes a few berries in between. They are not affected by daylength.

Berries in this group are smaller and not as abundant as June-bearing types. The total harvest is about the same as for June-bearing types, although it is spread out over time.

Remove flowers and runners the first 4 to 6 weeks after the initial planting. This will sacrifice the early harvest, but they’ll flower again and yield berries later in the season.


3. Day-Neutral

Day-neutral varieties produce strawberries through the growing season and will flower regardless of daylength. Fruits are smaller and the plants don’t yield as heavily as the June-bearers.

As with the everbearers, remove flowers and runners that develop during the first 4 to 6 weeks after planting. They will flower again later and set fruits in the current season. Cooler temperatures might yield heavier crops in late summer.


4. Alpine


Wild Strawberry Red Fruit Sweet - Radfotosonn / Pixabay

Alpine strawberry.


These are the smaller, oval-shaped berries carpeting the ground in their native northern hemisphere habitats. Sometimes called “fraises des bois“, French for “strawberries of the woods”, these strawberries often belong in the species Fragaria vesca, although several species of alpine strawberries grow around the world.

They’re found in a wide range of climates, in USDA zones 3 to 9. Avoid planting in low spots or where the soil stays soggy after rain.

Alpine strawberries tolerate some shade but give them 4-6 hours of direct sunlight. Plant them 12-18″ apart. They don’t grow a vigorous system of runners but will propagate from seeds and division.

Some strawberry enthusiasts swear by these tiny morsels and grow no others.


Preparing the Bed for Strawberries


garden rakeFind garden space that gets full sun for the best yields. Strawberries start growing before the end of winter, when the sun is still low in the sky. Take this into consideration when locating your garden. In partial sun, foliage and fruits might be plagued by diseases that ruin the crop.

Avoid low spots. Locate the beds on higher ground where cold air won’t collect and freeze the flowers. Try growing strawberries in containers if you don’t have garden space.

Don’t plant them where tomatoes, peppers, potatoes, or eggplants have grown in the past 5 years. Verticillium wilt disease from infected plants in the nightshade family (Solanaceae) can also infect strawberries (family Rosaceae).

Strawberries prefer sandy loam and must have well-drained soil. This is one reason you often see them growing in raised beds. Another benefit of raised beds is increased air circulation, which helps prevent diseases from spreading among the plants.


How To Configure Strawberry Beds

The Matted Row System

In the matted row system, space strawberries 18″ apart down the middle of a 4′ wide bed. Spacing between the beds depends on the method of harvest and whether large tools (tiller, mower, wheelbarrow) will be required. For most home gardeners, 2′ or 3′ between beds serves that purpose.

June-bearing strawberries grow in matted rows, allowing their numerous runners to spread. Over the growing season, let plants fill in to a density of 4 or 5 plants per square foot. Heavy leaf canopy discourages weeds from growing in the bed, but overly congested growth encourages diseases.

The Hill or Mounded System

In this technique, crowns will be spaced in a zigzag manner 12″ apart, in mounds 8″ high. These hill systems are narrower than matted row systems, at about 24″ wide. This permits better air circulation and drainage around the plants. Disease prevention is of prime importance.

This method suits everbearing and day-neutral strawberries, which have fewer runners. In fact, websites recommend removing all runners in hills, forcing plants to grow lateral crowns next to the original plants.


Dig In!


Loosen the Clay 

First, remove all vegetation where the strawberries will be planted. They don’t compete well with weeds.

Loosen the existing soil, breaking up the clay to a depth of about 12″. This is easier to do if the soil is damp. Don’t work the soil if it’s wet, though; that will collapse the air spaces between soil particles.

Add Drainage Material

Now, incorporate (don’t layer) 2″ to 4″ of pine fines, sometimes called soil conditioner, into the loosened soil. Pine fines (photo, above) are partially composted small bits of pine bark. Because they decompose very slowly, they help keep the soil open, improving drainage for many years. Pine fines might not be available everywhere. See if you can find bags of “soil conditioners” that include pine fines.

Strawberries also like large-grained coarse sand (not play sand) added at this time.

Adjust PH, Peat Moss

Strawberries need acidic soil, with a pH range between 5.5 and 6.5. One or two inches of pre-moistened peat moss incorporated 8″ into the bed will help lower the pH in alkaline soil.

Your local agricultural extension office can analyze a soil test and make recommendations about pH and fertilizers.

Compost

Next comes the nutrient-rich compost. Incorporate 2″ or 3″ of compost into the top 4″ of soil. Placing it deeper in the soil will put it out of reach of the strawberry’s shallow roots.

Compost provides nutrients for the strawberries as well as for the microbes living in the soil. Microbes, active during the growing season, break down organic matter, making nutrients available to plant roots in a usable form. These microorganisms derive the benefit of carbohydrates from this relationship. Microorganisms also help plants fend off soil pathogens and contribute in other ways that scientists are now researching. In healthy gardens, billions of microorganisms occupy a tablespoon of soil!

For sandy soil, add more water-holding amendments, such as peat moss, pasteurized loam, and compost.

Some gardeners apply 10-10-10 fertilizer with the initial soil preparation.

Rake the soil, filling in low spots.


Planting the Strawberries


strawberry ozark beauty in pot

Strawberry ‘Ozark Beauty’.


If you received bare-root plants, trim long roots to about 6″. Place the roots in a bucket of cool water for an hour, in the shade.

Although a raised bed is an efficient method of growing strawberries, they can be planted in level gardens. Pay special attention, though, to slope, drainage, and air circulation.

After preparing the soil, dig a hole for each plant, spreading out the roots and firming soil around them. The crown of the plant, where the leaves meet the roots, should be right at (never below) soil level.


Mulch


Strawberries Flowers Spring Fruit - Eric-Tanas / PixabayOnce all the plants are in place, apply 2″ or 3″ of an airy mulch, such as pine straw or weed-free straw (photo, right). The traditional use of straw as a mulch might be where the term “strawberry” came from.

Don’t cover the crowns; give them space to emerge freely. This kind of material, rather than a heavier mulch, permits air circulation and lowers humidity around fruiting stems, helping prevent rot.

Mulch cools the soil, conserves moisture, and keeps the fruits clean as they grow. As it rots, it adds organic matter to the soil and needs to be replenished now and then.

Using mulch in the growing season is optional, of course. In beds of June-bearing strawberries, a thick layer of mulch could hinder runners trying to root into the soil.

Another option used by many commercial growers and home gardeners is black plastic or fabric over the soil. This warms the soil rapidly in late winter and early spring. Commercial growers using “plasticulture” renovate the beds every year. If you’d rather not use plastic, you could use biodegradable black mulch. Using a soil cover might extend strawberry production. And weeds won’t stand a chance. Still, this is optional.

Water the bed, making sure the entire planting depth has been moistened.


In Their First Year


Most experts recommend removing all flowers during the first 4 to 6 weeks after planting. This concentrates energy in the roots and runners. For plants in the June-bearing group, however, there will be no harvest the first year if you planted them in early spring. But they should yield a bountiful harvest the next year.

Other groups of strawberries will develop more flowers in the months ahead. They will bear fruit later in their first season. For everbearing and day-neutral varieties, apply fertilizer after their first crop.

Water the beds every week if there isn’t substantial rainfall. Strawberries need 1″ to 2″ of water per week, most importantly after planting and during fruit set. Most of their roots are found in the top few inches of soil, so they are very susceptible to damage from drought.


Pollination

These early flowering plants attract bees and other pollinators. Strawberry flowers contain both male and female reproductive parts. Although they can self-pollinate or be pollinated by wind, strawberry flowers achieve more complete pollination from the activity of pollinating insects. This results in fruits that are plump and well-formed.


Headings

Page 1: Types of Strawberries (June-Bearing, Everbearing, Day-Neutral, Alpine), Preparing the Bed for Strawberries (How To Configure Strawberry Beds, The Matted Row System, The Hill or Mounded System, Dig In!), Planting the Strawberries, Mulch, and In Their First Year (Pollination)

Page 2: The Harvest, Renovating the Strawberry Bed, Varieties, Winter Protection, Potted Strawberries (The Pots and Potting Soil, Watering the Containers), Problems? (Insects and Mites, Slugs and Snails, Diseases), and Celebrate!

Return to the top


Early Spring: Wrens, The Wire Basket, And Edibles

2021


early spring offerings at garden center, potted bulbs, violas, lemon cypress

Early spring offerings at the garden center where I worked for a few years.


Early Spring Activities


This is my favorite time of the year…when winter transitions into spring. In this USDA zone 7b location, in southern North Carolina, warm spring weather might alternate with cold rainy days, but the trend, at least, is going in the right direction.

Give the gardens some time to dry somewhat before working in the soil. Walking on wet soil will collapse the minute air tunnels that help the soil drain. We’ve had so much rain through the winter that gardening activities might best be limited to growing plants in pots for now.


For the Birds


Yesterday, after working on the potted plants outdoors, I sat for a few minutes just to listen to the songbirds calling to each other. Cardinals, goldfinches, Carolina wrens, chipping sparrows, tufted titmice, and robins are communicating with their mates or looking for new ones. A delightful soundtrack!

In early spring of last year, a pair of wrens built their nest in an empty 6″ pot (photos, below), sitting on a plant stand. This location is under an overhang and faces south, creating a warm microclimate. The deer netting stopped raccoons from climbing the stand, but it didn’t deter the birds.

The wrens and nuthatches, in particular, normally come to the feeders only a few feet away from where I pot up plants. Unfortunately, the wrens abandoned the nest after laying eggs, even though they were comfortable having me around. It appeared that a snake must have scared them off. Occasional disappointments are par for the course in the natural world. The eggs were cold when I found them and wouldn’t have hatched.

The wrens are now investigating the pots stored under the potting table, so I moved one to the plant stand.


Replanting the Wire Hanging Basket


The Basket and the Liner 

A 16″ wire hanging basket has hung on the shepherd’s hook in the front garden for 5 or 6 years. It’s planted with a few perennials and a rotating cast of colorful characters. For fall through mid-spring, I add pansies and violas, and then replace them with heat tolerant annuals for the summer.

This time, instead of buying another coco liner that the birds will instantly pick to shreds, I used a large fabric pot that had been idly hanging around the shed for years. After planting and installing it on the hook, I wrapped the completed basket with deer netting to prevent the kind of damage they can do.

The heavy synthetic material was cut and shaped, and the excess was later trimmed to just above the rim. The material is similar to landscape fabric, but sturdier. So, I wasn’t concerned about the liner slumping through the wires. Nor am I concerned that the birds would steal it! Water will drain through without taking any soil with it. It doesn’t look bad, after smoothing the sides. In fact, I now prefer it over coco liner!

More Options

So, maybe you have something that can be repurposed to use in your wire baskets. A couple of layers of porous landscape fabric or heavy burlap probably would work as well. I was prepared to tie black deer netting inside the basket to support the liner, but it wasn’t needed.

When planting wire baskets, I always add a layer of plastic inside the liner to help slow evaporation. It also delays decomposition when using a coco liner. Poke several holes in the lower third of the plastic to allow for drainage. But keeping the lowest 1″ to 1 1/2″ intact will provide a small reservoir of water for thirsty plants on a hot summer day.


Add Some Color For Early Spring Plantings

On one of my daytrips to northern North Carolina last autumn, I bought a few packs of pansies and violas from Beautiful Earth Garden Shop on NC 704 in Lawsonville, North Carolina. (Phone 336 593-1083; call for hours.) Well, I never got around to planting them, so they overwintered on the covered porch. Rabbits helped themselves to the flowers as they opened. But the plants look fine, and it was time to give them a proper home.


wire basket, planting

Help wanted!


I replaced about 1/3 of the soil in the basket with fresh potting soil. The new soil contains a fair amount of peat moss, which provides the acidity these plants need. The pansies and violas will fill the spaces between the existing heuchera, variegated pachysandra, and acorus.

Golden creeping jenny (Lysimachia nummularia ‘Aurea’) replaces the English ivy that the deer yanked out of the pot. Chartreuse foliage spreads wherever it wants and will trail over the sides. These existing perennials already have started growing during this early spring weather. Creeping jenny spreads rapidly in moist soil, so take care if you prefer not letting it escape to the garden.

I’ll enjoy this arrangement until warm weather settles in, and when summer annuals will be planted in all new potting soil. Violas and pansies die in hot temperatures but can be grown again in late summer/autumn. In this climate, they’ll survive the winter and flower most of that time.


And Edibles for Early Spring


Spinach ‘Monstrueux de Viroflay’


spinach 'Monstrueux de Viroflay' in pot, early spring

Last year’s spinach ‘Monstrueux de Viroflay’.


Also called ‘Monster of Viroflay’, this is my favorite spinach to grow in pots. A few plants sown last fall remain in a 14″ wide bowl (6″ deep), so I added more seeds and some fresh potting soil around them. The seeds are 4 years old, so they might germinate…but they might not (…they didn’t).

Spinach, lettuce, and other greens are among the easiest crops to grow from seed, either in pots or in the garden. All seeded pots outside must be covered with deer netting to protect them from perpetually hungry chipmunks, mice, birds, and squirrels.

Oxalates and Kidney Stones

This spinach, a French heirloom dating back to 1866, has huge leaves and a milder flavor than the smaller-leaved varieties. It also has lower levels of oxalates, which, for some, are a concern. If you get kidney stones, ask your doctor, and also ask about kidney pH levels.

A diet high in animal proteins tends to lead to an acidic (or low) pH. On the other hand, those consuming a primarily plant-based diet have higher (more alkaline) pH levels. People with acidic systems are more likely to develop kidney stones.

We’re all different, of course. And to further complicate matters, our bodies make oxalates, some absorb more than others, and certain gut bacteria consume them!


Broccoli


early spring, broccoli


This year, I bought a variety called ‘Lieutenant’. It was the only one the garden center had. The label says “few side shoots”, which is a disadvantage since those smaller side shoots can prolong the harvest for weeks or months. But I’ll try it. I planted 4 of them in a 20″ wide pot, in soil well enriched with composted manure.

As broccoli grows, I’ll harvest a lower leaf now and then to add to soup or a stir-fry. Super nutritious.

(***Update***: Although I’ve grown broccoli twice a year in these pots for a few years, this crop of ‘Lieutenant’ was rather disappointing. May 2021)


Lettuce


lettuce 'Red Sails'

Lettuce ‘Red Sails’.


I planted a few ‘Red Sails’ from the cell pack into a 12″ wide pot. This red and green leaf lettuce is more heat tolerant than many and should keep producing for quite a long time. Even so, lettuce prefers cool weather and can be planted in late winter in southeastern U.S. Red-leaved lettuces have more beneficial antioxidants, such as anthocyanins, than green lettuces.

Pick the outer leaves and let the center of the plant continue growing. When it turns bitter or goes to flower, that’s the end of lettuce in the garden until the weather cools again in autumn. Regularly fertilizing all greens with fish emulsion or some other high nitrogen product provides nutrients for steady growth.

Sharp-tipped pine cones and deer netting discourage animals from burying seeds from the bird feeder.


Strawberries For Early Spring Planting


The garden center also had strawberry plants, which looked very healthy. I planted all 4 ‘Ozark Beauty’ plants in a 12″ pot. Yes, that is tight. There’s limited space where I currently live, so this is just a fun experiment. Later, a larger garden will be planted with lots of berries and other perennial edibles.

When transplanting strawberries, be sure to keep the crown at or slightly above the soil surface (photo, above), not buried. Before long, big ripe berries will join me for breakfast, even though the first few weeks of flowers should be removed. This is another plant that will need to be netted. Everyone wants ripe strawberries.

***Update***: I harvested about 15 yummy strawberries this season. The first few were delicious and large, followed by smaller berries. It’s recommended to remove all flowers during the early weeks, but, for this pot, I just let them grow…and set fruit. June 2021


strawberries

No, these did not grow on the potted plant.

*    *    *    *    *    *    *    *    *

I need a good-sized pot to grow snap peas on a trellis, and another for dinosaur kale. Maybe I’ll find them under the potting table, before they’re claimed by our local wrens.

This is just the beginning. There are so many cool season crops, from seeds or transplants, that can be grown in containers. Ask your local agricultural extension agent for early spring recommendations tailored to your climate.


Return to the top


Homemade Chicken Soup and Biscuits


Homemade Chicken Soup


homemade chicken soup


Please Pass Some Comfort Food


To say that the year 2020 was a tumultuous one is a grand understatement. From politics to pandemics, I don’t think I’ve seen a time with greater divisions among the population and even between family members. But let’s leave all of that behind for a while, and enjoy some homemade chicken soup.

Here’s a recipe for winter’s ultimate comfort food: Chicken Soup. While some cooks make soup with more broth or egg noodles, I like to add lots of vegetables and some cooked pasta. This is a must for anyone feeling hammered by a cold or the flu. Feel free to adjust the proportions of ingredients to suit your family. I make about a gallon at a time, and freeze portions for later use.


Ingredients for Chicken Soup


  • 1 package of 3 or 4 chicken breast halves, with skin and bones, rinsed (excess fat or skin removed)
  • salt and pepper
  • all-purpose unbleached flour
  • butter and olive oil or vegetable oil
  • 2 to 4 stalks celery, cut into slices
  • 1 or 2 yellow onions, sliced or chopped
  • 3 to 5 carrots, sliced
  • 2 large cloves fresh garlic, crushed or minced
  • several white button mushrooms 
  • 2 bay leaves
  • 3 or 4 15-ounce cans of low sodium, no MSG chicken broth, plus 2 or 3 cans of water
  • herbs: a handful of fresh Italian flat-leaf parsley (chopped), 2 to 3 tsp. Italian oregano (and some sweet marjoram if you like), and 1 tsp. French thyme. Measurements can vary, depending on your preference. If using dried herbs, use half as much as the amounts specified for fresh. Start with small amounts, and add more if desired. Parsley is always much better used fresh, and is widely available.
  • 2-4 cups fresh greens, such as spinach, dinosaur kale, Swiss chard, arugula; chopped
  • leftovers: vegetables and/or cooked rice or barley (optional)
  • enriched pasta (mini farfalle, elbows, penne, broken spaghetti…), pre-cooked or cooked separately while the soup is simmering, drained
  • grated Romano cheese


The Process: Making Chicken Soup


Prepare the Chicken


  • Place about 1 cup of the flour in a bowl.
  • Add 1/2 to 3/4 tsp. salt and 1/4 tsp. black pepper. Mix well.
  • Rinse the chicken well and pat dry with a paper towel.
  • Add chicken to the bowl, coating each piece, pressing flour onto all surfaces.


Next…

  • Place a large stockpot, with a heavy bottom, on the stove.
  • Add a few T. oil and butter. Heat it up, at medium or medium high heat.
  • Add each piece of chicken, after flouring it, to the hot pot. Sometimes I spoon more of the flour mixture onto the chicken, and cook it some more. This helps thicken the broth just a bit. (Don’t save the leftover flour. Discard it to prevent contamination.)
  • Sear the outside of the chicken, both sides, until it’s golden brown, but not burned. Adjust the heat if necessary. It will not be done inside, but will cook more when added to the broth. Move the chicken around to prevent sticking or turn down the heat. The brown residue will add flavor to the soup.
  • Once the chicken has browned, remove it to a dish, and turn down the heat.
  • Now, add the chopped or sliced fresh vegetables (celery, onion, carrot, garlic, mushroom), but not the greens, stirring often. The residue will loosen up, or use a wooden spoon to help it along. Sauté until the vegetables are lightly softened, but not browned.


And Then…

  • Add the broth and water, and stir. Turn up the heat to a boil, then lower the heat to a low simmer.
  • Add the bay leaves. Other herbs will be added later.
  • Add the chicken and its drippings back to the pot. Keep it on a very low simmer, not a vigorous boil, for 40 (smaller chicken pieces) to 60 minutes. Very low heat keeps the chicken more tender.
  • 10 minutes before it’s done, add the thyme.
  • Remove bay leaves.
  • Add salt and pepper to taste. Broth is often quite high in sodium, so don’t over-salt.
  • 5 minutes before it’s done, add oregano, marjoram, and parsley.
  • Remove chicken to a clean dish. You might want to use a large spoon to hold the pieces together; the meat could fall off the bones. Check the soup for tiny bones that might have fallen to the bottom of the pot.
  • Discard the chicken skin. Cut the meat and add back to the soup. I usually reserve some of the chicken for a stir-fry or freeze it separately for later use.
  • Add fresh greens and low simmer a few minutes to wilt.
  • Stir in cooked pasta.
  • Add leftover vegetables (such as cooked peas, corn, green beans), if desired.
  • Reheat and stir the soup, then serve. Top with grated Romano cheese and a sprinkling of fresh parsley.


You also might enjoy homemade collards soup. It’s more comfort food for winter or for those not feeling so well. Most of the herbs and greens I use in cooking are started from seeds. At any time of the year, there’s something to pick for soups, salads, veggie omelets, and stir-fries.


Easy Buttery Biscuits 


I just started making these last month. They are so good! But, in an effort to not overindulge in carbohydrates, I won’t make them often.


butter biscuits with chicken soup


Very simple:

  • Preheat oven to 425º F.
  • Melt 3 T. butter in a small pot.
  • Prepare a baking sheet lined with parchment paper.
  • Place 1 1/4 cups of self-rising flour into a bowl. This makes a dozen biscuits.
  • Add a dash of salt (optional).
  • Add about 3/4 cup heavy cream to the flour. Mix well with a fork. Add more flour if it’s too sticky.
  • Turn out onto a floured surface and knead for a minute.
  • Use a rolling pin to flatten the dough to about 1/3″ thick or slightly thicker.
  • Use a cookie cutter or a juice glass to shape biscuits and move them to the cookie sheet.
  • The last bit of dough can be shaped by hand so none is wasted. It might come out lumpy, and that’s perfectly fine. Call it “rustic”.
  • Spoon melted butter over the tops, dripping down the sides. The dough will absorb the butter.
  • Bake until the tops turn golden, about 15 minutes. Turn the sheet halfway through if your oven has a hot spot.
  • Serve with more butter (optional, but…). Next time I might add some shredded cheddar cheese to the dough. (***Update***: Yesterday, I made a batch of biscuits, half with cheese and half without. In the cheesy part, add thin pieces of cheddar to half the dough. Then fold the dough, roll it, and proceed with recipe. I haven’t decided which option I like better; hmm…this calls for a taste test. January 27, 2021)


Enjoy, and be well!


Return to the top

Mabry Mill On The Blue Ridge Parkway


Mabry Mill


Mabry Mill

Mabry Mill is among the most photogenic stops on the Blue Ridge Parkway.


Last month, a leisurely drive took me to Mabry Mill in Meadows of Dan, Virginia. It was an easy detour from a few of those towns in northern North Carolina I had been exploring. During this pandemic, with social distancing in mind, day trips are pleasant diversions. My mother and I called them “mental health drives”.

I’ve spent the past few months looking for property with more sun, more space, and no homeowners’ association. The goal: large gardens for pollinators, butterflies, and birds. Raise greens and vegetables, and maybe a dog. Fix it up while working part-time? Open a little plant shop? The possibilities are exciting! With the vaccine apparently a likelihood, maybe more properties will soon come to the market.

For years, the western part of North Carolina was the location of choice. But, for the past month or so, I’ve widened the search to include counties in the northern part of the state. Lovely area, beautiful terrain, home to several vineyards. This is where people waved from their riding mowers as I drove by.


Getting to Mabry Mill


driving the Blue Ridge Parkway

Driving along the Blue Ridge Parkway.


The mill is located at milepost 176.1 (watch for signs) on the Blue Ridge Parkway and is administered by the National Park Service. This is a truly memorable drive and part of the National Scenic Byways system. The Blue Ridge Parkway winds 469 miles through the southern Appalachian Mountains. Elevations range from 649′ near the James River, Virginia, up to 6053′ on the slope of Richland Balsam Mountain (milepost 431) in North Carolina.

The Parkway connects the eastern side of Great Smoky Mountains National Park, which straddles the border between Tennessee and North Carolina, and Shenandoah National Park in Virginia. It continues northward as Skyline Drive, from where it intersects with U.S. Interstate 64 near Afton VA, to Front Royal VA. The Blue Ridge Mountains are part of the larger Appalachian Mountain chain.

But don’t expect to whiz by at interstate speeds; this is a slower road, with over 380 stopping points. There are many intersections along the faster U.S. or state highways where you can pick up a local stretch of the Blue Ridge Parkway. And gas up the car before reaching the Parkway because there are no filling stations on this road.


Caution

Keep in mind that people live and work here, so there might be farm vehicles on or crossing the Parkway. And check with the National Park Service to see if hazardous conditions or inclement weather might have closed parts of the Parkway.


Camera’s Ready


Trails cabin

Trail’s cabin.


Very picturesque. The entire area presents scenes of astonishing beauty, with views of pastoral landscapes, deep valleys, and mountain vistas. If you need to get away from it all, come to the Blue Ridge Parkway.

The “blue” in Blue Ridge derives from the Cherokee Indian description for the mountains, an area they and their ancestors have inhabited for over 10,000 years. Their term translates to “land of blue mist”. Isoprene compounds (hydrocarbons) are released from and protect the trees in hot sun, cloaking the distant hills in a bluish haze. The Mohawk, Iroquois, and Shawnee also inhabited this mountain chain, with the Cherokee centered around the Great Smoky Mountains at the southern terminus of the Blue Ridge Parkway.

This was my second visit to Mabry Mill, and I had a particular goal in mind: pictures of fall foliage! Although there was some color in the trees and shrubs, the bright reds and oranges of sourwood and maple, and the glowing gold of hickory, had already passed. A gentleman in the restaurant informed me that, just a few days prior to my visit, a wicked wind had stripped much of the fall color from the trees.

Photographers after the perfect shot of the mill and its reflection waited for the pond water to stop rippling after a young boy had stirred it up. But no one complained. He was having a great time! A few of us exchanged “Oh well” glances, and made sure we were positioned to capture the moment.


Mabry Mill grounds

Entering the grounds of Mabry Mill.


Building Mabry Mill


Edwin B. Mabry and his wife, Mintoria Elizabeth (“Lizzie”), had acquired the property and water rights around 1905, and finished construction of the gristmill three years later. By 1914, the gristmill, the sawmill, and blacksmith and woodworking shops were providing services for residents living in the area. A sorghum evaporator and the remains of the whiskey still also can be seen.

Mabry Mill flume

A flume channeling water toward the mill.

Mabry built a system of concrete tributaries, which collected water from streams above the mill, and directed it toward the wooden flumes (photo, right). Those flumes, in turn, channeled water toward the race, which fed water to the overshot waterwheel.

Because the water flowed slowly, the gristmill (called a “slow grinder”) ground corn with less friction, preventing the grain from overheating and burning. This earned the Mabrys a reputation in the region for producing products of excellent quality.

A few years after the mill and the shops were operating, around 1918, the Mabrys built their new home. It has since been replaced with a wooden structure once owned by the Marshall family (photo, below). The house on the site was built in 1869 near Galax, and donated to the National Park Service in 1956.


appalachian house

The old Marshall house.


The National Park Service

The Parkway’s construction began in 1935 at Cumberland Knob, milepost 218, just south of the border between North Carolina and Virginia. In 1938, two years after Ed Mabry died, the National Park Service purchased Mabry Mill.

Restoration of the historically significant mill and other buildings was completed in 1942. By then, gristmills had been rendered obsolete by more efficient large-scale milling operations and transportation networks that shipped products throughout the country.

The site is home to the restored mill, the wooden residence, and the workshops. This property includes short walking trails, a restaurant, and a gift shop, where you can pick up publications and maps. The restaurant closes for the season in early November, so check first if you’re hungering for their famous pancakes.

On certain days through the year, the National Park Service conducts craft demonstrations recounting ways of the past. They also bring in live musical performances to entertain visitors. The day I was there, Park Rangers Chris and Tabitha welcomed questions and shared information about how residents met the many challenges presented to them at that time. Each year, hundreds of thousands of travelers from around the world stop at the mill.


Seeing how others lived just 100 years ago gives me renewed appreciation for our more modern conveniences. Now that my mother has passed, I enthusiastically look forward to life in a more rural location…one with those modern conveniences.


Farther Up the Road


yellow flowers of witch hazel at Mabry Mill

Native witch hazel, Hamamelis virginiana, in bloom at the mill.

In no rush to get home, I drove for another two hours or so, northward on the Blue Ridge Parkway. There was so much to see; each stop had its own unique view or plant life or structure to learn about. Trail’s Cabin, Shortt’s Knob Overlook, Rocky Knob, Rakes’ Mill Pond…and that’s only one small segment. Informative signs provide more details at the various sites.

“There’s something for everyone” along the Blue Ridge Parkway. If you’re curious about the history of a region or its natural wonders, if you enjoy photography or painting, bicycling or walking the trails, it’s all here. Check before you go to see when campgrounds, visitor centers, and picnic locations will be open.

Within a few miles of the Parkway are hundreds of attractions, including museums, folk art centers, performance theaters, lodging, restaurants, water sports, caverns, and fishing opportunities. Enjoy the friendly vibe or the local craftwork in any of the quaint shopping districts not far from the Parkway.


Biodiversity


pink thistle flowerThe Parkway accommodates tremendous biodiversity. According to one pamphlet, 159 kinds of birds nest along the Blue Ridge Parkway, and dozens more migrate through it. 130 species of trees, 1600 kinds of plants, and 74 kinds of mammals (including bears) live here. Near one of the gorges, a sign indicates that 25 species of native ferns inhabit that area.

More than 50 species of threatened or endangered plants occupy terrain around the Parkway, so tread respectfully.

Among the oldest land formations on earth, the Appalachians got their start 1.1 billion years ago. From that time up to around 250 million years ago, European and North American tectonic plates collided, pushing up this mountain range that stretches from Pennsylvania to Georgia.

The Appalachians once were as high as the Rocky Mountains, but erosion slowly reduced their elevation. Now, the tallest mountain east of the Mississippi River is Mount Mitchell, reaching 6684′, near milepost 350, west of Old Fort NC. These cooler mountain tops support evergreen spruce-fir ecosystems, also found in the northern United States and Canada, while mixed hardwood forests occupy the lower elevations.

As rivers and streams shaped the surface of the land, pockets of territory became isolated from each other. Smaller “niche” ecosystems evolved, each with its own assortment of organisms. Geographic isolation and a great deal of time are the primary drivers behind speciation. One kind of salamander might inhabit a particular streamside location, but not occur anywhere else in the world, not even over the next ridge.


From the first superintendent of the Blue Ridge Parkway, Stanley Abbott:

“A parkway like Blue Ridge has but one reason for existence, which is to please by revealing the charm and interest of the native American countryside.”

Modern living continues to extract more land for housing, transportation, and commerce. But, with conservation of natural habitats, the National Park Service has protected vulnerable ecosystems for wildlife and preserved the history and character of the region for all to see.


If you’d like to read another article about gristmills, this one at The Farm In My Yard describes one that is still working in North Carolina, and dates from pre-Revolutionary War days: The Old Mill of Guilford. (Try their gingerbread mix!)


2020: The Year That Wasn’t?


pumpkin pie

Kim’s pumpkin pie.

Well, it’s almost over. We have the holidays to look forward to, right? Oh wait; here, we can’t gather indoors in groups numbering more than 10… Some areas are discouraging any kind of indoor celebration. I wonder what most American families will do.

There will be turkey roasting in the oven while freshly baked pumpkin pies cool on the counter. We’ll celebrate Thanksgiving (400th year since the Mayflower) and Christmas, although new traditions—new ways of gathering—might be born. (With respect due the native Indian cultures, I acknowledge that not everyone celebrates this day.)

How will your holidays look different this year?

Such misery this pandemic has caused many millions of us: jobs lost, loved ones lost, businesses closed, weddings postponed, school children missing out. The good news on the radio this morning announced another pharmaceutical company that has developed a vaccine for the virus. If it’s safe and effective, sign me up.

If all we can do is gather outdoors, then so it shall be. No problem; I’ll gather the camera and some snacks, and be off to some not-too-distant location…somewhere in nature, which, for me, never fails to rejuvenate.

This has been a difficult year for all of us, all around the globe. Good days are on the horizon, though, and I wish you happiness and good health. There’s still so much to be grateful for. Let’s celebrate that.


trees and sky, North Carolina

Northern North Carolina.


Return to the top

Microgreens: Healthy and So Easy To Grow!

2020

Updated 9/24/2024


Mmm…Microgreens!


A mixture of microgreens, primarily brassicas, and a few beets.

A mixture of microgreens—primarily brassicas—and a few beets.


Here’s an easy way to grow nutrient-dense plants in a tiny space without lifting a trowel. Have you ever tried growing microgreens? This is such a simple method of incorporating the most concentrated sources of antioxidants and other nutrients into your diet.

Maybe you’re not sure about all those supplements in the health food store, and you want to go the more natural route. Besides, the experts tell us, vitamins, minerals, and antioxidants are best obtained from a wide variety of foods, including fresh fruits and vegetables.

Eating from several of the plant families ensures that we get a diverse assortment of nutrients. Greens provide a hefty helping of antioxidants, vitamins, and minerals, but missing from the plant world is Vitamin B-12. This is of particular concern among vegetarians.

Vitamin B-12 is found in seafood, meats, dairy, and fortified cereals. Because I don’t eat red meat at all, and other animal proteins only a few times per week, I take Vitamin B complex, among a few other supplements.

If you have any questions, ask your health care professional.


Why Are Microgreens So Good For Us?


Certain nutrients have gained prominence over the past decades, as research suggests their efficacy in maintaining good health. Although not among the basic food categories needed for survival (carbohydrates, fats, protein, vitamins, and minerals), these substances help us fight or prevent many serious illnesses, including cancer. Phytonutrients, polyphenols, prebiotics, and antioxidants—oh, my! Sure, it can be confusing.

Research indicates that microgreens have between 4 and 40 times more nutrients than a similar amount of the full-grown crops. That’s all it took to convince me!

Seed suppliers sell individual varieties as well as mixtures. Accordingly, they’ll vary in color and flavor. The mixtures I use are primarily composed of the brassicas, and here’s why…


The Brassicaceae Family


arugula

Arugula ‘Astro’ seedlings.


Let’s start with the First Family of Plant Nutrition, the cabbage and broccoli relatives, or the mustard family. Plant taxonomists changed the name of this family from Cruciferae to Brassicaceae (“brass·i·kay’·see·ee”), but the terms cruciferous vegetable, brassica, and cole crops refer to the same group of plants. These brassicas have uniquely beneficial properties that set them apart from other plant families.

I’ve written many times in The Farm In My Yard about the health benefits of these plants. If you do just one thing to improve your diet, start with the brassicas. It helps that these microgreens are really easy to grow—and fast!

This family comprises many types of super-healthy plants. I include at least one in my diet every day: arugula, broccoli, Brussels sprouts, cabbage, cauliflower, collards, kale, mizuna, mustard greens, pac choi, radish, tatsoi, turnip greens, and others. Nasturtium, another brassica, can be grown as shoots.

I’ll prepare the broccoli, for example, steamed, in a stir-fry, or lightly cooked with garlic, olive oil, and mushrooms. Brassicas make healthful additions to pasta dishes, homemade or store-bought soups, pizza, omelets, salads, smoothies, and sauces.

You can harvest brassicas grown as microgreens within 3-4 weeks of sowing. Give them at least 6 hours of direct sunlight for optimal growth. With less than ideal conditions, you’ll still be able to harvest greens, but they’ll take longer to grow and they might lack some color. For the full complement of phytonutrients, though, give them sun.


microgreens


Health Benefits of the Brassicas

Adopting a healthy lifestyle presupposes dropping some bad habits and incorporating those that contribute to greater longevity. Adding half a cup of microgreens might not negate the harm done by smoking or your daily dose of mac and cheese, but it’s a start. Consuming foods from the brassica group helps:

  • reduce inflammation
  • slow the aging process (skin, eyes, joints, brain, vascular system)
  • reduce the chances of getting age-related macular degeneration and cataracts
  • reduce the risk of cancer, heart disease, type 2 diabetes, dementia

These greens and vegetables contain varying amounts of Vitamins A, B complex, C, E, and K. They contain calcium, fats (Omega-3), fiber, folate, iron, magnesium, manganese, potassium, protein, zinc, and more. Some of these nutrients are among the dozens of types of antioxidants, which neutralize potentially harmful free radicals.

What Are Free Radicals?

Remember learning about atoms, electrons, and protons?  Well, here’s a summary:

The atom contains protons and neutrons in the positively-charged nucleus. The nucleus accounts for more than 99.9% of the atom’s mass. Surrounding the nucleus are the orbits, or shells, which hold the negatively-charged electrons. Up to two electrons fill the inner shell (“1 shell”), up to eight electrons fill the next shell (“2 shell”) and other shells contain up to 2 times the square of the shell number.

The number of protons (equal to the atomic number in the periodic table) distinguishes oxygen from carbon or sulfur or any other element. A stable atom, one that is inert, has an equal number of protons and electrons. Atoms of different elements bond together to form molecules, such as sugar, proteins, and water.

In order to become stable, atoms must complete their outer shells. They do that by stealing one or more electrons from, or giving them to, another atom. The outer shell is where chemical reactions with other atoms take place. Chemical bonds hold the atoms together. When weak bonds split between atoms or molecules, free radicals are formed.

These unstable free radicals seek to steal electrons from nearby molecules. This sets up a chain reaction of instability—one molecule stealing from another molecule—causing oxidative stress. This cascade of interactions is what can damage our cells. Cancer and other inflammatory diseases can begin if the disruption occurs near cell nuclei or membranes.

Those free radicals form in response to stresses in our bodies, including pollutants and toxins in our cells and bloodstream, and enzymes present in the normal process of digestion. We are healthier if there are more antioxidants than free radicals in our systems.

What Are Antioxidants?

Antioxidants are substances that prevent oxidative stress and reduce inflammation. They can be vitamins, minerals, or any of the many thousands of phytonutrients. Deep green, red, orange, and other colorful plant pigments are loaded with antioxidants.

Vitamin E is the most abundant fat-soluble antioxidant. It helps protect us from heart disease by limiting LDL (low-density lipoprotein) oxidation and plaque formation.

Vitamin C is the most abundant water-soluble antioxidant. It, too, donates electrons to free radicals, ending the damaging cascade of instability. Vitamin C shows promise in the fight against cancer, especially types that affect the mouth, larynx, and esophagus. (Discuss diagnoses and treatments with your doctor.)

In recent studies, researchers used isotopes to track the uptake of these nutrients. They associate antioxidants, such as beta-carotene, lutein, and lycopene, with possible avenues of cancer treatment.


Glucosinolates

Phytonutrients are a major category of nutrients found in the brassicas. Of particular interest among this group are the glucosinolates, which include sulforaphanes. These substances are not found in significant amounts—or at all—in any other family of plants. These compounds, numbering more than 100 kinds, are key players in lowering the risk of cancer and inflammatory diseases. Different phytonutrients are found in brassicas eaten raw and in those which are cooked.

That’s why this is my go-to vegetable family. Every day. While preparing these greens for cooking, I also eat a few raw pieces. When possible, I’ll cut or chop the broccoli or kale (or any brassica) and let it rest on the kitchen counter for 30-60 minutes, so the enzyme, myrosinase, can start transforming precursors of sulforaphanes into the sulforaphanes themselves in the damaged plant cells. Heat destroys this essential enzyme, so we would miss out on those powerful sulforaphanes if we cooked the greens right away. Eating raw brassicas, however, also delivers the benefit of sulforaphanes. Broccoli sprouts contain the highest amounts of these beneficial nutrients.

Before you think you’re protected because of the three little broccoli florets you just had with your steak dinner, think again. Consider making brassicas and other vegetables the main attraction, and using chicken, beef, or pork as condiments. If this is too big a leap, try adding more vegetables and decreasing the amount of meat consumed over time. Baby steps are better than not moving at all.


Cabbage Red Cabbage Blue Cabbage - manfredrichter / Pixabay

Mature red cabbage, one of the brassicas.


Other Plant Families for Microgreens, Sprouts, or Shoots


The Amaranthaceae Family

Amaranth, beets, quinoa, spinach, and Swiss chard are members of this family. Because of the higher oxalate content in this group, check with your doctor if you’re prone to kidney stones. Lots of pigments are found in amaranth, beet greens, and ‘Bright Lights’ Swiss chard, adding color to your clippings.


The Amaryllidaceae Family

The onion group, which also includes garlic, green onion, leeks, and shallots. Seedlings are very finely textured and take longer to grow.


The Apiaceae Family

Many useful herbs and vegetables belong to this family: carrot, chervil, cilantro, celery, cutting celery, dill, fennel, parsley. All can be grown as microgreens.


The Asteraceae Family

This group includes endive, the lettuces, single marigold (the ‘Gem’ series), radicchio, and sunflowers. Look for varieties that have red pigments, which have more anthocyanins. Anthocyanins are powerful antioxidants.


Grains and Legumes

Barley, oats, rice, winter wheat; alfalfa, chickpeas, lentils, mung beans, pea and pea tendrils.


microgreens on tomato salad

Microgreens on caprese salad.


The Lamiaceae Family

Mint, anise hyssop—minty anise flavor; basil—many colors and flavors, including cinnamon, sweet, lemony.


The Polygonaceae Family

Sorrel, red-vein sorrel.


Headings

Page 1: Mmm…Microgreens!, Why Are Microgreens So Good For Us? (The Brassicaceae Family, Health Benefits of the Brassicas, What Are Free Radicals?, What Are Antioxidants?, Glucosinolates), and Other Plant Families For Microgreens, Sprouts, or Shoots

Page 2: What Are Microgreens?, What Are Shoots?, What Are Sprouts?, and How To Grow Microgreens, (How To Use Microgreens, The Container, The Soil, The Seeds, Maintenance, Yellow Leaves?)
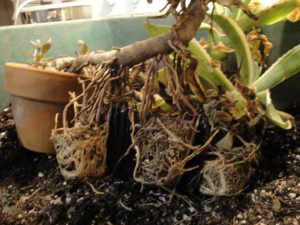
Return to the top

Fall Cleanup: Brush Piles For Wildlife


Brush Piles and The Fall Cleanup


trees in fall color

Autumn in NC.


Fall weather has debuted in most regions of the northern temperate zone. And frost has kissed the peaks of the higher elevations in western North Carolina. But, before you gather the tools, the leaf bags, and the kids for the fall cleanup, consider being a little less tidy this year. I’ll explain how to do this when constructing a few brush piles in the garden.

“What? Why?” you might ask. Sure, the gardens always look neat and orderly after the fall cleanup, while the plants remain dormant and bare. But at what cost?

While cooling weather invigorates, it also sends signals to local wildlife that they must prepare for winter, or they will perish. Food and water for those remaining active, shelter from the elements, and protection from predators will become life-or-death issues for these organisms over the coming months.

Plants benefit from a layer of organic matter on the ground below them. It insulates their root systems from severe cold and holds moisture in the soil. A covering over the soil also prevents topsoil from blowing away. As the material decomposes, plants absorb valuable nutrients. This natural mulch also provides nutrients for earthworms and soil microbes, which contribute to the biological health of the soil. “I’m with you so far, Mother Nature.”

“Okay, so I’ll mulch the gardens.” Well…that’s better than nothing, but it’s not quite the same.


And Here’s Why:


caterpillar and dogwood twig

This caterpillar mimics a dogwood twig.


In each region, thousands of species of beneficial spiders, insects, and other animals rely on that garden debris over the harsh winter months. It protects them from temperature extremes, icy storms, and desiccation. It protects them from certain death, which is inevitable when that debris is hauled off to the recycling center.

Imagine how many butterfly chrysalises or praying mantis eggs will be carted off to their doom. Or the enormous number of native bees seeking refuge inside and among dead plant stems.

And what’s the buzzword of the decade in gardening circles around the world? Right: Pollinators! But are we doing them a favor by removing them and the debris they’re sheltering in? We are not.


What We Can Do About It

maintain brush piles after fall cleanupDormant insects remaining on the property, protected in brush piles all winter, will restock the garden in the spring. Otherwise, the landscape is pretty lifeless, until bees, beetles, butterflies, and moths gradually move back to your garden months later. But there won’t be nearly as many of them if so many were removed with the fall cleanup.

Begin construction of new brush piles by mid- to late summer. Caterpillars crawling around will find them suitable resting places and pupate among the twigs for a long winter nap. Some insects overwinter as adults, briefly emerging on warm winter days to feed. Leaving the shelters in place all year, however, is the best option, and one which benefits many insects and animals.

Consider letting nature behave closer to the way it was intended, the way it evolved over time. Who doesn’t want more butterflies and birds flying around the garden? This complex web of life in your own neighborhood will improve as a result. More insects to pollinate the vegetables, fruit trees, and natural stands of vegetation. And more food for frogs and baby birds. More beauty, more interest, more life!


Brush Piles For the Birds


carolina wrens often shelter in brush piles

Carolina wren, a tiny bird with a mighty voice.


Birds (including wrens, cardinals, juncos, thrashers, robins, sparrows, mourning doves, and towhees) often forage close to the ground. All my life, I’ve been fascinated by birds and by all of nature. We’ve watched them search through leaf litter and brush piles for worms, seeds, insects, and other sources of food. They also will find materials for nest-building activities in late winter and spring.
Some birds seek shelter among the piles of twigs when storms blow in. And they’re handy places to hide when predatory hawks are spotted overhead. Wrens are particularly active around these structures, so you might want to construct one within view of the house.


Any Other Benefits?

There are ecological benefits of keeping in place the biomass produced on your property. Considering the “carbon footprint”, nature’s mulch is an improvement on bringing in bagged mulch that had to be processed and transported to your retailer and then to your home.

Truth be told, though, I often used mulch in gardens that I installed for customers. But I also planted a variety of evergreen and deciduous material, flowering plants, and ground covers. These gardens hosted a rich assortment of indigenous insects and animals, even after the fall cleanup.

And, of course, you won’t need as many of those yard bags often seen lining residential curbsides. Imagine the savings in resources by making brush piles on your property: plastic bags, paper bags, and time, gasoline, and money spent picking up mulch or paying the town to recycle garden debris. Recycling is better than the landfill, but not removing debris from the property is even better.

Another bonus is the compost that gathers under the pile as organic materials break down. Scoop it out and use it in the vegetable garden or in potted plants. Replenish with leaves and twigs as the material reduces to compost. You might want to start a separate compost pile for leaves, weeds, twigs, and kitchen vegetable scraps and eggshells. Or simply bury the kitchen scraps in a hole in the garden. If earthworms are active, they’ll consume it within a week or two.

It’s entertaining, for many of us, to watch the birds on a cold winter day. Provide a source of clean water and a bird feeder to attract them to your yard.


white woodland allium, forest

Undisturbed environments provide habitat for overwintering insects and animals.


“But what will the neighbors say?”


I realize this requires a leap of tradition to implement. One suggestion is to edge the beds and to keep grass neatly mown. Plant up a few colorful pots for the summer and winter seasons. This will indicate that the gardener living there does care about her property and that her brush piles are intentional. Maybe the neighbors will take a cue and do likewise; mention the pollinators! And the carbon footprint!

If space permits, keep a few brush piles in the back yard, out of public view. If you have space only in the front, perhaps you can hide your Pollinator Palace behind some shrubs.


Suburban Life

Now, if you have a homeowner’s association to deal with, you can keep the front yard looking presentable and still be ecologically correct. Even in the city, constructing attractive twig sculptures as “garden art” can serve several purposes at the same time. I’ve seen twigs and leaves molded into animal shapes and simple mounds.

During the fall cleanup, rake or use a mulching mower and direct the chopped leaves under the trees and shrubs and into flower gardens. Smaller pieces of material decompose faster and are less conspicuous. Then place a 1″-2″ layer of shredded hardwood mulch or pine bark nuggets over the chopped leaves. Nice and tidy. Earthworms will feast on those leafy bits while the worms are still active, and insects will hide in the debris.

Move fallen twigs and dead stems to the piles out of view. If you’re absolutely overwhelmed with too much material, choose which parts will go to the recycling center. But if you notice a mantis egg case or butterfly chrysalises, cut those parts of the stems and add them to your brush pile or tuck them among the shrubs.


spring landscape


Replacing Grass with Mixed Plantings

Making brush piles is a natural part of the fall cleanup in rural areas. But many of us live where expansive lawns, trees, and HOA’s predominate. By adding shrub borders and undergrowth, though, more birds, mammals, and insects will make your garden their home.

A verdant, layered landscape naturally provides more opportunities for insects and animals to find food and shelter. This kind of environment supports the rich biodiversity that is becoming increasingly rare as suburbs gobble up more territory. We can help by providing conditions that attract wildlife: food and water, shelter, and places to raise offspring. For starters, let the dandelions bloom! If you see a large area of clover, mow around it and let the honey bees collect nectar and pollen. And, of course, avoid using pesticides in the landscape.

Replacing grass with trees, shrubs, perennials, bulbs, and annuals gives me the greatest satisfaction. And, no, it doesn’t have to look like “a jungle out there”. Well-designed and diversified borders are very attractive, and they bring biological activity within view. They also add to the property value!

Being connected to nature is an innate need that benefits us psychologically. And shrub borders afford a measure of privacy in communities where houses line up with little space in between.

You’ll enjoy seasonal blooms, dazzling fall color, winter structure, and the promise of spring in delicately unfolding leaves. While we enjoy the beauty of the garden, the wildlife will have found a welcoming home for generations to come.


Brush Piles: Basic Construction


brush piles, simple piles of twigs


There’s no formula for building these brush piles. Frankly, anything will work. Make it large enough, though. Several feet on each side will do, and 2′ or 3′ tall to begin with. Smaller lodgings will function well enough for pupating insects.

If you have the space, however, construct something more substantial. A large twiggy brush pile in the old Maryland garden discouraged deer from jumping over the fence in that location. And all kinds of animals found food and shelter there.

Removing all the dead stems and leaves during the fall cleanup severely reduces populations of these little critters. Advancing up the food chain, fewer caterpillars and beetles means less food for larger insects, frogs, and birds…which means less food for snakes, bigger birds, and foxes. So, that means less life overall in the garden.


Multiple Brush Piles


Several habitats around a spacious yard are better than one big brush pile. Think of a little caterpillar roaming around, looking for a place to pupate in late summer. Close, in his case, is better than far.

Caterpillars are in a race against time when looking for their winter homes. As masters of camouflage, chrysalises often look like dead leaves or sticks, blending in with the surroundings. But caterpillars traveling a greater distance have a higher risk of being consumed by predators.

The gulf fritillary’s chrysalis (photo, above) is difficult to detect on plants that are dying down in autumn. Unfortunately, this one pupated on the door frame, and ended up as dinner for a local lizard.


The Process

Autumn leaves for brush piles

Oak leaves keep a more open, airy structure.

First, lay down a bed of fallen leaves. Then pile large branches on the leaves, and add twigs, and more leaves on top. Add some perennial stems from the front yard, and the frosted zinnias and seedy marigolds. Simple!

Add more branches, leaves, and twigs through the season. The shelter doesn’t need to be airtight. Insects and animals will find nooks and crannies to hide in. Adding a layer of evergreen boughs on top and on the windward side will help keep the pile dry for the inhabitants inside.

Keep some openings large enough for birds to enter when they need shelter from a predator. Chipmunks, mice, toads, and reptiles also will enjoy your efforts. Some are likely to hibernate in the soil under the brush pile.

The old potting soil from the summer pots can be used in the gardens, where organic components will continue to break down and improve the soil. Or place it on the windy side of the shelter.


Perennials In Place, Then To the Brush Piles


If possible, let the herbaceous perennials, such as black-eyed Susan (Rudbeckia hirta, R. fulgida), coneflower (Echinacea), tickseed (Coreopsis), goldenrod (Solidago), asters, and ornamental grasses remain in place as they go dormant. Bees and other pollinators will busily collect pollen and nectar as long as the flowers produce it. Birds will pick at the seedheads in autumn and winter.

Insects that fed on plants during the summer will shelter or lay eggs on or near them for next year’s generation. A good time to cut back the dead plant stems is in late winter or early spring, just before new growth begins. If you must remove the stems earlier, add them to the brush piles. But leaving the dead plants standing in place distributes the habitats—and the sheltering wildlife—throughout the property.


An Attitude Adjustment


While the fall cleanup has been the normal practice for generations of homeowners, the consequences include diminished populations of wildlife. Most of the plants that feed us and animal life require insects to pollinate them. Disposing overwintering insects in enormous bags for curbside pickup, however, eliminates huge numbers of beneficial organisms.


And then we wonder why there aren’t as many fireflies and ladybugs, moths and butterflies, frogs, lizards, and birds as there were in generations past.


Fewer caterpillars and beetles will support fewer toads and birds. It’s as simple as that. Bird populations in several types of ecosystems are disappearing at an astonishingly rapid rate. Loss of habitat is part of the cause, but we can start to reverse that trend by simply adopting a fresh attitude toward wildlife. Appreciate it. Encourage it. Nurture it. Where you live.

Watch Douglas W. Tallamy’s videos or pick up a copy of his book, Bringing Nature Home, for inspiration and lists of plants that attract wildlife. Also, there are loads of pictures of insects, and a strong emphasis on using native plants. On the back cover:


“…Douglas Tallamy presents a powerful and compelling illustration of how the choices we make as gardeners can profoundly impact the diversity of life in our yards, towns and on our planet.”


gulf fritillary butterfly

Female gulf fritillary butterfly.

Return to the top

Dividing Chives: Easily Done!


Updated 1/28/2024


Here’s How To Divide and Rejuvenate Chives


Potted chives, about to be divided.


There are few plants that are easier to manage than chives. This herb, in the onion family (Amaryllidaceae), benefits from an occasional division. And as autumn approaches, a rejuvenated plant will reward you with a fresh crop of flavorful leaves until the snow flies.

Chives (Allium schoenoprasum) is super hardy, growing as a perennial in USDA plant hardiness zones 3 to 9. In the colder zones, it behaves as a herbaceous perennial, dying back to the soil after some hard freezes. A few months later, new leaves emerge from dormant bulbs in the ground when the soil begins warming up. Wherever I’ve lived, it has always been the first herb to sprout new foliage in late winter or early spring.

Here in zone 7 North Carolina, pot-grown chives has some usable foliage through most of the winter. If grown in a protected area or next to a south-facing wall (northern hemisphere), it will retain some foliage in cold weather. Potted chives is less winter hardy, by one or two zones, than those grown in the ground because the roots are fully exposed to cold air temperatures.

The term, “chives”, is from the French word cive, which derives from the Latin word for onion, cepa.

Some gardeners use the singular form of the word, “chive”, and others prefer using “chives” for both singular and plural applications. Your choice. Similar to the terms “species” and “impatiens”, I add the “s” at the end.


Why Divide Chives?


After a few years of growth, the small bulbs in the soil become very crowded. One year, the chives will look fine, and the next year it might fail to emerge at all. By dividing the clump every 2-3 years, the younger and more vigorous bulbs will have a chance to grow. Those old bulbs might already have decomposed, so you won’t see them in the soil.

Wet soil exacerbates any problems it might have, so plant it where the drainage is good, in a raised bed, or in a clay pot. In fact, chives can tolerate quite dry soil, and it doesn’t mind being potbound. But for the best growth, keep potted chives damp to lightly moist. It needs full sun—6 hours or more each day—to grow well.

Another reason to divide chives is to provide more plants for the garden, to give away, or to sell at the neighborhood yard sale. Perhaps you’d like to add a division to the strawberry jar you’re filling with herbs. Chives responds very quickly after division.

If onion aphids have weakened your chives early in the season, removing all the foliage is an option. That would be another good time to divide the plant, perhaps waiting until after the blooms fade. I’ve never had a problem with onion aphids after spring.

***Update***: These tiny young onion aphids (photo, below) hitched a ride on the potted chives brought indoors last month. So, I cut back the plant and moved it outside, after feeding a few aphids to the betta. The other chives on the deck already are beginning to show new leaves. 2/5/2021


onion aphids

Onion aphids from chives.


How To Divide Chives


The Pot

This process begins with digging up the clump or unpotting the potted chives. The plant in the photos has been growing in a 6½” clay azalea pot (shorter than wide—about 5″ tall). I will replant the same pot with one of the divisions, after cleaning it. Replanting in a dirty pot will make the next plant more difficult to remove. The new root ball will get stuck on the debris tightly clinging to the walls.

Another issue to consider is the shape of the pot. If the top curves inward, the root ball won’t slip beyond the narrow section, and you’ll have to cut straight or tapering sides to get the root ball out of the pot.

If you want to use Grandma’s ceramic pot, simply grow the chives in a plastic pot, with holes, that fits inside the prettier one. While double-potting lets you use a decorative pot without a drainage hole, remember to empty water collecting in the bottom.

Plastic or frost resistant ceramic pots are fine, but use one that is small to medium in size. A big pot holds a large volume of soil that stays wet in a rainy period or in the cold. The excess moisture could kill your chives unless you’ve added extra drainage material. Chives grows nicely with a few other herbs in a window box.


Cut It Back


cutting chives' leaves

Cutting leaves right above soil level.


Cut off all the foliage, down to about 1/2″ from the soil surface. While it might appear extreme, this plant won’t skip a beat. Already, a day after cutting back this plant, it has grown 1/3″ (photo at the end).

Removing the foliage makes the process easier and neater. Also, there’s less stress on the roots because they won’t have to supply water to the foliage. Take the good leaves to the kitchen, and add them to baked potatoes for dinner, or to eggs, a salad, or soup. You’ll have long leaves to snip from rejuvenated plants within a couple of weeks, depending on weather.

Look for leek moth larvae, immature insects that sometimes bore into the hollow leaves or burrow inside and destroy the bulbs. This insect is native to Europe and Asia, but also is found in North America, where it can become invasive.


Divide and Multiply

If you’re removing your chives from the ground, dig a few inches from the base of the clump, and about 8″ deep. Tease off loose soil and put the earthworms back in the garden. Don’t worry about some lost roots; chives’ roots regrow very fast.


The root ball in a potted plant will become very congested with tightly packed roots, both dead and alive. Use an old serrated knife to slice off the outer edges of the root system. And remove that center part if there are no bulbs there. Compost this tired soil or toss it under the shrubs.

An old clump of chives often grows outward, while the center dies out. Identify the places where natural divisions can be separated. Now divide the plant. Use the knife to make a few or several divisions. I kept 12 to 20 shoots in each division. If you want, you could cut smaller divisions for more plants.


Potting Up


Place a wad of polyester fiberfill over the pot’s drainage hole. A small bag can be purchased for a few dollars at hobby shops. Because it’s synthetic, it doesn’t break down and can be reused. The PF prevents soil erosion, leaving all the soil in the pot. Also, sowbugs, earthworms, and other critters will not be able to gain entrance to the soil through the drainage hole. But water will drain freely.

Add some potting soil to the pot and hollow out a depression for the fresh division. The soil line should be about 1/2″ to 1″ below the rim of the pot. Firm the soil around the roots to prevent settling or air channels through the soil. Add more soil if needed. But don’t bury the crown of the plant any deeper than it was growing before the division.

Water the plant and place the pot in the sun. Done! Wasn’t that easy?


Growing Chives Indoors


Light

Chives grows easily in a sunny window, where it gets at least 6 hours of direct sun. Abundant sunshine allows optimal photosynthesis and keeps the plant growing strong. Lack of adequate sun causes thin, weak growth that falls over.

Artificial light can help on cloudy days. Place the plant close to a light source to supplement the natural light it gets, but not so close that it can feel the heat.


Temperature

Even if the windowsill is chilly on winter nights, the plant should thrive there. Chives growing indoors should stay in leaf all season, even though those growing outdoors will go dormant. Cooler winter temperatures (45° to 65°F) indoors keep the plant shorter and in better condition. It will bloom in spring only if it has received enough cold, so don’t expect flowers.

If you must keep chives indoors in the summer, set the pot back several inches from the glass so it doesn’t overheat.


Water

Keep the soil damp. Water thoroughly, and then let it dry a bit. After 10 or 15 minutes, empty excess water that remains in a saucer. Chives can grow in a pot as small as 4″ across and doesn’t mind being potbound for some time. A full plant in a small pot requires water more often.


Fertilizer

Every 6 weeks, from mid-fall through winter, apply a dilute (1/4 to 1/2 strength) solution of fertilizer if the plant continues growing.

From spring through early fall, fertilize every 3 or 4 weeks at about half the strength recommended on the package. Chives just isn’t that fussy. Wait 5 or 6 weeks after dividing before starting to fertilize. Chives planted in the garden might need fertilizer only once or twice during the growing season.


Tips for Harvesting Chives


When cutting the leaves, cut the entire leaf, almost down to the soil. The bulbs will soon generate new growth. If you cut the tips off a bunch of leaves, all the ends of those leaves will turn yellow.

Intercalary meristematic tissues right above the bulbs permit regrowth of the leaf from the ground up.


chives in flower

Chives in flower.


Chives flowers in spring (or early summer in northern zones) after being exposed to several weeks of a cold winter. It’s very pretty in bloom, with pinkish purple flowers on sturdy stalks. It looks like their cousins, the ornamental Alliums, grown from bulbs planted in autumn.

This herb’s flowers produce generous amounts of nectar, attracting beneficial insects. Chives’ flowers are edible. Simply pull some of the little florets off the head and use as a garnish. Young flowers have a milder flavor than those that have been open for a few days.

The stalk, or peduncle, that the flower is attached to is quite tough, and not edible for most purposes. Hold the base of the plant and pull out the entire flower stem.


Chives from Seed


As a monocot, chives produces flower parts in multiples of threes. So, each floret has 6 petals and the seed capsule is 3-lobed.

Different varieties of chives have similar flavor, but some have finer foliage than others. ‘Dolores’ has thin foliage, while ‘Purly’ and ‘Staro’ have wider leaves.


garlic chives going to seed

Garlic chives going to seed.


And there’s garlic chives, Allium tuberosum, with a distinct mild garlic flavor. Very nice in salads, but it will spread all over the place if the seedheads are not removed (photo, above). It also spreads underground more vigorously than onion chives.

Garlic chives grows in zones 4 through 9. Its pretty white flowers appear later than onion chives. Enjoy the flowers for a few days but remove them before seeds develop. Most wild animals do not feed on chives.

Garlic chives has leaves that are flattened, while onion chives has leaves that are cylindrical in cross-section.

Growing chives from seed is quite easy. Sow chives about 1/4″ deep in moist potting soil. You can use market packs or individual 3½-4″ pots, with 10 or so seeds sown together. Some growers sow dozens of seeds in one pot for a faster sale.

As soon as the seeds germinate, give them full direct sun for strong plants. They can be planted out after hardening off the seedlings, and they’ll tolerate light frost at a young age.


                               *     *     *     *     *     *     *     *


Chives has been used for 5,000 years by civilizations in both the Old World and the New World. The foliage is high in Vitamin C, carotenoids, and manganese. It’s very high in Vitamin K. Because we normally don’t consume chives in large quantities, it’s not considered a major source of nutrients.

Dividing chives is an easy project for a cool end-of-summer day. Clipped fresh chives is very nice on a chilly day with a baked potato, melted cheese, crumbled bacon, topped with barely cooked broccoli…and butter… Enjoy!


chives, the day after division

Chives, a day after dividing the original plant.


Return to the top

Lavender Cuttings: Tips for Propagating Lavender


2020

Updated 5/25/2024


Kim’s Tips for Rooting Your Own Lavender Cuttings


taking lavender cuttings

Cutting a lavender stem at a node.


How wonderful—the fragrance of lavender wafting through the back yard. You’re pleased beyond measure with these silver-leaved subshrubs in the pollinator garden, and perhaps you’d like more of them. The bees and butterflies are all over them! And the deer never touch them!! Garden centers stock several cultivars of lavender, but they are not inexpensive. Problem solved: “I’ll root my own lavender cuttings!”

The plants have performed well, and the garden is buzzing with activity. Now, you’d like to expand the garden to provide even more sustenance for all the bees and other insects. Admittedly, there is some work involved. Properly preparing the heavy clay soil takes effort and materials, but you know it will be worthwhile.

We need pollinators for farms and orchards, for our own vegetable gardens, and to regenerate natural stands of greenery. They pollinate every third bite of food we eat.

Because it takes several weeks to root cuttings and to grow them on to the proper size for transplanting, time is on your side. So, let’s begin by taking cuttings from the plants in the garden. While they’re rooting, you’ll have plenty of time to get the soil just right for the new plants.


Patent Rights

Because it’s illegal to propagate trademarked plants for resale, I bought the newer lavender cultivars in trays of 60 to 200 tiny rooted plants, called plugs. Labels of branded varieties carry the caution, “Unauthorized propagation prohibited”. Many varieties were not under patent protection, however, so those were the ones I propagated.


Lavender from Seed

Another option is sowing seeds—‘Ellagance Purple’ and ‘Lady’ are two that you might try growing. ‘Munstead’ is a strain that has been around for a long time. Seeds take a few weeks to germinate, so this project is best started in spring. Plants grown from seed (sexual propagation) can vary in certain characteristics, including plant size, foliage color, flower color and size, and time to first bloom.

Plants vegetatively propagated, on the other hand, will have consistently similar characteristics. Cloned plants, from cuttings, have the same genetics as the stock plant, so the rooted cuttings will look identical to the parent.


Lavandula and butterfly


Prepare the Pots and Soil for Lavender Cuttings


First, assemble 4″ or 4 1/2″ plastic pots. Bigger pots hold a much larger volume of soil and dry too slowly.

Lavender is susceptible to several fungal diseases, so starting with clean materials is essential. At the very least, wash the pots with soap and hot water. Better yet, clean the pots with a bleach solution, let them sit for a few minutes, then rinse thoroughly.

Another option is to use new cell packs, with 4 to 9 cells per pack. Soil in small cells dries faster, so you’ll need to closely monitor these containers.

Don’t use soil left over from last year’s plants; it could be harboring disease spores. Never throw “used” soil into the trash. Instead, add it to the flower gardens or the shrub border, where it will contribute organic matter as it decomposes.


Options for Potting Soil:

  • Always begin with pasteurized potting soil. Mix this with clean coarse sand or perlite. The medium should drain well, allowing both water and air to percolate through the soil.
  • Use products formulated for succulents, and add houseplant potting soil to make a gritty medium, but one which will hold some water.
  • Or, simply, use a fresh bag of pasteurized potting soil, which includes perlite, and be very careful about watering.

Avoid using soil containing a large percentage of peat moss, which is acidic and stays too wet for lavender. This herb, like many others, needs close to a neutral pH.

Incidentally, most potting soils sold in garden centers contain no soil at all, and are sometimes called “soilless potting mixtures”. For our purposes, the term “potting soil” will do.

If the medium is dusty dry, mix in a small amount of water. Avoid breathing in the dust. The soil should be slightly damp. Fill the pots with potting soil, and firm lightly. Leave about 1/2″ to 1″ of space between the soil surface and the pot’s rim.


Making the Cut


joyce chen scissors for cutting lavender

Joyce Chen scissors.


When To Cut

Cuttings taken in early to mid summer should root adequately before autumn. These are considered “semi hardwood” cuttings. The stems aren’t fully matured, but they aren’t too tender, either. Tough old woody stems will not root.

Collect lavender cuttings in the morning, when they’re fully plumped with water. Don’t use material from the bottom or from the shady side of the plant. Use healthy foliage, without any spots. Cuttings from plants that have not been overfertilized with nitrogen are more likely to root successfully.


How To Take Lavender Cuttings

With clean sharp scissors, take cuttings from non-blooming, non-budded stems. Lavender cuttings from the tips of the stems, rather than from middle sections, make better propagating material. If your early blooming lavender plants were deadheaded (old flower stems cut back) early in the season, the remaining stems might already have branched out, providing fresh cutting material.


lavender cuttings

Cuttings, before removing bottom leaves.


Lavender cuttings should be only 2″ to 3 1/2″ long, depending on variety. Large cuttings have greater leaf surface area, and the cuttings might wither before roots form. When taking cuttings from any plant, consider the number of leaves, light, water, humidity, and time to root. Each variety has its own combination of variables that results in prompt, successful rooting. Long cuttings, low humidity, lack of light, and wet or dry soil will not yield rooted plants.

Make the cut where two leaves join the stem (photo at top). This part of the stem is called the “node”, and the first roots often emerge there.

Now, remove leaves on the bottom inch or so of the stem. Gently peel them off. Otherwise, leaves will rot in the soil, which could rot the stem.


lavender cuttings

Cuttings, ready for sticking.


Rooting Lavender Cuttings In Water

Coleus cuttings start rooting in water in a few days; lavender requires weeks in soil. When possible, I always root plants in potting soil rather than in water. The roots’ cell structures differ between the two methods, and those growing in water often die when re-adapting to soil.

If you have plenty of cuttings, perhaps rooting some in water will work for you. Cuttings should still be about 3 1/2″ long. Use only an inch of water in a glass, don’t crowd the cuttings, and remove leaves in the water. Place the glass in part sun, and change the water every few days.


Sticking the Lavender Cuttings


After decades of rooting plants under lights for my business, I’ve had the most success with cuttings that were stuck right next to the inside of the pot. Particles of soil touching the wall of the pot tend to permit more air to circulate around the stems. That’s precisely what lavender needs.

The stems aren’t sitting in wet soil, although there is some contact. At night, as the temperature drops, water vapor precipitates on the inside of the pot. And the humid air in that space helps the cuttings root.


lavender cuttings in a pot

Lavender cuttings.


This 4 1/2″ pot accepted 9 cuttings, with 1 in the center. Avoid crowding the cuttings; space them so their leaves don’t touch each other. Lightly water in the cuttings to make better contact between the stems and the soil.

I propagate other herbs, including thyme, rosemary, oregano, sage, and bay laurel, in the same way.


Actinovate

When propagating herbs and perennials each season, I use an organic biological fungicide called Actinovate. This product, a bacterium called Streptomyces lydicus strain WYEC 108, prevents vulnerable plants from succumbing to most diseases. Water the solution into the soil after sticking or lightly mist the cuttings, occasionally, in the morning. I also use it when germinating seeds.

This fungicide is quite expensive, but it makes plant propagation much easier for me. It carries the OMRI label and is safe to use on edibles.

Always exercise caution when using materials for treating plants. Don’t breathe the dust, avoid getting it on your skin (rinse thoroughly), and don’t improperly dispose of leftover product or the container. Read the label.


Rooting Hormone

Rooting hormone powder coats the base of the cutting with a chemical fungicide and plant hormones. While it accelerates the rooting process for many plants, this product carries the Environmental Protection Agency’s Caution rating, as does Actinovate.

I haven’t used it for many years, but, if you’ve had good results using rooting powder, then try it on your lavender cuttings. Always read the label, and never discard leftover powder where it can pollute streams.


Raise the Humidity


lavender cuttings in clear plastic bag

Pot of cuttings in open plastic bag.


To raise the humidity around the cuttings without causing rot, place the pot of cuttings into a clear plastic bag. Pull up the bag so it surrounds the cuttings, but don’t secure it. Fuzzy-leaved plants, such as lavender, rot (not “root”) easily in high humidity. A closed plastic bag or some other closed system raises the relative humidity to 100%. It also causes the “greenhouse effect”, raising the temperature too high when exposed to the sun.

So, keep the top of the bag open. Enough humidity will remain around the lavender cuttings. In very dry environments, the bag can be partially closed, but don’t let heat build up. Empty any water that collects at the bottom. If the soil is moist and there’s significant condensation inside the bag, open the top more widely, and let excess moisture dissipate. Wet soil will rot the cuttings.


Light For Lavender Cuttings


sunshine through trees


Lavender loves to bask in the sunshine. The sooner the cuttings get back to the sun, the sooner they can resume strong growth. But harsh sun will desiccate the unrooted cuttings. This is a race against time.


Indoors

Indoors, place the cuttings where they will get gentle direct sunlight. Sunlight helps cuttings root faster, but strong sun will dry them and overheat the air inside the bag. Bright filtered sun most of the day, as through a sheer curtain, works well. Average indoor temperatures (high 60’s F to the mid 70’s) will help them root.

Don’t put the cuttings too close to a window, in the hot sun. Check to make sure excess heat can escape. Lavender cuttings will not root in low light, so it might require a bit of experimentation to find the perfect light level to root the cuttings without desiccating them.

New growth emerging from the tip of the stem indicates a cutting that is beginning to root. Congratulations! Patience pays off!


Artificial Light

A 4′ long fixture with 2 daylight LED or fluorescent tubes makes a perfect nursery. Here, the plants never see a cloudy day, and you can keep a close eye on progress.

Place the lavender cuttings close to the tubes, within 3″. They should be as close as possible to the lights, but not feel heat from the fixture. Keep the lights on for 16-18 hours each day.

Smaller tubes and grow bulbs emit less light, which might not be enough for lavender. But if that’s what you have, try it. Make sure the cuttings are close to the tubes and that the lights are kept on for 18 hours each day.


Outdoors

Many of us don’t have indoor space suitable for rooting lavender cuttings. In that case, place the pots outdoors in dappled shade when the temperature is suitable. Give them more bright shade than harsh sun. Don’t expose them to hot afternoon sun and find a location out of the wind.

In a pinch, take a few cuttings and simply stick them at the edge of a planter, in light shade cast by a plant. I’ve been able to root many kinds of plants this way. Watch out for slugs, by the way, and use organic Sluggo to bait them. Scoop out rooted plants, and pot up for a few additional weeks of growing and getting used to full sun before planting them in the garden.

The cuttings in the photographs go outdoors on the deck in the morning. I take them back inside at noon or in early afternoon. It’s been way too hot and humid outside this summer—mid 90’s F, over 100° heat index for days at a time. When it cools down, they’ll spend more time outdoors.

(***Update***: The pot of cuttings in the photographs has only one survivor. Prolonged heat, frequent downpours, and mischievous chipmunks digging in the soil killed the rest. But that one well-rooted plant looks great, and will stay in its 4″ pot over the winter. 1/1/2021)


Ready for Transplant?


Okay…it’s been about 5 or 6 weeks and most of the cuttings show new leaves growing at the tips of the stems. That’s great!

If you see roots at the drainage holes in the bottom of the pot, the cuttings might be ready to divide. Remove the cuttings from the pot by gently tipping the pot upside-down. See if there are enough roots to move them to the next stage. Each cutting should have a few 1″ to 2″ long roots. Handle with care, since the roots detach easily from the stems and dry quickly when exposed to air.


Cuttings Rooted in Pots

Before settling them into their permanent homes, the rooted cuttings in pots will need to grow a more extensive root system. Transplant them individually into their own small pot or into 4-cell market packs. Be sure to maintain the same soil level against the stem; never bury the stems. Use the same kind of soil you used to root them.

If they’re rooted, give them a few hours of direct sun for a few days before exposing them to full sun. Let them root into the pots before planting in the garden. Rooted cuttings don’t require high humidity, so remove the plastic bag.


Cuttings Rooted in Cell Packs

If you planted the cuttings in market packs to begin with, simply push up the bottom of a cell to check root growth. Don’t pull the cutting itself. Well-rooted plants can be planted directly into the garden if you monitor them very closely. If needed, cover temporarily with a “caterpillar” tunnel fitted with bird netting. This protection admits air and sunlight, and will prevent damage from digging animals while the lavender becomes established.

If cold weather is approaching, use a clear plastic cover over the tunnel, and vent it in the daytime. This will buffer severe conditions, and could save the plants.


Harden Off the Lavender Cuttings

Harden off the cuttings by gradually introducing them to outdoor conditions over a period of a week or so. Place the pots of lavender outdoors, in morning sun for a few days, then in more hours of sun. It’s easy to forget them, when they’re out of sight, so remember to water! Plants receiving abundant sunshine make more food for themselves, through photosynthesis, so their roots will grow faster. By the end of the hardening off process, the plants should be able to tolerate direct sun all day.

Remove flower buds appearing on young cuttings. For now, all energy should be directed toward growing a robust root system.

Any cuttings that haven’t rooted and have foliage that feels limp can be discarded. If they look like this after a month, it’s not likely they will root. Figure out how to improve the growing conditions, and try again.


The Garden is Ready


garden rake, prepared soil


And so are the plants. Water them first. Then remove the rooted plant from its pot and gently loosen the outer roots if they form a tight root ball.

Plant the little lavenders, maintaining the same soil level next to the stem. Firm the soil around the roots to eliminate air pockets. For almost all plants, you should be able to see the top of the original root ball after transplanting.

Be sure to space them properly, according to the variety. Some mature at 16″ tall and wide, while others can grow as large as 3′ or 4′ across. Lightly shade the plants if the leaves wilt in moist soil. Sticking a leafy twig in the ground on the sunny side works well enough.

During hot weather, check the soil moisture every day, although you might not have to water every day. Feel the soil a few inches down and next to the root ball. If you detect moisture, don’t water. If it wilts or the soil feels dry, water around the root ball.

When you do water, keep the foliage dry. This helps prevent disease.


To Mulch Or Not To Mulch

If you use mulch in the garden, avoid placing it under the canopy of the plant. Where it rains regularly, mulch can hold too much moisture in the soil, so use only a thin layer or, preferably, none at all right under the plant. Keep mulch off the stems.

Avoid finely shredded hardwood mulches, and choose pine fines or small nuggets instead. They permit better air circulation around the lavender.

Planting lavender on raised ground helps the soil drain faster, and plants display better when elevated above surrounding lawn or paving.


Is Your Lavender Winter Hardy?


lavender


Each plant variety has a hardiness zone rating, usually between zone 5 and zone 9 for lavender. If you live at the colder end of that variety’s hardiness zone, the rooted plants might need the protection of a cool greenhouse or a cold frame until next spring. It depends on expected weather patterns—temperature and precipitation—over the next several months for the cultivars you’ve selected.

At this point, in late summer, waiting to propagate lavender until next year might be more feasible, especially for gardeners in colder climates.

Lavender is drought resistant once established in the garden, but often dies when overwatered. Improving soil drainage is especially important for cultivars planted in the colder regions of their hardiness zones. “Winter wet” is a frequent cause of lavender failure.

Plant lavender with other perennials and shrubs that share its preferred growing conditions. Although it isn’t native to the U.S., it is non-invasive.

You might enjoy reading about the history of lavender and its uses through the centuries. This article at The Farm In My Yard includes more detailed information for growing lavender successfully.

Better for the Environment

Traditional property management calls for removing winter shelter and sources of food for insects and animals, so this is how we can begin to compensate, right in our own gardens.

Propagating plants is an economical means of providing new material for your gardens. Planting species that offer sustenance to pollinators is not only ecologically preferable to maintaining lawn grass, but it’s also prettier!


lavender


Return to the top

The Imperial Moth: A Magnificent Creature!


What Is This Big Yellow and Purple Moth?


Imperial moth

Dorsal view of the Imperial moth on the glass storm door.


Most of us follow some sort of routine after sunset or before retiring for the evening. First, I bring the bird feeder indoors. If I don’t, the raccoons will surely empty it—every last seed. Once, a few years ago, they had removed the feeder from the hook and entirely disassembled it.

Second, I turn on the front porch light, and, later, secure the storm door. If I hadn’t done this a couple of nights ago, I would have missed this visitor. In the few seconds it took to grab the camera, the moth had already slid partway down the glass. I’ve never seen one of these Imperial moths, and it was an impressive sight!

After taking photographs, I gently nudged the moth into a glass bowl for the night. She didn’t seem terribly eager to fly away, and didn’t require much encouragement. The plan included show-and-tell with a couple of neighbors the next morning before releasing the moth to the trees down the block.


This Imperial Moth Is a Big One


Imperial moth

This female moth has a 5.5″ wingspan.


This Imperial moth has a wingspan of 5.5″, although adults normally measure from 3″ to 7″ wide. This one is a female. Males have more purplish-brown spotting on their wings. Another distinction involves the antennae on males, which are feathered in order to more easily detect pheromones given off by females.

In formal circles, she is known as Eacles imperialis imperialis (Drury, 1773). The Imperial moth is found in rural and suburban habitats from Argentina north to New England, and, in the United States, from the Rocky Mountains east to the Atlantic Ocean.

In the northern U.S. and Canada, its populations have been in decline since the mid 1900’s due to artificial lighting, pesticides, and diminishing habitat. This moth is quite common throughout the mid Atlantic region.


Life Cycle of the Imperial Moth: 4 Stages


1. The Egg

A small caterpillar emerges from the yellow egg in 10 to 14 days, consuming its shell (chorion). But the young caterpillars might roam for a few days, I’ve read, before settling down on the branch of choice. (***Update***: Eggs can hatch within a day or two, as documented under “They Hatched!”, below.)


2. The Five Instars

When it emerges from the shell, the larva can puff itself up to about 1/3″ long, appearing larger. The black spines (scoli) at the head and the posterior end might ward off predators.

After feeding for a while, the larva is ready to molt. The caterpillar attaches silk to the main vein of the leaf, and grasps the silk with its legs and prolegs. Each time the caterpillar molts, it expands, and the exoskeleton firms up. Sometimes the larvae eat their exoskeletons for the protein content.

As members of the Saturniidae family (the giant silkworms), Imperial moth larvae undergo 5 instars. During the first instar, the larvae are orange with black crossbands, and have short hairs. They grow darker after each molt, although there are regional variations and subspecies.

By the last instar, the caterpillars are 3.5″ to 5″ long. Color morphs will be dark brown, burgundy, or green, and they have long hairs and shorter spines. In sensitive people, these hairs and bristles can cause a rash.

The dark colored larvae have white spiracle patches, while green caterpillars have yellow spiracle patches. Spiracles are breathing pores, located in a line down each side of the caterpillar.

The University of Florida has excellent photographs at their website.

Food Sources

Larvae of the Imperial moth feed on native oak, maple, sweet gum, sassafras, and pine trees. Some websites indicate the caterpillars’ preference for pine trees. They also feed on eucalyptus, box elder, and Norway spruce. Less commonly, the larvae feed on elm, hickory, persimmon, honey locust, and many others.

This caterpillar is a favorite food source for birds.


3. The Pupa

After the 5th instar has matured, it burrows into the ground to pupate. The Imperial moth does not make a cocoon, as other silk moths do. The overwintering pupa is dark reddish brown to black, and has appendages on the posterior end that help it rise in the soil just before the adult emerges. While buried, it is not vulnerable to birds, although burrowing animals might eat it.


4. The Adult Moth

Adults emerge, usually at dawn, to mate. In the northern part of their range, adults appear in mid-summer (June-August). In the southern part of their range, they emerge over a longer period of time, from April through October.

Imperial moths have only one brood per year. In warm areas where they’re found, some observers have stated that they have 2 broods. But it is believed that the one brood is actually emerging over a prolonged period of time.

Males appear before the females. After mating, female Imperial moths lay eggs on foliage at dusk.


A Mommy Moth!


The Imperial moth

This is the ventral surface of the moth, and what I saw first. “Oh, wow!”


It appeared that the right hindwing had been damaged. So, I didn’t think she had recently emerged from her pupa. Imperial moths live only a week or two, for the sole purpose of mating and laying eggs. Their mouth parts have been reduced, preventing them from feeding. Neither the male nor the female takes sustenance as an adult.

To make the Imperial moth more comfortable during her overnight accommodations, I added some greenery from the garden. No, not for the purpose of providing food. I just thought she would feel more at home, while being held captive, until she could return to her natural habitat. Incidentally, people also benefit, psychologically, when we’re in the presence of living plants.

There was a surprise the next morning. A dozen eggs had fallen under the greens to the bottom of the bowl. So, dutiful subject that I am, I will place them on the leaves of an appropriate tree.

What fun! (Behemoth or Beshemoth?)

(***Update***: Over the past week or so, I’ve noticed a few more Imperial moths flying through the yard. Two of them were eagerly followed by hungry birds, but I didn’t see the birds catch them. 8/3/2020).


yellow moth eggs

Here are some of the eggs.


They Hatched!


caterpillars eating maple leafBy yesterday morning (7/25), about 2/3 of the dozen eggs had hatched. That was unexpected! So, I took a few leaves from the red maple tree (Acer rubrum) by the mailbox and placed them in the bowl. This morning, it was clear that they had begun eating. The edges of the leaves were nibbled (photo, right), and tiny dark feces fell to the bottom.

(***Update***: When I read that Imperial moths can be raised in captivity, I decided to keep the eggs. I assume that Mommy Moth laid the rest of her clutch after I’d released her. 8/4/2020)

The remaining eggs hatched last night, and those caterpillars were visibly smaller, but only slightly so, than their older siblings. I brought them to the kitchen table to photograph them. If they weren’t eating (the maple leaf, that is), they headed toward the brightly lit patio door, requiring persistent redirection. This reminded me of sea turtle hatchlings scurrying instinctively toward the water.


First Silk For the Imperial Moth

I gathered all but a few of the caterpillars, placing them and a maple leaf in a bag for release. At the maple tree, I placed each one on a leaf, until it “stuck”.

Newly hatched larvae attach themselves to the leaf with a fine silk thread, apparently not just during molting. When I picked up the tiny caterpillars to place them on the leaves, I could feel the resistance of an invisible thread. Smart little caterpillars.


White Hairs

Something else I noticed concerned those hairs on the caterpillar. All caterpillars had the black scoli and many white hairs. Most of those hairs seemed to be somewhat irregularly placed on the caterpillar, although others were extensions of the scoli. And, coincidentally, the maple leaves had fine white trichomes (extensions of the epidermis) on the back of the leaf, mostly along the main veins. The trichomes and many of the hairs on the larvae looked exactly alike.

It looked as though they might have picked up some of those trichomes, because some caterpillars had several hairs around their heads, and others had very few. Most hairs on the segments appeared to have been randomly placed and at odd angles to each other.


caterpillars, maple trichomes

Caterpillars and trichomes on maple leaf.


***Update***:  The following section was added 9/14/2020.


New Food For the Imperial Moth


imperial moth caterpillar

This caterpillar has been feeding on crape myrtle. No hairs!


For a few days, I added different types of leaves to see if the caterpillars demonstrated a preference. They were not interested in loropetalum, oak, holly, or passiflora. They did, however, love the crape myrtle—more than they liked the native maple. When offered a buffet of several kinds of freshly picked leaves, including maple, the caterpillars ate only the crape myrtle. How perplexing that the caterpillars preferred this non-native tree (Lagerstroemia indica)! And, surprisingly, they lost all their white hairs (photo, above) after feeding on crape myrtle for a few days.

To attract more wildlife to your property, plant a large number of native plants. As we’ve seen with this imperial moth, our native insects and birds will feed on some non-natives as well. But the best bet is to plant more natives than exotic species of plants. Choose plants that flower at various times of the year to attract more species of insects and animals. And plant them in multiples; a single specimen plant might not get the attention from a female insect looking for a nursery to host her young. Contact your local native plant society for plant species recommendations.

Keep in mind that lawn chemicals and insecticides could kill imperial moths while they’re pupating in the ground.

I released the caterpillars to a 6′ crape myrtle. This plant had volunteered in the front garden from seed and was transplanted into a 5-gallon pot. The larvae regrew those fine white hairs and now all caterpillars are thriving in their new home!


Mature imperial moth caterpillar on crape myrtle stem.

Imperial moth caterpillar on crape myrtle in the Charlotte garden.


Return to the top

Basil Downy Mildew: You Can Prevent It!


Yes, You Can Prevent Basil Downy Mildew!


lettuce-leaf basil

Pots of young lettuce-leaf basil.


What could be more refreshing than a garden salad harvested from your own back yard? We love our tomatoes, cucumbers, green onions, ripe sweet peppers, and the ‘Tango’ celery added to mixed greens. And don’t forget the basil!

But you’ve noticed how basil has struggled the past few years despite all the suggestions offered by the garden center. It just doesn’t look quite right, which prompts the question,


“What Is Wrong With My Basil?”


Gardeners throughout the world are having issues with basil. From Anchorage to Adelaide, readers at The Farm In My Yard clearly have problems with this herb. And it used to be so easy to grow! Now their leaves develop black spots every summer, and they’re yellow between the veins. This is not appetizing at all.

Does that sound familiar?

Well, join the club! For over a decade, we’ve been dealing with spotty ugly basil, infected by that awful disease known as basil downy mildew. This water mold has been seen in more than 44 of these United States, and in just about every country where this herb is grown. Once the disease has reached your plants, you might think it’s all over.

But it isn’t! By managing it differently than you normally do, you can have beautiful basil once again. I’ve successfully grown it in pots every year since the disease was first identified in the United States. The plants grown in the garden, however, almost always have succumbed to BDM. But there’s more to it than just growing them in pots, as you’ll read later.

You need not worry that Peronospora belbahrii will infect other plants in your garden. BDM targets only basil.


basil downy mildew

Yellow areas between the veins.


How To Recognize Basil Downy Mildew


As you can see in the photo, above, formerly healthy green leaves developed yellow patches bordered by the main veins. After a stretch of high humidity or rain, the symptoms became readily apparent. The plant looked fine one day, and the next morning it looked like this!

The condition worsened, as it infected more leaves and more stems. The leaves became yellow overall, and black spots showed up. Within a week, the plant was worthless. It had been growing in a large pot with a tomato, so I cut the basil at soil level and threw it in the trash.

We’ve had a very rainy spring and summer so far (2020), and this plant started showing signs of distress by mid June. I picked the good green tips, and kept them indoors in a glass of water until they went into tomato-basil salads.

The local grocery store had full sweet basil in small pots, so I bought one. The first thing to do is to discard the clear plastic wrap around the plant. Why? Because humidity causes the problem in the first place!


potted bsil

This is a pot of healthy sweet basil.


How BDM Starts


Microscopic BDM spores on the leaves need relative humidity above 80% or 85% for only a few hours in order to germinate. Local weather reports will indicate the relative humidity, and you might be surprised by how high that number is at dawn, even during “nice” weather.

Although you might not have had rain or high humidity during the daytime, your basil can still become infected. Here’s how:

As the temperature decreases through the night, the relative humidity rises. It’s usually around dawn, the coolest hours, that the relative humidity reaches its highest reading. With BDM spores on a susceptible variety, 2 or 3 hours of high humidity will get the disease growing. So, even during comfortable daytime weather, the infection gets its start quietly, hours before the alarm clock goes off.

Most years, we can grow basil successfully for a few months before the humidity increases. But over the past few years, BDM has struck earlier in the growing season.

If the summer is hot—in the mid 90’s and above—and the nights don’t cool off very much, the relative humidity won’t rise to the critical 80-85% level required for germination. Unless there’s rain.

Gardeners living where the humidity is always low probably won’t have problems with BDM. But one brief rainstorm could be enough to initiate the disease, if spores are present, even in a normally dry region. If the weather dries sufficiently, though, the disease will subside. Pick off and discard infected leaves, and normal growth should resume.

Wind carries the spores from infected southern-grown plants to northern zones (northern hemisphere) each year. Plants that are shipped to garden centers around the country, infected seeds, and overwintered infected plants are potential sources of basil downy mildew. But the spores do not survive cold winters, and the disease needs a living host.


At Dawn, The First Day


basil downy mildew

Early symptom–fuzzy gray layer on reverse.


Once the spores germinate, they grow into a gray fuzzy film on the leaf’s reverse. You have to be an early riser to catch this stage of the disease. You’ll notice a change in the leaf’s appearance, showing light green to yellow areas between the main veins.


Later, Or The Next Day


The mold progresses to the next stage, when tiny black dots become visible on the back of the leaf. Those dots are the sporangia that have burst open, releasing spores to infect the next basil that comes along. The leaf becomes more discolored, wrinkled, and spotted. The sporangia can be so thick that most of the leaf reverse is covered in black.


basil downy mildew

Black sporangia on reverse.


And Then


Yellowing between the veins continues, and leaves develop black edges or spots. Although the infected leaves won’t harm you if eaten (unless there’s a true allergy to the mold), they will not have that rich summer basil flavor and aroma you longed for. It’s time to look for new, healthy young plants. Or start some seeds!

Any basil without good color, either light or dark green, or purple, tastes awful. Whether it’s caused by disease, poor growing conditions, or lack of nitrogen, pale leaves will disappoint your taste buds. Some varieties, notably the lettuce-leaf basils, normally have light green leaves (photo at top).


Three Suggestions To Prevent Basil Downy Mildew


At the end of this post, I’ll include links to other articles at The Farm In My Yard with information on basil downy mildew. They have all the details you’ll need to grow beautiful basil. And there are methods for growing this herb outdoors in the garden in ways which might decrease the likelihood of BDM.

For disease-free basil, consider these 3 tips:


1. Grow Basil Under Artificial Lights

The Structure

Many gardeners don’t have sunny windows or any garden space to grow basil. You can grow a decent crop, however, under artificial lights, such as fluorescent tubes or LED’s. The more expensive LED’s last longer and consume less energy.

You can buy light cart kits to assemble at home, but they will cost you dearly. Instead, gather a few materials from the hardware store, including the light fixtures, and construct your own light table. Another option would make use of an empty bookshelf. Perhaps the basement or a spare bedroom could become indoor growing space for houseplants and edibles. I recommend a small fan to circulate the air.

A 4′ long plug-in fixture with 2 tubes and a reflector on top will suffice. Smaller units emit much less light and might not provide enough light for herbs. So, for plants that normally require lots of sunlight, try to find space for the larger fixture.

Two or three fixtures lined up about 2′ apart significantly increase the light levels, so you can grow other edibles or houseplants with the basil. Maybe you’d like to add parsley and cilantro to your indoor garden. Lots of possibilities!

For 35 years, I used plant tables originally built by our contractor friend, Wally. I broke them down and reassembled them each time we moved. Constructed from 2″ x 4″ framing, carriage bolts, screws, hooks, small chains, 4′ light fixtures, and 4′ x 8′ sheets of exterior grade plywood, each table was a marvel of functional simplicity. Matte white surfaces reflect light back to the plants, so consider painting the structure, including the plywood, and the room white or off-white.

Be careful using electricity and water in close proximity. If you have any doubts, ask a licensed electrical contractor for advice. But it’s not difficult to set up a simple table with lights. Double the fun and add fixtures under the table, where it’s a bit cooler. Lettuce and mesclun should do well there.

Growing Basil

Keep the plants very close to the tubes—within a couple of inches—and leave the lights on for 14 to 16 hours each day. Yes, this is more hours of light than they’d receive outdoors, but with lower photosynthetic photon flux density (“weaker” light) indoors, plants use this light more efficiently over a longer period of time, resulting in increased growth. Your indoor basil probably will look better than outdoor basil.

Basil likes temperatures from the high 60’s and into the 80’s F, but prefers to be above 70°. You might be able to grow it indoors all year. Keep the soil slightly moist, but not wet.

Pinch back the stems so the basil won’t grow too tall. This prevents lower leaves from being shaded, which will cause yellowing. Cutting back the plants also forces branching, supplying more tender growth for the kitchen. Remember to fertilize every 2 to 3 weeks to keep the foliage a rich green color; pale foliage tastes terrible.

Start seeds or buy young transplants every few months. Basil is an annual, and once in flower mode, it often starts deteriorating. Cutting off the flower buds and a few nodes (pairs of leaves) under them, however, will delay its demise. Place potted basil plants on inverted pots, if needed, to raise young plants closer to the lights.


microgreens in a tray

Microgreens, primarily broccoli.


Growing microgreens in shallow trays is another worthwhile project for your light table. Tender basil seedlings, among many other edible plants grown for microgreens (photo, above), can be harvested 2 to 4 weeks after germination.

Advantages:

  • Basil is within reach of your kitchen.
  • You can grow it all year long.
  • No insects, with careful monitoring. No pesticides.
  • Pick only what you need, without any of it deteriorating in one of those plastic clamshell containers.
  • Basil growing in conditioned air (heat or AC) indoors has low relative humidity, so downy mildew will never be a concern. Don’t mist the plants.
  • Growing plants indoors keeps you connected to nature, which has proven psychological benefits.


tomato-basil salad

Tomato-basil salad.


2. Move Potted Basil Indoors In the Evening

Now that you know how BDM becomes established in your plants, keeping basil in pots is a good solution. Sure, you can also grow it in the summer garden. But having at least one potted basil is a safety net if BDM ravages your garden.

Once rainy weather settles into your neighborhood, or if you’ve noticed BDM in gardens around town, it’s time to pull the pots indoors for the night. Humidity indoors will never reach the levels that exist in the garden outside. Basil I’ve kept indoors has never gotten BDM.

Don’t forget to place the pots back outside in the morning, if it’s warm enough. Basil should receive at least 6 hours of direct sun outdoors. If rainy weather is in the forecast, keep potted basil plants in a bright spot or under lights indoors for the day. Avoid watering them indoors unless it’s absolutely necessary. Plants in 7″ or 8″ pots are easier to move around than basil in huge, heavy ceramic pots. So, consider ahead of time which pots you’re going to use.

A collection of several pots will be easier to wheel back and forth on a cart. How convenient is that?! Treat yourself to one of those carts with a recessed surface, which doubles as a saucer. But don’t let water collect beneath the pots. This will cut off air circulation in the root ball, and could rot the roots. Out to the deck for sunshine, indoors at night for disease-free basil!


3. Use Varieties That Are Resistant to Basil Downy Mildew 

Recent breakthroughs in basil breeding show promise for disease-free and pesticide-free growing. Rutgers University developed several new BDM resistant varieties of sweet basil. Look for ‘Rutgers Obsession’, ‘Rutgers Devotion’, ‘Rutgers Thunderstruck’, and ‘Rutgers Passion’. When I ordered seeds this spring, my regular supplier had already sold out.

In Israel, Genesis Seeds and Bar-Ilan University bred the variety called ‘Prospera’. It is available through the commercial arm of the partnership, BIRAD Research and Development Company, Ltd. Your favorite seed house might stock it.

Proven Winners is offering ‘Amazel’. This is a vegetatively propagated variety, and is sterile. It will be sold only as plants since it doesn’t set seed.

In a Maryland trial testing all of these BDM resistant varieties, ‘Prospera’ and ‘Amazel’ did not show any symptoms. Some of the Rutgers plants showed very mild symptoms in autumn, probably because other stressors made them more vulnerable at that time.

I look forward to trying some of these new varieties next year. Check with these suppliers: Johnny’s Seeds, High Mowing Seeds, Harris Seeds, and Proven Winners. As far as I know, only sweet basil is available as disease resistant varieties. I’m not aware of disease resistant lemon and Thai basils, two more of my favorites.

No, none of these new varieties are genetically modified organisms (GMO’s).

(***Update***: I’m pleased to report that the ‘Rutgers Obsession’ basil growing in front of a tomato plant in a 20″ pot outdoors has not shown one speck of basil downy mildew. We’ve had the weather to put it to the test, though, with high humidity and long periods of rainy weather. 9/2/2021)


Concluding


American goldfinch, male

Male American goldfinch.


At the end of the season, as any surviving basil goes to seed, consider leaving it in the garden. The cheery little American goldfinches will appreciate this windfall.

I hope you’re encouraged by these options for growing BDM-free sweet basil. It takes a little effort, yes, but I can’t imagine a season without this fresh herb. I strongly recommend growing the new BDM-resistant varieties.

Good luck, and happy gardening!


Here are two other posts about basil (Ocimum basilicum), with detailed growing instructions:

Growing Basil In Pots: How and Why

Basil Downy Mildew: Symptoms and Solutions


basil downy mildew

Symptoms of basil downy mildew.


Return to the top

Bees and Butterflies: At Home In Your Garden


National Pollinator Week: June 22-28, 2020


lavender, for bees and butterflies

Lavender and honey bees.


In 2007, the U.S. Senate passed a bill designating one week in June as National Pollinator Week. This legislation recognizes the importance of pollinators, including bees and butterflies, in our food supply and in the health of all ecosystems.

Every third bite of food we consume is directly attributable to pollinators. The global economic value is worth between $300 billion and $600 billion per year. Around 85% of all flowering plants are pollinated by insects, ensuring the regeneration of forests and fields as well as high yielding edible crops.

Our morning coffee beans are primarily self-pollinated, depending on crop species. Introducing bees, however, can increase the yields and lower costs of production.

In tropical regions of South America, Africa, Indonesia, and, more recently Australia, a tiny midge is responsible for pollinating cacao trees, bringing us chocolate. Chocolate contributes, incredibly, $100 billion annually to the global economy.

In the southern hemisphere, pollinator awareness programs take place in November. The Australian Government’s Department of the Environment recognizes November 8-15 as their pollinator week for 2020. Many countries throughout the world observe this initiative, and local organizations sponsor programs to raise awareness.

An outdoor project can be an enjoyable and healthy way to use our time. Having the children participate will teach them valuable skills they will carry with them wherever they live.


And, if there’s one thing we could use more of, it’s nature.


bee box

A bee house.


What Bees and Butterflies Need


All living creatures need food and water, shelter, and a place to raise their young. By adapting the way we maintain the property around our homes, we can achieve both an attractive landscape and one that fosters populations of wild creatures. Currently, 40% of the insect pollinator species are at risk of extinction. A few of us can make a small difference in our neighborhood; millions of us can really shake it up!

Houses—entire communities—generally have been built after felling all the native trees, bulldozing the rest, and covering the ground with a high maintenance lawn. Streams were diverted to concrete pipes underground, taking habitat from frogs, salamanders, and turtles. Where this tradition is changing, developers are roping off and protecting native stands of trees and understory species.

Maybe the builder spotted in a fast growing silver maple, a row of clipped hollies along the foundation, and a couple of forsythias in the back. Well, that won’t do much for all the bees and butterflies, or for the hummingbirds, bats, moths, and beetles that pollinate our crops and wild plants. And right there, in this yard and in that yard, lie the broken links in the food chain. Our monocultured and unnaturally manicured properties are sold as low maintenance, but there’s little life there.


The Missing Elements


dragonfly


We concentrate instead on creating an “indoor oasis”, untroubled that the quiet stillness outside the door is not what Mother Nature had intended. No birds chirping or warbling…no cicadas or katydids…no lizards leaping for their dinner…nowhere for the dragonfly to land.

Yes, we need more nature in our lives. By cultivating a relationship with the natural world, there’s more than just a pretty sight beyond the living room windows. There’s life. Birds will continue to follow million-year-old migration paths. Mason bees and swallowtail butterflies will secure homes for their young. And there will be less talk of scarcity.

Need to feel better? Try gardening!


1. A Garden of Annuals for Bees and Butterflies


marigolds for bees and butterflies

Bumble bees in the marigolds.


Maybe this week’s goal is to carve out a section of the big lawn in the sunny back yard, and plant a flower garden. Mid summer isn’t too late for annuals, either from seeds or from transplants. Or, for now, consider how your family can use the property in the future. It’s always a good time to decrease the amount of lawn space we have to mow, fertilize, and treat for insects and diseases.

Be sure to plant significant drifts of flowers instead of a dot of zinnias here and a couple of marigolds over there. Large blocks of similar colors are more likely to get attention from pollinators. If your space is limited, though, there are some options. Sunny windowbox gardens and pots filled with bright colorful flowers will generate interest from the pollinators. Or perhaps there’s room for hanging baskets.

Each pollinator has its own preferences. Hummingbirds are attracted to the color red, but bees can’t see it. Bees are initially attracted to blue, yellow, and white, and then will visit a red flower nearby. Hummingbirds can feed from long tubular flowers, but hover flies need short little flowers.

At night, moths can detect white or pale colored sweet-smelling flowers that are open at that time. Almond flowers are pollinated primarily by honey bees, and tomatoes by bumble bees. Butterflies are especially interested in landing platforms, such as those found on plants with wide, flat flowers.


What Is An Annual?

An annual grows from a seed that germinates, generally, in spring or summer. It grows for several weeks to a few months, matures, and then begins to flower. Many species of annuals bloom all summer, until frost ends their lives in autumn, roots and all. But, by then, the plant will have set seed, with help from the local pollinators. An annual completes its life cycle within one growing season.

Those seeds will remain dormant over the winter, protected by their seed coats. With favorable weather conditions next spring, some of the seeds will germinate. Many, however, will be consumed by small mammals, birds, and insects.


What Do Pollinators Do?


bumble bee on passiflora

Bumble bees on passion flower vine. Arrangement of flower parts facilitates pollination.


Bees and butterflies, and other pollinators, transfer pollen grains from the male anthers of a flower to the stigma, the female part of a flower. Sometimes male and female flowers grow in separate flowers on the same plant (that’s a monoecious plant). And other plants have either all male or all female flowers (dioecious plants). Some have both male and female reproductive elements within each flower (perfect flowers).

Pollinators don’t do this intentionally. Instead, their goal is to collect the flowers’ pollen and nectar. They inadvertently pick up the pollen on their hairs or wings, after being lured in by the flowers and the sweet nectar. Then the pollinators transfer pollen from flower to flower, from plant to plant, as they forage. Thus, they enable fertilization of the ovules, germ cells in the ovary of the female flower.

The male and the female parents must be the same species in order for their chromosomes to be compatible. However, interspecific and intergeneric hybrids sometimes do occur among closely related individuals.

The end result is a ripe fruit with viable seeds. That could be a zinnia’s seedpod, for example, or a blueberry, a peach, or a tulip poplar’s samara.

Cross Pollination

Ah, the genius of nature. Pollen grains and stigmas in many species mature at different times, preventing self-pollination.

Moving pollen among different plants of the same species permits cross-pollination, resulting in stronger genetics and, potentially, a better future for the species. Apple trees and blueberries are two crops that benefit from cross-pollination.


Single? Double? Triple?


double pink vinca--less nectar for bees and butterflies

Catharanthus ‘Soiree Double Pink’, an annual vinca. Extra petals replace reproductive parts.


Flowers with single rows of petals usually have more pollen and nectaries than those with a more complicated petal structure. Plant breeders all over the world have brought to market thousands of these kinds of fluffy triple-flowered hybrids, and they are beautiful. That’s fine, for aesthetics.

But, for bees and butterflies, there’s less treasure for them in flowers filled with petals. Reproductive structures that produce nectar and pollen are often reduced and replaced with additional petals (photo, above). Collecting pollen or nectar from these packed doubles is less efficient, and requires extra visits to gather sufficient quantities. So, pollinators will look for more desirable plants elsewhere, to conserve energy, and avoid such anomalies of nature.

When choosing the varieties for your annual garden, keep these details in mind. Gardens loaded with heavy producers of nectar and pollen (in other words, single flowers) will better serve the pollinators that visit them.

Sunflowers

sunflower seeds for birds, bees and butterfliesMany varieties of recent sunflower introductions have been hybridized to grow flowers with very little or no viable pollen at all. When looking through catalogs, make note of the ones called “pollenless”. These varieties will make less of a mess on the credenza and won’t cause you to sneeze. But they have little to offer bees and butterflies.

Pollenless sunflowers won’t develop mature seeds filled with sustenance for birds and other animals. If pollinators and full seedpods are what you want, ask the seed supplier for varieties that make edible seeds, not just edible flowers.

These varieties of sunflowers will attract pollinators and make edible seeds: ‘Big Smile’, ‘Black Peredovik’, ‘Chocolate’, ‘Giganteus’, ‘Hopi Black Dye’, and ‘Kong Hybrid’. Also, ‘Mammoth Grey Stripe’, ‘Mammoth Russian’, ‘Paul Bunyan’, ‘Royal’, ‘Royal Hybrid 1121’, ‘Sunzilla’, ‘Super Snack’, and ‘Titan’.

Sunflowers have a row of showy ray florets surrounding the disc florets. Disc florets open slowly over time, from the outer edge to the center, ensuring many visits from different pollinators.

The Asteraceae family is perhaps the largest, with 1900 genera and over 32,000 species. (The orchid family is its main rival, but no one knows exactly how many species are in either family.) Members of this extended family include sunflowers, dianthus, lettuce, coreopsis, marigold, zinnia, coneflower, gerbera daisy, chrysanthemum, and shasta daisy.


Where to Plant?


squash flowers

Thin peduncle (flower stalk) under summer squash flower indicates a male flower. A female flower has a rounded peduncle.


A large bed of color around the patio or the mailbox, a free-standing raised bed, and a border close to the vegetable garden are just some of the possibilities. Farmers often include wide bands of wildflowers alongside their fields of crops for better pollination and heavier yields.

One plant that attracts all sorts of pollinators is ‘African blue’ basil. This is a sterile herb—unable to set seed—so it flowers constantly. Other varieties of sweet or flavored basils customarily are used in the kitchen. Plant an ‘African blue’ basil in early summer, close to tomatoes, peppers, and squash to encourage bees to visit the veggies. And let it flower.

Check with local garden centers to see what they have available. Ask for help choosing annuals—seeds or transplants—that attract pollinators.

Before you do any digging, ask your municipality (call 8-1-1) to mark underground utilities. Whether you’ll be tilling the area or digging it by hand, you’ll certainly want to avoid damaging any of those lines.

Locate the garden where a source of water is easily accessible. New transplants and young seedlings will need consistent moisture until they’re established. During summer drought, water the bed thoroughly every week or so.

Sun or Shade?


fuchsia flowers

Fuchsia flowers.


Find an area that gets full sun if you want lots of flowers. Full sun is at least 6 hours, but annuals will positively thrive in more sun than that. Summer annuals blooming heavily in sun will attract the most pollinators.

But several species prefer shade, such as impatiens. The ‘Imara’ impatiens, resistant to impatiens downy mildew, provides a carpet of color under the trees and shrubs. This plant attracts bees and butterflies, and also hummingbirds.

Where summers aren’t too hot, the fuchsia baskets (photo, above) will entice the hummingbirds to visit every day, like clockwork. This plant does well in dappled shade or early morning sun. And it likes moist soil. As the temperatures climb and fuchsia fails, hummingbirds will flock to the single petunias and salvias, which need lots of sun. They also visit herbs in bloom, including basil and lavender.


How Big Is Big?

hummingbird at feeder

Hummingbird.

With proper soil preparation and regular maintenance, a plot that measures 10′ x 6′ can become a magnet for pollinating insects. The flowers will buzz with activity from perhaps dozens of species of bees and butterflies, and moths and hummingbirds, too.

This country is home to over 4,000 species of bees alone! More than 20,000 species live around the globe. Some live in colonies, and many are solitary creatures. Interestingly, the honey bee is not native to the United States. It was brought by European settlers hundreds of years ago and proliferated throughout the country.

To increase the activity and the number of pollinating species lured in, make the bed even larger. And include more variety in the plants selected. Use masses of the same plant, and repeat elsewhere in the garden, if you want. Planting larger blocks of a particular color or flower type will attract more pollinators than scattering them about.

If this is your first gardening effort, keep the garden a manageable size so you’re not overwhelmed. There will be maintenance involved! Weeds, no doubt, will have to be pulled. And your garden will need fertilizer a few times through the growing season for the best results. An inch or two of mulch will help cool the soil, retain moisture, and restrain weeds. You can always expand the area as you gain confidence in your skills.

Container Gardens

Even in a very limited space, some of the local bees and butterflies will find the lovely combination pots on your balcony or the patio. Use bright colors, and have your camera ready—for the flowers and their visitors. Once they find their preferred flowers, pollinators will come back day after day.

Remove seedpods to encourage more flowers to develop, although finches and other birds will feed on seeds remaining on stalks late in the season. Fertilize regularly to keep the plants in prime condition. Plants in containers might need daily watering.


Added Benefits

  • Vegetables and Fruits


bee and blueberry flower

Blueberry flowers.


Insects are on a constant lookout for sources of pollen and nectar. You might discover your fruit trees, blueberries, and vegetable crops yielding heavier harvests since installing a flower garden.

Edible crops and plants growing naturally in or around your property will benefit from complete pollination because of the larger populations of pollinators. Include plants whose flowers attract pollinators early and late in the growing season, as well as during the summer months.


I grow many kinds of greens (photos, above) in the cool seasons. Before they’re replaced with summer crops, I allow them to go to flower in late winter to early spring. Most are biennials in the Brassicaceae family, including kale, collards, broccoli, arugula, and mustard greens. Although they don’t require pollination for a harvest, the cruciferous flowers provide pollen and nectar for bees, braconid wasps, hover flies, and other pollinators at the time of year when little else is available.

Pansies and violas provide sustenance for bees that emerge on pleasant winter days. These colorful cold-tolerant biennials grow in garden beds and in containers.

  • Braconid Wasps

braconid wasp, aphids

Braconid wasp.

The tiny non-stinging braconid wasps are hardly noticeable, but they help keep populations of live-bearing aphids in check. A female braconid wasp deposits an egg in or on an aphid. After hatching, the wasp larva consumes the tissues, killing the aphid. One braconid wasp can parasitize 200 aphids in her brief lifetime. Adults emerge to mate, and a new generation of females will begin hunting aphids.

Pollen is an important food source for the braconid wasps, which will feed on some aphids as well. So, even these tiny insects help pollinate plants.

Photo at right shows a wasp about to deposit some eggs. White aphids have been parasitized, and the others are alive. I’ve often seen leaves with a hundred aphid mummies (the aphid’s empty exoskeleton) attached, with no living aphids.

Planting a wide variety of flowers helps these beneficial insects. Self sustaining populations of beneficials contribute to the overall health of your garden, reducing or eliminating the need for pesticides.

  • For the Birds

Let’s not forget about the birds! Although most species, other than hummingbirds, don’t play a major role in pollinating plants, songbirds certainly have a place in any natural ecosystem. We can play an important part, in our own yards, by maintaining an environment that fosters healthy populations of native animals.

ruby crowned kinglet

The tiny ruby-crowned kinglet at a winter feeder.

The numbers of many species of birds are declining, due primarily to human interference. We’ve removed their habitat in favor of expansive lawns and non-native trees and shrubs. And we’ve killed off their food sources by spraying pesticides every time a “bug” shows up. Can we please adopt a new attitude?

After all, birds help by consuming huge numbers of insect pests that otherwise could destroy crops or damage potted plants. Birds and bats keep mosquitoes and moths in check. More insects in the garden will support more avian activity.

Restoring healthy populations of all native animals and insects will return balance to the ecosystem. Sometimes, though, the songbirds fall prey to foxes, snakes, or hawks. Predator and prey: yes, folks, that’s how it works.

There are many benefits to living in modern society, but loss of habitat for wild creatures is not one of them. Letting nature be is a crucial step in re-establishing native populations and preventing extinctions.

Let ‘Em Seed About

Finches, sparrows, and chickadees feast on seeds that develop after the flowers fade. So, don’t be too hasty to deadhead the last round of flowers. Allow them to remain in place through the fall and winter, so the birds have another food source available when they need it. Birds will soon recognize your property as a wellspring of year-round sustenance.

Bright yellow and black American goldfinches are fond of zinnias, cosmos, salvias, and asters that have gone to seed. In late summer and autumn, the finches, northern cardinals, thrashers, blue jays, and other animals eagerly consume seeds atop the black-eyed Susans and tall sunflowers. And you might notice plants germinating next spring from seeds the birds overlooked.

Water


butterfly on lily pad


Include a source of clean water for the birds. A birdbath in the garden is fine, or you could keep a large plant saucer on the deck. Change the water frequently to prevent mosquito wrigglers from reaching adulthood.

The bees and butterflies also will appreciate a small saucer of water on a hot summer day. Place a flat rock island in the water for safe sipping. A mud puddle, just a bare patch of wet sandy clay, provides moisture and minerals for butterflies.

  • Cut Flowers

Another benefit of growing a garden of annuals is the almost endless supply of cut flowers for indoor arrangements. Include plans to expand the garden next year, to keep the pollinators happy, too. Check with your agricultural extension service to see which flowers last longest in a vase.

Try Some Of These For the Bees and Butterflies

Ageratum, alyssum, bachelor’s button, cleome, cosmos, fuchsia (hummingbirds), herbs, impatiens, lantana, marigold, and pentas. Rudbeckia (annual and perennial varieties of black-eyed Susan), salvia (annual and perennial types, a hummingbird favorite), some of the sunflowers, tithonia, verbena, and zinnia.


Headings

Page 1: National Pollinator Week, June 22-28, 2020, What Pollinators Need (The Missing Elements), and A Garden of Annuals for Bees and Butterflies (What Is An Annual?, What Do Pollinators Do?, Cross Pollination, Single-Double-Triple?, Sunflowers, Where To Plant?, Sun or Shade?, How Big Is Big?, Added Benefits, Vegetables and Fruits, Braconid Wasps, For the Birds, Cut Flowers)

Page 2: Perennial Favorites For Bees and Butterflies, Lavender, Herbs, Brush Piles, Go Native, A Comprehensive Garden Plan (Dream, Plan, and Implement, On the Right Path, Stone, Diversify, Some Native Woody Plants, Asking for Help, Dig In!, Small Is Beautiful), and Links

Return to the top

How To Get Healthy? Start With More Greens!


2020

Updated 9/28/2024


Tomatoes, A Tribute to My Mother, Takotsubo, and A Tactic Called “Just One Leaf”


Open any food or garden section in print or online sites, and you’ll see articles on the benefits of eating healthy greens and colorful foods. Today, I’ll show how you can start adding leafy greens to your diet without being terribly inconvenienced. And I’ll mention how it might have saved my life.

How exciting—the first two ripe tomatoes of the season came off the vine this morning. And there’s some beautiful ‘Genovese’ basil begging to be picked. So, you can guess what’s for dinner tonight:


Tomato-Basil Salad!


It’s so easy to prepare:

  • ripe tomatoes, cut into chunks, including the juice
  • freshly picked sweet basil
  • cucumber, cubed or sliced
  • thinly sliced onion
  • mozzarella cheese
  • Italian oregano
  • extra virgin olive oil
  • red wine vinegar
  • salt and pepper

Mix it all together, and enjoy with some good bread for dunking (optional). This salad hits the spot when it’s hot, for one person or for a crowd.


But First, A Tribute To My Mother


My mother and I have lived together for the past 7 1/2 years. Many of the ripe tomatoes from the garden ended up in tomato-basil salad, a summertime staple for this family of Italian descent. How we loved our eggplant parmigiana, vegetarian lasagna, manicotti, and stuffed artichokes! How we loved to eat! In so many of our memories growing up and growing older—the holidays with family, sitting around the table for hours—good food always featured prominently.

Early last month, I had notified my family that there wasn’t much time left for Mother. So, my siblings prepared for a visit, and my sister sent an early Mother’s Day bouquet of white roses, purple statice, and baby’s breath—very much appreciated.

One brother came from out of town and spent the day with us, recalling some of the funnier family moments. We had ravioli and Easy Broccoli One for dinner. I’m a firm believer in the health-giving powers of broccoli, so I prepared it one way or another quite often. I’ve joked before about broccoli being Mother’s “favorite”, and she did too. “Oh, what a surprise—broccoli … … thank you…” She ate well that evening, better than any day in recent months.

But, the next morning, her time had come. She passed quickly and peacefully while I spoke to her and with 9-1-1. A friend said that the sense of hearing is the last to go, which gives some consolation, knowing she might have heard me.


“Don’t Forget To Watch Bob Ross”


My mother lived for 95 years, leaving behind a brood of 4 children, 11 grandchildren, and 8 great-grandchildren. Photographs of family reunions, grandkids, and the great-grandchildren sat in a neat pile within reach of her favorite chair. Mother often lamented the fact that the family had scattered all over the country and couldn’t get together more often for the holidays.

She enjoyed driving her little Toyota, running errands nearby, right up until early last year. Have Rollator, will travel! When speaking with friends on the phone, her humorous references to the “joys” of growing old brought a smile to my face. Humor is the best medicine.

She was an artist, as a few relatives are and were, and I’m inclined to pick up the brush myself and give it a whirl (photo, above—a detail from one of her paintings). I don’t have to wonder very long where this stubborn streak of independence or rebelliousness came from…or my love of animals and of all nature. So, maybe some of her talents run through my veins as well. I hope so. Sure, we had occasional disagreements, but the foundation of our commitment to family was unshaken.


Stress, Nevertheless


People often speak of “a good death”, and, in all honesty, we could not have asked for a more peaceful departure. The next few days, though, taught me that the body reacts to experiences differently than the brain does. While my brain thought I was handling this major event quite calmly, my body had a different opinion.

Soon after Mother had died, the four of us siblings got together, telling stories while dividing those belongings she had gathered—and loved—for nearly a century. Whether it was the distress of a misplaced ring or the stress of her passing, I ended up in the hospital three days later.

With Covid concerns at the time, I drove myself to the emergency room, with moderate chest pain. My mother had had serious heart disease for a few decades but was able to function fairly normally with assistance from her medications and her cardiologist. But I had to wonder: is it my turn? My blood pressure had soared to a dangerous level, so I was admitted.

After several tests over the next two days, the doctors did not find any “separation of the layers” or blockages in my coronary arteries, and the valves were working as they should. But my blood pressure stayed very high. Blood tests also showed the presence of those markers when the heart has been impaired.

One consequence of blood pressure this high could be stroke, and my release from the hospital was contingent upon healthier numbers. A few medications attempted to normalize the readings, and one in particular did an astonishingly good job of lowering those numbers to 79/51. Won’t be taking that one again! (It was hydralazine.)


Takotsubo Two!

Almost 4 years previously, I woke at 4:00 in the morning with a stabbing pain in the center of my chest. Considering our family history, I thought it could have been a heart attack. The ambulance came, the EMT recorded my blood pressure at 275/135, and off to the hospital I went.

The usual tests were performed, and a cardiologist administered a catheterization to trace the blood flow in and around my heart. The score: although I was lightly sedated, his words indicating that I had “the arteries of a 20-year-old” were music to my ears. After decades of being more than careful with diet, I wondered if I had needlessly missed out on all those BLT’s, pasta, and toffee cookies.

On the day of discharge from the hospital, another cardiologist explained what happened. He said one of the lower chambers of the heart (the left ventricle) had ballooned out, giving it an odd outline. Good news—I would fully recover but would experience fatigue for a few months. He and a dietician recommended continuing with a diet heavy in healthy leafy greens and losing some weight.

What’s Takotsubo?

That’s when I first heard the term “Takotsubo”. This Japanese word means “octopus pot”, a reference to the interior shape of the affected ventricle. The syndrome was first described in Japan in 1990. More than 90% of the cases involve women, aged 58 to 75 (check, and check).

So, it happened again. This time, though, stress was very much the precipitating cause. Often called “broken heart syndrome” or “stress-induced cardiomyopathy”, a sudden life-changing event, such as the loss of a loved one, winning a lottery, being assaulted, or a car accident, can trigger Takotsubo syndrome. Most cases are due to a stressor, but around one-fourth occur for no discernible reason.

The ring, by the way, was found after my return from the hospital.


Add Just a Little More Green


greens from the garden

Greens from the garden: green onion, mustard greens, dinosaur kale, arugula, ‘Red Russian’ kale.


I’m not a nutritionist. All I know is what I’ve read or heard over the years and observed from family members. The purpose for writing this article is simply to credit how changing my diet many years ago might have prevented a stroke or a heart attack, possibly saving my life during these two bouts with Takotsubo. (Even though the death rate from this condition is fairly low, other contributing factors and our family history concerned me.) You, too, might decide to make some improvements in your own family’s habits.

Take from it what you want—and take heart—this doesn’t have to happen overnight. I encourage you not to wait, however, until after you’ve gotten your first stent to make some changes. We did eat pretty well growing up. But, in retrospect, we consumed more carbohydrates than is currently considered healthy, and certainly fewer healthy greens.

Simply adding fresh leafy greens to soup, a smoothie, sauces, salads, a stir-fry, store-bought pizza, or rice and pasta dishes is a great step toward a healthier future. Grocery stores offer a much wider variety of greens than they did decades ago.

Growing your own plants from seed opens up so many more options. And you can’t beat the convenience of walking a few feet out the kitchen door to pick fresh healthy greens for today’s omelet or soup. Many of them can be grown in pots on the deck or the balcony if you don’t have garden space.

At the end of this article is a list of links to posts I’ve written about growing and using greens. You’ll notice the frequency with which I refer to “the brassicas” (broccoli, cabbage, cauliflower, collards, kale, etc.), the source of the most beneficial and densely packed nutrients.


healthy greens added to egg salad sandwich


Try this: a simple egg salad sandwich, on rye, made with one hard-boiled egg, mayonnaise, green olives, chopped dinosaur kale (a brassica, and super healthy), and topped with lettuce. Add chopped onion, if you like. No salt needed. I usually serve it on a bed of lettuce or mixed greens, without the bread. You can do the same with tuna or chicken salad. Adding “Just One Leaf” of kale significantly elevated the nutritional value.


Greens In Small Steps

Easing into dietary improvements by making small changes might meet with less resistance from your family. Perhaps starting a garden and letting the kids participate will get them engaged.

Children who help care for a garden are more likely to eat what they harvest. Start with easy crops, such as dinosaur or ‘Red Russian’ kale, collards, lettuce, a cherry tomato, Swiss chard, and radishes. Mustard greens are colorful and fast-growing—‘Florida Broadleaf’ has mild mustard flavor (and it self-seeds), while ‘Scarlet Frills’ offers a spark of heat and spice. These are easily grown from seed.

nasturtium 'Alaska', edible flowers and greens

Nasturtium ‘Alaska’, easy from seed, needs darkness for germination.

If your garden has good, rock-free soil, sow a pack of carrot seeds, and thin them properly. You’ll find traditional orange carrots and also nearly white, yellow, red, and purple varieties. ‘Rainbow’ is a blend of colors. Watch how excited your children will be when they harvest their buried treasure! Try growing ‘Adelaide’, a miniature carrot, in 6″ pots. Delicious, and so cute.

A customer at the farmers’ market in Rockville MD added chopped ‘Alaska’ nasturtium flowers and leaves to his grilled hamburgers. Each bite revealed a different combination of colors. Every year, he came to the market for his “burger-fetti” nasturtiums. Look for ways to introduce greens and colors at mealtime to make it fun.

Just One Leaf

As the first bits of greens have been accepted, keep adding more leafy greens (Just One Leaf or two at a time) and cutting down on some of the carbohydrates and animal proteins. Get creative in the kitchen. Soon, you’ll notice a boost in energy and might reach for a cup of tea and a handful of nuts for a mid-afternoon snack, packed with vitamins and minerals, fiber, phytonutrients, and protein, instead of soda and a chocolate doughnut.

Unless it’s absolutely necessary, I never peel fruits and vegetables. The skins have more antioxidants, fiber, and vitamins than the flesh. So, I don’t peel apples, peaches, carrots, cucumbers (some are less bitter, such as ‘Diva’ and ‘Mini Me’), eggplants, sweet/white/pigmented potatoes, tomatoes, or zucchini.

But I Miss My…

Once in a while, it’s perfectly okay to indulge in an ice cream sundae or Christmas cookies. But you might find that the desire for such decadent treats decreases as your interest in healthy foods increases. Sugar is addictive!

Over time, adding healthy greens to the spaghetti sauce, a stir-fry, or the morning smoothie will become second nature. Not doing so might make you feel as though you’re missing out.


Eat Your Colors


red and yellow peppers, with healthy pigments

Ripe sweet bell peppers.


You’ll discover a new appreciation for incorporating colorful greens and vegetables into your salads. Deep green, purple, red, orange, and yellow pigments are filled with healthy antioxidants and other nutrients.

These plant pigments help prevent many major illnesses, including cancer, heart disease, type 2 diabetes, age-related macular degeneration, inflammation, premature aging, and other disorders. Understand that they will help prevent illness. Do your best to eliminate other risk factors, too, and you know what they are.

Ask your doctor if you have any dietary concerns. While it is true that spinach, Swiss Chard, and beet greens (in the Amaranthaceae family) are high in oxalates, we need to examine the relationship between oxalate content and kidney stones. Some nutritionists believe that including more meat in the diet lowers the blood pH level, while a primarily plant-based diet raises the pH and lowers the incidence of kidney stones. Kale, incidentally, has extremely low levels of oxalates.

Another issue is how eating large amounts of certain raw brassicas can affect the thyroid gland, so, again, ask your doctor.


Add these to your salad and you’ll soon say good-bye to pale iceberg wedges:

  • deep green and red lettuces
  • purplish ‘Red Russian’ or blue-gray dinosaur kale (brassica)
  • baby beet greens (more nutrients than the roots)
  • turnip greens (brassica)
  • arugula (brassica)
  • spinach
  • Swiss chard
  • radish (brassica)
  • shredded red cabbage (brassica)
  • Asian greens, such as tatsoi, mustard, mizuna, napa cabbage, ‘Tokyo Bekana’ (brassicas)
  • broccoli leaves, or stems, leaves, and small heads of ‘Happy Rich’ (brassicas)
  • purple and orange carrots (heated carrots have more available antioxidants)
  • ripe lunchbox sweet pepper (red, orange, yellow) and bell peppers (orange bell peppers are extremely high in zeaxanthin, an antioxidant that’s good for eyesight)
  • tomato, cucumber, green onion, celery, cooked button mushrooms, lightly roasted pecans, feta or bleu cheese, fresh basil, avocado, a hard-boiled egg, kalamata olives
  • and a simple homemade dressing: extra virgin olive oil, red wine vinegar, water, fresh minced garlic, some herbs (small amounts of Italian oregano, and maybe thyme and sweet marjoram) and lemon if you like, some Dijon mustard, and salt and pepper


heads of green and red lettuce

Colorful lettuces.


Headings

Page 1: Tomato-Basil Salad, But First, A Tribute To My Mother (Stress, Nevertheless, Takotsubo Two!), Add Just a Little More Green (Greens In Small Steps, Just One Leaf, But I Miss My…), Eat Your Colors, and Add these to your salad…

Page 2: The Veggie Omelet With Greens (Juice?, Or Cereal?), How It All Began (Close To Home, The Food Pyramid), But How Safe Are the Complex Carbs? (The Insulin Response, Too Many Carbs), In Conclusion, and Links

Return to the top


Daffodil Bulbs: Divide, and Multiply the Flowers


How Do Your Daffodils Look This Year? 


daffodil bulbs, yellow, cane creek park

Daffodils in February at Cane Creek Park, Waxhaw NC.


For years, your daffodil bulbs bloomed to great satisfaction. From late winter to mid-spring, there was never a shortage of cut flowers to bring indoors. And plenty remained in the garden to admire from indoors or for neighbors to enjoy.

But this year, they were so disappointing! Masses of slim green leaves look healthy enough, but there were only a few flowers! Come to think of it, there weren’t many last year, either. They should be in their prime right now.


daffodil leaves, no flowers comp

Clumps of daffodils with all leaves, very few flowers.


Why does this happen? You’ve been using the bulb fertilizer recommended by the garden center, and, heaven knows, they never went dry! They looked great a few years ago. Clearly, there’s a problem with the daffodils.

This is called daffodil “blindness”, or lack of flowers. A number of factors contribute to this condition.


“Should I Remove Them?”


Not yet. Just let them soak up the sun’s energy, undisturbed, for as long as the leaves remain green. Don’t cut, knot, braid, or mulch over the leaves. Keep them exposed to direct sunlight. Remove any seedpods, if you see them, to conserve energy and resources. All energy should be directed toward plumping up the bulbs.

In this article, you’ll find tips for restoring your daffodil gardens back to their spectacular spring show. I’m including information on conditions for growing daffodil bulbs successfully for many years into the future. But it’s too early to dig them up right now. Once the leaves have turned yellow or brown, we can begin to dig, divide, and re-set the bulbs.

Bulbs that have been forced in a pot should be planted into the garden after the foliage yellows. While the leaves are green and photosynthesizing, continue watering and provide sunlight. Lasagna pots, crowded with layers of bulbs, rarely bloom well, if at all, a second time. These bulbs might need a year or two in the garden gathering strength for more blooms in the future.


Hardiness 

There are 13 divisions of Narcissus, grouped according to their flower structure. Thanks to the efforts of daffodil hybridizers, consumers can choose from among 32,000 registered daffodil varieties! Also, according to the American Daffodil Society, there are between 40 and 200 daffodil species.

In general, daffodils grow in USDA plant hardiness zones 3 to 11, although some prefer the cooler end, and others, the warmer zones. Before purchasing your bulbs, find out which zone you live in and which varieties will grow there.

‘Camelot’ and ‘Flower Record’, for example, are better suited to zones 3 to 7, struggling in a warm zone 7 season and failing south of it. The paperwhites Narcissus tazetta (N. papyraceus) ‘Avalanche’ and ‘Minnow’, on the other hand, do better in the warmer zones 5 or 6 to 9.


For Now, Fertilize the Daffodil Bulbs


Apply a complete bulb fertilizer to your daffodils and other spring-flowering bulbs. It should have low levels of nitrogen (N), but more phosphorus (P) and potassium (K) content. Use a low analysis product, such as 5-10-10 (N-P-K). 10-10-10 also is acceptable.

As plants photosynthesize, they make their own food and store it in the bulbs. This nourishes the embryo, which is dormant in summer, and prepares the plant for next year’s growth. The more carbohydrates stored in the bulbs, the more flowers for next spring, as long as other conditions are favorable.

Fertilizer applied as the bulbs begin to emerge from the ground could cause the robust foliage and heavy flower heads to flop over. I normally fertilize the bulbs later, around the time of peak bloom, if they need it. Non-flowering bulbs can benefit from a light fertilizing before dividing the clumps. Because the foliage will stay green for several more weeks, the bulbs will have time to utilize the fertilizer.

A soil test conducted by your local agricultural extension service will indicate whether any nutrients should be added.


Bone Meal

For years, many gardeners have relied on bone meal to fertilize their bulbs. Bone meal contains a small amount of nitrogen (3-4%), more phosphorus (12-14%), no potassium, and some micronutrients (Ca, Fe). Mixed products available for bulbs might include bone meal, but also have additional nutrients to make a complete formulation.

The problem with exclusively using bone meal is that it takes longer than other products to break down and become available to the roots. Furthermore, phosphorus, the primary ingredient, moves very slowly through the soil profile. For that reason, bone meal added to the root zone—before planting the bulbs—might be more useful than applying it to the surface of the ground. Avoid direct contact, though, between the bulbs and the fertilizer. Still, it’s not likely to provide nutrients until months or a full season later, after microbes have begun decomposing it.

Bone meal is a slaughterhouse by-product, after sterilizing and grinding cow bones. Some animals are attracted to the scent, so burying it might prevent it from being consumed.

Because daffodils and other bulbs aren’t very demanding, giving them anything should result in good growth. Soil pH should be somewhere between 6.0 and just below 7.0 for nutrient availability. If a soil test indicates adequate phosphorus, I wouldn’t use bone meal. An excess of P will interfere with the uptake of other nutrients.


Food or Fertilizer?

Notice the distinction between the terms “fertilizer” and “food”. Fertilizer is the product we apply to plants. There are many kinds of fertilizers, including soluble and granular types, and compost. They provide various amounts of nutrients to help plants function at an optimum level.

Food is a product of photosynthesis; plants make their own food inside the foliage. This substance is stored as carbohydrates in bulbs, stems, and roots, depending on the species.


Easy Does It!

Daffodils and other bulbs we plant in our gardens don’t need much in the way of nutrients, so never overfertilize. Perhaps you’ve seen clusters of yellow or white daffodils randomly appearing along roadsides or in the middle of a field. Heirloom varieties of Narcissus bulbs are sometimes the only surviving clues that an old homestead once stood nearby. Daffodil bulbs can live for decades!


***Update***: At the south edge of the woods at the new property, daffodils emerged under snow and after a tangle of growth had been cleared away (photos, above). Once the honeysuckle vines, brambles, and tree saplings had been removed, the daffodils grew thick and healthy, although there were few flowers. The soil there is rich with decomposed leaf litter. After the foliage begins to yellow, I’ll divide and transplant most of the bulbs. 3/20/2022


daffodil bulbs


***Update***: Well, I never got around to dividing these bulbs. Starting in January 2023, abundant flowers grew on stronger plants (photo, above). And the flowers lasted 2 months! I don’t know the variety, but it’s an older one with fragrant double flowers. Because the flowers last such a long time, I’ll transplant several divisions to the garden on the far side of the driveway, visible from my office. 4/13/2023

“Then, why do those old abandoned daffodils look better than mine?”

Over time, year after year, fallen leaves and other organic debris have collected at the soil surface above the daffodil bulbs. Microorganisms decompose this material from spring through fall, while the soil is warmer. Nutrients from decomposition slowly filter down to the roots, and are absorbed as the roots emerge in late summer and autumn.

Those abandoned daffodil bulbs don’t need fertilizer from us, nor do they need a layer of mulch. Mother Nature is looking after them! Sometimes, less is more.

Growing our bulbs leaner could help. Pushing them to “grow better” is one reason for overabundance of foliage and lack of flowers. High nitrogen is particularly problematic. For spring-flowering bulbs in decent garden soil, the application rate recommended on the package of bulb fertilizer can be halved. Unless your garden soil is absolutely wretched, keep the fertilizer levels somewhat low.

If the garden soil is good enough to sustain annuals and perennials, it is more than adequate for daffodil bulbs. With occasional applications of fertilizer to garden plants through the growing season, the bulbs lying dormant in the soil below them will have plenty of nutrients when they begin to root out.

I fertilize lightly, sometimes, in autumn, as the bulbs root into cooling soil, and again when they’re in full leaf in spring. It just depends on how the garden has been managed. In many years, I don’t fertilize at all.

Bulbs planted in gardens under irrigation might be getting too much water, which can rot the bulbs. Daffodils don’t appreciate dry soil, but wet soil will kill the bulbs, and then nothing will sprout.


mount hood daffodil bulbs

‘Mount Hood’ daffodils. As they age, they turn ivory white. Soil in the mulched garden was good, so I rarely fertilized them.


“Can I use compost?”

A moderate amount of compost top-dressed on the surface and watered into the soil makes a fine addition. Or scratch the compost into the surface of the ground. Covering the compost preserves the beneficial microbes, which will be destroyed by the sun. Because the bulbs are deeper, they won’t be damaged by light cultivation.

Nutrients in decomposing mulch also contribute to the health of the soil. Soil under slowly decaying shredded hardwood mulch is probably sufficient for daffodils and other spring-flowering bulbs. Earthworms consume partially decayed material, enriching it in their own special way. They then distribute the castings (earthworm excrement) throughout the garden soil, and aerate it as well.

Shredded hardwood mulch breaks down faster than pine products, but don’t pile on large amounts. That could cause manganese toxicity and raise the pH too high. It’s a good idea to use shredded hardwood for a few years, and then switch to pine for a few years.


Headings

Page 1: How Do Your Daffodils Look This Year?, “Should I Remove Them?” (Hardiness), and For Now, Fertilize the Bulbs (Bone Meal, Food or Fertilizer?, Easy Does It, “Then, why do those old abandoned daffodils look better than mine?”, “Can I use compost?”)

Page 2: Sunlight For Daffodil Bulbs, Daffodil Bulbs Under the Trees, Soil and Drainage (Soil Preparation, Dig In!), Divide and Multiply Daffodil Bulbs (The Process, “And How Deep Is That?”), Time To Plant Daffodil Bulbs (Planting in Autumn, Planting in Early Summer), Summary

Return to the top

Daniel Stowe Botanical Garden, in Belmont NC

2020


A Visit to Daniel Stowe Botanical Garden


Daniel Stowe Botanical Garden, daffodils


A few days ago, I visited the Daniel Stowe Botanical Garden, in charming Belmont, North Carolina. In 1991, Daniel Stowe, a textile industry executive, and his wife, Alene, dedicated 380 acres to this natural showcase. They developed themed gardens and installed spectacular fountains among meadows, woodland, and lakefront property.

This is a relatively young horticultural destination, which opened in 1999 with the 13,500 square foot Robert Lee Stowe Visitor Pavilion. Individuals and groups can reserve spacious rooms for weddings, luncheons, and corporate events. Stop by The Garden Store for a book, a bottle of wine, or that special botanical gift. Or perhaps you need a snack to fuel further exploration.

DSBG offers educational opportunities for adults and children throughout the year. “Holidays at the Garden” is a magical event for everyone. For information regarding hours, event planning, special displays, and classes, contact www.DSBG.org.


The Orchid Conservatory


orchid, Daniel Stowe Botanical Garden

Orchids at Daniel Stowe Botanical Garden.


Not far from the Pavilion, inside The Orchid Conservatory (2008), a photographer snapped pre-wedding photographs of the bride-to-be. Behind her, water splashed down the stone wall, and orchids bloomed and scented the air. Perfect setting!

Several tables and chairs outside on the patio invite visitors to recharge in the winter sunshine. Visitors may picnic anywhere in Daniel Stowe Botanical Garden, amid birdsong and seasonal color.

Activities centered on orchids—the show, educational presentations, and the sale—take place during the first three months of the year. A schedule of events can be found on the website.

I cannot provide the botanical names of the orchids, but will supply photographs…


Daniel Stowe Botanical Garden, air plants

Many species and varieties of Tillandsia, or air plants, growing in the orchid house.


Theme Gardens


Daniel Stowe Botanical Garden fountain

Fountain in Ragan Canal Garden.


New features continue to add to the garden’s vision of instilling an appreciation of nature. In Lost Hollow: The Kimbrell Children’s Garden (2014), children “of all ages” play and create adventures. They can indulge an active imagination among the trees and trails, the Moonkeep, an amphitheater, and around the sunken pond. So cute, the children’s smiles.

Be sure to bring the camera, as there are delights at every step. Paved walkways and forest paths direct visitors from one garden room to the next. There’s the Nellie Rhyne Stowe White Garden, the Cottage Garden, and a Four Seasons Garden. Follow the 100-yard-long water feature in the Ragan Canal Garden to the great water fountain at the end.

Beyond the fountain is the Piedmont Prairie Garden (2018). Here are native grasses, perennials, and other plants that lived in this area 200 years ago. The Magnolia Allée, more water features, and the Conifer Garden stretch into the distance, approaching Lake Wylie.


sculpture by Gary Lee Price at Daniel Stowe Botanical Garden

Gary Lee Price sculpture, “Child of Peace”, in a bed of crape myrtles and dwarf mondo grass.


The Carolina Thread Trail


From the Persimmon Trail, off the parking lot, you can connect with the Carolina Thread Trail, maintained by the Catawba Lands Conservancy. Part of this path follows the edge of Lake Wylie.

The Carolina Thread Trail consists of 260 miles of public and private properties that connect people and communities over 15,000 acres of protected Southern Piedmont terrain. The master plan calls for including more than 1600 miles of trails and blueways.


Stickwork by Patrick Dougherty


brochure, Patrick Dougherty stickwork at Daniel Stowe Botanical Garden

DSBG’s brochure, Patrick Dougherty’s Stickwork.

Take a look at the photographs, hanging in the Pavilion, of the fascinating work by North Carolina resident, Patrick Dougherty.

His work is commissioned all around the world, and one of his larger-than-life sapling sculptures stands on the grounds of DSBG. Walk through the Pavilion, exit the back door, then turn right. “The Magnificent Seven”, seven huge woven urns, complete with fenestration, dominates the vista beyond the pergola. I don’t know how long it will last.

Typical for gardeners, two acquaintances and I speculated whether the twigs might root in the ground and leaf out in spring. We looked for willow stems, which could root. “Oh, look…do those buds look like they’re swelling to you?” Alas, I couldn’t squeeze just one more picture out of the camera…not one.

Near Lost Hollow, a sinuous bundle of sticks snakes its way through the trees, passing under a small bridge. Not only does this sculpture (done by DSBG, I assume) provide a quirky element on the daffodil-dotted slope, but it also holds back topsoil and leafy mulch that could erode downhill. Plus, birds, insects, and other critters might find refuge there during winter months. This can be done by anyone, maybe on a smaller scale, and would be a great fall or winter project.


Information


The DSBG website lists all coming events and details, and the fee schedule for admission to the garden.

Daniel Stowe Botanical Garden

6500 S. New Hope Rd., Belmont NC 28012

704 825-4490


Return to the top

Tornado in Matthews NC! Time for Smaller Trees?


2020

Updated 11/4/2024


fallen oak tree, tornado

An old oak tree felled by the Matthews tornado.


Tornado!


I’ve been out of town for a few days, visiting family in New Jersey. On the return drive, the weather report on Charlotte’s WBT radio warned of impassable flooded streets and a tornado that had toppled old oaks and mature maples near my home, in Matthews, and in nearby towns. Over 3″ of rain fell last Thursday, swelling streams and rivers and saturating the ground. When the soil is that wet, it becomes more fluid; a brisk wind can push over 200-year-old trees.

tree trunk with rotten core exposed by tornado

Rot inside the trunk, a weak spot.

And that’s just what happened. Shallowly rooted evergreens and even perfectly healthy bare trees couldn’t stand up to the sustained high winds. Trees with rotten cores (photo, right) fell over at ground level or shattered some distance up the trunk. Healthy or somewhat compromised—it didn’t seem to matter. Tornadoes choose their victims indiscriminately.

On Friday, I drove around and saw those damaged trees, twisted and gnarled, some sheared of all their branches and leaves. On Pineville-Matthews Rd., the junipers, cypresses, and evergreen magnolias fell like dominoes, one against the next. For all the beauty Nature reveals to us, there’s always the flip side, too—devastation and death.

Police were out directing traffic. Stoplights were dark, and trees leaned on overhead wires. When this happens, remember to observe local laws. Here, we treat an intersection with a non-functioning stoplight as a 4-way stop. I was pleased to see cars on the main road come to a stop to allow vehicles lined up on the side streets their chance to proceed.

The main roads had been cleared of debris, but some of the side streets were still littered with limbs, piles of greenery, parts of roofs and fences, and road signs.


Aftermath of the Tornado


After the tornado, something will benefit and grow after the wreckage has been removed. Shrubs and flowers shaded by the thickening canopy will be reinvigorated by brighter light. And, of course, more weeds will grace our gardens.

Sure, we’ll have to move the shade lovers to more appropriate locations, or plant a new tree. Residents whose homes border main thoroughfares will reestablish screening plants that provide a measure of privacy. The silver lining in this cloud could also mean more fruitful harvests from our blueberry bushes and vegetable gardens. But certainly, we’ll miss our trees.


tree fell on house roof, tornado

Half the tree landed on this house in Matthews NC.


Roots or Consequences


Checking the NOAA (National Oceanic and Atmospheric Administration) website confirmed the presence of a few tornadoes in the Carolinas on February 6, 2020. Around 12:15 p.m., an EF1 tornado cut a swath 150 yards wide and 17½ miles long south of Charlotte, from Pineville to Matthews. It lasted 16 minutes, with winds that reached 95 miles per hour.

Warm moist air masses clashed with strong cooler fronts, setting this severe weather pattern into motion. Local media recorded some of the devastation.

There were no deaths in this area, although two casualties, unfortunately, were reported elsewhere in North Carolina. I spoke with a man in Matthews, who said his aunt and uncle were in the room right below where part of a tree trunk had crashed through the roof. They were not injured, thankfully, but the Fire Department declared the home unsafe to occupy (photo, above).


Pancakes

It’s incredible, when viewing the uprooted plants, that almost all the tree roots are in the top foot or 18″ of the soil. You’d think these 50′ or 80′ tall trees would have deep roots that anchor them to the ground, but most do not.

Compacted soil, bedrock, and natural growth patterns for the species keep the roots shallow. And there is more of the necessary oxygen, fertility, and microbial activity closer to the surface. So, tree roots spread out from the trunk in search of water and nutrients, extending beyond the drip line.

When the force of the wind is stronger than the ability of the tree’s roots to hold it in place against resistance, the tree will succumb. Plants might hold up at first, but, after a while, trees can begin to fall over.


Time for a Tree Check-Up


felled tree

A huge tree, at least 100 years old.


This might be a good time for a tree health check-up from a licensed arborist. Granted, there are no guarantees. But a trained specialist can see aspects of the tree’s growth that could indicate the likelihood of trouble in the future. Pruning trees properly when they’re young and as they grow, if they need pruning at all, will improve their branching structure for decades to come.

The arborist might find decay where a few trunks come together 30′ from the ground. This is where leaves and water might have been collecting for years, eventually rotting the bark. Decay then spreads deeper into the interior wood. Also, as trunks and large congested branches grow in girth, they compete with each other, compromising transport of water and nutrients, and, therefore, structure and strength. Many of the trees that came down in this tornado had rotten cores.


topped tree, sky

A topped tree, showing weak epicormic shoots.


Another weak point occurs where several stems grow as a result of topping or heading back the trunk or side branches. Those epicormic shoots (photo, above) have feeble connections to the wood and compete with each other. Most of them fall from the tree over time. Never top a tree! It’s a difficult decision to make, but you’re probably better off replacing large trees that have outlived their usefulness (too large, too close to the house, cracking the foundation) instead of topping them.

girdling root

Girdling root on maple tree and no trunk flare.

Another clue to look for is a missing flare. That part of the trunk looks flat (vertical) where it descends into the ground. This usually indicates a girdling root or some other obstruction underground, and possibly a sparse root system on that side. Rocks and soil discarded against a tree trunk can cause problems later.

Mother Nature does not issue guarantees. Sturdy trees that give no indication that anything is wrong can blow over in high winds, regardless of the care it has been receiving.


Trees for Shade

In areas with hot summers, such as here in the Carolinas, we love our trees. We value our family’s lives and the integrity of our homes, of course, so it makes sense to evaluate the plants on our properties, especially those standing close to structures.

Certainly, a mature tree canopy helps reduce energy bills and adds aesthetic value. But ignoring unhealthy trees or pruning them improperly can be very costly in the long run.


Alternatives to Towering Trees


Magnolia Flowers Plant Petals - ottawagraphics / Pixabay

Small to medium-sized cultivars of magnolia are suitable for most home landscapes.


Although you might be inclined to replace a dead tree with the same species, now is the perfect time to reconsider that choice. Visit a reputable garden center and ask the tree expert for recommendations. ‘Bradford’ pear? Silver maple? Weeping willow? No thanks!

There are many other options that will fit better in your landscape. Find species with strong branch attachments, and those that won’t litter the ground and fill the gutters with twigs or fruits every time a breeze blows through the neighborhood.


Landscape Considerations

Always look at the scale of the site, how your home fits into the local surroundings. A 3-story Victorian could look lovely framed by a natural stand of stately scarlet oaks. If they’re growing 15′ from the sunroom, you could enjoy the shade for 10 years or even 50. But a microburst or a tornado could send tons of wood hurtling toward Logan’s antique Firebird…or your home.

It’s safer to locate the tallest trees much farther from the house. Then you won’t have to deal with the oak trees’ acorns in the driveway every year.

Ask about native trees and shrubs, although there are so many beautiful exotic species I must have. Each species has many cultivars to choose from. If one tree doesn’t seem substantial enough, plant three or five of them in a raised bed, properly spaced. Perhaps large shrubs will work better for your situation or in tight spaces.

Add drifts of small shrubs, perennials, groundcovers, a patch of colorful annuals, and spring flowering bulbs for a complete garden. Mulch to suppress weeds, conserve moisture, and prevent erosion.


A Short List of Small to Medium-Sized Trees


Check with local garden centers, agricultural extension offices, botanical gardens, and native plant societies for suggestions. Here are several of the species (native and non-native) that grow in this part of North Carolina:

  • American hornbeam (Carpinus caroliniana)
  • Birch (Betula ‘Whitespire Senior’ and others)
  • Carolina silverbell (Halesia)
  • Chaste tree (Vitex)
  • Chinese pistache (Pistache chinensis)
  • Crape myrtle (Lagerstroemia indica)
  • Dwarf evergreen magnolia (Magnolia grandiflora ‘Little Gem’)
  • Eastern redbud (Cercis canadensis)
  • Flowering dogwood (Cornus spp.)
  • Fringe tree (Chionanthus spp.)
  • Full-moon maple (Acer japonicum)
  • Golden chain tree (Laburnum)
  • Japanese maple (Acer palmatum)
  • Japanese snowbell (Styrax japonica)
  • Lilac (Syringa)
  • Magnolia (Magnolia spp.)
  • Paperbark maple (Acer griseum)
  • Parrotia (Parrotia persica)
  • Peanut butter tree (Clerodendrum trichotomum, can be invasive)
  • Serviceberry (Amelanchier)
  • Sourwood (Oxydendrum arboreum)
  • Stewartia (Stewartia pseudocamellia)
  • Witch hazel (Hamamelis spp.)
  • Smaller varieties of oak, birch, maple, tupelo, plum, crabapple, cherry, conifers.


Do Your Research


Research cold/heat hardiness (USDA plant hardiness zones), disease resistance, forms and colors that enhance your property’s appearance, and seeds or fruits that feed wildlife. Include some natives in your garden to support diversity of local insect and animal species.


Severe weather events can cause considerable damage to our homes. Each year, they claim human lives. The cost for cleaning up and repairing the damage is quite high, but, of course, some of the losses we can’t recover.

The United States leads the world in the number of tornadoes, averaging more than 1,000 annually. North Carolina averages 22 per year. The states with the highest number of tornadoes, in descending order, are Texas (135/year), Kansas, Oklahoma, Nebraska, and Iowa.

Although a tornado will alter the look of our landscape, this is an opportunity to view it with a fresh perspective. Looking into the future, planting smaller trees and shrubs appropriate for the site might prevent the heartache of real loss.


Return to the top

Daffodils and Birdsong: The Signs of Spring


2020


cherry trees and daffodils for early spring color

These cherry trees started blooming in January.


Warming Up: The First Daffodils


Early Daffodils

Around the corner, white daffodils bloomed incredibly early—on New Year’s Day! A neighbor’s hellebore, or Lenten rose, was in full flower at the same time, and the local cherry trees (photo, above) have been covered in pink for weeks starting in January. Forsythias are beginning to flower, and the bulbs are coming up thick and healthy after all this rain.


yellow daffodils, cane creek park

Daffodils in February, Cane Creek Park, Waxhaw NC.


At some point in the early months of the year, seasonal signals indicate the coming of warmer weather to this USDA zone 7b (borderline 8a) area. Flowers popped open this morning that weren’t there yesterday. The grass is greener. Songbirds are more vocal than they were last month. And on blueberries and other shrubs, leaf and flower buds are plumping up, preparing to push those bud scales aside. Mother Nature puts on quite a show in spring, my favorite season.

Maybe there are other indicators that you look for in your landscape. First snake sighting? Migrating birds flying north? Moths flitting around the porch light at night?

The National Oceanic and Atmospheric Administration (the National Weather Service) predicts a greater chance for above normal temperatures over the next 3 months (spring, 2020). This prediction is for the southwest U.S., across the south, and partway up the Atlantic coast. Northern Alaska has a high probability of higher than normal temperatures. Check NOAA’s map for your region’s long-term temperature and precipitation forecasts.


daffodils and other bulbs emerging

Wood hyacinth, Hyacinthoides hispanica, in January.


Punxsutawney Phil

woodchuck, or groundhog

A woodchuck.

This year, Punxsutawney Phil, the prognosticating rodent, concurred with NOAA’s forecast, calling for an early spring. Phil would be wise to check with NOAA every year before making his Groundhog Day predictions; his accuracy is below 40%. And there are only 2 possibilities: shadow, no shadow!

This tradition, celebrated in the United States and Canada, dates back to 1887, and is a fun, although not terribly accurate, test that helps build anticipation for spring.

Phil is one of several groundhogs, or woodchucks, around the country called upon to presage the coming weather. After being awakened at dawn on February 2, if he does not cast a shadow, the tradition dictates, spring will come early. The alternative is six more weeks of winter. Well…six weeks from Groundhog Day falls in mid-March. So, mid-March (“six more weeks of winter”) and early spring, as I see it, are the same thing. I guess you’d have to define “early”.


What? Snow?!


squirrel in bird feeder

Squirrel takes all.

For a couple of hours on Saturday, I was mesmerized by a wet snow. We haven’t had any snow here this winter, and I just love to watch it. I also have to go outside and feel it. Then a beautiful Cooper’s hawk came for a visit. The question is…would he swoop down for one of the birds at our back yard bird feeder?

Earlier, I put outside a spoonful of peanut butter, suet, more seed, and whatever we had collected in the “bird cup”. This container sits on the kitchen counter, and is where we put crumbs, withered blueberries, strawberry tops, older peanuts, and anything else that might interest the birds. These morsels go into the box (photo, right) near the bird feeder, and the birds share this bounty with squirrels and various marauders in the night.

I didn’t cover the emerging bulbs to protect them from snow. Daffodils, hyacinths, and wood hyacinths get through this time of the year just fine with no help from me.


The Birds are Changing Their Tune


male northern cardinal

A male northern cardinal.

The local birds recently have been singing in what I call “the key of procreation”. When the birds change their tune, spring isn’t far behind. There’s something almost magical about birdsong at this time of the year. I love to hear it.

Northern cardinals, Carolina wrens, tufted titmice…they all have spring calls that are distinctly different from chirps and melodies sung later. These calls help unite young breeding pairs and reunite mated partners after a separation.

The hawk showed up, though, and everything suddenly went very quiet. He sat in the trees for two hours, his plumage camouflaged by the browns and grays of tree trunks and branches. But he did not make an attempt to catch lunch on the fly.

There are plenty of hiding places for the birds, and they were aware of the hawk’s presence. Birds warn each other of this kind of threat by issuing alarm chirps.


Daffodils and Deer


Some of the yellow daffodils on the berm are beginning to bloom, although recent wind (a tornado, actually) laid them nearly flat to the ground. I planted these bulbs several years ago, and it’s always a pleasure to see their green shoots emerge in January or February. But this winter, they began rising in late December.


deer and daffodils

Deer resting among the untouched daffodils.


Deer regularly pass by them as they travel the berm, but they never eat them. All parts of daffodils are poisonous to warm-blooded animals. But bees and other pollinators looking for pollen and nectar when not much is available appreciate the early blooming bulbs, brassicas, and fruit trees.

The bulbs’ foliage is the only ground-level greenery in that area for now. It’s a small thrill to see these bulbs thriving up there, and a bigger one watching the deer walk around them! (***Update***: Several deer rested all morning on the berm, among the blooming daffodils. They sniffed but didn’t eat the flowers. Feb. 14, 2020.)

If deer have eaten every one of your cherished tulips, you’ll have greater success with daffodils.


The Edibles


mini broccoli aspabroc

Miniature broccoli ‘Aspabroc’.

We had a very mild winter. True—it’s not over. But I covered the broccoli, the kale, and the green onions on only a few nights. Although these plants can tolerate temperatures into the teens, I prefer to protect them below 25°F. This keeps their foliage in great shape. And the green onions would be very difficult to pull from frozen soil!

The microclimate created by the corner between the house and the shed keeps the deck a few degrees warmer than out in the open. Maybe there’s a sunny corner where you can tuck in a few pots of winter greens. Or you might be able to dig a small garden next to a south-facing brick wall.

It won’t be long before you’ll see small pots of hardy cool season greens showing up at the garden center. You can get a head start and plant seeds indoors now for many of these plants.

Mustard greens from last year’s spring garden volunteered in the front garden by mid-summer. The Italian parsley is growing large, and, recently, I picked a few substantial stems of ‘Aspabroc’ miniature broccoli for dinner. The ‘Arcadia’ broccoli heads were harvested in December, but side shoots will provide additional harvests for the next 2 or 3 months. Broccoli leaves are edible, too, and highly nutritious.

Frequent heavy rainstorms washed away much of the soil’s fertility, so I fertilized the pots a few times through the winter. Without it, the broccoli heads would have been much smaller and the greens…well, less green. When the temperatures were more moderate, I used SeaPlus (seaweed and fish emulsion). In cooler soil, though, when microorganisms aren’t active, a soluble synthetic fertilizer works better. Microbes break down the nutrients in organic fertilizers and make them available to plant roots, but they’re dormant in cold soil.


A Few Simple Chores In the Garden


As you make your rounds through the garden, note the chores that need to be done. Maybe the mulch needs a refresh by simply turning it over with a garden rake. Are chickweed and other winter-germinating weeds about to go to seed? Don’t let them! Just one seedpod can turn into dozens of weeds next year.


yellow bulb leaves from shade

Yellowed leaves caused by shade.


A thick blanket of last year’s fallen leaves will block light from the daffodils and hyacinths emerging from the ground. Although the shaded spears look yellowed now, they’ll quickly green up when exposed to sunlight. Take some of the leaves to the compost pile, or to the brush pile where insects and other animals find refuge in inclement weather.

Have you noticed the first bulbs emerging from your lasagna pot (photo, above)? Be sure to water them if they’ve been under cover, and give them sunlight to green up etiolated foliage. Gardeners in colder climates still need to protect the pots from alternate freezing and thawing, which could kill the bulbs. Their roots don’t have the benefit of insulation provided by the mass of soil around them, as do bulbs planted in the garden.


Even though it’s still chilly, these stirrings in our gardens point to nature’s own impatience to get the show on the road. So, bundle up, and take the kids, the dog, or your thermos to the garden. For me, the thought of going out in the cold is worse than actually being there. Besides, if you stay indoors, you could miss the first act!


Return to the top

Northern Cardinals: Flashes of Brilliance


Welcome the Northern Cardinals


Whose heart is not warmed by the sight of brilliant red cardinals feasting at backyard feeders? Add a fresh snowfall and the birds’ familiar calls as they defend their territory, and you’ve got some delightful moments on a cold winter day. I almost wrote a “dreary winter day”, but living close to nature precludes this dismal perception; every day is a lovely day.

This commonly seen favorite songbird normally remains in the area, both winter and summer, as long as food is plentiful. Now doesn’t that just lift your spirits!


cardinals are one of our favorite birds

A male northern cardinal.


Where Cardinals Live


Other species of cardinals live in Central and South America, and there are many subspecies within their range. This article is about the northern cardinal, Cardinalis cardinalis, whose name derives from the red vestments worn by Catholic cardinals.

Cardinals are abundant throughout most of the United States: in the area from the Atlantic coast west to eastern Montana and eastern New Mexico, including all of Texas and parts of the deep southwest. They also live in Mexico, but not commonly in higher elevations.

Fortunately, the cardinal’s population has remained stable while the numbers of many other songbirds have decreased dramatically. Some songbirds no longer live in areas where they used to be abundant.


a pair of cardinals

Female and male cardinals.


The cardinal’s range, in fact, has expanded northward, to include areas in Canada north and east of the Great Lakes. Although the cardinal has been seen in Canada for many years, it’s only since about 1980 that proof of nesting activity has taken place there. The prevalence of well-stocked feeders is considered the primary explanation for this expansion.

Border regions close to their usual ranges see cardinals settling into those areas. They’re not yet commonly found in those border regions, but populations are increasing.


Habitat


Part of the cardinal’s success lies in the species’ adaptability to various environments. They reside in woodlands, shrubby thickets, swamps, and forest edges and clearings. Northern cardinals in the desert southwest live near streams and washes, in tall brushy growth and mesquite groves.

City parks and suburban residential gardens often host these beautiful birds, as long as it’s fairly quiet. They retreat to the security of thick undergrowth if disturbed but will return soon afterward. Cardinals are usually the first to arrive and the last to leave the backyard bird feeders. When I rise, before it’s light, inevitably it is the cardinal that comes first to the feeder, unless the opossum is having a late night out.


northern cardinal and wren on back fence

Northern cardinal and wren on back fence.


Plant a Garden for the Birds


You can encourage birds and other wildlife to make your property their home. Contact the local Audubon Society or other birding experts and find out which plants attract birds. One option is to have a landscape plan drawn up, incorporating features that will bring in the wildlife.

The garden depicted in the blueprint below shows the hardscape for a water garden I planted in the 1990’s: paths, stonework, pond, footbridges, and the underground wiring and plumbing. This new garden replaced all the lawn on the slope with a series of 5 waterfalls and a 35′ pond, stone steps, and layered plantings all around. Over time, my clients asked me to expand the gardens and remove more lawn, incorporating plants that offered berries, seeds, perches, and protection for birds.

The year-round availability of water attracted all sorts of wildlife, including dragonflies, frogs and toads, turtles, songbirds and birds of prey, and snakes. Occasionally, the owners added inexpensive feeder goldfish, after the great blue herons had picked off the ones that couldn’t hide fast enough.


Plant a lush landscape—less grass to mow!—that provides food, water, shelter, and nesting options. Include trees (small ones if your space is limited), evergreen and deciduous shrubs, and flowers that produce edible seeds or berries. Trees planted where they can shade the house and windows from hot afternoon sun will lower your energy bills.


Native Plants

Native plant species attract insects and offer food for birds and much of the rest of the food chain. Caterpillars will eat the leaves, and that’s a good thing. Resist the temptation to spray the “bugs”, which will feed many kinds of birds, lizards, and frogs. Although adult cardinals consume primarily seeds and fruits, they feed mostly insects to their nestlings. Pesticides will harm not only the insects but also the birds and other animals that feed on them.

Group together several trees and shrubs in the landscape. Birds prefer density of growth rather than a tree here and a couple of shrubs over there. If they can quickly retreat to dense undergrowth, they’ll feel more secure in your garden.

Walk through a local botanical garden and note the native species you might be able to use in your garden. Observe how the taller species are underplanted with masses of shrubs and perennials, giving a layered and full appearance. Keep these principles in mind when landscaping your property.


State Bird


This beloved bird has achieved state bird status in Illinois, Indiana, Kentucky, North Carolina (Mother’s favorite!), Ohio, Virginia, and West Virginia. In some areas, they’re called “redbirds”.


Headings

Page 1: Welcome the Northern Cardinals, Where Cardinals Live, Habitat, Plant a Garden for the Birds (Native Plants), and State Bird

Page 2: The Cardinal’s Diet (The Problem with Seed Husks), Live Cam (links), The Yellow Northern Cardinal, Water, Growing Sunflowers, Nesting Cardinals (Sexual Dimorphism, Courtship, Longevity, The Nest and Eggs), Predators, and Bird Watching

Return to the top

10 Tips for Protecting Cool Season Vegetables

2019

Updated 9/24/2024


Here are 10 Tips for protecting cool season vegetables from freezing temperatures.


cool season vegetables in the garden

Cool season vegetables: from the top, broccoli, leeks, ‘Red Russian’ kale, light green mustard greens, and collards.


Ready For Fall?


Throughout parts of the United States, and in chilly climates everywhere, gardeners are scrambling to save their tender plants. Most of us have brought in all the houseplants. More laissez-faire gardeners do nothing special to extend the season, beyond harvesting the last of the cherry tomatoes and clearing out the frosted vines.

And there are those of us who strive to keep cool season vegetables growing even in winter. And we’ll plant more of them! Soon I’ll transplant ‘Monstrueux de Viroflay’ spinach seedlings into pots to grow on the deck through the winter. This French heirloom spinach has huge leaves with a milder flavor. It has lower levels of oxalates, so those who have been advised to avoid eating spinach might be able to eat this variety. Ask your doctor.

In early October, I planted 2 dozen onion sets (for green onions) in a 12″ pot on the deck. Green onions are ready for harvest, in mild weather, only a few weeks after planting the sets. To preserve them in the cold, I’ll cover them with plastic sheeting (Tip #2). Green and bunching onions grow more slowly in cold weather.

I planted more sets every couple of weeks and will soon plant the remaining bulbs before they dry up. A favorite bunching onion called ‘Nabechan’ has straight sides. Not having a bulb at the bottom makes it easier to harvest. Sets are not available for bunching onions, though, so they must be started from seeds.


Where There’s a Will, There’s a Way


2023 USDA plant hardiness zone map


Potted cool season vegetables will grow under a plastic covering in cold weather. To extend the season, strings of miniature incandescent Christmas lights (Tip #6) will raise the temperature to more comfortable levels. Later in this article, I will list all 10 Tips for protecting crops in winter.

Starting with the simplest ideas and progressing to the more advanced methods, find the level you’re most comfortable with this season. Your budget, your USDA plant hardiness zone (photo, above), and the types of crops themselves must factor into your decision.

As you gain confidence and become more motivated to keep the garden producingyou might decide to try the next level. Cost savings realized by growing your own fresh food might justify the expense of new materials.

It’s only through experimentation, by taking a chance, that you might discover all the opportunities—and the limits—of gardening challenges. This is how green thumbs are cultivated.

If you’ve never grown cool season vegetables, several articles at The Farm In My Yard provide detailed information to get you started. For a greater understanding of any issue, enter the term in the search bar or click it in the tag cloud.


The Advantage of This Latitude

I’ve been growing greens in winter for decades, for my customers and for my family. Fortunately for us, living in the southeast doesn’t present as difficult a winter hardship as would living in Montreal, Montana, or Scotland. But there are options for just about every climate.

There’s no substitute for stepping outside and collecting a green onion, a mild mustard leaf, and some kale and spinach for our Sunday morning omelet. We pick what we need when we need it.


Succession Planting: Warm, Then Cool Season Vegetables


Because our favorite greens love cool weather, they grow in the garden after the tomatoes, peppers, and cucumbers have been harvested. So, with some planning, you can schedule a succession of crops. When one crop finishes up, new transplants or seeds are ready to take its place. Now, that’s an efficient use of space!


cool season vegetables

Cool season vegetables and greens replace summer tomatoes and peppers. Plastic protects plants on very cold nights and the netting deters deer.


Radishes, beets, spinach, and other fast-growing plants can be sown directly into the garden in late summer to early autumn. After they’ve been harvested, there might be time for another quick fall crop.

Certain greens and root vegetables have a shorter window of time during which they retain the best quality. So don’t let them linger in the garden. On the other hand, some cool season vegetables can be harvested over many months of growing! That’s at a time when there are fewer weeds, fewer bugs, and less drought to worry about.

If the weather is still warm for the first round of seeds, look for varieties of cool season vegetables that are more heat tolerant. Some catalogs indicate the preferred soil temperature for each crop, or you can get that information from your agricultural extension office. Soil temperature can be lowered by irrigating during hot weather. Additionally, frames covered with knitted shade cloth, made from black polyethylene (available from Johnny’s Selected Seeds and others), provide consistent shade until the weather cools. That bit of shade can make the difference between seeds germinating in August or having to wait until late September to sow them.

Here in zone 7b (average lowest winter temperatures 5° to 10°F), we enjoy productive edible crops and herbs in the garden year-round…with some protection in winter, of course. But we’ve also grown them in colder Maryland winters.

Because I’ve been “advised” by the HOA to stop growing vegetables in the garden (photo, above), they’re now in pots (photo, below) on the fenced deck. (Note to self: next move, no HOA!) Young ‘Aspabroc’ miniature broccoli plants grow in a 20″ pot, where a tomato grew during in the summer. Italian parsley lasts all winter, and sharp-tipped pine cones discourage squirrels.

***Update***: In October, 2021, after my mother passed away, I moved to a small town in northern North Carolina. More property, more nature, woods in the back (where a bobcat and I came face-to-face!), no traffic, gorgeous topography, great friends, just a couple of degrees cooler than Charlotte, and no HOA to tell me what I must or can’t do on my property. 3/1/2024


potted broccoli

‘Aspabroc’ miniature broccoli and parsley.


Peas…Yummy!

Peas grow best in the garden’s “shoulder seasons”. That’s when temperatures can be cool to warm, and when frost is no surprise. So, before the end of tomato and pepper season, you can sow a pack of pea seeds next to a trellis and begin harvesting two months later.

Edible podded snap peas and snow peas are absolutely delicious. Many are eaten on the spot. And because they grow vertically, the vines take up little square footage. During the shoulder seasons, in moderate climates, they don’t normally require a protective covering.

pea vine

Peas growing next to the house, a warmer microclimate, in the Charlotte garden.

If you have facilities that can accommodate pea vines, such as a lean-to or a cool greenhouse (Tips #9, #10), this crop can be grown as the temperatures dip lower during the winter months. But there is a point below which the vines will be killed in unheated structures.

Last autumn’s loosely covered pea vines (photo, right) made it just fine through the mild winter and started bearing pods in late winter.

Look for disease resistant varieties when growing any vegetables or greens under cover. Plants are more susceptible to diseases when grown in humid conditions.


Gather Information

Get to know each crop, and how much cold it can tolerate with or without protection from freezing weather. I’ve researched calendars for scheduling vegetables in this zone and have found some of them, compared to my own experience, to be overly conservative. They restrict sowing and transplanting to a narrower period of the calendar than I’m willing to gamble with.

Gardening in a warmer microclimate offers more protection than growing plants out in the open. Planting against a sunny south-facing wall or in a protected corner out of the wind provides opportunities to extend the season.


bees and butterflies feed on nectar in winter

‘Red Russian’ kale in bud.


Kale, collards, spinach, Brussels sprouts, mustard spinach, arugula, leeks, and green onions can tolerate the coldest conditions, within reason. I cover the crops when temperatures dip below the mid 20’s. Even if they’re not covered, they will survive. But I want the plants to continue providing premium quality greens. If not stressed by very low temperatures all day and night, these crops will grow if daytime temperatures rise into the mid 40’s.

Cauliflower and ‘Bright Lights’ Swiss chard need to be covered earlier than other greens. Frost normally won’t kill the plants. But repeated freezing will damage the foliage, halting growth until warmer temperatures (or the protective coverings) return.

These crops and other cool season vegetables won’t need protection if grown farther south. Again, cold tolerance is variety specific, so try new cultivars now and then and see which ones work best for you. For example, ‘Green Magic’ broccoli does well when planted in early spring and again in early autumn. This variety needs a warmer temperature when forming its head. On the other hand, ‘Arcadia’ broccoli can mature in very cold weather, so this is the one I plant later in autumn. Another benefit is ‘Arcadia’s bumper crop of side shoots; in Charlotte, they produced for months.

For More Information

There is so much information online and in catalogs, books, and magazines. But, for local perspectives and information about other growing conditions, check with your agricultural extension office. And speak with helpful vendors at the neighborhood farmers’ market.

Garden clubs, botanical gardens, and garden centers selling seeds, supplies, and transplants sometimes offer classes covering various subjects. My “Cool Season Vegetables and Greens” presentations drew the most attendees. Many of my customers started with just one crop and then returned for more. A healthy addiction!

Keep Records

As you begin new garden projects, place labels with the plants, photograph progress, and take notes for future reference. Add some varieties you’ve never grown before to discover delightful new flavors. Observation of the varieties you’re growing in your garden is invaluable when planning future garden projects. There is no substitute for hands-on experience…and records of successes and failures!

Keeping detailed drawings of crop placement in the garden will help when considering crop rotation. Not growing plants from the same family in the same place every year helps decrease concentrations of pathogens and insects. But, because so many of the cool season vegetables are in the Brassicaceae family, it’s difficult to rotate these crops in our limited space.

Succession planting calls for sequential use of space, maximizing the amount of produce harvested through the seasons. It is especially important to prepare the soil before the fall or spring season, adding fresh compost, aged manure, or planting mix.

For optimal harvests, you’ll need to fertilize regularly as the plants grow. Instead of relying on memory, record the names of the products and when you applied them.

Have all underground utilities marked by your municipality before proceeding and keep a record of their locations. Call 8-1-1 to schedule an appointment.


Headings:

Page 1: Ready For Fall?, Where There’s a Will, There’s a Way (The Advantage Of This Latitude), and Succession Planting: Warm, Then Cool Season Vegetables (Peas, Yummy!, Gather Information)

Page 2: Seed or Transplant? (Seeds, Temperature, Transplants, More Favorites), Crops With Ornamental Edible Leaves (Tender Leaf Kales), Crops That Form Heads, Soil Fertility (The Importance of Microbes), Nutritional Benefits, and Ready For the 10 Tips?

Page 3: Tip #1: Move Tender Plants Indoors, Tip #2: “Quick! Cover Up!”, Tip #3: The Hot Water Bottle, Tip #4: Low Tunnels, Tip #5: Deal with the Wind, Tip #6: Add Christmas Lights, Tip #7: I’ll Have a Double

Page 4: Tip #8: A Simple Cold Frame For Cool Season Vegetables, Tip #9: A Lean-To, Tip #10: The Greenhouse, Finally!

Return to the top of Page 1

Potted Bulbs: Tips For Planting A Lasagna Pot


potted bulbs


“Good things come to those who wait.”


Everyone has heard this saying. Gardeners who plant spring-flowering bulbs in their gardens must necessarily agree. We’re a patient lot, and expect to wait for apples, for tomatoes, for fat mounds of ‘Great Expectations’ hosta. And we wait for spring.

We wait…and we watch. In fact, both of those words derive from the Anglo-French waiter, to watch over, and the earlier Old High German wahta, to watch.


snowdrops

Snowdrops (Galanthus).


And then, one day in January or February, maybe March where you live, the first of the early snowdrops’ nodding bells dare to defy ankle high snow. With the next break in the weather, snow crocuses reveal their sprightly blooms, followed by bold spears of early daffodils. When their cheery yellow trumpets open, they demand attention, proclaiming to the world, “We’re here!”

yellow daffodils

Yellow daffodils in the garden.

Daffodils bring life to a chilly landscape, and, at the same time, they assure us that spring is either here or near. Their warm colors—various shades of yellow, orange, salmon and peach—are a psychological cup of hot chocolate. But I also love the white and pink varieties. Fragrant ‘Bell Song’ is a favorite, with a light pink cup and white outer petals. ‘Mount Hood’ is a substantial and long-lasting variety, first creamy, then mostly white.

But, if digging in cold soil is not your cup of tea, perhaps another option will interest you. This alternative can be accomplished in the kitchen or the garage. Or on the back porch. And it won’t take long to do.


Potted Bulbs—The “Lasagna Pot”


This project involves growing spring-flowering bulbs in pots, planted close together. Blooms open in late winter, in some areas, and continue to please for weeks, or even months, afterward. Often called lasagna pots, they’re simply generously sized pots filled with layers of bulbs.

Because we don’t intend to keep the bulbs in the pots from year to year, it’s perfectly acceptable to space them so they’re almost touching. That’s how we get the most flowers. We do, however, want to place them close to the proper depth. Growth emerging from the bulbs is narrow and pointed, and it will easily find its way through the bulbs above them.


Suggestions For Types Of Bulbs To Use


Spring-flowering bulbs can be classified based on timing of bloom. Early, mid, and late spring bulbs keep the flowers coming for a long season of color. Snowdrops and snow crocuses are early, and larger Dutch crocuses bloom in early to mid spring. Hyacinth’s blooms scent the air in mid spring, followed by grape hyacinths, which continue to late spring. Many thousands of kinds of daffodils and tulips bloom early, mid, or late season, depending on variety.


puschkinia

Puschkinia libanotica, a spreader.


Don’t overlook the minor bulbs or unusual varieties. It’s always fun to try something new. Check out Allium, Chionodoxa, Ipheion, Ornithogalum, Puschkinia, and Scilla. They’ll add another dimension at less cost than the same number of tulips, hyacinths, or daffodils. And, due to their small size, you plant them only a few inches deep.

See what the garden center is stocking this year, or consider the vast offerings from mail order sources. Keep in mind that the longer the bulbs stay at comfortable shopper-friendly temperatures in the stores, the more they dry up. So, purchase them soon after they become available in autumn, and keep them cool (under 50°F), but not freezing, until you plant them. Feel the bulbs, choosing those that are plump and firm.


Perfect Timing…Or Not

You can orchestrate a perfectly sequential roll-out of flowers, timed so three of these will follow or coincide with 5 of those. Looks good on paper…but in real life, potted bulbs respond, more or less, to their own internal clocks.

Don’t obsess over the timing. Use catalog descriptions as somewhat vague guidelines. Just enjoy the process, the anticipation, the flowers.


The Process


The Pot

pottery

First choose a pot. The larger it is, the more bulbs will fit. It should be deep enough to accommodate large tulips or daffodils, which will be planted about 8″ below the soil surface. Plan on about an inch between the top of the soil and the pot’s rim.

Look for pots that are frost resistant, or use plastic pots. The pot needs to have a drainage hole.

I chose a decorative clay pot, 12″ wide and deep. And there’s algae growing on the sides, adding a rustic element.

Two 10″ or 12″ plastic pots that fit into your ceramic pots by the front door can be planted now, and kept cool over the winter. When they begin to sprout, simply slip them into the pretty pots. Add preserved moss, colorful twigs, and a few pine cones to the inserts for a finished look. In late winter, you can add small violas, if there’s room, for more color. They’ll take the cold weather, up to zone 5 on the USDA plant hardiness zone map.


Polyester Fiberfill


polyester fiberfill

Polyester fiberfill.


Use a small handful of this synthetic fluffy material to cover the drainage hole. Water will drain through it, but the soil will stay inside the pot. I use it for all potted plants to prevent erosion, from 2″ clay pots for dwarf succulents up to the largest pots.

Another advantage is that polyester fiberfill prevents ants, earthworms, sowbugs, and other critters from crawling inside the pot through the drainage hole. Because it doesn’t rot, it can be used again. You’ll find it at any hobby or craft store.

I never add rocks or gravel in the bottom of the pots.


Potting Soil

Rountree's potting soil

Potting soil with a high percentage of pine fines can be mixed with a more peaty soil.

Use fresh potting soil that drains well. Mix in pine fines or coarse sand if your soil is heavily composted and stays wet. Avoid using any kind of manure near the bulbs.

Add a few inches of soil to the bottom of the pot, and lightly firm it in. This is where the first of the bulbs will be planted, so measure the depth.

Not sure how deep to plant them? If in doubt, plant so the bottom of the bulb will be as deep in the soil as three times the height of the bulb. The small minor bulbs can be planted four or five times their height. But don’t stress over it; there’s some wiggle room when planting bulbs.


Headings

Page 1: “Good things come to those who wait.”, Potted Bulbs—The “Lasagna” Pot, Suggestions For Types Of Bulbs To Use (Perfect Timing…Or Not), and The Process (The Pot, Polyester Fiberfill, Potting Soil)

Page 2: Planting the Bulbs (Narcissus ‘Ice Follies’, N. ‘Pipit’, N. ‘Tête-à-Tête’, Brodiaea ‘Queen Fabiola’, Muscari ‘Dark Eyes’, and Crocus ‘Yellow Mammoth’), Mulch and Water, Caring for the Potted Bulbs, How Cold?, Can We Grow the Potted Bulbs Again?, and Update: Here’s How the Lasagna Pot Did This Spring

Return to the top


Pumpkins At The Union Market


pumpkins, union market


The Union Market, a Local Favorite


Anyone traveling on Providence Rd. south from Charlotte toward Waxhaw, North Carolina, is familiar with this roadside market. Union Market carries vegetables and greens from local farms, freshly-cut herbs (in season), fruits from orchards nearby, Duke’s breads, and a selection of refrigerated meats, dairy products, and prepared meals. (In order to stock a wide variety of fruits and vegetables, though, they are sometimes brought in from elsewhere. But the emphasis is on fresh, locally grown produce.)

I sometimes buy heirloom tomatoes (‘Cherokee Purple’ and ‘Pineapple’), sweet peppers and cucumbers before mine are ready, cantaloupe, and a loaf of rye bread. After the Christmas trees and greens, they’ll close for the winter for a well-deserved rest.

Now, of course, it’s pumpkin season! You can hunt for the perfect pumpkin, or for one that’s not so perfect. This year, there’s a huge one tucked into the autumn vignette, weighing in at almost 400 pounds.


~400 lb. pumpkin, union market

The biggest one on the lot.


So, you can carve your terrier’s smile, a grim monster, or a psychopathic clown face into your pumpkin. But don’t delay; Halloween is here! Union market has lots of pumpkins and squashes to choose from—the pinkish ‘Porcelain Doll’, the striped ‘Speckled Hound’, and the bumpy ‘Knuckle Head’… Small ones, big ones, smooth ones, warty ones… Round orange, blocky pink, flattened white, orange splotched with green, and some that are kind of bluish gray…

While you’re there, pick up a bunch of corn stalks. And they have a good selection of ornamental corn—tiny ears and full-size, too.


Ready for the Holidays?


Here’s an old family recipe for pumpkin pie that uses canned pumpkin. (I’ve used fresh pumpkin, but results weren’t as good.) Delicious! My daughter, Brynn, is coming for a visit soon, so I’ll be making a couple of pumpkin pies, with homemade crust.

These autumn fruits can dress up the front door or the view out the kitchen window. They’ll last through Halloween and right up to Thanksgiving. And after Thanksgiving, it’ll be time for winter delights—garlands and lights, bows and paperwhites. And, yes, Union Market will have Christmas trees and greens.


For more information


The Union Market

Owners: David and Christine White

Address: 1316 Providence Rd. South, Waxhaw NC

Phone: (704) 843-0227

Hours: This is a 3-season market. Check the website for hours.


Return to the top

A Passion For The Gulf Fritillary Butterfly


2019

Updated 9/12/2024


The Gulf Fritillary Butterfly


gulf fritillary butterfly

Female gulf fritillary butterfly.


At the Hendersonville Garden Jubilee in May, I bought a small Passiflora vine as a gesture of support for Bee City USA. One third of the food we eat and 80% to 90% of all flowering plants rely on pollinators to set fruit and, therefore, to reproduce.

Bees are efficient pollinators, but other insects and animals, including butterflies, beetles, moths, bats, and hummingbirds, also provide this service. This article concentrates on attracting the gulf fritillary butterfly to your garden.


bumble bee on passiflora

Bumble bees love this passionflower vine (Passiflora).


Passiflora incarnata


Planting the passionflower vine had to be delayed until late summer, after the siding replacement had been completed. And then the plant took off! 

Passionflower vine (Passiflora incarnata), also called maypop, is the primary food source for larvae of the beautiful gulf fritillary butterfly. This herbaceous perennial is native to the southeastern quadrant of the U.S., in USDA zones 5 to 9. A substantial vine, growing to 20′ in length, it blooms from late spring to late summer. Its pale purple 3″ flowers yield kiwi-size yellow-orange fruits from which you can make jams and jellies, although I haven’t tried it.

Other species of Passiflora can host larval fritillary populations, but some are toxic and will kill the caterpillars. So, choose carefully! Usually, the female senses chemicals with her antennae and determines suitability of a particular plant for oviposition (depositing the eggs).

Passionflower vines also host the variegated fritillary, the Mexican fritillary, the Julia butterfly, and the zebra longwing. I was hopeful but not overly optimistic that the caterpillars would show up this late in the season. But I have since learned that caterpillar activity of the gulf fritillary ordinarily takes place in late summer.


If You Plant It, They Will Come


It wasn’t long before the vine had wrapped its tendrils around the coleus and the Salvia coccinea planted only 2′ away.

I saw the bright orange butterflies a few times this summer, flying around the gardens. But now they visited the vine almost every day to lay eggs, and then the nearby hanging basket of flowers to sip nectar. Adults feed only on nectar, including flowers of lantana, zinnia, Buddleia (butterfly bush), salvia, and Liatris.


zinnia, calibrachoa basket

Hanging basket with zinnias and calibrachoa.


Soon, holes appeared in the leaves…already?…and then bigger holes. Success! Long gone are the days when I would have implemented measures to “remedy” this behavior.

gulf fritillary butterfly cqterpillar

Caterpillar of gulf fritillary butterfly.

Close inspection revealed several orange caterpillars with purplish stripes and black bristly projections. Then more appeared, wave after wave, as the older ones matured and crawled away to pupate. I would not have thought that a plant this small could sustain more than 40 caterpillars over a few short months. But it did, although some chrysalises have succumbed to a fungal disease. Recently I noticed more small caterpillars, even though we’ve already had a light frost.

Thank goodness, I thought, because this Charlotte NC garden isn’t large enough for this vigorous vine. These caterpillars and their voracious appetites help keep this young plant in bounds. The plan is to dig it up and to transplant it to a bigger garden when I move. All of it will be removed, or it will take over the neighbors’ gardens as well. The vines had no trouble growing under the sidewalk and emerging several feet on the other side.

***Update***: Since planting the passionflower vine (in northwest NC) at the edge of the woods almost 3 years ago, it has spread to cover the ground 20′ around the trellis. In 2023, I saw several male gulf fritillary butterflies, but no females. This year, we have both males and females and plenty of flowers for the pollinators, but no caterpillars yet. Rocky clay soil and mowing confine the spread of the vines. 9/12/2024


Life Cycle of the Gulf Fritillary Butterfly


gulf fritillary butterfly on lantana

Gulf fritillary butterfly on lantana.


Gulf fritillaries (Agraulis vanillae) are commonly found in open sunny habitat, grasslands, woodlands, fields, and in gardens. These subtropical butterflies range from Texas to Florida and migrate north from Missouri to Delaware. This butterfly is also found in Central America and in Hawaii.

The gulf fritillary and the zebra butterflies belong to a group called the longwings (Heliconiinae). Larvae of both species feed on passionflower vines. Although the gulf fritillary resembles other fritillaries, it is, in fact one of the longwings. Other fritillary larvae (meadow and great spangled) feed on wild violets.

Predators avoid longwing butterflies due to several odorous chemicals produced in abdominal glands. Passionflowers contain poisons (alkaloids, cyanogenic glycosides), which are picked up by the caterpillars as they feed on the leaves. These chemicals make them distasteful to birds and other animals, but less so in the gulf fritillary.

After mating and consuming protein-rich pollen for several days, the female butterflies lay eggs on passionflower vines. This caterpillar prefers mature foliage, if it is plentiful, leaving other butterfly caterpillars to feed on the young leaves at the tips. I’ve read conflicting information, which states their preference for the young growth tips of the vines. There, the plant doesn’t produce nectaries on its foliage, which attract ants that defend the plant from butterflies and larvae.

Adults measure about 2½” to 3½” wide, with females being larger and a bit darker than the males. Females also have more pronounced markings, and both have white spots on the undersides of their wings.


Eggs and Larvae


Eggs are yellow when first laid. They hatch in 3 to 8 days, depending on temperature.

The caterpillar feeds on foliage and molts 4 or 5 times over the next 11 to 20 days. Then it crawls to a suitable point of attachment for its chrysalis.


Pupae of the Gulf Fritillary Butterfly

For 5 to 12 days, according to the websites I read, the caterpillar pupates. But the chrysalis by the front door has been hanging around for at least 2 weeks. It is alive; it reacts when I nudge it. A small sign just under the doorbell, where the pupa resides, requests “Please Do Not Disturb.”

The small chrysalis, at only 1 1/8″ in length, could easily be mistaken for leafy debris. But hanging on the door trim or on the shutters, it becomes conspicuous. In fact, the first chrysalis I saw, also on the door trim, had been partially eaten, probably by a resident lizard. Although I’m tempted to move them to the shrubs to “save” them, it’s better to let nature decide. If this were a rare species, I might think differently. (***Update***: Well, someone dined on this chrysalis, too! 11/2019.)


Mature Butterflies

Adults typically live for a few to several weeks in warm weather, and longer in cooler temperatures. This butterfly prefers warmer regions, and dies when it gets close to 20°F.

The gulf fritillary butterfly can produce several generations per year in warm winter zones.


gulf fritillary butterfly, lake lure flowering bridge

Gulf fritillary butterfly, Lake Lure Flowering Bridge.


Typical Butterfly Life Cycle


The typical life cycle of a butterfly:

  • starts as an egg,
  • which hatches into a caterpillar (the larval stage),
  • which pupates in the chrysalis (the pupal stage), undergoing metamorphosis,
  • and then emerges as the adult butterfly.

The gulf fritillary overwinters in cooler zones as adults. Do them a big favor and build a brush pile where they can find shelter in cold and inclement weather. Simply stack piles of twigs, branches, straw, and weeds, and let fallen leaves blow in. Birds, insects, and other creatures will appreciate this kind gesture. And you’ll get some compost out of it.

I give the results of this small experiment Four Stars, an A+. As I mentioned earlier, I was pleasantly surprised by how readily the butterflies found the passionflower vine, and by the number of caterpillars feeding from it. If you’ve been considering what to plant to attract pollinators or pretty butterflies, you won’t go wrong with this one. Just give it time and some space!


passion flower vine eaten by caterpillars

What remains of the Passiflora. Good job, caterpillars!


Return to the top

South Mountains State Park, North Carolina


Introduction to South Mountains State Park


Yesterday, I spent a couple of enjoyable hours at South Mountains State Park hoping to get some late afternoon pictures of fall color. But there wasn’t much going on quite yet. This was my first trip here, but fall foliage is a good reason to return. If you like being surrounded by nature, this is the place for you!

poison ivy

Poison ivy.

South Mountains State Park is the largest in North Carolina’s state park system. It is located south of Morganton, about an hour and a half northwest of Charlotte. You can hike along 50 miles of trails, enjoy camping and equestrian paths, and pack a picnic lunch. There are no designated swimming areas. But there is poison ivy (photo, right) on the ground and climbing trees, so you are advised to learn how to recognize–and avoid–it. It can cause a rash even from dormant stems.

The park comprises two separate areas:

  1. the larger Jacob Fork Access, 3001 South Mountains State Park Ave. (S.R. 1904), Connelly Springs NC 28612 (828 433-4772)
  2. Clear Creek Access, 5999 Branstrom Orchard St., Morganton NC 28655

More information is available from the NC Division of Parks and Recreation, Department of Natural and Cultural Resources, at south.mountains@ncparks.gov or www.ncparks.gov. Some activities require a permit and carry fees, so check first.


The Visitor Center


South Mountains State Park, NC


My first stop was at the Park Office, not far from the entrance sign, to pick up a map and purchase a couple of books (insects and butterflies) from the store. I walked through the interactive display room, with information on various topics, including watershed pollution, river basins, seasonal changes in the forest, and the 80′ tall High Shoals Falls (a strenuous hike, according to the list of Trails).

You can also learn about the unique plant and animal ecology of the Spray Cliff Community. This type of biome is rarely seen in this terrain (elevation approximately 1500′) of the North Carolina piedmont. Throughout the Blue Ridge Mountains, though, this kind of constantly wet environment is more common.


spray cliff environment sign


Sounds of Nature


Kids of all ages will want to press the buttons to hear the drumming of a pileated woodpecker, the call of a wild turkey, or the song of a Swainson’s warbler. And you’ll learn that just one bat can consume 3,000 insects in one night! At the exit, various brochures are available, listing, for example, wildflowers or birds of South Mountains State Park.


bird calls, south mountains state park


Going For A Walk


I asked the park ranger about hiking to High Shoals Falls, but it didn’t sound like a good idea; my knee certainly would have objected. She highlighted on the map where I could find the easy trails. The road continued downslope about a mile from the Park Office, ending in a parking lot.


tree signs, south mountains state park


Here was the beginning of the Hemlock Nature Trail and the River Trail, the two easy trails. Downstream, a fisherman cast his line for trout, and most hikers were packing up for the day. This time, I walked the gravel-and-earth-surfaced Hemlock Nature Trail, alongside Jacob Fork River, easy enough even for a wheelchair. Maybe next time I’ll try a moderately difficult trail; one can always turn around!


South Mountains State Park


At intervals down the path, signs described features such as local trees, animal tracks, salamanders, rotting wood, and species of fish living in the river. And there are handrails, some benches, and a restroom on the Hemlock Nature Trail.


animal tracks sign


A Carolina wren sang nearby, accompanied by the stream’s whooshing refrain. Lovely walk, less than half a mile into the woods. I love this. The clean fresh smell of moist woods…


Death and Birth


The steep hillside across the river was home to huge evergreens, including Rhododendron maximum, and deciduous trees in various stages of succession. Big old trees claimed much of the canopy, but eventually they, too, will fall. Opportunistic saplings and forest floor flowers take advantage of the new sunlight and quickly fill the space.


large tree, South Mountains state park


Why wait for a summer vacation “to get away from it all” when a trip to one of the state parks takes just an hour or two? For me, there’s no greater power than being in nature to restore feelings of wellness. I need that connection with the natural world. The sights, the smells, the music of the trees, birds, and water…nothing is more refreshing!


hemlock, South Mountains state park

Hemlock, Tsuga canadensis.


forest at South mountains state park, river, rhododendrons

Riverside Rhododendrons and trees.


mushroom, South Mountains state park

This mushroom gives shelter to a passing fly.


Mushrooms and Other Fungi

After the mushroom’s gills mature, the spores disperse. When the spores germinate, they grow a complex system of hyphae that absorb nutrients and water from the ground and leaf litter. The fruiting structures—the mushrooms—ensure that a new generation will continue to decompose and recycle organic matter.

The mushrooms themselves are fleeting, but the mycelium, the collective term for the branching hyphae, can live an incredibly long time, perhaps thousands of years and spreading over many square miles in undisturbed forests.

Birth, growth, maturity, procreation, death, and decomposition. It’s all part of Nature’s plan to use and to recycle nutrients, giving new life to generation after generation.


Return to the top

A Trip To The Old Mill Of Guilford


The Old Mill of Guilford, in Oak Ridge, North Carolina


A couple of weeks ago, I took a pleasant drive to a part of North Carolina that I don’t normally visit. The Old Mill of Guilford, in Oak Ridge, is a working mill an hour and a half northeast of Charlotte. It has the distinction of being one of the oldest operating gristmills in America. The mill is located at 1340 Hwy 68 North, a few miles northwest of Greensboro.


History


Before We Were The United States


Let that sink in. Before we were The United States!

After moving from Hopewell, Virginia, in 1753, Daniel Dillon settled in this area, then part of Rowan County. In 1755, a tract of 552 acres of land was surveyed for Dillon, and, in 1759, was granted to him by the Earl of Granville. On January 10, 1764, according to Rowan County records, Dillon obtained a license to build a public gristmill, to grind grain for area farmers, near the mouth of Beaver Creek.

In 1771, this area became part of Guilford County.


The American Revolution


British Successes

George Washington

George Washington.

During the American Revolutionary War (1775-1783), it is believed that the mill was seized by British General Charles Cornwallis, in February of 1781. Cornwallis saw earlier successes against General George Washington’s Continental Army in New Jersey, in 1776.

But, by June, 1778, the French had entered the war, in support of the Americans. So Cornwallis shifted his campaigns to the South, hoping to enlist American colonists still loyal to Great Britain and the Crown. He thought that taking the South first would make it easier to win in the North.

Cornwallis’ forces defeated American troops in several battles in the South, including the ports of Savannah, Georgia (December, 1778), and Charleston, South Carolina (May, 1780). He also fought Major General Horatio Gates at the Battle of Camden, South Carolina (August, 1780), strengthening the British hold on the South.

After Gates lost Camden, Washington replaced him with Major General Nathanael Greene to lead the Continental Army in the South.


The Tide Turns   

Cornwallis’ exhausted army soon met with stronger opposition as they marched toward North Carolina. A turnaround began on October 7, 1780, when the Patriot militia defeated the Loyalists at King’s Mountain, near the border between North Carolina and South Carolina. Patriot troops surrounded and surprised British Major Patrick Ferguson’s 1200 men. Ferguson was killed after an hour’s fighting, and the Patriots claimed victory. Among the 900 Patriots was Davy Crockett’s father, John Crockett.

Greene divided his troops to force Cornwallis to battle on multiple fronts. Brigadier General Daniel Morgan defeated British forces led by Colonel Banastre Tarleton at Cowpens, South Carolina, on January 17, 1781. Cornwallis pushed into North Carolina and engaged in heavy recruiting to expand his forces. Greene was in Virginia doing likewise, before returning to North Carolina.

On March 14, 1781, Greene and his troops camped near Guilford Court House. This location is near present-day Greensboro, which later was named for General Greene. The next day, the Battle of the Guilford Court House lasted less than two hours, pitting Cornwallis’ 1900 soldiers against Greene’s 4400 troops and militia. Both sides suffered losses before Greene’s forces retreated. Cornwallis lost one fourth of his troops in that short period of time.

After decisive losses at King’s Mountain and Cowpens, and this Pyrrhic victory at Guilford Court House, Cornwallis abandoned the British campaign for the South. He and his army proceeded to Wilmington, North Carolina, to rebuild his forces. Greene moved into South Carolina, achieving a dissolution of the British hold on the South, later in 1781.


Surrounded

Cornwallis led his troops to the Virginia coast, hoping to receive backing from British General Henry Clinton’s large army in New York City, and ended up in Yorktown, in southeastern Virginia. He raided every farm he came across, stealing horses and freeing thousands of slaves, winning allegiance from many of them. General Cornwallis fortified the town, and waited for help.

In the meantime, Washington asked the Marquis de Lafayette to block Cornwallis’ escape. George Washington’s troops and the French, under Comte de Rochambeau in New York and Comte de Grasse’s fleet offshore, surrounded Cornwallis’ army. After a three-week siege, this battle effectively signaled the end of the American Revolution.


And Surrendered

After 5 years of General Cornwallis’ participation in the war, he surrendered his 8,000 British soldiers and seamen to the French and American forces at Yorktown, on October 19, 1781. He did not attend the surrender ceremony, perhaps due to illness, but sent his second-in-command, General Charles O’Hara. O’Hara presented Cornwallis’ sword to the American and French commanders.

Peace negotiations commenced in 1782, and the Treaty of Paris was signed on September 3, 1783. The United States of America now was formally recognized by Great Britain as a free and independent nation.


The Mill


The Old Mill of GuilfordDaniel Dillon’s estate, through Nathan Dillon, executor, sold the tub mill, a house, and 175 acres on Beaver Creek to Joel Sanders (also seen as Saunders) in 1808 for $900. Records indicate that Sanders owned two other mills on Deep River, in Guilford County. Sanders moved the mill 500′ downstream; the original mill now sits in the mill pond.

Through the early 1800’s, the mill changed hands from the Dillon family to the Sanders family. In 1869, R.A. Blalock, for $2250, purchased a half interest in the mill and 197.25 acres. James A. Sanders and his wife, Ella, sold the other half of the mill and 197.25 acres, in 1872, to John M. Brittain for $2500. In 1875, Brittain bought Blalock’s interest for $2350.

Ownership of the mill continued under the R.M. Stafford family, and then the Johnsons, then the Baynes and Lowry (Lowery) families, the Cudes and the Beesons.

In 1912, British buttons and musket parts reportedly were found on the site when the dam washed away. The next year, in 1913, K.L. Hendrix (Hendricks) bought the mill. Undocumented information indicates that the mill was converted to a roller mill, replacing the less durable wooden water wheels.

Around 1928, a metal pipe was installed under the road, replacing the canal from the dam. The mill changed ownership a few times over the next quarter century, from the Hendrix family to the Staffords, and back again.


The Old Mill of Guilford


In 1954, Clarence E. Bailes and McLeod Leather Belting Co. purchased the roller mill, a power plant, and 122 acres. They replaced the roller mill machinery and the turbine with a 24′ x 4′ Fitz overshot water wheel.

Bailes made other improvements to the operation to comply with agricultural regulations, added the sales office, and built the feed mill next to the original mill. Lloyd Lucas became miller and operated the mill until his death in 1975, when the mill closed.


In Modern Times


Charles Parnell purchased the mill in 1977, renovated it, and restored its 200-year-old tradition as a water powered gristmill. He and his wife, Heidi, developed many new products, which gained national recognition for quality.

Annie Laura Perdue spent years training as a miller under Mr. Parnell. When both of the Parnells died in 2007, she took over as miller.

The mill currently is powered by electricity, as the metal pipe that carries water from the mill pond needs to be replaced. Although the mill has experienced many changes over the centuries, some original parts, including structural timbers, still remain in the building.

In 2008, Amy and Darrell Klug bought The Old Mill of Guilford. Annie Laura continues to this day as miller, with help from community volunteers. The Old Mill of Guilford brochure, compiled by Jack L. Perdue, concludes with this succinct missive: “The Klugs continue to introduce new products, maintain the historical integrity of the mill, and enhance the mill’s reputation for high quality, natural stone ground products.”


products at the Old Mill of Guilford


Products


The Old Mill of Guilford’s website lists many locations in North Carolina where their products are sold. (Yes, they can ship them to you!) And, of course, you’re welcome to purchase directly from the mill store. It’s open every day from 9 a.m. to 5 p.m. You can find outlets carrying the mill’s flours and mixes in other states, as well, including Virginia, California, South Dakota, and Texas.

This is a privately owned operation, so your patronage is kindly appreciated.

Think: Gifts! Stocking stuffers! Must warm up the oven once in a while!


The Mill Store has grits and flours of all kinds (including rye), steel cut oats, gingerbread mix, lemon poppyseed and sweet potato biscuit mixes. Buttermilk and apple cinnamon pancake mixes, corn meal, cookie and scone mixes. But there’s so much more! The store, conveniently located right next to the gristmill, offers 50 or so all natural ground products, with no preservatives. You’ll also find local jams and honey, bean soup mixes, locally made crafts, and even a jigsaw puzzle featuring The Old Mill of Guilford.

Annie Laura and volunteer Carola were there to answer all my questions, as they packaged and labeled the mill’s products.


Carola and Annie Laura at the Old Mill of Guilford

Carola, left, and Annie Laura at work.


The Old Mill of Guilford is listed in the National Register of Historic Places. It would be a great day trip with the kids, a camera, or an easel and canvas. Since semi-retiring, I love finding places like this.

Today, it’s so easy to put bread on the table, but imagine how complicated it was 200 years ago. And who doesn’t miss the smell of freshly baked bread or muffins? With cold weather about to make its debut in the coming days, this is a great time to bake something. Mmmm…gingerbread!

Phone: (336) 643-4783, Amy and Darrell Klug.

Email: info@oldmillofguilford.com.

Website: www.oldmillofguilford.com.

Address: 1340 Hwy 68 N, Oak Ridge, NC 27310.


An article about another gristmill can be found here: Mabry Mill On The Blue Ridge Parkway, in Meadows of Dan, Virginia. It’s part of the National Park Service.


The Old Mill Of Guilford

The Old Mill of Guilford.


Return to the top

A Garden For The American Goldfinches

Updated 7/12/2024


American goldfinch, male

Male American goldfinch.


American Goldfinches and Basil


basil going to seed, kept for American goldfinches

Basil ‘Genovese’ going to seed.

There’s been considerable excitement, lately, around the old basil plants on the deck. Flashy yellow American goldfinches have been flitting around the plants, landing near the tops of 4′ tall stems.

Normally, I would have cut the stems to prevent flowering, but the herb has had basil downy mildew. So I just let it go, curious to see who would show up. What a pleasant surprise to see the goldfinches move in for a feast of seeds!

Before the seedpods ripened, though, ruby-throated hummingbirds came for the white flowers’ sweet nectar. Almost like clockwork, these tiny marvels stopped by for their daily visits late in the afternoon.

Recently, I moved the big pot of basil to a sunnier place less than 10′ away. But the hummingbirds continued looking for the flowers in the old location. They hovered for a few seconds, and then flew away. The birds repeated this pattern for a few days until they rediscovered their treasure.


Memories from Childhood


sparrows

Sparrows.

We’ve been feeding birds all our lives, through the generations. I vividly remember my grandmother feeding the sparrows outside her kitchen door, and can recall the fevered chirps as they jockeyed for position and pleaded for more.

When my parents were dating, my mother’s green parrot bit right through my father’s fingernail.

Growing up, we always had a caged canary singing in the kitchen. And his name was always Tammy.

Before and after our own children were born, we kept various tiny chirpy finches, pairs of parakeets, and, for 20 years, a cockatiel named Narcissus. Narcissus was a rescue, and like my mother’s parrot 80 years ago, he never really warmed up to anyone else. For me, though—kisses, conversations, and a few bars of “We’re In the Army Now”. He sat on my shoulder, chuckling in my ear, between flights to the window for a peek outside.

Yes, we have an affinity for birds. Whether it’s bread crumbs, suet, pieces of fruit, peanut butter/seed pinecones, or bird seed from a bag…and water…our birds can count on us.


To the Rescue!

While growing up in Oradell, New Jersey, I often took in nestlings that fell from the neighbors’ trees. First I tried placing them back into their nests. At times there was nothing I could do; they were beyond help. And who knows? Maybe the parents pushed small or sickly birds out of the nests so they could concentrate on raising the rest of the brood.

Although not all the rescued chicks survived, I did my best to raise them to independence. Today, there are several organizations nationwide which will take orphaned animals.


Cedar Waxwings   

cedar waxwing

Cedar waxwing.

One year, I raised a beautiful cedar waxwing, which returned year after year, coming much closer than the rest of the flock. They fed on insects and berries, timing their migratory visits to coincide with the harvests.

Decades later, I occasionally witnessed a rare moment in the Rockville, Maryland back yard. A flock of perhaps 50 cedar waxwings gathered around and hovered over the small goldfish pond, chattering and dipping their beaks into the water. After only a few minutes of this hasty business, they were gone, off to warmer climes!

If I hadn’t peered out the kitchen window at just the right time, I would have missed it. We lived in that house for about 30 years, but I saw this activity only 3 or 4 times.


American Goldfinches


Migrations


map, Canada, United States

The American goldfinch (Spinus tristus) spends its summer breeding season from North Carolina to Washington state, and north to parts of Canada. Its winter range shifts farther south, across the United States, except for the coldest regions of the northern states, and to parts of Mexico.

Populations will remain near stocked feeders in northern parts of their range if temperatures are above 0°F. Many migratory birds will hang around for the winter, and not head for warmer habitats, if food is readily and consistently available.

This sociable little finch travels in flocks, often in association with pine siskins and common redpolls. Peak migration seasons are mid-fall and early spring.

Its flight pattern is an undulating wave. The bird flaps its wings a few times, and then glides. It often chirps during flight while it flaps its wings, and is silent when gliding.

The American goldfinch is the state bird in New Jersey, Iowa, and Washington.


Habitat


American goldfinches are common in weedy fields, meadows, floodplains, and in open woods. They’re found among shrubbery, along roadsides, and around suburban residential properties. All season, they seek semi-open areas, trees, and dense evergreens for shelter and nesting.

The National Audubon Society reports that songbird populations are declining in most areas around the country. Habitat loss, using harsh chemicals, exotic plants displacing native species…these are some of the factors that take their toll. One practice that would help all seedeaters is simply letting plants remain in the garden after they’ve gone to seed.


Median Strips

When traveling several hundred miles north a couple of months ago, I noticed that miles and miles of the median strips, in Virginia and Pennsylvania, had been allowed to go “natural”. There were mature stands of wild “weeds” including milkweed, Queen Anne’s lace (wild carrot), goldenrod, ironweed, chicory, black-eyed Susan, grasses, and various asters. And there were lots of moths and butterflies, including monarchs, and American goldfinches, of course, feeding on the seeds.

It was quite a shock to see this about-face in landscape management style. Where mowers and machines previously had kept the near-sterile ground cover at a mere inch or two, these long stretches boasted complex systems of flowers and seedheads, saplings, and greenery in various stages of development…in other words, life!

Although this style of landscaping won’t appeal to everyone, I was happy to see nature catch a break. Maybe it’s time to adopt a new attitude…one that takes into consideration all organisms within an ecological system, seen and unseen. It’s time to look beyond aestheticism and to incorporate principles of sustainability if we’re ever to see a decline in population loss and extinction.


Food Sources


Perennials


mixture offoods for goldfindh

A smorgasbord for goldfinches: pink coneflower, orange sunflower, blue globe thistle, white yarrow.


American goldfinches forage in flocks, except while breeding. They prefer habitats we consider weedy, feeding on many plants in the Asteraceae family (the composites). That includes native perennials such as:

  • globe thistle (Echinops)
  • flodman’s thistle (Cirsium flodmanii)
  • field thistle (C. discolor)
  • cobweb thistle (C. occidentale)
  • wayleaf thistle (C. undulatum). Thistle is their first choice. Check with your cooperative extension service to see if any of these native American species are considered invasive in your region.
  • goldenrod (Solidago)
  • ragweed (Ambrosia). This one—not goldenrod—causes late season hay fever.
  • purple coneflower (Echinacea purpurea)
  • New England asters (Symphiotrichum [formerly Aster] novae-angliae)
  • cup plant (Silphium perfoliatum)
  • Joe-Pye weed (Eutrochium, formerly Eupatorium)
  • yarrow (Achillea millefolium)
  • black-eyed Susans (Rudbeckia spp.)


thistle, loved by American goldfinches

Thistle and European goldfinches.


More Perennials

  • bee balm (Monarda)
  • anise hyssop (Agastache foeniculum)
  • lemon balm (Melissa officinalis). A patch of lemon balm grew outside the kitchen window when I lived in Maryland. In late summer, I let it go to seed for the American goldfinch. These agile acrobats grasped the 2′ stems, bobbing up and down while feeding on the seeds. American goldfinches apparently enjoy several plants in this family (Lamiaceae)—the balms, hyssop, basil, catnip, sage…
  • the sages (Salvia spp.), annuals and perennials
  • dandelion (Taraxacum)
  • gayfeather, or blazing star (Liatris)
  • western fescue (Festuca californica)
  • yellow-eyed grass, blue-eyed grass (Sisyrinchium spp.)
  • little bluestem (Schizachyrium scoparium)
  • big bluestem (Andropogon)
  • California field sedge (Carex praegricillis)
  • common milkweed (Asclepias syriaca)


milkweed

Milkweed seeds for food and nesting material.


Goldfinches also feed on young twig bark, maple sap, and tree leaf buds.

Deadheading your plants—removing the aging seedpods—results in a tidier garden, but one that is devoid of goldfinches. So, if you enjoy watching these sprightly birds, allow at least some of your plants to go to seed. Other insects and animals also will benefit from a more casual approach to gardening.


goldfinch feeding on salvia

A flock of goldfinches feeding on salvia seeds.


Annuals

Zinnia angustifolia

Zinnia angustifolia, the Star series.

Annuals that goldfinches feed on include zinnia, cosmos, daisies, salvia, marigold, poppies, and black-oil sunflowers. The American goldfinches are granivores, feeding almost exclusively on seeds. Consumption of insects is more accidental than it is intentional.

If you have an abundance of zinnia, cosmos, or sunflower seedheads, but prefer cleaning up the garden before planting the autumn pansies and violas, consider harvesting them after the seeds ripen. Save them in a cool dry place, where mice can’t reach them, for the autumn and winter feeders.

But don’t wait too long to first offer the seeds. You want to invite American goldfinches to stay before they migrate from the area. Once you start offering food, continue feeding them through winter.

Nyjer (Guizotia abyssinia, an herb of Ethiopian origin) and black oil sunflower seeds can be purchased from garden centers, hardware stores, warehouse clubs, and from specialty wildlife centers. Nyjer is grown in Ethiopia and Kenya, and is sterilized before importation. Often called “thistle”, this is an unrelated plant.


Trees and Shrubs

Ask your local Audubon chapter and other bird specialists for specific advice about native trees and shrubs that support populations of the American goldfinch. Some species that offer seeds and shelter include:

  • elm (Ulmus americana). Look for varieties that are resistant to Dutch Elm Disease.
  • American basswood (Tilia americana)
  • hazelnut (Corylus cornuta)
  • American beech (Fagus grandifolia)
  • American sycamore (Platanus occidentalis)
  • common witch hazel (Hamamelis virginiana)
  • river birch, and other species (Betula spp.)
  • western red cedar (Thuja plicata), and other arborvitae species
  • white alder (Alnus rhombifolia)
  • western redbud (Cercis occidentalis)
  • common buttonbush (Cephalanthus occidentalis)
  • island mallow (Lavatera assurgentiflora)


Greens

Goldfinches have been seen feeding on beet greens and on foliage of sunflowers and zinnias. Those evenly spaced V-shaped bites on the edges of Sedum leaves are due to birds seeking moisture and maybe nutrients. But I can’t yet definitively accuse the goldfinches of this practice.


American goldfinch

Male American goldfinch.


Headings

Page 1: American Goldfinches and Basil, Memories from Childhood (To the Rescue!, Cedar Waxwings), Migrations, Habitat (Median Strips), Food Sources (Perennials, Annuals, Trees and Shrubs, Greens)

Page 2: Feeding American Goldfinches: To Feed or Not To Feed (On the Menu, Feeders, On Sunflowers), Weeds and Water, Nesting, Cowbirds, Other Goldfinches, a New Perspective In Gardening (Some Simple Fixes To Help American Goldfinches)


Return to the top

Tips For Planting A Potted Miniature Garden

2019


Down To Earth Garden Center, and Planting a Miniature Garden


On a recent drive to the mountains of North Carolina, I passed by Down To Earth Garden Center. Maybe it was the charming picket fence, or the need to save time and buy a few packs of vegetables for the deck pots. Either way, the inviting entrance lured me back.

Plus, when living in West Virginia, waaaay back in the 1970’s, I wholesaled potted houseplants to a popular shop called Down To Earth, in the downtown Morgantown retail district. Fond memories…


Down To Earth Garden Center is located at 1080 South Trade Street, in Tryon NC. Fran and Gary Garside are the owners, and Kiara and Dylan offered friendly greetings and help. After a quick turn around the yard, I asked permission to take a few photographs for the blog. Oliver, the friendly terrier, had no objections, either.

Here’s another small but meticulously maintained garden center.

Check out their facebook page, Down To Earth Garden Center, in Tryon NC.

Phone: 828 859-2283. Call for new hours.


The Newest Project


An empty blue ceramic pot sits in our front garden, begging for employment. A while ago, I sowed a pack of older zinnia seeds in it, but they didn’t germinate. So, the pot is looking for work. Construction on our home and others in the neighborhood this summer prohibited any large scale gardening, so I’m eager to exercise some creative horticulture before frost.


Thuja occidentalis 'Primo'

Thuja ‘Primo’, an arborvitae.


Seeing the dozen or so varieties of hardy dwarf evergreens at Down To Earth Garden Center, I instantly knew what my next project would be. The pot to be planted is roughly 16″ square and 8″ deep. There’s plenty of room for a collection of miniatures, some rocks and gravel, and driftwood with character.

The term “driftwood” is loosely applied here, referring to any piece of weathered wood or woody root. Most of the small pieces I’ve gathered have come from the woods, not from a body of water.


Fairy Gardens

In recent years, this style of garden has been called a “fairy garden”, but some gardeners simply refuse to call it that. Let’s just call them miniature gardens. If you or your grandchildren want to dress them up with happy gnomes and resin residences, go right ahead. But for me, a natural landscape is the way to go.

By the way, this is not a new trend in gardening. I remember planting terrariums for a florist in New Jersey, more than 4 decades ago. I used dwarf tropicals, driftwood, rocks and gravel, and life-like little “faux” mushrooms. Merchandisers, however, have captured attention from new audiences by calling them fairy gardens.

Any hobby shop you visit will be stocked with associated paraphernalia, from named fairies and cute cottages to stone staircases. This could be a fun introduction into gardening for our younger folks.


Tropicals For a Miniature Garden

Although I will be constructing a garden using cold-hardy species, you might prefer using tropicals for indoor gardens. Garden centers stock miniature plants in 1 1/2″ to 2″ pots for this purpose. You’ll find them as stores gear up for the busy fall (or spring) growing season, but many stock them year-round.

Some species stay small while others eventually will grow too large for a miniature garden. But for a year or so, they’ll do fine. You can find all sorts of ferns, Nephthytis, young palms, peperomia, pilea, baby tears, little succulents for sun, philodendron, and pothos. Young trees, such as Podocarpus, aralia (Polyscias), dracaena, Serissa, and Norfolk Island pine also are available.


Little Evergreens For the Miniature Garden


Picea and Thuja

dwarf evergreens

Some of the hardy dwarf evergreens at the garden center.

From Down To Earth, I selected Picea abies ‘Jana’, a Norway spruce, and Picea glauca ‘Blue Planet’, a white spruce. Each of these globular evergreens grows only 1″ to 2″ in a year when planted in the garden, and less than that in a pot. Their needles are a whopping 1/4″ to 1/3″ long!

Upright growing Thuja occidentalis ‘Primo’, an eastern arborvitae, grows 2″ to 4″ per year, and will serve as a vertical accent in the composition. Dwarf conifers are perfect for trough gardens, rock gardens, and also for outdoor railway layouts.

(***Update***: Each of the spruces grew less than 1″ this past year, and ‘Primo’ added only 1 1/2″ in height. All plants look great, although ‘Jana’ burned a bit at the top during a long stretch of hot weather—100°F heat index. 8/25/2020)

‘Primo’ could easily be mistaken for its cousin, Chamaecyparis, a well-loved genus which I often included in customers’ landscapes and in mine. This dwarf arborvitae has dense fans of tightly-packed foliage whorled around its stems—fabulous textural interest! ‘Primo’ was selected from a crop of seedlings at Iseli Nursery in 2004, and was released to the trade in 2017. Its foliage can take on deeper green to bronze tints in cold weather. When planted in the garden, this variety will grow to about 3′ tall and 1 1/2′ wide in 10 years.

A Holly Called ‘Jersey Jewel’

Down To Earth also had dwarf junipers, Cotoneaster, a ferny Chamaecyparis, and a holly with the cutest and tiniest round leaves. It was difficult narrowing down the choices to 3 plants. Hmmm…I might have to go back for that holly. (***Update***: A couple of months later, I did go back for that holly, Ilex crenata ‘Jersey Jewel’, when my visiting brother, Jeff, and I went for a drive in the mountains.)


The Cold Facts


All 3 dwarf evergreens are hardy to minus 30°F, or USDA zone 4. Because they will be kept above ground level, in the pot, their roots will not be insulated by surrounding garden soil. On an average winter night here in zone 7b (borderline 8a), however, the soil probably will freeze only an inch or two into the pot. I’m more concerned about summer heat in this area.

So, how, then, do spruces and firs survive way up in the frigid north? First, they evolved there, and their cellular chemistry has adapted to harsh conditions. Second, a blanket of snow and a layer of forest floor debris help protect plants’ roots, to a degree, even if air temperatures plummet to well below 0°. And those are the full-sized specimens, with roots that venture more deeply than the tiny evergreens I’ll be using in the pot.


Other Variables

Large pots in winter sunlight absorb more heat than small ones during the daytime, and release it to the atmosphere at night. And the more hours of sun, the better. You can see how a larger soil mass offers better protection from the cold than a smaller one. It takes more time for a greater volume of soil to release the warmth gathered during the daytime.

Consider, also, the color of the pot. Dark pots absorb more energy from the sun, sometimes making the difference between life and death for their inhabitants. In this case, I already have the blue pot, and it’s a light shade of blue at that. But later I’ll describe other tricks we can employ when dealing with harsh winter weather.

This container has survived many winters outdoors without cracking because it’s frost resistant. Still, there are no guarantees. For those pots that have great value to you, empty and clean them, and store them upside down in the shed or the garage.

Within reasonable limits, most of us in the U.S. can find something to grow in winter pots. Just look for the hardiest specimens you can find, and get some advice from an expert at your local garden center. If live plants are out of the question, consider berried stems, colorful twigs, cut greens, moss, pine cones, and other seasonal ornamentation for the decorative pots by the front door. Or you might choose to take the risk with live plants.


shallow pots

Low profile pottery, perfect for miniature gardens.


In Unusually Cold Conditions


Hardiness Zones

Each variety of tree, shrub, and perennial is assigned a winter hardiness zone. That zone represents the lowest temperatures it can tolerate when planted in the ground. It’s useful when labels include the range of tolerance, such as “USDA zones 4-7”.

Regions on the USDA plant hardiness zone map are divided in ten-degree increments. The additional “a” or “b” designation further narrows down each zone to slightly cooler or slightly warmer parts, respectively. So, zone 7b is 5° warmer in winter, on average, than zone 7a. The zone numbers increase as average winter temperatures increase from Canada to the southern U.S.

It’s not unusual in this area of North Carolina to see temperatures drop into single digits a few nights each winter. And, conversely, we sometimes have those glorious winters that rarely get below 25°! Normally, I recommend using plants for planters that are rated two zones hardier than the zone you’re living in. For example, a zone 5 Pieris japonica that should tolerate winter temperatures as low as -20° planted in the ground likely will survive a zone 7 winter (0° to 10°F) in a pot.


The Weather Report

The last weather report of the day will determine if anything needs to be done for the plants outside. I’ll probably move the miniature garden to the warmer back deck, which is protected by a fence. That’s where plants, including edibles in pots, will get the most hours of direct sun.

The corner between the shed and the back wall provides a cozy microclimate. And, if needed, I can move the miniature garden into the shed or indoors for the night. But I’d rather not; it’s rather heavy.


Cold Frames

Let’s say you live in the cold northern states, but you want to pot up a miniature conifer garden. You’ll need to provide some protection when temperatures drop so low that the plants are at risk. Here are a few suggestions for those areas where these conditions last for months.

Move the pot into a sunken cold frame, or one that is lightly heated by a heat mat or heat cables. Heeling (burying) the pot into the soil, inside the cold frame, will give more protection by insulating the root system. Or you could pile mulch around the pot up to the rim.

Where winter conditions are cold but not severe, heeling in the pot next to a south-facing wall might be all the protection required. Or move it to a covered sunny porch against the wall of the house. Avoid placing it where ice or snow from the roof might fall on the plants. Watch out for animals that like to dig. Surround the planting with deer netting or a wire barrier (chicken wire, hardware cloth) to prevent damage.

The cold side of a heated greenhouse, an unheated lean-to, a minimally heated sunroom, or a sunny garage window might work during the frigid winter months. The plants will need direct sun even though they’re dormant in winter, but keep them very cool. And don’t forget to water! When cold, the miniature garden will dry very slowly, but it still needs to be checked.

If it’s too warm, the plants will beak dormancy prematurely. But, without adequate sun, that new growth will be weak.

Here’s A Bright Idea

Another option is to surround the pot and soil with a string of indoor/outdoor miniature incandescent lights. Enclosing the whole thing, or just the pot, in plastic at night creates a “lightly” heated bubble of protection.

I’ll use this simplified version of a cold frame during periods of severe cold, meaning temperatures in single digits at night. But I probably won’t wait for the temperature to drop that low. These varieties are new to me, and I don’t want to lose them.

cold frame

Setting up the cold frame in autumn.

In the Maryland back yard, I assembled the cold frame (photo, right) every autumn. Succulents, geraniums, cyclamen, and other plants that tolerated cool temperatures, but not frost, spent the winters there. Edible cool season greens grew continuously under cover. And all received abundant sunlight in the back yard, on the south side of the house.

Cinderblocks and boards supported sheets of durable twinwall polycarbonate above the patio. Extra bricks on the north side (above cinder blocks) helped slope the cold frame toward the south for drainage and a better orientation toward winter sun. I used clear 4-mil plastic to cover the entire frame, sealing up the sides. And I weighed it down so it wouldn’t blow away.

The purpose of the strings of Christmas lights is to give gentle warmth, not light. So, use incandescent lights, not LED’s. The number of strings used in the cold frame varied with outdoor temperatures and with the amount of warmth needed for a particular group of plants. A string of 100 mini lights provides about the same warmth as a 40-watt light bulb.


Keeping Their Cool

These evergreens grow best when exposed to natural seasonal variations. But because the roots are above ground, they are more limited in what they can tolerate.

In any case, don’t keep hardy plants on display indoors or enclosed under plastic any longer than necessary. They might break dormancy, and could suffer cold damage when exposed to normal temperatures again. Open or remove the plastic covering every morning, before the sun heats the space.


Headings

Page 1: Down To Earth Garden Center, and Planting a Miniature Garden, The Newest Project (Fairy Gardens, Tropicals For a Miniature Garden, Little Evergreens For the Miniature Garden (Picea and Thuja, A Holly Called ‘Jersey Jewel’), The Cold Facts (Other Variables), and In Unusually Cold Conditions (Hardiness Zones, The Weather Report, Cold Frames, Here’s a Bright Idea, Keeping Their Cool)

Page 2: Tips for Potting Up the Miniature Garden (Double Potting), Plants For the Miniature Garden (Bloomers, Hardy Plants, Moss, Pruning), The Blue Pot, The Off-Centerpiece, More Plants For the Miniature Garden (Let’s Start Planting), The Little Fillers For the Miniature Garden (Acorus, Carex, and Ophiopogon, Eleocharis, A Welcome Weed and Viola), and The Small Stuff


Return to the top


How To Transplant Houseplants

2019

Updated 9/26/2024


Time To Transplant Houseplants?


potting soil, how to transplant houseplants


As the end of the growing season approaches, we need to prioritize all the chores that need attention. Do the houseplants require transplanting? The plants that summered outdoors must come back inside soon, before frost damages the foliage or kills the plants.

They’ve been luxuriating on the porch, in higher humidity and brighter light than they usually receive inside. It’s no wonder they look fabulous! So, reintroduce them to indoor conditions while the days are still somewhat long and before the furnace kicks on and dries the air.

Perennials that looked picture perfect in May now look a little stressed after those record high temperatures. And the tired vegetable garden needs fresh compost or aged manure before setting the fall crops.

In a few weeks, flowering bulbs will arrive at garden centers…with pansies, violas, snapdragons, dusty miller, and Heuchera, trailing ivy, and hardy grasses. You’ve been dreaming of those beautiful combination planters, like the ones you saw last autumn at the garden center. But first things first.


Should We Transplant Houseplants Now?


Let’s start with the houseplants. Exposing tropicals to cooling temperatures outdoors, as autumn takes hold, could stress your houseplants. And some of those plants are pleading for attention right now.

While certain plants can tolerate cooler temperatures (cyclamen, ferns, English ivy, succulents, ponytail palm), others can’t. The aroids (peace lily, Dieffenbachia, Anthurium, Philodendron, Alocasia, Chinese evergreen, pothos), prayer plants (Calathea, Maranta), and some of the begonias, for example, should come indoors before temperatures dip below 60°F.

Although they won’t be killed by a few nights in the 50’s, or even the 40’s, you don’t want to prolong their discomfort. Chilling stresses many of our tropical houseplants, and can rot roots and disfigure foliage.


Inspect Them First


You probably won’t need to transplant houseplants, summering on the porch, that were repotted in the spring. All you need to do now is to inspect them for insects and spider mites before bringing them indoors. Check the bottom of the pot for slugs and sowbugs hiding around the drainage hole.

Clean up the leaves, too, and remove any that are discolored, insect-eaten, or damaged. Peel away the entire leaf, so none of the leaf stems (petioles) remain that later will turn yellow or brown.

After the inspection, wipe down the pots, wash the saucers, and place the plants in front of the windows where they seemed to thrive last winter.


Horticultural Oil


scale insects on ficus neriifolia

Scale insects on Ficus neriifolia. Leaves are 7/16″ wide.


The dwarf Ficus neriifolia contracted a scale infestation, so I sprayed it with a horticultural oil solution. For insects and mites, horticultural oil works very well. It smothers the pests and is safe to use on most plants, including edibles.

Wiping the horticultural oil solution on smooth leaves (fiddle-leaf fig, pothos, peace lily) with a soft sponge removes dust, grime, and residue from water and fertilizers. It gives them a nice luster without appearing artificial. Read the label; I prefer to use less oil than is recommended on the label—to start with, anyway. Horticultural oil makes surfaces slippery, so be careful.


fiddle-leaf fig

The fiddle-leaf fig, Ficus lyrata.


Do Your Houseplants Actually Need Bigger Pots?


potted plant bonsai

Evergreen bonsai.

Knowing if the plant needs repotting, when to repot, and how large a pot to use is half the battle.

Does it wilt often? Perhaps instead of repotting, the plant needs to be deeply watered. Or maybe the roots have rotted in waterlogged soil, or the water rushes right through without moistening the soil.

I’ve seen a lot of dead plants over the years, and many simply were in pots that were too large. “Aren’t we supposed to transplant houseplants every year, just like our children outgrow their shoes every year?” No; once they have matured, plants can stay potbound for quite some time.

“If I transplant houseplants into bigger pots, won’t that make them grow faster and bigger?” No, another myth! If you transplant houseplants into pots twice the size they need, they more likely will die faster.

Large pots hold large quantities of soil and water. When the moisture is not used by the plant, the sodden mass just sits there, cutting off the oxygen supply and rotting the roots. So, if the entire volume is not tightly filled with roots, the plant doesn’t need to be repotted.

Many houseplants like being potbound. English ivy (Hedera helix), pothos (Epipremnum aureum), Philodendron, palm trees, Ficus trees, African violets, succulents, snake plants (formerly Sansevieria, now Dracaena), and bonsai prefer somewhat cramped quarters. Many potted herbs (rosemary, lavender, chives, sage, thyme) also fare better when potbound. But, in order to ensure good health, gardeners must provide nutrients according to the needs of the particular plant, and according to the time of year.

It’s helpful to know the habits and preferences for each kind of plant. For example, although the 4′ tall variegated snake plant (Dracaena trifasciata ‘Laurentii’) eventually will need a 10″ or 12″ pot, its cousin, the dwarf bird’s nest species (D. hahnii), can stay in a 4″ or 5″ pot for many years!


Fertilizing Houseplants

Most tropical plants spending the winter indoors won’t need fertilizer until late winter or early spring. If they continue to grow and look healthy, and they’re receiving good light, though, diluted solutions (1/4 to 1/2 strength) can be added every 4 to 6 weeks. Err on the side of using less fertilizer in winter.

As long as they’re properly watered and fertilized, your plants can remain perfectly happy while potbound. In fact, they’re easier to manage this way, since there’s less likelihood of overwatering. But you’ll have to water more frequently.

Look for products formulated for foliage houseplants or for flowering plants. They’re available in several forms: timed-release prills (use a low dose from fall through winter), liquids, granules, and soluble crystals. Read the label.


Fungus Gnats

Plants in smaller pots are less susceptible to diseases, root rot from overwatering, and fungus gnats. Ever have those annoying little “fruit flies” around your houseplants? The simplest remedy is to allow the soil surface to dry out.

Female fungus gnats lay eggs on moist soil. When the tiny larval worms emerge, they eat small roots, sap on cuttings, fungus, and organic matter in the top inch or two of the soil. Let the surface of the soil dry before watering again, and you’ll have fewer fungus gnats. See if adding a 1/2-1″ layer of pine fines as a mulch might prevent gnats from laying eggs.

Yellow sticky cards are good for catching flying insects. A card placed horizontally near the plants, on the pot’s rim, or in a sunny window attracts the most gnats.


Save the Spider!

spider plant

A green spider plant.

The spider plant in the 4″ pot that your girlfriend gave you two months ago is literally crawling out of the pot. She propagated it from one of her own plants, so it has sentimental value.

Spider plants, related to other strong-rooted Asparagaceae (formerly Liliaceae) family members, develop roots that circle around the inside of the pot. The vigorously growing roots raise the entire plant higher in the pot, opening up air spaces around the root ball. This dries out the finer roots, and water gushes immediately through the drainage holes without moistening the soil. Clearly, it’s time to work on this one.


When Should I Transplant Houseplants?


A good time to transplant houseplants is in spring to mid- or late summer. Plants that recover slowly (for example, succulents) should be repotted, if needed, by mid-summer. In autumn and winter, plants receive fewer hours of daylight, photosynthesizing at a reduced level. Our slower growing tropicals don’t grow much foliage in autumn and in winter. And roots also are reluctant to grow.

Cooler temperatures, compared to the balmy summer days spent on the porch, cause systems to slow down. So, trying to force plants to grow at a time when they’re entering semi-dormancy often does more harm than good. Plopping a plant’s almost dormant root system into wet soil and expecting it to grow is asking the plant to do something against its nature. It would rather stay semi-dormant.

greenhouseProviding a greenhouse atmosphere—warm, humid, and sunny—keeps your houseplants in much better condition, even through the shortest days of winter. Optimal light levels increase rates of photosynthesis, respiration, and transpiration. As a result, they might grow almost as fast as they did in June.

But most of us deal with dryer air, energy-saving chilly nights, and dim lighting (in the plants’ eyes) until the hyacinths bloom outside.

Plants, both indoors and out, take on renewed vigor once the days lengthen closer to springtime. Some of us humans do, too.


How Big Should the Pots Be?


succulent dish garden

Succulent dish garden in ceramic bonsai tray.

I’ve grown dwarf peperomias and miniature succulents, such as Echeveria minima and Haworthia truncata, in 2″ pots for many years. Since the succulents are prone to rot in wet soil, keeping them very potbound decreases the chances. There simply isn’t that much soil in the little clay pot, and it dries fast in direct sunlight.

Most of the succulents I enjoy growing are on the small side, anyway. Almost all are in 1½” to 4″ pots, and others have been planted in larger, but shallow, bonsai trays.

I brought with me from Maryland a 4½” pot of Drimiopsis kirkii, one of the African leopard lilies, and it has yet to be repotted into a larger pot, 6 years later. Its cousin, Drimiopsis maculata, however, grows from bulbs which multiply faster than those of D. kirkii. So, most of the D. maculata plants get divided more often, but they’re still in 4½” pots. Older plants are moved into 6″ pots, and remain crowded until divided.

Dracaena hahnii, the dwarf snake plant, lived happily for years in a 4½” pot. The small, glossy-leaved Spathiphyllum wallissii would have complained if it had been bumped up into anything larger than its 6½” plastic pot.


pink cyc.

We’ve had this miniature cyclamen for years.


A pink flowering miniature cyclamen stays in its 4½” pot (photo, above), year after year. Now, in late summer, it is coming out of dormancy and beginning to grow new foliage, contrary to what most other plants are doing. That’s because its growth cycle calls for cool to cold, but not freezing, temperatures in order to set flower buds. It will be fertilized accordingly, for a full canopy of marbled leaves.

The plant’s habit and its root structure help determine the required pot size. In general, transplant houseplants into pots that are only 1″ to 2″ wider, and only if they need it.


The Old Weeping Fig

weeping fig

Variegated weeping fig.

A weeping fig (Ficus benjamina), given time, will grow to the ceiling. Instead of raising the roof, its height can be managed by “aesthetically” cutting stems back in the spring, when it will respond faster.

I grew a variegated weeping fig in a 14″ pot for about 15 years, in front of a big window that received a few hours of morning sun. When the tree grew to almost 8′ tall, above the top of the window, I pruned it back a few feet. Then, when it regrew, all the foliage was once again in the sun and at eye level.


African Violets


African violet

A healthy African violet.


African violets (Saintpaulia ionantha) are happy to stay in 4″ pots for years. Miniature African violets need smaller pots than that.

A rule of thumb for pot size and an African violet is to plant it in a pot that is 1/3 the spread of the foliage. So, a 4″ pot will accommodate a plant that is 12″ wide. Plants in top condition might take a slightly larger pot, but you have to pay very close attention to moisture and soil drainage.

“What should I do with an African violet that has a long trunk?”

As these plants grow new leaves from the top of the rosette, older leaves lower on the stem die off. That’s part of their natural growth pattern. When the plant develops a trunk, it’s time to make an adjustment. But don’t do this if the plant is slowing its growth. Spring to mid-summer is a better time for this procedure.

Remove the plant from its pot and slice off the bottom third of the root ball. Shave off a small amount from the sides as well. Wash the pot, check the plant for insects (mealybugs, especially), and treat with horticultural oil if necessary.

Place a small wad of polyester fiberfill (from a craft shop) over the hole. Add a small amount of African violet potting soil in the bottom of the pot. These plants like peat moss in their mix. Set the plant in the pot, and fill in the sides with more soil, using a chop stick to firm soil in the gap.

Part of the trunk will now be loosely covered with soil, and it will grow new roots. The top of the root ball should be lower in the pot than it grew previously. (Yes, this is exactly what we don’t ordinarily recommend.) Water it in, using lukewarm (about 85°F) water. Keeping the soil too wet will rot the trunk and the roots.

If needed, use the kitchen sink sprayer to wash soil off the leaves, using lukewarm water. Towel off the water drops, and let the plant dry in a warm location.

It’s less stressful for these plants if this is done every year or two, before the trunk grows a few inches tall. But I have seen perfectly happy violets with long stems curling over the edge of their pots.

“What are those marks on the leaves?”

Water the soil—always lukewarm for African violets—and avoid wetting the leaves. If water splashes on the leaves, absorb it with a towel, and let the plant dry in a warm place. As drops of water chill on this plant’s leaves, unsightly tan or brown rings and lines will be left behind.

Grow African violets at 70 to 74°, and fertilize regularly with a product formulated for this genus.


Less Is More

stack of clay pots, transplant houseplantsMove miniature species of plants into something only 1/2″ to 1″ larger, if they need it. I know; that doesn’t seem like it could make much of a difference. But for the plant whose roots, in the wild, might be crammed between layers of sedimentary rock on a blustery cliff, 1/2″ is plenty.

Large-growing plants require new pots up to 2″ wider in diameter. Peace lily (robust varieties of Spathiphyllum), weeping fig (Ficus benjamina), Chinese evergreen (Aglaonema spp.), and larger palm species can be moved from 6″ starter pots into 8″ pots. And, importantly, this assumes that the roots tightly fill the smaller pot.

Many of the tropicals will survive and prosper over the next several months, even while very potbound. If they’re already in 8″ pots, they’ll likely be fine until spring, when they can be potted on if needed. The 6′ tall fiddle-leaf fig in an 8″ nursery pot, though, can go into a 10″ pot, since the heated sunroom has floor-to-ceiling windows. Sunny conditions encourage plants to grow new roots, but carefully monitor soil moisture. Avoid watering houseplants (especially succulents) on cloudy days.

If growing conditions in your home are not ideal, but plants absolutely need to be repotted, transplant them now, before fall, into slightly larger pots. Wait until spring to transplant large houseplants, if it’s needed at all.

Houseplants don’t require repotting every year. Once they have attained a mature size, they no longer need to be moved into progressively larger pots. Instead, regularly fertilizing with products formulated for houseplants will supply all the nutrients they need.


Headings:

Page 1: Should We Transplant Houseplants Now?, Inspect Them First, Do Your Plants Actually Need Bigger Pots? (Fertilizing Houseplants, Fungus Gnats, Save the Spider!), When Should I Transplant Houseplants?, How Big Should the Pots Be? (The Old Weeping Fig, African Violets, Less Is More)

Page 2: Prepare for Transplant (Root Insects, Speaking of Spider Plants, Roots-Air-Water-Light) and Potting Up (Score the Root Ball, Potting Soil, Begin Filling the Pot, Downsizing, Water It In)

Return to the top


Impatiens ‘Imara’: Welcome Back!


Good news for shade gardeners:


impatiens 'Imara', orange

A new impatiens variety called ‘Imara’, at a local nursery, 2020.


‘Imara’ Impatiens


After trials that tested five thousand seedling impatiens plants, Syngenta Flowers has come up with a new variety called ‘Imara’™ XDR (Extra Disease Resistance). Joost Kos, Syngenta’s head of Research and Development, and Ton Groot, Senior Flower Breeder, spent 9 years developing this strain. In 2011, they found one plant that demonstrated very high resistance to impatiens downy mildew. And this plant was the basis for the breeding program that came up with ‘Imara’.

This disease, caused by the pathogen Plasmopara obducens, rendered our beloved Impatiens walleriana into a leafless pile of withering stems. And this wasn’t just a local affliction. It happened across broad swaths of the country and around the world.

In 2011, I grew the variegated ‘Seashells’ impatiens, with soft creamy margins on the leaf edges. Over several weeks, the once-beautiful salmon flowering plants continued to decline. No matter what I did, I couldn’t save them from the fate that was the destiny for almost all impatiens. Soon, greenhouses stopped offering this species for sale.

Impatiens walleriana is a compact seed-grown annual, named in honor of British missionary Horace Waller (1833-1896). The species originated in eastern Africa. ‘Imara’ comes from the Swahili word for “strength and resilience”. Popular in the landscape, impatiens carpeted shady plantings around the world in residential gardens to massive displays in commercial settings and botanical gardens. The plant has been sorely missed. Wholesale growers and retailers felt the pinch when they lost their #1 shade annual.

New Guinea impatiens (I. hawkeri) is a bolder, larger grower and just wasn’t an adequate substitute for our little favorite. And this species costs more because most nursery plants have been vegetatively propagated.


More Impatiens Breeding


In the past few years, newer inter-specific hybrids made it to garden centers. ‘Bounce’ (Selecta Seeds) and ‘Divine’ (Pan American Seeds) were available, but we were hoping to see our old friends again. These two varieties still resembled New Guinea impatiens, with their larger leaves and taller habit.

Pan American Seeds has another new cultivar called ‘Beacon’. This variety shows “high resistance” to IDM, according to The International Seed Federation. But only side-by-side testing between ‘Imara’ and ‘Beacon’ will determine which one performs better in any particular setting.


A Welcome Comeback


In June of 2018 and this year, seeds of ‘Imara’ became available in limited markets. Believe me, the breeder and their licensed propagators are working feverishly to bring enough seed to market. Talk with the growers at your favorite garden center to see if they might stock it. And request this plant by variety name.

Impatiens (always with an “s”, singular or plural) is eaten by deer and rabbits, so take precaution. Sprinkle some blood meal among the plants, or spray with repellents. Regardless, many gardeners will be using ‘Imara’ in their summer garden beds and in planters next year.

‘Imara’ is currently available in these colors: red, rose, pink, white, orange, orange with a white star, salmon shades, violet, and a mixture. New colors certainly will follow. So, make plans now to invite your old friends back to the shady garden. This is a comeback that all gardeners will welcome!


impatiens

‘Imara’ is now available in pink.


Return to the top

To The Moon And Back: 50 Years Ago

2019


Fifty years ago today, NASA successfully landed the first manned expedition to the moon.


The United States wasn’t the first, though, to send a manned spaceship into Earth’s orbit. That distinction belongs to the Soviet Union. Yuri Gagarin aboard Vostok 1 was the first to orbit the Earth, once, on April 12, 1961. The image of the American astronauts planting the flag on the moon is indelibly fixed in our minds. But many earlier milestones laid the “groundwork” in the evolution of this remarkable achievement.


Photographed from Command Module by Pilot Michael Collins, showing Lunar Module ascending toward Command Module. Earth in distance.


The Space Age Begins


On October 4, 1957, the Soviet Union launched the world’s first artificial satellite. Sputnik I, at only 23″ in diameter and weighing 184 pounds, took 98 minutes to orbit the Earth on its elliptical path. Soon after that first flight, Sputnik II carried a dog named Laika into space on November 3, 1957.

At the time, relations between the United States and the Soviet Union were less than cordial. The Soviet Union’s launch into space suggested the possibility of nuclear weapons transport on spacecraft. This, then, prompted the United States Defense Department to fund, with Congress’ approval, the National Aeronautics and Space Administration. The “Space Act” formally created NASA in July of 1958, partly to maintain our technological edge over other countries.

The Space Age had begun.


Moon Voyages: The Soviet Union and The United States


President Dwight D. Eisenhower, in February, 1959, asked NASA to compile a list of military test pilots who met certain requirements. These 110 aviators were candidates under consideration for Project Mercury, the first crewed space program.


The Luna Missions

On September 13, 1959, the Soviet Union sent Luna 2, an uncrewed spacecraft, to the first impact landing on the moon’s surface. This is the first time a man-made object made contact with the moon. And on October 4, Luna 3 took the first photographs from the far side of the moon in a “fly-by”. Luna 1, earlier in 1959, failed to land. Both nations can count many losses of equipment in those early years of space exploration, but, certainly, valuable information was gained.


Alan Shepherd

Astronaut Alan Shephard was the first American to reach suborbital flight on May 5, 1961. This was less than a month after Gagarin’s historic accomplishment. Shephard flew on Freedom 7, with a Mercury-Redstone rocket.


John Glenn

John Glenn on his first mission.

John Glenn

Less than a year later, on February 20, 1962, John Glenn became the first American to orbit Earth. He completed three orbits on board Friendship 7. The space race was underway, sparked by something said by President John F. Kennedy in a 1961 speech. He challenged us to land a man on the moon and to safely return him to Earth before the end of the decade. President Kennedy prohibited Glenn from making another space flight, in order to protect this American hero.

A few years earlier, on July 16, 1957, Glenn completed the first supersonic flight across the United States. Called Project Bullet, Glenn averaged 586 miles per hour, including three refuelings. The trip lasted 3 hours, 23 minutes, and 8.3 seconds, and the country was continuously photographed in panoramic mode.


Wally Schirra

Walter (Wally) Schirra was one of those original 110 test pilots chosen by NASA. Schirra was born on March 12, 1923, in Hackensack, New Jersey, and was raised in Oradell, where I grew up. On October 3, 1962, his first flight was designed to examine support systems of the spacecraft, Sigma 7. Another task was to test space suits. At one point, Schirra’s suit heated to 90º F, but he was able to fix the problem. On this mission, Sigma 7 orbited the Earth 6 times during a 9 hour flight.


moon


More Firsts


The first woman in space was Valentina Tereshkova, from the Soviet Union. She flew on Vostok 6, on June 16, 1963. By the end of 1963, the United States had launched two astronauts into suborbital flights and four into orbit.

On December 4, 1965, Wally Schirra and Tom Stafford began a two-week mission aboard Gemini 7. During the flight, Schirra injected a little levity by reporting a UFO sighting to Houston Mission Control. He implied that he had seen Santa Claus. The joke came with sound effects, as Schirra played “Jingle Bells” on the harmonica he had smuggled aboard. Stafford also had a part to play–ringing the sleigh bells!

Commander Wally Shirra plaque, OradellSchirra was the only astronaut to have flown in 3 NASA programs–Mercury, Gemini, and Apollo. The borough of Oradell, New Jersey, celebrated his accomplishments with a joyous red-white-and-blue parade down Kinderkamack Road to Oradell Avenue. Yes, I was there.

A park at that intersection must have a plaque commemorating his achievements; I’ll check next time I visit. (***Update***: Yes, there’s a plaque. Below is the town park, at the intersection of Oradell Ave. and Kinderkamack Rd.; the plaque sits at the base of the flag. August 13, 2019.)

Harry Carlisle, my father and a professional photographer, compiled an exhaustive pictorial account of Wally Schirra’s work in the space program. He donated it to the Oradell Public Library…from where it promptly was stolen.


Schirra Park in Oradell NJ.


Successes and Tragic Failures

After a few failures in the unmanned U.S. Pioneer program, the Ranger mission first impacted the moon on January 30, 1964. A series of successful crash impacts and soft landings (1964-1965) yielded many thousands of photographs.

The Soviet Union’s Alexei Leonov performed the first space walk on March 8, 1965. In 1966, the U.S.S.R. made the first soft landing on the moon. Their Luna 9 and Luna 13 missions sent the first pictures from the lunar surface.

The U.S. Surveyor 5 mission took tens of thousands of photographs. It also made the first use of an Alpha scatter soil composition monitor, on September 8, 1967. This device analyzed soil composition to help determine safe landing spots on the lunar surface.

Apollo 1

After the successful Mercury and Gemini missions, the Apollo program was designed to go a step further. Goal: take humans to the moon! At the Kennedy Space Center launch pad in Florida on January 27, 1967, Virgil (Gus) Grissom, Ed White, and Roger Chaffee, aboard Apollo 1, were scheduled to run systems tests prior to a future launch. Disaster struck when an electrical arc ignited the pure oxygen atmosphere inside the Command Module, killing all three astronauts.

Grissom was the second American in space, on the Liberty Bell 7, during the second Mercury flight in 1961. White spent 36 minutes as the first American to space walk, outside Gemini 4 in 1965. And this was going to be Chaffee’s first space flight.


astronauts, Apollo 1 crew Grissom, White, and Chaffee.

Apollo 1 crew Grissom, White, and Chaffee.


The Space Shuttles

Two additional disasters that claimed lives occurred in the space shuttle program. In 1986, Challenger exploded a mere 73 seconds after liftoff, killing all 7 crew members. This is one of those events that made such an impact that most of us can recall exactly where we were when we first heard about the catastrophe. I had just left an office building in Rockville, Maryland, where I maintained interior plants for Springtime Environments.

The second incident, in 2003, involved the Columbia Space Shuttle. It disintegrated during its return into the atmosphere, killing the crew of 7.

As in all human endeavors that reach ever farther into the realm of discovery, risk is part of the equation. Every achievement attests to the precision of scientific research and application. These milestones inspire awe and we applaud the contributions made by these courageous men and women.


Testing His Wings


moon


In the first flight after the Apollo 1 tragedy, Wally Schirra, Donn Eisele, and R. Walter Cunningham flew in the Apollo 7 mission on October 11, 1968. This first three-person crew to venture into space tested the Command and Service Modules (CSM) in Earth’s orbit. This flight included the first live television broadcast from an American spacecraft. Success of this mission paved the way for the proximate Apollo 8 mission and the moon landing in 1969. For each of these astronauts, this was the last space flight they would make.

From December 21 to December 27, 1968, Frank Borman, Jim Lovell, and William Anders were the first to travel beyond low Earth orbit and to fly into deep space. (Goose bumps!) Apollo 8 orbited 10 times around the moon, and safely returned back home.


Armstrong, “The Eagle Has Landed”:  7/20/1969


Apollo 11 insignia, apollo 11 moon landing

The Apollo 11 insignia, designed by Michael Collins. Names not included to signify effort made by all participants.


Preparation

The goal envisioned by President Kennedy in 1961 was about to be realized. Government scientists, university scholars, and engineers and scientists from the private sector made incredible progress.

Altogether, 400,000 people contributed to the Apollo 11 moon mission. They included contractors who made the space suits, medical experts, and mathematicians and astrophysicists who worked on the spacecraft and the launch. All communications and camera equipment, containers for rock samples, fabrics and fasteners—everything had to follow strict manufacturing specifications. No detail was too small for consideration.


Apollo 11

Buzz Aldrin on moon

Buzz Aldrin.

Neil Armstrong, Edwin (Buzz) Aldrin, and Michael Collins boarded on July 16, 1969. After launching atop the powerful Saturn V rocket, the spacecraft reached speeds of up to 17,000 miles per hour. (“Buzz” is from Aldrin’s young sister’s mispronunciation of the word brother, or “buzzer”. He took it as his legal name in 1988.)

The astronauts orbited one and a half times around Earth before they reached the moon, 238,800 miles away. The trip took 3 days, 3 hours, and 49 minutes. But before setting the Lunar Lander onto the moon, the Command Module, Columbia, orbited 30 times.

Eagle safely descended into the Sea of Tranquility, about 1200′ west of the West crater. Command Module pilot Collins remained on board the Columbia, orbiting the moon. All this work and anticipation culminated in the historic July 20, 1969, landing. These brave Americans were the first to land and walk on the surface of the moon.

The Apollo 11 mission delivered, 50 years ago today!


Apollo 11 video from the moon

CBS News, live coverage with Walter Cronkite and Wally Schirra, July 20, 1969.


Moon Walk

But Neil Armstrong didn’t step off the Lunar Lander until 6 hours after landing. Armstrong, as Commander of the Lunar Lander, was chosen to be the first to step foot on the moon at 10:56 p.m., followed 19 minutes later by Aldrin. Upon making contact with the lunar surface, he uttered the unforgettable, “This is one small step for a man, one giant leap for mankind.”  

The astronauts installed instruments (sensing seismic activity, solar wind) on the moon that would relay data back to Earth. Armstrong spent 2 hours, 31 minutes, and 40 seconds on the surface of the moon. Aldrin and Armstrong gathered 47.5 pounds of rocks and “soil” from below the surface. And they placed the American flag a short distance from the Eagle.

CBS News broadcast the entire trip, with Walter Cronkite and Wally Schirra narrating the events. At one point, they pondered whether the flag would remain standing when the Eagle departed to meet Columbia. I have heard that it did not. But another flag was planted on the moon’s surface during a subsequent mission.

Time To Go

Aldrin and Armstrong remained at the landing site for 22 hours and 37 minutes. When it was time to leave, the Lunar Lander docked with the Command Module, flying overhead. After a successful and momentous expedition, the three astronauts headed home in the Command Module.

The Command Module was the only section to make the trip home. It safely splashed down in the Pacific Ocean on July 24, 1969, a few miles from the recovery ship, the U.S.S. Hornet. The Apollo 11 mission logged over 1,000,000 miles during this incredible eight-day exploration.


VP Pence honoring the 50th anniversary of Apollo 11 moon landing.

Vice President Mike Pence honoring the 50th anniversary of the work and success of the Apollo 11 mission, 7/20/2019. Buzz Aldrin, third from right.


More Accomplishments

In 1970 and 1973, the U.S. sent 5 unmanned rover missions to the moon. More “firsts” include Vladimir Remek, from Czechoslovakia, on March 2, 1978, the first in space from a country other than the U.S. or the U.S.S.R.

Sally Ride was the first American woman in space, and the youngest person in space, on June 18, 1983. Ride’s mission on Space Shuttle Challenger was to deploy two communications satellites. On July 25, 1984, Svetlana Savitskaya, from the Soviet Union, became the first woman to walk in space. And Yang Liwei was the first person from China to venture into Earth’s orbit on November 15, 2003.


More Apollo Missions


From the beginning of space flight through 1972, 6 Apollo missions landed 12 men on the moon. Briefly:

Apollo 9–James McDivitt, David Scott, Russell Schweikart.

Apollo 10–Thomas Stafford, John Young, Eugene Cernan. Didn’t land, first live color TV transmission.

Apollo 12–Alan Bean, Pete Conrad, Richard Gordon. Lightning struck the spacecraft, causing no major damage…landed in Ocean of Storms…

Apollo 13–John Swigert (“Houston, we’ve had a problem here.”), Fred Haise, James Lovell. Oxygen tanks failed (explosion) 200,000 miles from Earth. Lovell saw oxygen venting outside the spacecraft, loss of power, 38°F cabin, low water. Crew lost 31.5 pounds, but returned safely.

Apollo 14–Alan Shephard (hit some golf balls), Edgar Mitchell, Stuart Roosa.

Apollo 15–David Scott, James Irwin, Alfred Worden. First rover.

Apollo 16–John Young, Charles Duke, Thomas Mattingly.


Apollo 17

On December 7 through December 19, 1972, Gene Cernan and Harrison (Jack) Schmitt, with Ronald Evans as Command Module pilot, flew on Apollo 17. The astronauts were accompanied by five mice (4 males and 1 female–Fe, Fi, Fo, Fum, and Phooey, named by the crew) for the purpose of biological experiments. One died on the flight, and the four that returned were sacrificed for examination.

Cernan was the last person to walk on the moon. Each Apollo mission had a third member remaining in the Command Module, and the last 3 expeditions included rovers for increased mobility.

Apollo 17 was noted for being the longest moon landing, at three days. It also had the longest total moon walk time, and took the largest samples. The crew spent the longest amount of time in lunar orbit, and orbited a record number of times, at 75.

About 850 pounds of moon rocks were collected during the Apollo program. Apollo 17 was the last manned mission to the moon. The United States can proudly proclaim the honor of being the only country to have landed people on the moon.

Many uncrewed flights have headed toward the moon since then, from the U.S., Russia, India, China, Japan, Israel, and the European Space Agency. And recently, President Donald J. Trump announced the goal of sending another manned flight to the moon within five years.


The Smithsonian Institution

A trip to the Air and Space Museum at the Smithsonian, on the National Mall in Washington, D.C., is a must. Here, visitors are permitted to touch a moon rock, and see the space suits worn by astronauts, complete with moon dirt. The last time I was there, one of the capsules was on display.


And Other Missions Beyond

Subsequent explorations have reached Mars (Mariner 4 and 9, Mars 3 missions, Spirit and Opportunity). And several ingeniously designed spacecraft and telescopes have launched toward Mercury (Mariner 10, Messenger), Saturn, and Jupiter (Galileo). Voyager 1 has left our solar system! I watch spellbound as videos of their journeys are broadcast back to Earth.


moon landing

Success!


Once More for John Glenn


Traveling in zero gravity causes dozens of physiological changes in humans. Early in 1998, 77-year-old John Glenn asked to participate in medical experiments while in space. Test results would advance our understanding of aging processes. So, on October 29, 1998, he departed the Earth’s grip once more, for nine days and 134 orbits aboard the Space Shuttle Discovery. In addition to Glenn, Curt Brown and several others were on board.

This mission deployed the Spartan Solar Observing spacecraft and the Hubble Space Telescope orbital systems test platform. Glenn participated in microgravity experiments documenting changes in balance, visual perception, bone and muscle density, sleep patterns, metabolism, immune system response, and blood flow. After their flights, many astronauts experienced visual problems resulting from pressure on the optic nerve.


The Barringer Crater


Barringer crater AZ


In 1891, Daniel Barringer, a mining engineer, discovered what would later be known as the Barringer Crater. He postulated that this 50,000-year-old 3/4 mile wide crater in Coconino County, Arizona, was caused by meteor impact. During the Pleistocene epoch, the area was open grassland, with some woodlands. Mammoths and giant ground sloths lived there, many thousands of years before humans arrived.

Grove Karl Gilbert, chief geologist with the United States Geological Survey, announced that an explosion of volcanic steam had caused it. Most geologists at the time accepted Gilbert’s explanation, although attention was beginning to focus on the theory of meteor impact. Decades later, another American geologist, Eugene Shoemaker, investigated the 560′ deep crater.

Shoemaker studied the Barringer Crater for his Ph.D. at Princeton University, New Jersey, in 1966. While at Caltech, in 1969, he began searching for Earth-orbiting asteroids. Shoemaker became the first director of the U.S.G.S. Astrogeology Research Program. He proposed that large asteroid strikes can cause sudden geologic changes and that they’re common, over time. But, prior to Shoemaker’s work, these “astroblemes” were considered to be extinct volcanoes, including those on the surface of the moon. Later investigations estimated that a 160′ wide nickel-iron meteorite had hit Earth at 29,000 miles per hour.

The Barringer Crater, although privately owned, was designated a National Natural Landmark in 1967.


And Comet Shoemaker-Levy 9

comet

In 1993, Shoemaker co-discovered, with his wife, Carolyn Shoemaker, and David Levy, Comet Shoemaker-Levy 9 at California’s Palomar Observatory. This comet provided the first opportunity to predict and to observe a collision between two bodies in our solar system.

In 1992, as Comet Shoemaker-Levy 9 approached our largest planet, Jupiter, it broke up into 21 fragments. Each fragment later crashed into the planet at an astonishing 137,300 miles per hour. Seven to eight hours, on average, lapsed between impacts, which occurred from July 16 through July 22, 1994.

A few years earlier, NASA launched Galileo toward Jupiter, from the Space Shuttle Atlantis, on October 18, 1989. Its mission was to study the magnetic field and the planet’s moons. The spacecraft recorded the comet’s demise, which happened on the unseen night side of the planet. The Hubble Space Telescope also captured the event for scientists to analyze.

Gene Shoemaker died in a car collision near Alice Springs, Australia, on July 18, 1997, and his wife suffered severe injuries. On July 31, 1999, the Lunar Prospector space probe carried some of his ashes toward the moon. He is the first and only person to have ashes buried on any celestial body outside Earth. Yet another first.


Jupiter and a moon

Jupiter and one of its moons.


My Friend, Deri

Deri's moon card

Deri’s card.

The Barringer family currently owns the Barringer Crater. Years ago, when I was selling plants at the Rockville Farmers’ Market, in Maryland, a good customer stopped by every week. We chatted about any subject under the sun… birds, dogs, dinosaurs, cameras… We became good friends, and I often worked on her property in town. She didn’t have family nearby, so she frequently spent holidays with me and my 2 kids.

She was a dear friend, and, unfortunately, passed away in 2003. Her name was Deri (Frederika) Barringer, granddaughter of Daniel Barringer. She spun fascinating tales of the family crater and of her travels across far-off continents, photographing for the National Geographic Society. Small world, when threads intersect.

After her death, she wanted to have her ashes dispersed over a river in Colorado. When the local beer company used water from that river, she declared that she would be “the life of the party”. That’s our Deri! This colorful character happily announced her wishes before she became seriously ill. And, when the time came, her brother complied.


Heading for the moon.


Return to the top

Return To The Lake Lure Flowering Bridge

2019

Updated 10/28/2024


An Early Summer Visit To The Lake Lure Flowering Bridge


petunia's hideout, lake lure flowering bridge

“Petunia’s Hideout”

On Wednesday, I headed once again for the Lake Lure Flowering Bridge, hoping to find respite from this prolonged period of high humidity and temperatures in the mid 90’s. Yes, I could retreat to the air conditioned confines indoors. But that’s too close to the refrigerator. As usual…the mountains!

The first thing I noticed upon arrival was the missing huge maple (photo, right) at the end of the parking lot. It had a great rotten hollow at the base and was taken down as a precaution. It didn’t take long for someone to put a green roof on the stump and to invite The Bear to reside in the cozy void.

Another thing I noticed was that it wasn’t much cooler here than in Charlotte. Lake Lure sits at 1,000′ elevation, so I expected it to be a bit cooler. Regardless of the temperature, I needed pictures.


The New Information Station


The information station was stocked with all sorts of maps, diagrams, and mailboxes brimming with brochures since my last trip here. At that time, only the frame had been built. The volunteers at The Lake Lure Flowering Bridge do an excellent job informing the public.

It doesn’t matter whether you’re an avid gardener or a beginner; the flowering bridge is simply a wonderful place to enjoy plants or to walk through on your way to the lake or to lunch in Chimney Rock, just up the road half a mile or so. I met two friendly ladies here, in the shade—a volunteer who plants herbs in the garden and a visitor enjoying a private tour.


Daylilies Galore At the Flowering Bridge


I don’t recall ever seeing as many beautiful daylily hybrids (Hemerocallis) on the flowering bridge. Some flowers were enormous! (Missing were cultivar identification tags. Next time, I’ll look more closely.) These perennials have sturdy flower scapes, and some have high bud counts.

Although each flower lasts only a day, you can see from the photograph of the double orange daylily that many buds have yet to open, and several scapes grow on each plant.


Peak Bloom at The Lake Lure Flowering Bridge


True blue balloon flowers (Platycodon grandiflorus) and their round buds invite inspection. Pink and white cultivars also are available, and dwarf types, such as ‘Sentimental Blue’.

Several varieties of hydrangeas boldly proclaimed their presence throughout the garden. Those with cone-shaped inflorescences, Hydrangea paniculata, include ‘Pinky Winky’, ‘Strawberry Vanilla’, and the popular ‘Limelight’. A few smaller mopheads (H. macrophylla) also grow on the flowering bridge.

Crocosmia, grown from bulbs native to South Africa, was in full golden bloom. Crocosmia, sometimes called montbretia, is hardy in zones 5 to 9 and is a member of the iris family (Iridaceae).

Dwarf butterfly bush, Buddleia davidii ‘Pugster Blue’, has strong stems and grows only about 2′ tall. It’s hardy to zone 5, growing in full sun and well-drained soil. Other colors are available in this series of small butterfly bushes. Most of these perennials were humming with pollinators—bees, wasps, moths, and butterflies.


Roses


The roses were in full bloom, and some had wonderful fragrance.


Hibiscus


Growing to about 4′ in height, Hibiscus ‘Starry Starry Night’ is a stunner with flowers up to 8″ across! They appear from midsummer to fall. Leaves are dark burgundy-black, with the deepest color in full sun. This one likes moist, well-drained soil, as most hibiscus plants do.

Hardy hibiscus grows in zones 4 to 9, and stems die to the ground in the colder zones. Apply a few inches of mulch under young plants before winter. Hibiscus is native to North America and is said to be deer resistant, but…


More Native Perennials At the Flowering Bridge


goldenrod, buddleia at lake lure flowering bridge

Early goldenrod next to the dwarf butterfly bush.

Goldenrods (Solidago) were just beginning to open in the flowering bridge garden, and will continue all summer. Their bright yellow flowers and those of the ‘Pugster Blue’ butterfly bush played well off each other, a nice combination.

Stokesia laevis, native to the southern U.S., likes acidic soil and remains evergreen in warmer regions. It tolerates drought when well established. Stokes aster grows to 2′ tall and blooms over a long period of time, in full sun.

Tickseed (Coreopsis), with its canary yellow flowers and finely textured foliage is always so pretty. When choosing coreopsis varieties for your garden, check their hardiness zones. Some do not tolerate frost. But, among the annual tickseeds, breeding efforts have come up with some spectacular new colors. The family Asteraceae includes around 80 species of coreopsis, all native to the Americas.

Stately clumps of billowing garden phlox (family Polemoniaceae) showed off their peak bloom. Bees, butterflies, hummingbirds, and other pollinators are attracted to these plants. Most of the 67 species are native to North America.

Mountain mint (Pycnanthemum muticum), zones 4 to 8, spreads rather invasively by rhizomes. This plant is a member of the Lamiaceae family, along with many other herbs. Its small pink flowers sit above silvery bracts. This plant can be used to make a mild tea. Kind of understated with its unusual flowers, but a strong pollinator magnet.


Black-Eyed Susan

The widely adaptable black-eyed Susan, Rudbeckia fulgida var. fugida, was in top form. Among my favorites of the hardy Rudbeckias, this variety is perfect for meadow, prairie, mass plantings, or clustered among the shrubs. Use it to highlight a garden around a lamp post or off the patio. And they’re well-suited in combination with ornamental grasses.

Deer are not especially fond of this variety, but they might take a bite now and then. They came in for seconds in the Maryland garden. Give them full sun or sun for 2/3 of the day and well-drained soil that doesn’t stay wet. The best thing about “Ruff” is its incredibly long bloom period. Although it begins flowering a short time after Rudbeckia ‘Goldsturm’, it blooms until frost, weeks longer than ‘Goldsturm’. Deadheading helps maintain the display.


Annuals


Zinnia, lantana and ‘Bat Face’ Cuphea attracted pollinating insects. Although they will die with autumn frost, annuals give us the opportunity to plant different varieties each year. And they flower all summer. Although some varieties of lantana perennialize in zone 7, they’re usually planted only for the current season’s flowers. Coleus, grown for its colorful foliage, is another heat-tolerant annual.

Elephant ears (Colocasia) produce large tropical leaves from underground tubers. This garden had both the black and the green-and-black-mottled varieties. They’re perennial in warmer sections of zone 7, but I don’t know if they survive the winter in Lake Lure. Because cold winter air passes under the bridge, the soil is not as well insulated from temperature extremes as is garden soil.


Styrax 


styrax at flowering bridge

Styrax japonica seedpods.


A Japanese snowbell (Styrax japonica) that had been growing for 25 years in the Maryland garden was cut down by the family who bought the house from me. I loved that tree for it fragrant pendulous white flowers and for the umbrella-shaped canopy. It’s a great tree for shading a sunny patio. C’est la vie.

That tree in Maryland seeded heavily, but there never were many seedlings popping up in the bed below it. I did, however, gather a few, germinated them, and then brought them with me to North Carolina, where the grounds maintenance crew whisked them away with the loropetalum trimmings…

This species of styrax has many ornamental features in addition to the flowers and habit—the fruits will split open later in the season, revealing shiny brown seeds. The leaves and twigs are fine in texture, and it has a pleasing horizontal branching pattern. A perfect small tree!


Osmanthus


osmanthus hetero. 'Goshiki'

False holly, Osmanthus heterophyllus ‘Goshiki’.

Osmanthus heterophyllus ‘Goshiki’ has variegated leaves, with some pink at the tips of the stems. ‘Goshiki’ means “5 colors”—white, creamy yellow, gold, pink, and green—for the different hues that appear in the somewhat spiny leaves.

Plant in full sun, or in morning sun in hot zones, and in moist soil. Strong, hot sun will burn the tender new foliage or the white parts of the leaves.

This Asian native is hardy in zones 6 to 9. Use it in mass plantings or as a specimen, in borders or in a bright woodland setting. Small flowers are fragrant. This compact evergreen grows 5′ to 7′ tall.


Peanut Butter Tree


clerodendrum trichotomum at lake lure flowering bridge

Clerodendrum trichotomum, the Harlequin Glorybower.


What?! Yes, apparently, crushed leaves from this suckering tree from eastern Asia smell like peanut butter. Clerodendrum trichotomum (family Lamiaceae), more commonly called Harlequin Glorybower, grows in zones 7 to 10, and reaches 10′ to 20′ tall, and wider than that.

Hummingbirds and butterflies sip nectar from its flowers, which appear most of the summer. This large-leaved tree makes a bold statement in the landscape.


But If There’s Work To Do


A simple screen or workshop like this one can be constructed to hide the works of the garden—the compost pile, tools, and stacks of pottery. It defines the edge of the garden, and it also can hide the neighbor’s trash cans.

Incorporating structures into a landscape adds another dimension, enriching the experience. Finally, personalize with a green roof, interesting twigs and vines, and small hanging pots that express your whimsical side.


wood screen, plants


The Twig Chair


Here’s a great place to rest after the day’s transplanting and weeding, surrounded by peace and beauty. With iced tea, some magazines, and the family dog for company, it’s a great way to spend a summer afternoon. All that’s missing is the “Please do not disturb” sign.

Every time I visit the Lake Lure Flowering Bridge, something new is in bloom, or one of the sections has been completely replanted. It’s only about an hour and a half from Charlotte, and there are plenty of restaurants and mom-and-pop shops to make this area a delightful way to spend the day.

Bring the kids; a Merry-Go-Round and other children’s activities are only a mile away in the Village of Chimney Rock. There are lots of reasons for returning to the Lake Lure Flowering Bridge over and over again!


Hurricane Helene


Chimney Rock Village sign, after flood


This section added 10/7/2024:

***Update***: Hurricane Helene and the resulting floods and landslides scoured the western North Carolina mountains and other regions in the southern Appalachian Mountains for a few days on and after 9/27/2024. It destroyed small towns, roads, bridges, and people’s lives. Around 100 people died and many more are missing in NC alone. Heroic efforts are being made by individuals, churches, and charitable organizations to assess the damage, bring food, water, and communication to trapped families, and to begin the process of mitigating the damage and rebuilding.

Most shops and restaurants in Chimney Rock have been washed downstream to Lake Lure. From what I’ve seen in news coverage, the Lake Lure Flowering Bridge has been reduced to the only remaining feature: part of the concrete balustrade at the edge of the bridge (as in the photo at the top of this article).

Mark Huneycutt documented what he has seen, and here’s one of his videos:

I walked to Chimney Rock for answers… Hurricane Helene Aftermath – YouTube

Rescue operations request that you not venture to the area on your own, even if offering help and supplies. The ground is unstable, and you could end up being one of those needing rescue, so leave it to the professionals. Ask them if you can help.

Please, generously donate money and requested goods to legitimate rescue operations. I donated to Samaritan’s Purse and will forward a portion of my proceeds earned at the farmers’ markets. Samaritan’s Purse, headquartered in the area, has tractor trailers, machinery, supplies, and an army of dedicated volunteers. They are doing a fantastic job, so please help them in their efforts. Thank you.

Added 10/28/2024:

This video demonstrates hope, determination, and generosity in the face of a devastating life-changing event. I also have donated to hurricanehelenewnc.com from my revenues at Wellspring Gardens (Elkin NC farmers’ market):

Asheville is Worse than We Realized – Can They Rebuild?

Thank you again.


Return to the top

Annuals That Tolerate Heat, and Garden Tips

2019


Annuals That Can Take the Heat


American flag


Happy 4th Of July!


Well, it looks as though the heat is on, as we celebrate our nation’s 243rd birthday. And summer just got started! Enjoy your Independence Day barbecues with family and friends, but don’t neglect the garden annuals and other potted plants. They’re going to need more frequent watering at these temperatures.

Here are some things we can do to mitigate problems that come with extreme heat, followed by a list of heat tolerant annuals.


Mulch the Beds


Mulching the gardens will keep annuals and shrub borders looking fresh all summer. Mulch serves several purposes:

  • it retains moisture in the soil
  • the soil stays cooler without the sun beating down on it
  • it helps prevent weeds from germinating
  • mulch helps prevent soil erosion
  • it prevents mud and dormant disease spores from splashing onto the plants
  • long term, it breaks down and adds organic matter to the soil
  • and it looks good

If bags of mulch have been hanging around for a while, gases can build up that might damage tender young annuals. So, open the bags and let the gases escape. I recall mulching newly planted alyssum many years ago, and by the next morning, they looked as if they’d been fried!

Sometimes, termites are found in old bags of hardwood mulch. Once the contents are spread around the gardens, though, the termites probably will die from exposure or due to separation from the colony.


Types of Mulch


pine straw

Pine straw under a tree.


There are many kinds of mulch available from garden centers. I’ve always liked the look of dark brown shredded hardwood mulch. On a slope, it holds better than pine bark nuggets because the fibers interlock. Large quantities of shredded hardwood used repeatedly, however, can cause manganese toxicity and it can drive up the soil’s pH. Limit the depth to only 1″ in flower gardens or 2″ around shrubs and trees.

It’s a good idea to switch to a pine bark product for a few years to avoid these imbalances. Rhododendrons, azaleas, blueberries, hollies, and other acid-loving plants prefer pine products. But, if you want to use shredded hardwood around these plants, don’t pile it on and use an acidifying fertilizer.

Grass clippings break down quickly when used as a mulch by itself or under another mulch product. They contain some nitrogen, gently released as it decomposes. Use a very thin layer around your plants because it can heat up significantly as decomposition begins. But grass clippings can carry residue from weed killers and other chemicals used on the lawn, so maybe the best thing to do is to leave them on the lawn itself.

mulch for heat tolerant annuals

Pine bark nuggets can last a few years, but, if you’re a tidy gardener, you’ll have to blow away or pick out fallen leaves. It’s graded according to particle size, from pine fines, to small and large nuggets. Pine straw is new to me, since moving to North Carolina, but I still prefer shredded hardwood.

Mulch should not be piled high in the garden. Two inches suffices for most applications, although pine straw is applied more thickly. Keep it away from the stems and trunks of the plants.

Tree leaves that fall in autumn make a protective layer for garden plants, although many will blow around in high wind. This is more acceptable in rural areas or where the gardens aren’t open to public view. Most homeowner associations will find this free source of natural mulch objectionable. You could use a mulching mower to chop the leaves into smaller pieces, rake them into gardens, and cover with an inch of a more attractive mulch. Earthworms and decomposition will make them disappear.


Gravel In the Garden

I’ve never used gravel as a mulch around plants, except for potted lavender or succulent dish gardens. It settles into the mud, and “gravel travels” on an incline.

In certain circumstances, such as in the desert southwest and in dry rock gardens, gravel is a good choice. Around dry stream beds and in paths, gravel and rocks add natural elements, but should be laid over landscape fabric to prevent settling into the soil. If using gravel on the surface of a walkway, look for the kind with angular rather than rounded edges; it is less likely to sink underfoot.


Landscape Fabric

I am not a fan of using landscape fabric under mulched plants. This barrier interrupts the natural decomposition that occurs where the mulch meets the soil. Without the fabric, earthworms ingest the partially decomposed material next to the soil surface, and deposit fertile castings (excrement) into lower levels of soil, improving it in the process. This is how it works in nature, accompanied by thriving populations of various microbes.

Leaves, fallen trees, and dead insects and animals contribute to a healthy environment on the forest floor as they decompose. Microbes, earthworms, rain, and freeze-thaw cycles help distribute nutrients through the soil profile.

As the mulch breaks down over the fabric, weed seeds blowing into the beds will readily germinate in this rich medium. So, most gardeners using landscape fabric will be disappointed when they see those dandelions, plantains, and weedy maple trees taking root there. Mulch, with or without landscape fabric, doesn’t entirely prevent weeds, but it will greatly reduce their numbers.


Water the Garden Beds


marigolds, easy annuals

Marigolds planted by volunteers in Arbourgate Meadows, Charlotte NC.


Make sure the flower beds and the shrubs, especially new ones, get a deep soak now and then if rain is scarce. Unless your area receives a prolonged period of rain, passing showers will moisten only the mulch. In most soils, 1″ to 2″ of water per week ensures that deeply growing roots will get their share.

Watering a little bit every day or two will not produce deeply rooted plants. Unfortunately, shallow roots are susceptible to stress from not only dry soil but also from hot soil.


watering can


It’s always best to water early in the morning, so the foliage is dry going into the night. This lessens the likelihood of diseases infecting annuals and other plants. Some of the water applied during the heat of mid-day will be wasted because of rapid evaporation. But if you’ve forgotten, and the plants are wilting, water as soon as possible, regardless of the time of day!

For busy families, watering with soaker hoses or tubes and emitters saves time. By placing the water directly on the soil, or under the mulch, very little is lost to evaporation. These systems can be attached to a computerized control center at the faucet. Just be doubly careful, though, when digging nearby, that the spade doesn’t land on the soaker hose. But if it does, there are repair kits for that.

The kids might enjoy a sprinkler or Slip ‘n’ Slide on a hot Fourth of July, especially the ones under 35. For a softer landing on the slippery strip, water the lawn underneath it first.


About the Hose

A garden hose kept in the sun will significantly heat the water inside it. Spray it out over the grass until it’s cool enough to apply to the gardens. Water under the canopy and beyond the drip line of the plants. Watering heavily as needed will cool the soil…for a while, anyway.


Water and Potting Soil


caladium impatiens pot, annuals

Caladium, variegated English ivy, and ‘Prizm’ impatiens, before impatiens downy mildew came along. The new ‘Imara’ impatiens is downy mildew resistant.


The trend in gardening over the years leans toward growing annuals in pots for key areas around the yard. Gardeners also are decreasing the square footage devoted to annual garden beds.

Container gardening requires vigilance, because soil in pots generally dries faster than garden soil. Hanging baskets filled with thirsty annuals and small blooming pots on the picnic table probably will need daily watering in areas with intense summer heat. For this reason, I prefer using larger pots when possible, such as 12″ to 18″ hanging baskets.

Strawberry jars introduce verticality and a unique appearance. Look for smaller varieties of plants to fill these containers.

Adding a thin layer of mulch to potted plants has the same advantages as mulching the garden. I use 1/2″ of pine fines, and sometimes shredded hardwood.


Amendments For Annuals

Potting soil with a high percentage of coarse drainage material, such as pine fines or perlite, tends to dry quickly. The soil doesn’t hold water, due to the large air pore space between the particles. Supplementing the potting soil with compost, peat moss, fine coir, or even some clean loamy topsoil from the garden adds more particle surface area where water can cling. You don’t want to create a heavy soil, though, that doesn’t drain well enough.

Rountree's potting soil

Planting mix, above, with high levels of pine fines, is best used to improve garden soil. Potting soil tends to have more finely textured materials.

When I lived in Maryland, Leaf-gro was readily available to amend potting soil and garden beds. I used tons of it! It was pure, rich compost, and was the end product of all that yard debris (weeds, grass, leaves) sent to the recycling center.

An additional benefit of using garden loam is the introduction of root-friendly microbes and micro nutrients, although you might have to pull a weed now and then. I can see you shaking your finger and warning of soil pathogens and worms…yes, true. If you’re concerned, you can buy bagged products that have been pasteurized. Ask to see the contents, though. The last bag of “sandy loam” I purchased contained mostly finely ground pine bark and sawdust.

Water-holding crystals are another option for potted plants and garden beds. Read directions carefully. Don’t add dry crystals to a pot; they need to be pre-moistened. I never found them to be that effective, but these new potting soils with all those pine fines might be improved with them.


Amending After the Fact

Supplementing bagged potting soil is becoming common practice for my pots these days. For the potted tomatoes that were drying too fast, I scratched about a gallon of clay loam from the vegetable garden into the top layer of soil in each 20″ pot. With each watering, the fine particles will sift down through the pot, filling some of the pore spaces.

It seems to have worked. The tomatoes aren’t beginning to wilt by mid afternoon after watering in the morning. And, on some days, I can even skip a watering. Much better.


Fertilizing Annuals

Heat-tolerant plants growing in pots will run out of fertilizer within just 2 to 4 weeks, depending on soil quality. Frequent watering and rainstorms leach nitrogen, in particular, through the soil. And, once nitrogen levels drop too low, older leaves will turn yellow, the plant might become pale overall, and growth will slow down. Nitrogen is the macronutrient that is needed in greater quantities than any of the other nutrients.

Each plant species is different. Some need more phosphorus or iron or magnesium. Check the label for a comprehensive list of ingredients.

Many annuals are particular about soil pH; some need acidic soil, while others tolerate a higher pH. At either end of the scale, certain nutrients become unavailable to plants. Most plants, however, grow well enough over a fairly broad range. But, if you notice yellowing, consider taking a soil test and having the chemistry analyzed.

Garden centers stock many kinds of fertilizers. They’re available as soluble crystals, dry granules, liquid concentrates, and as slow-release (or timed-release) prills.

Fast growing annuals need regular applications of nutrients. Rather than a feast-or-famine regimen, put the plants on a schedule so they never show the effects of “hidden hunger”. This and other good horticultural practices will keep your plants in prime condition until the end of the season.

Slow-Release Fertilizer

At high temperatures, slow-release fertilizer is consumed faster than the label might indicate. So, a 6-month product might be depleted after 4 months at 85°. Instead of simply placing the prills on the hot soil surface in a pot, dig a few small holes between plants, add the prills, and cover them with about an inch of soil. This will keep them cooler and prevent rapid release of the fertilizer.

In gardens, slow-release fertilizer can be placed under the mulch, scattered over the root zone. A small amount is released as water percolates through the medium.


Pot Colors


heat tolerant annuals in pots

As these plants grow, they will shade part of the pots’ surfaces as summer temperatures rise.


Roots growing on the sunny side of dark pots, in hot summers, can heat to the point of death. So, most plants prefer light colored pots that reflect energy from the sun. If you really want to use the new rust-brown pots by the front door, add plants that trail over the side of the pot, shading enough of it to make a difference.

Another option is to use an insert, a plastic pot that sits inside the pretty pot, with space for hot air to escape. Maybe your beautiful teal pots can be tucked under the tree near the pool and planted with shade loving annuals.

This isn’t a concern in most parts of the country, but in southern states, the plants will appreciate this detail. Choose heat tolerant annuals that are less likely to be damaged by these conditions.


Winter Pots

Conversely, in chilly winter climates, dark pots absorb the sun’s warmth, delaying freezing of the soil. Find out if your pots will tolerate frost, and make sure they drain freely. “Frost resistant” does not mean “frost proof”.

When I potted large planters for customers’ winter gardens, I included sheets of styrofoam in the shoulders and on the sides of the pot, which absorbed the soil expansion as it froze. Pots with straight or sloping sides, with no curved shoulders, allow freezing soil to heave upward, usually avoiding breakage. In Maryland winters, expensive concrete pots were most likely to survive the cold.


Evaporative Cooling

clay pots

Efflorescence on clay pots.

Most terra cotta pottery is porous, allowing air and water to pass through the sides of the pot. Some clay pots, though, are fired at higher temperatures, making them non-porous.

A clay pot with moist soil stays relatively cool, as moisture wicks through the pot. As water evaporates, the surface of the pot feels cooler. The same principle applies to perspiration evaporating from your skin. So, decorative clay pots in the summer are another alternative. But, they dry out faster because of the moisture loss through the pot.

The pots in the photograph have a white mineral coating called efflorescence. When fertilizer salts in solution migrate through the clay, they crystallize as the water evaporates. It can be removed or enjoyed.


Nursery-Grown Landscape Plants


nursery trees


Because containerized nursery plants are watered daily in warm weather, growers use a mix comprising mostly fast-draining pine fines, sand, and perlite, with some organic matter (peat moss, ground coir, compost) for water retention.

During hot summer weather, it is important to get transplants established as quickly as possible. New roots reluctantly grow into the native soil, but can be encouraged to do so by scoring the root ball or by teasing out some of the roots on the sides. This causes slight injury to the roots, and stimulates the plant to quickly form new side roots from the pericycle, a layer of cells inside the root.

Also, amending garden soil with organic matter, such as nutrient-rich compost, and pine fines for better drainage creates a welcoming habitat for new roots. Heavy clay soil is not very accommodating and hinders rapid rooting. You want to give your plants soil that drains well and entices roots to grow deeply. If you’ve ever tried to dig in dry, compacted clay soil, you know why plants are slow to establish. Good soil preparation makes a huge difference!


Why New Plants Sometimes Fail

A newly planted ‘Soft Touch’ holly, azalea, or autumn fern needs to have water replenished in the root ball every day in hot breezy weather. Until new roots expand into the soil, plants are entirely dependent on you for their daily dose. Make sure the water isn’t too hot.

I often consulted with homeowners when their new plants failed. When the shrubs were unearthed, their roots often were quite dry.

One landscape I visited here in Charlotte had very large evergreens newly planted in front of the house. All were dead or dying during a prolonged drought. After a little digging, I saw that 95% of the root system on each plant was bone dry because there was no organic matter mixed into the heavy clay soil. And only one irrigation emitter was placed on the side of the root ball. Each plant this size would have required a few emitters.

To make matters worse, the soil had been backfilled in large clods, and not broken up at all. Any water that flowed from the emitter drained right into the crevices, bypassing the root system. Those large air-filled gaps dried exposed roots even more. Any moisture in the root ball was quickly wicked away by the clay. This costly disaster illustrates the need for thorough soil preparation: breaking up heavy soils, incorporating amendments (drainage materials, organic matter) for improved tilth, and firming the soil around the root ball.

The problem is this…

…and it’s a point that doesn’t get a lot of attention. Water is sucked into the tiny spaces between clay particles by capillarity. And what’s abundant in soils throughout much of the country? Clay! So, when the shrub’s potting soil that is mostly pine fines (with large air pore spaces) sits next to native soil that’s composed of mostly clay (with tiny air pore spaces) what happens to the water? That’s right! It’s pulled from the shrub’s potting soil into the surrounding clay.

Clay always wins! This is one explanation for nursery plants that fail, even though the surrounding soil in the bed feels damp.

The remedy for a shrub with a high percentage of pine fines and perlite in the pot is to work some of the native clay into the root ball. Poke some holes a few inches deep (try using a dibble) on the surface of the root ball and fill with a few handfuls of clay or loamy clay; water it in.

This improves the water-holding capacity of the soil inside the root ball. Granted, this is a fine point. But the principle was effective for the potted tomatoes, mentioned in “Amending After the Fact”, above.


When Can I Plant?

Shrubs and trees establish in the landscape faster in autumn, when soil temperatures are still warm enough to promote root growth. Even in chilly soil, in the 40’s F, roots can grow. Air temperatures are more moderate then, and rain falls more predictably. The next best time is early to mid spring, as the soil begins to warm and before the trees leaf out.

But plants can settle into the landscape during the summer, too, as long as soil preparation was adequate and water is provided when needed. That ‘Jelena’ witch hazel would much rather be in the ground than sitting in a black pot at the nursery on this Independence Day.

Summer annuals root quickly, but give them enough water to prevent wilt. They’ll probably need water every day until their roots grow more extensively through the soil. And give them enough to moisten the entire root ball and the surrounding soil. It takes only one sunny 90° day to dry that new plant to a crisp!


Reservoirs and Saucers


creekMost hanging baskets and large plastic pots have a reservoir or an attached saucer at the bottom. It holds an inch or two of water that the plant’s soil will gradually absorb by capillarity.

It isn’t necessary to drain it off in the summer, if the plant is full of foliage. Any water the soil can’t absorb within 30 minutes, however, should be poured off.

For young plants and for succulents or plants that like dry soil, the reservoir or the saucer should be drained. Pour the excess water onto other plants instead of wasting the nutrients. Even worse is to let dissolved fertilizer wash down the street to the storm drain, eventually polluting the local creek.

Another option is to remove the saucer and allow water to drain freely into the flower beds or the shrub border.


Planting Wire Baskets

When I plant a wire basket, I line the inside of the coco liner with a “repurposed” sheet of plastic, such as an empty mulch bag. The plastic prevents evaporation through the coco liner, and slows decomposition of the coco liner.

Be sure to punch holes through the plastic in several places to allow drainage. But leave the bottom inch or so intact, forming a reservoir to hold water a bit longer, until it’s absorbed by the plants.

(For decades, as owner of Wellspring Garden, I never bought trash bags. I saved all the empty bags from potting soil, amendments, and mulch for that purpose. Using less plastic is the way to go!)


So, It’s Your Turn To Host the Party


red-white-blue


A trip to the garden center reveals plenty of options to dress up the landscape for the holiday:

  • full grown, colorful blooming baskets for the deck or the porch
  • a potted combination “drop-in” worthy of that gorgeous ceramic container near the front door
  • some large annuals, in 6″ or 8″ pots, for the garden, looking as if they’d been growing there for months
  • a potted herb garden that guests can pinch to customize their salads (basil, chives, and others), and some mint ‘Julep’ or ‘Kentucky Colonel’ for iced tea, or other beverages.

Finally, string some lights for evening ambiance, and add red, white, and blue accents to celebrate Old Glory. Don’t forget to bring greenery into the powder room, in a pretty pot, adorned with a small flag.


Headings

Page 1: Happy 4th of July!, Mulch the Beds (Types of Mulch, Gravel In the Garden, Landscape Fabric), Water the Garden Beds (About the Hose), Water and Potting Soil (Amendments For Annuals, Amending After the Fact, Fertilizing Annuals, Slow-Release Fertilizer), Pot Colors (Winter Pots, Evaporative Cooling), Nursery-Grown Landscape Plants (Why New Plants Sometimes Fail, When Can I Plant?), Reservoirs and Saucers (Planting Wire Hanging Baskets), and So, It’s Your Turn To Host the Party

Page 2: Heat-Tolerant Annuals

Return to the top

The Garden Patch, McFarlan’s, Strawberry Hill

2019


The Garden Patch, McFarlan Bakery, and Strawberry Hill U.S.A.


smile-face cookies


The Garden Patch, Columbus NC


Last weekend, I took a drive toward western North Carolina, and stopped in at a nursery I often saw when traveling out that way. The Garden Patch is located on West Mills Street, in Columbus, not far from Route 74. I was given a friendly greeting by Jeanine Gauen, the owner, and then proceeded to the hardy plants section.


The Garden Patch sign, Columbus NC


After seeing the cute little holly with tiny leaves, I asked permission to take some photographs for The Farm In My Yard. Jeanine gave me a business card, and then we started chatting.

She moved to North Carolina 11 years ago, from Chicago. It’s no wonder the population is shifting southward. The climate is so much more comfortable! Maybe it’s the longer growing season. Winter greens that grow with little or no protection is high on the list of must-haves.

Yes, it does get hot in the summer, and that’s why the mountains and the foothills are popular. It’s cooler than the lower elevations, but the winters are still quite mild. You just have to pick the right elevation. And, to me, there’s the unmistakable appeal of smaller towns.

Luna, the long, lovely dog, came out to say hello. So, of course, Jeanine and I exchanged naughty dog stories for a few minutes, before I was gently reminded that the store had closed for the day…..Horrors!!…. Bold me, I asked if I could just get a few pictures before leaving. “Thank you!”


Osmanthus heterophyllus ‘Kaori Hime—Party Princess’

Osmanthus het. Party Princess, at The Garden Patch

Osmanthus ‘Party Princess’.

‘Party Princess’ is a false holly, and it grows in USDA hardiness zones 7-9. This patented variety can be kept at 2-3′, but it has big fragrance.

Plant this evergreen in sun or part sun, grouped around the lamp post or in the garden near the mailbox. It also works well as a border or a short hedge. In hot climates, it does best with light shade during the harsh afternoon hours.

Enjoy the fragrance when it’s in flower, late summer to fall, near the patio in the back yard. With some selective pruning, this tiny-leaved shrub is well-behaved in the garden. It appears to be a low maintenance plant, and not bothered by deer. Very cute. Another must-have!

Here are more discoveries at The Garden Patch:


Callicarpa dichotoma ‘Wine Spritzer’

This deciduous Callicarpa, a new beautyberry called ‘Wine Spritzer’, grows in zones 6 to 9. It stays a bit smaller than its green-leaved cousins, to 4-5′ tall. The more direct sunlight this plant receives, the brighter the variegation. However, in hot climates, the foliage can suffer sun scald in full sun, so consider planting it in morning to early afternoon sun. It does not fruit as heavily as the green varieties.

If it’s like the green types, this shrub does best with an annual hard pruning in late winter to early spring. I used to prune the ones in Maryland to within 1′ of the ground or lower. Since it flowers on new wood, pruning like this didn’t diminish the crop of purple berries. And growth is more controlled this way. In fact, the later I cut them back (May, at the latest), the shorter the shrubs ultimately grew. New shoots regrew quickly, although this variegated variety might respond more slowly.


Cryptomeria japonica ‘Chapel View’

Cryptomeria ‘Chapel View’ is a beautiful evergreen with dense blue-green foliage. This Japanese Cedar grows in zones 6-9. It has minimal, if any, winter bronzing. This one is not as large as some, growing up to about 10′ tall and 6′ wide. If needed, the plant can be pruned to shape.

‘Chapel View’ is a good variety for an informal screening hedge, as a specimen in a large rock garden, or on the corner of the house. Plant it in slightly acidic soil, and mulch it.


oakleaf hydrangea at The Garden Patch.

Hydrangea ‘Little Honey’.


Hydrangea quercifolia ‘Little Honey’

‘Little Honey’ Oakleaf Hydrangea shines in the lightly shaded garden with its bold gold leaves and white summer flowers. This variety grows only 4′ tall, and is hardy in zones 5-9. A sport of ‘Pee Wee’, it is derived from the native species.

Shade doesn’t have to be a drab, dark green forgotten space. Mass a few of these eye-catching shrubs, and add yellow variegated hostas, and Hakonechloa (golden Japanese forest grass) to “echo” the hydrangea’s color. Plant a cluster of autumn ferns (Dryopteris erythrosora ‘Brilliant’) for contrasting texture and copper-colored new fronds. Sweet!

Another way to enjoy ‘Little Honey’ is to plant a drift of Liriope ‘Royal Purple’ in front of the shrubs. Rich royal purple flowers are attractive with the chartreuse background. You might have to spray for deer, though.

‘Little Honey’ will burn in hot sun, but without some direct sunlight, the color will be closer to green. It tends to deepen in color over the growing season. Morning sun is appreciated. If more light is needed, consider limbing-up lower tree branches or creating openings in the canopy, but avoid hot afternoon sun. Prepare the soil well for this shrub because it needs good drainage. This hydrangea puts on another show in autumn with its red fall color.

A running water fountain brings additional elements to the shade garden—mesmerizing sound and birds! Don’t forget to add a bench, from which to enjoy it all.


Delosperma nubigenum ‘Wheels of Wonder—Golden Wonder’

‘Golden Wonder’ is an ice plant, native to South Africa. It grows in zones 5 or 6-9, and needs very well-drained soil. It will tolerate dry conditions. Bright flowers develop in late spring and early summer. This plant stays short, so it’s good candidate as a ground cover in hot spots.


Sedum telephium ‘Desert Black’

Sedum Desert Red, The Garden Patch

Sedum ‘Desert Black’.

Here’s another succulent bred by Terra Nova Nursery. ‘Desert Black’ has chubby purplish leaves on short upright stems. More sun = deeper color.

It grows to only about 7-8″ tall. Deep pink flowers rise in clusters a few inches above the leaves in late summer to early fall. It’s hardy in zones 4-9, and likes full sun and dryish soil that drains very well.

Great for rock gardens or perennial gardens not under irrigation. These sedums, when in flower, are visited by every passing butterfly and other pollinators.


The Garden Patch

The plants were in great condition at The Garden Patch. Look for some of these varieties for those problem spots in your landscape, and have a chat with the employees. But remember that hours are limited on Saturdays.

Address: The Garden Patch, 39 West Mills St., Columbus, North Carolina

thegardenpatchnursery.com

828-894-2200


*     *     *     *     *     *     *     * 


McFarlan Bakery, Hendersonville NC


Mother looks forward to the little treats I bring home from these trips, so I would never want to disappoint her

I often drive through downtown Hendersonville, and stop for lunch, brochures at the Visitor’s Center, or butter rum lifesavers at Mast General Store. This is a great place to spend an afternoon, especially when the thermometer heads for the high 90’s in Charlotte. It’s almost always 5-10°F cooler here.

On this day, I bought a few donuts and cream cheese-filled pastries. Yum! This bakery has been delighting its customers since 1930. Here are some possibilities for the next trip:


McFarlan Bakery

Michael W. Cole, owner

Address: 309 N. Main St., Hendersonville, North Carolina

mcfarlanbakery.com

828-693-4256


“Ursula” The Bear

There have been several bear sightings in downtown Hendersonville.


Fabulous detail! This bear was sponsored by NCSDAR and was painted by Starlotte Englebert. It will be auctioned on October 19, 2019, to benefit Crossnore School and Children’s Home. For more information: DowntownHendersonville.org.


    *     *     *     *     *     *     *     *


Strawberry Hill U.S.A., Chesnee, South Carolina


Part of the fun of these day trips is discovering new routes to travel instead of using the old familiar ways. A very pleasant drive home along Route 11 East, in South Carolina, took me past the Cooley Brothers Peach Stand. Take exit 5 off I-26 South for the Cherokee Foothills Scenic Highway, or Route 11. The stand is located 5 or 6 miles west of Chesnee.

It was well worth the stop. I bought a bagful of delicious local peaches, a large cantaloupe that ripened perfectly, sesame sticks, and several beefsteak tomatoes at a price no one could beat! They also stock jellies and jams, baked goods, and t-shirts.

Another building across the street was busy with customers, so I had to take a look. Several people were sitting outside, enjoying their ice cream. Perfect, since I mustered some restraint and had not yet touched the pastries. I ordered a hot fudge sundae, and for less than $4.00, this mountain of chocolate chip mint and whipped cream and hot fudge…well, it was almost too much!

There are places of historical interest not far from here, so next time…


Strawberry Hill U.S.A.

3097 Hwy. 11 W, Chesnee, South Carolina

strawberryhillusa.com

The Shed 864-461-7225

The Cafe and Ice Cream Parlor 864-461-4000


Road Trip


Take advantage of the lower gasoline prices, pack a few essentials, and enjoy a summer road trip. Even now, I’m wondering what the next destination will be. Often, I don’t have a specific goal in mind…until an interesting place finds me. Have fun!


Return to the top

Fig Trees: How To Grow Edible Figs

2019

Updated 4/14/2024


Delectable, Edible Figs


The plant wish list grows longer each day. Within the next couple of years, I hope to move to a property with larger garden space, so I can shrink that list. First to be planted will be a couple of fig trees…blonde figs, purple figs…


figs


Many years ago, our local Derwood, Maryland grocery store brought in fresh figs. I couldn’t believe it. So, I indulged in the extravagance, and bought a small box, at $9.00 or $10.00 per pound. The last time I had had fresh figs was about 25 years earlier, in Oradell, New Jersey… …

As a young girl, my first introduction to the delectable fig was when my maternal grandfather picked them from trees growing in his Englewood garden, two towns over. A substantial brick wall surrounded the back yard, as I recall, just beyond the monstrous cast iron stove in the kitchen.

My grandfather’s figs grew on the right side of the garden. On the left were my grandmother’s tomatoes, herbs, and where she threw out bread for the birds. I can still hear them—sparrows, tons of sparrows!


sparrows


Papa’s Fig Trees


Salvatore and Catherina D’Arrigo married in Sicily, after, according to tradition, his sisters had been married and settled into their homes. Now, in 1906, they sailed across the Atlantic, to enjoy a new life of freedom and opportunity in the United States. After passing through Ellis Island, they settled near extended family members in Bergen County, New Jersey.

Nanny, Papa

Nanny and Papa D’Arrigo, before setting sail for America.

Industrious and self-sufficient, Nanny and Papa wasted no time getting down to business. They opened a tavern/restaurant and purchased a house. I imagine that, like Johnny Appleseed, wherever my grandfather landed, a fig tree grew. That part of the eastern seaboard, though, is quite cold in the winter, and not considered “fig country”.

But my grandfather had some tricks that worked, apparently, for his fig trees. In addition to his skills in business, Papa was also a landscape gardener. Must be in the DNA!

Every autumn, after the trees went dormant, he surgically severed part of the root system near the base of the tree. He bent over the trunk of the fig tree until it was just above the ground. Then he covered the trunk and branches with piles of leaves and burlap…all tucked in for the winter. In early spring, each fig tree was raised, pruned, and staked. (Other family members recall the standing trees simply being cloaked in layers of burlap, so he might have tried different methods.)

Recently I read that this was a common practice in Boston, New York City, Philadelphia, and other cold cities where the fig tree could not survive without a little manipulation.


Second Helping

It was a full half century after my grandparents had arrived on these shores when I had my first… fresh… fig from their garden. Papa passed away when I was 10 or 11, and Nanny, 5 years after that. So, we didn’t have too many years to enjoy those figs, but they certainly made an impression.

A quarter century after the last of Papa’s figs, those fresh figs showed up at the grocery store in Maryland. And yes! They tasted exactly as I had remembered them!


fig tree


Origins Of the Fig Tree


The common fig (Ficus carica) is native to Turkey. By 5,000 B.C., it had been distributed throughout the Middle East and the Mediterranean region by Greek and Roman traders. Fig trees readily adapted to hot, dry summers and mildly cool winters, and they also made their way to England and China. They grow from sea level up to over 5,000′ in elevation.

map, Turkey, Mediterranean

But its roots go back much further than that. At a Neolithic archaeological site called Gilgal I, in the Jordan Rift Valley, evidence shows that fig trees were cultivated 11,400 years ago.

Remains of a plant found in a home dating to that period indicate that early populations knew how to vegetatively propagate fig trees from cuttings. The parthenocarpic “mutant” they grew was a sterile form that bore fruit without pollination.
Cultivated for human consumption, figs are probably the oldest domesticated crop. Figs predate by a thousand years the earliest agricultural grains—wheat, barley, and rye.

Sumerian stone tablets from 2500 B.C. recorded culinary uses of the fruit. For thousands of years, before sugar gained widespread use, figs sweetened foods and desserts.

Legendary twins Romulus and Remus have been depicted under the bough of a fig tree as they were fed by the mother wolf. The forbidden fruit, of Bible fame, was probably the fig and not the apple. Figs have long figured in religious symbolism, associated with peace, prosperity, and fertility.

The term “fig” was first used in the English language in the 13th century. It is derived from the Old French figue, and the Romance fica (Ficus is the genus name for edible figs and for the hundreds of tropical species).


The Fig Moves To The New World

Early explorers brought fig trees to the New World as early as the 15th century. And the Spanish Franciscan missionaries are credited with planting figs in southern California from 1769. ‘Mission’ is a well-known variety, with excellent flavor and sweetness. It is parthenocarpic, not requiring pollination to set fruits.


Worldwide Production

Worldwide, Turkey produces the most figs, with 26% of the crop. Egypt, Algeria, Morocco, Iran, and the U.S. round out the rest of the top 6 producers. California, with a climate similar to the tree’s native land, grows almost the entire American commercial crop. Texas comes second.


Figs as Houseplants


weeping fig

Variegated weeping fig.


This article describes the edible fig, which grows outdoors. The weeping fig (Ficus benjamina), the creeping fig (Ficus pumila), the rubber plant (Ficus elastica), and the ever-popular fiddle-leaf fig (Ficus lyrata) are primarily tropical houseplants, but they don’t produce edible figs for humans.

The edible fig tree does not grow well or produce fruit indoors.


Inside the Box

My father’s career centered around food photography, mostly with the Nabisco cookie company. We kids were delighted when he brought home samples of Fig Newtons, first becoming available in 1891. In fact, as a teenager, I spent one summer at the Fair Lawn NJ Nabisco plant deftly packing boxes of chocolate chip cookies and Fig Newtons.

This explains not only my fondness for these cookies, but also my complete aversion to anything sticky. Dirt’s okay; sticky is not.


figs


If It’s Too Cold


Okay, I was determined to grow a fig tree. Most experts at the time said they wouldn’t survive Maryland’s cold winters. Much later, with a little research, I learned that there are several hardier varieties of fig trees. Most fig trees grow in USDA plant hardiness zones 7 through 9, with a few growing in zone 6, and several tolerating warmer zones. ‘Chicago Hardy’ is hardy to zone 5. Before choosing a particular variety, check its hardiness zone from a few sources. There are over 200 varieties to choose from.

A garden center called Behnke’s Nursery was the go-to place for plant nerds like me. But it was some distance around the clogged Beltway circling Washington, D.C., in Beltsville, Maryland. They retailed more species of plants than I had ever seen. Certainly, they’d have figs!

I bought a variety called ‘Brown Turkey’, one of two types available. The next year, I transplanted it into a bigger pot. Smaller varieties of figs can grow in 20-gallon pots or larger. The plan was to grow it outside in the summer, let it drop its leaves in the fall, and then move it into the unheated garage for the winter. There, it wouldn’t suffer from the lowest winter temperatures. And, because the fig tree bears fruit even when growing in a large container, this small effort would have fruitful dividends.

This routine served us well for several years, until that killer winter. One year, the temperatures dropped to lows we had rarely seen, and the wind blew its icy breath through the gaps around the garage door. My fault—I didn’t raise the fig tree off the floor or move it inside. Consequently, it froze solid and died. When the garage door was replaced, I went for the more expensive well-insulated model.


A Nod To Behnke’s

Just a few weeks ago, I read in one of the trade magazines that, sadly, Behnke’s is about to close its doors. Another pillar collapses. Many in the gardening world, it seemed, knew this company.

In fact, recently at the Hendersonville Garden Jubilee, Larry Morton, the bonsai vendor at Bella Bonsai Nursery, told me that he had worked there for a few years in the ’60’s. Small world… Here’s to Albert and Rose Behnke, German immigrants, who opened this nursery almost 90 years ago.


Headings

Page 1: Delectable, Edible Figs, Papa’s Fig Trees, Origins Of the Fig Tree (The Fig Moves To The New World, Worldwide Production, Figs as Houseplants, Inside the Box), and If It’s Too Cold (A Nod To Behnke’s)

Page 2: How To Plant and Grow Fig Trees, Hardiness, Sun, Soil Preparation For Fig Trees, Time To Plant (Mulch), Watering Fig Trees, Fertilizing, Pruning Fig Trees, Foliage, Fruits Of Fig Trees, That Little Fig Wasp, Problems, Types of Fig Trees, and Varieties of Fig Trees

Return to the top


The Hendersonville Garden Jubilee, 2019

2019


So, What Can I Add To the Garden This Year?


This past Saturday, I headed for the cool North Carolina mountains to attend the Garden Jubilee Festival. Over 250 vendors set up their booths on the streets of downtown Hendersonville, on Saturday and Sunday, from 9:00 a.m. to 5:00 p.m. It was going to be hot, but Charlotte was going to be hotter. We’ve been stuck in this prolonged period of July-like weather, and the grass is already browning out.

I love going to garden shows. Rain or shine, but, preferably, not extreme heat. This is the type of venue where my little horticultural company, Wellspring Gardens, sold herbs and vegetables, annuals, perennials, seasonal plants, and houseplants…succulent dish gardens, herb gardens in decorative clay pots, and colorful combinations. If it sounds as if I would like to do this again…well, you’re right.

Many of the vendors I met last year were back again. Some who braved constant rain a few weeks ago in Waynesville were here in Hendersonville, happier about the weather. This garden show traditionally runs during Memorial Day weekend. Here are some of the booths I visited.


water feature, Hendersonville garden jubilee


Water Dance


“Water Feature Specialist”

This outdoor display (photo, above) required 5 hours to set up on Main Street. The company installs water gardens, patios, and other landscape projects. They also maintain them.

www.waterdancellc.com, waterdancellc@gmail.com.  828 687-9007, 828 712-8268.


Brigg’s Garden Center, Horse Shoe NC


I started the day at Brigg’s, after finding a shady parking space. They had lots of annuals, perennials, and shrubs, including blooming hydrangeas. A few pots of blue/lavender Hydrangeas clustered around a blue ceramic seat created a lovely color combination.

They demonstrated, under the city’s trees within their space, the value of repeating colors within a garden by grouping plants with related colors. Lots of customers. I bought a few bright yellow Sanvitalia, or creeping Zinnia, for pots.

Briggsgardencenternc.com.


Stepp’s Plants, Etc., Flat Rock NC


swingtime fuchsia

Fuchsias like cooler temperatures, such as eastern (morning) sun. And hummingbirds love them.

Stepp’s had the biggest and some of the best-grown plants at the show. Their specialty, at this show anyway, was large combination hanging baskets. Nice combinations, good healthy plants, beautiful, and selling like hotcakes!

One or two plants filled the little red wagons that customers carted them around in. Gorgeous fuchsias, million bells (Calibrachoa), petunias…

steppsplants@yahoo.com. Larry Jr., Gayle, and Larry Stepp. 828 243-5299.


Plant Smart Shade Gardens


Karen had a large collection of Hosta varieties, from large growing plants to miniatures to unusuals. Tiny golden ‘Little Miss Muffet’ grows only 4″ tall, nice for tucking between rocks or at the edge of a shady garden walk. ‘Whee!’ grows to 15″ tall and has rippled edges. ‘Golden Tiara’, with gold margins, quickly fills a space and is a medium small variety.

Hosta breeders are trying to bring new features to this huge genus. Several recent introductions have red petioles, including ‘Fire Island’ and ‘Miss Susie’, two that were represented here. Informative signs.

George and Karen Smart, hostas@alwaysplantsmart.com, facebook.com/AlwaysPlantSmart.


Barry Farms


Lots of herbs, including uniquely fragrant patchouli, and hardy succulents. They also had one of my favorite annuals, the variegated Nasturtium ‘Alaska’, which is both pretty and edible.

barryfarms@gmail.com.


Landy’s Woods, Nebo NC


Natural log and wood planters. Simply drop in a large pot of plants and add some moss to the edge for a finished look.

Landyswoods@gmail.com.


MrMaple, East Flat Rock NC


Concurrently with this event, MrMaple on Saturday hosted the “MrMaple Festival 2019” in East Flat Rock. Ever popular Japanese maples and other species, many rare varieties…and expert advice to ensure longevity (for the tree) in the garden.


Japanes maple Red Filigree Lace

‘Red Filigree Lace’ Japanese maple.


mrmaple.com. Tim Nichols 828 551-6739, and Matt Nichols 828 226-5684, facebook.com/japanesemaple. Open to the public by appointment.


Linda’s Plants


Many nicely-grown flowering plants, including Osteospermum, Verbena, herbs, sweet potato vine. Busy booth!

lindasplants.com.


Lindas plants, Hendersonville garden jubilee

Linda’s Plants.


Ziba Cards and Jewelry


zibaKaren had hundreds of glass-covered pendants for sale. Images in a broad range of subjects (birds, zebras, plants and flowers, religious, inspirational, insects, graphics, music…).

Karen Rollefson, www.zibacards.com, zibacards@gmail.com. 704 806-1725.


caristo silver jewelryCaristo Jewelry Designs, Asheville NC


Silver bracelets with free “organic” design, and nicely detailed enameled (cloisonné) earrings and pins.

Southern Highland Craft Guild. www.caristojewelrydesigns.com, caristojewelry@yahoo.com. Linda 828 691-7700 and Carl 828 778-7247.


Wildwood Herbal


pink gypsophila“Plants-Produce-Cannabis”

Succulents, herbs…this is where I found the pink flowering gypsophila that’s going into the small wire basket on the deck. I used to grow one like this from seed, nice in smaller combinations. I’ll post the cultivar name as soon as I can recall its name (‘Pink Fairy’?).

Darsey Driver, 336 692-7615, Darsey@wildwoodherbal.org. And Seth Salmon, 828 407-3339, Seth@wildwoodherbal.org.


Dean Epperson


Hand-made natural live-edge wood tables and seats, complete with Ambrosia beetle tunnels and verticillium streaks. So…bugs and fungus, but beautiful bugs and fungus! Nature is awesome.

deanepperson@gmail.com.


Memories by Laura, Franklin NC


“Vintage Framed Memory Art & One of a kind collectibles”

Teacups, old keys, crystal butter dishes, small cut glass bowls, glass beads, decorative metal accents and other treasures fused in a glass panel and framed.

Hang them in windows or wherever light passes through them if plants are kept in the cups. Try small succulents and tillandsias (air plants).

Laura Williams—LL Design, www.MemoryGlassArt.com, laura34275@gmail.com. 942 223-9109.


dancing peacock mapleHigh Country Nursery


Acer japonicum ‘Aconitifolium’ (Dancing Peacock), must be spectacular in full autumn “plumage”, when showing off its scarlet and orange foliage.

japmaple.com.


green wind chimesWindy Mountain Chimes, Asheville NC


Stained glass of the audible kind, including wind chimes in red-white-and-blue, appropriate for this Memorial Day weekend.

I bought one in peaceful shades of green, with glass and beads hanging from an old horse shoe.

Mother enjoys the nice sound when we “accidentally” bump into it, where it temporarily hangs on the kitchen wall.

Denise Parlier, mtnchimesandcrafts@gmail.com. 828 667-3518.


J & B Herb & Plant Farm, Inc., Roxboro NC


Bay laurel! I had just run out of the last of the dried bay leaves, so I bought a nice, full plant. Make sure you’re buying Laurus nobilis for cooking, since other similar laurels are toxic if ingested. J & B carries a wide variety of organically grown herbs, vegetables, and scented geraniums.

On my way back to the truck, I bought a pot of Origanum ‘Compactum, a marjoram with velvety leaves and wonderfully aromatic fragrance. Although both of these herbs are hardy to zone 8 or in a protected microclimate here in zone 7b, I lost the two that I had a few years ago. But I’m not going to take the chance again, and will keep these potted herbs outside in the summer and inside during the coldest parts of winter.

www.facebook.com/JandBHerbFarm.


Bella Bonsai


Many species of potted bonsai…tiny-leaved variegated Serissa, variegated Schefflera arboricola, dwarf Pomegranate (with fruit), citrus plants (with fruits), Fukien tea. But the showstopper is the old Yaupon Holly that had been cut back as a mature plant, sprouting above a magically, fantastically gnarled trunk (photographs, below).

Larry Morton, BellaBonsaiNursery.com, bellabonsainursery@gmail.com.


Hendersonville Bee City


gulf fritillary butterfly

Female gulf fritillary butterfly.

“Celebrate Pollinator Month by learning about how bees, birds, and butterflies are crucial to our native plant habitats, local agriculture and the health of our communities.”

You’ve come to the right place, to this display, if you want to know anything about bees. Information on an initiative to repopulate the environment with bees and other pollinators can be found at Hendersonville.gov/bee-city, with a month-long calendar of events. June is, after all, Pollinator Month. Proceeds from plant sales go toward painting a mural on one of the Hendersonville buildings. I bought a perennial Passiflora (photo, right, with one of the dozens of gulf fritillary butterflies that laid eggs on the vine).

Hendersonville.gov/bee-city.


Muddy Llama Pottery Studio, Zirconia NC


“From Earth to Art”

Among the collection of bowls, mugs, vases, and (I had to ask) sponge racks, some had salamander handles and real leaf impressions. Most of their pottery is sold through retail stores.


Cathey Chet, muddyllamapottery@yahoo.com.  828 674-2671.


Canvas bags, hats; shows in Hendersonville, WaynesvilleAll Things Canvas, Bryson City NC


“Hats—made of 100% cotton duck. Bags—made of 100% Acrylic Sunbrella®. Highly resistant to UV rays, water and mildew.”

Well-made, and in nice colors, these items will last a long time.

Jan Kleinrath, www.jansallthingscanvas.com, info@jansallthingscanvas.com. 828 788-1767.


Preston Montague


“Artist, Educator, Landscape Designer”

I bought a card, but I doubt if it will be mailed away. It shows a flurry of monarch butterflies. Meticulously detailed natural elements in all of his artwork, and in the display—mosses, bracket fungi, and a cicada!


Preston Montague, carolinanaturalist.com, naturalistnc@gmail.com. 336 558-6137.


The Silk Thread, Franklinton NC


“Eco printing. I gather leaves, plants and flowers and through a natural process, transpose Nature’s actual colors, designs and faux textures onto pure silk in my NC Studio.”

Silk and raw silk, naturally imprinted with leaves, moss, and even pecans! Treat yourself to something unique and beautiful. Clothing, purses, scarves. Exquisite compositions.

Theresa Brown, theresa@thesilkthread.com. 919 880-7431.


   *    *    *    *    *    *    *    *    *


yaupon holly at Hendersonville Garden Jubilee

A woman sitting under a huge tree?? Actually, it’s the Yaupon holly bonsai, from Bella Bonsai, less than 2 feet tall.


Hendersonville Garden Jubilee 2019


oaklead hydrangea, Hendersonville garden show

Oakleaf hydrangea in one of the large streetside planters.

This show was sponsored by Lowe’s, “Our State” Magazine, and the city of Hendersonville NC. The schedule included 5 presentations each day, with topics ranging from plants for shade, unique trees, native plants, pruning, and lawns to native bees, composting, mushroom logs, starting a veggie garden, and joy in gardening.

Thank goodness for the shade cast by trees up and down the street. Lots of shrubs and perennials were in bloom, adding to this town’s reputation for bringing ambiance to the busy downtown shopping district. “Leave your pets comfortably at home” during show hours.

There were some food vendors, and Hershey’s ice cream, whose chocolate chip mint hit the spot! And, of course, the local shops and restaurants were ready and waiting for visitors.

VisitHendersonvilleNC.org. 800 828-4244.


Thanks to all the participants, the sponsors, and the crowds for making this another successful event. Great show, Hendersonville!


The 2020 Hendersonville Garden Jubilee


***Update*** 5/1/2020: The 2020 Garden Jubilee will have a different look this year, in order to enforce hygiene and social distancing required by state and federal authorities.

So, in 2020, the festival will take place from May 22 through May 25, from 9 to 5, but not in downtown Hendersonville. Instead, booths will be clustered at various nurseries and other sites in the area.

***Update*** 5/22/2020: This link will give you updated information and a list of participants. In 2020, downtown Hendersonville was awarded Accredited Main Street America recognition for maintaining a vibrant economic community in their historic downtown.

Until the vaccines come along, we need to follow such practices so fewer of us become casualties. My best wishes for your good health, and I’ll see you in Hendersonville…or thereabouts!


Return to the top

Tips For Planting a Wire Hanging Basket


2019


Tips For Planting a Wire Hanging Basket


hanging basket, zinnia, calibrachoa, yellow, purple

The 16″ wire hanging basket with purple calibrachoa, yellow and white zinnias, and yellow mecardonia.


Now that the weather has settled, it’s time to plant the hanging basket. Okay, it’s 43°F in Helena, Montana, so you’ll have to wait a while. But here in Charlotte, it’s already 90°. We’ve had beautiful spring weather for weeks now, and gardens all over town are showing new life.

It is confirmed once again that I could never move back to a colder winter climate. Picking tomatoes here in early June is commonplace rather than a rarity. In the past, I’ve lived where a ripe tomato for a Fourth of July barbecue won neighborhood kudos! It’s not the summer heat I look forward to but rather the longer growing season and greens that grow through the winter.

I bought several pots of annuals two weeks ago but haven’t planted them. The plan is to refresh the wire hanging basket, and to fill the front beds with color. Complicating matters, though, is when the new siding will be installed. Our building has been rescheduled to a much earlier date, so no gardening will take place until the work has been completed.


A Few Preliminaries


Can I Reuse Old Potting Soil In the New Hanging Basket?

The hanging basket that held blooming violas and a few perennials over the winter will be emptied. The old soil, which still has value in the garden, will be dug into one of the flower beds. Organic components (peat moss and fine pine bark, primarily) break down, enriching the soil.

Used potting soil can be broken up and thrown under the shrubs or topdressed in a thin layer on the lawn. More options include adding it to the compost pile and using it in the backfill when planting trees and shrubs. I never throw away old potting soil, and, of course, I’ll save the perennials. But for new hanging baskets, use fresh potting soil for the best results.

Soil in large planters can be used again if it still has good tilth and hasn’t been waterlogged. It’s good idea, however, to replace the top third of soil. If diseased plants grew in it, I would discard the soil.


Refresh/Reuse

paint colors

If the metal frame looks a bit tattered, now is the time to clean and dry it. Buy a can of spray paint, in the color of your choice, and freshen it up. Look for one that will stick to the finish on the frame. Some are metal; others are vinyl-covered metal.

Maybe your mother the artist has some ideas about color. Jazz it up a little in a shady spot, or color-coordinate the paint color with the flower colors. If you prefer classic black or bright white, those are fine, too. By the way, wire hanging baskets are also called “English Garden” baskets.

For a frame that looks only a little scuffed, try using a solution of horticultural oil (more concentrated than you would use for insects) wiped over the frame. I’ve used the oil to freshen used plastic pots, which often looked like new again. Be careful—horticultural oil makes surfaces slippery.


Line the Liner

Wire baskets are available with reinforced green sheet moss, but more often with a coconut fiber liner. I’ve used both, and have found the coco liners to be more durable, although I prefer the color of the moss.

If you need a new liner, garden centers stock both pre-formed liners and bulk rolls that can be cut to the length desired. Before shopping, measure the curve of your hanging basket, adding a bit extra, for a proper fit.

A Simple Trick

Here’s a trick I’ve used for many years: line the inside of the coco liner with a sheet of plastic. Reuse an empty mulch or potting soil bag, cut so it extends above the rim. The excess will be trimmed after planting. Now, punch several holes around the bottom third of the plastic to allow for drainage. In hot or dry climates, consider leaving the bottom 1″ to 1 1/2″ of the plastic intact. The soil and plants will absorb water that collects in the reservoir.

coconut

Coconut: source of coir for potting soils and coco liners for baskets.

This offers a few advantages. First, the plastic prevents soil contact with the coco fiber, delaying decomposition. A thick liner, made from coconut husks, will last an additional year or two.

Second, plastic prevents rapid evaporation of moisture from the soil. Plastic stops the hot dry wind from reaching the soil.

Third, plastic slows down infiltration of icy cold wind, delaying chilling of the soil in winter combinations.

And, fourth, soil won’t be lost through the thin, loosely woven spots in the liner. See if you can double up on the coco liner in those spots. And face the dark side of the plastic, if there is one, outward. This is less conspicuous than a bright yellow beacon peering out from the between the fibers.

Other Options

Perhaps you have other materials hanging around the shed that can substitute for a coco liner. A few layers of burlap, landscape fabric, an old blanket, or that unused fiber grow pot could work for this growing season. Still, I would line it with a plastic sheet for the reasons stated above.


wire basket, fabric liner

A repurposed grow pot, now used as a liner for the hanging basket.


Where To Place the Hanging Basket


bracket for hanging basket

Notice how weight is distributed along the vertical part on the left, pushing bracket against the wall.


Have you decided where the shepherd’s hook will be placed? Have you already installed a sturdy bracket on the fence or deck post? Well-constructed wrought iron is costly, but it lasts a long time. Look for the thicker, heavier hooks and brackets. Visit the hardware store for special anchors and instructions if attaching the bracket to a brick surface.

Make sure the bracket or the hook is large enough to accommodate your hanging basket. This isn’t a concern with smaller baskets but is often overlooked for the large ones. Hardware is available in different sizes, so measure first, or you might find that the large hanging basket you want to use won’t fit onto the shepherd’s hook you already have.

Sometimes it’s hard to determine whether the vertical part of the bracket should be placed above or below the horizontal part. Securing the vertical side below the horizontal arm, as in the image above, helps direct the force against the wall. The bracket is less likely to pull away from the wall or post.


Sun Or Shade?


House, tree in front


Pay close attention to the number of hours of direct sunlight the chosen location will receive. As the sun changes its path across the sky from one month to the next, the amount of sunlight will vary. A location near the front door might get lots of sun in April but could be in almost full shade once the trees leaf out.

Don’t expect a blazing burst of color from plants that need 7 or 8 hours of sun if you place the hanging basket under the semi-shady deck. Plant tags often erroneously indicate “partial sun/full sun” for plants that really need full sun. Partial sun to us gardeners, by the way, is 4 hours of sun.

Ask salespeople at the garden center for advice about light requirements. Petunia, verbena, calibrachoa, lantana, zinnia, and scaevola need full sun. Lobelia, bacopa, browallia, torenia, and some of the begonias will do well in morning sun and bright afternoon shade in this hot climate. Caladium, anthurium, ‘Non-Stop’ tuberous begonias, ferns, and foliage plants can take various levels of shade.


Choosing Plants For Your Hanging Basket


Plants have upright, mounding, or trailing habits. For smaller baskets, perhaps only mounding and trailing plants will fit. If single-variety monoculture is your preference (for example, a 12″ pot of purple Wave petunias or a 10″ pot of sky blue lobelias), go for it.


Geranium flower.


If you want a pot of zonal geraniums, avoid hanging it so high that all you see is the bottoms of the leaves and the pot. Place it with the flowers at eye level or enhance it with some trailing vinca vine and a few mounding white or yellow calibrachoas. Adding a trailing element creates greater interest.

salvia black and bloom

Stately Salvia ‘Black and Bloom’ attracts hummingbirds, butterflies, and bees.

The 16″ wire hanging basket, for the shepherd’s hook in the front garden, can hold 6 to 10 plants. A large perennial Salvia ‘Black and Bloom’ (photo, right; hummingbirds visit every morning!) grows in the bed behind the basket, next to a yellow-tipped arborvitae.

So, the color scheme will include blue ‘Laguna’ (heat-tolerant) Lobelia, purple calibrachoa (million bells, a small cousin of petunia), little yellow Mecardonia, and a few golden yellow and white (powdery mildew resistant) Zinnia angustifolia.

A Heuchera with orange-ish foliage might remain in the pot, if the color plays nicely with others. (A passionflower I had bought earlier in Hendersonville survived the summer in a tiny 2″ pot.)

I use this color combination in the fall, sometimes, when planting violas. It borrows from both the warm and the cool color palettes. When in doubt, combine colors next to each other on the color wheel (for example, red-orange-yellow [warm colors], or pink-blue-purple [cool colors]) or opposite each other (red-green, blue-orange, purple-yellow). Adding white calms everything down when using several colors.

(***Update***: While the annuals awaited completion of the siding installation, a few of them perished. It happens. I plugged the survivors into the basket and fertilized them. Six weeks later, you can see how nicely it filled out. That’s the basket, at the top of this article. And I planted the passionflower, a vigorous vine, in the garden for the gulf fritillary butterflies. Autumn, 2019.)


zinnia ang.

Zinnia angustifolia ‘Star’ series, disease resistant.


Consider These Color Combinations:

  • red-white
  • yellow-white. These first two options make clean, crisp combinations.
  • chartreuse, green, orange, and white look good together
  • shades of yellow-orange-cream
  • blue-yellow-white
  • red-white-yellow
  • silver or gray and shades of pink
  • purple-blue-silver-pink-white
  • lavender-purple-white
  • warm maroon-peach-coral-cream-sky blue

Generally, I avoid using gray/silver with pale yellow. Orange and pink together don’t do anything for me.

We tend to gravitate toward our favorite colors, so try adding varieties you haven’t tried before. See if you can introduce foliage color (caladium, coleus, lysimachia, heuchera, sweet potato vine, begonia) that echoes the color of a flower.

A contrast between flower and foliage forms might also bring greater interest. Adding fine foliage or delicate flowers (nierembergia, diascia, bacopa, lobelia, alyssum, euphorbia ‘Diamond Frost’, mondo grass) contrasts effectively with bolder textures.


Headings

Page 1: Tips For Planting a Wire Hanging Basket, A Few Preliminaries (Can I Reuse Old Potting Soil In the New Hanging Basket?, Refresh/Reuse, Line the Liner), Where To Place the Hanging Basket (Sun Or Shade?), and Choosing Plants For Your Hanging Basket (Consider These Color Combinations)

Page 2: Ready to Start?, Time To Play In the “Dirt”, Timed-Release Fertilizer, and Maintaining the Hanging Basket (Water, Soluble Fertilizer, Deadheading, New Varieties, Pruning Your Hanging Basket, Insects and Spider Mites, Slugs, Deer!)

Return to the top

Whole Bloomin’ Thing Festival: A Garden Show


2019


Last Saturday, the Frog Level Association held its annual “Whole Bloomin’ Thing Festival” on the streets of downtown Waynesville, North Carolina. When a leisurely road trip, the need to explore, and a garden show align in one day, I’m on my way!


whole bloomin' thing garden show, waynesville nc

Geranium baskets and annuals.


Unfortunately, the weather forecast did not include sunshine. But those of us who have sold at garden shows such as this one recall that most of them are held Rain or Shine. (And you can guess how the weather affects revenues.)

Okay, that did it; I was determined to go if only to spend a few dollars to help out some of the vendors. Plus, I needed a gift for Mother on Sunday, Mother’s Day.


Frog Level?


Frog Level mural near the garden show, Waynesville NC

The mural in Frog Level.


Colonel Robert Love, a Revolutionary War soldier, founded Waynesville in 1810. He donated land for public buildings, and named the town after his commander during the war, General “Mad” Anthony Wayne. Today, the town is the largest in the state west of Asheville, with about 10,000 residents. It sits nestled between the Great Smoky and the Blue Ridge Mountains, at about 2700′ elevation.

The low-lying area near Richland Creek was sometimes prone to flooding, thus the name, Frog Level. This section had some commercial enterprises in the 1800’s, and the town was incorporated in 1871. But, when the railroad came through in 1884, more development took place and opened access to the west.

KW Edible Landscaping Nursery at the garden show

KW Edible Landscaping Nursery.

As the town grew, businesses opened uphill from Frog Level. The area deteriorated several decades ago, until new shops and restaurants revitalized it. In 2003, the National Register of Historic Places recognized the Frog Level Historic District. This is a great spot for garden shows and street festivals, with lots of restaurants and independent shops to visit.

In 2018, Waynesville received a “Main Street America” designation by The National Main Street Center. The town is committed to “preservation-based economic development and community revitalization”. I hope to find one of these towns, maybe down the slope a bit, within the next few years to settle in.

On April 30, 2019, Riley Howell, a UNC Charlotte student, lost his life when he tackled the gunman who killed another student. This brave act detained the suspect, allowing time for the authorities to move in and capture him. Riley was from Waynesville.


the whole bloomin thing garden festival, a rainy day at the garden show

The Hickory Nut.


Back To the Garden Show


hummingbird feeders, moongirlglass at garden show

Moongirlglass hummingbird feeders.

About 75 vendors registered for the garden show, and there were surprisingly few vacant spaces. Kudos to those who braved torrential rainstorms! An umbrella wasn’t enough protection on a day like this, but I found a full-length plastic poncho in the back of the truck. Luckily, the temperatures were in the 60’s.

It rained non-stop. Everyone could hear the familiar sound of pop-up tent canopies being emptied of their catch. Some huddled under cover, enclosed by waterproof sides that kept them almost dry. Others openly defied inclement conditions, and contentedly waited for customers. That’s the spirit!

The Mother’s Day flowering baskets and big geraniums didn’t seem to mind. The music, though, was cancelled.

There were wood crafters, jewelers, artists, potters, and several plant places. I chatted with a woman selling a friend’s hummingbird feeders, glassware, and her plants.

The first booth I visited at the garden show, All Things Canvas, had really nice bags and hand-painted sunhats. Jan was also scheduled for the Hendersonville Garden Jubilee on Memorial Day weekend.

jeanette franich jewelry, the whole bloomin thing garden show

Jewelry at Janette Franich’s booth.

Janette Franich had very nicely crafted jewelry. I tend not to wear jewelry, but if I did, there were some tiny bird’s eggs in a silver nest hanging on a fine chain that might have tempted me.

KW Edible Landscaping Nursery, from Stokes County NC, sold trees and shrubs that could be incorporated into home landscapes. Not only ornamental, but also edible!

And, speaking of edibles, there were a few food trucks on site.


Can’t Leave Empty-Handed


I bought a hand-made pot from Milton Mugs. My mother liked the purple and blue colors and especially the attached saucer! 

The photograph at the top was the booth (vendor declined credit) where I bought a few plants, including ‘Vancouver Centennial’ stellar geranium, ‘Berggarten’ sage, and a Sempervivum (Hens and chicks) called ‘Oddity from Albidum’, with rolled leaves.


Hog Back Ridge Herb Farm, from Spring Creek NC, had lots of tomato varieties that I’d never heard of. A small cherry tomato called ‘Blueberry’ caught my eye. Although I don’t have any room for another tomato plant, I am determined to see this one fruit, even if that means another potted tomato on the deck. (***Update***: ‘Blueberry’ had rich, spicy tomato flavor. 2/2021)

The Hickory Nut (E. Main St., Chimney Rock NC) displayed metal garden art and plants, including herbs, perennials, and annuals. They had large beautiful basil plants—‘Genovese’ and the lettuce-leaf  ‘Valentino’ among them.

Because of the weather, many of the items the vendors had planned to bring with them had to be left at home or in their stores.

So, the next time a garden show visits your town, or the next town over, support your local economy and buy something there…especially if it’s raining.


Return to the top

Growing Basil In Pots: How and Why

2019

Updated 3/5/2024


Why Should We Grow Basil in Pots?


Valentino basil.

‘Valentino’, a lettuce leaf basil, normally is light green in color.


This year, I’ll grow basil in pots. It’s too early to grow basil outdoors, but I am starting seeds now for early sales (transplants and cut herbs) at the farmers’ markets.

Although summer thunderstorms are most welcome after a dry patch, that’s when Basil Downy Mildew becomes a real problem. In this article, I’ll describe the disease and offer tips for growing perfect basil once again.

Basil Downy Mildew was first described in Uganda in the 1930’s. It has been a serious problem in the United States since 2007, when it first appeared in Florida. The disease now has appeared in most of the U.S. and elsewhere around the globe. I lived in Maryland at the time of the first outbreak and was selling plants at farmers’ markets and garden shows.


How To Recognize Basil Downy Mildew


The leaves of affected plants become speckled in pale green or yellowish blotches, mostly bordered by the main veins. Eventually, entire leaves turn pale green.


A coating of grayish felt, visible at dawn, covers the bottom of the leaf. Soon afterward, small black dots appear. Those black dots (sporangia) released their spores, which will infect other basil plants. The plant looks sickly, as if it needs fertilizer…or something…and never again has that healthy basil look.


Do you recognize some of these symptoms? These characteristics are diagnostic for Basil Downy Mildew. (***Update***: Photograph above, left, was taken at a Charlotte garden center on May 20, 2019. BDM arrived early that year.)

Spores float on air currents, usually migrating north from infected southern-grown plants. They also can be carried on seeds or spread from overwintering local greenhouse plants.

Humidity that rises higher than 85% for a few hours is sufficient to initiate this infection on susceptible varieties. Other water molds affect coleus and seed-grown impatiens, but only basil (Ocimum basilicum) can catch this one. And its name is Peronospora belbahrii.

Can we do something for our beloved basil?…


Easy Solution: Basil In Pots


weather station…Yes we can! Growing basil in pots is the answer! Take the pots indoors in rainy weather to prevent spores from germinating.

But that’s not the only time basil is susceptible to this disease. Nighttime humidity levels can rise quite high even on a day that was perfectly clear and comfortable. When the temperature drops through the night, the lowest temperature usually occurs right around dawn. When the temperature drops to its lowest measurement, the relative humidity increases to the highest level.

Check your local weather report early in the morning. Look for the relative humidity measurement, which can be 85% or 95% at dawn. Rain doesn’t even have to be in the forecast. With spores in the air and basil exposed to high relative humidity, it will become infected. The spores need a few hours of these conditions to germinate. Fortunately, normal indoor conditions never come close to those levels of humidity.

Every year that I moved them indoors at night, the potted basil plants remained BDM free. And almost every year I grew basil outside, BDM was inevitable.

None of the relatively non-toxic sprays I tested worked well enough. But I prefer to not spray herbs at all. Some cultivars introduced over the past several years are recommended as having “some tolerance to Basil Downy Mildew”…but they still can develop the disease in humid areas.


New Varieties

Fortunately, new varieties promise “high tolerance to BDM”. Rutgers University and Van Drunen Farms developed resistant varieties that are available to growers, and, more recently, to retail customers. A huge demand for production of basil downy mildew resistant varieties is driving the research.

(***Update***: Basil ‘Obsession’, from Rutgers, has grown extremely well this summer, and with no BDM. I’ll take some cuttings for winter pots. Several seed suppliers stock these new resistant varieties, but demand might exceed supply, so order early. 9/2/2021)


Long-Time Favorite Herb


Since it was my customers’ favorite herb, I had to figure out a way to grow basil without using chemicals. I couldn’t afford to lose my best-seller. At that time, I started many varieties of basil from seed under fluorescent lights in the basement. They grew larger outside, after transplanting (2½”, 3½”, 4½” pots, and some that were larger), until they were sold at the markets.

tomato basil salad

Tomato-basil salad.

Knowing that high humidity provided the right conditions for this infection, I moved all the basil flats into the garage at night. Every day! Two small table fans kept the air moving around the plants, so the basil never caught BDM when handled this way.

My business infrastructure was very simple and did not include greenhouse space at that time. During the height of the market season, I grew several dozen flats of basil in various stages of growth at any one time.

These tips were passed along to my customers, who were glad to know how to stay ahead of the problem.

So, I always grow basil in pots, and take them indoors when the humidity is expected to rise high enough to cause trouble. It is a commitment, but the reward is freshly picked luscious basil for summer salads and lasagna. The disease often appears by mid- to late summer, but it can show up earlier.


mini purple basil

‘Miniature Purple’ basil for salads or trained as a tiny topiary standard.


Varieties Included:

  • sweet basil: ‘Genovese’, ‘Genovese Compact’, ‘Fino Verde’, ‘Italian Large Leaf’, ‘Aroma 2’, ‘Nufar’, ‘Marseillais Dwarf’, ‘Amethyst’, ‘Miniature Purple’, and others
  • lettuce-leaf sweet basil: ‘Napoletano’, ‘Tuscany’, ‘Valentino’
  • Greek basil: ‘Yevani’, ‘Minette’, and 2 ‘Columnar’ varieties
  • lemon basil: ‘Mrs. Burns Lemon’
  • Thai basil: ‘Siam Queen’, ‘Sweet Thai’
  • ‘Magical Michael’
  • lime (good with cucumbers)
  • holy: ‘Kapoor tulsi’ (O. americanum v. pilosum)
  • ‘Mexican Spice’
  • ‘African Blue’ (an ornamental basil and an excellent pollinator magnet)
  • ‘Cardinal’ (a cinnamon type; this one and the previous 3 basils have some or good resistance to BDM)

The few that showed any resistance to the disease, however, were not the varieties we prefer in the kitchen.

It wasn’t long before basil started disappearing from other growers’ booths at the markets. So, it was worth the effort to keep basil alive and growing.


Basil In Pots: Potting Up


Start with clean materials. If you’re reusing a 12″ wide pot, clean it out very well, including all the old soil. Don’t discard it, though; throw it under the shrubs or dig it into the flower garden. Even used potting soil has value in the garden. A pot this size will accommodate several stems of basil for the entire growing season.

Wipe down the inside and the outside of the pot with a 10% bleach solution. Allow it to sit for a few minutes before rinsing thoroughly.

Basil is susceptible to several air-, water-, and soil-borne pathogens. That’s why it’s important to begin with clean materials.


Shopping For Basil Transplants

Look for rich green uniform coloring in the foliage. Familiarize yourself with the normal coloring for the varieties you’re interested in growing. For example, ‘Siam Queen’ Thai basil has dark green foliage, while lettuce-leaf basils (top of page) have light green puckered leaves.

Avoid wilted plants and those with brown edges, yellow lower leaves, pale green foliage, splotchy surfaces of leaves, and black spotting on the stems or leaves. Turn the leaves over and look for the tiny black dots of BDM. Inspect purple-leaved varieties carefully. Avoid buying basil that has started flowering.

Underpotted (tightly potbound) and underfertilized basil is stressed and will not last all season. Leaves that are off-color taste awful!

Look for small pots (2½-4½”) with 2 or 3 seedlings in the pot. The plants should have foliage down to the soil or close to it.


Growing Basil From Seed

If you can’t find the varieties you’d like to grow, consider starting them from seed. This gives you an opportunity to try new flavors—maybe lemon or lime, or anise-flavored Thai basil.

Seeds that are kept cool and dry remain viable for a few years, so you won’t have to germinate the entire packet…unless you want to.


lemon basil seedlings in pots

Lemon basil sown in 4″ pots.


Pots and Seedling Mix

Have market packs or 4″ pots cleaned and ready. Use the same bleach solution recommended for larger pots, described above.

New peat pots are an option, and can be planted pot and all, without disturbance. Always pinch the bottom open in a few places before transplanting peat pots. This allows roots to quickly grow into the potting soil. Peel off the rim of the pot protruding above the soil level to prevent water from wicking away to the atmosphere. Roots will soon grow through the peat pot in moist soil.

Use pasteurized seedling mix. Most pathogens have been destroyed and its finer particles make better contact with the seeds. Fill containers with the seedling mix to within 1/2″ of the rim, tamping lightly. Fresh, fine-grained, high quality potting soil also works well.

Water gently, using lukewarm (around 85° F) water. Label the pots with the varieties of basil you’re growing and the date—for example, “Sweet basil ‘Genovese Compact’, 4/20/19”. Labels are easily fashioned from a clean, repurposed plastic milk jug.

Now, make a small depression in the center of the pot, about 1/4″ deep. Drop in a few seeds. Or make a few separate small depressions in the pot and drop a seed in each one. The latter is my preferred method; the separation gives each stem a little breathing room.

Cover with 1/4″ of soil. An exception is Thai Basil, which prefers to be sown on the surface of the soil and not covered.

Water

When moistened, basil seeds develop a grayish-white mucilaginous coating. This is normal. The gel holds water next to the seeds and it might attract insects, which help distribute seeds in the wild. And the stickiness helps seeds adhere to the soil.

Place the pots in a flat or a tray and give them warm sun indoors. Basil germinates within a week in damp soil at temperatures in the 70’s and 80’s F. If it’s too chilly, you can place the pots of basil on a heat mat. Seeds won’t germinate and young seedlings will fail in cold soil.

Keep the soil damp to moist but not wet. Never let water collect in the tray. Use lukewarm water, and water gently so the seeds won’t become dislodged. You could water from the bottom but pour off the excess once the soil surface has moistened.

Now That They’re Germinating

As soon as the seeds germinate, give them at least 6 hours of direct sunlight. This ensures shorter sturdy stems that are less susceptible to damping off disease. Use artificial light (see “Maintenance”, page 2) if you don’t have sunny windows.

stretching seedlings

Seedlings (not basil) stretching due to insufficient light.

With favorable outdoor conditions, young seedlings can be placed outside for at least part of the day. Don’t expose them to temperatures below 70°, or to wind or full hot sun if they have been indoors for a while. Check the weather forecast.

Basil needs warmer temperatures than most herbs and vegetables. Even if it’s frost-free and the garden is ready, don’t be tempted to plant basil until the soil has warmed up. Basil will either sit still or deteriorate in cool or wet soil.

Damping off is a fungal disease that appears as a narrowed, light brown section of the stem that causes the stem to bend over, killing the seedling. Avoid overly wet and humid conditions, stagnant air, low light, and cold temperatures. Young seedlings are more susceptible to damping off than older plants.


Return to the top

Headings

Page 1: Why Should We Grow Basil In Pots?, How To Recognize Basil Downy Mildew, Easy Solution: Basil In Pots (New Varieties), Long-Time Favorite Herb (Varieties Included), and Basil In Pots: Potting Up (Shopping for Basil Transplants, Growing Basil from Seed)

Page 2: Repotting Basil In Pots (The Soil, Score the Root Ball, Add Plants, A Small Pot of Dwarf Basil), Maintenance For Basil In Pots (Light For Basil In Pots, Temperature, Watering Basil In Pots, Dealing With Slugs and Snails (Caterpillars), Fertilizer For Basil In Pots, Harvesting and Hormones), and About That Basil Downy Mildew (Growing Basil Outdoors)

Lavender: History and How To Grow It

2019


Lavender’s Long History


old lavender


B.C.


For many centuries, lavender has enjoyed popularity for its alluring fragrance and for its medicinal qualities. Lavandula dentata was first cultivated on the Arabian peninsula, and other species spread from Greece across Europe. Lavender species might also have originated in the Cape Verde Islands and the Canary Islands off the west coast of Africa.

Thousands of years ago, Egyptians and Phoenicians used the herb in perfumes and during mummification. When Egyptian King Tutankhamen’s (1341-1323 B.C.) tomb was opened by Howard Carter in 1922, claims were made that the scent of lavender could be detected.


Greek islands


Greek traders introduced lavender around 600 B.C. to the Hyères Islands, off the southern coast of France, and to Europe from there. Ancient Greeks used it for insomnia and backache, and in public baths.

CleopatraOther healing qualities of lavender were recorded in the 3rd century B.C., when Greek physician/philosopher Theophrastus (c. 372-287 B.C.) wrote of them in Concerning Odours.

Cleopatra (69-30 B.C.), Queen of Egypt from 47-30 B.C., was able to temporarily preserve her kingdom from Roman rule. As the story goes, she used lavender to win the love of Roman generals Julius Caesar (100-44 B.C.) and Mark Antony (83-30 B.C.).

Upon defeat by Augustus Caesar (63 B.C.-14 A.D., first Roman emperor from 27 B.C.-14 A.D., and heir of Julius Caesar) and Cleopatra’s death by suicide, Egypt then became a Roman province.


Early A.D.


Mary is said to have used lavender when Jesus (4 B.C.-30 or 33 A.D.) was an infant and again when he was crucified. Both the Bible and, later, William Shakespeare’s (1564-1616) work The Winter’s Tale, refer to the herb as “spikenard”. Ancient Greeks called lavender “nard” or “nardus”, apparently after Naarda, a city in Syria where it was sold.

Pliny the Elder (23-79), Roman naturalist and encyclopedist, described relief from “women’s problems” attributed to lavender. His great work, Naturalis Historiae, is composed of 37 volumes, describing natural sciences from agriculture to mineralogy to zoology. Dioscorides, the Greek physician under Nero (37-68), collected herbs and, in 77, wrote about their uses in De Materia Medica.

When the Romans invaded England in 43, they used the lavender they brought with them for bathing, cooking, and giving scent to the air. The Romans and the early French believed in its antiseptic properties, and used it to treat infections and to heal wounds.

It is no surprise, then, that lavender derives from the Latin root lavare, meaning “to wash”. And when the Romans departed England around 410, this plant was left behind, growing in gardens around monasteries.


It’s Debatable

Much information online refers to the introduction of lavender to England as late as the 16th century. But as important as this herb was in Roman culture, and because other references claim that they did indeed bring it with them when they invaded England, I will leave it there…unless I find information that clarifies the debate.


From the Middle Ages Forward


old stone castle


During the Dark Ages, from the late 400’s to 1100, lavender wasn’t used much outside the monasteries. An edict issued by the Holy Roman Empire in 812 ordered monks to grow vegetables, medicinal herbs, trees, and flowers. Lavender was grown at Merton Abbey, near the center of production in Mitcham, in Surrey, England. According to records from 1301, Merton Priory sold lavender to raise money for King Edward I (1239-1307).

Medieval and Renaissance women who worked by taking in laundry used the herb to scent it when washing and also when drying the laundry on top of lavender shrubs. In 12th century England, washerwomen using the herb in this manner were called “lavenders”. Incidentally, the word “laundry” derives from the same root, the Latin lavare.

Monks cultivated it in monasteries as a medicinal herb during the Middle Ages (in European history, approximately 500-1350). A German nun named Hildegard of Bingen (1098-1179) used lavender water with vodka and gin for relief from migraine. And French King Charles VI (1368-1422) slept with lavender-filled pillows.


From the Renaissance


Fit For a Queen Or a King


King Henry VIII

King Henry VIII.


English King Henry VIII (1491-1547) destroyed the stone monasteries and their medicinal herb gardens in the 1500’s during the religious purges. Because this plant is not native to the area, remaining specimens of lavender were found primarily in private gardens.

King Henry’s daughter (with Anne Boleyn), Queen Elizabeth I (1533-1603), enjoyed fresh flowers every day and lavender conserve, a type of jam. She sought relief from migraines by drinking an herbal tisanne containing lavender.

King Louis XIV (1638-1715) of France bathed in scented water. Around this time, lavender was used to treat headaches, nervous conditions, insect bites, mad dogs, and snake bites. And if people needed their passions stirred, they just tied some stems to the bed post!


And For the Rest Of Us

Merchants traveling along the Silk Road, from central Asia to Europe, inadvertently carried the Black Death with them. Bubonic plague spread across Europe from 1346 to the early 1350’s, killing one-third to possibly 60% of the entire population.

Infected fleas on rats transmitted the Yersinia pestis bacterium to people initially through flea bites. But modern researchers now think transmission was airborne, particularly among crowded populations. Outbreaks of the plague were treated with lavender as an antiseptic, but its efficacy is questionable, especially against such a virulent microbe.

Lavender Makes Good Business Scents

Sixteenth century glove makers in Grasse, France, used lavender to scent their wares. I can’t judge the accuracy of the claim, but it was said that those who made or wore the gloves were spared the agony of plague and cholera.


lavender soap


In the 1600’s, the Shaker community was the first to commercially cultivate lavender in the area now known as the United States and Canada. They used it to treat hyperactivity, flatulence, insomnia, and to fight bacterial and fungal infections. Products sold in distant markets included candles, cleaning products, soaps, and treatments for bee stings, migraines, burns, restless sleep, and skittish horses.

In another European epidemic in 1664-5, many died from the Great Plague. Lavender sold for high prices and was in demand for its supposed ability to ward off infection and to repel insects. People wore bundles of the herb on their wrists. Burglars of the ill took precautions by washing in Four Thieves Vinegar, containing lavender, garlic, and vinegar, to prevent infection. Criminals who were caught and sentenced to digging graves also washed in the vinegar.

Seventeenth century herbalists John Gerard and Nicholas Culpeper wrote about the benefits of lavender. Gerard prescribed it for palsy. A few decades later, in 1652, Culpeper recommended it, in The English Physician, “for all the grief and pains of the head”.

Ornamental Use

In 17th century Ireland, lavender was planted as a low clipped lawn. Later, in the mid 1860’s in County Down, Sir Arthur Rawdon’s Moira Castle maintained an acre of lavender lawn. John Reid, in 1766, recommended lavender as an ornamental walkway edging in The Scots Gardener.


The Victorian Era


Queen Victoria

Queen Victoria.


Both Queen Victoria and Queen Elizabeth I, hundreds of years before her, used herbal products supplied by Yardley and Company of London.

Britain’s Queen Victoria (1819-1901) popularized lavender from its use as a deodorant and floor and furniture cleaners. The Queen appointed Miss Sarah Sprules “Purvey of Lavender Essence to the Queen” and used it everywhere and as a cure-all.

lavender productsAs a strewing herb on floors, it gave out a fresh scent when walked upon. Women sold bundles of lavender, called Tussie mussies, on the city streets. The scent became synonymous with purity and cleanliness.

In 19th century Provence, France, lavender treated dizziness, nerves, convulsions, stomach ailments, infections, palsy, and repelled fleas and other insects.

Lavender is still used in dried flower arrangements, pot pourri (flowers and buds), and sachets (for fragrance and to deter moths). Bath products, candles, and perfumes sold today attest to lavender’s enduring qualities.


Too Much Lavender?


Lavender’s overuse contributed, consequently, to loss of its popularity in the early 1900’s. It also became associated with “old ladies”, although during World War I, medics dressed soldiers’ wounds with it.

And then, in the 1920’s, French perfumer Rene Gattefosse severely burned his arm. He immediately plunged it into a vat of lavender oil, the story goes, and experienced immediate pain relief and, according to some, rapid healing. His book, Aromatherapie, describes applications for wounds and other uses derived from essential oils, and gave rise to…you guessed it…aromatherapy!


In the Medical Establishment


Whatever your beliefs—whether lavender’s popularity is due to its use as a panacea or as a wonderfully fragrant plant—it is beautiful in a sunny garden and it attracts bees, butterflies, and other pollinators.

There are only a few scents that come close to lavender on my list of favorites. But, on one of the “favorite smells” lists online, this scent rated #49! And “petrol” rated…#1! Bacon, freshly baked bread, rain, cookies in the oven, and mowed grass made the top 10 in some of those lists. But…49th?!


Caution!

test tubes, lab

The U.S. National Institutes of Health recommends that pregnant or lactating women not use lavender on their skin or take it internally, because the side effects are unknown. For sensitive people, it can cause skin irritations, and can be toxic if consumed.

In prepubertal boys, gynecomastia, an enlargement of the breasts due to hormonal imbalances, can be caused by topical lavender products.

One research study claimed that attaching a pad dipped in lavender oil to the neckline of clothing reduced the risk of falling by 43% among nursing home residents.

Testing for its use in treating canker sores and insomnia resulted in insufficient evidence for its efficacy…

…But let me tell you a little story 

One spring day at the garden center, I was working on lavender topiaries and large specimens—reshaping, cutting back, repotting, and removing all the dead leaves. The scent was just wonderful. It took a couple of hours to clean up all the plants, and then it was lunch time.

As always, I spent the time in my truck, reading and listening to the news while enjoying my lunch. Well…that day was the closest I had ever come, in the past 4 decades, to falling asleep while at work. I had to fight to stay awake!

Normally skeptical of proclaimed powers of plants, I believe this one—that the scent of lavender can induce sleep! No wonder it has been found in bath products for thousands of years.


Edible Lavender


Lavender has been used fairly extensively over the centuries, in conserves, teas, vinegars, and pastries. One of my herb books describes lavender as “an acquired taste”. I made lavender tea, once. Only once.

Apparently, L. a. ‘Munstead’ is the most popular variety for cooking and baking, for its sweeter fragrance and “citrusy notes”. Those seeking new culinary experiences might find lavender in salads, dressings, pasta, sauces, and desserts. If I remember correctly, it was at the Olney Farmers’ and Artists’ Market, in Maryland, where, years ago, I purchased a lavender bud and lemon poundcake that was delicious.


lavender

Lavender flowers.


The Lavender Genus


Lavender is a member of the mint family, Lamiaceae, and is related to basil, thyme, rosemary, Swedish ivy (Plectranthus), ajuga, Phlomis, and all the salvias, including sage. Their lipped flowers appear in whorls on spikes carried above the foliage. Flower colors range from white and pink, to blue, lilac, violet and blackish purple. Some species in the family have yellow flowers.

The stems of plants in this family are usually, but not always, square in cross-section. Lavender’s resemblance to rosemary has confused many gardeners, but the scent distinguishes one from the other.

There are 47 known species in the genus Lavandula. Leaves are generally simple (with a smooth or “entire” margin) or dentate (with a toothed margin), although some species have pinnate leaves (L. buchii, from the Canary Islands). Leaves and other parts are covered in trichomes, the fine hairs (the indumentum) from which essential oils are harvested. L. lanata (from Latin lanaius), the woolly lavender, is covered in woolly hairs.

Most gardeners associate this genus with silver or gray foliage, but it includes some green-leaved species as well. Also available are variegated cultivars, such as ‘Platinum Blonde’, whose leaves are edged in creamy white.


Lavender From Seed

transplanting lavender seedling

‘Ellagance Purple’ seedling.

Lavenders are small and shrubby in their growth habit, qualifying as woody perennials or as sub-shrubs.

Some will bloom in the first season when grown from seed, and, where they don’t survive the winter, would be considered annuals. I used to grow a variety called ‘Lady’, which had a powerful scent.

A new English lavender called ‘Blue Spear’ will sprout in 2 to 3 weeks from seed, after first being chilled for a week in the freezer. It will perennialize in zone 5 or 6, but can be grown as an annual flowering plant in colder regions. Seeds have to be started very early, though, or the previous fall, for blooms from late spring through summer. ‘Blue Spear’ is an upright plant, growing 11-14″ tall and a bit narrower than that.

***Update***: This summer, I’m growing a variety of lavender from seed that blooms the first year if the seeds are started early in the season. ‘Ellagance Purple’ has dense spikes of deep purple flowers. So far, they look healthy in their 2½” pots, but I’m not sure they’ll have enough time to bloom this year. Photo shows how long the roots are compared to the stem. 7/20/2022


moth on lavender


Perennial Species


Cross-pollination among the species and varieties gives rise to more variation. Cuttings taken from desirable plants (asexual or vegetative propagation), however, assure the grower that all the young cloned plants will look the same. Many newer cultivars are under plant patent protection and may not be propagated and sold without authorization from the patent holder.

Their common names also vary widely. The English types are well-defined, but when it comes to French or fringed, Greek, Italian, or Spanish, there doesn’t seem to be universally accepted agreement concerning the species they’re assigned to. When shopping for plants, refer to the name of the cultivar (‘Hidcote’, ‘Provence’, etc.) to avoid confusion.


Lavandula angustifolia

lavenderZones 5-8. Formerly L. officinalis. Commonly called English lavender, this species grows well there but is native to France, Spain, and Italy. It is used more often in cooking than other lavenders, due to its lower camphor content. This species’ essential oils are considered superior to those of other species. Earlier blooming than lavandins, generally.

Varieties include:

  • ‘Blue Spear’: zones 5 or 6 to 8 or 9. 11-14″ tall, upright growth; deep blue substantial flowers, will flower first year from seed.
  • ‘Ellagance Ice’: compact; large silver-white-light bluish flowers all summer.
  • ‘Ellagance Purple’: zones 5-7; 12-18″ tall, deep purple flowers on full spikes, blooming first year from seed.
  • ‘Hidcote’: 12-18″ tall; tightly budded stems; flowers deep purple.
  • ‘Jean Davis’: 18″ tall; light pink flowers.
  • ‘Melissa’: 24″ tall; pale pink to white flowers late spring to early summer.
  • ‘Munstead’: heat, sun, and humidity tolerant; 12-18″ tall; late spring to early summer flowers from pale blue to shades of purple.
  • ‘Platinum Blonde’ (‘Momparler’): zone 5b. To 18″ tall, culinary. Creamy white leaf margins.
  • ‘Royal Velvet’: 24-30″ stems; velvety purple/navy blue flowers that retain color when dried.
  • ‘Sweet Romance’: 12-18″ tall; purple flowers early summer to fall; a Proven Winners cultivar.


Lavandula x intermedia

provence lavender

Zones 5-8. Often called Lavandin or Dutch lavender, this species is a cross between English lavender (L. angustifolia) and spike lavender (L. latifolia). Flowers have abundant nectar, and contribute to the sought after monofloral honey. These interspecific hybrids, denoted by the lower case “x” in the species name, are sterile and cannot set viable seed.

Varieties include:

  • ‘Fred Boutin’: to 3 1/2′ tall. Late summer light blue blooms.
  • ‘Grosso’, also called ‘Fat Spike’: about 3′ tall and wide; very fragrant; medium violet blue flowers. Grower Pierre Grosso (1905-1989) discovered this variety in the Vaucluse district of France. It has a very high oil content and is disease resistant.
  • ‘Hidcote Giant’: to 3 1/2′ tall. Dense, dark purple flowers, dries well.
  • ‘Phenomenal’: zones 5-9; grows 2′ to 4′ tall and wide. ‘Phenomenal’ is more heat, humidity, and drought resistant than others. Introduced by Peace Tree Farms, 2012.
  • ‘Provence’: from southwest France; foliage grows 2′ tall with very tall spikes of pale purple flowers in early summer to early fall; culinary, and commercially grown for the perfume industry. One of my favorites for scent and for tall, see-through flower spikes.
  • ‘Seal’: 4′ to 5′ tall! Strong fragrance, late summer blooms.
  • ‘Thumbelina Leigh’: zones 5 or 6 to 9. A dwarf English lavender, growing only 6″ to 12″ tall, medium blue flowers. This selection comes from New Zealand.
  • ‘White Spike’: to 3 1/2′ tall. Nicely contrasting white flowers, mid-summer. Culinary.


Lavandula dentata

Zones 8-9. French or fringed lavender grows about 3′ tall; toothed edges (dentata, from Latin for tooth), light woolly texture; narrow spikes of long-lasting purple flowers beginning in late spring.

From the Mediterranean region, Atlantic islands, Arabian Peninsula.


Lavandula stoechas

lavender stoechasZones 8-9. (Pronounced stee′-kiss; [“oe” has long “e” sound, as in “amoeba”, and Greek “ch” has a hard “k” sound.] Derived from the Greek stoichas for “in rows”.) French, Italian, or Spanish lavender is a compact grower, feathery petals at tip of inflorescence. Sometimes called “Butterfly lavenders”.

From France, Spain, Portugal, Italy, Greece; considered invasive in Victoria, Australia since 1920. Can self-seed. This was probably the species commonly grown in ancient Rome and Greece. Eucalyptus fragrance.

Varieties include:

  • ‘Dark Eyes’: 2′ tall. Purple-red flowers May to autumn if deadheaded.
  • ‘Kew Red’: zones 8 to 11. Red-violet blooms with deep pink bracts at tip. From southern Spain. Introduced by Kew Gardens, 1999.
  • ‘Otto Quast’: 2′, prune for fullness. Reddish-purple flowers with deep pink bracts at tip.
  • ‘Silver Frost’ (L. angustifolia x lanata): 2-3′ tall, lax stems. Heavily felted silver foliage.


Lavandula pedunculata

Zones 9-10. Also known as Lavandula stoechas subspecies pedunculata. Spanish or French lavender has flowers high above the foliage, and long narrow petals on tip of flower. From Iberia, western Turkey, Morocco.


lavender field


Photograph above: field of lavender at Notre-Dame de Sénanque Abbey, southeast France, in the Vaucluse district of Provence near the village of Gordes. Established by Cistercian monks in 1148.


Return to the top

Headings

Page 1: Lavender’s Long History, B.C., Early A.D., From the Middle Ages Forward, From the Renaissance (Fit For a Queen or a King, And For the Rest of Us, Lavender Makes Good Business Scents), The Victorian Era, Too Much Lavender?, In the Medical Establishment (Caution!, …But let me tell you a little story), Edible Lavender, The Lavender Genus (Lavender From Seed), and Perennial Species (L. angustifolia, L. x intermedia, L. dentata, L. stoechas, L. pedunculata)

Page 2: How To Grow Lavender (On Location, Light, Soil, How To Improve Drainage, Lime and Gypsum, Shopping for Lavender, How To Plant Lavender, Watering, To Mulch Or Not To Mulch Lavender, Fertilizer, Pruning, Growing Lavender In Pots, Azalea and Standard Pots, Freezing Temperatures, Heeling In, Growing Lavender Indoors)

Grow a Potted Tomato: A Step-By-Step Guide


How To Grow a Potted Tomato


young tomato plants

Young tomato plants.


This year’s plan is to grow two potted tomato plants on the deck, inside the fence and away from deer. But less than a week ago, it snowed! For the near future, we’ll be having temperatures in the 70’s F, and in the 50’s at night. It’s time!

Judging by the numbers of people shopping at the garden centers, I’m not the only optimist out there. Always check your local forecast to see if it’s safe to plant tender edibles. Our friends in the North are still shoveling snow. Sorry, guys. Here are today’s purchases, and the step-by-step guide on page 2.


potted tomato


Tomatoes


Warm temperatures turn thoughts to tomato plants, so off to the garden center I went. Since we rarely buy tomatoes from the grocery store in the winter, we’ve been looking forward to this moment.

In one of the pots, I’ll include a young flat-leaf parsley and a sweet basil I bought at the grocery store a few weeks ago. The two herbs will be planted on the south side of the heirloom ‘Rutgers’ tomato, so they won’t be shaded. I’ll remove tomato leaves that interfere with the herbs. In case raccoons and squirrels set their sights on a lovely ripe fruit, bird netting wrapped around the fruiting plants will deter them.

Unfortunately, direct sunlight is decreasing in the vegetable garden, next to the house, as the trees to the south grow larger. Even so, the new ‘Sun Gold’ cherry tomato will go into the garden; if any tomato will produce a crop, ‘Sun Gold’ will. Besides, it did well enough last year. It produces loads of bright orange super sweet tomatoes, great for salads and snacking. Bet you can’t eat just one!


Basil


Tuscany basil

‘Tuscany’ basil.

The garden center also had ‘Tuscany’ basil, a light green lettuce-leaf type, with huge puckered leaves. It is wonderfully sweet and lightly spicy, with a hint of fresh anise flavor. ‘Genovese’ and lettuce-leaf basil are among my favorites for Tomato-Basil Salad.

And I added to the cart a pot of ‘Siam Queen’ Thai basil, for the baked salmon. Basil needs warmer temperatures, so they’ll stay in pots for a while, and come inside at night. Potted basil will come indoors even in summer, during rainy or humid weather. That’s when Basil downy mildew becomes a problem.

Curly parsley, a rogue seedling with last year’s flat-leaf parsley, and arugula survived the winter and still look good enough to hold onto for a while. The enclosed deck is a warmer microclimate, where winter temperatures are always higher than on the other side of the fence.

Although there’s some potting soil around, I’ll need more to fill those large pots and a few others. So, I bought the largest bag of soil the garden center carries. There’s enough packaged fertilizer left over from last year.


Caterpillars, Anyone?


I always keep a supply of Bt for battling the caterpillar invasions. Bacillus thuringiensis (Bt) is an organic alternative to substances I’d rather not consume, yet many people still consider it a “chemical”. It is not. Bt is a naturally occurring bacterium. An occasional spraying with Bt on the cole crops (kale, broccoli, cabbage, etc.) and on parsley and dill will save them from utter destruction!


tobacco hornworm

The tobacco hornworm on a tomato leaf.


Sometimes, 1 or 2 tobacco hornworms attack our tomato plants. They look very similar to the tomato hornworm, which has V-shaped markings instead of the tobacco hornworm’s slashes (photo, above). They’re difficult to see because they blend so well with the foliage.

Left undisturbed, these larvae will develop into a type of hawk moth. But this very hungry caterpillar, as it grows, consumes large quantities of leaves, and leaves behind…well, you know what it leaves behind.

This nature nerd, as a young student, kept a tiny caterpillar indoors, and supplied daily rations of tomato leaves. Well, it grew enormous and wandered off to a secluded spot to pupate. My greatest fear was that my mother would find it. I finally found it, and donated it to a teacher’s Wardian case.

Spraying with Bt kills these hidden caterpillars if you can’t find them. It is more effective, however, when used on young caterpillars. But, if they have little things on their skin that look like grains of rice (photo, above), just pluck off the caterpillars and place them in the shrubs. A small female parasitic wasp laid eggs on or in the caterpillar, and the wasp larvae fed on and will soon kill the caterpillars. The “rice” grains are pupating wasps. And some little animal might appreciate a morsel such as this.


tomatoes


Big Pots


I bought two 7′ tall stakes and two 20″ diameter lime green pots, at first considered somewhat disagreeable, but now perfectly acceptable. This shade of green blends in with the greens and browns on the deck. When summer heat is a problem, light colors reflect some of the hot sun bearing down on the pots. This helps moderate soil temperature, which rises in a dark pot. Conversely, in the winter, black pots absorb warmth, keeping hardy herbs and cool season greens happy.

Discounted prices on vegetable transplants accomplished their intended effect: I bought more than I had planned. So, now there are 2 sweet peppers to plant, one a “green-to-red-when-ripe” bell, and the other a ‘Lunchbox’ orange.


Peppers


Lunchbox peppers

‘Lunchbox’ sweet peppers.


‘Lunchbox’ peppers are small and colorful (red, orange, or yellow—a separate color on each plant). I add them to omelets, salads, stir-fries, shrimp and vegetables with rice, and pizza.

They add great color accents as well as a higher vitamin C content than green peppers. In fact, one medium-large ripe lunchbox pepper has 100% of the RDA for Vitamin C.

It takes almost 3 weeks longer for a pepper to mature from the green stage to the colorful one. Normally, I would have waited a week or two for the pepper plants, but they were on sale…and it has been quite mild…

(“Weather Alert: severe thunderstorm watch, possible large hail, winds gusting to 60 miles per hour”. Time to move some things around outside.)


One More Tomato

The heirloom ‘Black Prince’ tomato is not as susceptible to cracking as some of the other black tomatoes. And the fruits are smaller. This one substitutes for the ‘Black Krim’ I was looking for.

If ‘Black Prince’ doesn’t do well enough, I’ll pull it out and plant something else. That’s one of the many advantages of living where the growing season is long. (***Update***: The ‘Black Prince’ has grown taller than the 7′ stake, and it is loaded with medium-sized fruits! I’ve already picked more than 20 richly flavored “black” tomatoes. Photo at end of Page 2. June 25, 2019)


And Zucchini

zucchini

Zucchini with fruits.

The fourth of the four-for-$10 deal is a zucchini called ‘Black Beauty’. The seedlings have barely grown beyond the seed leaf stage, and they, with the basil, come indoors at night.

A 50-pound bag of aged cow manure rounded out the purchase.

I’ll plant the zucchini into a nursery pot, and later into the garden. But for now, the garden is still packed with cool season vegetables and greens.


Headings

Page 1: How To Grow a Potted Tomato, Tomatoes, Basil, Caterpillars, Anyone?, Big Pots (Peppers, One More Tomato, And Zucchini)

Page 2: A Step-By-Step Guide To Planting a Potted Tomato, Maintaining Your Potted Tomato, Temperature, Watering a Potted Tomato, Fertilizing a Potted Tomato, (How Often?, Blossom End Rot), Limiting the Suckers On Your Potted Tomato

Return to the top

More Quick Tips for Today’s Garden


More Quick Tips For Today’s Garden


Here are several more quick tips for the gardens in early spring. Several links have been provided, where you’ll find more details.


1. Fertilize Violas and Pansies


It’s no wonder these cold-hardy little biennials are seen all around town. They’re planted in median strips, at neighborhood entrances, around shopping centers, and in our gardens.

They live through the winter, delighting all of us with their colorful, cheerful appearance. Cold is what they like; in late spring or early summer, they will fail in the heat. This year, we had a very mild winter in zone 7b Charlotte, so they looked beautiful all season.


wire basket with cool wave pansies

A wire basket with hardy violas and ‘Cool Wave’ pansies.


Quick tips: As long as they’re in active growth, fertilize every 6 or 8 weeks, even in the winter! Use fertilizer that has a higher percentage of phosphorus, the middle number on a package. A ratio of 1-2-1 or 1-3-1 will work. Those three numbers represent the percentages of nitrogen, phosphorus (phosphate), and potassium (potash) in the product. They are always listed in that order: N-P-K.

Keep in mind that violas and pansies need acidic soil. You can mix peat moss into the bed in preparation for planting, also incorporating pine fines (soil conditioner) to improve drainage. Or use a product (Soil Acidifier) that will lower the pH, if your soil tests on the high side. Soil that has been limed might be too alkaline for violas, which prefer a pH level around 5.5 to 6.0.

If you have a spare hour or so, deadhead (pinch off) the old faded flowers. Whether or not that actually helps promote bloom, it certainly will improve the appearance of the plants, especially for pansies.


2. Harvest Greens


collards

Collards, with flower bud.


Recently I cleaned the vegetable garden. I harvested most, but not all, of the greens that have been producing since last fall.

Later today or tomorrow, I will wash and sauté the greens down to “wilt”. Then they will be divided into portions and frozen in plastic zip lock bags. The next time I make soup from scratch (or from a can), a rice dish with rotisserie chicken, lasagna, or buy a store-bought pizza, one or two of those bags of greens will be added to the dish. That’s an easy way to add greens to a meal, and increase the nutritional content.

The two large clumps of collards will make a fabulous Collards Soup. For that, I use a large stockpot, which makes about a gallon of soup. I also freeze some of it in plastic containers for later use.

tokyo bekana

Chinese cabbage ‘Tokyo Bekana’.

In addition to the collards, I harvested mustard greens and dinosaur and ‘Red Russian’ kales. The light green Chinese cabbage ‘Tokyo Bekana’ will be added to the next salad. Swiss chard ‘Bright Lights’ remains in the garden, and should last until autumn if it’s partially shaded.

The vegetable garden next to the house is becoming increasingly shaded. The trees on the berm to the south have grown larger and wider over the past 5 years. At this point I’m seriously considering growing a couple of tomato plants in containers on the enclosed deck, safe from the deer.

The sweet pepper plant did well enough in the garden, so it will go there again this year. But most of that garden will contain a variety of greens, green onions, leeks, and probably a cucumber. It’s still the perfect place for fall and winter greens because it’s a warm microclimate, being right next to the house. And at that time, the trees are leafless, so there’s more sun.


The Beneficials

Quick tips: Several of the brassicas are in flower, so I left a few of them in the garden for the honey bees and the tiny braconid wasps. During late winter and early spring, few food sources are available for these beneficial insects, so I like to help when I can. And you can add some flowers to a salad or as a garnish.


3. Plant More Cool Season Greens and Vegetables


dinosaur kale in flower

Dinosaur kale in bloom.

Broccoli ‘Happy Rich’ is ready! So I made a trip to the garden center a few days ago to pick up a few pots of this delicious miniature broccoli. Ordering seeds is just not feasible right now; I’d have lost 4 or 5 weeks of growing time, so I went for the quick fix: transplants!

Broccoli ‘Imperial’ is one of the varieties recommended for growing in the spring and late summer. This crop will be able to tolerate the warmth of the late spring season, when it will be harvested. I love broccoli. So many vitamins, minerals, phytonutrients…and protein too.

Carrot, radish, and beet seeds can be planted now, even before frost has retreated north. Pea seeds could have gone into the ground weeks ago, but the ones I planted in the fall made it through the winter, and are now flowering and making pea pods (photo, below).

As space opens up in the garden, I’ll sow seeds of mesclun, tatsoi, leeks, and maybe ‘Scarlet Frills’ mustard for its beautiful and fairly spicy foliage, adding some spark to salads!


pea vine

Fast growing edible-podded peas on a trellis.


Check with your local agricultural extension service for a chart describing what can be planted when. It wouldn’t be a bad idea to get a soil test, to remove doubt about the pH or which nutrients need to be added.


Lettuce


Salanova lettuce

Pots of ‘Salanova’ lettuce ready for the garden.


A few pots and market packs of lettuce purchased over the past week will supplement the patch of lettuce seedlings that survived the winter in the garden. Smaller plants will continue to grow after the mature heads have been harvested.

A red butterhead lettuce called ‘Skyphos’ is reliable even in warm temperatures, up to a point. It retains very good flavor when others turn bitter in the heat.

When trying to extend the lettuce harvest, look for varieties that tolerate high temperatures. Varieties listed for planting at this time include ‘Nancy’ (green butterhead), ‘Vulcan’ (red leaf), ‘Sparx’ (Romaine), ‘Muir’ and ‘Magenta’ (summer crisp), and ‘Skyphos’, of course, one of the favorites I’ve grown for years. The heirloom ‘Black Seeded Simpson’, a loose-leaf lettuce, and ‘Outredgeous’ Romaine are more options for a spring garden.


healthy greens--AllStar Gourmet lettuce mix

Johnny’s Selected Seeds’ Allstar Gourmet lettuce mix.


Quick tips: ‘Red Sails’ lettuce is too pretty to pass up, and it can grow well into spring. Leafy vegetables with deep green color and red pigments, the anthocyanins, have more antioxidants. These nutrients help us fight many illnesses, including cancer and inflammation. So, I always prefer richly colored varieties.

More Quick Tips: How To Grow Lettuce

Lettuce seed germinates readily at a soil temperature in the 60’s F. It will take longer, but seeds will even germinate at 45°. They won’t, however, do anything above 75° or so.

Lettuce appreciates very rich, moist soil. Fertilize every couple of weeks with high nitrogen fish emulsion, earthworm castings, or compost if the soil temperature has increased. And provide ground limestone for calcium and to raise the pH, which prevents tip burn. If a soil test indicates proper pH for greens, add gypsum instead, which also provides calcium but doesn’t change the pH. It’s best to deal with pH months ahead of planting crops.

Organic products rely on soil microbes to break them down and to make their nutrients available to plant roots. But, in winter, microbes are dormant, so I use a synthetic soluble fertilizer.

As the weather warms up, give lettuce morning sun, which is less harsh than hot afternoon sun. You can plant a quick crop between young tomato plants, in partial shade.

Watch out for slugs; scatter granules of organic Sluggo outside the lettuce bed, to draw them away from their intended meal. Slugs can transmit a form of meningitis when ingested, so… And aphids can be a problem, too, but you can just wash them away.


4. Pick the Parsley


parsley for chicken soup

Italian (flat-leaf) parsley.

This versatile herb gives fresh flavor to meat, fish, and poultry dishes, sauces, soups, potatoes, eggs, salads, sandwiches, garlic bread, mayonnaise, and herb butter.

The addition of vitamin- and mineral-rich parsley enhances just abut anything you cook. But add it late in the cooking process, in the last few minutes, as you would most leafy herbs. Cooked for a long time, the flavors will evaporate away.

Concerned about your breath? Chew on a couple of leaves; the chlorophyll will freshen it.

There are two main groups of parsley:

  1. flat-leaf, plain, or Italian (‘Giant of Italy’, a new improved sweeter ‘Peione’, and smaller ‘Titan’)
  2. curled leaf parsley (‘Favorit’, ‘Double moss curled’, ‘Paramount’), famous as a garnish and pretty as a garden edging, but also edible.

Decades ago, as a kid, I remember seeing my grandmother in her Englewood, New Jersey, kitchen, holding a huge bunch of flat-leaf parsley inside her arm. Nanny was the real thing—Sicilian-born and a great cook—so for those looking for real parsley flavor, go for the flat-leaf.

When I was growing up, my mother (Nanny’s daughter) always used curly parsley. Several years ago, I asked her why she used the curled and not the flat-leaf. She said the Italian parsley always tasted funny, so she preferred the curled. Do you know which other herb looks like flat-leaf parsley? That’s right…she must have bought cilantro! Neither of us likes this herb at all! So, if you’ve been reluctant to buy or grow flat-leaf parsley, see if its resemblance to cilantro might be the root of that problem.


Here’s good news: it’s easy to grow!

Parsley (Petroselinum crispum) is a biennial member of the Apiaceae family, a cousin of dill, cilantro, carrot, and fennel. Set young transplants into the garden in early spring, through the summer, and in the fall. Fertilize every few weeks with a high nitrogen product, such as fish emulsion. Parsley also is adaptable to growing in potted herb gardens.

In areas with moderately cold winters, it will tolerate freezing temperatures. The foliage will stay in better condition if it receives some protection from a warmer microclimate, such as next to a south-facing wall. Or grow it in a cold frame in colder climates.

parsley with flower stems

Flat leaf parsley, going to flower.

Quick tips: Plant parsley in rich soil. Amended with compost or aged manure to a depth of 12″ or more, parsley will develop a large root system when grown in the ground. ‘Gigante’ (or ‘Giant of Italy’) grows into a massive mound of dark green leaves, 2′ tall and wider than that. In spring, the stems begin to grow tall, preparing for its blooming phase (photo, right).

This is parsley’s natural cycle of growth as a biennial. It’s seeded in one year, grows, overwinters once, and then flowers the next spring or early summer. Sometimes parsley goes to flower the first year if it was seeded very early.

Harvest the plant before it goes to flower, or when you notice that the stems are growing tall (photo, right). If you wait much longer than that, the sweet flavor will become strong or bitter. Cut the stem at soil level, and remove any yellow or pale green leaves.

Cut parsley stems will stay fresh for a few days in a glass of water on the counter or in the refrigerator.


Prepare the rest this way:

  • Wash the parsley thoroughly in cool running water. Shake off as much water as you can, or put it through a salad spinner.
  • Have a couple of 1- or 2-cup plastic containers handy.
  • Remove thick stems. Cut and reserve the leaflets, and keep them intact.
  • Transfer leaflets to the plastic containers, packing them in tightly.
  • Freeze the containers.
  • The next time you need some parsley for soup or tomato sauce or roasted vegetables, simply flake off the quantity you need. Chop them before adding to cooking.
  • Simple! Although it doesn’t look like fresh parsley (it looks wilted), the flavor is better than the dried option. And it takes up less space than chopped parsley frozen in ice cubes.


Who’s eating all the parsley?

Deer and Rabbits

quick tips: dont feed the rabbits!


Does this sound familiar? The parsley is growing beautifully, it has great color, and it’s providing lots of clippings for the kitchen. All of a sudden, the leaves disappeared…overnight! Well, we’re not the only ones who are fond of parsley. Deer and rabbits like it, too. They can do a lot of damage in one sitting.

Quick tips: You can’t use chemical deer repellents, but you can construct a frame around the parsley plants. If you have a big old lamp shade with “ribs”, remove the fabric and replace it with bird (deer) netting. The bigger the shade, the better. Anchor it to the ground so it can’t be kicked over. Or fabricate something yourself from hardware cloth or chicken wire. Make sure young rabbits won’t be able to squeeze through the openings. The goal is to physically exclude animals from reaching the parsley, cilantro, and dill.

Black Swallowtail Butterfly Caterpillars


black swallowtail butterfly egg on parsley

Yellow egg, left of center, on parsley flower bud.


If the parsley looks smaller than it did last week, look for little caterpillars feeding on the leaves. The female black swallowtail lays tiny yellow eggs on plants in the Apiaceae family (parsley, cilantro, fennel, dill). She deposits them primarily on the bottoms of the leaves. They’re hard to spot, but once you’ve learned to recognize them, you can simply rub them off.

Quick tips: Look for young caterpillars a few days or a week later, in case you missed a few of the eggs. The young brown and white larvae look like bird droppings, appearing less appealing to predators. An organic approach is to spray with Bt (Bacillus thuringiensis), a naturally occurring bacterium. Bt causes caterpillars of moths and butterflies to stop feeding, and they’ll die a day or two later.

But I like butterflies!

caterpillar on fennel

Black swallowtail larva on fennel.

Quick tips: Now, if you would rather keep the butterflies, as I do, simply transfer caterpillars from the parsley to a bronze fennel plant. Bronze fennel is a large growing and pretty perennial herb, and a food source for this insect. The fennel is edible for us as well, in salads or to garnish fish.

As the larvae grow, they turn into large black and green striped caterpillars (photo, right). These parsley worms, as they’re sometimes called, will consume more and more of the foliage. Not a problem for the vigorous bronze fennel, but a smaller parsley plant can disappear in a flash.


5. Weed!


Dandelions, chickweed, and hairy bittercress top the list of winter weeds around here. In untended fields, the bright yellow flowers of wintercress cover acres of ground, not unattractive at all!

Your local garden center can help with products that prevent weed seeds from germinating or that will kill weeds after they sprout. Don’t use them, though, near the edibles. Bring fresh samples with you. Diligent weeding and mulch are recommended.


Dandelion


Derived from the French “dent de lion”, dandelion refers to the toothed (dent) edges of the leaves. Bright yellow flowers dot the landscape from late winter on. If they are not killed or removed, each of those flowers will develop into a cluster of seeds. This method of seed dispersal, by the wind, is called anemochory.

Quick tips: This weed develops a taproot sometimes more than a foot deep. Leaving part of the taproot behind after “pulling” the weed will result in a new dandelion regrowing from the root. Either remove the entire root (there’s a tool for that), spot treat with a non-selective herbicide, or use a broadleaf weed killer. Always read the labels. Keep weed killers away from herbs and vegetables.

The dandelion in our lawns (Taraxacum officinale) looks similar to edible “dandelion greens”, in the species Cichorium intybus, a type of chicory.


Chickweed


chickweed, quick tips: remove the seeds

Common chickweed, with small white daisy flowers.


Chickweed grows close to the ground, spreading about 1 1/2′ wide. Thick mats of this weed will hide among the lawn grasses, winter greens, and last year’s fallen leaves. Their seeds germinate in cool seasons, and the plants grow fast, lodging against walls and other objects that trap winter warmth.

If you pull the top, the roots have such a strong hold on the soil that the stem will stretch and break off. In a couple of weeks, you’ll have the pleasure of pulling it again. Grasp firmly under the crown of the plant, just below where the stem meets the soil, and make sure you get the roots.

Two species that often grow here in North Carolina are common chickweed and the more hairy mouse-ear chickweed.

Quick tips: Don’t wait as long as I did for this garden chore. Next winter, there will be an even bigger crop of chickweed. That’s not such a bad thing, though, because tender young greens are edible. Like many greens, common chickweed (Stellaria media) is very high in vitamins and minerals. One website claims it is fairly high in oxalic acid; for those with certain health conditions, check with your doctor. Add it to salads, soups, sandwiches, and stir-fries.


Hairy Bittercress

bitter cress. Quick tip: remove weeds before they seed about.

Hairy bittercress.

This species of cress (Cardamine hirsuta) is a short but abundant winter annual that grows a small rosette of edible bitter foliage, topped by a cluster of white flowers. It is related to broccoli and cabbage, in the Brassicaceae family. Disturbed seedpods open explosively, dispersing seeds in every direction. Ballochory is the name of this method of seed dispersal.

The “ounce of prevention is worth a pound of cure” axiom certainly holds true with weeds. Many times more weeds will grow in the next season if they are allowed to go to seed.

Not all of them will germinate, though. Seeds can remain viable for decades, patiently waiting underground for that moment when the soil is disturbed. Exposing the seed to favorable conditions, such as light, water, and the right temperature, is all they need to germinate.


6. Take a Moment to Just Enjoy Spring


There will always be more quick tips for the garden, but they can wait. Take the kids or the dog or yourself outside, listen to the sounds of nature, and just enjoy being!


Japanese maple, new leaves. Quick tip: enjoy spring!

New leaves on Japanese maple.


Return to the top

Quick Tip for Today’s Garden: Start Here!


Some Quick Tips In Today’s Garden


As the weather warms, it’s time to turn our attention to a few garden chores. I’m going to attempt to keep each Quick Tip short, and direct you to the links where you’ll find a lot more details.


snow crocus

Early crocuses.


Quick Tip #1: Spring-Flowering Bulbs


It’s no secret—I love spring-flowering bulbs! My last home in Maryland had thousands of them. Jolly daffodils, fragrant hyacinths, early snowdrops, crocuses in every color, big clumps of wood hyacinths, electric blue scilla and tiny pink ones… Grape hyacinths in white, pink, and shades of blue… Species tulips, Ipheion, Chionodoxa, the reliable spreading Puschkinia, and stately Allium. There were fritillarias, Eranthis (photo below), Erythronium, Dutch and rock garden iris, and the invasively spreading Ornithogalum. Even a snake’s head iris or two.


eranthis, quick tip #1

Winter aconite (Eranthis hyemalis).


Bulbs bloomed before the winter snows had melted away, all the way through spring. Five months of flowers! Before one finished its bloom cycle, others began theirs. But spring-flowering bulbs weren’t the only stars of the garden. There were Helleborus and Siberian Iris, lilies and azaleas, and Fothergilla, Viburnum and Tiarella among the many other shrubs, trees, and perennials. And violas, of course!

“Okay, so what should I do with them now?”


Fertilize Them

By early spring, daffodil foliage is fully developed here in the Carolinas, and the early varieties are beginning to fade. Fertilize when the bulbs are near or at peak bloom. The reason I prefer not to fertilize them as soon as the foliage emerges is because the nutrients could cause exuberant growth. The soft growth in these leaves and flowers is more likely to cause them to flop over.

Use a complete product formulated specifically for bulbs rather than just bone meal. Foliage will continue to photosynthesize for weeks, sending energy to the bulbs, “restocking the larder”. Carbohydrates stored in the bulbs sustain the plants through their summer dormancy and ensure that the bulbs will flower again next year.

Lightly fertilize the bulb beds again in late summer to autumn, when new roots emerge from the bulbs. Water well if the soil is dry from drought. If you’ve tended annuals above the bulbs and fertilized them now and then, you can skip the bulbs’ fall fertilization.


Wait For Them To Yellow Naturally

In an effort to tidy up the yard, many gardeners braid the green leaves or remove them entirely after the blooms fade. But the bulbs rely on spring sunshine reaching the leaves to make enough food for themselves. That’s how the bulbs grow larger and develop flower buds for next year’s display.

Wait until the foliage is yellow or brown before cutting it at soil level. Don’t braid or knot the leaves, which interferes with photosynthesis.


Remove Old Flowers


remove daffodil seedpods, quick tip #1

Daffodil ‘Tête-à-Tête’ with faded flower and developing seedpod.


Snip off old flowers before they have a chance to ripen seeds. This is especially important for the large flowers, such as daffodil, hyacinth, and tulip.

All energy should be directed into plumping up the bulbs for next year instead of into seed production. Small bulbs are often encouraged to spread by seed, so it is not critical to deadhead them.


Divide Them

Did your daffodils bloom heavily this spring? Or did you see a lot of leaves and only a few blooms? If the plantings seem to be declining, wait until the foliage has turned yellow or brown. Then carefully dig up the clumps, label the colors or the cultivar names, if known, divide, and transplant them. The most common reasons for fewer flowers are:

  • Not enough direct sun. As our landscapes mature, the shrubs’ branches begin to overgrow the bulbs. Shading the bulbs’ foliage weakens them to the point that they die out.
  • Not planted deep enough. Shallowly planted bulbs divide up, forming many small bulblets, which are too small to flower.
  • Wet soil that kills the bulbs. Plant new ones this fall in well-prepared beds, making sure water drains freely. Incorporate a large amount of pine fines, coarse sand, and/or horticultural grit, which elevates the bed. Gypsum helps improve drainage if used annually for a few or several years.
  • Poor soil or soil that is severely compacted cannot sustain life. There’s no shortcut when it comes to soil preparation. But if there’s not much you can do about soil quality, plant grape hyacinths, galanthus, puschkinia, and crocuses. These are planted closer to the surface. With some bulb fertilizer and a cover of mulch (1″ or 2″ of shredded hardwood), they’ll have a good chance of surviving.


Quick Tip #2: Liriope, Mounding Or Spreading?


Liriope (pronounced “lir eye’ uh pee”) is a workhorse of a ground cover. One of my favorite plants to use in large drifts under trees or through a shrub border is a variety called ‘Royal Purple’.  It blooms in mid- to late summer, depending on location.

I don’t know why this cultivar is not well-known in landscape circles, but the common “blue lilyturf” is the one usually seen. The flower of ‘Royal Purple’, as the name suggests, is a rich deep purple and far prettier in the garden. Try it in front of or near large chartreuse or gold hostas for a stunning combination.


liriope royal purple?, quick tip #2

Liriope muscari ‘Royal Purple’.


The Spreading Liriope Spicata

There are two species of liriope often seen at garden centers. One is Liriope spicata, an aggressive spreader, and the one that gives lilyturf a bad reputation. It will creep into narrow cracks in the sidewalk, it will invade the territory originally claimed by Heuchera and other perennials, and it will take over the lawn.

Sure, there are some applications where this species has value, such as in inaccessible areas, in ditches, or on banks. It also will cover large areas under trees. Liriope is related to hosta and daylily in the Asparagaceae family, and all can effectively prevent soil erosion. They have extensive root systems that knit the soil together. But, if you want liriope that doesn’t spread, choose the mounding varieties of liriope.


The Mounding Liriope Muscari

The other species, Liriope muscari, grows in clumps and does not run all over the place. L. muscari is the species to which ‘Royal Purple’ belongs. Another popular variety, with cream- or yellow-variegated leaves, brightens up a shady area and has rich purple flowers. There’s a white flowering variety called ‘Monroe’s White’, for shade, and a pink one, and some with lavender or fan-shaped flowers.

The clumps will expand over time, but they’re well-behaved in garden beds. Most cultivars grow in sun or in shade. In regions with hot summers, though, morning sun or dappled shade is less stressful than full or afternoon sun.

Notice the mnemonic?

Quick tip: “spreading spicata” and “mounding muscari” refer to those species’ growth habits. When shopping for this plant, look for the species that will suit the purpose for which it was intended. The invasive tendency of Liriope spicata has turned many people off to any kind of liriope.


Cutting Back


quick tip--cut back liriope

Old tattered foliage of liriope.


Narrow leaves begin to emerge in late winter to mid-spring. Last year’s foliage can look a little ragged by springtime, especially in colder areas of the country. The tips of the leaves often become frayed, and much of the foliage might have turned brown over winter. And the local deer population can cause damage. Place some dried blood among the clumps to discourage them, or spray with a deer repellent, especially as they come into bloom.

liriope--new foliage emerging

New foliage emerging in center of clump.

Before applying a fresh layer of mulch to dress up the beds for the season, cut back the old liriope foliage. This will remove the old foliage, considered unsightly by some gardeners. Raise the lawnmower’s deck, if necessary, and mow down the liriope to remove old brown foliage.

But this must be done before new leaves begin to shoot up from the center of the clump. Delaying this until after new growth has emerged will chop off the ends of tender leaves, leaving brown tips on new green growth. And don’t try this on recently planted liriope, which can be yanked out of the ground.

An alternative is to cut each clump by hand if there aren’t that many plants. Sharp scissors will do the trick. You can either collect the trimmings and compost them, or let them lie on the ground, to be covered by fresh mulch. Remove diseased foliage to the trash. A string trimmer might work, if it cuts and doesn’t shred the leaves.


And Fertilize

When there are so many chores that need attention in spring, I usually bury old leaves under a fresh 1″ layer of shredded hardwood mulch. The buried leaves will break down in the soil. Be sure to leave the crown of the plant uncovered.

Before applying mulch, broadcast granular fertilizer, such as 10-10-10, to the liriope, but prevent it from landing in the crown of the plant. Compost is an excellent fertilizer.


Liriope Diseases

Liriope can sometimes be infected with anthracnose, a disease that causes reddish-brown spots or dieback on leaves when they should be dark green. Remove clippings from the garden when cutting back the foliage of infected plants. Keep the foliage dry and increase air circulation by not crowding plants. Thinning the tree branches in the canopy above the liriope planting will allow more light to reach the plants.

Crown rot shows up as yellowing or browning at the base of the leaves, eventually consuming the entire plant. These plants should be removed and discarded. Avoid watering late in the day, which keeps leaves wet during the night when diseases take hold. Try not to include them in the irrigation pattern.

Plant liriope in well-drained soil, and, once established, water them in the morning once a week during times of drought, but don’t keep them wet. Annual applications of gypsum will help condition the soil and improve drainage.


Spacing

liriope sparsely planted

Liriope planted about 2′ apart

A common mistake is planting this ground cover too sparsely. These clumping liriopes (photo) are planted over 2′ on center. Liriope will not expand to fill the spaces between these plants any time soon. Instead, weeds will take this opportunity to colonize the bed.

Planted 12″ to 14″ apart, liriope will cover the ground, shading it and cutting down on much of the potential weeding.

In soil that is well-amended with compost and pine fines, liriope will expand more vigorously and have better-looking foliage in winter. In poor soils, it probably won’t die, but it will struggle.


Quick Tip #3: Garden Bed Edging


There are many contrivances designed to mark the edge of a bed. Whatever your personal preference is, go for it—white scalloped concrete or wire segments, bricks on a diagonal tilt, wooden ties, or heavy black plastic spiked to the ground.

I used a garden spade, with a sharp straight blade, to simply cut a steep angle 3″ into the ground. This suffices to stop most lawn grasses from spreading into the bed for a few months.

Diagonal brick edging looks quaint in Williamsburg. But if I used bricks, I preferred to “plant” them end-to-end almost flush with the ground. This forms a convenient mowing strip between the bed and the lawn, over which the mower’s wheels could follow the outline of the bed. And it’s less conspicuous.

In the back yard, in the informal Maryland gardens, gray or brown rocks lined the beds. If they were unearthed from and couldn’t be used on landscape work sites, I took them home. The edging was softened by plants that crept over and between them. There was no grass in the back yard, so these rocks functioned to define the mulch pathways and raised borders.


Is the Edging Too Conspicuous?

Brightly colored materials edging garden beds, such as colorful rocks or painted concrete segments, are conspicuous by their presence. The edging materials can end up getting all the attention instead of your exquisitely designed plant combinations. See if the boundaries can be maintained with the spade or with more muted shades of planted bricks or stones.


Headings

Page 1: Quick Tip #1: Spring-Flowering Bulbs (Fertilize Them, Wait For Them To Yellow Naturally, Remove Old Flowers, Divide Them), Quick Tip #2: Liriope: Mounding Or Spreading? (The Spreading Liriope Spicata, The Mounding Liriope Muscari, Cutting Back, And Fertilize, Liriope Diseases, Spacing), and Quick Tip #3: Garden Bed Edging (Is the Edging Too Conspicuous?)

Page 2: Quick Tip #4: Cutting Back Sedum ‘Autumn Joy’ (Other Perennials That Could Benefit), Quick Tip #5: How To Divide Hosta (Hosta Flowers, Fertilizer, Divide and Multiply: Preparation, and Dig, Divide, and Replace), and Quick Tip #6: Pruning Early-Flowering Shrubs (Renewal Pruning, A Personal Perspective on Pruning)

Return to the top

Hardening Off: Getting Ready To Plant


Plants Are In the Garden Centers, But Is It Warm Enough To Plant Them In the Garden?


blueberry 'Patriot'

Early spring flowers and leaves on the potted blueberry.


Our local garden centers are stocking up for early spring sales, and it’s great seeing all this color! Some of the plants can go into the garden soon, after hardening off.

Blueberries, redbuds, and pink dogwoods—nursery trees and shrubs that overwintered in local outdoor conditions—can be planted now. If there’s cold weather coming, that’s okay; these plants are used to it. If it’s severely cold and established plants have started leafing out, they’ll probably show some damage on the tender foliage. But they’ll recover.


Time For Tender Plants?


The tender warm-season types, such as basil, tomatoes, peppers, dahlia, cosmos, and caladium, can’t be planted until the weather has settled and the soil has warmed up. They must have frost-free weather. They also need to undergo a process known as “hardening off” before being subjected to the elements outdoors.

April 10 is the average date of our last spring frost (Charlotte NC, zone 7b/8a), but normally that’s still too early for peppers and basil. In most years, by that date, the soil hasn’t warmed up sufficiently for them.

snow, bird feeder

Snow on one of the bird feeders.

Tomatoes and many annuals can be planted around mid-April if the weather cooperates. They can tolerate cooler soil than peppers, but not frost or cold soil. Last year, in a mild spring, I planted a tomato in late March. A few cold nights necessitated covering it, but it survived.

It’s rare, but not unknown, for a snow squall to blow through Charlotte in April. Recent weather patterns sometimes indicate suitability for transplanting, but that doesn’t guarantee pleasant weather will continue.

(***Update*** April 2, 2019: Well, it snowed this morning! The 1/2″ of snow was the most we’ve seen here all winter. Other than placing the potted blueberry under an overhang next to the house, I didn’t protect any of the plants outside. The shrub is in bloom, waiting for the bees to pollinate it, but frost would have ruined the flowers. The temperature stayed several degrees above freezing next to the wall.)


Cold Soil


Soil might require more time to warm up after a cold, wet winter. And a prolonged stretch of cloudy skies, with no sun, will delay warming the soil. Maybe you’ve had a milder-than-average winter, as we’ve had here in the Carolinas. Still, pay close attention to the weather forecast.

Have protective covers (row covers, plastic sheets, old blankets) and maybe some strings of incandescent miniature lights handy, just in case.


Lobularia 'deep Lavender Stream'

Lobularia ‘Deep Lavender Stream’ likes cool weather, but cover during hard frost. Wonderful fragrance.


Hardening Off


snapdragon 'Snaptastic' strain, needs hardening off before planting

Snapdragons need hardening off before planting.

Most bedding plants and edibles begin life in greenhouses, shielded from cold temperatures and wind. Their leaves are quite tender in this protected environment. When these plants are suddenly exposed to outdoor conditions, though, the shock of full sun, colder temperatures, and a brisk breeze will cause them to wither. They might not recover.

Hardening off is the process of gradually toughening up the plants’ tissues to prevent wilt in the wind, scorch in the sun, or damage from the cold.

Each species or variety has a range of temperatures it can tolerate. So, even though acclimated dianthus can go outdoors here in mid-March or earlier, acclimated dahlias can’t. Dianthus can tolerate hard frost, but dahlia can’t.

Annuals are often categorized as being “half-hardy” or “tender”. Look for signage in garden center departments that indicate whether the plants can take some frost and cool temperatures, or none at all. Before purchasing all the plants your garden will need, find out which ones will tolerate cool weather or some frost, and plant those first.

Most greenhouses prepare their plants to some degree. Moved outdoors to tables exposed to the elements, these plants are hardening off naturally. Ask the salesperson if it’s safe to plant your selections or if they’ve been hardened off. Set them in the garden at the appropriate time; prepare to cover them at night if new foliage could be damaged by a late frost. The extent of damage depends on the species and on the severity of the weather.

Some garden centers display plants in lightly heated space, out of the wind. Frost-tolerant varieties with new growth emerging in these conditions will need hardening off before transplanting to the garden. Perennials that have fully leafed out in a greenhouse, compared to the same varieties established in the ground, might need protection if planted out. Delay planting or cover them on chilly nights.


Some Like It Quite Warm

Temperature-sensitive species, such as caladium, grown from tubers, will languish or re-enter dormancy in cool (not even frosty) weather. Cool to a caladium is anything below 65°F. Tender young plants can be killed by a light frost. Pepper plants and basil will suffer in cold soil, especially cold wet soil, even if the air temperature is above 50°.

We often see cold-sensitive annuals (caladium, vinca, zinnia, basil) at the big stores more than a month before it’s safe to plant them. That’s a gamble some are willing to take. They need warm weather and warm soil, so I’m not even tempted. Not yet.


The Process of Hardening Off


dusty miller, plant after hardening off

Dusty miller (Senecio) is a short-lived perennial.


Hardening off is a gradual process. Over a period of about a week, introduce home-grown seedlings and greenhouse plants to outdoor conditions. These plants need a period of adjustment if they have been pampered in a protective environment.

Start hardening off the plants by placing the flats or pots in a protected place outside, out of the wind. Give them 2 hours of gentle morning sun the first couple of days, and then dappled sun or light shade for the rest of the day. Strong sun, cold, and wind might be too harsh at this point, particularly for home-grown seedlings.

If the weather is especially inclement, you might have to delay placing them outside. Exercise caution with tender annuals (coleus, impatiens, zinnia), basil, and other plants that need warm temperatures.

Cool season vegetables and herbs (kale, broccoli, lettuce, parsley, cilantro), half-hardy annuals, and hardy perennials (Heuchera, Hosta, Sedum) can withstand chilly temperatures. But they still need hardening off if they’re coming directly from a heated greenhouse.

If the plants show no signs of stress (wilt or scorch), leave them outside a while longer. Give them direct sunlight. Be careful not to burn them in unusually high temperatures and strong sun. Don’t coddle the young plants by keeping them in the shade, though, unless shade is what they require. However, plants that need some shade in the summer usually tolerate or enjoy a few hours of direct sun on cool days in late winter through mid-spring.

Gradually lengthen the amount of time the plants spend outside in the sun and breeze. Keep the seedlings damp to moist, but not wet. Check them periodically for wilt. The plants will dry out much faster in warm sunshine and moving air. Finally, if the weather is suitable, plant them.


At the End Of the Day

Bring them inside in the afternoon if a drop in temperature is expected. Soon, the plants will be able to stay outside at night if the temperature is within their range of tolerance. Forgetting to bring the warmth-loving plants back inside is a sad story I’ve heard more than once.


If the Plants Are Really Tender…

plants under lights, plant outside after hardening off

…they might not be able to tolerate more than 30 minutes of gentle outdoor sun or dappled shade the first day. This is often the case with home-grown seedlings which didn’t receive enough direct sunlight indoors. Weak seedlings won’t tolerate any direct sunlight the first few days without withering and will take longer to adjust to outdoor conditions.

The root system of a seedling grown in inadequate light will be weak and won’t be able to supply enough water to the leaves. That’s one reason why it wilts so readily when placed outside. Also, the cuticle, the protective waxy surface layer of the leaf, is underdeveloped in low light.

Hardening off these frail plants might not be worth the effort. If they don’t improve in a few days, consider buying stronger transplants from the garden center or the farmers’ market. You might have enough time, though, to start new seedlings indoors. This time, give the seedlings stronger sunlight, place them closer to artificial light, or run the lights a few more hours each day.

Vigorous young tomatoes grow like weeds and can be planted lower in the ground. They’ll hardly skip a beat, so I’d consider keeping them as long as they have some good leaves and improve in outdoor conditions.


Plants Grown Under Lights Need Hardening Off

The photograph, above, shows a multi-tube light fixture positioned several inches above potted plants. As long as the lights are on 14-18 hours per day, the seedlings will grow into strong plants.

I used to start most seedlings indoors under 4′ long light fixtures (shop lights). I installed 2 daylight fluorescent tubes per fixture, before LED’s became commonplace. Flats were placed only 2-3″ below the tubes. Light intensity drops precipitously as distance from the lights increases. That’s why ceiling lights do almost nothing for sun-loving plants.

Plants grow beautifully under artificial light, close to the tubes. They’ll never see a cloudy day! But don’t place them so close that they could feel the heat. Old tubes decrease in efficiency and feel hotter.

Perhaps you have a south-facing bay window that gets natural sunlight all day, and the seedlings look sturdy and healthy. That’s great! However, they still require hardening off, gradually exposing them to wind and full sunshine. Otherwise, even these sturdy plants will wilt from the stress of sudden exposure to the elements. Outdoor sun is more intense than indoor sun because windows absorb and reflect much of the sun’s energy.


Do I Have To?

Now, it’s entirely possible that your plants will thrive without any hardening off whatsoever. Perhaps the garden center took care of that for you by keeping them outdoors, exposed to the elements. After all, many gardeners purchase their plants and have them in the garden within the hour.

That’s fine, if the weather is mild, and perhaps overcast, or if the plants have been fully hardened off. With a favorable forecast, consider planting in late afternoon or evening to lessen the shock.

If plants require hardening off, limit the process to as short a period of time as possible.


A Gamble In the Garden


USDA plant hardiness zone map

The USDA plant hardiness zone map, revised 2012.


As our average nighttime temperatures rise, the likelihood of frost diminishes. But we must be prepared for that dreaded surprise, when the temperatures plummet lower than the weather forecaster predicted.

Here in USDA plant hardiness zone 7b, a moderate part of the Southeast, we’re entering the “shoulder season”. This is when the weather can be delightful or it can be a little “iffy”. As in, “iffyou put that basil in the garden now, it will surely die!” Okay, seriously… March can bring us beautiful 75° days, and then we can have 3 drizzly days in the 40’s. Nighttime temperatures can be 42° or 22°. Okay for kale transplants, but not okay for okra or Thai basil.

Tokyo Bekana

Chinese cabbage ‘Tokyo Bekana’, coming into flower.

That’s currently the pattern in our location—warm and then cool. Edible greens don’t mind at all. Cool season greens and vegetables planted now should do very well, after hardening off. In fact, they could have been planted a month ago with no problem! But we didn’t have snow on the ground like our friends in the North.

The cool season vegetables already in the garden have been producing non-stop since autumn, after the tomatoes and peppers had been pulled out. I’m not in any hurry to see the end of the mustard greens, collards, and kale. Soon I’ll harvest collards for a big pot of soup. Love these mild winters!


Early Green Onions: No Hardening Off Needed

green onions

Green onions planted from onion sets.

A few weeks ago, I planted about 50 green onion sets, or young bulbs, and they’re already a few inches tall (photo, right). If cold weather comes for a visit, that’s no problem. Their little patch sits right against the south-facing wall of the house, in a comfortable microclimate.

Although we’ll still have some frosty nights, the onions won’t need to be covered. They can be gently tugged from the moist soil without damage, since they’re not yet heavily rooted.

Delicate young growth of onions and bunching onions grown from seed will require hardening off.


Headings

Page 1: Time For Tender Plants?, Cold Soil, Hardening Off (Some Like It Quite Warm, The Process of Hardening Off, At the End Of the Day, If the Plants Are Really Tender, Plants Grown Under Lights Need Hardening Off, Do I Have To?), and A Gamble In the Garden (Early Green Onions: No Hardening Off Needed)

Page 2: What Can I Plant After Hardening Off? (The Safest Bet: Pansies and Violas, Half-Hardy Annuals, Helleborus, Heuchera), The Warm Color Palette, The Cool Color Palette, and Spring: The Season of Rebirth

Return to the top


Campbell’s Covered Bridge, Landrum SC


Campbell’s Covered Bridge


Campbell's Covered Bridge

Campbell’s covered bridge.


A weekend drive, with no destination in particular, delivered me to an unexpected surprise. The sign on the side of a local road said “Campbell’s Covered Bridge”, and included an arrow to point me in the right direction.

With only a quarter of a tank of gasoline indicated on the dashboard, I hoped to combine tasks. The last quarter tank holds so much less than the first quarter tank, so fuel took priority. Luckily, the gas station was a few miles ahead, according to Garmin, and the bridge somewhere beyond that.


campbell's covered bridge


I was in Greenville County, South Carolina, exploring an area that was new to me. The weather consisted of a persistently pesky light drizzle, with temperatures in the 40’s. Wipers on, then off, then on… Not terribly unpleasant for a walk around a park, I thought, even with a camera hanging around my neck. Since there were, as yet, no highlights on this trip, I was hoping for a sign. And I got one.


There’s the sign!


Sharp right turn off the road! Blink, and you’ll miss it. I blinked…backed up, and pulled into the parking lot, next to 3 or 4 other cars. Apparently there’s a second entrance farther down the road with a tighter parking lot. A young man in formal ROTC dress told me so.


red flowers on maple trees

Red flowers on native maple trees.


The red-sided bridge was down a gentle slope—very picturesque, I’m sure, when the maple trees are in full fall color, or as light green leaves unfurl in spring. The trees were a week or two away from new spring foliage. But the maples were in flower, which warmed up the grays and browns of bare forest twigs. And some yellow daffodils over by the picnic table brought cheer to what some would call a dreary day.

Jacket on, umbrella open, camera dangling. The slippery slope with all the water draining toward the stream from the field above limited access. Different shoes, different story.


campbell's covered bridge diagram

A diagram on the site.


There’s something about the sound of a mountain stream…I just love it! Beaverdam Creek spills over smooth flat bedrock, and I imagine this would be a great place for the kids to splash around on a hot August afternoon. Bring a picnic lunch and art supplies for a quiet break.


Built and Rebuilt


On August 24, 1908, 20″ of rain fell in one day, washing out the original bridge. Local residents used the rock shoal upstream to cross the water. A year later, Charles Irwin Willis (1878-1966) built the current 35′ x 12′ bridge on land belonging to Alexander Lafayette Campbell (1836-1920). The truss followed the contours of the land, so the bridge was not built square.

campbell's covered bridgeCampbell’s Covered Bridge has a four-span Howe truss on each side, with X-braces and vertical tie rods. William Howe, from Spencer, Massachusetts, patented this design in 1840, and it was often used for railroad bridges.

According to the Greenville County Recreation District, the Crescent Community Club restored the bridge in 1964, and Greenville County restored it again in 1980. The bridge was closed to vehicular traffic in 1984.

Campbell ran a corn grist mill downstream from the bridge. A dam built 75′ upstream created a mill pond, providing water to drive the mill. The Campbell grist mill closed in the 1950’s, but some of the stone foundations from the mill and the house can still be seen.

In 1979, E.O. Productions filmed a scene for the movie “The Day of Judgment”. Set in the 1920’s, an avenging angel rode a horse out of the bridge to see that justice was done!

The address is 171 Campbell’s Covered Bridge Rd., Landrum, SC. This is the last covered bridge in South Carolina—worth a visit.

This website has many seasonal photographs of the bridge that you may see but not copy without permission: https://www.scpictureproject.org/greenville-county/campbells-covered-bridge.html


downstream from bridge

Downstream from bridge.


upstream from campbell's covered bridge

Upstream from bridge.


campbell's covered bridge

Be careful where you walk.


Return to the top

Southern Spring Home and Garden Show

2019


It’s Time For the Home and Garden Show!


flower arrangement at the garden show

Arrangement by Kazuko Ikuta, Sogetsu school.


For two weekends in late February and early March, the annual Southern Spring Home and Garden Show, charlottespringhomeandgardenshow.com, comes to the Park Expo and Conference Center, in Charlotte NC. It arrives at that time of the year when many of us gardeners are itching to get out into the garden.

For years, my little horticultural company, Wellspring Gardens, set up at the Washington (D.C.) Home and Garden Show and then at the Maryland Home and Garden Show, in Timonium, Maryland. For several years I did both shows, and then decided to rent space at just the Maryland show.

There were many other local venues where I sold plants, such as Green Spring Gardens Park (Annandale, VA), Towson Gardens Day, Brookside Gardens Herb Fair, the Carroll County Farmers’ Market, the Leesburg VA Garden Festival, and the Garden Festival at Ladew in Monkton MD. These events were held rain or shine. So much fun…and so much work! Most of these occurred before the weekly farmers’ markets started up for the season.


cut tulips


Liberty Hall


A few hundred exhibitors set up throughout the show, either selling directly to customers or setting up consultations for home improvement. Since time was limited, I didn’t spend it in this section. But when there’s a house to fix up, this is the place to be. Here you can view products and speak with contractors.


King’s Greenhouse


King’s Greenhouse’s booth was located near the front entrance of the home and garden show, with the home improvement contractors. They had lots of plant material that could be planted outdoors now, including pansies and  Heuchera cultivars (coral bells) in various colors, shrubs, and indoor plants. Hardening off the plants first will prevent damage to their foliage.

Kingsgardencenter.com. Phone: (704) 821-7507.

And food vendors were located in a couple of places, so shoppers need never go hungry. I took home a hot dog for Mother (she’d been begging for one) and we shared a really good cheese pastry.


Freedom Hall


Landscape companies set up full-scale gardens in this section of the show, complete with large trees, flowering shrubs, perennials, bulbs, and flowers. There are waterfalls, ponds, pergolas, she-sheds, and a chicken coop! I like to visit this area first, before it becomes crowded. Belgard is one of this home and garden show’s sponsors, so their paving materials feature prominently in the landscape displays.

Here are some of the booths I visited:


Ikebana International, Charlotte, Chapter 49


At the entrance to this section was an exhibit with Ikebana flower arrangements designed by members of Chapter 49. Those who are interested in this ancient Japanese art of flower arranging may attend meetings, held on the first Thursday of September, October, November, February, April, and May. Meetings are open to the public and are free to attend. Marcia and I had a lovely conversation, some of it on the subject of flowers!

www.ikebana49.org.


All Natural Streams Landscaping, Billy Provett


waterfall at charlotte garden show, billy provett


Owner Billy Provett always does a fabulous job with his water gardens. The sound of splashing water, the lure of nighttime illumination, and a restful garden ambiance create a magical place…right in your own back yard!

This pondless waterfall cascades down a slope and into a basin filled with rocks. A pump recirculates the water, sending it back to the top of the stream. This is perfect for a family who would enjoy the sound of water but not the high maintenance of a fish pond. People’s Choice Award.

www.naturalstreams.com. Phone: (704) 577-4306.


Southern Showplace Landscapes, B. J. Fisher


A beautifully illuminated coral-bark maple, seen through the stems of a birch tree (photo, below), got everyone’s attention. So did this firepot, atop a large stone sculpture with water trickling down its sides. Environmental Award.

www.southernshowplace.com. Phone: (704) 699-0815.


Plant Man, Elton Liles


water feature, garden show


Another beautiful water garden, with a blooming camellia on the right. An important detail is using stone of similar color and varying sizes. Note that in the waterfall, flat horizontal stones make an effective fall. The void behind the cascade magnifies the rich tones of the water spilling into the pond. Best in Show Award.

www.plantmancharlotte.com. Phone: (704) 219-0160.


Southern Stonescapes, Daniel Flynn


old bench, garden show


Every landscape is improved by adding some hardscape, whether it’s a gazebo, a paved patio, a boulder outcroppping (with a pond?), or simply a large pot. Landscape the front yard for curb appeal, and personalize the private spaces.

I love this old lichen-encrusted bench. A great way to personalize your garden is to use items that might be gathering dust in the basement or the shed. Best of Outdoor Living Space Award.

 www.sstonescapesunlimited.com. Phone: (704) 309-9117.


Bushwackers Landscaping, Chad Little


garden show, stone fountain


Part of this display includes an assemblage of stones, plumbed up the center to create a gentle cascade of water spilling over the edge, into a pondless reservoir. Just what thirsty songbirds need in our hot summers!

www.bushwackerslandscaping.com. Phone: (704) 463-0174.


Old Hickory Buildings of Monroe, Tim Beane, Betty Beane, Amanda Beane


A few sheds were on display, one with a couple of chickens! In the back of the shed was a door that led to a covered outdoor run, where the chickens could enjoy some sunshine and pick in the grass whatever it is that chickens pick.

Another looked like the perfect get-away to finish that book, with a cup of coffee and the dog for company. Uh-huh: She-Shed! Or use it for a comfortable potting area, regardless of the weather outside.

ohbofmonroe.com. Phone: (704) 289-5147.


The Market Place in Independence Hall


I encourage you to visit and shop at these home and garden shows. I know how much work goes into setting up and preparing enough material to keep the booth well-stocked. This one ran for two 3-day weekends, and that requires a tremendous effort to produce inventory!

All kinds of products are available for purchase from the vendors. You can find a couple of companies selling plants, of course, and also artwork, antiques, clothing, housewares, birdhouses, goodies for the kitchen, pottery, wood products, tools, and furniture. Much of it is garden-themed, and some of it is not. And you can order sod and compost, a security system…or book a vacation to get away from it all.

There are fewer plant booths than we gardeners prefer, but that’s nothing new. That’s a perennial problem at home and garden shows such as this one. In February and early March, the weather is a gamble, especially in the colder region back in Maryland. But we had so many more “green” booths! There was the bonsai man, and a few herb vendors, several selling early flowering plants (pansies, ranunculus, forced spring-flowering bulbs, hellebores), perennials, houseplants, the African violet lady, the Plumeria person, and carnivorous plants. I hope this show’s organizers will try to bring in more plant vendors.


Guest Speakers


Just when I needed a break, the YouTube gardening video “sensation” Laura LeBoutillier (“Garden Answer”) and Proven Winners’ director of marketing Marshall Dirks conducted a lively talk to an engaged crowd. Ty Pennington (“Trading Spaces”), Julia Collin Davison (“America’s Test Kitchen” and “Cook’s Country”), and Matt Fox (HGTV’s “Room by Room”) also gave presentations this year.

Several other speakers conducted programs and DIY workshops with topics ranging from aquaponics to bees, cooking to curb appeal, dog training to cake decorating, and chalk paint to herb gardening, among others.

These are just a few of the many booths I visited in Independence Hall:


Juice Plus Tower Garden®, Cathy Melesh

Tower Garden RYou can harvest an impressive amount of produce from this ingenious hydroponic (soilless) system using a vertical growing “field”, where many pockets hold various plants.

A reservoir on the bottom (photo, right) pumps nutrient-rich water to the top of the tower, where the plants’ roots inside absorb what they need. LED lights supply illumination for herbs and greens (or houseplants) indoors.

Or, used outdoors without the lights, you can grow your own salad all summer long!

Bonus: Cathy’s sister, helping at the booth, was a customer at the garden center where I used to work. Small world!

cathymelesh.towergarden.com. Phone: (704) 560-0994.


The Card Gallery, Abby D. Morgan


pop-up card


There really are some of us who still write letters…yes, on paper. So, when I saw these laser-cut pop-up greeting cards, I had to take a few home with me. There wasn’t a pop-up children’s book that I could resist, when my kids were little, so…

http://alexnbo.com/thecardgallery.pdf. Phone: (919) 593-7270.


Oakdale Greenhouses, LLC


Oakdale greenhouse at garden show


A wide variety of plants—Serissa and juniper bonsai, hanging plants with roots enclosed in a ball of moss and twine (Kokedama), succulent gardens, air plants (large and small Tillandsia) in hanging glass globes and other bromeliads, Nepenthes, houseplants both unusual and common—it’s all here!

Every year I end up buying a few. This year I bought a succulent I’d never seen before. It grows in a rosette, like an Echeveria, and it has thick blue-gray leaves with small burgundy dots. And I bought a tiny Ficus pumila quercifolia, with variegated leaves. You’ll find inexpensive 2″ starter pots and larger dish gardens and terrariums.

https://oakdalegreenhouses.com. Phone: (704) 596-4052.


DirtWorks Pottery, Dan Triece, with Ben Vanpelt

potters wheelI love pottery. In front of me is a glazed blue coffee mug I bought almost 30 years ago, when my brother and I went to a craft show in New Paltz, New York. No, not from Dan. But this illustrates how these items become members of the family, integrated into our lives…mine anyway. There’s something about bringing home a piece of art that was handcrafted by a “real person” instead of by a machine.

Dan and I chatted while he fashioned tiny ceramic vases on the potter’s wheel. They will have to be glazed and fired, of course, but there were hundreds more ready to sell. I bought two of them, deep blue. As soon as I returned home, I filled the vases with a few violas plucked from the garden. Perfect! Mother and I can enjoy them while we’re working the jigsaw puzzle.


pottery at garden show


Also for sale were bowls of all colors and styles, platters, vases, bread dishes, artistically styled pitchers with curved handles, small teabag rests…just beautiful! Phone: (336) 873-8979, Seagrove NC.

https://www.facebook.com/Dirtworks-Pottery-429257577168804/


BBC Expressions, Billie Colley


If you like color, take a look at these uniquely painted table tops. Billie paints on plywood rounds, from 22″ to 28″ in diameter. And then they’re coated with a few layers of protective epoxy, a process that takes weeks for completion. But they’re not for outdoor living…treat them as works of art, which they are, and keep them indoors.

I was mesmerized— by the color combinations, by the sinuous swirls, by their simple-but-precise beauty! A cherry base is normally attached when a table is purchased, except when on display at shows.

Certainly this must be a skill that Billie has honed over the years. Born in Turkey and raised in Britain, all these influences must have contributed to her aesthetic. But, no! Although she really enjoys painting and designing mosaics, architecture is her trade, and this is a relatively new endeavor!


The top row photographs are close-up details of 3 tables. The center bottom photograph shows pendants employing the same technique. On the bottom right is the table top that first drew my attention. Gorgeous!

Billie at work, and explaining the technique to some customers.

Website for jewelry: https://www.etsy.com/shop/BBCExpressionsGifts. Phone: (704) 256-4000.


Come for a Visit


The next time a home and garden show comes to town, take advantage of the opportunity to talk with the vendors. It’s a great introduction to the projects you might want to get underway this year. The owners and personnel representing the companies are eager to help with your questions and to provide solutions to those nagging problems that never seem to get properly fixed.

And don’t forget to pick up that weird plant or the piece you fell in love with, for the finishing touch…because it might be gone tomorrow. Happy Spring!


yellow tulips, trees


Return to the top

Starting Seeds for Cool Season Greens


Starting Seeds for Cool Season Greens 


dinosaur kale, 7/18/19


The coldest part of winter has passed for most of us, and it’s time to start seeds for cool season greens. Late winter transitioning to spring is my favorite time of the year. That’s when I start seeds for early harvests. This article covers details for growing some of the early greens, particularly spinach and the brassicas. On Page 3 is a recipe for a veggie omelet, an easy way to get more greens into the diet.

If the garden were bare, I would have started seeds a few weeks ago. But the greens in the vegetable garden continue to offer harvests. Unfortunately, the “list of wants” from the seed catalog is far more extensive than the garden’s square footage can accommodate! It’s time for the last harvest of collards for soup; that’ll open up some space.

While we’re harvesting established cool season greens, I’ll start several new crops indoors. These plants will be plugged into the garden as space opens up. But the seedlings will not be kept in their little pots very long; this stresses the plants and causes them to bolt, or to flower prematurely. (Photo, above: dinosaur kale germinated at night; it will green up in the sunlight.)


The First of the Cool Season Greens: Spinach


spinach 'Monstrueux de Viroflay' in pot

Young spinach ‘Monstrueux de Viroflay’.


I would have sown spinach directly into the garden by now, but we’ve had a long run of chilly rain. The soil is so wet that it’s doubtful any seedlings would even be tempted to germinate. At this time of the year, pay close attention to the weather forecasts. Conditions could deviate considerably from the averages.

It’s not good to dig in soil this wet anyway. That would drive out air spaces and ruin the tilth of the soil by compacting it. 

As temperatures begin to moderate, slugs come out in force and will decimate any seedlings that dare to grow in this weather. Rain: good for slugs. Sluggo: bad for slugs! Organic Sluggo pellets attract and kill slugs and snails. This version of the product contains materials (iron phosphate) that add nutrients to the soil. Check the label, though; Sluggo has other products with added ingredients. The organic option is safe to use around the edibles.


Spinach From Seed Is Easy!

Spinach germinates readily, from 50°F up to the mid 70’s (soil temperature), as soon as the ground can be worked in late winter or early spring. For better chances of success, choose varieties that are disease resistant and slow-bolting. In well-prepared soil, spinach is one of the easiest crops to seed directly into the garden.

Prepare the bed by incorporating 2″ to 3″ of compost and/or aged manure into the top 5″ of soil. Spinach prefers soil pH near neutral, from 6.5 to 7.3. A soil test will indicate how much lime, if any, should be added to raise the pH.

For baby leaf harvest, sow the seeds thickly in a patch, about 1″ apart. For full-size leaves, space the seeds a few inches apart, with rows 8-10″ apart. Crowding the seeds too closely or poor soil will result in a disappointing crop.

‘Monstrueux de Viroflay’

There’s a wonderful variety called ‘Monstrueux de Viroflay’ (photos, above and below), a French heirloom dating to 1866. It grows very large for spinach, up to 20″ tall with 10″ leaves, and should be spaced several inches apart.

Viroflay, or Monster, as it is often called, is lower in oxalic acid, or oxalates, than other spinach varieties. It might be acceptable for people with health concerns that prohibit spinach consumption. Check with your doctor.

Keep the soil moist and add organic fertilizers, such as fish emulsion, Sea-Plus, or earthworm castings, every 2 weeks. In cold soil, however, liquid synthetic fertilizers high in nitrogen work better than the organics. Microbes in the soil break down organic material and make those nutrients available to plant roots. But microbes are dormant in cold soil, so they can’t perform this vital service. They’ll become more active as the soil warms up in late winter or early spring.


spinach seedlings

‘Monstrueux de Viroflay’ spinach seedlings.

Spinach Bowl

Another option is to sow seeds directly into a 14″ wide, 6″ deep bowl filled with fresh potting soil (photo, above). The pot has drainage holes. Portability allows me to bring the pot indoors on especially cold nights while the cool season greens are beginning to germinate. And moisture levels can be carefully monitored.

Since the sappy crooked pine tree that shaded the deck from afternoon sun has been cut down, conditions on the fenced-in deck are more favorable to growing vegetables in containers.

Fill the pot with potting soil to within an inch of the rim. Simply scatter seeds on the surface, a couple of inches apart for smaller varieties and a few inches apart for Viroflay. Cover with another 1/3″ to 1/2″ of soil. Water…and wait… Spinach’s two seed leaves, the cotyledons, are easily differentiated from other seedlings by their long narrow shape. Thin as necessary; you can eat the culls.

Don’t neglect fertilizing potted greens. Rain and irrigation quickly wash nitrogen out of the soil.


Harvesting Spinach

Spinach.

Harvesting the crowns begins within 4 or 5 weeks, depending on weather and soil fertility. Pick individual leaves at any age, allowing the central growing tip to continue producing new leaves. Or cut the entire plant at the soil line before flower buds begin to grow.

By sowing new crops of spinach every week or two, you’ll have continuous harvests of spinach, as long as the weather favors growth.

Spinach quickly bolts, or goes to flower, at temperatures above 75°. Dry or nutrient-poor soil stresses the plants. And spinach will flower prematurely if the plants are stressed by growing too close together.

Harvest the entire plant if you notice flower buds forming. Cutting off the flowers will not stimulate spinach to grow a new bunch of leaves. Instead, start more seeds.

Use spinach steamed as a side dish, or in sauces, soups, smoothies, salads, pasta dishes, or an omelet.


And Then the Brassicas


cool season greens grown as microgreens

These microgreens are mostly brassicas.


The Brassicaceae family is a huge group of edibles. It includes arugula, broccoli, Brussels sprouts, cabbage, cauliflower, collards, kale, komatsuna, mizuna, mustard greens, pac choi, radish, tatsoi, turnip, and others.

All members have similarly notched seed leaves, or cotyledons. Those are the first two heart-shaped leaves to emerge from the seeds (photo, above). Because the seed leaves are already formed inside the seed, the little plant can begin photosynthesizing—and feeding itself—immediately upon germination. True leaves, which develop after the seed leaves, are also similar for most of the cruciferous vegetables. That’s why it’s important to label your pots so you can distinguish “this” seedling from “this other similar looking” seedling.


Include On the Label:

  • the name of the crop (dinosaur kale)
  • the name of the cultivar (‘Black Magic’)
  • the date of sowing (brassicas germinate in less than a week if sown indoors)

Store leftover seeds in their original packets, and make sure the cultivar name is included on the label. Store in a cool, dry place, such as the refrigerator. Most seeds of cool season greens are viable for 2 years or so. If not already indicated, mark the year of purchase on the packet.

It’s helpful to keep a record of the varieties you’ve tried and liked or disliked. Include how you started the seeds (in 4″ pots or cell-packs, under lights, directly in the garden), the dates you seeded and transplanted, and the weather conditions. Include notes on what was successful and what wasn’t, and possible explanations. Did the seeds germinate and then keel over and die (damping-off disease)? Did critters eat your cool season greens as soon as they started growing? Should the seeds have been started earlier? Or later?

There are successes and failures in every gardener’s life. Being able to pinpoint the reasons for a disappointing crop will enable you to be more watchful or to try a different approach next time. Check with your local cooperative extension office, through state land-grant colleges and universities, for advice. Failure is a learning experience, not a reason to stop trying!


Damping-Off

Damping-off disease can appear soon after germination. Sometimes, diseased seedlings don’t even appear above the soil, looking as though the seeds didn’t sprout at all. The small seedling develops a narrowed brown spot on the stem. Then the top of the plant falls over, and the seedling dies. This is caused by several species of fungus, whose spores are in the air, in the soil, in the water, or on the seeds themselves.

Damping-off often accompanies:

  • poor air circulation
  • high humidity
  • crowding
  • low light
  • low temperatures
  • reusing old soil
  • and overwatering

Space the seeds farther apart, run a small fan nearby, water in the morning, and increase the temperature and light levels if they’re low.

The first time I used the organic biological fungicide called Actinovate, life became a bit sweeter. It is costly, but a much safer option than chemical fungicides. And, with the number of seedlings I grow each year, a wise investment. Make up a small amount of the solution when needed and apply from a spray bottle or a small watering can when sowing the seeds and as soon as the seeds germinate. Always exercise caution when using sprays, and read the labels.


Caterpillars on Cool Season Greens

When the weather warms up in mid- or late spring, you’ll notice butterflies and moths flying around your cool season greens. How nice, you might think. But those lovely insects are on a mission, and that mission is to find suitable plants on which to lay their eggs.


Most of the brassicas are targeted by the female:

  • Cabbage Moth (or Diamondback Moth)
  • Cabbage Looper
  • the velvety green Imported Cabbageworm (also called the Small White Butterfly or Cabbage White Butterfly—white with black markings). Look for them lined up on the leaf’s midrib.
  • Cross-striped Cabbageworm (fine black stripes across the back, yellow stripe on the sides).
  • A few other species target particular brassicas or are limited geographically.

Here in my North Carolina garden, the 1¼” long Imported Cabbageworm has been the most commonly seen caterpillar on the brassicas. It is well-camouflaged in the green foliage. But for the past couple of years, populations of the Cross-striped Cabbageworm have been increasing. They’re especially pesky when lodged among the broccoli florets. Sometimes I don’t see them until I begin cutting the broccoli (just remove them). Inspecting the produce and spraying Bt regularly takes care of that.

Eggs hatch in a few days to a week, and immediately get to work chewing little holes and then bigger holes in your broccoli, kale, and other brassicas.


Harlequin bugs on cabbage


Another insect feeding on brassicas is the black and orange harlequin bug (photo, above). I squish them when I see them, although they’ll see you approaching them and will try to hide. They cause whitish blotches and distortions in the foliage.

Bacillus Thuringiensis (Bt)

As soon as you notice the white moths and butterflies flitting near the brassicas, it’s time to get the sprayer bottle ready. The imported cabbageworm is the larval stage of a butterfly and the one you’ll see in the daytime. The other caterpillars are moth larvae and are active at dusk or at night.

Mix up a solution of Bt, Bacillus thuringiensis, available from the garden center. Dipel and Thuricide are brand names for Bt. It doesn’t take long for these voracious little caterpillars to inflict considerable damage to your plants, so don’t delay.

Spray both the upper and lower surfaces of the foliage, occasionally agitating the solution. Begin spraying a few days after first seeing the moths, or certainly when you see holes appearing. Set the sprayer nozzle to a very fine spray; larger drops of water will bead off the waxy foliage. One or two drops of dish soap in the sprayer will help the solution stick to the foliage if you can’t get a fine spray.

It washes off in the rain, but any Bt clinging on the reverse (bottom leaf surface) might be enough for the current batch of caterpillars. Spray the brassicas every 5 to 10 days, as long as the insects are active.


sprayer


How Does Bt Work?

Bt is a naturally occurring bacterium that disrupts the caterpillar’s digestive system when ingested. The insects stop feeding immediately and die within a day or two. Spray as soon as you notice them because young caterpillars are more susceptible to Bt than older caterpillars.

Bt effectively rids the garden of moth and butterfly larvae, including swallowtails that eat parsley. Although they won’t bother your broccoli, black swallowtail larvae feed on parsley and its relatives in the Apiaceae family, including dill, cilantro, and bronze fennel.

The tradeoff? Fewer moths and butterflies, but more undamaged produce. I enjoy watching the black swallowtail butterflies, though, so I plant the large perennial bronze fennel for the caterpillars picked off the parsley and dill. Bt targets larvae of moths and butterflies, and nothing else.

After picking the crops, I sometimes let the caterpillars feast on the remains. Those caterpillars might feed another brood of baby birds or green anoles at that time of year. Once cold autumn weather has settled into the area, these caterpillars will no longer be around to bother the fall crop. Autumn is another delightful time to garden.

Bt is perfectly safe to use on edibles. Use up the diluted solution within a few days. Store Bt in a cool location out of the sun. Buy a small fresh bottle every couple of years, as this is a live organism, not a chemical.


Headings

Page 1: Starting Seeds for Cool Season Greens, The First of the Cool Season Greens: Spinach (Spinach from Seed Is Easy!, ‘Monstrueux de Viroflay’, Spinach Bowl, Harvesting Spinach), And Then the Brassicas (Include On the Label, Damping-Off, Caterpillars on Cool Season Greens, Bacillus Thuringiensis [Bt], How Does Bt Work?)

Page 2: Broccoli (Improve the Soil for Cool Season Greens, Harvesting and Side Shoots, When the Brassicas Bloom), Mini Broccoli (Early Sprouting Broccoli and ‘Spring Raab’, Broccoli ‘Happy Rich’, Who’s My Favorite?, Gai Lan and ‘De Cicco’, Sowing Seeds, Late Sprouting Broccoli)

Page 3: Dinosaur Kale, Hardening Off Cool Season Greens (Gradual Changes), Growing Plants Under Lights (More Tips Using Artificial Light), Getting More Cool Season Greens Into Your Diet, A Veggie Omelet Recipe Using Cool Season Greens

Return to the top

Spring Is Coming: The Earliest Signs

2019


Signs of Spring


cherry tree, late winter to spring blooms

An early blooming cherry tree in the neighborhood. Rain darkened the bark, providing contrast with flowers.


Early Spring Bloomers


The birds are singing their spring songs (I love waking up to that), and the delicate sweet fragrance from early blooming trees floats on the breeze. Spring-flowering bulbs of all sorts are pushing up emerald green spears, and some of the daffodils are coming into full bloom.

A few varieties of cherry trees, with their characteristic horizontal banding of lenticels on the bark, are blooming now, in late winter. Lenticels are pores that allow gas exchange between the plant and the atmosphere. Autumn cherry trees (Prunus subhirtella ‘Autumnalis’) in neighborhoods I sometimes drive through have been flowering non-stop for months. They don’t have the short, showy burst of a ‘Yoshino’ cherry, but any flowers on a winter day are a welcome sight.


magnolia's big pink blooms, early spring

Saucer Magnolia.


Neighborhood saucer magnolias (Magnolia x soulangeana) just started blooming with their pinkish-purple cup-shaped flowers. This can be a tricky species; an untimely frost can turn all the open flowers brown in a flash. Look for a later-blooming cultivar to plant in spring, plant it in a protected location, or take your chances! You can now find a wider range of flower colors (yellows and purples) thanks to modern breeding.

Star Magnolia, M. stellata

Star magnolia.

The related star magnolia (Magnolia stellata) is another late winter or early spring flowering tree. Its blooms are white or pink, depending on cultivar, shown against silvery gray bark.

Magnolias prefer full sun and moist, well-drained soil. They dislike root disturbance, so situate them where you won’t be digging around the root system.

Their smaller size recommends them to areas of the property where large trees would be out of place. When designing your landscape, always consider the mature height and spread of a tree’s canopy.


The ‘Yoshino’ Cherry For Spring Flowers


‘Yoshino’ is a hybrid between Prunus speciosa and P. pendula, and was first introduced to Europe and North America in 1902. It grows in USDA Zones 5-8, to a height of about 35′ or 40′. Plant taxonomists proposed that the true scientific name should be Prunus x yedoensis ‘Somei-yoshino’. (The lower-case “x” after the genus Prunus signifies that this variety is an inter-specific hybrid; “yedo”=Tokyo.)

There was some doubt, now resolved, whether this variety was distinguishable from the Jeju flowering cherry. ‘Yoshino’ is genetically different from the King cherry, now named Cerasus x nudiflora. The Jeju cherry is an endangered species, with only a few hundred specimens remaining on Jeju Island.

If you’re planning a trip to the U.S. capital, try to schedule it when the ‘Yoshino’ and other varieties of cherry trees are in full bloom around the city, and particularly at the Tidal Basin (photo, below). Just gorgeous! Much has been written about Tokyo Mayor Yukio Ozaki’s generous gift of thousands of cherry trees back in 1912, meant to celebrate the growing friendship between Japan and the United States. See if you can find a live cam of the Tidal Basin’s cherry trees as they begin to bloom.


cherry trees, Tidal Basin, early spring bloom

The Washington Monument and cherry trees around the Tidal Basin.


One year, my daughter, Brynn, marched with her high school band in Washington D.C.’s National Cherry Blossom Festival parade. The festival is an annual commemoration of Japan’s gift and a celebration of spring. Check with the National Park Service for the progress of the trees’ buds (posted about March 6), because the two events—the festival and the trees’ peak bloom—often don’t coincide.


In the Landscape

I planted a ‘Yoshino’ cherry in a customer’s garden, behind a pergola that the owner had built at the end of a large pond installed in the family’s back yard. Their concern that it would grow too slowly for them to enjoy the flowers and the full stature of the tree was dispelled after only a handful of years. This is a fast grower, with smooth maroon bark and attractive horizontal branching. Pink flower buds open to clouds of white to pale pink blooms. For many gardeners, ‘Yoshino’ cherry trees are synonymous with spring.

It’s no wonder cherry trees are held in such reverence in Japan and in gardens around the world. They are perfect complements to a pergola, a pond, or an old barn, and often feature prominently in Asian-style naturalistic garden design. Although the ‘Yoshino’ cherry is not the longest living ornamental tree, there are some gnarly 100-year-old specimens in Washington, D.C.

I used to cut budded branches from a tree in our back yard, and force them in a vase indoors. Use stems with buds that have visibly swelled in anticipation of spring.

Another show takes place when all the petals fall to the ground, like pink snow. It’s a lovely sight, and the flowers blow away or disintegrate after a few days. They will stick to the soles of your shoes, so consider that fact if you want one near the house or a frequently used sidewalk.


Headings

Page 1: Early Spring Bloomers, and The ‘Yoshino’ Cherry For Spring Flowers (In the Landscape)

Page 2: Finally, Amaryllis! (“Can I Plant Amaryllis Outdoors?”), Primrose For Spring, Forcing Hyacinth Bulbs (And After They Bloom?), Daffodils, Columbine, The Vegetable Garden (Herbs), Viola, A Rare and Perfect Day, and Ah, Spring!

Return to the top

The USDA Plant Hardiness Zone Map

Updated 9/28/2024


Find Your USDA Plant Hardiness Zone


2023 USDA plant hardiness zone map


Throughout this blog and at other gardening sites, we often refer to a plant’s “hardiness zone”. Find your location on the map to identify your zone.

Since moving to northern North Carolina in 2021, I’m now in Zone 7b. Here, the average annual extreme minimum winter temperature is 5-10° F. My location is not far from the higher elevations of zone 6b (-5-0° F). According to the older 2012 map, where I live was clearly in zone 7a. Keep in mind, though, that this short snapshot in time doesn’t necessarily predict the trend in the timescale over the next thousand years.

At this USDA map website, enter your zip code to see if your area increased or decreased in the average extreme minimum temperature (the map loads slowly). Where I live, that temperature is 2° higher than it was in 2012. This does not mean that overall temperatures have increased an average of 2° F, just the lowest extreme minimum temperature.

Gardeners in other countries have similar systems of categorizing climate ratings.

Since I moved to North Carolina in 2013, we’ve had a few winters when the lowest temperatures fell almost to 0°F. We’ve also had a couple of seasons in the past few years when I rarely needed a winter jacket.

The 2023 map above replaces the 2012 map. Most zones of the country have been shifted upward a bit to reflect the slightly higher average extreme winter temperatures. But that won’t stop Mother Nature from testing the limits. These are averages, after all.


Microclimates


microclimate that raises the temperature just a few degrees, compared to out in the open, can make a huge difference. Place the winter garden close to the south side (in the northern hemisphere) of the house, a solid fence, or the shed. There’s a little wiggle room in your USDA plant hardiness zone if you take advantage of warmer microclimates.


seedings of early spring greens


In late February of 2024, I placed flats of the first cool season greens of the year on the south/southeast side of the enclosed porch (photo, above). Here, they can grow where the temperatures are up to 3 or 4 degrees warmer at night than 15′ from the house, and they’re protected from the wind. Now that they’re well rooted, the brassicas and lettuces will tolerate freezing temperatures, within limits, before they’re sold or set into the garden.


spinach Monstrueux de Viroflay, French heirloom

Potted spinach ‘Monstrueux de Viroflay’, a French heirloom.


The USDA Plant Hardiness Zone On the Label


Most vegetables, greens, annual flowers, and herbs are rated “cool season” or “warm (or main) season” plants. They are not generally assigned USDA plant hardiness zone numbers on their labels. Check with your local agricultural extension office for a planting timetable.

Parsley and cilantro, pansies and violas, kale and green onions are considered cool tolerant. Here, they thrive in cold autumn weather, and usually sail right through the winter in great condition. And some, such as collards, kale, and green onions, tolerate warm temperatures as well.

A particular variety of broccoli can be more cold tolerant than another, so choose varieties carefully. In this case, experience with a wide variety of named cultivars will guide you when choosing the best one to plant in March (‘Green Magic’, ‘Imperial’) or September (‘Arcadia’, ‘Kariba’). It all depends on your zone!

But basil, zinnias, and bell peppers are warm season plants and cannot tolerate frost or prolonged exposure to temperatures below 50°F. Depending on your climate zone, you’ll be able to grow tender sweet basil outdoors beginning somewhere between February and June.

Each tree, shrub, and perennial is given a zone number, an indication of how much cold it can tolerate in winter. A plant’s zone rating signifies the likelihood of its survival after an average winter. Some plants also are assigned heat zone ratings, which is helpful in hot climates.

Strawberries and raspberries, for example, are hardy in zones 3 or 4 to 7 or 8, depending on variety. Blueberries, as a group, have a wide range of temperature tolerance, growing in zones 3 to 10. Certain varieties, such as highbush and lowbush blueberries, grow toward the cooler end of the range, while rabbiteye blueberries are suited to the warmer southeastern U.S.


A Little More Protection


cold frame for cool season vegetables

Cold frame in Maryland.

With simple materials, there are a number of ways to protect cool season greens in winter. From wind barriers to low tunnels to a cool greenhouse, some of these tips will work for you.

On very cold nights, cover with clear plastic sheeting to retain the heat gained during the daytime. Adding a string of miniature incandescent lights or a heat mat will raise the temperature even higher in a cold frame. Don’t forget to open the cover in the morning. Temperatures rise quickly inside a closed frame.

During bitterly cold or icy weather, the clear plastic sheets stay in place in the daytime, without over-heating the plants beneath the cover. Loosely drape the plastic over the crops, allowing excess heat to escape when the sun shines. All of our winter crops bounce back after a night of below-freezing temperatures. I loosely cover them at 25° F to prevent an interruption in their progress and damage to the foliage.

In late afternoon, I’ll secure the plastic if the nighttime temperatures are expected to drop below the low 20’s. Many of the cool season greens can survive with no winter protection in warmer zones. Each variety of cabbage, broccoli, or cauliflower, for example, has a more defined range of tolerance, so choose cultivars carefully.

Another option is to plant a dense evergreen hedge on the north or northwest side of the garden, or wherever your prevailing winter winds come from. Evergreens help diffuse and divert frigid winter winds.


The Sun’s Path


The sun’s zenith rises in the sky as summer approaches and begins to fall again after the first day of summer. Although the shortest day and the first day of winter is December 21, our lowest winter temperatures occur around the third week of January. Similarly, the hottest part of summer occurs a few weeks after the first day of summer.

As you plan the location of your vegetable garden, remember that a winter garden receives fewer hours of light. Try to orient it toward due south for the best exposure.

If there are deciduous trees south of the garden, you might actually get more sun in the winter, when the trees are leafless, than in the summer.


the suns path

The sun’s path across the sky, in southern North Carolina.


As an avid vegetable gardener, I will find ways to grow a few rounds of greens and vegetables all through the year. I’ll never move to a colder zone if I can’t grow my favorite greens there in winter. The average extreme minimum temperature creeping a bit higher on the thermometer makes it just slightly easier to succeed.

In addition to the plant’s hardiness zone, other factors contribute to success or failure in your garden. Time of planting, general health of the plant, ongoing care, and soil condition all have an impact. Start your variety selection with the plant’s hardiness zone, though, because that’s the one factor we can’t control.


Return to the top

What Is Wrong With My Houseplants?


2019: HAPPY NEW YEAR!


Does your list of New Year’s Resolutions include paying more attention to your houseplants? Now that the busy holidays are over, we’re almost back to our routines. The plants look forward to returning to their normal locations. They missed those bright windows!

If you’re dissatisfied with your plants’ appearance, today might be a good day to give all the houseplants a thorough examination and a good cleanup.


 Philodendron selloum, easy houseplants

Philodendron selloum adds a tropical element to the indoor environment.


What Is Wrong With My Houseplants?


Let’s begin with some easily recognized problems:

  • the plant has collapsed into a sad-looking heap of wilted foliage
  • leaf tips are brown
  • leaves are turning yellow
  • many of the leaves are dropping off
  • the flowers are gone

But your houseplants have sentimental value, so they’re not going into the trash…or into the compost pile. And you know they probably will recover with a little attention. After all, the same thing happened last year.

A home without houseplants looks sterile—to me, anyway—so there will always be indoor plants wherever we live. They rid the air of benzene, formaldehyde, and other pollutants. In return, we get a small boost in the humidity and oxygen content of the air we breathe.

And we enjoy living with nature. Many studies point to the psychological benefits of living with plants at home, at the office, in school, and in the community.

With the renewed interest in growing houseplants, a huge number of species and varieties are available. Popular plants, such as Fiddle-leaf fig (Ficus lyrata), are in such high demand at garden centers that supply is often difficult to maintain.

cold frame before covering, with mini lights

Several dozen plants are protected here, and will be covered with plastic for the night.

There are hundreds of plants in my collection, from 1″ tall miniature Haworthias to a 6′ tall 40-year-old ponytail palm (Beaucarnea recurvata).

Many succulents and half-hardy perennials spend the winter in the cold frame outdoors, heated with a few strings of miniature incandescent Christmas lights and covered with 2 or 3 sheets of clear plastic (photo, right). There’s just not enough room inside for everyone!

We often have warm winter days in the Carolinas. This gives some houseplants the opportunity to spend a few afternoon hours on the enclosed deck, basking in the mild sunshine.


My Peace Lily Is Wilting


Spathiphyllum, or peace lily, popular houseplants

Peace lily, Spathiphyllum.

Wilt in peace lilies due to underwatering is a common problem. There are few plants that exemplify wilt more clearly than this one. A dry but still living peace lily, once watered thoroughly, will recover. But a few leaves might turn yellow, and they won’t green up again.

Peace lily (Spathiphyllum spp.) is commonly available and a good choice for beginning gardeners. You see them in malls and offices all over the country, where lush foliage lends a tropical flair to indoor spaces. Garden centers sell cultivars ranging from robust five-foot-tall specimens to table-top varieties less than 10″ tall.

They like soil that stays lightly moist all the time. But roots that stay wet all the time (from overwatering, overpotting, sitting in a wet saucer, or poorly-drained soil) are unable to “breathe”. Air and water are equally important to root health. Tiny root hairs that absorb moisture rot in wet soil, so the plant can’t get water to the leaves, causing the familiar wilt. A plant can wilt from either dry or constantly wet soil.


Keeping the Peace Lily Tidy

Strelitzia

Bird of paradise.

When yellow leaves appear, remove the entire leaf—both the blade (the wide part) and the petiole (the narrow leaf stem). The petiole is connected to the crown, stem, or the main trunk of a plant by a thin layer of cells. That layer of cells, the abscission layer, helps the petiole separate from the main part of the plant if the leaf is no longer useful.

After cutting off most of the yellow leaf, peel off the last bit of the yellow or brown petiole. If it is difficult to remove, as in large cultivars, cut the base of the petiole longitudinally down the center, toward the stem or the crown. Now you can easily peel off each half of the remaining petiole.

This works on other species with strong leaf attachments, such as Bird of paradise (Strelitzia, photo, above), yucca, palm, and dracaena. Removing all those dead fragments greatly improves the plant’s appearance.

Easy to Grow

Peace lilies are not demanding when it comes to light. Provide bright indirect light or morning sun for continuous growth. Disregard the advice that they thrive in “low light”. Sure, they’ll survive for a while, but brighter light toughens the tissues. New growth emerges thicker and stronger.

Plants photosynthesize and grow faster and often bloom in those locations, sometimes emitting a trace of scent soon after the white spathe flowers open. During the shorter days of the year, peace lilies welcome a few hours of direct sun.


peace lily, flowers. easy houseplants

Peace lilies in bloom.


When the flower turns brown, snip off most of the stalk, wait a few days, and then pull out the remaining part of the shrinking brown stalk. You could remove it earlier, but sometimes a few green leaves are inadvertently removed at the same time. Once again, this keeps the plant tidy, with no lingering dead remnants.


How Often Should I Water My Peace Lily?

The Environmental Variables

diagram, wilted plantTemperature, light, humidity, fullness of the plant (number of leaves), pot size and type (porous or non-porous), soil composition, and air circulation affect moisture in the soil. A furnace cycling on more often during cold weather necessitates frequent watering of thirsty plants. Knowing how these variables work in conjunction with each other, for each species, will determine how often your plant needs water.

A full and potbound (roots tightly filling the pot) peace lily, in morning sun at 72°F, and in potting soil that drains fast (has a lot of bark chips), for example, might need water every 2 or 3 days. On the other hand, one that was recently transplanted into soil with mostly peat moss and kept in a room at 65°, in indirect light, with 15 other plants nearby (higher humidity) might need water every 5 or 10 days. That’s why it’s so difficult to answer the question, “How often should I water it?”

Most varieties of peace lily are potted into 6″ to 10″ diameter pots. Stick your finger into the soil an inch or two down from the surface. If the surface of the soil feels dry, but there’s damp soil below that, the plant does not need water.

Waiting to water your plants until they begin to wilt is not a good idea. Delaying for only one day could cause another leaf to turn yellow. Or the plant will refuse to produce new foliage.

How Can I Tell When To Water?

A better course of action is to feel the moisture in the soil and the weight of the plant and pot. Eventually, you’ll learn to recognize that when it feels “this” dry or light in weight, it’s time to water. Some gardeners rely on inexpensive soil moisture meters, but I don’t consider them to be very accurate.

And water your peace lily thoroughly! Not just a little bit that moistens the top 2″ of soil. Instead, give it enough to moisten the entire root ball. Some water will drain into the saucer, and a dry pocket of soil might soak up that excess. Drain off any excess that remains in the saucer after 15 minutes.

Many of us conserve energy in winter by keeping the thermostat in the mid to high 60’s F during the daytime and in the low 60’s at night. If you’re growing plants from the tropics, they appreciate being given lukewarm water, about 85° or 90°. This includes ficus, philodendron, pothos, African violet, Alocasia, Aglaonema, and spathiphyllum. Dry soil absorbs lukewarm water more readily than it does cold water.


Upon Careful Examination

Place a fully wilted peace lily in a bucket filled with lightly warmed water up to the pot’s rim. You might have to weigh down the pot. Keep it there for an hour or two, then let it drain. If it doesn’t revive after a few hours, remove the plant from its pot and examine the roots.

Certain materials used at the wholesale nursery, once dry, can resist absorbing water. It’s possible that, even though the plant had been transplanted into better quality potting soil, the plant’s original root ball stayed dry and was unable to produce new roots. When transplanting any plant, tease out some of the roots on the surface of the root ball, especially one that is solidly filled with roots. This helps stimulate the formation of new roots that will quickly grow into fresh potting soil.

I’ve worked on plants that seemed to have moist soil, yet remained in a wilted state. One of these conditions was usually the cause:

  • The plant was repotted too deeply, rotting the petioles and the crown of the plant. The crown should remain at soil level, where the green top growth meets the roots. Very few plants survive being planted lower in the soil. Rule of thumb: the original soil surface should be visible after repotting.
  • Over time, the organic matter (peat moss, wood products) in soil breaks down and loses most of its volume. Consequently, the soil surface drops lower in the pot. If roots are visible under the crown and are exposed to the air, add fresh potting soil to cover the roots. You might have to remove the plant from the pot and add soil under the roots to raise the crown to the proper level. Either way, don’t bury the crown.
  • The roots were not teased out from the root ball, and remained within the tight confines of the original root ball. The root ball dried out before new roots could grow into the moist new soil.
  • New potting soil was loosely added around the root ball, and not firmed in next to the roots. Moderate pressure against the roots helps develop a healthy root system, and fills any voids in the pot that could dry out delicate root hairs. It also prevents water from rushing through the pot, following the path of least resistance, and not soaking in.
  • The plant’s soil was wet for too long, and the rotted roots couldn’t regrow. Fungal and bacterial pathogens build up in wet soil and cause more problems.
  • The temperature in the room or of the water was too low. 
  • The plant was overfertilized, burning the roots. Many people think that fertilizing more often or using more than the recommended concentration makes plants grow faster. It doesn’t. Overfertilizing makes plants die faster. High salt concentrations draw water out of the roots, killing them.

Many of the problems we have with houseplants can be avoided if we keep them potbound in the winter. Cooler soil temperatures and shorter days do not favor root growth at this time of the year. It’s better to delay repotting houseplants into larger containers, if they need it, until spring to mid summer.


Headings:

Page 1: What Is Wrong With My Houseplants?, My Peace Lily Is Wilting, How Often Should I Water My Peace Lily? (The Environmental Variables, How Can I Tell When To Water?, Upon Careful Examination)

Page 2: How Often Should I Water Houseplants?, Should I Fertilize My Houseplants?, Brown Tips On Houseplants (Overwatering, Underwatering, Overfertilization, Disease, Guttation, Fluorine), Yellow Leaves, and My Houseplants Are Dropping Leaves

Page 3: Succulents (Porous Pots, Repotting and Refreshing), Ferns (Raise the Humidity), Pothos and Philodendron, Snake Plant (What is CAM?), English Ivy (Spider Mites), Will They Flower Some More?, and Before You Know It


Return to the top


Collards Soup: Comfort Food for Winter


Collards Soup


Here’s a hearty, healthy soup that will chase away that winter chill. Collards Soup, with greens and herbs freshly picked from the vegetable garden, offers balance to the delectables that we enjoyed over the holidays. Served with a chunk of warmed bread and melting butter…perfect!

Remember Paul Simon’s lyrics in “Sounds of Silence”? “I turned my collards to the cold and damp…” No? He didn’t say that?


collards greens

A few leaves of collards from the garden.


Ingredients


  • A few strips of bacon, cooked. Save 1 or 2 tablespoons of the fat (optional).
  • A large bunch of fresh collard greens, washed, with largest part of rib removed. Cut into bite-size pieces and set aside.
  • A handful of ‘Lacinato’ (dinosaur) kale or ‘Red Russian’ kale leaves, washed, with large rib removed. Cut into ribbons and add to the collards.
  • 2 tablespoons butter, and more for the bread
  • 3 tablespoons extra virgin olive oil
  • 1 large onion, chopped
  • 1 stalk celery, coarsely chopped
  • 2 or 3 medium garlic cloves, minced
  • A few white button mushrooms, sliced
  • 3 or 4 15-ounce cans of low salt chicken broth, plus 2 or 3 cans of water
  • 1 or 2 bay leaves
  • 2 or 3 teaspoons apple cider vinegar
  • 2 15-ounce cans of beans (cannellini, pinto, or others), drained and lightly rinsed
  • 1 15-ounce can diced or stewed tomatoes
  • 1/2 to 3/4 teaspoon dried thyme, or a bit more if using fresh
  • 1 to 1 1/2 teaspoons dried marjoram, or 2 teaspoons fresh. Substitute Italian oregano if preferred, or use a combination. Add more herbs if desired.
  • 3 tablespoons or a small handful fresh Italian (flat-leaf) parsley, coarsely chopped
  • 2 to 3 cups cooked (al dente) enriched Barilla pasta (extra protein, Omega-3’s, fiber), such as elbows or mini farfalle
  • Salt and pepper 
  • Grated Romano cheese


collards greens cooking

Bright green collards, ready for the broth.


The Process


  • Cook the bacon, reserving some of the fat. Set aside.
  • In a large stockpot, heat butter and olive oil.
  • Add onion and celery. Cook at medium heat, stirring, until almost tender.
  • Add garlic. Cook for a few minutes, stirring. (Never brown the garlic.)
  • Add collards, kale, mushrooms, and some bacon fat, if desired. Cook for a few minutes, stirring, until they turn bright green.
  • Add chicken broth, water, vinegar, bay leaf, and crumbled bacon. Raise heat to a boil, then turn down to a low simmer for 15-20 minutes. Stir occasionally.
  • Add beans and simmer for 10 minutes.
  • Add tomatoes and thyme, and simmer, stirring occasionally, for 10 minutes.
  • Add marjoram and parsley, and simmer for another 5 minutes.
  • Add cooked pasta, heat, and stir.
  • Salt and pepper to taste.
  • Done! Now, serve with grated Romano cheese and your favorite bread. This will make about 8 servings. Add more chicken stock and water if needed.


You Can Grow Them!


collards

Collards in the garden, late December.


Collards and kale are among the easiest crops to grow in the vegetable garden. As members of the family Brassicaceae, these plants are among the most concentrated sources of vitamins, minerals, and phytonutrients in the plant kingdom! Just one or two leaves added to omelets, pizza, store-bought soup, and rice or pasta dishes will add significantly to the meal’s nutrient content.

A few collards and several kale plants (dinosaur and ‘Red Russian’), among other crops grown through the winter, supply us with enough greens to pick almost every day. They’re super cold-hardy, and get covered with clear plastic when the temperature plummets to the low 20’s F.


On the Subject of Bacon


Since there are few occasions in this blog when the subject of bacon comes up, let me add that December 30 is National Bacon Day. We have Hernando de Soto (c. 1500-1542, Spanish explorer, looking for gold and a passage to China), to credit, or to blame, for introducing pigs to the Americas. In 1539, he brought 13 pigs to the southeastern U.S., which multiplied to a herd of 700 within 3 years. De Soto died of fever, and his body was laid to rest in the Mississippi River, which he and his crew were the first Europeans to discover.

A few morsels: About 10,000 years ago, wild pigs were domesticated in Central Asia…just under 10% of the pig is processed into bacon…just over half of American households have bacon in the refrigerator.

An occasional indulgence in foods that are generally perceived to be not so healthy is more than compensated by increasing the proportions of greens and vegetables in our diets. So, I will enjoy that bacon and a piece of good bread, guilt-free, every now and then, or these buttery biscuits that are so easy to make from scratch. Hope you enjoy this one! Happy New Year!


collards soup

Collards soup is ready. Enjoy!


Return to the top

Toffee Cookies: You Must Try These!


Time for Toffee Cookies!


The cookie from Kim’s Kitchen that is most frequently requested: Toffee Cookies! These delicious cookies were a Christmas tradition in our family.

My father worked with a photographer in Englewood, New Jersey, after returning home from serving in the U.S. Navy during World War II. His employer’s wife gave the recipe to my mother, sometime in the 1940’s.


toffee cookies

A Christmas favorite: Toffee Cookies.


Ingredients For Toffee Cookies


  • 1 cup light brown sugar, lightly packed
  • 1/2 pound cold butter
  • 1 egg yolk
  • 1 teaspoon real vanilla extract
  • 2 cups all-purpose unbleached flour


Added After Baking the Toffee Cookies

  • 10 (+ or -) ounces milk chocolate. I use 7 ounces Hershey’s milk chocolate plus 3 or 4 ounces Symphony milk chocolate. Use any kind of chocolate you prefer.
  • 1 to 1 1/4 cups chopped walnuts


The Process


  • Preheat oven to 350°F.
  • Cream butter and sugar in a stand mixer until well-mixed but not overdone.
  • Add egg yolk and vanilla. Mix, and scrape bowl.
  • Add flour in batches. Mix well, scraping bowl. Dough will be thick.
  • Spread on parchment-paper-lined cookie sheet that has a raised edge. I use an approximately 10″ x 15″ jelly roll pan, which is thicker than cookie sheets and has been in our family for decades. Use a butter knife and your fingers to spread the dough; this is the hardest part. The palms of your hands can flatten it somewhat; it will flatten more in the oven.
  • Bake 20 to 25 minutes, or until the top and edges begin to show a light golden brown color. Watch it carefully. One minute too long will result in a crispy cookie, and everyone in my family, except Mother, likes it chewy. Remove from oven.


Now, the Toppings

  • Break up the chocolate into pieces. Before the toffee cools, place chocolate on top. It will melt on the hot toffee. If the chocolate doesn’t melt, place cookie sheet back into the warm oven, turned off, but monitor it closely. Various brands of chocolate have different melting points. Use a butter knife to smooth the chocolate over the toffee.
  • Sprinkle with chopped walnuts.
  • Allow the toffee to cool before cutting into squares. This could take a few hours at room temperature. If the chocolate is still soft, your toffee cookies will not cut neatly!
  • Cut with a long-bladed knife into 1 1/2″ squares. Place in a cookie tin or plastic container, lined—and layers separated—with wax paper.


More dessert recipes from Kim’s kitchen:

Almond Crescents

Cream Cheese Pound Cake

Gingersnaps


Return to the top

Poinsettias: Merry and Bright!


Poinsettias in December


red poinsettia


Poinsettias have long been associated with Christmas celebrations and are the most popular indoor flowering plants. They appear as early as mid-November in every garden center, grocery store, florist, Christmas craft show, and hardware store across the country.

Recently, I bought one called ‘Ruby Frost’ (bred by Syngenta). It’s a short plant that fits perfectly under a table lamp. I prefer some of the novelty colors, such as the very pale, creamy peach Premium ‘Apricot’, but I didn’t see it this year. ‘Visions of Grandeur’ (Ecke) is another favorite, with soft pale pink bracts. It is stunning when grown to a large size.

Over 100 varieties are available, with new ones advertising improved features, such as darker leaves and longer-lasting bracts. The colorful parts, sometimes called flowers, are actually modified leaves called bracts. True flowers are the small yellow and red parts in the center of the youngest bracts. Poinsettias are also being bred for resistance to necrotic leaf margins, a physiological condition where the edges of bracts or leaves turn brown due to calcium deficiency.


History of Poinsettias


As you can see from the photograph below, wild poinsettias look quite different from the ones we grow today in greenhouses. The plant is native to tropical deciduous forests of Mexico, where they grow from 2′ to 12′ tall.

Seven hundred years ago, the Aztecs called the plant Cuetlaxochitl, and used the red bracts for dye. The white latex had antipyretic properties, and the Aztecs used it for treating fever (but don’t try this at home). King Netzahualcoyotl considered the poinsettia a symbol of purity, as did the Aztec King Montezuma in the 1500’s.


wild poinsettia

Wild poinsettia.


The first U.S. ambassador to Mexico (1825-1829), Joel Roberts Poinsett, introduced the plant to the United States in 1825 after seeing them in the area now known as Taxco. Poinsett, a physician and botanist, shipped specimens to his greenhouse in Greenville (or Charleston, depending on source), South Carolina. He also sent plants to Philadelphia botanist John Bartram, who, in turn, gave plants to Robert Bruist, a nurseryman who named them Euphorbia pulcherrima Willd.

poinsettia cyathia

Poinsettia flowers, the cyathia.

More than 700 species belong to the Euphorbia genus, a member of the Euphorbiaceae, or spurge, family, and have in common the characteristic white sticky latex sap. A Euphorbia flower generally comprises a single female flower, without sepals, surrounded by male flowers in a cyathium (plural: cyathia). The small flowers are located in the center of the colorful bracts, which attract the attention of pollinators.

Poinsettias are not poisonous, as was previously thought. Children and family pets chewing on the leaves or stems find out fast that better things await them on, or under, the dinner table. Those rare individuals who are allergic to the sap and develop a rash should immediately seek medical attention.


The Christmas Connection


poinsettia

The origin of poinsettias as a Christmas tradition began in the 1500’s, in Mexico, with a poor young girl named either Pepita or Maria. Because she was unable to provide a gift to celebrate Jesus’ birthday, she was inspired by an angel to gather weeds into a bouquet and to place them by the church altar. Red blossoms sprouted from the weeds, the story goes, which turned into poinsettias.

By the 1600’s, Franciscan priests in Mexico included them in Christmas celebrations. Around the same time, the writings of a botanist named Juan Balme began to appear, describing the poinsettia.


Modern Culture of Poinsettias


In 1923, Mrs. Enteman of Jersey City, New Jersey, discovered the first oak-leaved seedling and named it, appropriately, ‘Oak Leaf’. This was the first selection suitable for pot culture. Up until the 1960’s, all selections and sports are credited with having ‘Oak Leaf’ heritage.

Poinsettias were first grown as cut flowers (‘True Red’, ‘Early Red’), and were raised in outdoor fields before moving into greenhouses in the 1960’s. Paul Ecke, a California nurseryman, began breeding, in the 1920’s, most of the varieties grown today. His company discovered a way to breed plants that branched freely. So, for decades, this secret method allowed Ecke to remain the dominant grower…until the secret was revealed by a student, this story goes. Good branching structure and shorter stems culminated in their ‘Eckespoint Freedom’, in 1992.

Pennsylvania State University, the University of Maryland, and several commercial breeding programs proliferated in the 1950’s. Dr. Robert N. Stewart, of the Univ. of Maryland’s Agricultural Research Center in Beltsville MD, bred poinsettias with stiff stems, large bracts, and new colors. ‘Paul Mikkelsen’, named in 1963, was the first long-lasting poinsettia crop. ‘Annette Hegga Red’, with multi-bracted stems from pinching, and other sports were imported from Norway in 1964.

Before these new improvements came on the gardening scene, poinsettias grew long stems and were trained to look like a paperclip—“tromboning”, it was called.

Currently, California leads the nation (total: 34 million plants) in the number of poinsettias grown. The USDA reports that, in 2013, California grew 6 million plants. North Carolina came in second, with 4.4 million pots grown. Then Texas with 3.7 million pots, and Florida and Ohio, each with about 3 million pots. Red is the most popular color, claiming ¾ of all U.S. sales, followed by white, and then pink.

Poinsettias accounted for 23% of all U.S. indoor flowering potted plant sales in 2013. They contributed $144 million of the $618 million in this category.


Varieties


Looking for a basic red poinsettia is no longer a simple task. There are cherry reds and scarlet reds, deep velvety reds and burgundies. Some bloom early and some bloom later, and can last in color for months! There are plants with dark green foliage or a lighter shade of green. And there’s ‘Winter Rose’ (Ecke) with bracts that are curled, resembling a rosette. ‘Carousel’ (Ecke) adds a bit of a frill, with its wavy-edged bracts. ‘Mirage’ and ‘Lyra’ (both from Syngenta) were introduced in 2017. Every year or two, new introductions come to the marketplace.

Solid pinks, in shades from very pale to vibrant, and from clear pink to peach to salmon, broaden the palette. And, of course, there’s white, although most white poinsettias are creamy yellow and mature somewhat white, as in ‘Freedom White’ and the recent ‘Merry White’ (Selecta). The newer ‘Princettia’ series does have a pure white variety, and also several pink shades. These colors offer tones that fit better, stylistically, in many homes.


If bright rich orange is your color, there’s a poinsettia for you! ‘Lemon Drop’ and ‘Gold Rush’ bring even more color selections. But the traditional reds, such as the ‘Freedom’, ‘Prestige’, ‘Premier’, and ‘Viking’ series are still the favorites and readily available.

For those who dare, spray paints and glitter can be applied. White poinsettias suddenly, magically, become blue or purple! Very striking, unnatural some would say, and not for the faint of heart!


Variegated Bracts and Foliage


variegated poinsettia

A poinsettia with variegated bracts.


Variegated leaves, with creamy yellow margins, add another dimension, as in ‘Holly Point’. The newer ‘Tapestry’ (Ecke; photo, end of this section) is more vigorous than ‘Holly Point’ and more resistant to necrotic leaf margins. Foliage is gray-green in the center, and bracts are cherry red.

‘Mars Marble’ has cream margins with soft pink in the center of the bracts. ‘Christmas Angel Marbella’ (Selecta) also has creamy margins around salmon-pink centers.

For something a little different, there are series with spotted and splotched bracts. ‘Glitter’ (Ecke), ‘Shimmer Surprise’, ‘Tri-Color’, and ‘Jingle Bells’ look as if they’ve been splattered by white or pink paint. Some cultivars have yellow spots!

‘Ice Punch’ has red bracts with a blaze of pinkish white in the center. ‘Ruby Frost’ offers marbling in shades of pink, white, and red. (Note: the plant I purchased was labeled ‘Ruby Frost’, but it differs in appearance from photos in NC State Poinsettia Trials.)


‘Strawberries and Cream’ (photo, below) is a diminutive variety, often grown in a 4 1/2″ pot. It has oak-leaved bracts that are cream on the margin and deep salmon pink in the center. Because of its size, it fits nicely in a basket with small-leaved English ivy, a Norfolk Island pine, and a young fern. Cover the pots with Spanish moss, add a bow, and you’re all set!

To hide bare stems near the bottom of the plant, simply add sprigs of evergreens and pine cones. Or use them in baskets, lined with plastic to prevent leakage, with other plants surrounding the bare stems. Keep them in the pots and move the plants around until you arrive at a pleasing arrangement.


Headings

Page 1: Poinsettias in December, History of Poinsettias, The Christmas Connection, Modern Culture of Poinsettias, Varieties, and Variegated Bracts and Foliage

Page 2: How To Care For Poinsettias (Growing Conditions), Outdoors For the Summer, And Back Indoors Again, and National Poinsettia Day

Return to the top


Paperwhite Narcissus: Fragrant And Easy To Grow


paperwhite narcissus 'Winter Sun', white flowers, yellow cup

‘Winter Sun’ paperwhite daffodil.


The Paperwhite Narcissus


Among the easiest plants to grow for fragrant blooms in winter is the paperwhite narcissus, Narcissus papyraceus. Success is practically guaranteed, since the flowers are already inside the bulbs when you buy them. All they need to sprout is light and moisture. Yes—it’s that easy!

Bulbs are available in autumn, alongside their hardier daffodil cousins, and sometimes into winter. Narcissus papyraceus is the name used by the Royal Horticultural Society. It lists Narcissus papyraceus subsp. tazetta as a synonym.

Purchase the bulbs by the end of November if you want blooms for Christmas. But, if time is running short, garden centers and florists will have potted paperwhite narcissus already sprouting or in flower right up to Christmas and often into the New Year.

Look for large, healthy bulbs that feel solid when you lightly squeeze them. Bulbs generally will bloom 3 to 4 weeks after planting them; some require a week or two more. Keep them cool—in the 50’s F—until they’re planted.


Narcissus Narcissus Bulb  - Capri23auto / Pixabay


How To Plant Paperwhite Narcissus Indoors


With Roots In Water

Many gardeners prefer the traditional method of growing bulbs on a bed of decorative gravel or pebbles. Simply place a layer of pebbles in a shallow non-draining ceramic bowl or a glass container. Maintain the water level just below the bottom of the bulbs, which will sense the humidity and begin to grow roots. It won’t be long before growth emerges.

If you don’t see roots within a few days, add water until it touches the bottom of the bulbs. Once roots are visible, maintain the water level right below the bulbs. When the bulbs begin absorbing water, remember to refill the container to keep the roots wet. Avoid submerging bulbs in the water, which can cause rot.

Another method of forcing paperwhite narcissus is to rest a bulb in the top of a “bulb-forcing vase”, keeping water just under the bottom of the bulb. These vases come in a few sizes, so look for the small one made for daffodils. Amaryllis bulbs are sometimes grown this way in a larger vase.


With Roots In Soil

forced bulbs, paperwhite narcissus

Paperwhite bulbs on the soil surface.

I prefer forcing bulbs in potting soil. Place paperwhite narcissus bulbs for forcing close together, unlike bulbs planted in the garden. Several bulbs will fit in a 6″ or 7″ pot.

Put some potting soil in the bottom third of the pot and nestle in the bulbs. Then, add some soil between the bulbs, and see if you can layer in a few more. It’s okay if the bulbs’ noses protrude above the soil. Other gardeners might place the bulbs fully exposed on top of the soil. Now water the pot.

The root systems of paperwhite narcissus bulbs grow very vigorously. In fact, strong young roots often push the bulbs higher in the medium. Gently push them back down; eventually the roots will more securely grab the soil.

One or two bulbs in a small decorative pot also makes a lovely presentation. When selling plants at the Christmas shows, I offered sprouted single paperwhites in 3″ aged clay pots. The bulb was planted high with a collar of fluffy green sheet moss tucked in the soil around the inside rim of the pot. I added a twig and holiday ribbon or a few pieces of raffia around the leaves. Add a clay saucer…very cute. Perfect for a windowsill that’s too cold for other houseplants. 

I also planted paperwhites in ceramic bowls, 6″ and 7″ pots, and in squares of burlap, with moss and a bow, surrounding the pots and saucers. Customers enjoyed choosing among the different presentations to fit their needs.


Larger Bulbs

When I sold potted paperwhites in the fall and early winter, I purchased the largest bulbs available from suppliers. This ensured the greatest number of flowers, 2 or 3 multi-flowering stems per bulb. They were worth the additional cost.


Will Paperwhite Narcissus Come Back Next Year?


Forced bulbs have been weakened by the process and require an extra year or two in the garden, gathering strength before they’ll bloom again. Paperwhite narcissus bulbs for forcing are planted close together, but space them about 6″ apart in the garden. 

In colder climates throughout the U.S., most varieties are not winter hardy. Gardeners in Zones 8-11, however, can plant them outdoors, where they usually return every spring. At the end of this article, I include a list of varieties and their USDA hardiness zones

If you plan to set them into the garden after enjoying the forced blooms, keep the plants moist, give them direct sunlight, and do not cut off the foliage. It’s the same for paperwhites as it is for spring-flowering bulbs: leaves photosynthesize, storing nourishment in the bulbs. The more carbohydrates produced, the more flowers you’ll see in the future. For all bulbs, therefore, wait until the foliage has yellowed before removing it.

If your plans include saving the bulbs for the garden, force your paperwhites in potting soil. But don’t expect much of a floral show in the next flowering cycle. Bulbs growing in pots have depleted all the stored energy and require sunshine, moisture, nutrients, and time to gather enough strength to flower again.

As you can see from the list of varieties, several are hardy in colder climates. Left in the garden, they will bloom according to seasonal cues. Like other daffodils, roots grow in autumn, followed by the blooms in late winter to spring.


Temperature


Average indoor temperatures encourage rapid sprouting. Bright green leaves emerge before the tightly budded flowers. Temperature is one factor that determines how quickly the plants grow. Bulbs planted in late November to early December will probably flower for Christmas if they’re given temperatures in the high 60’s to 70°F. Rates of growth can vary, though, depending on the cultivar.

Let’s say you planted your bulbs on Thanksgiving Day, but now prefer to delay the bloom as long as possible. This is where lowering the temperature can help. Plants in full bloom or showing flower buds will slow down their development if they are kept very cool. And I mean “back porch” cool!

cool porch

Don’t let them freeze. Expose plants to temperatures in the 40’s to just about stop them in their tracks. They probably would survive close to freezing temperatures, but the leaves might flop over. Cool temperatures keep the plants shorter overall. If the leaves are falling over, gather them together and secure with ribbon or raffia to a stake.

Watch the weather forecast to see if the plants can be kept outdoors overnight. But don’t forget to water them. Incidentally, deer and rodents won’t eat your paperwhite narcissus. 


Chill!

When you bring the plants in for the night, put them in a very cool location. On the floor near a chilly patio door or in a cold window should suffice. Or in the garage if it’s cool but not freezing. Avoid placing them where they’ll feel the warm dry air from the heater. Kept very cool, the flowers last longer and growth will slow down.

Sure, bring them in for a few hours while your friends are over. (Not everyone likes the fragrance, though, so you might ask your guests.) Some varieties are less fragrant and are noted as such in the list of varieties, below.

Of course, there is the option of just letting them grow without fussing over them. If plants are available at the garden center, simply replace the old with the new. But if you prefer to grow them yourself, potting up a few bulbs every 7 to 10 days will give you a succession of blooms.

Planters Outdoors

If the weather remains chilly but not freezing, you can incorporate pre-started pots of paperwhites into patio planter combinations. Add evergreens, berried boughs, pansies or violas, and seasonal embellishments. I did this a few times, and, given favorable weather conditions, the flowers lasted for weeks.


Light and Water for Paperwhite Narcissus


paperwhite narcissus


Another factor that determines how well the plants grow is light. Direct sunlight will keep them shorter, but along with that come higher temperatures. So, try to find a spot that’s cool and sunny, like a chilly window.

Plants grow weaker in low light levels, and flowers—if they open—will be of lower quality. 

Keep the plants moist at all times, using cool tap water. A vigorous root system dries the pot quickly, so check the plants every day. Dry soil will damage the flower buds.


Please Pass the Vodka


vodkaNo, not for me. It’s for the paperwhites! In 2005, Dr. William Miller and student Erin Finan at the Cornell University Department of Horticulture studied the effects of alcohol on paperwhite narcissus.

First, they gave clear water to the bulbs until they began rooting out. After that, they found that plants were about one-third shorter when bulbs received a 4-6% solution of alcohol. So, a 1:7 to 1:9 solution (alcohol:water) will keep the plants shorter. (Divide “proof” by 2 to get alcohol content. For example, 80 proof is 40% alcohol. 40 ÷ 5% target = 8. Subtract 1. This results in a ratio of 1:7.)

Some online sources recommend a more concentrated alcohol content (1:5), but I wonder if that would interfere with water uptake. 

This works on paperwhites grown in water or in soil.


Fact of Life: Floppy Paperwhite Narcissus


Even with good growing conditions, the leaves of paperwhites grow tall and eventually fall over. Prepare for this ahead of time, and have some bamboo stakes, twigs from the garden, or a short decorative trellis and some twine, raffia, or ribbon to secure the stems. And maybe a little gin…for the bulbs.

Paperwhites offer a powerful fragrance. Maybe there are better places to display them instead of next to the Christmas turkey. For the same reason most cooks prefer unscented candles on the dinner table, paperwhites can find some other place for the occasion. Perhaps they can keep company with the cyclamen in the chilly foyer.


dinner table


Cut Flowers


Many paperwhite cultivars are suitable as cut flowers. But water uptake in other types of flowers can be hindered by compounds in the daffodils’ sap.

This also applies to hardy springtime daffodils that emerge in the garden, so keep cut daffodils by themselves for longer-lasting tulips, hyacinths, and others.


Off With the Old


When the scent loses its appeal, trim off the entire flower stem. Don’t discard the plant; there might be another flower stem that will emerge, even if the bud is not immediately visible. Remember to keep the soil moist.

Place finished pots in the garage or a chilly basement, in the sun, and continue to water. Keep them growing if they’re hardy where you live. Gardeners can plant their bloomed-out paperwhites outdoors after the harsh months of winter have passed.

Even though the varieties I grew were not hardy in Maryland, where I used to live, the plants and their soil were discarded under the shrubs or in the borders instead of at the landfill. The organic matter still had value in the garden.


paperwhite narcissus in a decorative pot, planted 1/6/19

‘Winter Sun’ bulbs.


Varieties of Paperwhite Narcissus


Subspecies of N. papyraceus have broad distribution around the world. They’re native to or have naturalized in southeast France, northwest Italy, Sardinia, the Canary Islands, Turkey, Greece, Israel, southeast China, South Korea, Japan, India, and Nepal. They also are found in Australia, New Zealand, Algeria, Morocco, Bermuda, Mexico, South America, and in United States along the south and west coasts.

The term tazetta derives from the Italian word “tazza”, which is a shallow wine cup. These plants used to be called Narcissus tazetta, but recent nomenclature classifies them as Narcissus papyraceus subspecies tazetta. All paperwhites are in the Amaryllidaceae family.

Alphabetically, and all are fragrant:

  • ‘Ariel’: large pure white flowers that face down slightly. Good for forcing, one source says grow only in soil. Zones 8-11.
  • ‘Avalanche’: white with greenish-yellow cup, strong fragrance. Called ‘Seventeen Sisters’ in the 1700’s for its profuse blooms. Heirloom; award winner. Mid-spring, zones 6-9.
  • ‘Canaliculatus’: white with yellow cup, sweetly fragrant, 4 to 7 flowers per stem. Short, to 6″ tall. Heirloom. Mid-spring, zones 6-10.
  • ‘Chinese Sacred Lily’ (N. tazetta chinensis or orientalis): white with golden yellow cup, wonderful fragrance, 5 to 10 small flowers per stem, might be not as free-flowering as others. One source said to give it a little bottom heat (about 70°F) to coax the flowers. Three to five weeks to bloom. To 16″ tall. Brought from China in the 1800’s and used to celebrate Chinese New Year. Zones 8-11. 
  • ‘Cragford’: white with vivid orange cup, 4 to 6 flowers per stem. Excellent cut flower (strong stem). Good forcer, 1′ to 2′ tall. Heirloom, award winner. Zones 5-9.
  • ‘Erlicheer’: double white with yellow mixed in, to 16″ tall. Award winner. Zones 6-9.
  • ‘Falconet’: deep yellow with orange-red cup, 3 to 8 flowers per stem, strong fragrance. Excellent cut flower, 1′ to 2′ tall. Award winner. Mid-spring, zones 5-9.
  • ‘Galilee’: all white, 10 to 15 flowers per stem, musky scent. Good for forcing. Zones 8-11.
  • ‘Geranium’: white with yellow-orange cup, very fragrant. Several stems, each with 3 to 6 flowers. Well-drained soil, good in the South. Up to 15″ tall. Award winner. Zones 4-9.
  • ‘Grand Soleil d’Or’: bright yellow with orange cup, 10 to 20 flowers per stem. Delicate fruity fragrance. Good forcer but takes longer to grow. To 18″ tall. Very early spring, zones 8-11.
  • ‘Inbal’: large clusters of white flowers, flat cup. Good for forcing, milder fragrance. Zones 8-11.
  • ‘Jerusalem’: large white flowers, mild sweet fragrance. To 20″ tall. Zones 8-11.
  • ‘Minnow’: pale yellow with yellow cup, fading with age, 2 to 5 flowers per stem. 8″ to 10″ tall, nice in rock gardens. Award winner. Zones 5-9.
  • ‘Nazareth’ (‘Yael’): creamy white, mildly sweet fragrance. To 14″ tall. Zones 8-11.
  • ‘Scilly White’: white with short pale yellow cup, 3 to 20 flowers per stem. Sweet scent, but not as strong as others. To 20″ tall. Late winter/early spring flowers. Zones 8-11.
  • ‘Winter Sun’ (‘Wintersun’): white with buttery-yellow to clear yellow cup. 4 to 5 weeks to bloom, milder fragrance. Zones 8-10, one source said Zones 9-11. (Photo, below).
  • ‘Ziva’: pure white, large cluster. 3 to 4 stems per bulb. Sweet, spicy scent. Zones 8-11. Also, the favorite for forcing.


Winter Sun paperwhite narcissus

‘Winter Sun’, one month after potting up.


If you prefer a milder fragrance, start with those indicated as such in the list above. Photographs of several cultivars can be found online.

In the meantime, I hope you’ll enjoy potting up a few of these paperwhite narcissus bulbs. Tuck a pot into a large basket with other winter flowers (Amaryllis, Poinsettia), some English ivy, and ‘Frosty’ fern for a festive arrangement. 


Merry Christmas and Happy Holiday Season to all!

Christmas greens


Return to the top

Kim’s Gingersnaps: Adding Spice To Your Life


Kim’s Gingersnaps


Here’s another cookie recipe that’s a family tradition during the holidays, but we enjoy them at any time of the year. A tiny few in our family prefer them baked until crispy. Most of us, however, like them soft inside. Gingersnap or gingersoft—your choice. This recipe has been adjusted a bit from my mother’s original recipe.


gingerbread tiny houses

Gingerbread tiny houses.


Ingredients For Making Gingersnaps


  • 1½ sticks butter
  • 1 cup white granulated sugar
  • 1/4 cup unsulphured molasses
  • 1 large egg
  • 2¼ cups all-purpose unbleached flour
  • 2 teaspoons baking soda
  • 1/2 teaspoon salt
  • 1 teaspoon ground ginger
  • 1/2 teaspoon ground cloves
  • 1 teaspoon ground cinnamon—I use just a bit more of the ginger, cloves, and cinnamon for extra “warmth”. Mix these 6 dry ingredients together in a bowl.
  • Very fine sugar in a separate bowl, for coating formed cookie dough


Santa, taking a cookie

One of Santa’s favorites.


The Process


gingersnaps dough

Finished cookie dough.

  • Mix butter and white sugar in the large bowl of a stand mixer. Don’t over-mix it.
  • Add the molasses. Mix well, scraping with spatula.
  • Add egg, and mix.
  • Gradually add and mix in the flour-spice mixture. Scrape with spatula.
  • After it’s all mixed together, refrigerate the covered dough for at least a couple of hours.
  • Preheat oven to 375°F or a little lower.
  • Line 1 or 2 cookie sheets with parchment paper.
  • Now that the dough is cool, spoon out enough dough to make a 1″ diameter ball. Roll it between the palms of your hands to form a sphere. Place balls, in batches, in the very fine sugar to coat. Roll them around and/or spoon the fine sugar over the dough.
  • Place on cookie sheets, about 3″ on center, and bake for about 8 minutes. They might need less time or a minute more, depending on your oven. In this electric oven, I put a pyrex dish of water over the “hot spot”, and bake one large and one small cookie sheet at a time. To avoid hot spots, perhaps baking one sheet at a time will work better.
  • Lay the gingersnaps out on the wax-paper-covered counter to cool somewhat. If they’re placed in cookie tins before they have fully cooled, they will stay a little softer. It takes almost no time to go from soft and luscious to crispy, so watch them carefully while baking and while cooling.
  • Wrap cooled cookies in foil and a plastic bag to freeze the excess.


*   *   *   *   *   *   *   *   *


When Brynn and Logan were little, I shaped some of the dough into gingerbread men, just for them. A little ginger, by the way, can settle an upset stomach and makes me feel just a bit warmer. How do you like them—crispy or soft? Either way, enjoy!


gingersnaps, cookies

Soft gingersnaps fresh from Kim’s kitchen.


Here are links to more of Kim’s dessert recipes:

Toffee Cookies

Almond Crescents

Cream Cheese Pound Cake


Return to the top

Over the Moon for Almond Crescents


Almond Crescents


This recipe for Almond Crescents is a subtle combination of nutty, sweet, and buttery flavors. Thanks go to a family friend, Evelyn Varecka, for sharing the recipe over 50 years ago.


almond crescents


Ingredients For Almond Crescents


  • 1/2 pound sweet butter (original recipe calls for unsalted butter, but either salted or unsalted can be used)
  • 3/4 cup powdered (confectioner’s) sugar
  • 2 large egg yolks
  • 1 cup almonds, grated fine in food processor
  • 1 teaspoon real vanilla extract
  • 3 cups sifted all-purpose unbleached flour
  • Very fine sugar (for rolling, after baking)


almonds


The Process


  • Preheat oven to 375° to 400°F.
  • Beat egg yolks at high speed in a medium-small bowl for 1 or 2 minutes, until lightly colored. I use an electric hand mixer. Set aside.
  • Cream butter for 1 minute at high speed in large bowl of a stand mixer.
  • Lower the mixer speed, and add powdered sugar. Beat at medium speed for another minute. Scrape bowl with spatula.
  • Add egg yolks, and beat for 1 minute at medium speed.
  • Add almonds and vanilla.
  • Mix in small batches of flour; mix thoroughly. Scrape bowl.
  • The original recipe called for forming dough into 3 or 4 logs, rolled up in wax paper, and chilling them in the refrigerator for a few hours before forming the cookies. Instead, I skip the “logs” step because the dough is easier to form into crescents before it has cooled down. Shape the dough (about 1 tablespoon per cookie) into crescents, and place them about 3/4″ apart on parchment-paper-lined cookie sheets. Refrigerate for a few hours.
  • Bake for 7 to 10 minutes. They’re done when the bottom edges begin to turn light brown. I prefer to bake one sheet at a time, turned halfway through, to avoid the hot spot in the oven.
  • Let them sit at room temperature for a few minutes, until they’re cool enough to handle.
  • Handling gently, coat cookies with very fine sugar in a bowl.
  • Place in cookie tin, and cover when fully cooled.

A cookie tin full of these cookies makes a nice gift. Or bake a batch, and share with your coworkers during the holidays. Save some for Santa! Enjoy!


Kim's almond crescent cookies

Freshly baked almond crescents from Kim’s kitchen.


More of Kim’s dessert recipes:

Toffee Cookies

Gingersnaps

Cream Cheese Pound Cake


Return to the top

How To Keep Cyclamen In Bloom


It’s Time For Cyclamen!


cyclamen photo

A florist’s cyclamen.


Cyclamen are perfect winter-blooming plants. Miniature varieties don’t take up much space, and they can fit in just about anywhere–a cool windowsill, the kitchen table, or a guest room. The cyclamen found in garden centers in autumn are florist’s cyclamen, which I’ll describe after the section on hardy cyclamen.

Now that we’re well into autumn, temperatures dip below freezing at night. Outdoor gardening activities are less critical, and preparing for the holidays takes priority.

Garden centers are brimful with enticing delights—real trees (fake ones, too) and wreaths and all the trimmings… Strings of miniature Christmas lights (“annuals”, according to some), bird feeders, seed and suet…

And plants, of course. Poinsettias in an ever-widening assortment of cultivars, paperwhite narcissus bulbs in bins or sprouting in pots, stately amaryllis in dozens of colors…and benches of cyclamen in sprightly pinks, reds, bicolors, and pure white.

potted cyc.I’ve always loved miniature cyclamen. Sometimes you can find one with an especially delightful scent. The miniatures, to me, are easier to manage and stay in bloom longer than the larger types. A pink miniature from last Christmas just went out of bloom, yet summoned the energy to form 20 new flower buds.

Now, they won’t bloom forever, but with careful maintenance, miniature cyclamen can bloom for many months.

Cyclamen are truly versatile. They easily fit into combination arrangements with Norfolk Island pine, English ivy, small poinsettias, and houseplants seeking company.

Grow them in rustic clay pots, in modern ceramics, in birch logs, and in baskets. Or clustered on the credenza with candles, amaryllis, and fresh greens. And near the front door, in the chilly foyer, under a desk lamp, with some ornaments, and, yes, more greens.

There are two groups of cyclamen: those that are hardy and can tolerate cold temperatures when planted in the garden (“Hardy Cyclamen”) and those that are grown for indoor culture (“Florist’s Cyclamen”).


Hardy Cyclamen—We Can Take the Cold


There are about two dozen species of cyclamen available to gardeners, all belonging to the Primulaceae family. In addition to Cyclamen, other members in the family include Primula, LysimachiaDodecatheon, and about 50 other genera.


Cyclamen hederifolium photo

The hardy Cyclamen hederifolium.


Cyclamen Hederifolium

Cyclamen hederifolium is the most commonly found hardy cyclamen. The ivy-leaved cyclamen grows outdoors in USDA Zones 5 to 7, and can take temperatures down to -20°F. Its resemblance to English ivy (Hedera helix) explains the specific epithet, hederifolium.

Although it has naturalized in the Pacific Northwest, it is native to rocky woodlands and scrub in the Mediterranean region, from southern France to Turkey, and to islands in the Mediterranean Sea. This species is adaptable, readily self-seeds, and grows from sea level to about 4,000′ in elevation.

In late summer and autumn, pink flowers with darker eyes emerge among the silver-mottled leaves. Cyclamen needs gritty soil with lots of organic matter to keep it happy. Roots of this species emerge from the sides and the top of the tuber. Be careful not to cultivate the soil above the tuber, which will damage roots and the “floral trunks”, extensions of the tuber that bear flower buds.

Large tubers of the ivy-leaved cyclamen that I grew for sale arrived in mid summer. I potted them into 4½” pots, slightly bigger than the tubers. Half the soil consisted of drainage material. Coarse sand, pine fines, and small gravel (like PermaTill) mixed with potting soil in a 1:1 ratio encouraged roots to grow. But they rooted…very…slowly. Tubers rot in soil that holds too much water, so good soil preparation is important for long-term success.


hardy cyclamen

Hardy cyclamen.


Rooted In and Around

Decades ago, in Maryland, I planted a C. hederifolium tuber in a friend’s front yard, under a young Japanese maple. About 10 or 15 years later, she asked if it could be dug and taken to her new house. After some exploration, I felt a flattened tuber the size of a dinner-plate! But it was pinned in position by the aggressive roots of the maple tree.

It could not be pried loose, so it remains there today. Planted where the soil dries out while the tuber is dormant was probably part of the key to success. The maple absorbed a great deal of the water in spring and summer.


More Hardy Cyclamen Species

Here are some of the hardy cyclamen species, listed from more cold-tolerant first:

  • hederifolium (USDA Zones 5-7): described above.
  • coum (Zones 5 or 6 to 8): 4″ tall, small dark green or variegated leaves with deep red reverse. Pink to purple blooms appear in late winter to early spring. Similar to parviflorum, but coum grows at lower elevations in northern Turkey, and the two don’t hybridize.
  • purpurascens (Zones 6-7): fragrant deep pink flowers in summer. Its silver-mottled foliage is nearly evergreen. Native to northern Italy and central Europe.
  • cilicium (Zones 6-8): white to pale pink flowers in fall to winter, and silver-mottled leaves.
  • mirabile (Zones 6-8): small flowers in autumn.
  • parviflorum (Zones 6-9): a green-leaved species, from 4,000′ to 7900′ elevation (alpine tundra, subalpine meadow) in northern Turkey. Small tuber, only ¾” across.
  • repandum (Zones 7-8): coarsely toothed leaf margins, silver-marbled.
  • graecum (Zones 7-9): Greek cyclamen blooms in autumn with white or pink, often fragrant, flowers. From southern Greece and southern Turkey.

Collectors grow many of the species cyclamen, keeping them year-round in cool greenhouses. Information on websites varies regarding bloom time, flower color, and leaf color. Rare species and forms of species are available from specialty nurseries and garden clubs.

It takes a few years for cold-hardy species to flower from seed. In the wild, seeds are coated with a sweet sticky substance, which attracts ants. They feed on the sweet part, and discard the seeds. This method of seed dispersal, by ants, is called myrmecochory, in case you were wondering.


Because of dwindling native populations, be sure to ask for “nursery-propagated tubers”. This is not synonymous with “nursery-grown tubers”.


*   *   *   *   *   *   *   *


Florist’s Cyclamen


red cyclamen


This is the species that is most widely grown for indoor cultivation.  

Cyclamen persicum comes from rocky hillsides, up to 3900′ elevation, in south-central Turkey, Israel, Jordan, and in parts of northern Africa. It is also found in some of the Greek islands, where monks grew it and introduced it to traders.

Native populations of this species had fragrant pink flowers. Although much of the fragrance has been lost in hybridization, some modern strains, especially the miniature and intermediate varieties, once again have some scent. They don’t throw scent far from their flowers, so smell the flowers before purchasing if fragrance is what you want.

Cyclamen are available in autumn, during the winter holidays, and for Valentine’s Day. In cool regions, some garden centers offer them in early spring.

Flowers come in a wide range of colors, including white, pink shades, salmon, scarlet, deep red, burgundy, lilac, and shades of purple. They can be solid or bicolor, or finely edged in a contrasting color (“picotee”). Breeders have come up with micro miniatures, miniatures, intermediates, and large-growing standard strains.

Foliage differs from one strain to another, some showing little silver mottling, and others showing bold silver variegation. Leaf margins can be smooth, lobed, or somewhat toothed. Flowers, too, can vary in form, from smooth to ruffled to fringed.

Keep cyclamen away from children and animals. Ingestion can cause abdominal distress, seizures, and even death.


Combinations


cyclamen, ivy in clay pot

A few miniature cyclamen and variegated English ivy in a clay pot.


These were fast sellers where I attended winter farmers’ markets in Olney MD, around Washington, D.C., and at the Carroll County Christmas shows in Westminster, MD.

In a Basket

Selaginella frosty fern

‘Frosty’ fern (Selaginella sp.), a fern ally.

In cool conditions, group together cyclamen, kalanchoe, ‘Frosty’ fern, and lemon button fern. Add a small pot of English ivy to trail over the sides. Small grasses, such as mondo grass or Carex, add textural contrast to combinations.

I kept the plants in their pots, and snuggled them together in baskets lined with plastic. Add Spanish or green sheet moss, holiday ribbon or raffia, and maybe some small pine cones for the finishing touches.

Never allow water to collect in the bottom of a pot cover or a decorative container.

In a Pot

They also can be potted together. Use a shallow pot that snugly fits the root systems of the plants; keep them potbound.

The popularFrosty’ fern, a Selaginella, develops white tips in cool conditions, and must be kept moist. More options include Norfolk Island pine, English ivy, and other plants that take the same conditions.

Clay pots allow soil to dry faster than non-porous pots. Potting cyclamen with other plants can be a bit tricky, especially if light levels are not optimal. Their tubers can rot in pots that are too large or if the soil is too wet.


Strains of Florist’s Cyclamen


cyclamen foliage

Marbled cyclamen foliage.


Most customers aren’t concerned with the name of the cyclamen, but some are. A strain called Verrano tolerates higher, but not tropical, temperatures. The new Dreamscape strain performs well over a longer period of time. These are good choices for landscape beds in moderate to cool temperatures during the “shoulder” seasons, when they’re not exposed to frost.

A few of the miniature strains growers sell for indoors are Mini Winter (also good in cool, moist landscapes), Fantasia, and Snowridge Mini. Intermediate strains include Laser, Snowridge Midi, and Allure. For larger pots (5″ to 7″), growers offer Sierra, Mammoth, Fleur en Vogue, and Friller.

Strains with heavy silver variegation are beautiful even without flowers. Picasso (fragrant flowers) and Silverado are two popular miniature cyclamen strains. Rembrandt is an intermediate cyclamen, and Winter Ice is a larger standard with broad silver markings. Halios ‘White Silverleaf’ is a newer white-flowering cultivar with wide silver edging on the leaves. Metalis, an intermediate strain introduced in the 2020 California spring trials, has a broad silver margin, a green central heart, and can be used indoors and in the landscape.

Varieties coming to market are bred for leaf color, flower fragrance, and disease resistance. Breeders also are looking for larger bloom counts and for blooms that bunch in the center. Another variety in the 2020 spring trials is the heat tolerant ‘Leopardo’.


What About the Seedpods?


cyclamen seedpod

Remove seedpods to encourage more blooms.

We normally remove faded flowers and their stems, encouraging more flowers to form. But, sometimes, for fun, I let seedpods develop at the end of the bloom cycle.

The flower stem curls curiously downward, and the pod splits open when the seeds are ripe. A fully developed seedpod resembles a grape.

Florist’s cyclamen grow quite easily from seed; they just take a long time to get to flowering size. Older strains of cyclamen needed 15 to 18 months from seed to flower. Newer varieties take only half that amount of time.

Seeds germinate soon after ripening if planted about ¼” deep. They germinate better in the dark, in high humidity, and with temperatures in the mid 60’s F. Tiny cyclamen leaves emerge after the tuber has begun to grow. I used to grow seedlings in 9-cell market packs until they were ready, months later, for 4″ pots. To save time, however, I purchased pre-finished cyclamen to sell at garden shows after they bulked up and came into flower.


Headings

Page 1: It’s Time For Cyclamen!, Hardy Cyclamen—We Can Take the Cold (Cyclamen Hederifolium, Rooted In and Around, More Hardy Cyclamen Species), Florist’s Cyclamen (Combinations, Strains Of Florist’s Cyclamen), and What About the Seedpods?

Page 2: Starting Out With Cyclamen, Choosing Cyclamen, Water, They Like It Cool (Miniature Cyclamen Might Be Easier), On a Chilly Porch, Dormancy, New Digs (Potting Soil), Fertilizer for Cyclamen, Light, Deadheading Cyclamen, and For Further Research

Return to the top

Our Favorite: Pumpkin Pie!


If It’s Thanksgiving, There Will Be Pumpkin Pie


pumpkin pie

Kim’s pumpkin pie.


Here’s a recipe for homemade Pumpkin Pie. Those few Thanksgiving guests who say “No thanks” might start asking for seconds once they’ve tried it. We’ve been making this pumpkin pie for generations. And, yes, it does call for home-made crust.


The Crust For Pumpkin Pie


You’ll need wax paper, a pastry cutter, a rolling pin, and counter space. This recipes makes 2 pies, and the crust and filling bake at the same time. I use clear Pyrex pie plates. Preheat oven to 375°F.


Ingredients

  • 2 cups all-purpose unbleached flour, plus a bit more for decoration on top of filling
  • 1 teaspoon salt
  • 1/2 cup Crisco all-vegetable shortening. You can substitute 1 or 2 tablespoons butter for some of the shortening, but any more than that and the crust will be less flaky. Use the very scientific “water displacement method” (remember Home Ec?) to measure the shortening. (Fill a 2-cup measuring cup with 1 1/2 cups cold water. Using a butter knife, add the shortening to the water, and submerge it until the water comes up to the 2-cup level. Drain water.)
  • 5 tablespoons cold water


The Process

  • Add flour to a medium size bowl.
  • Stir in the salt.
  • Add shortening.
  • Add water evenly over the flour.
  • Use a pastry cutter to work the dough, cutting into and distributing the ingredients evenly, but do this as quickly as possible. For a really good crust, work fast, work cool, and don’t overwork the dough. Dough will stick inside the pastry cutter; use the knife to clear it several times as you cut the dough. If it feels too dry (“floury”) and you’ve been cutting the dough for a while, add a little more water or shortening. Too much water and overworking will make the crust hard; shortening makes it flaky. It’s okay if you see tiny blobs of fat mixed in the dough.
  • Gather a handful of dough and squeeze it. If it stays in a clump, it’s ready to be rolled. If it’s very sticky, add more flour.
  • Divide the dough in half.
  • Cut 4 pieces of wax paper. Lay 1 piece on the counter.
  • Move half of the dough to the wax paper. Ball it up in the center. Cover with another piece of wax paper.

Roll It Out

  • Use the rolling pin to flatten the dough all the way to the edge of the wax paper. Invert a pie plate over the dough to see if it’s wide enough. Dough should extend about 1 1/2″ around the pie plate.
  • Now, carefully remove one sheet of wax paper. The knife will help loosen an edge.
  • Lift the bottom paper and lay the dough into the pie plate. Remove the paper.
  • Press the dough into the pie plate, in the angle and up the side.
  • Roll down the edge of the dough to the top of the plate.
  • Form the zigzag top edge of the dough using the index finger and thumb of one hand, and the other index finger.
  • Use a fork to pierce the dough in several places on the bottom and sides.
  • Repeat for the second pie.


pie crust

Pie crusts.


The Filling For Pumpkin Pie


Ingredients

  • 4 tablespoons butter
  • 1½ cups sugar
  • 2 large eggs
  • 29 ounce can Libby’s 100% pure pumpkin (no spices added)
  • 1 teaspoon ground ginger
  • 1 teaspoon ground nutmeg
  • 1½ teaspoons ground cinnamon. (For the spices—ginger, nutmeg, cinnamon—I like to add a bit more than the recommended amount.)
  • 1 teaspoon salt
  • 2¼ cups milk. We use 2%.


The Process

  • Preheat oven to 375°F.
  • Mix sugar and butter in the large bowl of mixer until evenly mixed; we like our Kitchen-Aid stand mixer.
  • Add eggs, pumpkin, spices, and salt.
  • Add milk last. Scrape bowl and attachment with spatula a few times while mixing.
  • Add filling to the 2 uncooked crusts.
  • Leftover dough, if there is any, can be shaped into a turkey or a pumpkin and placed on the filling.
  • Bake for 1 hour. Check the pies about 10 minutes before they’re done. If your oven has hot spots, turn the pies halfway through cooking so the crusts bake evenly.
  • Let them cool.
  • Enjoy, and Happy Thanksgiving!


orange pumpkins union market


Return to the top

This Is Why Fall Color Happens

Updated 9/6/2024


forest, fall color


One of the most phenomenal transformations in nature occurs in autumn when leaves take on fall color.  


Deciduous tree canopies change from shades of green to the reds, oranges, yellows, browns, and purples associated with this time of year. A drive along the Blue Ridge Parkway, or even a glimpse out the window to the Japanese maple in the courtyard, elicits feelings of delight and wonder.

Equal to the spectacle unfolding in front of us, as we watch colors brighten from day to day, is the curiosity for an explanation. Why does fall color happen?


Plant Pigments and Fall Color


fall color

Looking up in Lincolnton NC.


It all starts with plant pigments, which give leaves their color.

Sandwiched between a leaf’s upper epidermis and the lower epidermis is a layer of cells called the mesophyll. The mesophyll is composed of the upright cells of the palisade layer, near the surface of a leaf, and the more loosely arranged spongy mesophyll. Both kinds of cells within the mesophyll contain chloroplasts, with chlorophylls “a” and “b”. Also present within the leaf is a network of vascular tubes—phloem and xylem—which carry water and nutrients between the leaves and the roots.

These chlorophylls absorb wavelengths from different parts of the spectrum. Chlorophyll a absorbs violet-blue and orange-red wavelengths, and chlorophyll b absorbs blue light. All plants have “a” but not all plants have “b”. In lower light levels, “b” more efficiently absorbs energy from available light and transfers that energy to “a”.

In autumn, as chlorophyll degrades into transparent compounds, the carotenoids become the dominant colors. Those pigments were there all along, but the green chlorophyll masked them. We don’t see the oranges and the yellows until the greens begin to die down.


tree leaves

Spring foliage on maple tree in the woods.


Chlorophyll


maple leaves, fall color

Oak leaves, at Mabry Mill, Meadows of Dan, VA (2020).

The green pigment is the familiar chlorophyll. We see it every day as plants grow and produce foliage. Chlorophyll, contained within a cell’s chloroplast, is responsible for manufacturing sugars during photosynthesis. Carbohydrates, made from oxygen and hydrogen in water, and carbon from carbon dioxide, permit growth and development of the plant. Chlorophyll is continually depleted and replenished throughout the season.

We see green leaves because most of the green wavelengths in light are not absorbed but are reflected instead. Chlorophyll pigments absorb primarily red and blue wavelengths.

Changes occur in late summer as days shorten and temperatures drop. Cells at the base of the leaf’s petiole, where it attaches to the stem, begin to cut off the vascular system. Water and nutrients no longer move freely between the leaves and the stems. Production of new chlorophyll stops, revealing the yellows and oranges. Sometimes the leaf veins are the last parts to change color and remain green as the rest of the leaf turns color (photo, above).


Carotenes and Xanthophylls


yellow fall color, maple in charlotte nc

A maple tree in Charlotte NC.


Carotenoids are composed of xanthophylls and carotenes. These are the yellow, orange, and brown shades seen in plants and animals—daffodils, corn, buttercups, bananas…and canaries, egg yolks, shrimp, fish, and flamingos. These pigments absorb wavelengths from the blue and some of the green parts of the light spectrum, which chlorophyll can’t absorb efficiently.

Xanthophylls and carotenes protect foliage from oxidative stress (cell damage) during photosynthesis. When the tree is exposed to strong sun, carotenoids absorb excess energy from excited chlorophyll molecules and release it as heat. In autumn, carotenes protect leaves as the nutrients are withdrawn from the leaves to the stems. The tree will re-use these nutrients when new foliage emerges in spring.

Beta-carotene, lycopene, lutein, and zeaxanthin are more carotenoids, present in leafy greens, fruits, and vegetables. These pigments are good for plants and for us, too—in squash, sweet potatoes, tomatoes, colorful ripe peppers, carrots, oranges, apricots, and grapefruit.

Between 15 and 30% of tree species have yellow or orange fall color. Trees that turn these colors include hickory, ash, redbud, yellow poplar, birch, aspen, black cherry, sycamore, maple, fringe tree, cottonwood, sassafras, Parrotia, pomegranate, alder, ginkgo, witch hazel, and Katsura.


orange fall color, lincolnton nc

Lincolnton NC.


Red twig dogwood ‘Arctic Fire’ and yellow-twig dogwood ‘Flaviramea’ stems turn color in cold weather and good sun. Cut back the plants in late winter, almost to the ground, to encourage a multitude of young twigs that will take on color later that fall.

Brown is often the color of cell walls and can appear in the absence of other pigments. Sometimes, leaves turn brown without turning color as a result of an early freeze. A Japanese maple that normally turns red in autumn, for example, can turn brown when the temperature suddenly plummets. Also, a tree that has been cut down in late summer or fall will turn brown instead of displaying its usual fall color. More on that later, under marcescence.


Anthocyanins


red fall color, crape myrtle

Fall color of crape myrtle, Cane Creek Park, Waxhaw NC.


What about the red colors? Unlike the yellows and oranges, the red pigments, called anthocyanins, are produced in the sap when sugars break down in bright light.

This happens after some of the chlorophyll has degraded in autumn and as phosphate levels decrease. Phosphates break down sugars manufactured by chlorophyll in the summer in order to carry out cell activities. However, in the fall, phosphates and other nutrients move from the leaves to the stems.

You might notice that in some years, the red colors are more vibrant than in other years. Rich red colors are visible when anthocyanins are produced in greater quantities. Bright sunny days, adequate soil moisture, and cool but not freezing temperatures foster the blazing displays we look forward to each year. 


berries

Edible berries with high levels of healthy anthocyanins.


Nutritionists encourage us to “eat all the colors” of vegetables, greens, and fruits. Anthocyanins, among the most powerful antioxidants, are found in many fruits and vegetables, including apples, cranberries, blueberries, strawberries, blackberries, cherries, grapes, plums, red cabbage, and red lettuce.

Carotenoids can combine with anthocyanins to form deep orange, scarlet red, and bronze fall colors.

In temperate regions, about 10% of the trees turn red or burgundy. But the percentage can be as high as 70% in areas such as New England. Some plants with predominantly anthocyanin pigments include maple, oak, sweet gum, tupelo, sourwood, dogwood, cherry, and persimmon. Purple-leaved cultivars of smokebush and redbud turn deep red in autumn.


Variety Selection in Your Landscape


burgundy fall color, Japanese maple with lantern

Certain varieties of Japanese maple display great color in summer and again in autumn.


When choosing shrubs and trees for your landscape, be sure to ask the nursery about fall color. There could be several cultivars within a species, each with a different color in autumn.

Japanese maple in fall color, new gardens

Japanese maple.

Japanese maple (Acer palmatum), for example, comes in many varieties. Red-leaved cultivars of this tree seem to be the preferred choices among customers. Foliage that remains mostly red all summer will gradually deepen to a rich reddish burgundy. And then it suddenly looks as though the plant is on fire, turning bright red. On the other hand, green-leaved cultivars can be multi-colored in the fall, or rich orange, or sunny yellow. It just depends on the cultivar.

If you’re looking for a specimen tree, and fall color is a factor, visit garden centers and public gardens in autumn when the trees show fall color. Research the full botanical names (Genus, specific epithet, and ‘Cultivar’) of the varieties you like.

This is not a guarantee, however, that young potted trees will have the same fall color as established trees. Plants in nursery pots can behave differently than plants in the garden, so take that into consideration.


Fall Color Might Depend on Weather


parrotia persica, reddish fall color in snow

Parrotia persica in the snow.


Seasonal weather conditions also affect a tree’s fall color. In the Maryland garden, a Parrotia persica grew in an island bed. The leaves of this witch hazel relative often turned a bright yellow color. In other years it was amber-gold, and, more rarely, salmon-red.

Prolonged mild fall weather also affects the display. That Parrotia (photo, above) occasionally held its leaves until December. Many oak species keep their orange, russet, rich red, or brown leaves through early winter before shedding them.

Red fall color is particularly dependent upon weather conditions. In 2018, trees that normally turned brilliant red were rather dull here in Charlotte. The heavy rains, high winds, and overcast weather did not promote the production of anthocyanins.


Hormones and Abscission


Abscisic acid (ABA), produced in terminal buds, slows growth and signals the plant to produce bud scales that protect the buds over winter. ABA is also produced in the root system and is translocated to the leaves during drought in the growing season, signaling the leaves’ stomates to close. This reduces transpiration, conserving water content in the plant.

Hormones produced in leaves and in the tips of twigs influence development of the abscission layer. This layer is a few cells thick, characterized by short cells with thin walls, and sits between the base of the leaf stem (petiole) and the twig. During the growing season, higher levels of auxin regulate the influence of ethylene, two hormones, resulting in the leaves’ ability to remain attached. Auxin levels fall in autumn, however, exposing cells in the abscission layer to the effects of ethylene, which promotes leaf detachment.

Cells between the petiole and the twig are differentiated, disintegrating on the leaf end and depositing lignin and suberin on the twig side. This layer of cells is weakened, causing the leaves to fall off by their own weight or with help from wind and rain. Enzymes, such as pectinases, help the process by breaking down cell walls.

Remaining on the twig is a leaf scar, with remnants of vascular strands. Over several days, lignin (tough woody tissue) and suberin (corky bark tissue) will seal the fresh leaf scar, protecting it from infection and desiccation.


Marcescence


beech tree, winter

Beech tree.


Oaks (Quercus spp.) sometimes remain in brown leaf until early spring. Beech trees (Fagus grandifolia) can be spotted in the winter forest by their tan leaves dangling from the branches. Leaf retention through winter is called marcescence. The reason for this trait is open to speculation.


Nutrient Release

One theory claims that, by holding onto its leaves until new foliage is about to sprout, those newly fallen leaves will stay near the tree’s root system instead of blowing away in the winter winds. Since they have yet to begin decomposition, the nutrients locked inside the leaves will be released at a time when they can benefit the tree—when growth resumes in spring.


Browsing Animals

Another theory indicates that browsing animals are less likely to feed on marcescent twigs. In studies where deer were presented with both marcescent twigs and leafless twigs, they chose the leafless twigs.


Weather Abatement

Maybe the dead leaves help slow down fierce winds, protecting the buds from drying out. Even better is the accumulation of snow, as in the photograph (above) of a beech tree, decreasing exposure even more.

Another possibility is the protective shade cast by marcescent twigs on thin-barked trees, such as beech (photo, below). Large differences in temperatures, between night and day, can damage tissues on the south or southwest side of the trunk. Frost cracks and sun scald can be minimized when the trunk is partially shaded by brown leaves during the warm hours of the day.

If cracks occur, callus tissue will seal them, and healthy bark will compartmentalize the wound. There’s no need to paint it with “wound sealer” products. And never fill the cracks or hollows with concrete or dump rocks and debris at the base of a tree!

When a severe early frost suddenly kills a tree’s foliage, the abscission layer would not have had enough time to mature. Consequently, leaves can cling until those cellular changes occur. Young oak trees might exhibit this feature, but it often disappears with maturity. Sometimes only parts of the tree have leaves that cling.

You might have noticed that trees felled in the summer often hold onto their brown leaves.


beech tree marcescence

Beech tree in winter, Charlotte NC.


Why Do Leaves Fall Off?


For a plant to keep its leaves all year long, resources would have to be consumed at a time when they are less efficiently gathered. When light levels are less than optimal, and cold temperatures suppress metabolic processes, it’s easier for the plant to reabsorb nutrients and drop leaves. Water loss, insect predation, foraging animals, and damage from ice, snow, and high winds are some reasons why it just isn’t worth staying in leaf through the winter. The cost is too great.

pine needles, in fall

Pine tree with aging needles.

Conifers, on the other hand, have adapted to those conditions, and are able to photosynthesize all year. But they do slow down in cold weather. And the sticky sap in some species (pines, spruce, fir, and others) effectively fends off animals and most insects.

Evergreens drop some of their foliage each year; needles don’t cling forever. Some homeowners are alarmed when they see a large percentage of brown needles fall to the ground. That’s normal, as long as the tips of the stems remain green. A pine needle carpet is an effective mulch.


Protective Red Fall Color


Scientists have long speculated on the merits of anthocyanins—the red, blue, and purple pigments. Those adhering to the Photoprotection Theory claim that anthocyanins protect leaves from harmful effects of light. This pigment also helps the tree absorb nutrients more efficiently in cooler conditions, before leaf drop.

mustard greens 'Miz America'

‘Miz America’ mustard greens and other brassicas.

Coevolution Theory claims that insects avoid feeding on leaves high in anthocyanins. The red fall foliage color signals them to stay away, but red berries signal birds to come and feast. (***Update***: Growing many flats of colorful fall greens illustrates this point. Among brassicas [mustard, kale, broccoli, cabbage], the deep reddish burgundy ‘Miz America’, one of the mustard greens, is entirely free of damage from caterpillars that ravage green varieties in this group. 10/7/2022)

Dogwood trees, hollies, barberry, and pyracantha have red berries that attract birds. After consuming them, the animals help distribute the seeds. Poison ivy has whitish berries that birds eat, but its foliage is fiery red, signaling birds to come around.


fall color in red berries of winterberry

Fall color in berries of a dwarf winterberry, Ilex verticillata, at Freedom Park, Charlotte NC.


Red colors in some species of maple trees are produced by a different metabolic process than through chlorophyll breakdown. These anthocyanins aid in preventing competition with the tree’s own offspring by stunting the growth of saplings trying to grow nearby. This is one type of allelopathy.


But Only Part of the Tree is Turning Color


fall color


You might have noticed that a portion of a tree is prematurely turning color while the rest of the tree is still green. I’m not referring to an even coloring at the ends of branches, but rather to the one branch that is conspicuously different in color from the rest of the canopy. That branch is stressed…

  • on the side of the tree where the roots are exposed to hot sun and poor, dry soil, such as on a south-facing slope (northern hemisphere).
  • from root compaction.
  • due to root disturbance, from working in the soil under the tree, severing roots.
  • because it’s heavily shaded and not contributing to photosynthesis.
  • from the tree being coppiced, or cut back to the ground. As several stems regrow, the dominant ones interfere with the others. Weaker stems will show early color and die.
  • due to girdling roots. Maple trees are notorious for this. Look for and sever a root that crosses over the base of the trunk. The trunk will try to grow over the root, but could end up being constricted. Look up from that point, and you might see branches that are developing early fall color. One indication of a girdling root is the absence of an even flare all around the base of the tree. One side of the trunk will look flat where it enters the ground.
  • from clotheslines, hammock ropes, or other items tied around the trunk or branches, eventually girdling the stem.
  • where lightning or physical damage stripped bark off the side of a trunk, killing parts of the tree above the damage which no longer receive water and nutrients.
  • from insects and diseases causing disruption in the flow of water and nutrients, affecting parts or all of the tree canopy. This can happen at the base of a leaf, a twig or branch, in the trunk, or in the roots.


Fall Color and Species Distribution


red fall color in maple tree

Red fall color in a maple tree, Lincolnton NC.


Some parts of the world are known for their fall color. Southern Canada, parts of the northern U.S., Scandinavia, northern and western regions of Europe north of the Alps, the Russian Caucasus region, Japan, parts of China, the Korean peninsula, Argentina, Chile, southern Brazil, and New Zealand’s South Island are some.

Certainly, there are pockets in millions of places around the world with absolutely dazzling fall displays! One option is to create your own by including in your landscape a few specimens with spectacular fall color.

In this country, changes in color begin as early as September in the higher elevations of the Rocky Mountains, far north Minnesota, and upper New England (far north New York state, Vermont, New Hampshire, and southwest Maine). Southern states, part of the Atlantic coast, and the California interior between mountain ranges begin their autumn displays in November. Check out this map, where you can see how fall color progresses throughout the country.


Speaking of Cold


North America is home to a diverse habitat of 800 species of trees, including 70 oaks. Northern Europe has fewer—51 species, 3 or which are oaks. These numbers do not include cultivars of the species. One thing scientists can agree on: they can’t agree on the number of tree species inhabiting the planet. Some say the number is 10,000, and others estimate over 100,000 species.

During the Ice Ages, North American tree species in southern regions and along the north-south mountain ranges were spared extinction caused by glaciers. As glaciers expanded from the north, trees were able to find refuge farther south of their original range. This took place over thousands of years. The last Ice Age occurred from 18,000 years ago to approximately 12,000 years ago.

However, in Europe, glaciers covered a larger area of land. The Alps acted as a massive barrier to species trying to retreat toward southern latitudes. Those trees were cornered, and then covered up by mile-thick sheets of ice, causing mass extinctions. This explains the disparity in the number of tree species between North America and Europe.

At the height of the last Ice Age, about 18,000 years ago, glacial ice covered one third of the planet’s land surface. Today, about 10% of the land is covered by ice.


Fall color is nature’s last hurrah of the season. 


I hope you’ll consider planting trees and shrubs that have brilliant autumn color. If you’re not planning to do any landscaping, you can still enjoy the colors of autumn by visiting parks and public gardens, or by taking a leisurely stroll through the neighborhood. Maybe it’s time for a road trip. Don’t forget the camera!


fall color

Love it.


Return to the top

Trick-or-Treaters Will Like This Halloween Twist


carved pumpkins


Halloween Is Coming Up


I’d like to relate the story of a 29-year tradition that took root in our family. But first, some background.

After leaving Morgantown, West Virginia, we purchased our first home in Monrovia, Maryland. The first order of business was to build a greenhouse for the vegetable transplants, succulents, and other houseplants that I sold to florists and garden centers, and at the occasional plant sale held in the front yard. This was several years before the phenomenal rise in popularity of the farmers’ markets.

Fast-forward a few years to September, 1984, and we were on the move again, this time to a smaller property in Rockville MD, 30 minutes south. All the light fixtures and other horticultural paraphernalia came with us…along with our young daughter, Brynn, and our first Rhodesian ridgeback, Aureus.

The plants…hundreds of them!…found temporary quarters in every window or in the back yard, until the dozen or so 4′ fluorescent light fixtures were set up in the basement. But I didn’t need all the duplicate plants for the business at this time of the year, and they could easily be propagated if I did.


bars of chocolate for trick-or-treaters


Returning home with bags of little Butterfingers, Mars bars, Nestle crunch, and Smarties, I had a lightbulb moment.


What if we offered plants to the trick-or-treaters?


My husband, at the time, said, “That’s un-American.” But I wasn’t going to stop offering candy altogether. I intended to give trick-or-treaters a choice!

Despite doubts, I went ahead with the plan. A folding table under the porch lights held a few flats of small thornless succulents (like those in the photo, below), spider plants, and Moses-in-the-boat (Rhoeo spathacea) in 2″ or 3″ pots. White rope secured to the shrubs guided the trick-or-treaters along the sidewalk to the front door, and prevented shortcuts through the garden.


Assorted succulents


Spooky noises from a tape cassette echoed around the foyer, as glow-in-the-dark spiders crawled all over my t-shirt. And the great plastic pumpkin brimming with treats sat inside, on a bench by the door. Brynn went out trick-or-treating with her Dad; a few years later, her brother, Logan, would join them. Okay, we’re all set.


The First Knock on the Door


porch light

In our neighborhood, trick-or-treating took place during the early evening hours, and participating homes kept their porch lights on. Parents accompanied their young children, or they waited nearby at the curb.

I greeted our first visitors, and followed up with “Would you like a plant or candy?” I think I detected some quizzical remarks under their masks and make-up. After giving a succinct explanation to Snow White, a pair of dice, and a foil-covered cardboard robot, important decisions were about to be made.

“Can we have both?”

“No, you have to choose one or the other. You can have candy, which is gone in a few minutes, or a plant, which can last for years. It’s entirely up to you.”

It often happened that when the first of a group of trick-or-treaters chose a plant, then, like a contagion, the rest of the group followed suit.

trick-or-treaters, basket of candyOnce in a while, the young ones would have a change of heart, and I happily accommodated. It’s never too early to teach kids how to make a decision, but I didn’t want them to go away disappointed…not on Halloween!

The middle-school-aged kids and the few high-schoolers often chose the plants, and were surprisingly fascinated by this new twist on trick-or-treating.

They paused while I gave more detailed instructions for care, and even asked the names of the plants. So, I found small white labels and a Sharpie pen, and wrote common and botanical names for each of the plants.


There’s Always One


Halloween monsterTiny fingers gingerly grasped their bounty. I saved small bags and newspaper for the occasion, but most were content to carry the pots. They excitedly passed them to their parents, who responded with “Thanks! What a great idea!” I was thrilled that they were thrilled.

About 15 years into this tradition, a young boy started coming. His father remained at the curb, chatting with friends and neighbors. When he realized what was going on, the father shouted toward his son, “Take the candy. Take the candy!

The cute little boy handed back the plant he had chosen, and took a couple of chocolate bars instead. In this instance, I was willing to make an exception. He was the only trick-or-treater allowed to take both a plant and candy, and usually traveled alone, so I didn’t have to explain anything to his friends. This happened for a few years, and always played out the same way: “Take the candy!”


A Wider Web


spider web


The morning after the first Halloween, I took my daughter and the dog for a walk around the neighborhood. I noticed a green pot in the gutter, and a plant not far away in the middle of our neighbor’s lawn. That was one of mine!

child watering a plantThen we saw two more down the block in someone’s front yard. After gathering the bits and pieces, I had to decide whether to continue doing this in the future.

Hmmm… Actually, this was a no-brainer. Only a handful of plants were discarded, but dozens were given away! And to miss out on the opportunity to introduce young people to the world of plants? No way!

As the years went by, hippies, clowns, and Frankenstein monsters said they had given their plants to Grandma or to favorite teachers. Some kept their spider plants and philodendrons for 5, 6, or 7 years, and some told me that their hens-and-chicks (the hardy succulent, Sempervivum) were spreading all over the garden.

Several mentioned that they had used the story of the “Halloween Plant Lady” as a subject for classroom assignments. I had no idea this little tradition would have such an effect, and for 29 years, trick-or-treaters continued to surprise me.


Second Generation of Trick-Or-Treaters

And then I began to hear tales from our Halloween visitors that their Moms or Dads used to come to the Plant Lady’s house! The parents, former trick-or-treaters, parked their cars down the block and sent their kids up to the end of the cul-de-sac for their own plants!

This tradition lasted until 2013, when I moved to North Carolina. But I will do it again, some day. (***Update***: I did move to a rural town in NC, but, alas…no trick-or-treaters. 12/16/21)


Plants for Trick-Or-Treaters


Hens and chicks, often chosen by trick-or-treaters

Hens and chicks.


Houseplants and Houseleeks

As more children were born into the neighborhood, and into the one across Shady Grove Road, more trick-or-treaters showed up. We used to chuckle about something being in the water… Some years we had only 15 or 20 kids coming to the door, but in its heyday, Halloween brought well over 100 visitors for their treats.

The older children, middle- and high-schoolers, were more inclined to take a plant than the youngest visitors. Some told me they chose plants every year. Over the 29-year period of time, between half and two-thirds of the trick-or-treaters chose plants! Incredible!

jade plant

Jade plant.

Since I was in the business of propagating and selling plants, with a little forethought, it was easy to come up with enough material. Plants that propagated quickly:

  • wandering Jew (Tradescantia)
  • spider plant (Chlorophytum)
  • Moses-in-the-boat (Rhoeo)
  • Swedish ivy (Plectranthus)

These took a little longer to root:

  • jade plant (Crassula, photo, right)
  • miniature Kalanchoe
  • Philodendron
  • Pothos (Epipremnum)
  • dwarf snake plant (formerly Sansevieria, renamed Dracaena)
  • Hens-and-chicks, also called houseleeks (hardy perennials and always popular)

When I began selling plants at farmers’ markets in 1988, I added herbs and other edibles to the Halloween table. The mere mention of “pizza!” got them interested in oregano. And dinosaur kalekale!—was chosen by some. Parsley and thyme were more favorites, and young basil plants (indoors in warm sun) were given away only on warm Halloween evenings.


Flowering Plants


trick-or-treaters loved the blue violas

Blue violas grow in pots or in beds, and love cool weather.


I grew violas (smaller cousins of the pansy) in market packs, and cut them into single-plant sections. Our trick-or-treaters loved the idea of using the flowers in a salad. The plants were especially bright and colorful, and grew well in the cool weather. These biennials were planted outdoors in autumn, went dormant or semi-dormant in winter, and re-emerged in spring.

purple crocus

Crocus.

For March and April home and garden shows, I forced hundreds of pots of spring-flowering bulbs. They were potted up in autumn, and rooted during cool to cold weather, blooming in the spring.

So, I bagged up a few bulbs (Crocus, Puschkinia, Muscari, and the more expensive miniature daffodil ‘Tête-à-Tête’) for the more adventurous, or patient, trick-or-treaters. They loved the fact that these perennial bulbs would come back year after year. (Like they did.)

For the last Halloween in Maryland, in an effort to clean up the yard in preparation for selling the house, I gave away potted perennials, such as Hosta, Helleborus (Lenten rose), Sedum, and seedling Japanese maples. I have every reason to believe that some of those plants are still thriving in our trick-or-treaters’ gardens, or maybe in their parent’s gardens.


So, is it time to start a new tradition in your family?


Gardeners out there might give it a go, or maybe you have something else to offer trick-or-treaters in your neighborhood.

Time for me to fire up the old broom and get some flats of violas for the winter garden.


pumpkins and gourds welcome trick-or-treaters


Return to the top

The Lake Lure Flowering Bridge

2018

Updated 10/28/2024


A Trip To the Lake Lure Flowering Bridge


Yesterday, US 64/US 74-Alt/NC 9 delivered me to the Lake Lure Flowering Bridge. The weather forecast predicted a hot Saturday here in Charlotte. So, I decided to take another trip to the mountains of western North Carolina. There’s rarely a plan or an itinerary of any sort, but I always end up somewhere.

I have been there before, once a couple of years ago to walk the length of the bridge, and many times as a drive-by viewer on my way to…somewhere. If I had stayed home, I would have felt compelled to plant the potted vegetables that were quietly pleading, “Plant us…Plant us!


view from Lake Lure Flowering Bridge

View from the Lake Lure Flowering Bridge.


A Little History


This “Gateway to Somewhere Beautiful”, it’s called, opened in 2013, after a new bridge had been built 2 years earlier, right next to it. The original 1925 bridge and now this pedestrian walkway span the Rocky Broad River, which feeds Lake Lure, an easy stroll along the Town Center Walkway. (Parts of the movie “Dirty Dancing” and other movies were filmed here.) Stunning stone backdrops surround the lake, where you can enjoy water sports, dine, or simply sit back and take it all in.

The Visitor Center, between the lake and the garden, houses a small museum with artifacts and informative historical displays. You can trace the history of the Hickory Nut Gorge from the time of the Cherokee and Catawba Indians. Read about the area’s involvement in the Civil War and the Gold Rush, to today’s economy, centered around agriculture, industry, and tourism.

The garden has been designated a Monarch Way Station by Monarch Watch. And the National Wildlife Federation includes it in its Certified Wildlife Habitat program. It is known as “Historic Bridge Seven” in the Register of Historic Places.


path through the garden, lake lure

Path through the gardens, with scenic backdrop.


A short drive down the road is Chimney Rock State Park (“The Last of the Mohicans”) and the always bustling Chimney Rock Village. Here you can enjoy shopping and outdoor dining while being mesmerized by the sound of rushing water cascading down the rocky incline. Did I mention how scenic this area is? Spectacular!


Rocky Broad River

The beautiful Rocky Broad River.


Back to the Garden


A paved pathway takes visitors through a succession of gardens. There’s an herb garden, a fragrance garden, and one that highlights tropicals. And a miniature train garden, succulents, and roses. Annuals are planted here and there, providing vibrant color and nectar for the bees, butterflies, and other beneficial insects.

Perennials and woody plants are the backbone of this garden, and each section has a plant list to help identify individual specimens. This garden is open all year, inviting opportunities for new experiences every time I visit.

Expanding gardens spill out over the ends of the bridge span, offering more potential garden space. The parking lot is at one end, near the huge maple tree (2019—now a stump!). Planted near the other end of the garden is a Franklin tree, which no longer exists in the wild. You can stay on the level curvy paved path or explore several side pathways.


bricks, llfb, for a donation


There is no charge to visit, but do leave a donation in the box near the lake end of the walk. Contribute $200 (today=?) and have an engraved brick placed along the path. This garden is planted and maintained entirely by a group of hard-working volunteers.

Everywhere you go, you will see whimsical additions to the landscape. There are bird baths with good-luck coins (cameras are watching, the signs say), and repurposed painted doors. That’s a nice touch along a path as the garden transitions into another style or simply to add a splash of color.

You’ll see metal sculptures from inconspicuous to the can’t-miss Opuntia, houses for birds and bees, and an old chair with the seat replaced with a sack of soil and succulents.


Wildlife


The bright orange butterfly is a Gulf Fritillary. Males are bright orange, and females are slightly browner. The caterpillars feed on passion flowers (Passiflora), and adults take nectar from butterfly bush (Buddleia), lantana, zinnia, and other flowers.

Where water drained from one of the raised beds, a butterfly called the Red-Spotted Purple paused for a mineral drink. The larvae of this butterfly feed on several species of trees, including amelanchier, aspen, birch, poplar, and wild cherry. Adults find sustenance from dripping tree sap, rotten fruit, carrion…and dung. Sometimes they sip nectar from spirea, viburnum, and privet flowers. Birds avoid the red-spotted purple because it mimics the poisonous pipevine swallowtail butterfly. But I wonder if that’s the only reason.

This chrysalis (photo, above) clings to the back of an elephant ear leaf. Tropical Colocasia plants add dramatic presence to a garden, with huge green or purplish-black arrowhead leaves.

Another butterfly skipping around the lantana and the basil flowers was the Clouded Sulfur butterfly. Small lizards (green anoles) scurried off when disturbed. 


perennial sunflower, Helianthus

A tall perennial sunflower, Helianthus, for late blooms and bumble bees.


A cultivar of the perennial native sunflower (Helianthus) was a favorite of the bees. This stately plant grows to 7′ tall and offers bright color in sun to partial shade when little else flowers there at this time of year.

A water hose thoughtfully left on the edge of the sidewalk filled a bowl for thirsty dogs. It was a hot day! Heading back to the parking lot, the metal archway misted cool water on visitors who chose to take this route. That felt great.


So, What’s Blooming Now?


Perennials


solidago at Lake Lure Flowering Bridge

Pollinators at work on the goldenrod, Solidago. This is not the plant responsible for hay fever.


Camera in hand, I clicked away as others smiled hello or asked “What’s that?” There were visitors from New York, and several from other countries. A lovely woman from Hickory commented on the turquoise-winged wasps all over the goldenrods (Solidago) and was curious to know the name of another yellow flower. It was listed on the nearby clipboard as Rudbeckia fulgida, a small-leaved black-eyed Susan. It’s native to the eastern U.S.


rudbeckia fulgida var. fulgida

Rudbeckia fulgida var. fulgida.


A popular seller at the Maryland markets where I sold plants was Rudbeckia fulgida var. fulgida, a better choice, in my opinion, than the ubiquitous ‘Goldsturm’. I’m not sure if the specimens on the bridge were R. fulgida, as indicated on the plant list, or R. fulgida var. fulgida. The latter black-eyed Susan, a slightly glossy-leaved variety of the species, starts blooming a week or two later than ‘Goldsturm’, but it continues non-stop until frost.

And it is not susceptible to that unsightly black mildew that often covers leaves of ‘Goldsturm’. Sure, the flowers are smaller, but, to me, it is the superior variety.


Anemone

Anemone ‘Honorine Jobert’.


Reblooming bearded irises (“Update”, below) were budding up for an encore presentation, and chrysanthemums filled in the gaps. Tall, white Japanese Anemone ‘Honorine Jobert’ lit up the partly shaded recesses of the metal archway.


mum and glass sculpture, Lake Lure Flowering Bridge

Burgundy chrysanthemum echoes similar color in glass bead sculpture.


More Perennials

New England asters, Gaura, pink turtlehead (Chelone obliqua), garden phlox (Phlox paniculata), and Sedum ‘Autumn Joy’ were finishing up their blooms. Ripening seedheads of coneflowers (Echinacea) and black-eyed Susans attract hungry birds, especially the finches. Now there’s a lesson for visitors to the Lake Lure Flowering Bridge—keep the seedpods on the plants for the birds!

Heuchera, also called alumroot or coral bells, is bulking up foliage for what I’m sure will be an impressive display next year. Cooler temperatures bring out a vibrancy in the heuchera foliage that rivals fall tree color. Hummingbirds visit the airy flowers for their sweet nectar.

Also growing in part shade was toad lily (Tricyrtus), with orchid-like purple spotted flowers. It won’t grab your attention as other brightly colored flowers will, but, viewed up close, it has its charms. The fact that it blooms at the end of the growing season and in mostly shady conditions merits placement along a woodland path.


Annuals


Ruellia

Ruellia, sometimes called Mexican petunia.


There’s great botanical diversity on the Lake Lure Flowering Bridge. The brochure states there are over 700 species of plants in this garden!

A few heat-loving annuals are blooming overtime, such as lantana, scaevola (fanflower), ruellia, cuphea, and zinnia, attracting butterflies and bees. Coleus varieties, partly shaded by the maple tree, will stay in leaf until cold weather or frost claims them.

While perennial gardening offers many benefits, the annuals deliver an abundance of color and the opportunity to grow something different every year.


violas in the garden

Violas in our front yard flower through the winter.


In our front garden, near the sidewalk, I planted biennial violas a few weeks ago. Smaller cousins of the pansy, violas bloom all winter and spring in this USDA zone 7b location. They will succumb to late spring’s high temperatures.

The deer are fond of violas, so I spray the plants with a deer repellent every 3 or 4 weeks. These plants will “bridge the gap” in this garden between fall and spring.


Shrubs


Many of the plants on the Lake Lure Flowering Bridge have noteworthy features in the fall. When landscaping your property, look for not only flowers, but also ornamental bark, attractive twigginess or structure, fragrance, fall color, fruits, and benefits to wildlife.


Beautyberry


White Beautyberry

White Beautyberry, Callicarpa americana, overhanging Rudbeckia fulgida.


Beautyberry (Callicarpa americana), with branches gracefully bending under the weight of their fruits, is an easy shrub to grow. The birds feed on the ripe berries, distributing their seeds. Robins, mockingbirds, and thrashers will eat the berries when their favorite foods are no longer available.

There are both purple- and white-berried Callicarpa americana shrubs on the bridge. This beautyberry is a multi-stemmed shrub growing 4′ to 6′ tall.  It’s native to the southeastern U.S., from Texas to Virginia, in USDA zones 6 to 10. Cultivars of the related Callicarpa dichotoma and other Asian species range from 3′ to 10′ tall.


Purple beautyberry, Callicarpa americana.

Purple beautyberry, Callicarpa americana.


I used to cut back the purple beautyberry (C. dichotoma) in our Maryland garden to only 6″ or 12″. Because flowers, and therefore berries, form on new growth, this approach keeps it more manageable in the landscape. In fact, delaying the pruning until mid-spring (instead of late winter to early spring) will cause it to leaf out a bit later, keeping the plant even shorter and less “wild” looking.

Beautyberry is undemanding in a casual mixed border. This plant vigorously self-seeds, although birds consume many of the fruits.


Colchicum autumnale Waterlily

Colchicum autumnale ‘Waterlily’.


Planted near purple beautyberry in the Maryland garden, a fall-blooming bulb called Colchicum autumnale ‘Waterlily’ perfectly echoed the berries of the shrub. It is poisonous, so use with caution.

Mosquito Repellent

Fresh leaves of American beautyberry, Callicarpa americana, contain a substance that is said to repel mosquitoes and other biting insects.

I haven’t tried the beautyberry, but catnip (Nepeta cataria) always did an excellent job keeping mosquitoes away from me. Simply crush a leafy stem and rub it on your skin, adding a few drops of water to help distribute the natural repellent. If I reapply the solution soon after the first one dries, mosquitoes keep their distance all day. Prepare a concentrated solution a cup at a time and store it in the refrigerator, where it can last for a few weeks.


Strawberry Bush


strawberry bush, Euonymus americanus, at the Lake Lure Flowering Bridge

Native strawberry bush, Euonymus americanus.


Another shrub sporting curious-looking fruits is “hearts-a-bustin”, or strawberry bush. Euonymus americanus, native to the eastern U.S. (zones 6 to 9), is a suckering shrub, growing eventually to about 6′ by 6′. Inconspicuous flowers develop dark orange-red fruits in autumn, providing food for birds, but they’re toxic to us.

The untamed nature of this shrub is well suited to a wild native garden or on wooded slopes. Deer feed on the foliage and twigs.

This plant is susceptible to crown gall and, like other Euonymus species, to euonymus scale. But it does have interesting characteristics if you’re looking for a native plant to add to a woodland garden. Strawberry bush tolerates clay or sandy soil and growing near black walnut trees.


The Franklin Tree


Franklinia tree, F. alatamaha, at the Lake Lure Flowering Bridge

The Franklin tree, Franklinia alatamaha.


A Franklin tree (Franklinia alatamaha) grows near the lake end of the path. This medium sized tree is related to Camellia and Stewartia, in the family Theaceae. It has late season white flowers, vibrant red fall color, and ornamental striated bark. It needs well-drained, acidic soil, and dislikes compacted clay and wet conditions. Don’t plant it where cotton has been grown.

Franklinia has the reputation for being difficult to grow, but if you live within zones 5 to 8 and welcome a challenge…

Pennsylvania botanists John Bartram (1699-1777) and his son, William (1739-1823), “discovered” this plant in 1765. They collected specimens, saving the species from extinction, and named it in honor of their friend, Benjamin Franklin. All existing Franklin trees originated from specimens collected over 200 years ago, near the Altamaha River in Georgia. Unfortunately, it disappeared from the wild at about that time.


Styrax Japonica


Japanese snowbell

Japanese snowbell, Styrax japonica.

Another tree, one of my favorites, is the smooth-barked Japanese snowbell (Styrax japonica). This is a finely branched medium-sized tree with fragrant dangling delicate white flowers that appear after the spring rush is over. Some of the seedpods can be seen splitting open (photo taken Nov. 3), revealing brown seeds inside.

The species has a lovely broad umbrella-shaped canopy, but newer cultivars tend to be more upright. It grows in zones 5 to 8. A pink-flowering cultivar is available.


Time To Go


On the road again, Route 64 climbs to a cool 2500′ elevation as it continues winding through small towns and apple fields toward Hendersonville, where I sometimes have a hefty tuna sandwich on marbled rye before heading home.

I’d like to see the garden’s winter light display, so I might return to see that. But the fall color in the mountains of western North Carolina will probably draw me back in a month or two. Most likely, the trip will include a stop at the Lake Lure Flowering Bridge.


***Update: November 3, 2018***


painted penguin squashes

A pair of painted gourds.


On a quest for pictures of fall foliage in the foothills and lower elevation mountains of western North Carolina, I was reminded instead of the consequences of recent storms: broken limbs, toppled trees, and some rockslides…but no photo ops of fiery maples or golden hickories. The power of nature!

Today’s trip to the Lake Lure Flowering Bridge presented a few new subjects…

The rich purple reblooming irises didn’t disappoint. Several plants were in full flower, and some had more buds yet to unfurl. Blue fall-blooming asters welcomed busy honey bees, and purple coneflowers (Echinacea purpurea) still had some flowers. Clusters of yellow quilled petals crowned a robust Rudbeckia subtomentosa ‘Henry Eilers’.


Reblooming iris at the Lake Lure Flowering Bridge.

Reblooming iris.


Throughout the garden, seasonal decorations nestled in among the plants and structures. Pumpkins of various shapes and colors, painted squashes, sequined straw-stuffed figures… Soon these undoubtedly will give way to wintry themes and holiday lights.

A local company called Mark of Excellence, Inc., had just completed building this new information kiosk (photo, below). Mark, like all other contributors to this garden, volunteered his services for the enjoyment of all visitors.

Even though it’s November, you can see that the growing season is hardly at an end! Visiting public gardens, parks, farmers’ markets, and garden centers during off-peak times of the year will tempt you with some of these season-extenders.

It doesn’t take much to get me outdoors, but give me some plants to fuss over, admire, or photograph…and, well…dinner will be a little late.


Information station at the Lake Lure Flowering Bridge

The new information station.


Hurricane Helene


Chimney Rock Village sign, after flood


This section added 10/7/2024:

***Update***: Hurricane Helene and the resulting floods and landslides scoured the western North Carolina mountains and other regions in the southern Appalachian Mountains for a few days on and after 9/27/2024. It destroyed small towns, roads, bridges, and people’s lives. Around 100 people died and many more are missing in NC alone. Heroic efforts are being made by individuals, churches, and charitable organizations to assess the damage, bring food, water, and communication to trapped families, and to begin the process of mitigating the damage and rebuilding.

Most shops and restaurants in Chimney Rock have been washed downstream to Lake Lure. From what I’ve seen in news coverage, the Lake Lure Flowering Bridge has been reduced to the only remaining feature: part of the concrete balustrade at the edge of the bridge (as in the photo at the top of this article).

Mark Huneycutt documented what he has seen, and here’s one of his videos:

I walked to Chimney Rock for answers… Hurricane Helene Aftermath – YouTube

Rescue operations request that you not venture to the area on your own, even if offering help and supplies. The ground is unstable, and you could end up being one of those needing rescue, so leave it to the professionals. Ask them if you can help.

Please, generously donate money and requested goods to legitimate rescue operations. I donated to Samaritan’s Purse and will forward a portion of my proceeds earned at the farmers’ markets. Samaritan’s Purse, headquartered in the area, has tractor trailers, machinery, supplies, and an army of dedicated volunteers. They are doing a fantastic job, so please help them in their efforts. Thank you.

Added 10/28/2024:

This video demonstrates hope, determination, and generosity in the face of a devastating life-changing event. I also have donated to hurricanehelenewnc.com from my revenues at Wellspring Gardens (Elkin NC farmers’ market):

Asheville is Worse than We Realized – Can They Rebuild?

Thank you again.


Return to the top

Plan Now for Spring-Flowering Bulbs

2018


Time For Spring-Flowering Bulbs


colorful tulips, daffodils, muscari

Spring-flowering bulbs in a public garden.


In a few days, we finally will see some almost normal temperatures in this part of the southeast. It’s time to think about spring-flowering bulbs that will be planted over the next 2 or 3 months. Get comfortable; this is a long essay on the big topic of spring-flowering bulbs.

It often happens: when the daffodils, tulips, and wonderfully fragrant hyacinths bloom in February, March, and April, that’s when many customers ask for the bulbs. But most bulbs are planted in the fall and into early winter. Their roots develop as the soil cools in late summer and autumn, but growth above ground is delayed until months later.

It is no longer uncommon for garden centers to sell potted bulbs in spring. So, if you missed out on the fall planting season, or if you want to see the flower colors before planting, inquire with the growers. Vendors at spring home and garden shows and farmers’ markets also sell pots of budded or blooming bulbs.


yellow daffodils, cane creek park

Daffodils are reliable, easy to grow, and not eaten by animals.


Many thousands of varieties of bulbs are available to gardeners. Each region of the country has its favorites, based on ease of culture, resistance to hungry animals, and familiarity with what people “usually” grow there.

If you want something more unusual but your local sources don’t carry it, you can probably find it online or through mail order catalogs. Find out what the bulbs require before investing in 2,000 pink tulips that can’t take the heat in your back yard.


On the Subject of Tulips


pink tulips

Tulips are not deer-proof.

Large-flowering hybrid tulips grow in the cooler northern half of the United States, down to Zone 7. A few will perennialize in slightly warmer climates. The smaller species tulips will grow a bit farther into the South.

Tulip bulbs planted among the roots of trees and shrubs might work slightly better than those in open beds. The soil there is somewhat cooler and dryer. They’re not fond of warm temperatures and high moisture levels.

Many gardeners here in the piedmont of North Carolina plant tulips with the expectation of only one glorious show, and then tear them out when flowers fade. Beautiful as they are, tulips in zone 8 or warmer usually do not come back for an encore performance the next year. Even zone 7 is a challenge for them.

And that’s okay with a lot of people, including designers of public parks and municipal common spaces. But, wow, what a show...if you can keep the deer and rabbits away from them! They are especially fond of tulips, and I highly recommended using deer repellents. When using a solution in a sprayer, set the nozzle to a fine mist. A coarse droplet will simply bead off the waxy foliage and flowers without sticking.

Voles, too, eat tulip bulbs. Planting tulips with PermaTill (small, expanded gravel used for drainage) around them usually deters the voles. Stainless steel mesh planting baskets will exclude burrowing animals from the root zone. And squirrels have been known to do a little transplanting of their own. Products are available to help prevent these problems.


How Bulbs Work


crocus pickwick, white with purple stripes

Striped ‘Pickwick’ and purple ‘Remembrance’ crocus, in the Maryland garden.


A bulb is a shortened stem, with roots that emerge from the basal plate when the temperature cools in the fall. The basal plate, clearly visible on hyacinths, is a rounded disc of tissue at the bottom of the bulb. Tightly folded undeveloped leaves surrounding the flower shoot contain food for the plant during dormancy. A bulb has all the parts necessary to complete its life cycle: root initials in the basal plate, a growing tip, leaves, stems, and flowers.

daffodil and beeThe rooting bulbs remain safely tucked underground until the soil begins to warm up in spring. That signals the plants to burst from the ground with their beautiful, cheerful flowers. We bid another winter adieu! Hungry bees and other pollinators emerging on warm spring days feed on pollen and nectar from spring-flowering bulbs, when little else is in bloom.

The foliage must be given enough time to photosynthesize and to store carbohydrates in the bulbs. This food will sustain the plant during dormancy, and ensure that more buds will develop for next year’s flowers. So, after the flowers finish up, let the plants wither naturally. Foliage can be removed after at least half of it has yellowed.


First, a few words on summer- and fall-blooming bulbs


Garden centers stock most of the summer-blooming bulbs in spring to early summer. You can find bulbs, corms, tubers, and rhizomes of lilies, gladiolus, canna, caladium, iris, and calla at that time of the year. Nurseries also offer potted specimens as they come into growth.


Elephant Ears

For dramatic foliage plants, look for elephant ears (Alocasia and Colocasia spp.), which grow only a foot tall to over 6′ tall. These are tropical plants and will die with frost, unless the tubers are dug and stored over winter. Planted in the ground in regions where frost doesn’t penetrate the soil, they usually survive the winter.


Caladium

caladium

Caladium, in late spring.

The colorful caladiums are tropical and need warmer soil temperatures in winter in order to survive, even when dormant. Some gardeners dig up and save the tubers every year, but most purchase new tubers or potted plants in spring to mid summer.

Foliage colors include green, white, chartreuse, pink, peach, and red, and can be mottled, edged in a contrasting color, streaked, or spotted. Their spathe-like flowers are not showy and usually removed.

For the past four years, I’ve kept a large Italian terra cotta pot outdoors in the summer. It contains a white caladium, a few kinds of brake (Pteris) ferns, and trailing clumps of Pilea ‘Aquamarine’, with its reddish stems and incredible pewter-blue, rounded leaves. It’s also home to whatever else dropped in. This year: some bulbs of tender Ledebouria socialis (leopard lily), a miniature African violet, and Dendrobium kingianum, a small orchid that has lived in a 3″ clay pot for over 4 decades.

Dormant Caladium

When the weather cools, the whole pot comes indoors to the sunny kitchen, where the caladium goes dormant. One by one, the leaves turn yellow, and the caladium sleeps through the winter. At average indoor temperatures, it remains dormant.

Instead of digging out the tubers, I leave them in the soil, caring for the rest of the plants as needed. Every couple of years, some potting soil is added under the plants, and the pot goes outdoors to light shade. And each year, the caladium comes back after about a month of warm weather. It’s a heavy feeder, so fertilize caladium every 2-3 weeks while it’s in leaf.

Dormant caladium tubers that remain surrounded by soil over the winter are more likely to return the next year than dry, loose tubers kept in a bag. Keep them dry if by themselves in a pot; damp is okay, if in company with other plants.


amaryllis

This variety is always the first amaryllis to bloom.


Amaryllis

Amaryllis (photo, above) is a beautiful late fall to spring flowering plant. Dormant bulbs can be found at garden centers at this time of year, alongside the spring-flowering bulbs. Potted in the fall, Amaryllis bulbs begin blooming indoors around the holidays.


Colchicum Autumnale


This is one of my favorites partly because the plant is animal-proof and partly because it blooms in the fall. Sometimes slugs can be a problem. Scattering Sluggo granules near the Colchicum will take care of that.

The bulbs will appear in some, but not many, garden centers, along with the daffodils and other spring-flowering bulbs. Left on a windowsill, the bulb produces flowers with no encouragement necessary! But I prefer to plant these hardy bulbs in the garden. Colchicum is the source of a potentially toxic pharmaceutical component, so grow with care.

Only the flowers make an appearance in autumn; colchicum foliage arrives in spring and lasts a short period of time.

Placed near a shrub called Purple Beautyberry (Callicarpa dichotoma or C. americana), the Colchicum ‘Waterlily’ flowers perfectly echo the color of the shrub’s berries (photo, above).

Once planted, they soon begin blooming in white (‘Alba’) and shades of lavender-pink. ‘Waterlily’, available from Wayside Gardens, has many petals, pale in color until exposed to light. It has the appearance of a water lily, but it is not an aquatic plant. After 2 years in the ground, one bulb will produce dozens of flowers. This plant is sometimes called “fall crocus”, but it is not to be confused with…


…Fall Crocus

Species crocus bulbs, with saffron on the left.


A few hardy crocuses bloom in the fall. One is saffron crocus, Crocus sativus, which gives us our most expensive spice, harvested from the female flower part, the red style and stigma. Only 3 threads of saffron are laboriously harvested from each flower, explaining its very high cost. Incidentally, saffron has been used as a spice for 3500 years. And for more trivia–saffron crocus is a sterile triploid whose ancestry is open to speculation.

There are other bluish (C. speciosus ‘Cartwrightianus’) and white (C. kotschyanus) fall crocuses available. The lavender-blue color positively glows in the setting sun. This color is rare in the garden at this time of the year, and a welcome surprise when the flowers emerge through the Liriope and other short groundcovers.

Crocus, technically, grows from a corm, but, for simplicity, is often called a bulb.


Return to the top

Headings

Page 1: Time For Spring Flowering Bulbs, On the Subject of Tulips, How Bulbs Work, and First, a few words on summer- and fall-blooming bulbs (Elephant Ears, Caladium, Amaryllis, Colchicum Autumnale, Fall Crocus)

Page 2: Color Effects, Formal and Informal, Naturalizing in Lawns, Naturalizing in Meadows, If You’re New To Spring-Flowering Bulbs, When Planting Drifts of Bulbs (Microclimates and Timing, Laying Out the Beds), and Aftercare

Page 3: Galanthus, Crocus (Snow Crocus, Giant Dutch Crocus), Eranthis, Muscari, and Puschkinia

Page 4: Hyacinthoides, Tulipa (Tulips In Zones 7 and South, Species Tulips), Hyacinthus, Narcissus (Buying Daffodil Bulbs, Linnaeus, the RHS, and the ADS, Planting Daffodils, Fragrant Daffodils), and Allium

Page 5: Maintenance, Tricks to Hide Maturing Foliage, Stinzenplanten, Forcing Spring-Flowering Bulbs, Rock Gardens, and Don’t Overlook the Little Ones


The Best Cream Cheese Pound Cake Recipe


Cream Cheese Pound Cake


cream cheese pound cake

Kim’s Cream Cheese Pound Cake.


I’ve written many articles about vegetables, but I must confess that I have a bit of a sweet tooth. Here’s an easy recipe for Cream Cheese Pound Cake that has been used for generations in our family. An Oradell NJ neighbor named Elsie Janus gave us the recipe.

My mother used to dust it with powdered sugar, but I don’t. You can really celebrate decadence by serving it with your favorite ice cream. It’s also great with an afternoon tea or coffee with friends.

This recipe calls for 2 loaf pans. The two that I use measure 8.5″ x 4.5″ and 9″ x 5″.


Ingredients For Cream Cheese Pound Cake


butter cubes

  • 3/4 cup butter, or 1 1/2 sticks
  • 8 ounces Philadelphia cream cheese, original or 1/3 less fat
  • 2 cups sugar
  • 5 large or 4 extra large eggs
  • 3 cups sifted all-purpose unbleached flour
  • 3 1/2 tsp. baking powder
  • 1 1/2 tsp. salt
  • 2/3 cup milk, preferably not skim
  • 2 tsp. real vanilla extract


The Process


  • Preheat oven to 350°F.
  • Cream butter, cream cheese, and sugar in a stand mixer. Don’t overwork it.
  • Sift together flour, baking powder, and salt into a bowl; set aside.
  • Add one egg at a time to mixer, mixing after each one.
  • Now add flour mixture alternately with milk, about one fourth of each at a time.
  • Add vanilla.
  • Mix well, scraping bowl and beater now and then.
  • Pour into two loaf pans. I prefer to line them with parchment paper.
  • Bake for 1 hour. Check for doneness with toothpicks or a skinny knife at about 50 to 55 minutes. This cake is especially good if not overcooked. The top will be a light golden brown color…melts in your mouth…I save that part for last…
  • Cool. Freezes well.

When I used to sell at farmers’ markets in Maryland and around Washington, D.C., a baker’s license permitted me to sell home-made cookies, muffins, and this cake in addition to the plants. Now, if you promise to eat your greens and vegetables, I’ll post more of our favorite dessert recipes. The cook gets to lick the bowl, although experts advise against it (uncooked flour and eggs).

Buttery, cheesy…delicious!


cream cheese pound cake

Delicious cream cheese pound cake from Kim’s kitchen.


More dessert recipes from Kim’s kitchen:

Almond Crescents

Toffee Cookies

Gingersnaps


Return to the top

Dealing With Deer: A Multi-Pronged Approach


Dealing With Deer: A Multi-Pronged Approach


Today’s garden projects include adding netting and tall stakes around the tomato plants that the deer have nibbled. There are lots of fruits on the ‘Big Beef’ tomato, and I don’t want to lose any of them as these animals tug on the vines.

Your perception that there are more and more deer roaming our neighborhoods is valid. Several accounts I’ve read over the years claim that there are far more white-tailed deer now than there were in colonial days.


deer


The Costs Add Up


Damage to our landscapes, to farm produce, and to our vehicles is staggering. The Insurance Institute for Highway Safety reports that 1.3 million vehicular collisions with deer cause more than 150 human deaths and tens of thousands of injuries per year. The damage amounts to over $3500 per vehicle. Add the suffering from Lyme disease and other diseases caused by infected deer ticks, and the toll climbs.

Deer are most active at dawn and dusk, so be especially vigilant then. Mating season occurs in the fall, and there’s only one thing on their minds at that time of the year. This is when accidents are more likely to happen, so, in the absence of oncoming traffic, use your high beams to warn the deer and to light up the edges of the road.

About a decade ago, I was driving slowly through known deer territory (Brookeville Rd. in Brookeville, Maryland) when one of them came flying off the bank and over the hood of my pick-up truck. I missed him by an inch. Or he missed me. Two other times, in Thurmont, Maryland, and in Charlotte, North Carolina, my truck did make contact, but there was no damage. They walked away apparently unharmed, but I’m not sure the deer didn’t suffer at least a little.


Keep Your Distance


Deer are powerful animals; do not attempt to approach them to scare them away or to “make friends”. They’re becoming bolder and more comfortable in our suburban neighborhoods, even in mid-day. Years ago, in my almost-enclosed back yard, I startled 2 large animals, who reacted by thundering randomly through the yard, looking for an exit. They were unseen, blending in with the background, and perfectly still, until suddenly…they weren’t.

I was able to back up and reach the kitchen door just in time. This incident was a vivid reminder that they can kill you!


young deer

Yeah, adorable…


Changing Diets


Don’t get me wrong. I love animals. But the damage to our landscapes and vegetable gardens is enormously frustrating! The time, effort, and money invested in our gardens are wasted if we can’t realize the benefits.

pink astilbe

Astilbe.

Numerous websites have lists of plants that describe those species severely, sometimes, or rarely damaged by deer. These are guidelines only. Deer that eat Astilbe, Asarum, and Brunnera in one part of the country might not touch it in another state—not yet. When they’re desperate for food, they’ll try almost anything.

Deer might be more likely to feed on plant species they evolved with, in other words, native species. When deer pressure builds (a large population in a limited area or during drought), they will sample the exotics, or imported species. If they don’t die or get sick, they’ve found another item they will teach their offspring is safe to keep on the menu.

In fact, some studies indicate that deer prefer imported flowers, trees and shrubs, which compose a greater percentage of our landscapes. Even though they had passed up the Asarum europaeum (European ginger) in the Rockville, Maryland, garden for 25 years, they decided in year 26 and afterward that it was perfectly yummy!

Deer are now accustomed to browsing in residential communities, where there’s an abundance of well-maintained plant material. We fertilize and water on a regular basis, making them that much more tender and palatable to animals.

The formerly common native wildflowers have almost entirely been consumed by deer and are not regenerating. The rapid increase in deer populations, from lack of predators, is changing the character of both our native and cultivated landscapes.


Decades of Observation


multi-pronged deer antlers


After watching deer for many years, I can confidently assert that taking a “multi-pronged approach” is the most effective way to keep deer at a distance. Sure, one product will work pretty well for a short while. But the key to long-term success is to use several different repellents or barriers at a time. Mix it up a little!

Dozens of products can be found in garden centers, hardware stores, online, and at home and garden shows. There are sprays that smell like rotten eggs, mint, and rosemary. Others taste bad. You can buy capsules containing dried coyote urine, giving the impression that there are predators around. And then there are the barriers that prevent access to the plants.

Although it is often said that deer do not climb steps, a Maryland neighbor discovered that they do. After finding a large potted hibiscus on Julie’s deck, they regularly climbed the 5 or 6 steps to get to it.


Headings

Page 1: The Costs Add Up, Keep Your Distance, Changing Diets, Decades of Observation

Page 2: Deer Repellents (Sprays and Tablets, Repellex, More Spray Repellents, Devices, Granules, Barriers, Deer Netting, Gravel and Santolina, Got Milk?, Eggs, And A Few More)

Page 3: Plants That Deer Love (Hosta = Deer Bait), Plants Deer “Might Not Eat”, and What To Do

Return to the top of Page 1


Brussels Sprouts Slaw: The Recipe


Brussels Sprouts Slaw


Brussels sprouts


Here’s a recipe for Brussels Sprouts Slaw—absolutely delicious and nutritious! If you like garlic and cheese and pine nuts, you’ll love this dish. And if you like this recipe, you might want to try growing your own Brussels sprouts for super-fresh flavor.


Ingredients


  • 1 pound raw Brussels sprouts, rinsed, hard core removed, and finely shredded or sliced. Place in medium size bowl.
  • 1/4 to 1/2 cup pine nuts, lightly toasted in dry pan, turning often. Set aside.
  • 1/3 to 1/2 cup grated Romano cheese
  • Dressing, below


Brussels sprouts

Brussels sprouts grow on the plant’s stem.


Ingredients For The Dressing


  • 1 1/2 Tbsp. lemon juice
  • 1 small shallot, minced
  • 2 tsp. Dijon mustard
  • 1 small to medium clove garlic, minced
  • 1 to 2 Tbsp. mayonnaise
  • 1/4 tsp. salt
  • Dash black pepper
  • 3 to 4 Tbsp. extra virgin olive oil

Mix together all the dressing ingredients, except the olive oil, in a bowl. Now slowly whisk in the olive oil. Adjust measurements of ingredients, if desired. Some like less mustard; some like more garlic.


And Combine


  • Add dressing to Brussels sprouts, mix well, and refrigerate 30 minutes or more.
  • Then add the toasted pine nuts.
  • Add Romano cheese.
  • Adjust salt and pepper, if necessary.

Mix well and serve. This side dish can turn Brussels sprouts haters into Brussels sprouts lovers. Take it on your next picnic or try it as a light dinner. Enjoy!


Brussels sprouts slaw

Brussels Sprouts Slaw—it’s ready!


 *    *    *    *    *    *    *    *    *    *


Quickly Cooked Brussels Sprouts


Here’s another simple way to serve Brussels sprouts:

  • Rinse the sprouts and cut them in half.
  • Add to a pot of boiling water, or steam them in a smaller amount of water to preserve nutrients.
  • Let them cook on medium heat for a few minutes, then drain. Cooking longer makes them softer, but be careful not to overcook.
  • Either in the empty pot or in a serving bowl, add butter, a bit of salt, and chopped fresh basil to the sprouts.
  • Toss and serve.

Brussels sprouts is a member of the Brassicaceae (formerly Cruciferae) family, sometimes called the cruciferous vegetables. This large group of plants also includes arugula, broccoli, cabbage, cauliflower, collards, kale, mustard greens, pac choi, turnip greens, and others.


“Mmm…Sulforaphanes!”


The brassicas are famous not only for their generous vitamins, minerals, and fiber, but also, significantly, for their phytonutrients. And that’s not all—the anti-inflammatory brassicas also contain some protein and Omega-3 fatty acids.

Raw brassicas contain a group of nutrients called sulforaphanes, phytonutrients that help prevent many illnesses, including cancer. They also contribute to cardiovascular health and help preserve eyesight and brain function. No other group of edible plants has nearly the level of antioxidant glucosinolates that this one can boast; I’m not sure they have any!

Cutting up and immediately cooking the brassicas, however, will not produce the beneficial sulforaphanes. But there are 2 ways to get these powerful antioxidants. One is to eat them raw, as in the recipe for Brussels Sprouts Slaw.

The second way is to chop them up and let them sit on the counter for 40 minutes. There’s an enzyme in brassica tissues, called myrosinase, that is needed to produce the sulforaphanes. This enzyme, once activated by damaging the plant cells, needs time to convert sulforaphane precursors into the sulforaphane itself. But myrosinase is destroyed by heat; that’s why we need to wait before cooking them if we want those benefits.

So, if you’re preparing cooked Broccoli One or Two, Collards Soup, or simply adding any of the brassicas to store-bought pizza, steamed greens, or Eggplant Parmigiana, consider this “chop and hold” method of bringing out the best in the brassicas.

Because of the numerous health-giving attributes of the brassicas, I include at least one in my diet every day.


Return to the top

Easy Broccoli One and Easy Broccoli Two: Recipes


broccoli one and broccoli two recipes

Fresh broccoli crowns.


The route from “farm to table” can’t be any shorter than if it starts in your own back yard. Here are two broccoli recipes that take minutes to prepare, and might convince you to grow some plants this fall. 2 or 3 servings.


Easy Broccoli One:


  • Use a medium size pot, with a lid. Add 2 or 3 Tbsp. water.
  • Broccoli: Rinse a fresh crown, about 5″ in diameter. Remove tough, thick stem. Cut head into bite-size florets; remaining tender stems should be cut smaller. Some people don’t use the stems, just under the head, but they’re perfectly edible, as are the leaves. Place florets into the pot.
  • Mushrooms: Wash and trim stems of a few white button mushrooms, slice, and add to pot.
  • Cover, heat up the pot, then lower temperature, to steam the broccoli and mushrooms. Mix once or twice. Don’t overcook; heat enough to turn broccoli to a bright dark green color, which takes only a minute or two. Overcooking this vegetable makes it soft and smelly.
  • Finely mince a clove of garlic, and add to a small butter pot (ours is 3″ in diameter, stainless steel) with 1 tsp. butter and 1 or 2 Tbsp. olive oil. Heat this pot over low to medium heat until garlic is a light golden color. (Burned garlic tastes terrible. If you have to start over, that’s better than using the burned garlic.) This step might take a bit longer than cooking the broccoli; I start this one first.
  • Drain water from the broccoli pot. Add to the broccoli the contents from the garlic pot and a dash of salt. Mix and serve.


This is a great, fast side dish by itself. Or use it over some enriched pasta, with a little more oil and grated Romano cheese. Photo, below—it’s dinner, with a few black olives on the side.


easy broccoli one


Easy Broccoli Two:


  • cheese and graterIn a medium frying pan, add about 2 Tbsp. thinly sliced onion and 1 or 2 Tbsp. olive oil. On medium heat, cook and turn until onion is transparent to a light golden color.
  • Then add broccoli, cut into bite-size pieces, prepared as in Easy Broccoli One. Add 2 Tbsp. water and a dash of salt.
  • Mix well, and cover to steam over low heat. Stir once or twice, adding water if necessary. It’s done when it turns a bright green color or cook it to the desired tenderness. Drain excess water.
  • Serve with grated Romano cheese.


Wasn’t that easy? Delicious and super-healthy! Sometimes I add a few stems of ‘Happy Rich’ miniature broccoli (photo, below) if they’re ready to pick. This variety has small heads with great flavor. Several inches of the stem and the leaves are also edible. Like other brassicas, it tolerates freezing temperatures, and this one often forms heads until mid summer.

B and C vitamins are water soluble. Use as little water as possible so nutrients aren’t washed down the drain. Or, add the liquid to soup or freeze for later use.

After trying these recipes, you might decide to grow your own broccoli. Start seeds yourself or look for transplants at your local garden center or farmers’ market in mid summer to early fall and again in late winter to early spring. After you pick the main head, smaller side shoots (photo, below) will grow above the remaining leaves for many more weeks. You’d be right if you were thinking that broccoli is “the gift that keeps on giving”. Enjoy!


Return to the top

Time To Think About Fall Greens and Vegetables

Updated 11/16/2024


Ready To Grow Fall Greens and Vegetables?


seedings of early spring greens


It’s hard to believe it’s already time to start seeds for fall greens and vegetables. I’ve been putting it off because of the hot weather we’ve been having. But, unless I want to buy transplants, seeds will have to be started soon. You folks up north probably have sown seeds for the broccoli and cauliflower by now, and certainly the Brussels Sprouts.

Here in North Carolina, fall seems a long time away, but in order for us to harvest those fall greens, we need to start sowing seeds now. Remember to locate your fall/winter garden where it will receive adequate sunlight. And, of course, I’ll sow successive crops through the rest of summer and early fall, as space permits.

Because we have a long growing season in the Carolinas, we can squeeze in another crop of summer vegetables. Zucchini, summer squash, cucumber, and beans can be sown again. But with the encroaching canopy of the trees on the berm, south of the garden, I’ll be planting only cool-season vegetables for late summer and autumn harvests. The ‘Diva’ cucumber is loaded with fruits. And I will wait patiently for every last fruit to ripen on the tomatoes and peppers.

(***Update***: A few days ago, a large and dangerously crooked pine tree was taken down, and now there’s more afternoon sun for the tomatoes and peppers. More sun also gives us opportunities to grow containerized vegetables and fall greens inside the fence, protected from deer. August 2018)


If They Can’t Take the Heat


spinach in a bowl

Spinach.

Temperatures are still too high to sow lettuce and spinach outdoors, so I’ll wait another week or two. It’s still in the 90’s! They can be started indoors, in air-conditioned space, if needed.

Check the temperature of the soil before sowing seeds in the garden. Direct sun beating down on the dark soil surface can raise the temperature too high and dry it out very quickly. Look for one of those “Easy Tunnels”, or fabricate something yourself, to partially shade the soil and the tender young seedlings. You can purchase knitted shade fabric, made from black polyethylene, from mail order suppliers. In the southern states, 30-50% shading should work during the late summer months. This could lower the temperature by 10° or 15°F. Keep the soil surface moist to ensure good germination and to cool it down.

The best germination occurs between 55° and 70°F for lettuce and spinach. I usually put transplants into the garden instead of sowing seeds directly because hungry slugs, snails, and cutworms find tiny seedlings very tender and delicious.

Organic Sluggo will bait the mollusks (slugs and snails) to their deaths, and Bacillus thuringiensis (Bt), sprayed on the seedlings, will kill cutworms. Slug baits made with iron phosphate, such as organic Sluggo, are far less harmful to pets and to people than products containing metaldehyde, so be sure to read the labels.

One way to gather up a whole lot of slugs is to place a board, maybe 1′ x 2′, over damp soil. Go out and check the underside early the next morning, old knife in hand, and cut them quickly in half or squish them any way you choose…but, don’t use salt in the garden!


Choosing Varieties of Fall Greens


botanical interests seeds 

Sowing seeds for fall greens and vegetables, which prefer cool weather, can be tricky in July’s heat. Look online or through seed catalogs for lettuce, spinach, broccoli, and other crops that are described as being heat tolerant varieties. Yes, all lettuce and broccoli varieties prefer cool temperatures, but some will take warmer or colder weather than others as they form heads. If you’re buying transplants, ask the grower.

Either way, plan to provide some sort of device that will lower the temperature during these last hot weeks of summer. For later harvests, I’ll sow seeds that grow cool and mature in cold weather, and they will not need the shade fabric. Plants grow better with more hours of direct sun as the temperatures cool down.

Check with your local agricultural extension office for recommendations or for a planting calendar.


Planting Young Transplants


Soil

turned soil

Rich, dark soil with lighter brown clumps of clay, before incorporating.

Starting a vegetable garden with soil that has not been conditioned could result in a mediocre or poor harvest. Fall greens grow faster and larger in well-prepared soil.

Garden soil for these crops needs additional organic matter (compost, composted cow manure), drainage material (pine fines, coarse sand), and sometimes lime. A soil test will indicate the need for lime.

Our fall greens are being planted in soil that has been worked for 6 years, so it’s in very good condition. I will, however, continue to add compost, fertilizer, or manure to the garden with all new plants.

When digging soil, bring some of the lower-level clay up to the surface, and turn under the richer topsoil 4″ to 6″ deep (a few inches deeper for tomatoes, in spring). Over time, the clay soil on the surface will improve as mulch decomposes or when compost is added as a top dressing. Here you can see clumps of light brown clay that were brought to the surface of the soil (photo, above) before they were broken up.


Roots

Growers use pots and market packs of various sizes, including small 9-cell packs, 4-cell packs, 2″ peat pots and 4″ plastic pots. A smaller root ball needs more careful monitoring while the plant becomes established.


An important step before planting is to rough up the outside of the root ball (photos, above). This slightly injures the inner root layer called the pericycle, stimulating the plant to quickly send out new lateral roots into the soil. Be careful not to so severely damage the root system that the plant can’t supply water to the leaves on a hot, sunny day. Do this for every plant that is about to be repotted or planted into the garden.

A root ball that’s tightly packed with roots can be shallowly scored down the sides in a few places. Use a knife, a rock, or even a twig. Or use a cultivator to pry out some of the roots.


To Bury or Not To Bury?

broccoli

Broccoli ‘Arcadia’ from 4-cell-pack.

Most young vegetable transplants can be placed an inch deeper into the soil, or up to the bottom leaves. If the plant is more mature and has developed a somewhat woody or tough stem, plant it at the same level it was growing in the pot. But always, if possible, choose younger transplants.

Older plants can be stressed by being potbound or underfertilized, and might go to flower or head up prematurely, yielding undersized harvests. Young plants require more time to grow, but they will give you the largest heads of lettuce, broccoli, cauliflower, and cabbage. If in doubt, plant the top of the root ball level with the soil surface.

Firm the soil around the roots and stem using medium pressure. Humidity between the soil particles encourages the stem to grow fine roots without interference from tightly packed soil. Watering the plant helps the soil settle in around the root system and charges the soil with much-needed moisture.


broccoli in winter

Broccoli ‘Arcadia’ in winter.


These are same broccoli ‘Arcadia’ plants photographed in late December (photo, above). Trees on the berm cast too much shade until leaves dropped off, delaying harvest. When the garden gets more sun, heads should form in mid to late winter.


Fertilizer for Fall Greens

Planting fall greens and vegetables into late September, I mix a handful of granular organic vegetable fertilizer into the planting area. These crops grow beautifully with adequate nitrogen, so I will soon use higher nitrogen fish emulsion. Another application of fish emulsion will be made every 2-3 weeks through November, or every 2 weeks for potted greens.

mustard seedlings

Mustard seedlings in the garden.

Microbes in the soil break down organic compounds and make nutrients available to the roots. But, as the weather cools significantly, microbial activity slows down. I’ll use synthetic soluble fertilizers a few times in winter to keep the plants growing.

Greens and vegetables can grow all winter here, with some protection during very cold weather. This is worth the effort, since I can pick beautifully fresh kale and spinach for the Sunday omelet, or a big bunch of collards for collards soup.

Mustard greens ‘Florida Broadleaf’ was sown in late September, and germinated a few days later. The thinned seedlings will be used in soup, salad, or an omelet. Spinach sprouted about a week later.


Arugula


Love, love arugula! A forkful of salad greens that has a piece of arugula in it…mmm… The variety I prefer is ‘Astro’. It’s not as hot as the wild types, and it tolerates warmer temperatures. Arugula self-sows if it likes where it’s growing. Just let it flower and set seed. The papery seed capsules release the seeds, which germinate within 2 weeks, during favorable weather, near the mother plant.

It grows well in morning sun, during warm weather, and in moist, rich soil. Those who are more adventurous than I might enjoy growing the hotter ‘Wasabi’. Arugula doesn’t look like a member of the family Brassicaceae, but it, too, is in that famous family.

You might have seen the term “cruciferous” being used when describing members of the Brassicaceae family (formerly Cruciferae). It refers to the flowers of these plants, which have 4 petals arranged in the shape of a crucifix. The terms brassica, cole crops, and crucifer (or cruciferous) refer to the same plants.


Broccoli


One of the most nutrient-rich foods, broccoli is a must in my garden. Nutrients include protein, Vitamins A, several B’s, C, K, minerals, fiber, and their famous phytonutrients. To say that we eat broccoli in one form or another every 2 or 3 days is not an exaggeration. Just ask Mother.

broccoli crowns

Broccoli crowns.

Heat and cold tolerance ranges from poor to excellent, depending on the cultivar. In this zone 7b area, ‘Imperial’ can be sown in July or planted as transplants from July through August; Johnny’s Selected Seeds’ catalog rates it “excellent” in heat tolerance for broccoli. Normally, broccoli grows best in cool weather, but you can extend the harvest by choosing 2 or 3 varieties that are suited to the weather at different times of the year.

The variety that will see us through the winter is cold-hardy ‘Arcadia’, which grows a large number of side shoots once the main head has been harvested. For that reason, don’t cut off too many leaves when you do harvest broccoli, because each of those leaves could be topped by another side shoot.

By the way, tender broccoli leaves are edible as well. Add them to soup, a smoothie, pasta, or a stir-fry. After the harvest is done, I keep the plants in the garden to flower. Bumble bees and other early risers are fond of this bounty, and the flowers are quite pretty!


broccoli flowers and bumblebee

Bumble bee visiting broccoli flowers in early spring.


Miniature Broccoli ‘Happy Rich’


broccoli happy rich, delicious fall greens

Broccoli ‘Happy Rich’.

I’ve grown ‘Happy Rich’ for many years. This plant grows a small head at the end of a stem, harvested ideally before the white flowers open. Each of those little green beads is a flower bud, and even if the buds start opening when the stems are picked, they’re still going to the kitchen.

The head will never get to the same size as regular broccoli, but the flavor is superb. Once the little heads have been cut off with 6″ to 10″ of the stem, the plant will branch out and grow more little heads. The stem, the leaves, and the head are edible—steamed, stir-fried, or added to soup or a pasta dish.

Two plants have been growing in the garden since the spring, and they don’t look very happy. It’s been a hot summer in Charlotte, so I didn’t expect them to survive this long.

***Update***: In autumn, 2021, I moved to a larger property in the Piedmont, with lots of gardening potential. In the photo, below, ‘Happy Rich’ produced harvests for over 9 months in 2022. An Arctic Blast just before Christmas, when the temperature dropped 50 degrees to the low single digits, put an end to this planting. This area is in USDA zone 7b, so average temperatures allow growth all through the winter for many types of greens…usually. 11/16/2024


miniature broccoli 'Happy Rich'

Miniature broccoli ‘Happy Rich’ in spring.


Bt


The imported white cabbage butterflies visit frequently—more frequently, alas, than I do with the bottle of Bt.

Bt is an abbreviation for Bacillus thuringiensis, a naturally-occurring bacterium that kills caterpillars of moths and butterflies, and nothing else. Before you groan “no chemicals”, Bt is used by organic growers and it’s been around for decades. Perfectly safe, even for pollinators, and not a chemical. It easily rinses off produce. You can find both organic and conventionally prepared products.

All brassica crops are targeted by a few kinds of moths and one species of butterfly, which lay eggs on the leaves. The eggs soon hatch into voraciously hungry and well-camouflaged caterpillars. After consuming some of the Bt, they stop feeding and die shortly thereafter. Young caterpillars are more easily controlled than older caterpillars. Thuricide and Dipel are two brand-name products with Bt as the active ingredient.


cross-striped cabbageworm, common on cool season greens

Cross-striped cabbageworm, becoming more common here, on mustard greens. Expect several generations per season. Look for clusters of white woolly eggs.


Return to the top

Page 1: Ready To Grow Fall Greens and Vegetables?, If They Can’t Take the Heat (Choosing Varieties of Fall Greens), Planting Young Transplants (Soil, Roots, To Bury Or Not To Bury?, Fertilizer for Fall Greens), Arugula, Broccoli, and Miniature Broccoli ‘Happy Rich’ (Bt)

Page 2: Brussels Sprouts, Cabbage, Cauliflower, Collards, Kale, Lettuce, Nutritional Considerations of Fall Greens (The Sulforaphanes, Where’s the Beef?), and Only the Beginning

Easy Herbed Salmon For A Quick Dinner


Herbed Salmon


whole salmon


The Good


Most of us are familiar with the benefits of including salmon in our diets. It’s an excellent source of protein, Vitamins B12, B3, B6, D, Omega-3 fats, and the mineral selenium. Other nutrients include phosphorus, iodine, choline, pantothenic acid, and some potassium, iron, and zinc.

Research indicates that salmon helps ease the inflammatory process (through bioactive peptides—amino acids—affecting joints, brain, and heart tissues), and plays a part in preventing macular degeneration and certain kinds of cancer. The Omega-3 fats it contains are the ones that are most helpful, namely DHA and EPA.


The Bad


Every now and then, I come across someone who recommends not consuming it. The stated cause for concern is the level of pollutants found in salmon. Polychlorinated biphenyls (PCB’s), no longer produced but still circulating in the environment, and other contaminants are thought to contribute to some types of cancer.

After reading over a dozen credible websites comparing wild-caught salmon to farm-raised salmon and their positions on PCB’s, I decided to summarize and offer this: Wild salmon is many times lower in PCB’s than farm-raised salmon. And, many studies show no correlation between salmon consumption and an increase in cancer.

Consistency among the websites is as scattered as confetti in the wind! Even the U.S. Food and Drug Administration and the Environmental Protection Agency don’t agree on the acceptable level of PCB’s in our food sources, last time I checked.

Farmed salmon originating in Washington State and Chile have less contamination than farmed salmon coming from Europe. Wild-caught salmon from Alaska has lower levels than any other sources. Because PCB’s accumulate in fatty tissues, it is often recommended to trim off excess fat and the skin.

As consumers, we have access to both farm-raised and wild-caught salmon. So I purchase only wild-caught salmon from Alaska. When it is available, I buy a larger fillet, rinse it, place serving-size pieces into plastic bags, and freeze it. Admittedly, the texture is much better when cooked fresh, and that’s how I serve it to others.


And the Not-So-Pretty


There’s another significant difference between salmon from farmed sources and salmon that’s wild-caught. The healthier Omega-3 polyunsaturated fat is higher in wild salmon, and the less healthy Omega-6 is higher in farmed salmon. You want to consume a higher Omega-3 level compared to Omega-6, even though we do need a smaller amount of Omega-6 fat in our diets. So, wild salmon wins again.

Even though there’s some scary, and dubious, information on a few websites I visited, the consensus remains on the “we recommend a moderate consumption of wild-caught salmon” side of the argument. One site, among my favorites for science-based nutritional information, strongly supports a plant-based diet and therefore recommends against eating any salmon.

I like this fish too much to eliminate it from my diet, and we eat other kinds of fish as well. For its heart-healthy benefits, I will continue to prepare it every week or two. Most of the websites I visited recommended consuming salmon once or twice a month. Including salmon in your diet is your choice, and the information is out there for you to decide.


salmon filet


How to Prepare Herbed Salmon


Ingredients

This is for 2 servings.

  • 8 to 12 ounces fresh salmon fillet, rinsed
  • 1 quick spritz non-stick cooking spray, optional
  • several leaves of ‘Siam Queen’ Thai basil, coarsely chopped, or 2 tsp. dried (more or less according to taste)
  • 1½-2 tsp. fresh dill weed, or 1 tsp. dried (or to taste)
  • Salt to taste
  • 2 to 3 Tbsp. butter


The Process

  • Preheat oven to 400°F.
  • Spray a baking dish with non-stick spray, if you choose.
  • Lay the salmon, skin side down, if you choose to keep it on, on top of a small amount of butter in the dish. If fish is thick, score the thick part with a knife to cook it faster.
  • Press the basil and dill onto the salmon. Fresh herbs are preferred, but these two herbs retain good flavor when dried.
  • Place the rest of the butter, in pieces, on top of the fish.
  • Bake hot 8 to 15 minutes, shorter or longer depending on thickness of the fish. Baste once or twice while cooking to distribute those delicious flavors.
  • It’s done when the flesh flakes. Monitor closely because fish will be dry if overcooked.
  • Sometimes I broil it for the last minute to “caramelize” the points.
  • No need to turn it unless it’s very thick.
  • Give it a dash of salt after removing it from the oven.
  • Serve with the herbed butter in the pan. I don’t use lemon, which would overpower the flavors of the herbs.

If you prefer, fish can be grilled. Avoid very high temperatures or burning the fish, as this can affect nutrients and produce free radicals, which you don’t want.

It’s that easy! A little experimentation in the kitchen can result in fabulous meals for you and your family, ones you’ll go back to regularly. When I started offering Thai basil for sale at farmers’ markets, I had to figure out a way to use it in cooking. I never was fond of the licorice flavor of Thai basil. So I tried it in a couple of dishes and salads…nothing clicked.

Then, I thought, since I like salmon with dill, let’s try Thai basil with fish. Now, that’s the only way I make salmon! Over the years, I’ve tried other varieties of Thai basil and sweet basils, but prefer the richly-flavored ‘Siam Queen’ Thai basil, an All-America Selections Winner. Even though it has a powerful fragrance fresh, it mellows beautifully during cooking. This herb loves our hot summers, and, so far this year, we have been spared that dreaded basil disease, Basil Downy Mildew.


How to Dry Basil


When the plant starts to produce flowers, I cut back the flowering stems to a few inches above the soil, discard the flowers, rinse leaves and pat dry.

Remove any leaves that lack good color; pale leaves or very old ones are off-flavor or more bitter. Basil is a fast-growing leafy herb that needs to be fertilized now and then to produce high quality foliage.

Thai basil 'Siam Queen'

Thai basil ‘Siam Queen’.

Lay the leafy stems on a dish lined with a paper towel, and keep at room temperature, out of direct sun. Turn them occasionally. When leaves are almost dry and beginning to curl, strip or snip them from the stems and place them back in the dish to dry thoroughly. Instead, you can remove all the good leaves from the stems at the start, placing them in a single thickness on the paper towel so they don’t mat together.

Another option is to hang small clusters of stems to dry. Gather the stems together with a rubber band, which will continue to hold the stems firmly as they shrink.

Microwaving or oven-drying herbs at very low heat is faster, but nutrients are destroyed, and, to me, the herbs always taste burned. I don’t recommend this practice.

Both Thai basil and dill retain very good flavor when dried. Use more, maybe twice as much, when using fresh herbs, which is my preference.


Storing Basil

Once they are crispy dry, store the whole leaves in a glass jar. The reason you don’t chop them up is that cut surfaces cause more of the flavor to dissipate. Be sure the leaves are dry; if there’s any moisture remaining, they will go moldy in storage. With one or two plants grown in the summer, I can harvest enough leaves to get us through the winter.

What’s for dinner at your place? After writing this, I think tonight we’ll have Herbed Salmon. And Tomato-Basil Salad, since I just picked 3 beautiful ‘Big Beef’ tomatoes from the garden.


tomato basil salad

Tomato-basil salad.


Return to the top

How To Get Amaryllis To Bloom This Winter


Updated 1/17/2024


amaryllis

We’ve enjoyed this deep red amaryllis for many years.


While watering the gardens yesterday, I noticed that all the amaryllis pots next to the fence had been overturned by some middle-of-the-night visitors. Most likely raccoons were to blame, because the bird feeder was empty and the bird bath was dirty. Now is a good time to address the question,


“How do I get amaryllis bulbs to bloom again this winter?”


Most amaryllis plants are sold in 6″ or 7″ pots from Thanksgiving through winter. When garden centers and other growers order bulbs, they not only have a huge assortment of colors to choose from, but they also have the option of buying bulbs that are graded by circumference. The larger the bulb, the more flower stalks you can expect from it…and the more it costs. Many customers willingly pay several dollars more for a large bulb, knowing that it could produce 3 or 4 flower stalks instead of 1 or 2. But that’s worth the price, if you ask me.


A Brief History


Carl Linnaeus in 1753 named a flowering bulb probably from South Africa, but maybe from South America, Amaryllis belladonna. This plant was thought to be the South African Cape Belladonna. Elsewhere, the first named Hippeastrum species was dubbed the “Knight’s-star-lily” (origin unknown) by English botanist William Herbert. The confusion begins, although similar characteristics of both genera place them within the family Amaryllidaceae.

Hardy from USDA zones 6 to 8, true Amaryllis species have naturalized along the west coast of the United States, where conditions are similar to their native South Africa. Most of this article refers, however, to the genus Hippeastrum, the popular holiday amaryllis.

Breeding of the now familiar Christmas amaryllis began in 1799, when British watchmaker Arthur Johnson crossed Hippeastrum reginae with H. vittatum, two species collected in South America. By the mid 1800’s, his hybrids started showing up in the United States.

In the early 1800’s, British explorer and botanist Richard Pearce hybridized H. leopoldii and H. pardinum, two species he’d found in the Andes while employed by James Veitch and Sons Nursery. These crosses produced plants with large and mostly symmetrical flowers.

By 1821, Herbert had described 14 species of Hippeastrum and 3 species of Amaryllis in “The Botanical Register”.

Pearce’s Leopoldii hybrids were crossed with the best of Johnson’s Reginae strains into the mid 1800’s, in the Netherlands. These hybrids formed the basis for breeding most of the large-flowered Dutch hybrids available today.

Breeding continued as new species from South America were collected and sent to Europe. Reginae strains hybridized by Jan de Graaff and sons in the mid 1800’s were crossed with several Hippeastrum species and hybrids available in Europe at that time. Meanwhile, the common name “amaryllis” was loosely applied to plants in both the true Amaryllis and the Hippeastrum genera.


You Say Amaryllis, and I Say Hippeastrum


pale yellow amaryllis

A pale yellow amaryllis.


Debate over use of the terms “Amaryllis” and “Hippeastrum” continued for 200 years. It wasn’t until 1987 that the taxonomy finally had been clarified. The 14th International Botanical Congress decided that “Amaryllis” is the correct name for the South African genus, not the South American genus.

Nevertheless, we still call holiday Hippeastrum plants by their common name, amaryllis. There are approximately 90 species of Hippeastrum native to tropical and sub-tropical areas of South America, from Argentina to Mexico and the Caribbean. More than 600 cultivars are available.

In hardiness zones 7b and south, amaryllis (meaning Hippeastrum) bulbs planted below the frost line in well-drained soil probably will perennialize.

Today, bulbs are grown in many countries, including the Netherlands, Israel, Peru, South Africa, India, Australia, and the U.S. New amaryllis cultivars periodically come to the market, adding to the huge variety of colors and forms: white, pink, peach, coral, orange, scarlet red, deep red, yellow, and bicolors. Flowers can be a single row of petals, or double, or triple, and they can be broad-petaled or spidery, rounded or pointed. Both miniatures and full-size plants are available.

Most modern cultivars have ancestry from several species, including H. aulicum, leopoldii, pardinum, puniceum, reginae, and vittatum. We also see hybrids in the species H. papilio and H. cybister.


Pollinating the Flowers


flower parts, stigma, anther

Anthers, and stigma at bottom of photograph.

The photograph shows pollen, in the male anthers, that’s transferred to the female part, the stigma, during pollination. Gardeners not interested in collecting seeds can remove the anthers before they mature and spill their dusty contents on the flowers.
Hobbyists can easily pollinate plants. The pollen and the stigma have to be mature for fertilization to take place. Seeds require many weeks to develop in the pods, and several years to get to flowering size. (***Update***: I’ve had good results when sowing the seeds shallowly as soon as they loosen from the seedpod. 12/2022)

The next generation—seedlings resulting from genetic recombination—will be a mixed bag of pretty, gorgeous, or pretty hum-drum flowers. You could come up with something unique!

Amaryllis plants are propagated not only by seeds but also by tissue culture under laboratory conditions. Tissue culture yields the largest number of plants and they’re identical to the original plant.

Bulblets growing at the base of the bulb can be separated and grown on for a few years before flowering begins. They’re visible when you dig up the bulbs at the end of the growing season. Separate and pot up the large ones, but let the small ones grow attached to the mother bulb for another year or two.

Other methods of propagation, called chipping, notching, and twin-scaling, involve cutting the bulb into smaller pieces. Dusted with fungicide and potted in vermiculite, small bulblets will grow, which later can be separated and grown on.


amaryllis

The first amaryllis to bloom indoors, late winter, 2019.


In the photograph above, notice that this flower has triple the normal number of petals. You might see, also, the absence of anthers and stigmas in the flower. This is common in petal doubling or tripling with many species of flowers. Consequently, these cultivars must be propagated vegetatively since they can’t set seed.


Amaryllis Seedpods


I hand pollinated some of the flowers in winter and harvested seeds about 3 months later.

As the tough, recurving Y-shaped membrane (a light color, in right photo) dries thoroughly, it forces the pod to open, revealing the black seeds. Mother Nature came up with this ingenious process that allows the seeds to dry and to be as separate from each other as possible, aiding dispersal.


What To Do With Your Plants Now


What prompted me to write about amaryllis were the tumbled and torn plants found in the back yard. They can be fixed. Ten pots bloomed from February through May; we enjoyed a succession of flowers for months! New soil will replace tired, old soil, with the neck and shoulders of the bulb remaining above soil level.

potted amaryllis

If your plants have been weakened after wintering indoors, plant them in well-drained composted garden soil for the summer months. Wait for frost-free weather to put them outside. Give them direct sun in the morning up to early afternoon. In hot regions, keep them out of direct sun in the afternoon, although dappled shade at that time is fine.

Don’t plant too deeply; keep the neck of the bulb above ground level. Plants that have been languishing indoors should be moved gradually into more sun, or the tender leaves will suffer sun scald. Even if they do burn, several new stronger leaves will grow. Amaryllis bulbs grown in garden soil usually recover faster than those growing in pots.

If the long strap-like leaves don’t stand upright, you can stake them gently to keep them off the ground. It wouldn’t hurt to sprinkle some Sluggo granules around them because slugs and snails can damage the foliage or the bulb.


Red Blotch

Before planting amaryllis in the ground for the summer, check them for red streaks or splotches. You might have noticed this disease as the flower stems emerged from the bulbs months ago. This condition indicates a fungal disease caused by Stagonophora curtisii. The disease infects bulbs, leaves, and flower stems. Affected cells die, but surrounding tissues continue expanding, causing leaves or the flower stem to bend.

Peel off infected outer bulb scales and leaves. Throw those parts into the trash rather than composting them, as the spores can spread to other bulbous plants. A systemic fungicide might help clear up the disease. Ask your agricultural extension agent for advice.

When summering amaryllis outdoors in the ground, plant with half of the bulb exposed to air. Avoid splashing water near the top of the bulb, where the disease could take hold.

Physical damage also can cause red or reddish-brown areas. Although those areas look diseased, the rest of the plant continues to grow normally. In this case, fungus is not the problem. However, pathogens can gain entry into the host through bruised tissues.


Headings

Page 1: “How do I get the amaryllis bulbs to bloom again this winter?”, A Brief History, You Say Amaryllis, and I Say Hippeastrum, Pollinating the Flowers (Amaryllis Seedpods), and What To Do With Your Plants Now (Red Blotch)

Page 2: As Amaryllis Plants Grow This Summer, The Process (The Growing Cycle Indoors, And Then Outdoors), and Potting Up New Amaryllis Bulbs (Step-By-Step, and Something’s Growing!)

Return to the top


Improving the Landscape Is Like Painting a Picture


A Landscape Primer


Now that you and your family have enjoyed a few months of outdoor activities, you’ve noticed a few changes you’d like to make. Summer is a good time to start thinking about improving the landscape, but many gardeners wait until the cooler days of early autumn before starting the work. The weather at that time is more favorable for establishing most plants than it is during the hot—and often dry—conditions of summer.

This is not to say that you can’t successfully plant at other times of the year. With careful maintenance, plants will survive a summer installation.

Before the first time a shovel goes into the ground, get the underground utilities and cables marked. Call your municipal authorities (8-1-1, in the U.S.) to have it done.


Lake Geneva Lakeshore Path - islandworks / Pixabay

A fine example of framing the house.


Check All That Apply


  • Is the patio too small for family gatherings?
  • Are you tired of spending your weekends pruning shrubs?
  • Are you putting your house on the market within a few years?
  • Does retirement allow more time for vegetable gardening?
  • Is it time for the greenhouse you’ve always wanted?
  • Where will I put the cold frame the kids gave me last Christmas?
  • Now that the trees are mature, is it time to get rid of the struggling lawn (and the mower)?
  • Are the children showing an interest in butterfly gardening or a goldfish pond? Are you?


child watering tulips


Walk around the property, clipboard in hand, and note all the issues that need improvement. Go ahead; dream a little! Start to visualize how you could use different areas of the property.


A Little Research


Visit public gardens and parks at different times of the year, taking notes and pictures. Notice how the interplay among trees, shrubs, ground covers, flowering plants, and structures creates a harmonious picture. Don’t ignore how you got from point A to point B; pathways are practical and are among the most important features of the landscape.

Books, magazines, online sites, and classes offered by Master Gardeners’ programs and community colleges are excellent sources of information. Record the names of plants you can’t live without as well as those that do nothing for you. And get all the information, so you can avoid asking, after the planting, “What did I ever see in you?”

Cupressus arizonica blue ice

Cupressus arizonica ‘Blue Ice’.

Take a look at the trees, shrubs, and flowering plants offered by your local garden centers, and ask about winter hardiness and susceptibility to disease and insects. Find out what they do in every season of the year, what kind of maintenance they require, and how they can contribute to improving the landscape.

If low maintenance is important, look for dwarf varieties of plants that don’t need to be sheared every other month. Copy the full name of the plant: the botanical name (Genus and specific epithet), the ‘Cultivar’, and the common name. Then research them. “Japonica”, “Holly” and “White Splendor” refer to dozens of plants!

In the spring, and sometimes in the fall, landscape contractors set up full-size exhibits at home and garden shows. See which displays appeal to you the most. Personnel are available to answer questions and to set up consultations, but first find out how they will be compensated.

Compile a list of likes and dislikes (colors, materials, styles), which will guide the designer (or you!) in planning a garden that will give you the greatest pleasure. Decide what’s realistic financially and in terms of time and effort required to maintain your project.


Using Native Plants When Improving the Landscape

Plants that are native to your area adapt more readily to local environmental conditions. Seasonal temperatures, precipitation, and soil composition are a few factors that contribute to a species’ evolution. So, if the sourwood tree (Oxydendrum arboreum) evolved in the Carolinas, then the one planted in a North Carolina garden is likely to survive without being pampered.

Plant breeders have introduced “new and improved” versions that you might find more appealing than the original species. Cultivars of trees, shrubs, and perennials native to a region are available in a wide variety of plant heights or foliage and flower colors. Look for these “nativars” at your local garden centers.

cardinals bathe, watching while Coronavirus keeps us home.

Cardinals come for a daily dip.

If you want to attract more butterflies to your garden, find out which plants will feed the larval stage of a particular insect. Many species of butterflies have declined significantly in numbers, and it’s up to us gardeners to make an attempt at reversing that trend. Remember that insects, birds, and other animals evolved alongside a unique set of plant species, and that they’re all interdependent for long-term survival. If holes in the leaves bug you, perhaps confining those unsprayed plants to the back yard is a good compromise.

My mother and I enjoy watching the northern cardinals and other birds visiting the bird feeders. To make them feel at home in your garden, incorporate shrubbery that provides nesting opportunities and shelter. And don’t forget the bird bath! There’s nothing like a beautiful cardinal to enliven a winter landscape.

Speaking of shelter, consider constructing a simple brush pile to protect overwintering insects and other small animals. All that garden debris hauled off to the recycling center includes many insects in their pupal stage. Keeping cocoons and chrysalises on your property will ensure greater numbers of butterflies and other insects that might feed the next brood of bluebirds or wrens.


Leave It To the Professionals


landscape plan, improving the landscape


Perhaps the scope of this kind of work is beyond your comfort zone and you’d rather employ a landscaper to install it. If you hire a contractor, try to accommodate him or her by confining the family pets, removing children’s toys, and providing easy access for the workers.

Improving the landscape and transforming it from blah to beautiful requires a fair amount of disruption. Expect dust, mud, noise, and possible delays.

Identify existing plants that are special to you and ask the contractor early in the process if they can be worked into the plan. Some might be too large and unlikely to survive the transplant. Dig up dormant bulbs, if you can find them, and replant later in areas suggested by the designer.

If you’re an experienced gardener or an avid beginner, you might wish to participate in some aspects of the project. Maybe you’d prefer to have the contractor deal with permits, inspections, hardscape (utilities, paths, structures), and large specimens, while you plant the annuals, vegetables, and bulbs. All details should be spelled out in the contract. Open communication prevents most misunderstandings.

You might prefer to have the first phase installed this year, with additions made over the next few years. Ask the contractor which parts should go in first.


Headings

Page 1: A Landscape Primer, Check All That Apply, A Little Research (Using Native Plants When Improving the Landscape), Leave It To the Professionals

Page 2: Design Considerations For Improving the Landscape (The Right Size, Getting the Picture, But I’m Repeating Myself, One Garden in Derwood, Add Some Rocks), Improving Curb Appeal (Under the Parrotia Tree (Surprise!), Raise It Up, Only the Beginning

Return to the top

How To Grow the Best Blueberry Plants


blueberries maturing on the plant


Planting a Blueberry Patch?


July is National Blueberry Month, but it’s a rare day when I don’t consume blueberries. For many years, breakfast 5 or 6 days per week consisted of plain Cheerios, a handful of English walnuts, a handful of fresh strawberries, and a handful of fresh blueberries. Throw in half a nectarine or peach in season, or part of a banana, and I’m “doin’ the body good”. More fruit and nut than anything else.


Today is Day One


Until today. This morning, when I was researching nutritional information on the luscious little berry, I read the caution about eating blueberries and dairy, especially high-fat dairy, at the same time. The super-healthy antioxidants found in blueberries (strawberries, too) lose their desired effect when dairy and berries are eaten together.

Eating a lot more blueberries will increase the level of antioxidant activity, even in the presence of dairy. Apparently, this goes for strawberries as well. But this can get expensive, especially when berries are out of season.

So, all of you smoothie drinkers out there who use yogurt as a base might consider saving the blueberries until a few hours later. Or skip the yogurt. And today, the blueberry partnership comes to an end in my kitchen. At breakfast, anyway.


Blueberry Nutrients

A few berries in the bowl won’t hurt, and they certainly have other healthful reasons for including them. A ½-cup serving contains:

  • 40 calories
  • 1 g. protein
  • <1 g. fat
  • 11 g. carbohydrate
  • 7 g. sugars (blueberries have a low glycemic index of 53)
  • 2 g. fiber
  • high amounts of vitamins A, C, K (blood clotting, bone health, heart health), and the mineral, manganese

But it’s the antioxidant benefit I’m after more than anything else. Blueberries contain huge numbers of antioxidants, including the flavonols, quercetin (linked to lower blood pressure and reduced heart disease) and myricetin (cancer, diabetes).

Anthocyanins include malvidin and delphinidin, found predominantly in the blueberry skins.


blueberry, raspberry, strawberry photo


What Antioxidants Do


Blueberries have the highest antioxidant levels among commonly found fruits and vegetables—when they’re not eaten with dairy products. Anthocyanins are one group of antioxidants, the pigments that give red, blue, and purple fruits and vegetables their colors.

Antioxidants are health-promoting flavonoids belonging to a huge group of polyphenols. They circulate through our vascular system and help protect us from the damaging effects of free radicals. Those free radicals are produced as normal products of metabolism. They also help prevent free radical cell damage due to exposure to alcohol, cigarette smoke, and other pollutants.

A free radical, lacking an electron or two in the molecule’s outer orbit, is unstable as it tries to steal an electron from a nearby molecule, replicating the instability. This can lead to the development of cancerous cells if it happens in DNA. Antioxidants neutralize the unstable molecules.


More Benefits


blueberries in shape of heart


In addition to helping prevent oxidative DNA damage, potentially leading to cancer, and slowing down the aging process by 2½ years, antioxidants in blueberries are also linked to lower LDL cholesterol, the “bad” cholesterol that can lead to heart disease. But there are many other factors that contribute to this illness. One of those factors is inflammation, and blueberries—you guessed it—are also anti-inflammatory.

Many studies point to the positive effects blueberries have on blood pressure, type 2 diabetes, urinary tract infections, brain function, and muscle damage after strenuous workouts. Antioxidants help our bodies produce more nitric oxide and can relax blood vessels, helping to lower blood pressure.

This little fruit also slows the progression of age-related macular degeneration and glaucoma. There are plenty of reasons to include blueberries and other colorful plant pigments in the diet.

One clue to their growing popularity is the fact that per capita blueberry consumption tripled between 2000 and 2015, to just over 3 pounds per person per year. When I move to a place with more land, planting a blueberry patch is high on the list of garden projects.


Prepare for Planting Your Blueberry


Sun

First, locate your blueberries where they’ll receive at least 6 or 7 hours of direct sunlight. In areas with hot summers, dappled shade in mid-afternoon helps prevent stress. Consider the tree canopy and how soon it might begin to cast too much shade on your blueberry garden.

For all permanent plantings, I like to give plants an excellent base to root into. The section in Soil Prep 101 for Your Vegetable Garden headed “Prepare for Soil Prep” offers details on getting started, with a few exceptions for blueberries. Blueberries, in particular, require very acidic soil.

A soil test is recommended to get an accurate reading of the soil’s fertility, pH, and tilth. Proper planting and management will reward you with perhaps 20-30 years of blueberry harvests.


Drainage


Rountree's potting soil

Planting mix composed primarily of pine fines.


Very dry soil is difficult to dig, so watering the area a few hours or the day before starting the process will make it easier. I usually use a sturdy garden fork for the initial dig.

Loosen the soil 15-20″ deep, and 3 or 4 times the width of the root ball. Add a cubic foot or more, depending on how bad the soil is, of partially composted pine bark chips, also called soil conditioner or pine fines (photo, above) to facilitate drainage. Don’t layer the pine fines; instead, incorporate them into the full depth of excavated soil.

If you have sandy loam to begin with, you might not need as much soil conditioner. Here in the piedmont of North Carolina, however, we have heavy, sticky clay. Clay soil holds moisture and fertility, but it requires amendments to improve the drainage.

Coarse sand (not play sand, which is too fine) is another material that can improve drainage, but it should be used in conjunction with organic matter.

Loosening the soil and adding amendments and plants raises the finished level of the bed. Take this into consideration as you sculpt the land. Blueberries need good drainage, and you want to make sure you didn’t create a berm where the water has nowhere to drain. Hire a professional gardener, if you prefer, to till and prepare the soil according to how you want it done.

If you’re planting the shrubs in a row or in a group, the plants will thank you if you dig the entire bed instead of just the area around each plant. Remember to place the tallest-growing varieties on the north side of the garden (northern hemisphere). Concentrate the peat moss and compost near the plants, but add some peat and pine fines between them as well.


Gypsum

Gypsum (calcium sulfate) can be added annually for several years to soils that are especially intractable. It works by “flocculating”, or gathering, tiny particles of clay soil into larger particles, opening up minute channels through the soil profile. The larger air pore space allows water, air, and roots to more easily penetrate the soil.

Unlike lime (no lime for blueberries!), gypsum doesn’t raise the pH of the soil. Pelleted gypsum can be incorporated into the soil at the beginning of the process and applied as a top dressing in subsequent years. Water will carry it lower into the soil.


Soil PH 

Because blueberries are sensitive to high salt content, do not add mushroom compost or composted manure to the garden. Manure also can raise the pH of the soil.

Our soils in the eastern U.S. tend to be acidic, but not acidic enough for blueberries. Blueberry plants need a pH below 5.5, even as low as 4.3. Peat moss is very acidic, and blueberries love it. In addition to the pine fines, add at least one cubic foot of pre-moistened peat moss per plant. Again, thoroughly incorporate the peat with the top 12″ to 15″ of soil, breaking up the clods as much as possible.

Pockets of dry peat moss buried in soil will remain dry for a long period of time because it resists absorbing water. Clay readily absorbs water; you need to thoroughly mix the clay particles into the peat moss. Pre-moistened peat moss is easier to work with.

A moderate amount of aged compost can be incorporated into the top 6-8″ of soil. The amended soil should be at least 3 times the width of the root ball. Sure, that sounds like work, and the plants probably would survive with a lesser effort, but greater effort equals greater rewards!

Rake the area smooth.


Time to Plant Your Blueberry


Before removing the blueberry plant from its pot, water it. This will help the root ball slide out of the pot. Don’t pull the plant by the stem; this could damage the delicate root system. Avoid heavily damaging the roots of blueberries because they lack root hairs. Keep the label for each plant with the plant.

Let gravity help you. Tilt the pot almost upside-down and see if the plant comes out without too much coaxing. Be ready to catch it before it lands on the ground; stems are brittle and easily broken. If the roots still won’t let go of the pot, cut away the plastic pot with a utility knife or sharp pruners. Or use an old bread knife along the inside of the pot, separating the pot from the outside of the root ball.

Know how large the plants will grow when they reach maturity in order to gauge how far apart they should be planted. Plants often grow larger than the size indicated on labels. And to maintain the health of the foliage, spacing them farther apart assures good air circulation.


Grab Your Shovel


garden tools


Hollow out a hole in the prepared garden. The depth should be almost the height of the root ball. Allowing ½” to 1″ of the root ball to protrude above the finished grade is advised.

Never cover the original root ball with new soil; doing so would suffocate the roots and damage the stem. Blueberries prosper when planted in a raised bed, ensuring good drainage and high oxygen content at the crown of the plant.

Use a cultivator to loosen some of the roots on the outside of the root ball, or score it several times with a knife, slicing shallowly from top to bottom. This light damage will stimulate the root system to quickly send out new roots.

You want to encourage the plant to grow roots away from the plant and into the amended soil instead of circling around the original root ball.  Whenever you add anything into the landscape, do not dig a bowl with a smooth surface. Use a shovel to create jagged edges, which will direct growing roots into new territory.

Now plant the blueberry, backfilling with amended soil. Guide the loosened roots out into the prepared ground. Using medium pressure, firm the soil. Loosely packed soil will settle, possibly dragging the plant too deep into the ground.


First Pruning


blueberry branch


With young plants, remove very thin twigs, crossing or damaged stems, and cut back long stems to remove most flowers. Mature plants at the nursery, grown in large pots—okay, experts still recommend pruning them, but I’ve had no problems letting them set some fruit the first year when the plants are well cared for.


Label the Blueberry Plant

For new plants, bury the label on the north side of the stem. This way, you’ll know where to find the label if you need to know the cultivar’s name. Plastic labels that are shaded will last a long time. It’s not a bad idea to take pictures or to record this information in a journal. Keep track of the plants’ names in case one or two should perish, because…

…blueberries are particular about their pollinizers—the plants that provide the pollen. So, you’ll want to know the names of plants that need to be replaced. All blueberries bear fruit, but you don’t want to create a gap in bloom cycles by guessing which varieties to buy. Ensuring an uninterrupted succession of flowers and mature pollen throughout the bloom season yields an abundant harvest of beautiful berries.


Mulch

Once all the blueberries have been planted and the soil raked smooth, apply the mulch. I prefer to use pine products, such as 4″ of pine straw or 2″ to 3″ of pine bark nuggets for blueberries. An inch of pine fines also works. Don’t apply mulch against the stems.

Avoid walking over the newly prepared garden to prevent compressing the soil.


pine straw mulch for blueberry patch

Pine straw.


Mulch helps cool the soil and hold in moisture. It also helps prevent most weeds from growing, which compete with blueberries for moisture and nutrients. More mulch will be needed as it decomposes, but pine bark chunks can last a few years.

Shredded hardwood mulch is attractive and readily available. And it holds well on a slope, except during heavy rains. A thin layer, an inch or so, is acceptable. But too much hardwood will raise the pH of the soil. As long as you can maintain the pH that blueberries require, using a thin layer of shredded hardwood is okay. But pine straw and pine nuggets are preferred.

If the soil pH is too high, switch from shredded hardwood to pine bark nuggets. In fact, specialists recommend alternating between pine products and hardwood every several years. Changing the pH with mulch is a very slow process. So, you’ll need soil acidifier, which is available at garden centers, to lower the pH if it drifted too high.


Water

blueberry in a pot

Blueberry ‘Patriot’, in a pot for several years.

If you can’t plant the blueberries right away, they might require water every day.

Water the new garden well. For the next 2 weeks, or until the plants root in, the only water available to them is the moisture held by the original root ball. Naturally, if ample rain falls while they’re rooting in, you might not need to water. Dry clay soil in the bed will steal moisture from the plant’s root ball.

If the plant was being watered daily at the nursery, it might require daily watering after planting. Large leafy plants dry fast in warm, breezy conditions. New growth on the tips of the stems visibly wilts if the roots have been damaged or if the soil is dry. Having no root hairs subjects blueberries to early wilting if moisture levels drop too low. Water immediately, or those tender new leaves will turn brown.

Direct water from the hose over the original root ball. Feel the water first, to make sure it’s not hot. Give each plant at least 3 gallons of water, more for larger specimens. Water the soil a few inches beyond the root system to encourage new roots to grow toward the moisture. Monitor soil moisture levels for the first growing season.

Tap water has a high pH, so regularly irrigated soil will require acidifying.


How Are They Looking? 

Do they wilt every day although you water every day or two? Water deeply so that the entire root system is moistened. Shallow watering might satisfy roots near the surface, while those deep in the soil remain dry. As new roots grow into the soil, water more widely around the plants. The original root ball often resists absorbing moisture if it has gone too dry. That’s why we recommend pre-moistening peat moss and watering the potted plant before planting.

Overwatering also can cause wilt. Don’t overdo it. Too much water in clay soil prevents air from reaching the roots. Essentially, they drown. An overwatered plant is less likely to recover. I can’t over-emphasize the importance of good drainage… and that means amending clay soil.

Excessive root injury sustained when planting will cause the plants to wilt. You might need to lightly shade them for a few days to ease the stress. After a week or two, prune off branches that didn’t recover, or leave them for a while longer to see if dormant buds sprout from live wood.

Check to see if the root ball has settled too deeply into the soil. Raise it up if that’s the case. The crown of the plant should be flush with the surrounding soil level, or, preferably, raised a little above it. And make sure all air pockets around the roots have been filled with soil.

If your new blueberries are looking good and starting to grow, congratulations! Blue star!


Settled In


water from the hose


Once the plants begin to root in, after a couple of weeks, you can decrease the frequency of watering. It’s tempting to assume that the recent gentle rain is enough for the next few days. But it might have been only ¼”, which dampens the mulch but not the soil.

If in doubt, dig several inches into the soil near the edge of the original root ball to see whether the soil is running dry or is sopping wet. You don’t want either of those conditions.

One inch of water throughout the garden will moisten the top 4-6″ of soil. Every week during the growing season, the entire garden should receive 1½” of water, and more than that in sandy soil. After the plants have become established, water less often, if you need to at all, but water deeply when you do.


Family Likeness


our potted blueberry 'Patriot'

Early season flowers and leaves on our potted ‘Patriot’ blueberry.


Looking at the flowers in late winter to late spring, you might have noticed the similarity between blueberry (Vaccinium spp.) flowers and the flowers of Pieris japonica, and those of the sourwood tree, Oxydendrum arboreum. Their flowers resemble little bells.

All of them belong to the family Ericaceae, which includes heaths, heathers, azaleas, and rhododendrons, although these shrubs’ flowers bear less similarity to those of blueberries. Cranberry, bilberry, and huckleberry also belong to the Vaccinium genus.

Gardeners cultivate 50 or 60 species of blueberries around the world. Several species native to the United States and Canada formed the basis for almost all of the many blueberry varieties available today.

New dwarf cultivars of blueberries feel right at home in foundation plantings. Edible landscaping highlights both the ornamental and the edible aspects of growing blueberries.


Headings

Page 1: Planting a Blueberry Patch?, Today Is Day One, What Antioxidants Do (Blueberry Nutrients, More Benefits), Prepare for Planting Your Blueberry (Sun, Drainage, Gypsum, Soil PH), Time To Plant Your Blueberry (Grab Your Shovel, First Pruning, Label the Blueberry Plant, Mulch, Water, How Are They Looking?, Settled In), Family Likeness

Page 2: The 5 Major Groups of Blueberries (Lowbush Blueberry, Northern Highbush Blueberry, Southern Highbush Blueberry, Rabbiteye Blueberry, Half-High Blueberry), Blueberry Maintenance (Water, Mulch, Fertilizer, Pruning, Blueberry Pollination, Disease, Picking), Woodchucks and Friends, Plant Protection, Cage Your Blueberries


Return to the top

Iced Tea Pots: Cool and Refreshing!


Iced Tea Pots


Here’s an idea for an herb pot that’s perfect for these hot, humid days of summer. Grow herbs that you can use in iced tea! These iced tea pots will flavor your drinks all summer long.


glass of iced tea on a platter


The Plants


Spearmint


mint 'Julep'

Mint ‘Julep’.


First decide which mints you like. Spearmint (Mentha spicata) is a popular mint for iced tea and other drinks. There are several hybrids you can choose from, including ‘Kentucky Colonel’, ‘Mojito’, and ‘Julep’. Mint ‘Julep’ (photo, above) is my favorite; a pot that I brought from Maryland when I moved here several years ago is still in the front yard. And it is still growing in the pot.

“Common mint”, “garden mint”, or “mint” refer to spearmint, M. spicata, unless a variety has been indicated. This species originated in the area from Ireland to southern China.

Mentha x gracilis is a sterile hybrid cultivated for its essential oils. This is the flavorful ingredient in spearmint chewing gum.

Most mints are winter hardy in USDA hardiness zones 4 through 9 and have wide distribution around the globe. Species and their interspecific hybrids are native to Europe, Asia, Africa, Australia, and North America.


Peppermint


peppermint

Peppermint.

Peppermint (Mentha x piperita), including chocolate peppermint and a white variegated form, is another perennial mint. Variegated peppermint is beautiful, but the white sections scorch easily in hot sun.

Use peppermint in drinks and salads, and to help calm a queasy stomach.

This mint is an interspecific hybrid between Mentha aquatica (water mint) and M. spicata (spearmint). Anyone who enjoys some cool chocolate chip mint ice cream on a hot summer day will also like chocolate peppermint.


Other Mints


mint flowets

Mint flowers attract all sorts of pollinators.


And there’s orange mint, apple mint, pineapple mint, and Corsican mint, and many others. Gardeners can choose from among two dozen species and hundreds of varieties! They hybridize freely, although some of the seedlings can have an unpleasant taste. It’s best not to let them seed about.

Flowers appear at the tips of the stems. After letting the pollinators enjoy them for a couple of days, cut the stems back almost to the soil surface to prevent seeding and to encourage a flush of new growth.


Caution!

Anyone familiar with the invasive nature of mint gasps at the thought of growing it in the ground. Mint is an aggressively spreading perennial, and its mission in life is to cover the earth! Given moist, rich soil, it spreads by underground stems, called rhizomes. They multiply and spread in every direction.

The runners growing above ground will root wherever they touch the soil. I hope I’ve made my point. Unless you want them to take over, restrain them by keeping them in pots.

I’ve read articles that recommend keeping mint in a pot and burying the pot most of the way in the ground. This is supposed to prevent the rhizomes from escaping the confines of the pot. But rhizomes will pop up again unless the pot is very deep. And runners that grow over the edge of the pot will root into the surrounding soil unless they are relentlessly clipped back.


Lemon Balm


lemons and lemon balm

Another mint relative, lemon balm.


Lemon balm (Melissa officinalis), also in the mint family, has a cool lemon scent and flavor, and can be used in the kitchen when lemon is called for. There has been some promising research in Alzheimer’s disease using lemon balm.

A patch of lemon balm grew in the Maryland back yard. I cut it back hard to control the growth for most of the summer. Then, late in the season, I let it go to flower and to seed for the American goldfinches. They landed on the flexible stems and bobbed up and down as they extracted the seeds.


Lemon Verbena


lemon verbena

Lemon verbena.

Now, if you like a really strong lemon flavor, and growing a lemon tree is out of the question, look for lemon verbena (Aloysia triphylla). It grows somewhat on the weedy side unless it’s trimmed back once in a while. It will sprout again along the stems, as long as the roots are healthy.

Lemon verbena is native to South America and is hardy in zones 8 or 9 through 10 or 11. So, here in the piedmont of the Carolinas, this woody herb might survive a mild winter, although it will drop its leaves.

If you want to try growing it as a perennial, plant it in a warmer microclimate provided by a south-facing wall, and mulch it. Give it some time to re-leaf, as it can be a little slow.

Keep the soil moist. When watering, splash the leaves (top and bottom surfaces) to drown spider mites, which can be troublesome on this plant.


Stevia


If you like a little sweetness in your tea, add stevia (Stevia rebaudiana) to the mix. This is a summer annual throughout most of the country, but, with proper care, it can be grown in a sunny window in the winter. Stevia, or “sweet herb”, has been cultivated for a thousand years in South America.


stevia plant, add to iced tea pots

Stevia.


This herb is many, many times sweeter than table sugar. Clip a few leaves or a small stem, mash it in your hand, and add to the tea. You can also pick healthy leaves, dry them, and pulverize them to add to your drinks and to baking. But remember the higher potential it has for sweetening.

Cut back stevia to a few inches above the soil surface when it flowers to encourage new stems to grow. It will self-seed if you let the seedpods mature.

Stevia is hardy in zones 9 through 11.


Start With A Pot and Potting Soil


Soil in plastic and ceramic pots stays moist longer than soil in terra cotta pots, but clay pots are preferred by many gardeners. Most likely, you’re going to have to water your iced tea pots every day anyway. So just use a pot you enjoy seeing.

A clay pot can be lined with a plastic bag, with a few holes punched in the bottom for drainage. This will keep moisture in the soil a little longer.

A pot at least 12″ in diameter will accommodate 3-4 4″ pots. Pots with wide openings will produce the nicest looking plantings.

pot for new chives division

Polyester fiberfill covers the drainage hole.

Put a small handful of polyester fiberfill (available at craft stores) over the drainage hole. This prevents soil from eroding through the hole while allowing excess water to drain. It also prevents insects or worms from entering it. An alternative is to use a piece of landscape fabric, cut to cover the hole or the inside bottom of the pot. If there are several small holes in the bottom of the pot, it’s not necessary to use a filter.

Now add potting soil, lightly firming it as you proceed. Fill to within 2″ or 3″ of the rim of the pot. The soil should contain peat moss, which holds water. Pine fines, perlite, lime, starter fertilizer, and a wetting agent are also included in most bagged soil products. Adding compost to the mix will enrich the medium if it isn’t already included. These foliage plants enjoy a nutrient-rich potting soil.

When I grow and sell iced tea pots, I plant one stevia, one or two mints, and something lemony. So, all the flavor groups were covered: mint, lemon, and sweet.


Add the Plants


Starting at the back of the pot, plant the lemon verbena. Remove it from its pot, score the outside of the root ball with a knife if it’s heavily rooted, scoop out a hole for the roots, and plant. Firm the soil around the roots so that the top of the root ball (the plant’s soil surface) is an inch or two below the rim of the pot. That reservoir will hold water until it seeps into the soil. Avoid placing potting soil all the way to the top of the pot.

Now plant the stevia in the same manner, also toward the back of the pot, or in the center.

mint, a favorite in iced tea pots

Mint.

For the mint—or the mints—place them inside the front of the pot. Mint spreads and doesn’t grow as tall as the lemon verbena or the stevia, as it will be cut back periodically.

Firm the soil around all the plants. If the soil level settled too low, simply tuck in more soil under the roots. Finish off the pot by adding a layer of mulch, such as pine fines, which helps slow down evaporation. And it looks good. Water the pot to settle in all the plants.

Many customers have expressed concern about the flavors losing their identities because the roots are growing together in the pot. Not to worry; peppermint will always taste like peppermint. Keep the labels next to the plants, to identify the particular flavor you want. Sure, if a spearmint leaf rubs against a stevia leaf, you might get a faint taste of mint with the stevia. But it’ll wash off, and it’s always a good idea to rinse herbs and vegetables before consuming them.


Maintenance


Light


sun and clouds


Your iced tea pot needs direct sunlight for at least half the day. If the weather is cool where you live, the plants can take—and prefer—full sun (6 hours or more). Once the temperatures start getting into the 80’s F or higher, place the pot where it gets morning and early afternoon sun, and light shade during the hottest hours. 

If the plants are not getting enough direct sunlight, the stems will be thin and weak. They might give you some leaves or stems to clip, but will not regrow exuberantly, and could die off.

If the plants are weakened from lack of sun, cut them back, place them in more hours of direct sun, and cross your fingers. Usually the plants recover, but sometimes they don’t. When they do start to regrow, make sure they are getting enough water, as the demand for it will increase.


Water


These plants grow fast in warm weather. They will need frequent and deep watering to prevent wilt.

Once the roots grow throughout the pot, the plants will demand watering once or twice a day on warm, sunny days. Not just a cupful or two, either. It’ll be more like 3 or 4 quarts of water for a 12″ pot, and 3 gallons or more for a half whiskey barrel. Provide enough water to moisten the entire root ball, or until it starts seeping out through the drainage holes.

If water rushes out of the bottom of the pot immediately after watering, check to make sure the soil is firmed all the way around the pot. The water found the quickest exit, which is usually through an air channel in the soil, often along the inside surface of the pot.

In hot, breezy weather, it would be a good idea to keep a saucer under smaller pots. Let the excess water in the saucer get soaked up by the roots for up to an hour after watering. If it is absorbed by the roots quickly, then add more water.

Don’t, however, keep water in the saucer all the time. That could start rotting the roots, especially if the pot is kept in less than ideal sun. It might be a good idea to move the plants into a bigger pot if the plants wilt frequently. Or reduce the top growth (cut back) to slow the amount of water lost due to transpiration.

Always check the temperature of the water when it first comes out of the hose. It will be very hot if the hose has been kept in the sun. Too hot for plants!


Fertilizer


fertilizer bags

Espoma has many formulations of organic fertilizers.

Old leaves or those with poor color taste bitter or off-flavor. Fast-growing leafy herbs require fertilizer, especially nitrogen, every 2 or 3 weeks. Those include mint, basil, parsley, cilantro, and arugula.

I know; that’s contrary to what you might have heard from other gardeners. “Never fertilize your herbs; they’ll lose all their flavor.” Well, I disagree. Plants growing in pots don’t have the option of sending their roots a few feet away in search of nitrogen. They rely on you to provide it.

Since these are foliage plants, they need more nitrogen than they need other nutrients. Nitrogen (“N” on the package) is necessary for the formation of chlorophyll, the green pigment that gives leaves their characteristic color.

Both organic products and synthetics break down to the same or very similar compounds before the plant can use them. Plant-Tone and Garden-Tone are mild organic products from Espoma. High-nitrogen fish emulsion, earthworm castings, and Neptune’s Harvest are some of the organic products I use frequently.

Organic fertilizers also provide beneficial microbes, which break down organic matter in the soil and help the roots absorb nutrients and water more efficiently. Products containing microbes should be buried in the soil or covered with mulch, and watered in after application. Ultraviolet light from the sun kills microbes.

If plants are in need of a quick injection of nutrients, I have no problem using one of the soluble synthetics. Also, timed-release fertilizer products can be used if you tend to forget calendar reminders. If the product says “will fertilize 4 full months”, remember that the nutrients will be released faster in rainy or hot weather. Four months at 70 degrees would be about half that duration at 85 or 90 degrees. I often use a more expensive product that lasts “8 months”.


Pruning


The only way to keep mint looking beautiful and healthy is to cut it back regularly. When you harvest a stem, cut it almost all the way back to the soil, and use the good leaves at the tip. If you harvest stems frequently, and cut the stems hard (down to within 1/2″ to 1″ of the soil) each time, the plant will continually send up new growth from the base of the plant.

If you don’t use them often, the mints will start to look sickly, particularly in hot weather. Insects, mites, hot weather, and the occasional drought are stresses that take their toll. The plants will regrow beautiful new leaves for you. They just need a little encouragement. In fact, you can give the mints, including the lemon balm, a severe trim, cutting all of them to within 1″ of the soil if the pot is in need of rejuvenation. As long as the roots are healthy, the plants will bounce back from the underground rhizomes in a short period of time.

Lemon verbena and stevia will respond in the same way, just a little more slowly. Don’t cut them all the way down as you would cut mint. Just shape them up, or cut them back halfway, rinsing, harvesting, and drying the healthy leaves for future use.


Insects


Hot weather does bring out the beasts! You might see aphids, thrips, white flies, mealybugs, and little moth caterpillars rolled up in the leaves. As thrips scrape the cells on the leaf surface and collect the sugary sap, small scars become visible.

Most aphids can be dislodged with a strong spray from the hose. Horticultural oil will smother most insects and mites. Bacillus thuringiensis, or Bt, will get the caterpillars you might miss. If you want to use the clippings in your tea, rinse the foliage after spraying. These products are safe to use on edibles but remember to always read package directions.


Spider Mites

Tiny spider mites (arachnids, not insects) cause the characteristic stippling of the leaf surface as they feed on the reverse. Mites are easily drowned by occasionally spraying with water on the bottom of the foliage.


Overwintering


tea with mint from iced tea pot During cold weather, place the pot next to the south side of the house (northern hemisphere), and cover with a deep layer of leaves or pine needles. Partially planting the pot in the ground (“heeling in”) will better insulate the root system from extreme cold. The mints usually regrow a second season, but, most likely, stevia and lemon verbena will need to be replanted.

The root ball will be a solid mass of roots and rhizomes, which can be divided in the spring. Pot up some extras in case all the divisions you planted are of the same variety. Or wait until they emerge from dormancy, when you can more easily identify the varieties.

Refresh the soil, add more plants if you choose, and you’ll have another season to enjoy your iced tea pots!

When returning home from a hot day at work, I used to pick a stem from the potted mint ‘Julep’ sitting by the front door. A glass of freshly brewed iced tea, some lemon, stevia, and mint—how refreshing is that?!


Return to the top

The Best Eggplant Parmigiana

Updated 1/20/2024


Eggplant Parmigiana


eggplant


One of the favorite dishes from our kitchen is Eggplant Parmigiana. First, I have to admit that I never use Parmesan. Locatelli Romano is our preferred cheese for Italian dishes. Purchased as a solid wedge, and grated in batches, it’s always on hand in the refrigerator.

As a kid, I would “borrow” a chunk of Romano from my Sicilian grandmother’s kitchen, and hide under the table where I could savor every little bite. Mmm….so good!


grated cheese


Over the years, I’ve tried many recipes for Eggplant Parmigiana, but it wasn’t until last year that I came up with this combination. An organized kitchen is helpful as this dish is being orchestrated. And having some potted herbs outside the kitchen door is very handy.


Have These Ready


  • one 13″x 9″ Pyrex baking dish, or other dish that can take low heat from the stovetop, and oven heat
  • 2 non-stick frying pans, medium to large, for eggplant
  • separate bowls to hold zucchini and eggplant slices
  • pie plate for eggs and water
  • wide bowl for bread crumbs


tomato sauce for eggplant parmigiana


Ingredients


  • 1 or 2 small zucchini, yellow or green, unpeeled, cut into 1/4″ slices
  • 2 medium (less seedy than large) fresh eggplants, unpeeled, cut lengthwise into 1/4″ slices (no need to “bleed” out moisture)
  • Your favorite meatless tomato sauce
  • 2 cups or more seasoned bread crumbs; see below
  • 2 eggs plus 1 Tbsp. water, stirred together in pie plate
  • Extra virgin olive oil
  • butter
  • 1 lb. mozzarella cheese, sliced
  • About 3/4 lb. Provolone cheese, thinly sliced
  • 1 to 1 1/2 cups Romano cheese, grated
  • 1 or 2 cups wilted greens, such as spinach, arugula, Swiss chard, and dinosaur kale. Or use 1 or 2 bags of prepared greens. Greens are optional, but recommended. You can also use fresh greens.


Bread Crumbs—Ingredients


Mix together all these ingredients in the bowl:

  • Flat-leaf parsley.

    Several slices dry rye, whole wheat, and/or white bread, processed to medium-fine crumbs. I collect odds and ends in an open bag in the refrigerator, letting them dry.

  • 1/2 to 2/3 cup grated Romano cheese
  • 2 or 3 cloves fresh garlic, minced
  • 3 Tbsp. fresh flat leaf parsley, chopped
  • 1 Tbsp. fresh or 1-1 ½ tsp. dry Italian oregano
  • 1/2 tsp. salt, or to taste
  • 1/4 tsp. pepper, or to taste
  • 1/4 tsp. thyme, French preferred


The Process


  • Place baking dish on small burner of stove. Add a layer of sauce to coat the bottom of the pan.
  • Add zucchini slices close together in single layer, on top of sauce in baking dish. Turn on stove to very low heat, which will begin softening the zucchini as eggplant is being prepared. Move the pan around so no spots overheat. Turn over zucchini slices once for even heating. Make sure your dish will be safe to use like this. (If you prefer not to heat the pan, add some time when baking the eggplant.)
  • In frying pans, add olive oil and a little bit of butter. Not too much.
  • One slice at a time, dip eggplant in egg bath, then press into bread crumbs, coating both sides.
  • Add breaded eggplant slices to frying pans (I use 2 pans to speed up the process), and sauté over medium heat until medium brown. Don’t use high heat; this will brown the bread crumbs, leaving eggplant raw.
  • Place cooked eggplant slices close together, in a single layer on top of zucchini, into baking dish.
  • Continue sautéing eggplant slices, adding oil and butter as needed. While the next batch is cooking, add a layer of Romano, mozzarella, and Provolone cheeses, and more sauce, to the baking dish.
  • Add the greens in the middle layers.


Continue Layering

  • Continue layering eggplant, cheeses, and sauce until dish is filled. Usually there are 2 or 3 layers of eggplant. You can add leftover egg and bread crumbs, finishing with sauce.
  • Drizzle 1 or 2 Tbsp. olive oil over the top, plus a couple of pinches of oregano.
  • Bake at 350 degrees, loosely covered with foil. If the pan is filled to the top, place an old cookie sheet on the bottom rack to catch the spillover. If sauce is watery, lower heat, loosen foil, and cook a bit longer.
  • It’s done when sauce is gently bubbling all over, usually 40 to 50 minutes.
  • Serve with extra grated Romano cheese and sauce, if needed.

Wasn’t that easy? Maybe not the first time, but it is delicious! Serve with some good bread and a green salad or tomato-basil salad. Maybe some wine…good company…and…


stuffed artichokes, served with eggplant parmigiana

Fresh artichoke.


…Stuffed Artichokes


Snip the points off the artichoke leaves, remove the smallest bottom leaves, trim the stem to an inch or so, rinse, and drain.

Use the bread crumb recipe above, adding more Romano cheese, salt, and garlic. Place the artichoke in the bowl of bread crumbs and spoon the mixture between the leaves. Use your fingers to firm more crumbs between the leaves.

Place in artichoke holders and add 2 to 3 cups of water in a heavy stock pot. Drizzle olive oil, 2 or 3 Tbsp. water, and a dash of salt over the tops of the artichokes.

Using a covered stock pot, 2 well-stuffed large artichokes will need 2 to 3 hours on a low simmer to steam. Add water as necessary. They’re done when you can easily remove a large leaf. When you pull the leaf through your teeth, the green part is tender and will scrape off. (Artichoke greens are good for gut health.) Some prefer to use a pressure cooker, which speeds things up considerably.

Stuffed artichokes can be made ahead of time and reheated in the oven, covered with foil.

This dinner was a big hit when relatives came to town earlier this month. Enjoy!


Return to the top

No Fruits On Your Tomato Plants?

2018


Here Are Some Simple Solutions If Your Tomato Plants Have No Fruits In July and August


tomatoes


No Fruits In Hot Weather?


It looks as if we’re in for more above-normal temperatures in the Southeast through the growing season. No surprise there! I’m going to spend a few minutes to explain why we often have no fruits on our tomato plants when it gets real hot outside. In most years, though, production picks up again in late August or September when the temperatures drop several degrees.

bee, pollenThe main crop that most home gardeners are concerned with is the tomato, although this could happen to peppers, eggplants, and other vegetables as well. When temperatures soar into the 90’s F, the pollen produced in the flower is “denatured”, or, essentially, killed. No pollen means no fruits!

When the air is very still or humid, the pollen grains are less likely to be dispersed. But, we can’t control the weather, so I’ll concentrate on what we can do.


Try Some Shade For Tomatoes With No Fruits


beach umbrella--shade for tomatoes with no fruits in summer


Before you replace your vegetables with agaves and astroturf, there is something you can try in order to harvest a continuous crop. If temperature is the problem, and not lack of pollinating insects, you can simply provide a bit of shade during the hottest part of the day, usually from 1:00 to 5:00 in the afternoon.


Here’s How:

Some tall stakes stuck in the ground and an old sheer curtain could work. Make sure any covering is above the foliage, so air flow is not impeded. One day, a customer stopped by the garden center where I used to work and wanted to thank me for the suggestion. He said he finally (after many years of trying!) was able to get tomatoes in the hot summer months by simply repositioning the patio umbrella to shade his tomatoes for a couple of hours in the afternoon.

Look for black UV stabilized polyethylene mesh, sold as “knitted shade cloth”, from garden supply companies. Johnny’s Selected Seeds lists the product in their catalog. For the hot south, a product that casts 30% shade works well. Or you might find that 50% shade works better. Position it overhead, and on the west side to cut the harsh afternoon sun. A little experimenting will indicate the best arrangement.

Rat snake caught in bird netting. yes, it was freed.

This non-venomous snake was freed by snipping the mesh, starting at the tail end.

If you have a package of black deer netting, folding it over several times will give you about the same effect as the shade cloth. Check it daily, though, for snakes that can get caught up in it. A few times, I used sharp-pointed scissors to free non-venomous snakes that had become entangled in the netting.

Another option is lattice or snow fence attached to a sturdy frame.

The point is not to block all the light. You just want to moderate the harsh sun for a few hours a day, dropping the temperature to below 90 degrees. Not every growing season will require this mitigation. But, if you don’t see tiny tomatoes growing on your plants in mid-summer, this is one option you can try. When the temperatures moderate, remove the covering.


Shading the Flowers and Fruits


light shade helps crops with no fruits


Sometimes it’s not practical or necessary to entirely shade the large plants on the deck. So, I’ll use those mesh bags found in the produce section at the grocery store (holding avocados, tangerines, etc.). When it’s hot, I drape the mesh over the young flower cluster. It will stay in place as the fruit develops. This helps keep the animals away and prevents sun scald.

Occasionally we have summers when the temperature hovers in the mid to high 90’s for weeks at a time, not cooling off much at night. We might not get any tomatoes at that time, until the weather cools. But we do harvest more tomatoes by shading than if we did nothing.


Cultivars


sun gold tomato

‘Sun Gold’ tomato with netting to keep animals away.

Select varieties that are more heat-resistant; their pollen tolerates higher temperatures. Names that allude to the south or to heat are clues that those varieties could grow better in warm climates. ‘Phoenix’, ‘Estiva’, ‘Arkansas Traveler’, ‘Florida 91’, ‘Creole’, ‘Heatmaster’, and ‘Summer Set’ are cultivars often cited as being heat-resistant.

‘Better Boy’, ‘Terenzo’, and ‘Black Krim’ also should do well. The bright orange cherry tomato, ‘Sun Gold’, produces abundantly in our hot summers.

‘Big Beef’ has always been quite productive here and is highly disease resistant. If you must grow your favorites that are susceptible to heat, try using the shade cloth.

Check online or ask your local cooperative extension agent for information on recommended cultivars in your region. The varieties that had bountiful harvests every year when you lived in Buffalo, New York, might be disappointing in Birmingham, Alabama.


Pick Earlier


During very hot weather, fruits might not fully “color-up” to catalog pictures, so don’t leave them too long on the vine. Pick them once they’ve developed some color.

Let them ripen on the kitchen counter, but never in the refrigerator. Tomatoes exposed to temperatures below the mid 50’s undergo cellular changes that rob them of flavor and texture. Certain genes that enhance flavonoids in ripening fruits become inactive in cool temperatures.

Especially during periods of drought, thirsty animals know what’s inside those juicy ripe tomatoes! You won’t miss out on much flavor by picking them a day or two early…but they will.

Letting ripe fruits stay on the vine inhibits the production of new flowers. The plant thinks it has done its job by providing seeds for the next generation. Removing ripe or almost ripe fruits reminds the plant to resume its responsibilities.


Mulch


pine straw mulch if crops have no fruits

Pine straw.


Mulch the soil all around the plants with a thick layer of airy mulch, such as pine straw or oak leaves. Clean chemical-free grass clippings mixed with shredded leaves can be used, but not so deep that decomposition generates even more heat. These materials add organic matter to the soil as they break down, keeping the earthworms and the microbes happy, and provide nutrients to the plants. 

Mulch also helps prevent disease spores lying dormant in the soil from splashing onto the lower leaves of the plant. And, of course, it holds moisture in the soil and keeps it a little cooler.


Water 


No fruits? Supply enough cooling water.

Water thoroughly during hot, dry weather to moisten the top 10″ to 12″ of soil once or twice a week (more often in sandy soils). Established vegetables, in average soil, need 1″ to 2″ of water per week. Here’s why:

  • Lack of water causes wilt, stressing the plant.
  • Lack of water causes flower-drop. (Incidentally, flower-drop early in the season can be caused by cool weather.)
  • To prevent blossom-end rot, there needs to be enough moisture in the soil to keep calcium in solution.
  • Fruits that crack are responding to uneven soil moisture levels, although some cultivars are more susceptible to this. Cracked fruits are still edible, after checking for little critters (insects, slugs, sowbugs) that might be sipping the fluids. Ordinarily, it’s safer to discard fruits that have been partially eaten by raccoons or squirrels.
  • And a good watering in hot weather cools down the soil. But first check the temperature of the water coming out of a hose that sits in the sun. It could be too hot for plants. Don’t overdo the watering, which will dilute the flavor of ripening fruits and cause other problems.

Thorough and deep soil preparation invites roots to grow where the soil is cooler and where there’s more moisture. The more we can minimize stressful conditions, the more likely our vegetable garden will perform the way we’d like it to.


Better Pollination


Hand-Pollinate Flowers If No Fruits Are Growing


If pollinating insects are not plentiful around your garden, try hand-pollinating your tomatoes and peppers. Usually just shaking, tapping, or vibrating the flower is sufficient for the task.

Each tomato and pepper flower is perfect, containing both male and female flower parts. So, they can self-pollinate as well as receive pollen from other tomato plants. This will work if the pollen hasn’t already been killed by heat.

Photo, above right, shows simple procedure for pollinating a tomato flower. Gently flick, or tickle, a mature, but not old, flower to move pollen to the stigma.

The pepper (photo, above left) was unlabeled and purchased at a big box store. It had a big floppy habit. There were no fruits on it for the longest time, and I was about to remove it. But I gave it one last try, and hand-pollinated all the flowers. Since then, it has yielded a dozen big bell peppers, and it’s still full of fruit.


‘African Blue’ Basil

Plant an ‘African Blue’ basil near the garden. This is an ornamental basil and a pollinator magnet! Because it is sterile and can’t set seed, it keeps flowering all summer long. You can find this variety in late spring or summer as potted transplants.

Few plants attract as many pollinators. Having one of these plants near your vegetables will guarantee visits from honey bees, bumble bees, butterflies, and other pollinators. In fact, bumble bees often spend the night among its flowers, ready to go to work as soon as the sun comes up.


*   *   *   *   *   *   *   *   *


So, if you’re following sound horticultural practices and can’t understand why your vegetables have no fruits, try shading them for a few hours. Or perhaps one of the other suggestions will work for you.

I’ve had dozens of customers over the years who have tried shading when nothing else worked, and now they enjoy vine-ripened tomatoes and peppers without interruption. Tomato-basil salad, coming up!


water and vegetables


Return to the top

Create a Porch Planter Made for Shade

2018


good spot for a shady porch planter


A Shady Porch Planter


It is hot outside! This week’s temperatures are soaring well above normal. Throw in the (dis)comfort level, and it feels like it’s over 100 degrees out there! I refreshed the bird bath a few minutes ago. Three cardinals and a Carolina wren less than 15 feet away waited for me to leave.

We haven’t had rain for…well, the grass already is brown, and the trees’ leaves are beginning to flag…

We retreat to air-conditioned spaces, emerging in the evening to collect mail, pull some weeds, or feed the birds. A welcoming porch offers shade and a tall pitcher of iced tea shared with a friend. But, for a gardener like me, something is missing from this setting. That something would be plants!

Although a shady porch planter won’t support the blaze of color we see in our flower gardens, there are lots of plants that will grow there. Here in the Carolinas, a 12″ hanging basket filled with a well-tended Boston fern is a classic. It will require daily watering and fertilizing every 2 or 3 weeks. During cooler weather, in spring and fall, it will take some direct sunlight. Sitting on Grandma’s antique fern stand or hanging between posts, the Boston fern is beautiful in its simplicity. There’s something “cool” in that lush greenery, a calm repose…


Boston ferns for porch planter


But If It Goes Too Dry…


If the soil dries, there will be hundreds of little reminders shed from the older fronds. I’m talking about the pinnae, the small leaflets that line the midrib of the fern frond. Pull up the foliage and snip, down to soil level, the older, yellowing fronds. A certain amount of this shedding is expected, due to heavy shade on the lower fronds.

Soil that runs too dry will result in accelerated loss of foliage. And the edges of tender new fronds will turn crispy brown. I’ve seen ferns that looked dead from lack of water. But with a severe trim, down to soil level, and improved watering practices, the plants can recover. In a week or so, you’ll notice new growth emerging from the crown of the plant if the root system hasn’t been entirely killed off.

Plastic hanging baskets often have a 1″ deep reservoir in the bottom of the pot. Water your fern heavily enough to fill the reservoir. The plant will soon soak up that excess, so usually there is no need to empty it. I don’t recommend this for all plants, however–just the thirsty ones.

Under a porch that gets some direct sun, look for a fern variety called ‘Kimberly Queen’. Its habit is more upright, so it looks best sitting on the porch or on a low plant stand. Where conditions are too sunny for a Boston fern, ‘Kimberly Queen’ should do well. 


Following the Path of Least Resistance


One note about all potted plants: if water gushes out the holes immediately after watering, there’s empty space between the outside of the root ball and the inside of the pot. This space will need to be filled with potting soil, using a tool of some sort. Firm the soil all around, filling in the gaps, or the water will find that one air channel that remains unfilled. This will cause some or much of the root system to remain dry.

Why this happens:

  • letting the soil go too dry, causing the soil mass to shrink.
  • bumpy transportation, shifting loose soil around the pot, causing air pockets to form.
  • heavy roots or fern rhizomes (underground stems) growing along the sides of the root ball or coiled around the bottom of the pot (Bear’s-foot fern rhizomes, or the massive root systems of asparagus fern and spider plant). Strong roots can raise the whole plant higher in the pot. Most pots taper (become narrower) toward the bottom of the pot, so a gap will open as the root ball rises up.
  • loosely-packed soil. Firm the soil–not too hard and not too soft. Avoid piling new soil on top of the root ball. You might have to remove the plant in order to add soil under the root ball.


Ferns and Friends—Made for Shade


ferns and a dinosaur


I love ferns. A combination of different species planted together in a rustic planter, an aged clay pot, or a hollowed-out birch log speaks to my appreciation of the Permian aesthetic. Add a piece of driftwood, live moss, and some rocks collected from who-knows-where, and you’ve got a simple prehistoric scene straight out of Jurassic Park. Maybe you could borrow one of the kids’ toy dinosaurs…

bird bath mini garden

Miniature garden in a cracked birdbath.

Another “pot” that makes a cool miniature garden is a leaky birdbath. I turned a cracked granite birdbath into a tiny campsite, complete with shelter, a forest of prostrate rosemary, a firepit, and pebble pathways between clipped thyme plants (photo, right). Irish and Scottish mosses (Sagina subulata) served as the “lawn”, with driftwood logs for seating. (This one grew in direct sun most of the day.)

Look around; there might be something in the basement, at Good Will, or at a Habitat for Humanity Restore that can be transformed into something special.

Keep the fern arrangement in the shade. Two hours of direct sunlight on a hot summer day might prove fatal to these delicate denizens of the underbrush. And even though ferns like moist conditions, planting them in pots without drainage holes can result in a smelly anaerobic bog, suffocating their roots.

Avoid placing your porch planter in a windy location; ferns prefer the humidity and stillness of calm, close quarters.


So Many Choices

There are many ferns to choose from:

  • maidenhair ferns (Adiantum),
  • variegated brake ferns (Pteris),
  • lemon button fern and dwarf Boston ferns (Nephrolepis),
  • rabbit’s-foot fern (Davallia), with its fuzzy rhizomes,
  • the less fern-like bird’s nest fern (Asplenium) and Hart’s tongue fern (Phyllitis, a perennial),
  • fern allies, such as Selaginella, available in several colors and forms.

Among their numerous cultivars are smaller specimens, growing up to 12″ or 14″ tall, easily accommodated indoors when autumn approaches. Indoors, give them cool morning sun or very bright indirect light. I don’t recommend “low light” for anything, not even ferns. Stronger light makes stronger tissues, which will better tolerate indoor conditions.


Small Scale Gardening In a Porch Planter


With the popularity of miniature gardens, or fairy gardens, tiny 2″ pots of young plants are popping up all over the gardening world. You can find young ferns in a wide variety of foliage colors and textures.

Garden centers also sell assortments of succulents, flowering plants, houseplants, and terrarium plants, but not all are suitable for a shady porch planter or indirect light indoors. And get some information on the growth habits of the plants. Different varieties of ferns might grow only 2″ tall or over 4 feet tall! I grew the little 2″ fern 30 years ago; it was called New Zealand something…I’ll have to see if I can find it again. So cute!

miniature garden

For many years, I grew tiny plants under lights, including miniature strawberry begonia (Saxifraga cuscutaeformis), miniature African violets and their 1″ tall cousin Sinningia pusilla. And there was SonerilaPilea species, and dwarf Peperomia, many of which are available from specialty growers. There are miniature philodendrons, and I once had a dwarf Caladium that grew only 5″ or 6″ tall.

These little plants can be tucked in at the base of a hollowed “tree stump”, emerging from a patch of emerald green moss, or planted next to a “boulder”. Go ahead; make a scene! A tiny slice of the natural world…as mesmerizing as a well-appointed aquarium…   …   …


Little Plants for Sun

Some of my customers in Maryland were serious small-scale train enthusiasts. They looked for little plants to spruce up their outdoor displays. I turned twiggy forms of French thyme, Japanese maples, dwarf rosemary ‘Blue Boy’, and Juniper seedlings into bonsai. Their natural forms fit right into the smaller dimensions of their gardens. Miniature purple basil was trained into a tiny topiary, for one season.

And then there are the miniature evergreens, of course. That’s another post. But you get the idea. Check out all the departments in well-stocked garden centers; there are all sorts of small-scale plants that can be used in porch planters.


aerial view miniature garden

Miniature garden with dwarf evergreens.

Return to the top

Headings

Page 1: A Shady Porch Planter, But If It Goes Too Dry…, Following the Path of Least Resistance, Ferns and Friends—Made for Shade (So Many Choices), and Small Scale Gardening In a Porch Planter (Little Plants for Sun)

Page 2: Perennials for Your Shady Porch Planter (Some Possibilities), Color For a Porch Planter, Getting the Whole Picture, Year-Round Gardening In a Porch Planter (Warm Weather, Cool Weather, Evergreens), and Ready-Made or DIY Porch Planter?

Vegetables in Containers: How To Grow Them

2018

Updated 10/16/2024


No Garden Space? No Problem!


Growing Vegetables in Containers


peppers and green onions in a pot

Peppers and onions.


Before I started this blog, I managed the Edibles Department for a few years at an independent garden center in Charlotte, North Carolina. As some of our customers downsized to apartment living or to a condo with a balcony, they didn’t want to give up growing their own herbs and vegetables. So, they were glad to hear that they could grow vegetables in containers…as long as the balcony was on the right side of the building. And the right side for vegetables is the sunny side of the building.

Lack of direct sunlight and adequate growing space are limiting factors. Look around, though, and you might come up with some ideas. For example, some of our customers were given permission from their condo associations to garden in common areas. Running for open association board positions yourselves is one way to garner support. I encourage you to attend board meetings, bringing your neighbors, a plan, and a promise to maintain the site.

Neighborhood community gardens are another possibility, although there often is a waiting list. With so much emphasis on eating healthy foods, little pocket parks and community gardens are popping up all over the country.


For Your Convenience

damaged tomato, squirrel

A young tomato damaged by a squirrel.

Another reason to grow vegetables in containers is simply to have them close at hand when they’re needed. A few steps out the kitchen door to a handful of cherry tomatoes and a ripe ‘Flavorburst’ sweet pepper for today’s salad has its charms.

Keeping the pots elevated on the deck prevents some animals, such as deer and rabbits, from making off with the fruits of your labor. Won’t stop the raccoons, though. (***Update***: Or the squirrels; one thought this little green tomato had something to offer. Discard any fruits that have been chewed on by animals. If needed, I’ll wrap the potted tomato plants, growing on the deck, in bird netting. June, 2019.)


Sun? Not So Much


The choices for edibles in a shady spot are limited. The ones that might succeed in bright shade are arugula, cilantro, parsley, lemon balm (interesting research with Alzheimer’s), French sorrel, and seasonal leafy greens. With just a bit more sun, basil, rosemary, oregano, and maybe a cucumber plant could grow for you.

Reflected light counts, to a degree, including light bouncing off light-colored walls. And a white surface under the pots reflects more light onto the vegetables in containers.

Remember to monitor the sun’s path throughout the seasons. Once trees drop their leaves in the fall, your balcony or patio might receive more direct sunlight than it did in the summer. This opens up all kinds of possibilities for potted cool-season greens and vegetables. Pay close attention to expected temperature changes for the duration of your crops.

Fruiting plants, such as tomatoes, peppers, eggplants, and squash need at least 6, and preferably 7 or 8 hours of direct sun. These vegetables also need warm summery weather.


Approaching Summer Solstice

Our vegetable garden is now receiving the maximum amount of light, with the sun directly overhead. In the springtime of the last two years, heavy rains caused the tree canopy up on the berm, to the south, to swell with heavy, overhanging branches. Trees now cast considerable shade early and late in the day for most of the growing season. So, I planted fewer tomato plants and more greens.

Two large ‘Big Beef’ tomatoes are beginning to ripen, and a whole lot of ‘Sun Gold’ and ‘Mexico Midget’ cherry tomatoes. So, even with less-than-ideal conditions, there will be something to harvest.


At Julia’s Request

Several family members from New Jersey and California recently visited us in North Carolina. I promised Julia this article about growing summer vegetables in containers.


Vegetables In Containers: Which Ones?


Sweet and hot peppers, tomatoes, and eggplants can be grown in containers, as well as zucchini, yellow summer and Patty Pan squashes, cucumbers, and green beans. Also, it’s easy to grow most herbs in pots. Green onions, carrots, potatoes, and peas can grow in pots!

It’s just a matter of the details. One of those details is to look for dwarf or bush varieties of the crops you want to grow. There’s even a variety of corn (‘On Deck’) that grows in large pots.

One of the popular combinations I used to sell included a sweet or a hot pepper planted with two herbs. Theme combinations (‘Jalapeño’ pepper/cilantro/Greek oregano; ‘Carmen’ frying pepper/Italian parsley/Italian oregano) grew in 14″ pots. Customers found them irresistible if they were bearing fruit.

Growing more varieties of leafy greens in containers has become a priority as our garden becomes more shaded. In addition, greens can grow all year in regions with moderate winters.


Starting With Tomatoes


Much of the information in “Starting With Tomatoes” also applies to other vegetables in containers.


'Blueberry' tomato

Potted ‘Indigo Blue Berries’ cherry tomato ripens to orange and black.


Beginning with America’s favorite, tomatoes grow well in pots. Will it be a beefsteak or a cherry? An heirloom or a modern hybrid? A slicer or a sauce-type? Determinate? Indeterminate (it keeps growing until frost, bearing fruit all summer)? Black, red, yellow, or orange? Striped or solid? There are many thousands of varieties of tomatoes to choose from!

potted 'Terenzo' tomato, with red fruits

‘Terenzo’ tomato.

A dwarf tomato called ‘Terenzo’ (photo, right) can grow in a 10″ hanging basket, but a ‘Cherokee Purple’ heirloom or a ‘Big Beef’ needs something considerably larger. For the large varieties, I use pots at least 20″ in diameter.

The long-vining indeterminate cherry types (‘Sun Gold’, ‘Black Cherry’, ‘Mexico Midget’) can grow in a pot as small as 14″ in diameter, but they’d be happier in bigger pots. You’ll need to pay closer attention to water and fertility when using smaller pots.


Vegetables In Containers: Types Of Pots

Each kind of pot has both advantages and disadvantages.

Summer vegetables generally fare better in larger pots rather than smaller pots. Although the pot looks enormous compared to the transplant’s diminutive size, don’t be tempted to plant more than one tomato per pot.

You’ll be amazed how quickly that one tomato plant fills a 20″ pot. A new transplant in a large pot runs a greater risk of root rot during rainy weather. But, placing it under an overhang will prevent this loss. It’ll be different once more roots and foliage have grown.

An indeterminate tomato, such as ‘Cherokee Purple’, ‘Sun Gold’, or ‘Black Krim’, can share a 20″ diameter pot (photo, below) with a couple of herbs, such as parsley and oregano. Plant the tomato toward the back of the pot, on the north side (northern hemisphere), and plant the herbs near the southern rim.

Terra Cotta

Terra cotta looks good and has some weight. But clay is porous, so water vapor passes through the pot to the air outside, quickly drying the soil. If you want to use your large clay pots, you could line them with food-grade plastic and punch some holes in the bottom for drainage. This will slow down the evaporation process.

Certainly, use clay pots if you prefer, but prepare to water more often.

Ceramic Pots

Ceramics are beautiful and heavy, and they can be expensive. Soil temperature rises uncomfortably on the sunny side unless the pot is shaded. Try using light colored pots in the summer, which will reflect most of the heat.

If you’re unsure of the safety of the glaze, line the inside of the pot with food-grade plastic bags, poking several holes in the bottom for drainage. Choose a different pot if a sticker on the bottom warns “Not for direct contact with food”.

You could also plant the tomato in a large nursery pot, and then insert it into the decorative glazed container. Make sure both pots have drainage holes. This “double-potting” allows air circulation around the interior pot and eliminates concerns about questionable glazes.


vegetables in containers, green pot

Tomato ‘Rutgers’, sweet basil, and Italian parsley in a 20″ wide pot, April, 2019.


Plastic and Vinyl

These pots are inexpensive, readily available, and easily moved. They’re also the most likely to blow over in windy weather. But this is the first choice for most gardeners. Most of these pots last a few to several years in the sun, but, eventually, sunlight will degrade the material.

Wood Containers

Untreated cedar or redwood and half whiskey barrels are suitable for growing vegetables in containers. Check to make sure the pots drain freely.


Reservoirs and Other Considerations

Earth boxes and plastic pots often have built-in reservoirs or detachable saucers. And you can purchase caster kits and trellises for increased functionality. Some gardeners have the option to move their plants from the morning sun on one side of the deck to the afternoon sun on the other side; wheels make this so much easier.

Caution: some of the reservoirs are too deep before the water begins to exit the overflow hole. This can cause young plants to rot if the soil stays sodden all the time. You could drill a hole in the side, below the overflow hole, reducing the capacity of the reservoir. Or simply tilt the pot to allow excess water to drain. Older plants, full of foliage, will absorb water in the bottom of the planter, as long as it isn’t raining for several days straight.

Mosquitoes and Tree Roots

Add a piece of Mosquito Dunks to prevent mosquitoes from maturing in the secluded reservoir. They need only a few days in warm weather to complete their life cycle. Or tip the container to drain all excess water.

A pot sitting directly on soil anywhere near trees or shrubs will invite their roots to invade. Believe me, they will try to grow in that beautiful composted soil. Elevate the pot off the ground. This also facilitates drainage from the pot.

A few pieces of broken flagstone or “pot feet” raise the pots above the surface of the deck, helping to preserve the deck’s finish.

Saucers

Use saucers under the pots, but don’t let water remain in them for more than an hour. Plant roots need oxygen as much as they need water. Water in the saucer prevents air from entering the bottom of the pot.

Saucers aren’t absolutely necessary, but help if the soil has gone too dry. Just keep filling them until no more water is absorbed by the soil. In tall pots, though, the force of gravity will prevail over capillary action, preventing water from reaching the top of the root ball. So, you’ll also need to water the top portion of soil.

During long periods of rainy weather, I remove the saucers, or turn them upside down and keep them under the containers. This is impractical, however, if the pot weighs 50 pounds. Consider removing the saucer and using a few pieces of broken flagstone or brick to elevate the pots, if necessary.


Potting Soil

pot for new chives division

Reused polyester fiberfill covers the drainage hole.

Before filling the pot, place a small handful of polyester fiberfill (from a hobby store) over the drainage hole. This prevents soil from eroding through the hole, and prevents earthworms and other critters from entering. If you pull some of it through the hole to a point at the bottom, excess water will continue to drain if there’s soil in the little cone. This is helpful for potted plants that rot easily during long stretches of rainy weather (succulents, lavender, thyme, sage). This synthetic material doesn’t rot, so it’s reusable.

Use a good quality potting soil that drains well, but has peat moss to hold moisture. In addition to the peat moss, the mixture will have perlite (white particles that help drainage), pine bark chips (drainage), lime (to adjust the pH), compost or a starter charge of fertilizer, and often a wetting agent (to help the soil absorb water).

Amending the Potting Soil

Feel free to experiment with mixtures of different materials. Soils with a lot of bark (pine fines, wood products) in the mix tend to dry out faster. You can mix in smaller-particle loamy topsoil, spongy peat moss, aged manure, or compost to help slow water loss. Water-absorbing crystals might help, too. But moisten them before you add them to the soil. If you don’t, you’ll understand why I italicized the word “before”.

Adding a layer of undyed mulch on top of the soil helps conserve water and keeps the soil a bit cooler.

While some gardeners add rocks to the bottom of the pot, I never do. It was thought the rocks increased drainage, but the opposite is true; they create a perched water table in the layer of soil right above the rocks. Water percolating through the soil profile is held in this layer by capillarity, and often rots roots trying to grow there, limiting the useful volume of soil.


Headings

Page 1: Growing Vegetables In Containers, Sun? Not So Much, Vegetables In Containers: Which Ones?, and Starting With Tomatoes (Vegetables In Containers: Types Of Pots, Reservoirs and Other Considerations, Mosquitoes and Tree Roots, Saucers, Potting Soil (Amending the Potting Soil)…

Page 2: Transplanting the Tomato, Water, Going Away?, Staking, Fertilizing Vegetables In Containers, Blossom End Rot, On PH, Pollination), Peppers and Eggplants, Cucumbers, Squash (Squash Vine Borers), Green Onions (Bunching Onions from Seed), Leafy Greens, and Picking Vegetables In Containers

Return to the top

The Fiddle-Leaf Fig: Ficus Lyrata


“What’s Wrong With My Fiddle-Leaf Fig?”


There are few houseplants that exemplify architectural presence to the degree that Ficus lyrata does. Turn the pages in any home decor magazine or visit an online furniture showroom and you’ll see a statuesque fiddle-leaf fig in the corner of a perfectly-appointed living room. “That’s what mine used to look like,” you’re thinking, as you lament the pitiable specimen clinging to life in the spare bedroom.

Large plants can cost hundreds of dollars. Even a small bushy fiddle-leaf fig at the garden center can run $40.00 or more. It’s worthwhile to get this one right. The following suggestions might help.


Light


fiddle-leaf fig, Ficus lyrata

A fiddle-leaf fig grown as a standard.


Indoors, the fiddle-leaf fig prefers 2 or 3 hours of direct sunlight in the morning or early afternoon, and bright indirect light the rest of the day. During the summer months, keep the plant away from hot sun; it needs adequate air circulation between the plant and the window. Leaves can burn if they’re too close to the glass.

Skylights, light-colored floors and walls, and large windows that expose the plant to very bright indirect light for most of the day might provide enough light for the fig to remain reasonably healthy. But growth will be stronger in partial sun.

During the cooler months of the year, figs welcome a few more hours of direct sunlight.


Blame It On Hormones

The segment of a young stem (the internode) between leaf attachments (the nodes) will lengthen in response to lower light levels. Hormones cause cells in the shady side of the stem to elongate. That’s why the stem turns toward the light (phototropism).

A fully shaded stem will stretch as the plant searches for a stronger source of light. This stretch will be noticeable in the softer tip growth; woody stems won’t elongate.

If the leaves were stacked closely together at one point, and now they’re spaced farther apart along the stem, the plant is not getting as much light as it was before. Adequate sunlight keeps a plant more compact by preventing internode stretch.

Don’t place the plant in low light or in the corners of a room despite what you see in those magazines or in other media. If the fig tree doesn’t receive adequate light, it will begin to decline. One of the first signs that the plant is in decline is loss of leaves. And fig trees are notorious for signaling distress!


Watering the Fiddle-Leaf Fig


watering can

When the top 2″ or 3″ of soil in a large pot feels dry to the touch, it might be time to water. Don’t just feel the surface of the soil, though. You must feel the soil well below the surface. Although it feels dry on the top of the root ball, the soil could be moist enough 6″ down.

A narrow unfinished wooden dowel inserted most of the way into the soil will indicate the need for water if it comes up dry. Let it sit in place for 15-20 minutes before removing it.

Most moisture meters I’ve tested did not truly measure the moisture in the soil. The expensive models should be more accurate. Or lift the pot. After a while, you get a “feel” for how heavy a pot of moist soil weighs.

A full, leafy plant in a small pot dries faster than an overpotted sparsely-leaved plant. Don’t allow the entire root ball to go completely dry, but don’t keep it wet all the time either. If in doubt, don’t water, especially in cloudy weather. If there’s no sign of wilt, the fiddle-leaf fig can go another day or two without watering.

Never let the plant sit in a saucer of water for more than 20 minutes. Remove any water that is not absorbed through the drainage holes in that period of time. The soil in a tall pot will absorb water by capillarity up to a certain point. At that level, the force of gravity overpowers capillary action, so you will need to apply more water to the dry soil near the top.

A fig tree that is often overwatered or allowed to sit in water too long will suffer root rot and might not recover. Fungal infections from overwatering cause brown patches in older leaves. Eventually, all the leaves could fall off the tree.

Use water that is warmer than room temperature. In winter, lukewarm water for tropical plants keeps them more comfortable. Here, I keep indoor air temperatures between 60° and 68°F in winter. Water, tested with an aquarium thermometer, should read around 85° to 90° for plants such as figs, pothos, philodendron, Chinese evergreen, basil, alocasia, and African violet.

Water well enough to moisten the entire root ball. Not watering thoroughly results in dry soil lower in the pot, and roots there will die off. Applying small amounts of water a couple of times a week is not a good practice. Water thoroughly; then let the soil dry.


A Hasty Exit

Sometimes, water exits the drainage holes immediately after watering. In this case, the soil mass might have shrunk, which happens when soil has thoroughly dried out. Also, during transportation, the root ball might have shifted in the pot.

A gap has opened up between the inside of the pot and the outside of the root ball. Water finds the path of least resistance, following that air space to the holes at the bottom of the pot. But most of the soil stays dry. Fill the space with potting soil, using a dowel to firm in the new soil. Then the water will more slowly percolate through the root ball.


Humidity


sprayer


Fig trees, like many tropical plants, benefit from additional humidity when the air is dry. Simply grouping plants together will raise humidity in their vicinity, and all will benefit.

Using large saucers filled with pebbles and water will help raise humidity. The bottom of the pot should always be above the water level in the saucer. This arrangement is easier to maintain for smaller pots. If your home is especially dry, consider using a humidifier.

The positive effects of misting last only as long as there is a film of water on the leaves. And that’s only a few minutes. When water evaporates, a small amount of white mineral residue from the water persists on the leaf. It will build up over time but can be removed by wiping the leaves with a solution of horticultural oil on a soft cloth. Don’t use vegetable oil or mayonnaise. Look for horticultural oil. It’s a good idea to periodically wash the foliage to remove dust and grime.

Keeping foliage damp for long periods of time can initiate bacterial infections. Both young and older leaves can develop brown spots and yellow patches. These infected leaves will fall off.

Don’t place a fiddle-leaf fig where HVAC registers blow cold or hot dry air toward the foliage. Tender new leaves will turn brown on the edges. Louvered registers usually can be closed or use a deflector to change the direction of the air flow.

By the way, it’s normal for the fig tree to drop an older leaf or two now and then. As long as there is a net gain of healthy foliage, it’s probably not a concern.


Temperature  


Avoid placing fiddle-leaf figs in cold drafts. These plants, members of the mulberry family (Moraceae), originated in warm, humid areas of western Africa. They appreciate temperatures that are at least 63° to 65° at night and 68° to 70° in the daytime. But keep in mind that the higher the temperature, the lower the relative humidity.

If you keep your house in the mid 70’s in the winter, and are not uncomfortable dropping the temperature a few degrees, the higher relative humidity will benefit both you and your plants.


Fertilization


Plants purchased from garden centers are usually fertilized on a schedule, so ask a salesperson if your plant is due for fertilization. For the fiddle-leaf fig, and for all plants, it’s better to underfertilize than to overfertilize.

Too much fertilizer will burn the roots and could kill the plant. It will not make the plant grow faster! If you accidentally gave the plant too much fertilizer, flush a few to several gallons of clear water through the root system to flush out the excess. Use the fertile drained water in the garden rather than letting it go down the drain.

Use balanced fertilizers formulated for houseplants, such as 12-12-12 or 20-20-20, every 5 or 6 weeks during the growing season, usually March through October in the northern hemisphere. Follow dilution rates indicated on the package. Plants growing in less than ideal conditions, though, should be fertilized less often or at more diluted rates.

If the plant is in poor health, fertilize once at one-third the recommended rate, and try to improve the growing conditions. Wait to see how the plant responds before resuming the regular schedule. Fertilizing a plant that doesn’t need it or one that is frail (from something other than lack of nutrients) will exacerbate any problems it already has.

You won’t have to fertilize as often if you use slow-release (or timed-release) products. They simplify our gardening chores and are a great convenience. The prills are used up faster at warm temperatures and in moist conditions, such as when the plant is placed outdoors in the summer. For example, a timed-release product that says “6 months” on the label might need to be reapplied in 3-4 months at 85°.


Repotting  


When the roots are very crowded in the pot, it might be time to repot your plant. Consider doing this task in mid-spring to early summer. This will give your plant enough time to grow a strong root system before winter comes.

Don’t wait until autumn to do this, because shorter daylength and cooler indoor temperatures slow down plant processes. The fig will grow new roots very slowly, if at all, in average indoor conditions. That’s when a plant can suffer root rot. New soil that has no roots growing in it stays wet for a long period of time, which can damage nearby roots.

Choose a nursery (or ordinary plastic) pot that’s only 1-2″ larger in diameter. Score the outside of the root ball in several places with a knife. Or tease out roots from the surface of the root ball. This slight injury to the roots stimulates rapid re-rooting.

Don’t put a small plant into a huge pot thinking this will make it grow faster. It won’t.

All new soil goes below and around the original root ball, never on top of it. Heavily composted potting soil should have coarse sand and pine fines mixed in for better drainage. Firm it in well, filling all gaps between the root ball and the pot. For residential purposes, a large 7′ or 8′ tall plant can stay in a 14″ to 18″ pot indefinitely.

Since nutrition will be provided by fertilizer, there is no need to repot more often than every year or two while the plant is young. Recently repotted plants will not need fertilizer for at least 6 to 8 weeks, or until new soil has filled with roots.

Don’t worry if your fig is getting potbound. It’s easier to manage a fiddle-leaf fig in a somewhat tight pot. And it runs a lower risk of damage from overwatering.


Headings

Page 1: “What’s Wrong With My Fiddle-Leaf Fig?”, Light (Blame It On Hormones), Watering the Fiddle-Leaf Fig (A Hasty Exit), Humidity, Temperature, Fertilization, and Repotting

Page 2: But If You Want a Nicer Pot (Double-Potting), The Finishing Touches, Pruning the Fiddle-Leaf Fig (When To Prune), Outdoor Living (Before Moving Back Indoors), Insects and Mites, and Picture Perfect

Return to the top 

Pollinators: What’s All the Buzz About?


What’s All the Buzz About Pollinators?


Trips to the garden center and articles about landscaping and edible gardening. Radio garden programs and school field trips. What do they have in common?


fruit tree, honey bee


The subject of Pollinators will come up!


bee, pollenAnd for good reason: we rely on pollinators for more than a third of our entire food supply! Without the bees, butterflies, bats, and hummingbirds, we would not be able to feed our growing populations. Apple, peach, and nut trees, tomatoes and peppers. Zucchini, cucumbers, berry bushes, and farm animal feed. These are just a few crops that depend on these little critters. Trees, grasses, shrubs, and wildflowers also rely on pollinators for procreation.

Pollinators are attracted to the flowers’ sweet nectar, for carbohydrates, and to pollen for proteins and lipids. Insects and other pollinators gather nectar and pollen from the flowers they visit. During this beneficial arrangement, called mutualism, they unintentionally transfer pollen grains from one flower to the next.


The Fruits of Pollination

Pollen (the male component) deposited onto a receptive stigma (female) in a flower belonging to the same species initiates the fruiting process. The half set of haploid chromosomes in ovules and sperm are recombined during fertilization. (This is not the kind of fertilization that involves nutrients). This restores the full diploid chromosome count. The ovary (fruit) grows and toughens, protecting the seeds until the fruits are harvested or the seeds dispersed.

Fruits, though, aren’t limited to the recognizable apples, peaches, and pears on a grocery store shelf. Botanically, a fruit is any seed- or spore-bearing structure in flowering plants and other organisms. This includes wheat, a kernel of corn, a plump blueberry, a sweet cherry, or an heirloom tomato. Even fungi, including mushrooms, have “fruiting bodies”.

Animals attracted to these nutritious fruits aid in seed dispersal, although in many cases, the seeds themselves are consumed and digested.

And there are some anomalies in Mother Nature’s kingdom that permit us to call strawberries “fruits” or “berries”, although they are neither! The luscious little strawberry is the swollen receptacle, the part that connects the flower to the stem. The actual fruits, or achenes, are those little brown things on the outside. And there’s a seed inside each achene.

No pollination means no fruit in up to 80% of our edible crops!


Honey Bees


honeycomb, bees--pollinators

A honeycomb.


Honey bees (Apis mellifera) are not native to the Americas. They originated in Africa and migrated to Indonesia, Europe, and Asia. The early colonists brought them here, where they proliferated throughout the frontier, preceding the settlers’ expansion into new territory. Before this species was imported, thousands of other types of insects and animals pollinated flowers. And they still do!

As the nation’s population grew, more crops entered cultivation. Agriculture became even more dependent upon these easily domesticated pollinators.


almonds

Almonds.


California’s almond harvest relies entirely on bee activity for nut production. In fact, beekeepers ship 75% of the country’s “beehives for hire” to flowering almond orchards to ensure a good crop.

Of the many thousands of bee species found worldwide, the honey bee is the only one that makes honey. Forager bees returning to the hive with nectar give this bounty to the processor bees. Processors pass the nectar among themselves, helping to lower the water content. Then they deposit the liquid into cells and fan it with their wings to concentrate the honey. After that, they cap the cells with wax to seal the compartment.

Forager bees mix their saliva with the pollen they collected, which the processors place in the cells. Once they’re capped, the mixture begins fermenting, resulting in a substance called bee bread. Both types of cells, with pollen and nectar, also contain enzymes from the bees. Nurse bees feed this bee bread to all larvae, and the colony can access it for sustenance during winter. Enriched bee bread, called royal jelly, is reserved for queen larvae. Not all the honey is harvested by beekeepers; most is kept in the hives.


Why All the Fuss About Pollinators?

A syndrome known as Colony Collapse Disorder has raised the alarm to protect the honey bees. It is not precisely known what prevents most of the bees from returning to the hives. However, it is known that the queen, the larvae, and the honey have been abandoned. Without help from the drones and worker bees, the colony fails.

This is not a new phenomenon, though. Farmers a hundred years ago reported losing up to 90% of their bees to this “disappearing disease”.

CCD was named around 2006, when sudden losses affected increasingly larger proportions of total hive counts. By then, some honey bee operations had lost 50 to 90% of their hives. For the next 8 years, farmers reported hive losses averaging 33% per year.


Current Research

Research has pointed to several possible explanations, although combinations of factors are probably in play. In 2013, the U.S. Department of Agriculture and the Environmental Protection Agency joined forces to monitor CCD.

Various avenues of research are being pursued involving mites, fungi, loss of habitat, and lack of genetic diversity. Additional issues include chemical contamination of food sources and agricultural pesticides, notably the controversial neonicotinoids and fungicides. The Varroa mite and phorid flies are being researched for diseases that they could be vectoring into the hives.

Another question centers on pollen’s nutritional content from our crops, which might be weakening immunity.

In 2006, the honey bee’s genetic code was sequenced, opening up molecular approaches to treating CCD. Continuing research projects, through surveys, samples, and mitigation techniques overseen by the USDA, are getting closer to solutions. Unfortunately, there are no definitive answers for now.

Courses of action currently being followed include using antibiotics, fumigants, and genetic stock showing immunity to disease.


bee on pink aster flower, pollinators

Honey bee on aster.


So, What Can We Do About It?


To Spray Or Not to Spray

We can manage our properties in ways that are less harmful to the bees’ health. First, consider whether or not we really need to spray every insect that shows up in our landscape. No, of course we don’t!

Maybe you’ve been using a certain product for the last 30 years because it has delivered a 100% kill rate. Overkill? Okay, then, now might be a good time to reassess the need for it. By the way, most municipal recycling stations take old or unwanted containers of chemicals. Please don’t throw them in the trash or pour them down the drain or in the yard!

Make some changes today that help restore ecological health and predator/prey balance to your landscape.

If there are only a few pests damaging your plants, hand-pick them. Cutting them in half or squashing them is more humane than salting them or dropping them in a bucket of soapy water. Never use salt in the garden. A strong spray of water from the hose will wash away most of the aphids.

It’s unrealistic to be entirely free of insect life. And no one wants to live in that world.


Try Using These

In my gardens, I rarely use anything stronger than horticultural oil, organic Sluggo, or Bt. All of them are available in garden centers. See if you can tolerate less than perfect foliage or fruit in return for a cleaner environment. As I grow older, imperfection becomes increasingly acceptable.

Investigate some of the organic options, which are gaining favor throughout the gardening world. The products I mentioned are available from some manufacturers that have been licensed to print the “OMRI” logo (Organic Materials Review Institute) on their labels. Some companies choose not to pay the licensing fee, but their products are “just as organic” as the OMRI products.

Most importantly, don’t spray plants when pollinators are actively visiting them. The products mentioned above do not harm honey bees if used according to label instructions. Follow them carefully, paying special attention to dilution rates and time of application.

Bt

Bt (Bacillus thuringiensis) is a naturally occurring bacterium that paralyzes the digestive system of moth and butterfly larvae by changing the pH in their gut. After ingesting some of the Bt, the caterpillar stops feeding and dies a day or two later. It is more effective on younger caterpillars.

kale with caterpillar holes

Dinosaur kale with caterpillar holes.

I use it on the brassicas (broccoli, kale, etc.) to prevent utter devastation by caterpillars. Not using it at all means more than just a few holes in the leaves. The leaves disappear!

It works on gypsy moths, canker worms, cabbage worms, cutworms, squash vine borers, tent caterpillars, and the “very hungry caterpillar” known as the tobacco hornworm, among others.

The tomato hornworm looks similar to the tobacco hornworm (photo, below), except it has V-shaped lines and a black “horn” instead of a red one. But, again, if you see entire tomato stems denuded of their leaves, look for that hornworm first before filling the sprayer. There might be only one or two on a large plant. (Tip: if you see their poop pellets, look above them.)

Different strains of Bt also control fungus gnats, potato beetles, mosquitoes, and nematodes.


tobacco hornworm

Tobacco hornworm with parasitic wasp pupae.


Braconid Wasps

This species of Braconid wasp, Cotesia congregata, will kill or severely weaken the tobacco hornworm (photo, above). First, a female wasp lays eggs on or in the caterpillar. After hatching, the wasp larvae feed on the caterpillar’s internal tissues, and then pupate in the white cocoons.

Although it looks menacing, there’s really no need to spray this one. Simply remove the weakened caterpillar to the shrubs. The adult wasps will emerge, and then a bird or a lizard might finish off the caterpillar. The adult form of the hornworm is a type of hawk moth.


Headings

Page 1: What’s All the Buzz About Pollinators? (The Fruits of Pollination), Honey Bees (Why All the Fuss About Pollinators?, Current Research), and So, What Can We Do About It? (To Spray Or Not To Spray, Try Using These, Bt, Braconid Wasps)

Page 2: Planting for Pollinators (For Bees, For Butterflies and Moths, For Hummingbirds), Pollinators In the Landscape (Plant Selection, Host Plants and Nectar Plants, The Importance of Native Plants for Pollinators, Water and Minerals, Shelter), Attracting Pollinators to Your Garden, and National Pollinator Week

Return to the top


The Garden Jubilee, Hendersonville NC, 2018

2018


Hendersonville garden jubilee

Tillandsias planted in sea urchin shells, Sinbad Tropical Air-Plants, Supply NC.


One of my favorite things to do in Charlotte is to…leave Charlotte! It’s a lovely city, but sometimes I just have to get away to the mountains. It’s cooler there. I’m reminded of the lyrics by The Moody Blues, “…the trees are drawing me near…”


The Garden Jubilee


This past weekend, Henderson County, Lowe’s, and “Our State” magazine sponsored their annual Garden Jubilee Festival in beautiful downtown Hendersonville, NC. So, after checking the weather forecast, I decided to head out to the mountains on Sunday morning. Neither distance nor downpour would dissuade me from going.

Hendersonville garden jubilee

Briggs’ Garden Center.

I used to sell plants at venues such as this one. And, even though my garden space is very limited, I can probably squeeze one more little succulent onto the windowsill.

This was not my first visit to Hendersonville. When I moved to North Carolina a few years ago to help my mother, most of my belongings went into storage nearby. Sometimes I travel here just to visit my life in the container, and pick up a tool or a few pots…if I can reach them. I love this area of the state, and someday might call it home.

(***Update***: Finally made that move! But not here; instead, I found a home in Wilkes County. 12/15/21)

And what a fine day it was! We’ve been in a stormy pattern this past week, throughout the Carolinas, and, although it was a bit humid, it didn’t rain. This makes vendors very happy. How enjoyable to “talk plants” for a few hours, and to show appreciation for the effort that goes into making this event a success.


Who’s There?


potted bonsai plants

Plants from Sweet Valley Bonsai Nursery, Conley GA.


There were more than 200 vendors selling perennials, native plants, Japanese maples and other trees and shrubs. And colorful annuals and combination pots, carnivorous plants, lots of herbs and vegetables, and air plants. Nature-inspired jewelry, woodcraft, worm castings, and bonsai. Lawn furniture, tools, yard art, framed art, pottery, hand-made soaps, orchids, and, of course, succulents.

I bought sugar-free red raspberry jam, a small pot of Haworthia tessellata (a succulent with netted markings), some annuals, and bluets! I haven’t seen bluets (Houstonia caerulea) since I lived in West Virginia! It’s a tiny perennial with fine foliage and little blue flowers on the tips of the stems. Not sure if it’ll tolerate the heat here, but since when has that ever stopped a gardener from trying?


iris rhizomes

Bare root Iris rhizomes offered from Appalachian Iris Garden.


Then there was a bare-root iris called ‘Masai Warrior’ (photo, above) that had to come home with me. This is one group of plants that I never imagined becoming addicted to, but which I am becoming addicted to…

When I’m in the area, I always stop by the Mast Store on N. Main Street for a supply of (hard to find) butter rum Lifesavers and (hard to find) Necco wafers. I picked up some postcards and a new blouse, too. There are plenty of restaurants to choose from, and a bakery for something to enjoy on the ride home and for Mother.


A Good Day


driftwood bird feeder

Bird feeder artfully constructed from driftwood by Carter Creations, Haleyville AL.


Yes, it was a good day. Not only for the show, but also to see what had been planted in the raised brick planters all along N. Main Street. Anyone needing ideas on how to spruce up the landscaping around a shopping district should take a look at how Hendersonville did it—complete with trees, fragrant blooming shrubs (including HydrangeaFothergilla, Itea), grasses, annuals, artwork, and some really big boulders! Who wouldn’t want to live there?


carnivorous plants

Carnivorous plants, Sarracenia, from S and J Greens, Surry County NC.

All photographs were taken with permission from the vendors at the garden jubilee.


bluets at garden jubilee

Bluets, here one year, gone the next. Alas, too hot.


(***Update*** : The little pot of bluets made it through the winter, although it wasn’t much of a challenge, and is in full bloom (photo, above). During last summer’s heat, the pot was heeled into the garden, where the plant did not receive hot afternoon sun. 3/22/19. Unfortunately, it succumbed during the hot summer in 2019.)

And…not so sure Neccos are still available…boo-hoo… I’ll look when I return for the next garden festival.


Return to the top

Shrimp, Vegetable, and Rice Stir-Fry

2018


Shrimp, Vegetable, and Rice Stir-Fry


head of cauliflower

Cauliflower just picked from the garden, planted last fall.


Here’s an easy recipe I’ve adapted from something seen last year in “Southern Living”. Mother took some shrimp out of the freezer, and I had just picked this beautiful head of cauliflower. Add a few other ingredients, and — Bingo, a Winner!


shrimp for shrimp, vegetable, and rice stir-fry

Raw shrimp.


Ingredients


  • Rice, cooked separately (flavored, brown…your choice)
  • 1/2 lb. to 1 lb. shrimp, cleaned
  • 2 Tbsp. vegetable or canola oil
  • 1/3 tsp. kosher salt
  • About 1 or 2 cups fresh green beans or haricots verts, cut into 1 1/2″ pieces (frozen will work)
  • 1 1/2 cups small fresh cauliflower florets
  • One or two ‘Lunchbox’ sweet peppers for color, diced (optional)
  • 3 green onions, green and white parts sliced separately
  • Leftover vegetables (optional)
  • 1 large or 2 medium fresh garlic cloves, minced
  • 1/4 tsp. tsp. dried ginger
  • 1 large egg
  • 1 tsp. butter
  • 2 or 3 Tbsp. coarsely chopped fresh basil
  • 2/3 tsp. toasted sesame oil
  • 1 or 2 Tbsp. soy sauce


The Process


  • First, start cooking a pot of flavored rice, or plain rice, if you prefer, according to package instructions. I use Rice Pilaf. Don’t overcook it, or it will be sticky. Set it aside when it’s done (about 15 to 20 minutes), and start the rest of the recipe after you get the rice going.
  • Heat a large non-stick wok or other pan. Add half the oil, half the salt, and the shrimp. Cook hot, turning occasionally, until shrimp is no longer clear. This takes only 2 minutes or so. Remove shrimp; set aside.
  • Add the green beans, cauliflower, and ‘Lunchbox’ pepper to the remaining liquids in the pan, along with the garlic, ginger, the rest of the oil, and the white part of the green onions. Stir frequently for about 2 minutes, at medium-high heat. This is a good opportunity to use up leftovers, such as broccoli, dinosaur kale, peas, and carrots.
  • Add the rest of the salt and 2 1/2 to 3 cups cooked rice. Cook and stir until rice is just a bit dried. This takes a minute or two. Lower heat if necessary.
  • Push the rice mixture to one side, and add butter to the open area. Add the egg to the butter, scramble, and chop in the pan while it’s cooking. When the egg is done, mix it into the rice.
  • Add shrimp, soy sauce, basil, and toasted sesame oil. Stir to heat evenly.
  • Garnish with green parts of green onion.

This recipe for Shrimp, Vegetable, and Rice Stir-Fry takes only half an hour to prepare, and serves 2 to 4. Yummy.


Return to the top

How To Grow Succulents To Perfection!


Speaking Of Succulents


Earlier today, I gave a presentation on succulents at the annual meeting for the Charlotte (NC) Council of Garden Clubs. We spent a few hours at Southern Gourmet in Matthews, and, with their help, and someone else’s laptop, I was able to get through all the pictures. Thank you, CCGC, for the invitation.


succulents

Oscularia deltoides in bloom.


What Is A Succulent?


Succulents, by definition, are plants that store water in their leaves, stems, and roots. They evolved in arid regions (primarily in the Americas, Africa, and Australia), and can endure intense sunlight and prolonged drought and heat. By providing favorable conditions, we can grow colorful succulents in sunny windows. Over the past several years, they have been enjoying a resurgence in popularity.

Decades ago, I purchased young bare-root succulents from a California wholesaler for my horticultural business. Unwrapping each little parcel was like waking up on Christmas morning as a child. These were plants I’d never seen before—Titanopsis, Pleiospilos, Graptopetalum, Lapidaria—and were destined for sale at the Westover Flea Market when I lived in nearby Morgantown, West Virginia.

Although there are many species of hardy succulents in the Sedum and Sempervivum genera, this article addresses primarily the tender succulents, which require temperatures above freezing.


Plenty Of Light For Succulents


Haworthia cooperi, succulent with windowtip leaves.

Haworthia cooperi showing leaftip windows. Light refracts inside the leaf, even if the plant is almost buried in desert sand.

Adequate light is one of those conditions that must be met for these plants to show good color and characteristic form. Some succulents, such as Haworthia, Gasteria, Aloe, Epiphyllum, and Christmas cacti, grow well with at least 4 hours of direct sun, and very bright indirect light the rest of the day.

Crassula, Echeveria, Euphorbia, and Sedum appreciate even more light, at least 5 or 6 hours.

Cacti (succulents with spines or thorns), living stones, and Sempervivum (Hens and Chicks) need abundant sunshine, at least 6, but preferably 8, hours per day.

Direct sunlight keeps the plants colorful and compact. If the plants receive enough sunlight most of the time, they will tolerate the occasional stretch of cloudy weather without deteriorating.

Artificial light helps during the short days of winter or when the sun refuses to shine. When necessary, I use 2-tube 4′ long shop lights with “daylight” LED or fluorescent tubes. Be sure to place the plants within a few inches of the tubes for at least 16 hours per day.


When Light Is Insufficient


How do you know when your succulents are not receiving enough light? Plants that grow in the shape of a rosette start growing faster (photo above, left). The center leaves outgrow the outline of the plant, stretching toward the light. And the new part of the stem grows thinner. That happens when winter sunlight is scarce, as in this Graptopetalum pentandrum ‘Superbum’ (photo above, right).

In poor light, strong colors begin to pale, and purple, red, or orange highlights fade. New leaves become thinner. The internodes (stem segments between the nodes, where leaves are attached) on younger parts of the plant will lengthen (photos, above); this appearance is diagnostic for low light levels.

There’s a huge difference between “direct sunlight” and “bright indirect light”. A few hours of indirect light offers very little benefit to succulents; they need the strong sun. And, without adequate light, succulents are more susceptible to damage from overwatering.


More Sun For Cacti


Cacti also suffer in inadequate sunlight. The spines on new growth grow farther apart.

In upright species, the stem becomes narrower relative to the older part that was growing in good sun. If you see that the top half of a cactus stem is thinner than the bottom half, and the spines are not as closely clustered, the plant is not getting as much sun as it was before. Solution? More sun!

The colorful tops of grafted cacti (photo, above right) lack chlorophyll, and depend on the green stock plant for sustenance. Also, the graft is more sensitive to harsh sun and should be placed in cooler morning sun.


cacti are succulents too

Variability among cacti.


Light And Water


Light and water are inextricably linked in plants. When the sun doesn’t shine, photosynthesis, transpiration, and respiration slow down, and soil moisture sits unused around the root system. Play it safe and water succulents only on sunny mornings and when the forecast calls for sunny weather for the next couple of days.

Under normal conditions, allow the soil to dry completely before watering again. Although the soil feels dry on the surface, there’s usually some moisture in the lower half of the root ball.


glass, cactus

Glass container with two open sides.


These plants never need misting. Water that sits on the foliage can initiate rot, so shake it off or use a towel to dry it. Never let succulents sit in a saucer of water.

Although glass terrariums are very popular, I do not recommend succulents for terrariums. Unless the glass container has large openings for heat to escape (photo, above), succulents in direct sun will fry in terrariums! They also rot in high humidity or if there’s the slightest amount of excess water in the soil.


Pots


shallow bowls for succulents

Succulents and shallow bowls (Pike’s Nurseries, Matthews NC).


Succulents prefer to remain quite potbound, where roots are tightly packed in the pot. Plants in oversized pots are more likely to be damaged by overwatering simply because the greater soil volume holds more water for a longer period of time.

Shallow glazed containers, such as decorative bowls and ceramic bonsai trays, make delightful homes for succulent combinations (photo, below). Include rocks, gravel, and driftwood in these dish gardens to create a natural-looking scene from nature.


succulents in glazed bonsai tray

Small-growing succulents in a bonsai tray.


Tall glazed pots hold a reservoir of water that probably won’t be used by the plant. More appropriate for succulents, terra cotta (Italian for “baked earth”) pots are porous and help the soil dry faster when water vapor passes through the sides.

Repotting, if needed, should be done early in the growing season so a strong root system can develop before the days begin to shorten in autumn. Growth slows during those months. Always use pots that have drainage holes.


Potting Soil


Fenestraria succulents

Fenestraria species showing leaftip windows.

The soil used for succulents should be gritty for quick drainage. If needed, amend regular potting soil with perlite, coarse sand, horticultural grit, pine fines, charcoal, expanded rock, or PermaTill. “Cactus and Succulent” soil is available, although quality varies widely among brands.

When repotting, all new soil goes below and around the sides of the root ball, never on top of it. Planting too low in the soil results in rotten leaves and stems.

In their natural environment, certain succulents, such as Haworthia, Aloe, and Gasteria, have contractile roots. If blowing sand exposes the crown or the top of the root system, the roots are able to “pull” the plant lower into the soil. Amazing!


Living Stones

The ground-hugging living stones, or split-rock, succulents (photos, below) are extremely sensitive to overwatering. Use small clay pots and very gritty, gravelly soil. There should be only a very small percentage of organic matter in the soil.

These plants are well-camouflaged in their native southern Africa, almost indiscernible from the rocks around them. Some of the genera available for purchase include Lithops, Lapidaria, Gibbaeum, and Conophytum.


Fertilizer


Succulents grow slowly, so fertilize only 2 or 3 times during the growing season, from March through October.

Use products formulated for indoor houseplants, with small numbers on the package, such as 8-8-8 or 10-10-10. Those three numbers represent the amounts of nitrogen, phosphorus (phosphate), and potassium (potash) in the product. All products list these three primary macronutrients on the label in that order: N-P-K.

It’s better to underfertilize than to overfertilize, so use a more diluted rate than the recommendation on the label. For succulents, dilute it to half-strength.

Lithops and other living stones are extremely slow-growing, so they’re hardly ever fertilized. Use a very dilute higher phosphorus fertilizer only when the plant shows new growth.


Sempervivum (hens and chicks) can be tucked between rocks, and they’re hardy perennials.


Outdoors For The Summer


succulents in my sunny window

Light blue Echeveria in bloom.

Succulents summering outdoors benefit from higher light levels and often take on vibrant coloration. Jade plants (Crassula) develop red margins on their leaves in brighter sun, and Echeveria becomes even more colorful.

Monitor closely during periods of high heat. Above 85° F, provide light shade during the hot afternoon hours. Potted plants are more susceptible to stress from extreme conditions than those planted in the ground.

Transition your plants to outdoor conditions gradually. Give them just a couple of hours of early morning sun or dappled shade for the first few days. A plant that was growing indoors all winter will probably suffer sun scald if immediately placed outdoors in full sun. This hardening off process gives plant tissues time to toughen up so they can withstand more intense summer sun. Sunlight causes the cuticle, a protective waxy layer on the leaf surface, to thicken.

This beautiful variegated succulent, called Kalanchoe ‘Fantastic’, has a variably feathered band of cream between the pink edge and the greenish-gray base of the leaf (photo, below). I’ve had this plant for over a decade, and protect it from dropping temperatures in autumn by moving it indoors well before frost. Stronger sun and more stressful conditions might cause it to turn redder in color. It recovers, though, in less extreme conditions.


kalanchoe thyrsiflora, a succulent called "flap jack"

Kalanchoe thyrsiflora ‘Fantastic’, growing outdoors for the summer.


Protect your plants from excessive moisture. After receiving some rain, place the dampened succulents under cover. Check to make sure the drainage hole allows water to drain freely.


And Back Inside In Autumn

As autumn temperatures fall into the high 40’s at night, it’s time to bring your plants indoors for the winter. The more sensitive types, including Echeveria and Graptopetalum, come indoors before the thermometer drops below 55°. Prolonged exposure to cold, wet conditions will cause succulents to deteriorate, so check the forecast!


Pruning Succulents


joyce chen scissors

Joyce Chen scissors.

If your plants are growing too large and cannot be accommodated in the space available, consider cutting them back. Stretched-out plants benefit from selective pruning in early summer. New growth will soon emerge.

Cacti can be temperamental, so be careful if you choose to lop off the tops. For cacti, this is best done in late spring/early summer for a full season of recuperation.  Stronger light available in the summer causes the plant to respond with more compact growth. They might grow a few new stems below the cut.

During transpiration, water is “pulled” through the plant’s vascular system from the roots, to the stems, and then through the leaves and out to the atmosphere. This process is the primary manner in which moisture is removed from the soil. Therefore, avoid extensive pruning if any plant was recently watered. Because there’s less foliage on the plant after pruning, the soil stays moist for a longer period of time. Wait a few days, or until the soil is almost dry, before pruning.


Headings

Page 1: Speaking Of Succulents, What Is A Succulent?, Plenty Of Light For Succulents (When Light Is Insufficient), More Sun For Cacti, Light And Water, Pots, Potting Soil (Living Stones), Fertilizer, Outdoors For The Summer (And Back Inside In Autumn), Pruning Succulents

Page 2: Propagation Of Succulents (Rooting Cuttings, Stem Cuttings, Leaf Cuttings, Division, Seed), Root Rot And Insects (Root Or Stem Rot, Insects and Mites), Flowers, Time To Grow That Collection!

Return to the top

Cilantro: Love It Or Hate It, And How To Grow It

Updated 6/18/2024


Why We Either Love Or Hate Cilantro


Cilantro is one of those herbs that can elicit memories of mouth-watering foodie forays to Mexico, China, and India, or… maybe not! People who know it either love it or hate it. Count me among those in the latter category. But, as a grower, I included it in my farmers’ market inventory, displaying it downwind from where I stood.


young potted cilantro

Young potted cilantro.


Those who dislike cilantro have a spot in their genotype resulting in taste and olfactory receptors that can detect aldehyde compounds. This substance reminds us of soap or something metallic. About 15% to 20% are not keen to keep it in the kitchen, although in those countries where it is a dietary staple, a greater percentage of the population like it. Closer to 25% of my customers did not use cilantro.

Cilantro originated in Iran, and spread to southern Europe, northern Africa, and southeast Asia. It has been cultivated for several thousand years. In fact, the oldest remains of coriander were discovered in pottery found in a dry Israeli cave. They were dated to approximately 8,000 years ago!

This article describes some of the problems gardeners face when growing this plant and offers some solutions.


The Nature of Cilantro


bee on cilantro flower

Cilantro flowers.

The difference between cilantro and coriander (Coriandrum sativum) is based simply on which part of the plant you’re referring to. Cilantro refers to the leaves and coriander refers to the seed.

Cilantro is a short-lived annual that prefers cool weather. All parts are edible, including the roots, although leaves and seeds are consumed most often. Other parts might be bitter.

As a member of the Apiaceae family, its flowers are umbel-shaped, as indicated in the former name for the family, Umbelliferae. This family of plants also includes parsley, dill, chervil, celery, fennel, and carrot—all characterized by their umbrella-shaped flowers. The current family name is a clue that bees (such as the honey bee, Apis mellifera) are attracted to the flowers.


Cilantro Substitutes

Another plant with similar flavor grows better in the summer than most varieties of cilantro. Mexican coriander (Eryngium foetidum), also in the family Apiaceae, from Mexico to South America and the Caribbean, is popular in the cuisine of the area. Slow to grow from seed, culantro (with a “u”) develops leaves with raspy edges, so use the younger foliage in cooking.

Vietnamese coriander, Persicaria odorata, a perennial native to southeast Asia, also has cilantro-like flavor. It’s in the Polygonaceae family and is related to the smartweeds and knotweeds.

Papalo (Porophyllum ruderale or P. tagetoides, in the Asteraceae family) is a herbaceous annual found in Central and South America. It has cilantro flavor, apparently with mint and arugula mixed in.

Although these herbs can substitute for cilantro, this article describes the plant we’re more familiar with—Coriandrum sativum.


Consider Climate


In the moderate climates of the southern U.S., cilantro planted in the autumn grows beautifully, but slows down as cold weather approaches. It often survives winter conditions with a little protection or with none at all. From the end of winter into spring, it resumes growth.

Before long, warm temperatures signal the plant to flower. When the new leaves become small and finely dissected, flowering soon follows. Pull the whole plant and use the harvested leaves. Time to start a new crop! It is best used fresh; most flavor is lost when dried.

Successive crops of cilantro grow from spring through fall in the northern half of the country. A prolonged summertime heat wave, though, even far into the north, is the beginning of the end for this crop of cilantro. Try shading young plants during hot weather, and water with cold water to prolong the harvest.


Winter Protection


greenhouse for cool season vegetables

The small greenhouse in Maryland.


Cilantro is not likely to survive severely cold winters without the protection of a cold frame, a greenhouse, or a sunroom. Don’t coddle it with indoor temperatures that are comfortable for you. Grow it very cool, even cold (40’s to low 60’s F), for longevity and the best quality.

An unheated greenhouse offers adequate conditions for continued growth through the winter in the southern half of the country. Farther north, cilantro will grow in such a structure with minimal heating. Remember to open vents to prevent overheating in the daytime, and close them in mid to late afternoon.


Coriander


coriander (cilantro seeds)

Cilantro seedpods, or coriander.

If you’re growing cilantro for the seeds (coriander), let the plant mature naturally. Small white flower clusters will develop fruits, each of which contains 2 seeds. The round seedpods are fairly large and can be harvested when they are light brown and dry, but don’t wait until they start rolling away! Consider loosely wrapping the flower clusters with a fine mesh bag in order to catch the seeds.

Another way to harvest the seeds is to pull the plant and hang it upside down, in a mesh bag or a paper bag that permits air flow. Just make sure there are seeds already developing before you uproot the plant.

Or, let Mother Nature do her thing. Let the plant stay in the garden, go to flower, and set seed. The varieties of cilantro I’ve grown are open pollinated and not hybrids, so the next generation will look and taste like the parent generation. Ripened seeds will fall to the ground and germinate. But you might see young seedlings growing a few feet away, or at the end of the sidewalk. Maybe the critters that reside in your garden will be the only ones to reap this harvest.


What Cilantro Likes


cilantro

Cilantro leaves.


When growing cilantro, remember these 5 things: cool, young, fertile, moist, and fast. I’ll call them “Cilantro’s 5 Needs”. Customers often complained that the transplants they’d just bought from the garden center immediately went to seed. The following tips will help you grow a great crop of cilantro.

Keep a supply of seeds on hand, in case nurseries in your area don’t have the plants. Cilantro seeds germinate and grow rapidly. Starting cilantro from seed is one of the easiest projects for beginning gardeners. Seeds remain viable for a few years if they’re kept cool and dry.


1. Cool

Ask for cilantro in February or March, or whenever the “shoulder season” occurs where you live. Although that’s weeks before the last spring frost, that’s precisely what cilantro likes.

Make sure the plants are properly hardened off. That’s a process that gradually introduces cooler, sunnier, and breezier conditions to a greenhouse-grown plant. Any plant that is coddled in the warm, almost still environment inside a greenhouse is very likely to suffer stress or even death when suddenly exposed to the rigors of the outdoors.

During the cooler months of the year and during the transitional shoulder seasons, grow cilantro in full sun. At higher temperatures, provide direct sun in the morning hours, and light shade the rest of the day. You might have better results growing cilantro in the summer if it is planted in dappled sun or light afternoon shade cast by a tomato plant.

Because garden soil is cooler than soil in a pot, summer-grown cilantro will last longer if it’s planted in the ground. A thin layer of mulch will keep the soil a bit cooler.

Pot Color

herb pot.If your only option is growing cilantro in a pot, choose a light-colored pot during the warm months and a dark pot in the cooler months. Why? Because the color of the pot reflects or absorbs energy from the sun.

Summer sun beating down on a lovely cobalt blue ceramic pot can heat the soil to over 100°F. Conversely, a dark pot absorbs the sun’s energy in winter, and keeps the soil unfrozen a while longer.

If you want to include cilantro in a combination planter, plant the cilantro on the east or north side (in the northern hemisphere) of the pot. The soil there will be cooler than that on the south or west side.


2. Young

When purchasing plants from a grower, look for the youngest ones you can find. However, they shouldn’t be so young that the root system is too fragile to survive the transplant. Unless you need fresh cilantro now, avoid large plants in small pots.

If the plants are potbound, where roots tightly fill the pot, they are stressed. They should not stay in their little pots so long that the cramped quarters check their growth. If they have not been fertilized, or if they are showing signs that even a young plant’s leaves are getting finer in texture, they are stressed. And stressed cilantro plants bolt, or flower prematurely. 

I’ve seen cilantro with one seed per pot and I’ve seen it sown with 50 seeds in a pot. You want to find the happy medium, the right number of seeds to give lots of leaves to pick, but not so many that they intensely compete with each other. When I grow cilantro for sale, I sow 3 to 5 seeds in a pot. 

Since cilantro is a short-lived plant to begin with, its days are numbered with any of those warning signs: tight pot, too many seeds, finely dissected leaves, poor color. And if they’re already in flower, plant them, pick what you can, and let the bees collect nectar and pollen…for a little while. You can try cutting them back hard. If weather is favorable, you might get some regrowth out of them, but not usually.


3. Fertile        

organic fertilizers

Organic fertilizers, including worm castings, bat guano, blood meal.

Dark green leafy herbs, such as parsley, basil, arugula, mint, and cilantro, need rich, fertile soil. Nitrogen, one of the primary macronutrients, is needed on a regular basis and in larger amounts than other nutrients.

Nitrogen is highly mobile, so it is easily washed through the soil by rain or irrigation. Potted leafy herbs should be fertilized every 1½ to 3 weeks, depending on soil quality, frequency of irrigation, temperature, and pot size.

Without enough nitrogen, plants lose their rich green color and become pale. New growth slows down, and older leaves turn yellow and eventually die. More importantly, poorly colored leaves taste bitter or, at least, off-flavor.

Many plant experts recommend not fertilizing herbs, but I disagree. And, no, fertilizer doesn’t make cilantro toxic! Fertilizers break down into simpler molecules, and the plant recombines these molecules into compounds needed to carry out cellular processes.

N-P-K

For cilantro, use fertilizer that has a higher first number on the package. Examples: 10-6-4, 24-8-16, and fish emulsion’s 5-1-1. Those 3 numbers on the product label refer to the percentage content of Nitrogen, Phosphorus (phosphate), and Potassium (potash) in the formula. They always appear in that order on any label: N-P-K. 

Nitrogen is essential for building chlorophyll, the green pigment in foliage and stems. Phosphorus stimulates flower and fruit production, and root development. Potassium affects cell wall strength and hardiness. This is a simplified depiction of the roles these 3 major nutrients play; there are many other ways they contribute to plant growth and function.


4. Moist

Keep soil evenly moist—not too dry, which causes wilt, and not too wet, which rots the roots. Once root rot has claimed the root system, it will not recover. Make sure the soil drains well, and don’t let the plant sit in a saucer of water. A well-established potted plant likes a thorough watering—that is, until water begins to exit the drainage hole.

Sometimes water rushes out the drainage hole immediately after application. This occurs when the soil has dried too much, causing the root ball to shrink from the inside of the pot. The next time the plant is watered, the water will find the path of least resistance, which is the air gap between the inside of the pot and the root ball. Most of the root ball will miss the opportunity to absorb water. Fill the gap with potting soil and use a wooden dowel or chop stick to firm the soil, filling the space. This will slow down percolation, allowing the entire root system to pick up moisture.

Potting soils with a large percentage of coarse material, such as perlite and pine fines (or “wood products”), drain and dry quickly. Products with finer particles, such as peat moss, compost, and loam, tend to hold water better.

Garden soil well-enriched with compost, aged manure, or planting mix encourages deep rooting. Lower levels of soil, 8-12″ down, are cooler and have more moisture, contributing to a longer life for this herb. Cilantro is less susceptible to root damage in freezing weather when grown in the ground.

Cilantro doesn’t mind cool water from the tap or even refrigerated water, but never use warm or hot water. Check the temperature of water coming from a hose that has been sitting in the sun; it might be too hot for any plant!


5. Fast

An herb that completes its life cycle in a short period of time, like cilantro, can’t be forced to live as long as other plants do. It’s not in its nature! You can have cilantro almost year-round, though, if you start seeds every few weeks or purchase new transplants, if they’re available.

Weather permitting, sow a few seeds 4″ apart in a row, about 1/2″ deep. If the soil isn’t too cold, seeds should germinate in a week to 10 days. As the seedlings grow, thin to 1 or 2 plants per 4″ of row; thinnings can go right to the kitchen.

Another option is to experiment, sowing a few seeds in each of several spots around the garden. You’ll soon notice where they grow best in any particular season.

In soils with high clay content, loosen the bed to a depth of 12-14″, incorporating (not layering) pine fines or grit to increase drainage. Amending the top 6-8″ of the garden bed with lots of organic matter encourages roots to grow quickly. Apply fertilizer every few weeks to encourage leaf production.

You can begin harvesting some of the leaves soon after transplanting, or a month or so after seeding. Pick mature outer leaves first but allow the young leaves in the center of the rosette to continue growing.


Food Curry Indian Cuisine Asian - tortugadatacorp / Pixabay


Return to the top

Headings

Page 1: Why We Either Love Or Hate Cilantro, The Nature of Cilantro, Cilantro Substitutes, Consider Climate, Winter Protection, Coriander, and What Cilantro Likes (Cool, Young, Fertile, N-P-K, Moist, Fast)

Page 2: What Is Eating My Cilantro? (Rabbits and Deer, The Black Swallowtail Butterfly, Safe Haven, Raising Caterpillars, At The Olney Farmers’ and Artists’ Market), More Insects and Diseases (Insects and Nematodes, Diseases), and The Best Variety I’ve Grown

So, What Can I Do With All Those Greens?


“So, what can I do with all those greens?”


When there’s a bumper crop of kale, collards, spinach, Swiss Chard, or any of the other greens (which are so good for you, by the way), this is what you can do. Whether your winter greens are looking a little tired, or you just need to remove them to make space for the warm-season vegetables, many are asking that question.


curly kale, Swiss chard, dinosaur kale, arugula

Curly kale, Swiss chard, dinosaur kale, arugula.


Cook ‘n’ Freeze Those Greens


  • Have a few zip-lock sandwich bags handy.
  • Select healthy-looking greens and wash thoroughly. Inspect carefully for slugs, caterpillars, and other insects.
  • Cut and remove the thickest of the midribs.
  • Separate the varieties, or combine them.
  • Cut into wide ribbons, or thin, if you prefer.
  • Get out the Big Wok, or any other large, heavy pot.
  • Add 2 Tbsp. olive oil and 1 Tbsp. butter, more or less, to the pan. Heat it up.
  • Add a clove or two of minced fresh garlic. Saute until it begins to turn a pale golden color, but not brown (browned garlic is burned and tastes awful).
  • Add the greens. Lots of them.
  • Turn the greens continuously over low-medium heat, so they’re well-coated with the oil. You’ll see that they wilt down quickly.
  • Season with salt and pepper (optional).
  • When evenly wilted, allow to cool somewhat.
  • Ladle half a cup or a cupful into each sandwich bag.
  • Squeeze out the air, seal up the bags, and set aside to cool.
  • Put them into a larger freezer bag or plastic container.
  • Freeze. Use within a few months.


pizza with greens


In the Kitchen


***Update*** July 11, 2019: I harvested all the remaining Swiss chard and kale from last year (photos, below) and cooked them up this morning. There was a cup of leftover chicken stock, so that, too, was added to the pot while the vegetables cooked.


Next time you make soup or an omelet, bring home a pizza, or serve rotisserie chicken over seasoned rice, add a bag of these magical greens. Add these greens to a dish of lasagna or eggplant parmigiana. Simple! Put a bag in the refrigerator in the morning to thaw for that night’s dinner. Even canned soup from the grocery store is more nutritious after adding these greens. Fresh leaves added when the soup is heating up wilt almost instantly and double the vitamin content.

When you realize how simple this is—and how good it is for you—you’ll plant a whole lot more this fall. It’s easy to sneak these greens into your cooking, and your finicky eaters might not even notice!


veggie omelet with microgreens

Veggie omelet with fresh microgreens. You could also use a bag of thawed greens in the fold.


Return to the top

Did She Say Sustainable Bunching Onions?

Updated 3/8/2024


The Onion Patch


In a patch of soil under the cold frame in the old Maryland garden, I grew several dozen Japanese bunching onions. Although the frame was cold in the winter, it didn’t freeze, and those little plants provided us with all the green onions we needed for 5 or 6 years without replanting!

So, how do you get sustainable bunching onions? After describing two species of onions and sowing seeds, I’ll explain the “sustainable” part.


sliced bunching onions

Bunching onions purchased from the grocery store.


Two Species of Onions


Allium Cepa, the Bulbing Onion

Allium cepa is the commonly grown bulbing onion. Onion sets, small immature bulbs, can be purchased from garden centers in late winter and sometimes in autumn. Plant onion sets a few inches underground, and pull them as green onions before they form bulbs. Planting sets every couple of weeks will provide a continuous harvest.

Left longer in the garden and spaced properly, though, the bulbs will grow larger. Your garden’s latitude, which affects day length in the growing season, will determine which onion varieties will successfully form bulbs. Short-day onions are grown in the southern United States, and long-day or intermediate varieties are grown farther north.

Check with your local agricultural extension office for names of varieties that will mature as bulbs in your region. Bulbing onions also can be grown from seed or purchased in bunches of young seedlings, but most varieties require more than 110 days to mature.


Allium Fistulosum, the Bunching Onion

The variety I grew in the cold frame was called ‘Nabechan’. This variety is a member of the species, Allium fistulosum. Japanese bunching onions, or scallions, don’t grow bulbs. Several varieties are available, and all remain straight-sided, with minor swelling at the base. Bunching onions are available as seeds for home gardeners. 

Bunching onions are the ones usually sold in small bunches at the grocery store (photo, above). I use them in salads, omelets, stir-fries, and soups. Once or twice a week, I add a green onion to the spinach, mushrooms, a colorful lunchbox pepper, and kale in the veggie omelet. It’s really good with cheese and microgreens or slices of avocado in the fold…maybe some bacon on the side, and rye toast.

Although both species of onions can be harvested as green onions, the ones I sold at farmers’ markets were ‘Nabechan’ bunching onions. They were ready for the market when the 15 or 20 seedlings in 6″ or 6½” pots approached a harvestable size. Here’s how to grow them, if you’d like to give it a try.


Starting Seeds For Bunching Onions


Sow the seeds 1/4″ deep and about 1/4″ apart in 6″ pots filled with seedling mix. Water gently, so the seeds aren’t dislodged. They germinate well at temperatures around 70° to 80° F.

When the seeds germinate, give them full direct sunlight (6 hours at least), and lower the temperature. They thrive with cool to moderate temperatures, but avoid subjecting them to frost at this early stage. Inadequate light creates weak seedlings and feeble roots.

Keep the soil moist. Onions have shallow roots, and fail when grown too dry. Fertilize every 2 weeks with fish emulsion, Sea-Plus, or any complete fertilizer.


Transplanting Seedlings Of Bunching Onions

Once they’ve grown a few inches tall and are easier to handle, the seedlings will need to be spaced farther apart.

First, fill the new pot or pots with dampened potting soil to within 4-5″ of the rim. Yes, that seems too low, but more potting soil will be added as the seedlings grow. Firm it in lightly.


Where To Place the Crown

Now, gently ease the young plants and the soil mass out of the pot. Don’t let exposed roots dry out during this process. Cover them with a damp towel as you work.

You’ll see the 3 main parts of the onion: the green leaves, the white roots, and the region between the leaves and the roots, called the crown.

Hold up the seedling’s leaves and transplant it into the new pot. Space seedlings 3/4-1″ apart. It might be easier using a pencil to poke a hole into the soil for the roots. Plant with the crown at the soil surface, and lightly firm the soil around its roots. Add a small amount of potting soil over the bases of the stems to stabilize them. Plant them in wider nursery pots, if you choose, where they can remain until harvested. But they won’t require a deep pot.

Water the seedlings and place the pot in direct sun. But avoid harsh hot sun for a couple of days while the roots recover.


Growing Long White Stems


whole bunching onions


The trick to getting those long white stems is simply to plant the seedlings lower in the soil. Excluding light prevents chlorophyll from developing, blanching the stem. Leeks, another member of the Amaryllidaceae family, get their long white stems in the same way.

Every 10-14 days, add soil between the seedlings, an inch or so at a time, while holding the leaves upright. Although this sounds contrary to normal horticultural practices, the onions will recover. Chlorophyll in the covered stems will be reabsorbed by the plants.

Older leaves will turn brown and can be removed. But strong new foliage will emerge while the underground stem continues to thicken. It’s important to give seedlings full sun for optimal photosynthesis.

The pot is finished when the soil surface is about 1″ below the rim of the pot. The bunching onions will have 4″ or 5″ of white stem below the green leaves (longer than in the photo of store-bought onions, above).

Introduce the seedlings to stronger sun and cooler temperatures outside in the daytime. Protect them from frost while they’re hardening off. With good growing conditions (direct sun, moderate to cool temperatures, moist soil, and fertilizer every 2 weeks), the onions can remain in pots until they’re harvested.


Here’s Another Method of Seeding Bunching Onions


'Evergreen' bunching onions, seedlings in a pot

‘Evergreen’ bunching onions.


In the photo above, I started seeds about 1½” above the bottom of a 6½” pot, and spaced them farther apart. Adding soil every couple of weeks blanched the stems. Spacing them farther apart from the beginning obviates the need for transplanting.

I tilted the pot on the plant stand outside so the seedlings could catch the rays of the low sun during the shortest days of the year. On cold nights, the pot came indoors. These are seedlings of a variety called ‘Evergreen’.


Planting Bunching Onions Outdoors in the Garden


If you want to grow bunching onions in the ground, plant the pot of seedlings as a unit, covering the stems with 1″ to 2″ of soil. With good soil preparation and careful monitoring, young seedlings can be transplanted into the garden at this stage, weather permitting.

Seeding directly into prepared garden soil is another option if you can monitor progress and keep pests away. Remove weeds when they’re small; onions’ roots can be damaged even with shallow cultivation. By the way, deer and rabbits don’t eat onions.

As the seedlings grow, occasionally hill up soil around the base of the plants to lengthen the white stems. Within about 2 months of seeding, the bunching onions are ready to pull as needed in the kitchen. Younger plants are especially delicate and tender as a garnish. If they’re spaced an inch apart, the seedlings won’t need to be thinned.

Non-bulbing onions are easier to pull from the soil than other types of green onions that have begun to form bulbs. That’s why I prefer growing Japanese bunching onions for green onions. If needed, use a narrow trowel or a butter knife to help pry them from the soil if you want to harvest the whole plant or if bulbs have started forming when using onion sets.


Negi Onions

Bunching onions traditionally are sown in cell packs with several seeds per cell. Later, they’re planted out without separating the seedlings, allowing them to grow and be harvested as a “bunch”. But, in order to grow “sustainable” bunching onions, they need to be grown separately from each other.

In the popular “Negi” method of growing bunching onions, seedlings are spaced farther apart from the beginning and hilled deeply over time. These scallions are older and larger than the ones I grow, resembling leeks.


Here’s the Sustainable Part


green onion root


This is where bunching onions become sustainable bunching onions.

Instead of pulling out the entire plant when harvesting, insert a knife into the soil a few inches, making a cut through the stem 1/2″ to 2/3″ above the root system. By leaving the bottom of the stem and the roots intact, the plant will regenerate and give you another green onion after 2 or 3 weeks of favorable weather! 

Experience will sharpen your aim, but whether the stem was cut too high or too low, it doesn’t matter. It’s all edible. If you removed the whole stem accidentally, just cut off the bottom 1/2″, with roots, and replant 2″ below ground. It’ll take longer to grow, but it probably will survive.

With some protection in colder climates, it’s possible to harvest mature bunching onions all winter long. That’s why I grew them in a cold frame. Just be sure to plant enough of them. Depending on the temperature, they might remain semi-dormant and not regrow until the soil warms up. And what a surprise to see them vigorously re-emerge in the spring to provide another year of harvests!


“Can I Plant Bunching Onions From the Store?”


bunching onion, green onion rooting

Cut stems from the grocery store, later planted into a pot.


Sure can! Buy a bunch of green onions (as in the photo at the top), looking for those with clean white roots. Choose the stems you intend to use in cooking, and cut 1/2″ above the crown. Don’t let them dry out, and plant 2″ deep into a pot of lightly moist soil as soon as possible. Adding more soil later will lengthen the white part of the stem. Cut stems initially planted too deeply might exhaust themselves before reaching the light.

In the photo above, I cut these bunching onions over a period of a few days, and placed them in a clear plastic bag with 2 drops of water. Until a pot of soil had been prepared, the bag sat on the counter, in bright indirect light. You can see the older ones already sprouting. Growing onions in water, even short term, can turn them mushy and really smelly. That’s why planting them directly in soil is preferred.

Keep the pot moist and sunny, and you’ll see a green onion growing probably within 7 to 10 days during the growing season. In the middle of cold winter weather, though, keep the pot in a cool but sunny window indoors or in a cold frame. Soil that freezes could kill the root at this stage. Pick the entire plant or cut the stem when it has grown to the desired size.


Bottoms Up!


If you’re growing green onions from onion sets, this is one of the easiest crops to grow. Seedlings take a little more patience. Because they retain good flavor and substance for a long time, you can harvest what you need and let the rest of the bunching onions continue to grow. Sometimes, all I need is a single green leaf for a small omelet or a garnish.

Here’s to sustainability! Oh, and the reason why those ‘Nabechan’ bunching onions in Maryland failed after several years: contractors replacing the siding on the house trampled them to mush.


green onions in a pot

These were planted as onion sets in late winter, before starting seeds of bunching onions. They’ll be harvested as green onions or when they have small bulbs.


Return to the top

Basil Downy Mildew: Symptoms and Solutions

2018


healthy green basil

Healthy basil.


Basil Downy Mildew In the U.S.


Basil downy mildew is a devastating disease caused by the pathogen Peronospora belbahrii. This disease has been active in the United States since 2007, and for several years before that in Europe. BDM is thought to have originated nearly 90 years ago in Africa.

This water mold targets a very specific host—basil. Just basil. There are related species that attack other members of the Lamiaceae family, such as coleus, but it’s basil I’ll concentrate on today.

I’m writing about it now because some of you might have given up growing basil. If you’ve struggled with it the last few years, I’m going to offer some tips so you can once again enjoy your home-grown basil. And then I’ll share my favorite Tomato-Basil Salad recipe, a summertime staple around here.


Symptoms Of Basil Downy Mildew


basil downy mildew

Yellowing between main veins.


Let me begin by describing the symptoms of BDM. The plants might start the season looking great, all green or purple and… oh, that fragrance!… You probably harvested several clippings, using them in salads, on pizza, in tomato sauce. What’s summer without fresh basil?!

And suddenly it went downhill from there. The leaves developed blotchy yellow or pale green sections between the main veins. The discoloration then spread over most of the leaf surface. The leaf reverse (the lower surface) was covered in a fuzzy gray film early the next morning, followed by little black dots.

Those tiny black specks are the fruiting structures (sporangia) of basil downy mildew. They puffed out microscopic spores that were carried on the breeze to infect other basils. The plants became spotty overall, and never regained their strength.

In only a few days, the affected leaves turned yellow. Some of the tips of the stems remained green, but, eventually, they, too, showed symptoms. And most of the leaves dropped off.

You fertilized, you spoke kind, encouraging words. And you commiserated with friends. Yet nothing helped. How disappointing!


Spores and Relative Humidity


All is not lost. With some insight into how this disease works, you might be able to stop the progression of BDM and get more mileage out of your plants. Another option is to start with healthy new transplants and take precautions so it doesn’t happen again.

You might have noticed that basil downy mildew started showing up and spreading quickly during wet or humid weather. Good observation! In fact, spores require around 85% relative humidity for a few hours in order to germinate.

Even if the weather is quite dry or only slightly humid, the basil still can become infected. How? As the nighttime temperature drops, the relative humidity climbs. After a period of high humidity, the spores begin to germinate on susceptible varieties of basil.

Let’s say the daytime temperatures are in the 80’s F, with comfortably low humidity around 40%. With no rain in the forecast, you might think you’re in the clear. The problem is that the period of time just before dawn is when the relative humidity is at its highest reading of the day. It could easily reach 90%! The lower the temperature drops during the night, the higher the relative humidity rises.

So…limiting humidity around basil can keep the plant just outside the reach of the disease. If you live in an area that gets extremely hot and dry in the summer, your basil might survive unscathed. That’s happened only 2 or 3 times in my gardens since BDM started showing up in the mid-Atlantic and southern states.


Reducing Humidity


no basil downy mildew on potted plants brought indoors at night

Potted sweet basil.

How do you limit the humidity? Simple! That’s why I’m writing this now, before everyone gets their basil plants into the garden. Here are some suggestions for you:

Basil grown in the garden should be situated in an area with excellent air circulation. Don’t plant it in the middle of a bed, with neighboring plants all around, or next to a fence.

Planting basil near a paved surface, or surrounded by paved surfaces, has the benefit of having less square footage that’s able to absorb moisture. The goal is to reduce as many sources of moisture as possible. And that includes overhead watering! If you’ve read the posts about tomatoes, you’ve learned the importance of keeping foliage dry.

BDM can show up in one neighborhood while entirely missing the next one. It might not appear at all if the summer is very hot and dry and if the nights don’t cool down very much. Or it might not show up until rain returns after a long, dry summer.

Certain weather conditions, such as frequent rainstorms and persistently high humidity, foster the widespread and enduring presence of basil downy mildew. Once the spores are in the air, growing basil is a lost cause… Or is it?


The Ultimate Solution: Potted Basil


herb garden, toad

This pot will come inside at night, after releasing the toad.

Basil grows well in containers. An airy exposure up on the deck could be a good spot for it. Or sitting on a brick patio, or under the umbrella when it’s especially hot. Check your plants every day for those tell-tale light-colored blotches, and remove those leaves immediately.

If it looks like a losing battle, move the pot indoors for the night. That’s right! Get used to it if you want to—no, must—have fresh basil.

As long as you’re not living in the middle of a bog, the humidity indoors will never reach the levels required to grow BDM. And then place the basil back outside the next morning. On rainy days, keep the potted basil indoors, in a bright spot. Yes, it’s work, but worth the effort.

A few varieties of basil don’t get the disease, and plant breeders are working feverishly to bring more to market. Naturally, all of my favorites, including ‘Genovese’, ‘Yevani’, ‘Mrs. Burns’ Lemon’, ‘Tuscany’, and ‘Siam Queen’ DO get basil downy mildew. And, yes, I DO bring in the potted plants at night once the disease has reached the area or before rainy weather comes near.

Those that, in my experience, seem to be resistant are ‘Cardinal’, ‘Kapoor tulsi’ (holy basil), and ‘African Blue’ basil, but they’re not my favorites in the kitchen. ‘Eleonora’ is another that has been advertised as having “intermediate” resistance, but I have seen advanced cases of BDM on this variety.

(***Update***: New cultivars developed by Rutgers University will be worth trying. Look for ‘Rutgers Devotion DMR’, ‘Rutgers Obsession DMR’, ‘Rutgers Passion DMR’, and ‘Rutgers Thunderstruck DMR’. I grew ‘Rutgers’ Obsession DMR’ outdoors all summer, in 2021, and still have a cutting growing in the kitchen window. This variety did not develop any symptoms of BDM. Success! 1/22/2022)

Always remember: when you think about basil, think about how relative humidity can affect its health.


tomato basil salad

Tomato-basil salad.


Tomato-Basil Salad


Here’s a recipe for Tomato-Basil Salad, like Caprese salad, but with extra bits:

  • Ripe tomatoes, cut into chunks, juice included
  • Yellow or white onion, thinly sliced
  • Cucumber, alternately-peeled (no need to peel the thin-skinned ‘Diva’), halved and sliced
  • Mozzarella cheese, medium chunks
  • Sweet basil, usually ‘Genovese’ for us
  • Extra virgin olive oil
  • Red wine vinegar, or white wine vinegar if you prefer
  • Fresh Italian oregano, chopped; dried will work
  • Salt and pepper to taste

Measurements aren’t that important. Tomatoes are the main ingredient, and you can use all reds or mix the colors. Not too much onion. Certainly enough basil, and don’t use so much oregano that it overpowers the rest. Mother likes hers more vinegary. Oh, and get a nice loaf of bread for dunking. Enjoy!


Return to the top

Tomatoes: Stake, Water, and Prune

2018


How Are the Tomatoes Doing?


'Rutgers' tomatoes on a staked plant

A staked ‘Rutgers’ tomato.


The recent stretch of warm, sunny weather has helped the tomatoes and peppers double in height. It’s time to secure them to stakes or to cage them if you haven’t already done so. Once the last of the broccoli side shoots have been harvested from our garden, a zucchini will go there. And cucumber ‘Diva’ will be planted after the cauliflower has been picked, but that’s a while off.

Check with your local Master Gardeners office to see what else is safe to plant now, or look online for a handy planting schedule available from your local agricultural extension office. Keep in mind, though, that these are only guidelines. Weather trends and microclimates will dictate what’s safe to plant.


And Peppers?


Healthy pepper plant with red and green fruits

Sweet bell pepper.

Since the varieties of peppers that I planted don’t grow taller than 3′, the tomato cages will be used to support them. The metal cages are only about 3′ tall, once the prongs are anchored into the ground. These short cages are useless for tall tomatoes.

Peppers and tomatoes are in the same family (Solanaceae), by the way, so they need many of the same growing conditions.

As the plants grow, steer the young side shoots through the openings. A sweet bell pepper loaded with 5″ fruits will appreciate the extra support for the limbs. A high wind or a pelting rainstorm can cause heavy branches to split from the main stem. Small-fruited pepper plants can be staked, caged, or allowed to grow without support.

Keep an eye on the weather, though. A forecast calling for windy conditions might prompt you to put something in place before the storm arrives.


Determinate Or Indeterminate Tomatoes


Tomato varieties are categorized as either determinate or indeterminate. This pertains to their habit of growth and when they set fruit.

Determinate tomatoes generally stay short and set fruit within a concentrated period of time. Varieties such as ‘Roma’, ‘Celebrity’, and ‘Patio’ permit the grower to harvest most of the fruits at once—good for canning or making sauce. Although determinates tend to be short, some varieties will grow quite vigorously and might require staking.

Indeterminate tomatoes, such as ‘Big Beef’, ‘Sun Gold’, ‘Nepal’, and ‘Cherokee Purple’, continue growing throughout the season, and often produce right up to frost.

Even though both the cherry tomato ‘Sun Gold’ and the heirloom ‘Cherokee Purple’ are indeterminate tomatoes, the latter may grow to only 5′, whereas ‘Sun Gold’ can grow twice as tall. Learning about the different varieties you want to grow will indicate what kind of staking or caging you’ll have to do. You can always add a taller stake later, if needed.


Staking


trellis

Because we grow indeterminate tomatoes, we use 7′ or 8′ tall vinyl-covered metal stakes. Oak or bamboo stakes are available, as are collapsible wire cages. A decorative trellis is both attractive and functional. Anchor the supports far enough into the ground to prevent them from falling over.

Shoe laces make perfect ties for tomato plants. They’re soft and they can be retied as the stems grow in girth. You can also use twine, twist-ems, clothesline, or anything else that won’t cut into the stem. Some gardeners use ties in a figure-8 fashion, around the stake and around the stem. Or simply loop it once or twice around the stem and stake.

Check frequently through the summer to make sure the stem isn’t being constricted by the ties. Don’t tie so tightly that there is no room for movement or growth. Some bending and swaying in the breeze strengthens the plants.

Staking elevates foliage off the moist soil, decreasing the likelihood of disease.


orange cherry tomatoes

‘Sun Gold’ cherry tomatoes.


Young Plants


Consider the balance between the amount of foliage and the number of fruits. A young tomato plant with only a few leaves will not be able to support ripening fruits. It could show early symptoms of nutrient deficiency.

Examine the newest growth at the top of the plant. The tip growth of a very young plant might show signs of withering, or turn tan in color, or simply refuse to grow if it is also trying to supply nutrients to ripening fruit. Boron, a micronutrient needed in tiny amounts, is critical for new growth. The growth tip will sacrifice itself and future growth in order to do what a plant wants to do, which is to set seed in its fruits.

It’s best to remove all fruits on a very young plant. A sparsely-leaved plant struggles to get enough carbohydrates (the products of photosynthesis) into the fruits. This contributes to slow growth and mediocre flavor.


Suckers


As the tomato plants grow, add more ties, every foot or so, to prevent the tops from flopping over. At the same time, take a look at the stems, and decide which suckers will have to be pruned. Don’t confuse the suckers with the flower stalks that arise from the stems. The flowers are yellow and quite conspicuous.


Some more basic terminology: A sucker is the common name for the new shoot emerging from the angle between the top of a leafstalk (the petiole) and the stem (photo, above left). The side branch starts out as an axillary bud and grows rapidly. There are axillary buds above most leaves, and the branches, too, will sprout even more suckers. So, you see why it’s important to inspect your tomato vines frequently.

tomato leaf

A tomato’s compound leaf.

Suckers that are not removed will soon become main stems. The main reason I sucker tomatoes is for increased air circulation. This helps prevent many kinds of diseases from infecting the plants in this humid area. Many gardeners have commented that limiting the number of stems results in fewer, but larger, fruits.

Also, tomatoes will develop better color and flavor, and contain more antioxidants, if they’re exposed to gentle rays of the sun. This is especially true for the “black” tomatoes, such as ‘Black Krim’, ‘Kakao’, and ‘Cherokee Purple’.

A few more terms for you: The tomato leaf is a compound leaf, composed of the petiole and several leaflets, attached by petiolules. And the main rib of the leaf is called a rachis.


How Many Main Stems?

tomato sucker

Index finger points to a sucker.

Tomatoes are weedy plants and will grow lots of side branches. For most of the growing season, I keep only 3 or 4 main stems growing on each plant. Near the end of the season, I’m less particular about controlling growth. By then, I’m thrilled to harvest anything off the vines.

Since each of those side branches will try to grow, any suckers that I don’t want to grow into main stems will be removed.

Limiting the growth of foliage encourages better air circulation, helping prevent diseases from ruining your crop. Some growers permit only 1 or 2 stems to grow, but I don’t believe enough products of photosynthesis get to the ripening tomatoes. Just a hunch.

The plant has one thing on its mind, and that is to procreate! In order to do that—well, yes, after pollination—the fruits have to be adequately nourished until the seeds mature. And since all nourishment comes from photosynthesis, the plant needs to have enough leaf surface, and enough direct sunlight, to carry out this vital function.


Can I Root Those Suckers?

If, in early summer, you wish you had planted more tomatoes, you can root healthy 4″ to 5″ long suckers. They root quickly in 3″ or 4″ pots of moist soil, kept humid and in light shade. Simply bury the whole stem in each pot, keeping only a couple of leaves above the soil surface. You can also root them directly into the garden, kept moist and shaded until roots become established.

If it wilts all the time, remove a leaf or two from the bottom of the stem, or cut large leaves in half. A big, leafy cutting won’t be able to root or absorb water fast enough to keep the leaves turgid. Make sure the cutting has good contact with moist soil. Perhaps rooting cuttings in a glass of water will work better for you.

When the cuttings start growing, gradually introduce them to more sun before they’re finally planted out. Tomato suckers root fast, so if you don’t see results within 10 days, start new ones.

The sucker is genetically identical to the parent plant, so the fruits will be the same. This applies to both heirlooms and hybrids.


Limb It Up


Since the first suckers will appear near the bottom of the plant, you might be inclined to let them develop as Main Stem #2 and Main Stem #3. Always keep disease prevention in mind when dealing with tomatoes. I prefer to snip out those bottom suckers and, instead, let the plant start branching 10″ or 12″ above ground level.

As the stem grows taller, remove the bottom leaves, too. That’s right; this permits free air flow underneath the plant. And the soil surface will dry faster, further decreasing the incidence of disease.


red tomatoes

Headings

Page 1: How Are the Tomatoes Doing?, And Peppers?, Determinate Or Indeterminate Tomatoes, Staking, Young Plants, Suckers (How Many Main Stems?, Can I Root Those Suckers?), and Limb It Up

Page 2: Sun Scald, Blossom End Rot: Tomatoes and Peppers, Watering Tomatoes, Deer, and They’re Weeds, After All!

Return to the top


Aphids and Braconid Wasps

2018

Here Come the Aphids and Other Pests!


Springtime here in North Carolina was quite cool, but the temperatures are now in a more predictable, springlike pattern. For weeks now, we have been seeing outbreaks of certain insects, notably aphids.


ants and aphids

Ants feed on honeydew, the sweet excrement of aphids.


Onion Aphids


If you have chives, one of the first perennial herbs to emerge, you might notice aggregations of little black insects clinging to the leaves. Unless you look closely, you might think it’s just dirt. These onion aphids can be squished between your fingers, or use a strong squirt of water from the hose. Luckily, aphids are easily killed. If you must do something, mix up a solution of horticultural oil or insecticidal soap in a spray bottle.

There are around 5,000 species of aphids, and they come in almost every color of the rainbow. They are most common in temperate zones around the globe.

A mouthpart called the stylet pierces phloem tubes of stems and leaves, and sometimes roots, of a wide variety of plants. Phloem carries products of photosynthesis, rich with sugars and other nutrients in solution, so it’s no surprise aphids target the phloem tubes. Aphid saliva can distort the leaves, curling around and protecting the feeding insects from predators. Unchecked infestations can remove so much sustenance from a seedling that vigor is severely compromised.

The photograph above shows aphids, and ants feeding on their “honeydew”, or excrement. The presence of ants often is an indication that aphids are nearby. Ants fiercely protect aphids, and the food they generate, from predators.

Viral diseases are spread by aphids, and can kill your vegetables. This is why it’s so important to inspect your transplants by looking at the growing tip, the stems, and the reverse (bottom) of the leaf, where aphids tend to congregate. Look very closely, because the color of the aphid is often the color of the plant, a very effective camouflage.


Amazing Aphids

onion aphids

Onion aphids from chives.

Aphids reproduce asexually (no males; this is called parthenogenesis) by giving birth to cloned live female aphids (viviparity), or nymphs—lots of them. They bypass the egg-larva-pupa stages. And about a week later, those young aphids will begin to give live birth to another generation. So, you can see how their populations can build exponentially if unchecked.

When aphids are actively reproducing, they’re present in large numbers, feeding from those nutrient-rich phloem tubes. You might notice the honeydew deposited on the foliage below them. This clear layer of sweet and sticky residue often attracts ants. Eventually, black sooty mold spores will land on the honeydew and develop into a dark film that cuts off light to the leaves.

(***Update***: These black onion aphids in the photograph dropped off a chives plant that I had brought inside in January, 2021. Dinner for the betta.)

In autumn or when food becomes scarce, winged adult aphids mate, after which females will lay eggs. This ensures genetic diversity and broader territories. Eggs overwinter, and hatch into wingless females in spring.


Ladybugs


Now you might be wondering, “Why are there so many aphids so early in the year?” Populations of various insects build up in the local environment as numbers of predators gradually increase. You sometimes see a ladybug on a warm winter day, but it won’t be until all the “food is on the table” that you’ll see greater numbers of ladybugs and other predators coming in for the feast.

The larva, or immature form, of the ladybug is a grayish-black and orange crawler (photo, above) that resembles an alligator. Although the adults feed on aphids, the larvae consume huge numbers of them. Always identify the insects before deciding if they’re “good” or “bad”. Look up your local Agricultural Extension Service websites for excellent photographs and advice.


tiny praying mantis on wood hyacinth flowers

Tiny young praying mantis on flower of Hyacinthoides hispanica, the wood hyacinth.


Braconid Wasps


braconid wasp, aphids

Female braconid wasp preparing to inject eggs into aphids.


The ladybugs will be joined by many other beneficial spiders and insects, including green lacewings, hover flies, praying mantises, and the rarely noticed and underappreciated species of Braconid wasps. No, these wasps won’t make anyone run for cover. They’re hardly noticeable slender insects, and many are less than 1/8″ long.

Braconid wasps lay eggs inside the aphids, where the immature larvae kill the aphids by feeding on their tissues. That’s called endoparisitism. Then they transform into adult wasps, emerging from the dried aphid exoskeleton and flying away to mate and to carry on the family tradition. Depending on the species and temperature, it usually takes 2 to 3 weeks for the adult wasp to emerge.

Adults also occasionally consume aphids. Each female braconid wasp can parasitize about 200 aphids in her brief lifetime.


Aphid Mummies


aphid mummy

Aphid mummy.


What remains after the parasitic wasp emerges from the hollowed-out aphid is a black- or tan-colored shell, called an aphid mummy. If your eyesight is good, or with the help of a magnifying glass, you can see the hole where the wasp exited the aphid (photo, above).

Unless the aphid infestation is going to cause irreparable harm to the plant, let nature take its course, or just wash most of it away with water. Attacking every unidentified and supposedly “bad bug” with the arsenal you’ve assembled from the garden center upsets the balance that Mother Nature has provided. Accepting a blemish here and there is a small price to pay for choosing to foster a healthy ecological system in your own yard.

When harmful insects get way ahead of the game, though, it’s time to take appropriate action. But try to use a more benign approach that will accomplish the goal without poisoning the environment. Try squishing them or spraying a blast of water from the hose first. That should remove most of the insect pests.

If that’s not satisfactory, use a targeted application of insecticidal soap or horticultural oil, not a wholesale spraying of the entire garden. Over time, you’ll notice fewer insect pests and more beneficials as your property approaches a natural equilibrium between the two. But first, learn to identify the commonly found insects in your area—both the good ones and the bad ones.


Sustaining the Population

To keep populations of Braconid wasps around your property, you’ll need to provide the adults with sources of food when few aphids are around to sustain them. The adults look for nectar in the small flowers of the carrot family (Apiaceae), including parsley, cilantro, dill, and wild carrot.

broccoli arcadia flowers

Broccoli ‘Arcadia’ flowers, April 2020.

Their diet also includes nectar from flowers of brassicas, such as broccoli, kale, collards, arugula, and land cress, appearing in late winter to spring. The early flowers of fruit trees, shrubs, bulbs, and other plants also provide sustenance.

I don’t pull out the older spring blooming greens in the vegetable garden until the beneficial insects have had a chance to feed from them. Consider letting some of the early blooming garden weeds hang around for a while, pulling them before seeds mature.

Several generations of these little wasps will populate your garden each year. There are thousands of species of Braconid wasps, each one seeking battle with a particular enemy. Include a variety of native trees, shrubs, and flowers for the species of insects that are native to your area. Planting species that flower at different times of the year helps the insects gain a sustainable presence in your yard.

If you’ve ever seen how quickly aphids can take over, you’ll want to encourage Braconid wasps to remain on the property in order to control their populations. Avoid spraying anything in the garden, if at all possible, which kills beneficial insects as well as the harmful ones.


chives in flower

Chives in flower, after overwintering outdoors.


A Little Help For Our Friends


So, before you snip some leaves from your chives plant for tonight’s baked potato, look for these tiny black onion aphids. You might find some of the aphid mummies left behind on the chives or on the backs of the leaves of overwintering broccoli or kale.

Once you’ve learned how to identify braconid wasps, learn to live with these tiny warriors by providing what they need. Help them help you…


Return to the top

Tips For Growing a Tomato Plant


A Tomato Plant For Your Garden


tomatoes


Anyone who has grown a tomato plant and experienced sublime sun-ripened perfection understands the joy that awaits those new to this endeavor. But it takes a little skill. Starting with light, I’ll explain the basics here. And be sure to read related posts to get the full picture.


How Much Sun For a Tomato Plant?


young 'Cherokee Purple' tomato on the vine

‘Cherokee Purple’ tomato.

A tomato plant requires at least 7 hours of direct sun. Sure, many sources of information recommend 6 hours, and you’ll certainly have some success. But, for best performance, give it 7 or 8 hours or more.

Tomatoes produce more flowers in a sunnier location. And their leaves will make more “food” (carbohydrates resulting from photosynthesis) that keeps plants growing and producing. More hours of sun maintains drier foliage for a longer period of time. And drier foliage means fewer problems with disease.

Now if you don’t have a spot that gets 7 hours of sun, but it gets 5, you might be able to get fruits from a cherry tomato plant. Instead of being disappointed with the lower-yielding but yummy heirlooms or the big beefsteaks, try ‘Sun Gold’ or the other cherry tomatoes. ‘San Marzano’ and ‘Juliet’ also are worth considering for five or six hours of sun. Because they are high-yielding, you’ll probably harvest something.

But, in full sun, cherry tomatoes produce so many fruits that you’ll be giving them away by the bowlful. Really…they’ll have produced hundreds of fruits on a tall vine by the end of summer.


cherry tomato photo

A “hand” of cherry tomatoes.


Options

If you have the space, some experimentation might yield promising results. Try growing tomatoes in large pots on the sunny patio, and plant greens where there isn’t enough sun for tomatoes. Or perhaps a corner of the sunny rose garden can be given over to edibles that need full sun, if the soil hasn’t been treated with chemicals.

I don’t often recommend cutting down trees. Removing a silver maple that seeded near the vegetable garden, however, will make the garden more productive, and, if permitted, that’s the way to go. When selecting trees for an average size property, choose small-growing trees and locate them far from gardens requiring full sun. Consider their mature size and where the shade will fall from one season to the next.


More Light For a Tomato Plant


Here are some tricks to coax more production out of your edible plants if the sun exposure is less than ideal:

  • Plant in as sunny a spot as you have, perhaps near a white or light-colored wall, which will reflect more light toward the tomatoes. Or, using a little resourcefulness, create a reflective wall with tall stakes and white fabric.
  • Lay repurposed light-colored empty mulch or potting soil bags on the soil, on the sunny side of the plants. Anchor them with stones or bricks. Punch lots of holes in the plastic so the plants will get enough water from rain or irrigation. Don’t allow water to collect for more than a few days or you’ll have trouble with mosquitoes.
  • Porous synthetic or woven mulches are available from garden supply companies. White mulch helps reflect the light and also keeps soil cooler. Additionally, a source of light from below the plant confuses insect pests and might cause them to take up residence elsewhere.
  • Use a few stakes instead of one, or a wide trellis, for a tomato plant, tying main stems farther out from the core of the plant. This will get more light onto leaves that otherwise would have been heavily shaded.


Crop Rotation


zucchini with yellow flowers

Zucchini.

If space allows, locate your tomatoes, peppers, potatoes, and eggplants (all members of the nightshade family) where none of them have been grown for the last 3 or 4 years. This crop rotation lessens the likelihood of heavy insect and disease outbreaks from one year to the next. It prevents disease spores and insect larvae from building up in the soil and infecting new foliage.

Tomatoes and other members of the nightshade family (Solanaceae) are affected by certain insects and diseases that generally do not bother other families of vegetables. Cucurbits (zucchini, cucumber, squash) and brassicas (broccoli, kale, cauliflower) have their own problems, as do the other plant families.


Disease Resistance


You’ll notice on seed packets, labels, and in catalog descriptions, a series of capital letters after the cultivar’s name. Those letters are initials for the diseases to which that cultivar is resistant. For example, ‘Big Beef’ tomato has the letters AS, F2, L, N, TMV, and V after its name. They represent the diseases Alternaria stem canker, Fusarium wilt (races 1 and 2), Grey leaf spot, Nematodes (not a disease but a tiny worm), Tobacco mosaic virus, and Verticillium wilt, respectively.

Most hybrids have been bred to withstand some disease pressure. Heirlooms are more susceptible to disease, but the flavor of their fruits is superior to that of many varieties commonly found at garden centers. If you have the space, try growing one or two heirlooms in addition to disease resistant varieties.

(***Update***: In 2019, I grew 2 heirloom tomato plants in large pots, and both succumbed to disease well before the end of the summer. We had an especially wet and humid season, but I knew the odds when I’d bought them. Still, each one produced several dozen fruits before removal.)

Susceptibility to disease varies from one area of the country to another, so you might never see some of the diseases that pop up elsewhere.


red tomatoes


Weather plays an important role, too, and there’s nothing we can do about that. Choosing at least one disease resistant tomato plant is wise.

To a certain degree, we can manage the environment and our gardening practices in ways that discourage insects and diseases. I almost always include an heirloom tomato plant in my garden, knowing that it is more vulnerable to disease, but it’s worth the effort.


Disease Prevention For a Tomato Plant


For gardeners with limited garden space, crop rotation is not an option. In that case, consider mulching your plants with coarse, chunky material, such as pine bark mulch. Having a dry surface under the plants, as opposed to a moist surface that can harbor disease organisms, is another line of defense. Those large chunks will dry faster than the surface of clay soil or shredded hardwood mulch. Several inches of seed-free straw or dry oak leaves also work.

Porous landscape fabric is another barrier you can use. This product is available in both biodegradable and synthetic materials.

Using pine mulch or fabric will help keep dormant spores of soil-borne diseases, deposited from previous crops, from splashing up onto the low-growing foliage, infecting new plants. Always remove diseased foliage to the trash. Spores can, of course, be blown in from elsewhere, but it’s always best to exercise that ounce of prevention when we can.

Yes, problems can crop up. But usually there is enough fresh produce harvested from your own back yard to consider the garden a worthwhile project.


Air Circulation and Suckers

tomato sucker removed

Tomato sucker removed.

Air circulation around each plant is another factor in disease prevention. I plant tomatoes 4 feet apart in the garden and permit only 3 or 4 main stems to develop on each one. Some growers limit the number of stems to just 2 and space the plants closer together.

A tomato plant is a weedy thing, and, left to its own devices, will create a tangled twining mess of stems and leaves. That doesn’t mean it won’t produce fruit. However, controlling the growth improves air circulation, which keeps the foliage healthier.

As tomato plants grow, suckers grow from axillary buds in the angle between the leaf and the stem. Those suckers will grow into more main stems if not limited. Simply snip out the suckers that have been selected for removal.

Tie stems to tall, sturdy stakes to lift tall plants off the ground. Removing suckers and staking a tomato plant increases the air circulation around and through the foliage, prolonging the plant’s life.

When the plants have been established for a few weeks, and they’re growing vigorously, remove the bottom leaves to get more air circulating underneath the plants. I keep about 12″ of the stem leaf-free. Keep the foliage as dry as possible and avoid handling wet plants.


When Disease Strikes


tomato disease septoria?

‘Rutgers’ tomato infected with disease (Septoria?).


Diseased plants will start losing foliage, generally from the bottom up. Leaves become yellow, spotted, puckered, or crispy brown. Widespread disease requires removal of the plants.

If a disease has just been noticed, though, remove to the trash all spotty, blighted leaves with clippers that have been dipped in a 10% bleach solution before going to the next plant. Disease can spread from plant to plant on infected tools and hands.

Spraying the plants with an appropriate remedy might save the plants. Several copper-, bicarbonate-, and microbe-based fungicides are available for organic growers.

Prevent the deadly tobacco mosaic virus from infecting tomatoes and peppers by never smoking near the vegetable garden, and by washing hands thoroughly before working there. Tobacco is related to tomatoes and peppers, and disease spores might be present in the product.

Occasionally we see tomato plants with leaves at the top all twisted and contorted. Sometimes they’re discolored as well. This can result from the application of herbicides, if not on your property, then from a few houses away. The chemical is carried on the breeze, and it takes minute quantities to affect tomatoes. Either cut the plants back to healthy foliage or replace with new transplants. Check also for leafhoppers and aphids inside curled leaves.


Sun Scald


sun scald on peppers

Sun scald on sweet peppers.


On Peppers

Strong sun hitting the fruits on very hot afternoons can cause sun scald. Keeping enough leaf cover will protect the fruits. Patches of sun scald are the parts of the fruit that were perpendicular to the hottest rays of the sun.

Don’t thin pepper plants; they’re especially vulnerable to sun scald. These fruits (photo, above) from a young and sparsely-leaved ‘Lemon Dream’ pepper were not adequately shaded. But the good parts don’t have to go to waste. Simply remove the affected parts.


Tomatoes Exposed To Sun

ingredients for tomato basil salad, cherokee purple tomato

‘Cherokee Purple’ tomatoes and basil.

I prefer 3 or 4 stems on a tomato plant instead of 2; there are more leaves to lessen the sun’s intensity without entirely shading the fruits.

The flavor is more intense in some varieties (such as ‘Cherokee Purple’, ‘Black Krim’, and other “black” tomatoes) if the fruits are exposed to some direct sunlight. Morning sun is more gentle than hot afternoon sun. But on hot days, exposed tomatoes can get sun scald. Pick those tomatoes, remove the mushy parts affected by sun scald, and eat them right away, before they start rotting.

Sunlight gives fruits a richer color, increasing levels of anthocyanins. What are they? Anthocyanins, the blue and red pigments in fruits and vegetables, are powerful antioxidants, which help fight inflammation and play an important part in cancer prevention.

When you consider how much effort is required to support large amounts of ripening fruit on a mature tomato plant, it seems rational that 3 or 4 leafy stems will be able to produce a lot more “food” (carbohydrates from photosynthesis) for the developing fruits. This will help the fruits achieve full size and, more importantly, full flavor.


Return to the top


Headings

Page 1: It’s Time To Plant Tomatoes!, How Much Sun For a Tomato Plant? (Options), More Light For a Tomato Plant, Crop Rotation, Disease Resistance, Disease Prevention For a Tomato Plant (Air Circulation and Suckers, When Disease Strikes), and Sun Scald (On Peppers, Tomatoes Exposed To Sun)

Page 2: Time to Plant!, Plant Tomatoes Deeper, Trichomes, Stake or Cage a Tomato Plant?, And Water, and Deer

Soil Prep 101 For Your Vegetable Garden


cool season vegetables

Cool season vegetables and greens.


Finding the Perfect Spot for Your Vegetable Garden


For the purpose of this post, I’ll assume that your vegetable garden will be flush with the surrounding lawn, rather than in a raised bed. However, sound horticultural principles apply to either method. Locate the garden where it gets lots of direct sunlight, and avoid low areas that collect water after heavy rain. Place it close to a source of water.

Now that you’ve found the perfect spot for your vegetable garden, you’re ready for Soil Prep 101. The types of crops you plant in any season are weather-dependent, so make sure weather patterns in your location suit the peppers, basil, kale, or cauliflower.

Although this article concentrates on preparing beds for vegetable gardens, the principles apply to other plants as well, including new shrub borders and flower gardens for pollinators. Page 2 of this article has tips for improving the soil’s tilth, or workability, for most garden projects.

Prerequisites for this class: “How to Prepare the Soil: An Introduction” and “Yes, But Is It Sunny In the Winter?”


Swiss chard in a raised vegetable garden

Swiss chard in a raised bed.


Depending on your level of affinity for precise measurement, you can use either a measuring tape or simple paces to mark the dimensions of your garden. Gardeners who want to indulge in culinary experimentation by growing a wide variety of crops might regret not having made the vegetable garden large enough from the outset. Consider the possibility of expansion in the future.


How Much Sun Does the Vegetable Garden Need?


There is no substitute for sunlight. Without at least 6 hours of direct sun, the results will be disappointing. Anything less than that will reduce and delay the harvest.

Indirect, dappled, and filtered light don’t really count. In fact, during most of the growing season, fruiting plants perform so much better with 7 or 8 hours of sun, minimum! There are other types of crops that can be grown in less than full sun, including leafy greens (lettuce, arugula) and a few herbs (cilantro, parsley).


Layout


Tomato.

Someone out there is asking, “Do I run the rows (the long axes) east-to-west or south-to-north?” Good question! If your plans include growing several tomato plants and maybe some pole beans on a trellis, and you prefer one long plot that is accessible from both sides, I recommend east-to-west.

Long-term plants (tomatoes, peppers, etc.) will continue to get good sunlight all season. Spaced properly, they won’t cast as much shade on each other, especially as fall approaches and the sun sinks lower in the sky. But, if your garden receives sun all day, it won’t make much difference to main season crops.

Cool season crops, grown from fall through early spring, however, will get more sun when planted east-to-west. They’ll face the sun all day even though the days are short.

Taller plants should be planted on the north side of any plot (northern hemisphere), so they don’t shade smaller plants nearby. Some varieties of staked indeterminate tomatoes can grow 8′ tall!


lettuce basket, a portable vegetable garden

Lettuce growing in a basket.


On properties where spatial considerations are limited, do what you can to provide enough direct sun to those crops you can’t live without. Your crops might not be lined up in neat rows, but rather planted individually in a sunny corner over here and another by the back gate. Doesn’t matter. Do what works for you!

Container-grown crops, such as this lettuce basket (photo, above), can be moved around as conditions change.


Multiple Vegetable Garden Beds


With ample space, a series of garden beds can be laid out in a grid. When deciding where the plants will go, always keep in mind that you want to prevent tall plants from shading short plants, with few exceptions. Using straight pathways makes maneuvering the wheelbarrow and equipment easier.

Crops that prefer cooler, part-shade conditions as the weather warms can be planted between the taller plants or in the partial shade they cast. Those include late spring lettuces, arugula, cilantro, and spinach.

savoy cabbage

Savoy cabbage.

Having several plots allows for crop rotation, planting one family of plants in Plot A this year, in Plot B next year, and so on. This helps prevent the soil from being severely depleted of certain micronutrients and from allowing populations of insects and diseases to build up.

The nightshade family (Solanaceae: tomato, pepper, eggplant, potato), the cucurbits (Cucurbitaceae: cucumber, summer squash, zucchini, melon, pumpkin), and the brassicas (Brassicaceae: broccoli, cabbage, cauliflower, kale, Brussels sprouts) are groups of plants that benefit from being rotated every 4 or more years.

To clarify, one member of a family (tomato, for example) should not be planted where any member of that family (tomato, pepper, eggplant, potato) has grown in the past few years.

This is a good reason to keep a record describing where you plant each crop every year, as well as documenting successes and losses. Knowing the family names that crops belong to also helps with crop rotation.


Seed Or Transplant?


antique seed packet

Don’t go overboard if this is your first attempt. You’re not obligated to germinate every pack of seeds you bought. There’s always next season. Most seeds will remain viable for a few years if kept dry and cool.

Starting out with young tomato, pepper, or slow-growing parsley transplants might be more practical than growing them from seed, even though it is more expensive. You’ll find them at garden centers, farmers’ markets, and local hardware stores, and the growers often have good suggestions for cultivation.

If you’re late getting the vegetable garden going, transplants will save you several weeks of growing time. You can always supplement with fast sprouting varieties of seeds, such as those mentioned in the next section.

Starting plants from seed is a welcome challenge to many and is a source of fascination for children—and for adults, too. Don’t laugh, but, for me, it’s a thrill when the catalogs start showing up in the mailbox. I would never discourage you from exploring this facet of gardening. And, of course, there are so many excellent varieties available from seed that never show up in retail stores as transplants.


Seedlings For Vegetable Gardens Need Sun

Seedlings of fruiting crops need at least 6-8 hours of direct sunlight for strong growth. Use clean pots, pasteurized seed starting mix, and a waterproof tray. Provide the proper temperature for germination.
If you don’t have very sunny windows or a greenhouse, consider starting seeds under shop lights with daylight tubes. I use 4′ long fixtures that hold 2 tubes each. Seedlings growing very close to the tubes—only a few inches away—grow strong stems and roots.

Lettuces, arugula, and other leafy greens tolerate fewer hours of sun, although they appreciate full sun during the cooler months.

Avoid starting seeds too early in the season. This could result in leggy, weak plants that might not perform up to par in the garden.


seedlings

Broccoli ‘Happy Rich’ and Arugula ‘Astro’ seeded into cell packs (late winter, 2022).


Seeding Directly Into the Garden

Some crops grow easily from seed sown directly into the vegetable garden. Peas and beans, for example, and radishes, beets, and carrots are just a few species that can be planted right into prepared ground. Dinosaur kale, mustard spinach, mesclun, leaf lettuce mixes, zucchini, spinach, and cucumbers are more crops that can be directly seeded.

Read all the information on the packet, paying special attention to when to start and how deeply to sow the seeds. Although these crops germinate readily, gardeners must still watch out for pests, both above and below ground, and turns in the weather.


Spacing the Plants


It’s important to calculate how much square footage each of your plants requires, or at least to get a rough idea. On graph paper, map the proposed garden to scale. Use the plants’ spacing recommendations found on the label or the seed packet for the amount of space needed.

With a 1/4″ grid, each square can represent 6″ or 12″ of garden space. The diagram is optional, but it can help in future years when considering crop rotation.
It’s better to have more than enough room rather than not enough; plants don’t respond well to crowding. The seemingly large gaps between the major crops can be interplanted with “ephemerals”—those plants that grow quickly and are harvested before the majors achieve full size. Examples include radishes and lettuce between tomato plants, or green onions and beets between autumn-grown Brussels sprouts.


If It Looks Like This…


dry cracked soil

Clay soil shrinks as it dries, creating surface cracking.

Soil that dries as hard as a brick is impossible to work with. You can thoroughly water the area the day before or start digging a day or two after a good rain. Avoid digging or walking in the garden when the soil is wet. This compresses the soil, squeezing out tiny channels of air space that are critical for healthy root growth.

Sandy soil that drains too fast should be amended with copious amounts of organic matter. Bagged topsoil is also available, but quality varies widely. The tiny clay particles in clay loam help hold water and nutrients in the soil.

In a large vegetable garden, plan for pathways every 4′ or 5′, and restrict foot traffic to those areas. Use pavers, flagstones, pine bark, or even that old pile of bricks for the pathways. You can get very creative with stonework, and your garden can be the neighborhood show-stopper, but don’t lay out the stones until the end of the soil prep process.

Let’s begin! Please turn the page…


Return to the top

Headings

Page 1: Finding the Perfect Spot for Your Vegetable Garden, How Much Sun Does the Vegetable Garden Need?, Layout, Multiple Vegetable Garden Beds, Seed Or Transplant? (Seedlings For Vegetable Gardens Need Sun, Seeding Directly Into the Garden), Spacing the Plants, and If It Looks Like This…

Page 2: Remove Sod, Tilth, Soil Prep (The First Dig: Loosen the Clay, The Second Dig: Add Drainage Materials, Organic Matter vs. “Organic”, The Third Dig: Add Organic Matter), Fertilizers, Rake Smooth and Pave, Agricultural Extension and Soil Tests (To Lime Or Not to Lime, and What is pH?)

Yes, But Is It Sunny In the Winter?


Before you start digging, you must first decide where the garden will be located. Many factors should be considered, and the most important one is exposure to the sun. Just outside the back door seems like the logical choice. It’s always sunny next to the patio for summer barbecues. And it’s close to the kitchen and to the water faucet.


Yes, But Is It Sunny In the Winter?


sunshine through trees


That spot is fine, if you’re interested in growing main-season vegetables. But later this year, you’d like to venture into the world of Asian greens and other cool-season vegetables. First you will need to know if it will be sunny in the winter. The garden patch gets full sun in June, but it might be entirely shaded by the house in December!


The Sun’s Path


the sun's path, south side of house is sunny in the winter

The sun’s path across the sky, in southern NC.


The sun’s path and the shadows cast by buildings and trees vary greatly from season to season and from one latitude to another. On the shortest day of the year (the first day of winter) where I live in North Carolina, the sun rises only 31 degrees above the southern horizon. At that time, it rises and sets south of the true east-west axis. On the longest day of the year (the first day of summer), the sun is 77 degrees above the horizon, and rises and sets north of the east-west axis.

A north-facing back yard might be shaded by the house in winter due to low, slanting rays of January sun. In this case, move the proposed garden site farther away from the house. You will be able to enjoy both summer and cool-season crops. Your efforts can be divided among a few plots around the property. Plant each one with the crops that are best suited there at a particular time of the year.

Deciduous trees, such as maple, oak, and cherry, drop their leaves in autumn. Most cool-season greens will receive enough light as it filters through the stems and branches of trees. In our garden (photo, below), you can see shadows cast by twigs and branches from trees growing on the berm to the south. But, by the time the trees leaf out in spring, the sun is almost directly overhead. Tomatoes and peppers planted then will get enough sun, but as the tree canopy expands, the garden will be less sunny in the winter. Time for a bigger garden…elsewhere!


Is Your Garden Sunny In the Winter?


cool season vegetables, sunny in the winter

Cool season vegetables and greens. Plastic covers garden on very cold nights, and netting protects plants from deer.


In regions of the country with moderate winter temperatures, greens can be harvested through the season if the garden gets at least 5 hours of direct sun per day. Leafy greens (spinach, kale, mustard, tatsoi, Swiss chard, lettuce, and many others) will grow fairly well with slightly less sun than that required by head-forming vegetables, such as cabbage, broccoli, Brussels sprouts, and cauliflower.

But exposure to the sun for a longer period of time in winter is always best. The plants grow faster and stronger, and the soil absorbs more heat from the sun during the daytime. More heat prevents the soil from freezing deeply.

Using protective cold frames over the garden moderates severely cold temperatures by trapping the sun’s heat. Warmth is stored in the soil, and released to the plants during the night. Some crops, such as kale, collards, broccoli, parsley, arugula, and cilantro, tolerate cold weather. They often survive without any protection, in the southern half of the country, until they go to flower (or into the stockpot) in spring!

I’ll talk more about cold frames and other protective devices in future posts, and you might have guessed that I’m a fan. On sunny days, of course, cold frames have to be vented in order to release hot air and to get fresh air (with carbon dioxide) in.


Locate the Garden


So, once you decide which crops you want to grow—whether they’re warm-season or cool-season, or both—you can start by observing the path of the sun. Get your young math genius out there, with sticks and string, a level, a compass, and a protractor. Find how the sun and shadows track across the sky at different times of the year. Vegetable gardening could become a great family pastime!

Something else that could influence the location of the garden is the existence of underground conduit, utilities, and cables. Call your local officials (8-1-1) to have the utilities marked before digging anywhere. Tree roots also are a hassle. Guess which one wins if there are maple tree roots infiltrating the vegetable garden.


stone circle, sunny in the winter

Free-Photos / Pixabay. Stone circles built thousands of years ago were ceremonial and helped indicate when crops could be planted.


Return to the top

How to Prepare the Soil: An Introduction


trowel in soil


Along with the early daffodils comes really beautiful weather. It’s been sunny, the birds are singing…not too hot, not too cold. It’s time to prepare the soil. But first, we need to understand it.


Prepare the Soil


Herbs, vegetables, and flowers are going to be living—hopefully, thriving—in your garden for several months. For trees and shrubs, providing a good home will see them through the next decade, or the next century! It pays to give them the best conditions you can provide, and it all starts below the surface of the ground.


Axiom of the day: soil preparation is 90% of your effort.


If that sounds like work to you, you are correct! But you’re reading this presumably because past results have fallen short of expectations, and you want to improve your gardening skills. I’ve played in the “dirt” professionally for 50 years and can honestly assert: successful gardening depends on the health of the soil.

And here’s the good news. Thorough soil preparation will have benefits for many years to come. You won’t have to prepare the soil to this extent again.


The Soil Is Alive


Microbes


prepare the soil for seedlings

Seedlings in prepared soil.


Soil is more complex than meets the eye. There is a dynamic interplay among minerals, organic matter, air, and moisture. Earthworms, insects, nematodes, and tiny microbes also contribute. Healthy soil is teeming with life! These organisms play an important role in how soil functions. Without them, organic matter would not break down into those vital nutrients needed by all plants.

Vast mycelial mats of beneficial fungi, or mycorrhizae, live in close association with roots. Millions—or perhaps a billion—species of these beneficial microbes inhabit soils around the globe, many of which live within or around a particular species’ roots. Researchers estimate that there could be a trillion species of microbes living in air, soil, water, and living organisms.

Soil-borne mycorrhizae have enzymes that can unlock, or chelate, micronutrients tightly bound to soil particles, making them available to plants. These organisms can gather water and provide it to plants even though the plants’ roots don’t have direct access to moisture. And these microbes act as barriers to certain soil pathogens.

Bacillus, Streptomyces, and Pseudomonas are common bacterial microbes. Fungal mycorrhizae, such as Trichoderma, Hebeloma, and Glomus help roots absorb water and phosphorus. Other microbes, such as viruses and archaea, also inhabit the rhizosphere, the area surrounding the roots. Gardeners are familiar with the nitrogen-fixing bacteria (Rhizobium) that increase yields in legumes.

Scientists have only recently begun deciphering the enormous number of microbes and what they do for or to plants. Only a few plant families, including Brassicaeae, do not have associations with fungal mycorrhizae. Blueberries and other plants in the Ericaceae family (azalea, rhododendron) have very limited associations with mycorrhizae.

Microbes benefit from the symbiotic relationship with roots by getting carbohydrates in return. The numbers of microbes inhabiting just a tablespoonful of soil are staggering. Believe it or not, that’s greater than the number of people living on the planet! Of course, not all of these microbes are beneficial; many cause diseases in plants and animals.


Tilth

earthworm castings

Nutrient-rich earthworm castings.

Consider yourself lucky if your soil has good tilth, or friability, to begin with. Perhaps all you’ll need to do to prepare it is to add compost, aged manure, or some fertilizer periodically.

Soil stays more biologically active over a long period of time if it is not disturbed by frequent tilling. Beneficial fungi and nematodes are especially sensitive to major disturbances. Simply scratching products into the soil surface and watering them in preserves existing microbial populations in the soil.

There are several soil types distributed throughout the United States. They’re determined primarily by the kind of bedrock beneath the surface, the kinds of vegetation growing there, climate, and management practices employed through the centuries. Minerals from rock, eroded by water and wind, will be deposited downstream or downwind.


Soil Composition

Soil is composed of:

  • mineral matter (rocks, sand, silt, clay)
  • organic matter (carbon-containing [once-living] compounds such as compost, aged manure, dead roots, dead organisms). Never use fresh manure; the ammonia content can harm plants, and it might harbor pathogens.
  • living organisms (such as earthworms, nematodes, microbes, insects)
  • air
  • water

Tilth and fertility are determined by relative proportions of these materials. All kinds of soils benefit from the addition of compost and other organic materials. I confess to going a little overboard on these amendments when I prepare the soil. But the plants look great!

You might be fortunate to start with soil that has good tilth. It already has physical characteristics which promote plant growth. Or experience indicates that the roots will need some encouragement to grow beyond the original root ball.

Soil that is a rocky clay, for example, dries to the consistency of brick, and will need lots of amendments to improve drainage and to encourage roots to grow vigorously. On the other hand, sandy soils need materials that will improve water and nutrient retention. Instead of repeatedly failing with plants that can’t adapt to your soil, try starting out with those that can. Working the garden over the years will condition the soil sufficiently so you’ll be able to grow more species.
 

foxglove

Biennial foxglove (Digitalis purpurea).


Simply digging a hole in the ground, adding a cupful of compost, and plopping the plant in place won’t do the trick in heavy clay or rocky soils. Depth of topsoil, drainage patterns, ratio of clay to organic matter, air pore space (the space between particles), and, of course, fertility and pH, all enter into the equation.

The rich, black ground in our West Virginia garden needed no amendments at all; the foxgloves grew 7 feet tall! Still, I added organic matter every time new plants went into the ground.


From Awful to Awesome


First, the Awful Bit

Our first house in Maryland sat on the crest of a hill. Sunrises and sunsets were spectacular, but the soil was just awful. It was all clay and shale. Any organic matter that did exist blew away or washed down the slope. That “dirt” refused to yield even to the most enthusiastic shovel.

I created a vegetable garden farther down the slope, next to the greenhouse, that gave us fabulous crops of tomatoes and peppers. Digging in autumn leaves, vegetable scraps from the kitchen, and discarded material from my horticultural business greatly improved the soil. It didn’t take long for decomposition to begin and for the earthworms to show up.


wheelbarrow with compost to prepare the soil


Almost Awesome

A few years later, we moved farther south to a community that had been carved out of an old oak and hickory forest. Although the soil quality was better here than at the previous property, I continued to prepare the soil with every new project for the next 3 decades.

Before planting rhododendrons (like the one in the photo, below) in the afternoon shade, I added peat moss and pine fines to the soil. These materials were not merely thrown on top of the ground. Instead, generous quantities of amendments were incorporated (not layered) into the top 12″ to 18″ of existing soil. Then, I mixed nutrient-rich LeafGro (locally sourced compost) into the top 8″ of loosened soil.

This effort created a well-balanced mixture, composed of existing clay and loam, and the added peat moss, composted pine bark, and compost. After that, the soil remained undisturbed except for top dressings of fertilizer, compost, or mulch.


rhododendron

Rhododendron catawbiense.


I left the ditch behind the shrub border undisturbed, allowing rainwater to travel down the slope. Water that did not drain away would have meant death for the shallowly rooted rhododendrons.

Blueberries must have very acidic conditions, in a range from about 4.3 to 5.3 pH. Rhododendrons, azaleas, and hollies like their pH a bit higher than that, but still on the acidic side. Peat moss and pine fines incorporated into the soil helped provide the acidity and aeration.


calibrachoa with chlorosis

This calibrachoa has chlorosis from high pH.


Petunia, calibrachoa, pansy, and viola also benefit from a lower (acidic) pH. Plants growing in soil with closer to neutral pH will have sickly yellowish leaves with green veins (photo, above).


A Shady Oasis

Gradually, most of the back yard grew into a private woodland. Japanese snowbell (Styrax japonica), paperbark maple (Acer griseum), Pieris, Abelia, Viburnum, Kolkwitzia, and a group of monarch birches (Betula maximowicziana) were the main players. And the rhododendrons and existing vegetation, of course.

Mulched pathways meandered under the cool canopy, and all sorts of shrubs and perennials luxuriated in that rich soil. There was a small pond, a greenhouse, and no grass to mow in the back yard. Awesome. (***Update***: As it often happens, subsequent owners of the house altered the property to suit their needs and removed almost all of those plants.)


Monitor Soil Health Over Time


Preparing the soil for vegetables is not difficult, and the results will last for years. Most varieties prosper in improved soil 10 to 14 inches deep. Lettuce and radishes need only 5 or 6 inches.

Using the space efficiently and intensively calls for carefully managing the soil. Vegetables grow quickly, fruit heavily, and, therefore, require frequent additions of nutrients. 

Thoroughly preparing the existing soil will pay dividends, spelling the difference between getting a few vegetables from the garden (“Why bother?”) and having a truly abundant harvest (“Take some veggies, please!”). And, if you properly prepare the soil at the start, you’ll never have to repeat the effort to that degree.

Keep in mind, though, that, as organic matter breaks down and is absorbed by plants and other living things, you’ll need to add more compost. For top performance, plants need balanced fertilizers that are appropriate for specific uses, such as for vegetables, flowers, spring flowering bulbs, or the shrub border. That’s in addition to the compost or aged manure you originally used to prepare the soil. Lack of nutrients and compacted soils are among the top reasons for low crop yields.


Soil Testing

Contact your local Master Gardeners program, or the agricultural extension office, for information on soil testing. The results will indicate which amendments to add, and whether the pH is appropriate for the plants you want to grow. The report also includes a breakdown of the soil components: clay, silt, sand, and organic matter. Normally, I add more organic matter than soil tests recommended.

Soil pH is a measure of acidity or alkalinity. Neutral is 7.0, with acidic values below that and alkaline values above 7.0. A simple soil test will indicate pH and nutrient levels. Soil pH affects the availability of nutrients to plant roots, with most vegetables preferring pH levels between 6.0 and 7.3.

Years ago, a landscape client wanted to prepare the soil for a vegetable garden on the property she and her young family had just bought. She expressed concern for “bad things” in the ground, so I suggested that she ask for a lead test in addition to the basic tests. The cost of the basic test is very reasonable, but extra requests will raise the fee. No matter; it’s worth the cost.

The report showed a surprisingly high lead content in the soil, unusual for a newer home. So, you don’t want vegetables growing there! She submitted tests from different areas, and felt confident that the original spot was unique. Something probably had been dumped there before the house was built. Later, the family was going to have the contaminated soil professionally removed.

Lead Paint

trowel in soilIn 1977, the Consumer Product Safety Commission banned the use of lead paint in residential properties. If you live near an industrial region, a busy highway, or where lead paint might be a concern, I strongly advise testing for lead before you prepare the soil. Local zoning authorities should have records on past property use. For more information, contact the National Lead Information Center at 800 424-5323.

Lead poses a serious health risk, especially to young children. There is no level of lead that is considered “safe enough”. And most of us grow our own vegetables for the health benefits, after all.
For now, gather your tools and your help, and pace yourselves. This is not something to be accomplished in the hour before your daughter’s softball game. So, you might as well turn it into a party—arrange for pizza delivery at the end of the day! You certainly will have deserved it.


pizza


Return to the top

Using Miniature Lights For Warmth


Miniature Lights for… Warmth?


miniature lights


Yes! You can use strings of miniature lights to prevent frost from damaging tender transplants in the garden.

This article originally was written for springtime applications. But read through, and you’ll see how the same principles work for cold weather gardening in many regions. These lights will keep greens in better condition, sometimes all the way through winter. Your cool season greens can produce for weeks or months beyond the early freezes!


Unpredictable


The weather has been so weird this spring. Some days it feels like June, and others skim the bird bath in ice. Lots of us already planted tender (easily damaged or killed by frost) vegetables and flowers. Without some protection, they will be injured by the cold nights that are still in our forecast.

If the nighttime temperatures are predicted to fall below 50°F, I’ll cover tomato and pepper transplants in the garden. A night or two in the 40’s probably won’t hurt most transplants if they’ve been properly hardened off. But consistently chilly weather will slowly rob the plants of their vigor. Peppers and basil are particularly sensitive to cold soil, and can be killed by it, even if temperatures aren’t close to freezing.

It’s amazing to see snow still flying in some of our northern states. It is beautiful…to watch on TV.


cold frame, with plants

Early winter in the cold frame. Light strings snake around the bottoms of the pots.


Miniature Lights


Incandescent lights, as opposed to LED’s, give off gentle heat. Those 100-bulb strings of miniature incandescent Christmas lights can increase the temperature under cold frames. They also protect tender plants in garden beds when covered with plastic sheets to hold the warmth.

mini lights under plastic cover

Potted plants under cover, warmed by miniature incandescent lights.

This is especially beneficial in those locations where an upside-down bushel basket will not sufficiently ward off the cold. And I’m not suggesting that you attempt to defy good garden sense by planting peppers in February in Minneapolis. There are limits!

When I calculated the wattages, square foot coverage, and costs, the miniature lights were the most economical option for my purposes. Each 100-bulb string provides warmth equivalent to a 40-watt incandescent bulb. I also considered heat mats and heat cables. Have a look around hardware stores and see what garden centers have available. Look for ideas online or with mail order companies selling farm, garden, horticultural, or greenhouse supplies.

Use “indoor/outdoor” products that are safe to use in humid environments. Space heaters designed for indoors are not good candidates outdoors. If you’re planning a project outside your comfort zone, check with licensed contractors, especially for electrical work.

(***Update***: Above average temperatures in the Carolinas carried into mid-fall, so the amaryllis bulbs refused to die down. Recent nighttime readings in the low to mid 20’s would have damaged the potted bulbs, so they’ve been enjoying temperatures in the mid 40’s, thanks to miniature lights and a plastic cover. Not forcing early dormancy on the plants gives them extra time to photosynthesize and, perhaps, an additional flower bud. Finally, the leaves are beginning to yellow, and soon they’ll come indoors to rest and to begin the bloom cycle. December, 2018)


And More Bright Ideas

Include snow loads and wind events (they will happen) in your plans. Slope the top of a cold frame away from the house to allow run-off. During the occasional heavy snowstorm in Maryland, I got up in the middle of the night to sweep off snow that had accumulated 8-12″. Toby, our second Rhodesian ridgeback, thought this was lots of fun. Although polycarbonate is very durable and will bend with weight, too much distortion will allow frigid air to enter and might collapse the frame.

There are more permanent alternatives to consider. Do-it-yourself greenhouse kits could be used specifically for fall and winter crops, heated or unheated. Familiarize yourself with local weather patterns to decide what’s feasible…or necessary. You might be able to convert a shed or construct a lean-to by adding a few materials readily available from the hardware store. Contact your local agricultural extension agent for practical suggestions or check out the numerous online videos.


Cold Frames With Miniature Lights


cold frame interior, miniature lights

Setting up cold frame with new strings of miniature lights.

Cold frames are simple glazed structures that give extra protection to plants when the weather is unsuitable for planting out. Young seedlings or transplants can be hardened off here until they’re ready for the garden. Also, plants that normally go dormant or die in winter can be kept green in a frame. And edible cool season vegetables can grow all winter in a cold frame where it’s too cold out in the open.

Try to orient the frame’s exposure toward the south (in the northern hemisphere), which will give the greatest benefit in terms of heat gain. Bricks on cinder blocks (photo, right) elevate the north edge of the glazing for rain run-off and a more favorable aspect to the sun.

Each hour of direct sunlight shining on the frame keeps the temperatures elevated and stores warmth in the ground. If possible, locate the cold frame out of the wind and in a warm microclimate on the south side of the house or shed.


Materials

Some gardeners use lengths of sturdy wire, arched and stuck in the ground, covered with clear plastic secured by fasteners. Or use long pieces of PVC tubing anchored over rebar sunk in the ground. Repurpose old storm windows or doors (without lead paint) propped on a support.

“Low tunnels” or “caterpillar tunnels” are available at garden centers or online, complete with supports and coverings.

For the large frame in Maryland (photos), I used rigid twinwall polycarbonate panels, covered with clear plastic film to close the sides. On very cold nights, I added more sheets of plastic, separated by “netted” plant flats that trapped air between the layers. This created dead air space and better insulation.


cold frame for cool season vegetables

Cold frame in MD, vented in the daytime.


Houseplants

Oxalis, succulents, stellar geraniums, a variegated fig tree, and other houseplants (photo, top) survived the winter, although I did not expect them to grow. When cyclamen plants went out of bloom in the house, I moved them to the cold frame, where they happily set buds once again.

Plants that do not tolerate the slightest chill, such as African violet, Alocasia, pothos, philodendron, and basil, would not survive very long at temperatures below 60°F. They stayed indoors for the winter.


“Frame to Table”

Without using miniature lights in Maryland’s colder winters, I would not have been able to harvest this assortment of greens. I grew lettuces, leeks, arugula, hon tsai tai, mustard spinach, dinosaur and ‘Red Russian’ kales, and spinach. And Swiss chard, tatsoi, pac choi, mini broccoli ‘Happy Rich’ in wide, shallow pots, about 6″ deep (such as those in photo). ‘Nabechan’ bunching onions and some greens grew in the ground on one end of the cold frame, while potted crops sat on the brick surface.

cool season vegetables

Greens growing in wide bowls.

Dense materials, such as brick and stone, absorb heat during the daytime and release it at night. I threaded strings of miniature lights between pots, on top of the brick patio. Broken light bulbs cause part or all of the string to fail, so be careful with them. Pots of greens and herbs placed close to the edge of the frame allowed easy access.

Herbs grew all winter in this cool but frost-free environment. Parsley, oregano, sweet marjoram, rosemary, thyme, chives, sage, French tarragon, and bronze fennel are a few of the herbs I grew in the frame. Cold frames are great for half-hardy species and those that normally stay dormant in winter. Italian oregano, tarragon, and chives, for example, retained their foliage instead of going fully dormant.

I added an adapter to the porch light socket near the patio door, and the lights’ extension cords plugged into that. With a simple flip of the switch from the cozy kitchen, the lights turned on or off. That’s one advantage of building your frames close to the house. 

Remember to vent the frame on sunny days, turning lights on or off as necessary. Close it up by mid- to late afternoon. 

Water as necessary, keeping the soil damp, but not wet. During mild periods of the season, add a dilute dose of fertilizer to those plants (mostly the greens) that are growing.

Power Outages

Have a contingency plan during power failures if you’re going to keep tender plants in your cold frame. Use old blankets (keep them dry), more layers of plastic, and gallon jugs filled with hot water. When this happened a few times in MD, I heated water on the wood stove for those hot water bottles and brought the most tender plants indoors.

Snow or straw piled up around the sides and a layer on top holds in a substantial amount of heat. Clear the top in the morning to allow sun to reach the plants. But if the weather is especially harsh and overcast, the plants won’t mind staying covered for a day or two.


The Maryland Greenhouse


greenhouse for cool season vegetables

The small greenhouse in Maryland.


I built this greenhouse from a kit purchased from a horticultural supply company. It was fairly easy to put together, although some of the pre-drilled holes didn’t quite match up and the instructions weren’t great. But the twinwall polycarbonate and sturdy framing were able to withstand considerable weight from ice and snow. The structure was attached to a foundation, which was optional but recommended.

This is where I kept more flats of tender succulents. Placed on 2 x 2″ x 8′ posts propped up on cinder blocks near the ends, the flats were heated from below with strings of miniature lights. They had the additional protection of 1 or 2 layers of clear plastic secured on the sides and suspended a few inches over the plants. When nighttime temperatures plummeted to single digits, I added a couple of old bedsheets and another layer of plastic, and then removed them once the sun hit the greenhouse. None of the plants froze.

A second heavy duty indoor/outdoor extension cord reached the porch light adapter near the cold frame, so I could turn all the lights (in the cold frame and in the greenhouse) on or off from indoors.


Double Bubble

This extra “bubble” of lightly warmed air made it possible for frost intolerant plants to survive our zone 6b winter. A bubble inside a tightly sealed unheated greenhouse (or other structure) feels up to 2 or 3 zones (up to 20-30°F) warmer at night than outside air, and even warmer with miniature lights. Keep in mind, though, that each layer reduces the amount of light reaching the plants.

Two or three rows of tender plants—all under a single bubble—occupied the center of the greenhouse. Near the perimeter sat frost tolerant cool season greens in large black nursery pots. Dark colors absorb the sun’s energy, keeping soil unfrozen for longer periods of time. Large pots work better than small pots because they store more warmth. Sometimes I stored bales of potting soil, wrapped in black plastic, on the north edge, where the winter sun would not be blocked.

States in the middle and northern parts of the U.S., in USDA zones 4-6, benefit greatly from an extra barrier of protection from frigid temperatures. Cold hardy plants are more likely to survive than tender species in spaces with no supplemental heat.


Here in North Carolina


Since moving to Charlotte, North Carolina (USDA zone 7b/8a) in 2013, I’ve used clear plastic and miniature lights to ripen up the last of the summer vegetables. And they keep cool season greens and vegetables growing through the worst of our winter weather. To avoid any surprises, check the weather forecast daily.

Succulents that moved with me from Maryland spend the winters in lighted cold frames after filling the sunny windows indoors (photo, right). Delicate species stay inside.

One year, an HVAC contractor came to check the heat pump, located near the lower patio. There were several flats of plants in a second cold frame down there, with miniature lights. That frame was not easily visible from the house. A couple of days later I discovered that the contractor had inadvertently disconnected the extension cord feeding power to those lights…and life to the plants! You know the rest of that story.

(***Update***: I just finished enclosing the sunny front porch at my new home in northern North Carolina, where I moved in October, 2021. This is where the succulents and other plants will spend the winter, aided by miniature Christmas lights. December, 2022)


Cautions


cold frame

Cold frame covered with clear plastic and weighed down.

Make sure the miniature lights are rated for indoor/outdoor use, and that extension cords are also safe to use outdoors. I’ve been warming up the cold frames and garden plants like this for decades without mishap, except as noted above.

The tender succulents and bowls of mixed greens and herbs covered during the winter survived without damage. On nights that fell below 15°F, the temperature in the cold frame stayed in the high 30’s or 40’s, depending on the number of lights used.

Plants survived single-digit temperatures, helped by the old quilts and extra plastic placed over the frame at night. When needed, I added another string of lights. Placing the frame cover fairly close to the tops of the plants limited the volume of air those lights needed to heat. Not too close, though, or the foliage will feel the cold.

This works like a charm, but only if there’s a power source nearby. Be careful; don’t use extension cords that can’t carry the demand for power. Don’t hook up more than 2 or 3 light strings together.

There are few products on the market that demonstrate the phenomenon of planned obsolescence as clearly as cheap imported miniature lights. Stock up on them when they’re plentiful. They don’t last more than a couple of years with frequent use, and they’re becoming increasingly scarce in favor of LED’s. Tread carefully!

Lastly, instructions on the packaging recommend washing hands thoroughly after handling strings of lights. There might be some lead in the wire covering.


Miniature Lights Preferred


Christmas lights, plastic, cold frame

Mini lights warm up 2 large pots of young tomatoes.


There are other types of incandescents available but watch the wattage! If bulbs are hot to the touch, the plants will think so, too, so don’t place them close to the plants. The preferred miniature lights are barely warm, so they distribute the heat evenly and gently.

Make sure the bulbs are not in contact with the plastic covering or the leaves. Avoid letting the plastic cover touch the leaves; cold transfers through the plastic and will damage foliage.

It’s best to lay the strings on the ground, around—but not touching—the stem. The warmth will rise. For potted plants, wind some of the lights around the pots. Tall plants might require lights up into their branches.

If you’re not really trying to push the envelope, the plastic bag or old sheets probably will do the trick. It’s when that sudden blast of uncommonly cold weather comes around that prompts us to take extra measures.

(***Update***: In the photograph above, mini lights kept the young potted tomatoes [in 20″ pots] and a few other plants 15° warmer on an unusually cold spring night. I placed the miniature lights on the soil surface and wound them around the pots to keep the roots a bit warmer. Plastic was closed and secured with clips. April, 2019)


Out of Reach


Where lights are impractical, there is a solution. Use large plastic mulch or trash bags, and tuck in a hot water bottle. Seriously! A repurposed gallon milk jug filled with very hot water slowly gives off heat through the night. A little experimentation will tell you if the heat is given up too quickly (wrap the jug in an old towel to slow heat loss) or insufficiently (use 2 milk jugs or larger containers). Don’t place the hot water close to the foliage. Keep this in mind when the power goes out.

Those “water wall” products you see at garden centers work on the same principle. Water that heats up in the sunlight slowly gives up that heat to the plant at night.

Plastic bags that are nested, or layered, give better protection than a single layer. Spread the opening over a wide footprint (soil’s square footage) to capture heat rising from the ground. Or simply secure a large plastic sheet to a tall stake in the ground. Weigh down the covering with rocks or bricks to keep it in place and to seal out the cold. Remove the cover in the morning.


   *    *    *    *    *    *    *    *    *


I hope this information gets your garden successfully through the “shoulder” seasons, when temperatures can fluctuate wildly. Just a few readily available and inexpensive materials can prevent a total loss.

Later in the year, when autumn temperatures tumble, having materials ready for duty will extend the season. Rolls of 4-mil clear plastic—actually somewhat translucent—can be found in the hardware store’s paint department. This product (4- or 6-mil plastic) is less expensive than greenhouse film. If, however, you opt for permanent structures, the longer lasting film will be worth the investment.

If you’ve never grown cool season vegetables, these methods will open up a new world of growing opportunities. You can extend the season before and after the summer crops or protect tender ornamentals through the winter. No need to retire the trowel with the first fall frost!


potted broccoli

Young broccoli ‘Arcadia’ in 20″ pot, where a tomato grew in the summer. Sharp-tipped pinecones discourage squirrels.


Return to the top

A Microclimate and Frost Protection


Just when you thought it was safe to plant tomatoes!


Microclimate


thermometer

C and F.

Call it impulse or ignorance, the natural inclination for most of us gardeners is to push the season. I’ll admit it; I planted tomatoes and a sweet pepper here in North Carolina about 2 weeks ago, knowing very well that I might have to protect them at night.

But I’m ready, with plastic bags and bamboo stakes, and large sheets of clear plastic, if needed. Plus, the garden is located close to the warmer south side of the house. The sun’s warmth collects in the soil and in the wall, releasing it slowly over the nighttime hours. Peppers are more sensitive to chilly temperatures, so they get covered first.

Even though this cozy little microclimate gives a few degrees of protection, I’m not about to cause any discomfort to my new plants, nor to check their growth. So, I covered them when the nighttime temperature was predicted to fall below 50°F. That’s not even close to freezing, but that’s what I mean. I don’t want them to get close to freezing. And neither do they!

Incidentally, research indicates that tomatoes and peppers might yield more fruit if they have been exposed, when young, to temperatures in the high 40’s to low 50’s. But those plants will need to have been fully hardened off in order to withstand the less hospitable environment.


Microclimate: Where To Find It

Maybe your property has a warmer microclimate that will protect newly planted flowers or vegetables. Close to the south side of the house, a shed or garage could work. Or the sunny side of a solid fence. Perhaps your vegetable and cutting gardens are surrounded by massive stone walls…perfect. A dense hedge will cut wind speed and offer some protection.

A sunny porch, carport, or the protected corner of a patio might keep those young plants happier than if they were planted out in the garden just now. Who isn’t tempted by those first plants offered at garden centers, even though we know it’s way too early?

Direct sunlight warms the soil and surrounding structures. The area needs to be open to the southern sky (if you live in the northern hemisphere). A garden on the south side of a brick wall is great, but not if it’s shaded by a white pine tree. Dark colors absorb more of the sun’s energy, so they’ll release more warmth at night.

You can create a microclimate simply by covering sensitive plants with old bedsheets or sheets of plastic before the sun sets. Prop them up so the material is not touching the tender foliage. During the shoulder seasons, temperatures can fluctuate between seasonal and cruel. There are limits to the degree of protection afforded by microclimates.

Another option is to construct a temporary cold frame, with some sort of a support (bales of hay, cinderblocks, wooden boards) and a clear covering (lead-free old windows, patio door, clear rigid plastic, or plastic film). The cold frame can stay in place for as long as it serves your purpose, but you’ll need to open the covering to let cool, fresh air inside. Heat builds up quickly under clear glazing.


Always Check the Weather Forecast


In this Zone 7b location, April 15th is considered “safe” for most tender, main season edibles and flowers, but it is always advised to check the weather forecast daily. If the forecast had called for a long stretch of cold rainy weather, I would have delayed planting. No one wants to be planted in cold, wet soil.

More sensitive species, such as cucumber, zucchini, and basil, will not be planted until the soil has warmed up considerably.


Diascia flirtation pink

Diascia ‘Flirtation’ is one of my favorites for the shoulder seasons, when it could be warm or frosty.


Among flowers, caladium, scaevola, streptocarpella, zinnia, and vinca are a few that prefer warm soil before planting out. Their foliage will wilt or show damage even if the temperature hasn’t reached the freezing point.

The alyssum, snapdragon, and diascia, however, did just fine without protection, and even prefer cooler temperatures.

Frost occurs first out in the open—in the middle of the lawn or on the rooftops. Plants that can tolerate cool temperatures will be unharmed in a protective microclimate. They might be damaged, however, if they’re far from the house and subjected to a freeze. Just 5 or 10′ can make a difference!


Frost Last Night


frost on leaf


This morning I was surprised to see frost on the rooftops and ice in the puddles on top of the cold frame. It wasn’t “supposed” to get below 35°, but the temperature dropped well below freezing. The plants in the cold frame and in the garden are fine. Late yesterday afternoon, I covered the tomatoes and the pepper with large, heavy plastic bags (with more plastic bags layered inside for insulating dead air space) supported by a couple of sticks in the ground.

The larger the “footprint” of the covering, the better; the larger area of covered soil allows more heat stored in the ground to rise. And it was breezy yesterday, so a couple of bricks held the plastic in place.

Don’t forget to uncover the plants in the morning, as soon as sunlight reaches the area. It doesn’t take long for the inside air temperature to rise high enough to stress the plants.

There are some tricks you can use to fool…or assist…Mother Nature, and I’ll write about those in the future. You might want to adopt some common sense methods of protecting plants to stretch the season. In addition to taking advantage of microclimates, one of those tricks involves strings of miniature incandescent lights, like the ones you strung on the Christmas tree. So don’t pack them away in the attic just yet!


for a warm microclimate, add mini lights


Return to the top

How I Got To The Farm In My Yard

2018

The Farm In My Yard


Years ago, I had a conversation with a woman in the detergents aisle at the local grocery store. We were having a lovely chat about gardening, and, after some time, she suggested that I write a book. Who wouldn’t love to be published in the field of one’s toil and passion? She asked what the title would be, and I readily responded “The Farm In My Yard”.

I must confess that this was an idea that had been bouncing around in my head for a while, but with the demands of both work and family, there was no time to devote to the project.


flats of seedlings, The Farm In My Yard

Flats of plants, at sunrise, almost ready for the markets.


Working From Home


For most of my career as a self-employed horticulturist, all I had to do was to step outside the kitchen door and go right to work, growing thousands of plants (the “Farm”) on only a fifth of an acre of land (the “Yard”), tucked at the end of a quiet cul-de-sac. That’s just the kind of commute I like!

The farmers’ markets and garden festivals (okay, I did have to drive there) where I sold potted herbs and vegetables, annuals, perennials, houseplants, and dish gardens required that the plants be grown by the seller. I couldn’t simply buy them wholesale and then resell them. Where’s the fun in that?


herb gardens and forced bulbs at the garden show

Herb gardens and forced spring-flowering bulbs were garden show favorites.


The Infrastructure


I set up a potting station in the garage. Flats of transplants went to benches of 2 x 4’s on cinder blocks or around the yard. Sun-lovers grew in the front yard, and shady perennials, such as Hosta, Tiarella, Helleborus, and various ferns, preferred the back yard.

Cuttings rooted and seeds germinated under a dozen or so 4′ fluorescent light fixtures in the basement, and more in the spare bedrooms, as needed. Add talk radio and a pot of coffee and I could work happily, undisturbed, for hours, around my children’s schedules.

In the busy late winter to spring months, I transplanted homegrown seedlings and plug trays (flats of 50-300 young plants purchased from wholesale suppliers) until daylight faded. And then I’d move the operation to the kitchen counter, where I could work for several more hours.

Over the decades, more of these markets began operating year-round instead of just seasonally. Full displays required constant plumping of inventory throughout the year. There was always something germinating, or rooting, or being potted up. Always an opportunity to play in the dirt, on the farm in my yard.
 

Wellspring Gardens' booth at garden show

Wellspring Gardens’ booth at the Maryland Home and Garden Show, Timonium, in late winter.


Return to the top

Better Gardening: Getting Started On Day 1


2018

Gardening is not new to me, but blogging is…


packing truck for farmers' market, better gardening

Packing the truck for the farmers’ market, late spring. With limited space, some plants grew in flats on the driveway, next to the perennial garden.


…so bear with me as I figure this thing out. Since I like details, keeping the articles short is not my style. A subtitle could include the phrase, “beyond the label descriptions”. All those details not found on plant tags can make a huge difference toward a better gardening experience. So, here’s to better gardening; it starts now!

This blog is about gardening, nature, birds and bugs, and some cooking. I’ll also include information gathered on trips to garden shows and other places of interest.


New Jersey, West Virginia, and Maryland 


For 40 years, I owned a small horticultural business, which germinated in my parents’ Oradell, New Jersey, basement. When I moved to West Virginia, all the tables, light fixtures, and plants came with me. My husband and I lived there for a few years. For the next 35 years, we lived in Maryland, most of that time in Rockville, and had two kids and one divorce.

Throughout much of this period of time, I attended college classes in biology, botany, horticulture, landscape design, and landscape technology. I continued working, of course, selling plants at garden shows, flea markets, and county fairs, and wholesale to local garden centers and florists.

Then the farmers’ markets became phenomenally popular in the late 1980’s, popping up in every town and city. For many years, my little company (Wellspring Gardens; not affiliated with the online company) sold an assortment of plants at several farmers’ markets and other festivals in Maryland, Virginia, and Washington, D.C.


There was strong demand for herbs and vegetable transplants, and I also grew annuals, perennials, and houseplants. Succulent dish gardens and potted herb gardens, as well as seasonal offerings, were favorites at all the shows. Finding unusual varieties and growing new cultivars made my work fun and sometimes challenging.

I also spent a few years drawing landscape plans for contractors in Maryland, and many years installing gardens for customers I’d met at the markets.


North Carolina


better gardening, Rountree Plantation edible section

Cool season greens at Rountree Nursery and Supply, Charlotte NC.


Six years ago, Mother called from Charlotte, North Carolina, and expressed the need for help. So here I am, with a lot of plants, and supplies and furniture kept in storage. Since self-employment is not practical at this location, I worked for a few years, managing the Edibles Department at a local garden center (photo, above)…until just last week. (***Update***: I am now living in beautiful rural northern North Carolina, and have recently re-started the business. Wellspring Gardens will sell plants at 1 or 2 local farmers’ markets. 2/6/2022)
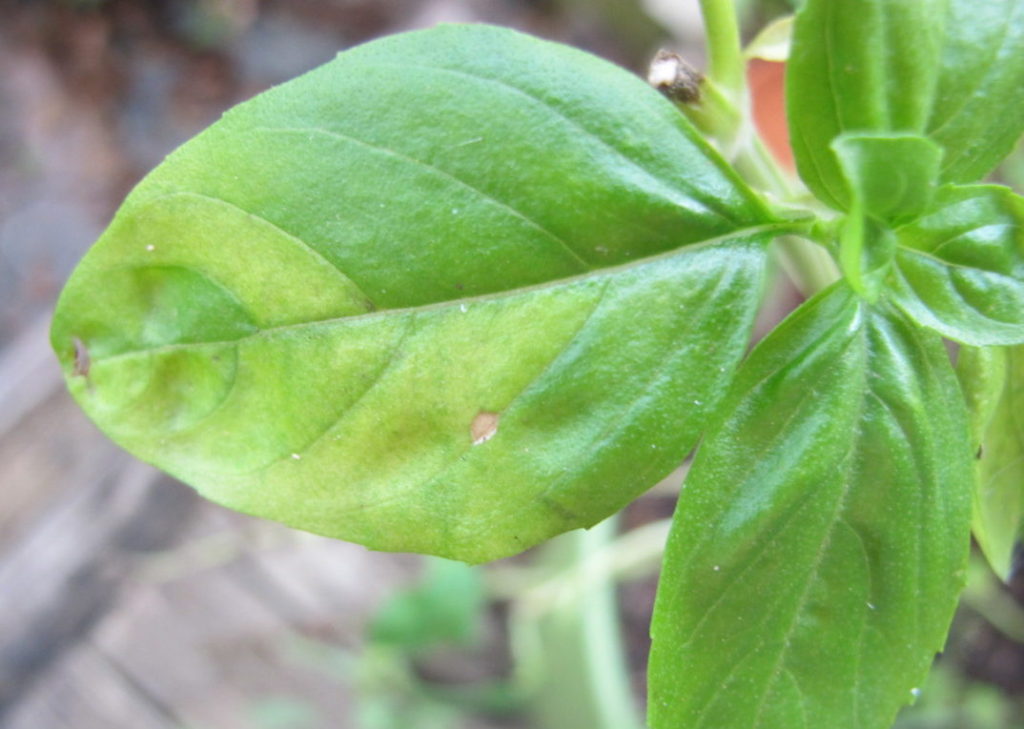
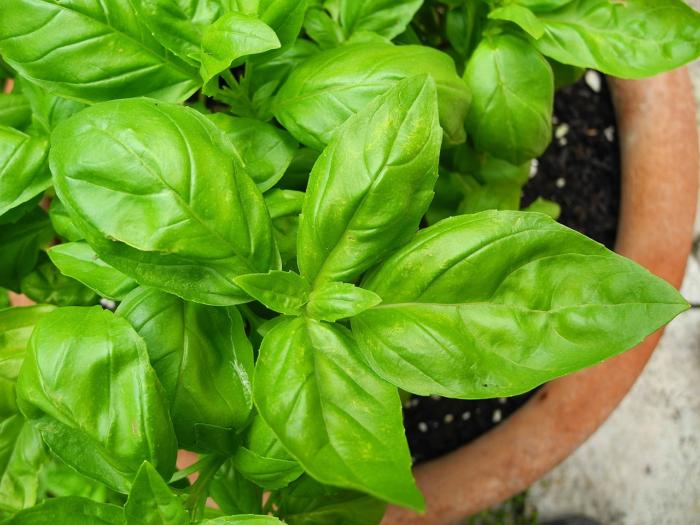
After receiving customers’ requests for gardening lessons, and a trip to Barnes and Noble for a copy of Blogging for Dummies, this blog was born. In order to retain ownership of the content, I set up a “self-hosted” blog. This takes work, especially for someone with no computer skills. But I’m glad to finally catch up.


The Farm In My Yard


Most of the posts here at “The Farm In My Yard” comprise helpful suggestions and timely tips. The information is derived from decades of decoding problems that friends, family, and customers have had with unproductive tomatoes, spotty ugly basil, 4″ long caterpillars, and soil that looks, well, dead. And that’s just the beginning. These articles might answer questions for both beginning and experienced gardeners.

If you’re curious why your tomatoes stopped producing fruit in the heat of summer, you’ll find the answer in No Fruits On Your Tomato Plants?. Join me for a lovely drive along the Blue Ridge Parkway and a visit to the picturesque Mabry Mill. Or perhaps you’re looking for recipes for homemade chicken soup or almond crescent cookies.
Check back now and then for new relevant information that will be added periodically.


Toward Better Gardening


Before you proclaim that you’ll never grow a green thumb, let me reassure you by saying that, even though I’m fairly competent now, I killed my first bunch of houseplants—in the early 1970’s, while in college. I did everything the plant shop told me to do, but they still died…as did the next few plants I bought.

A little experimentation was called for here. I was a Biology major, after all. The next plants (including Zebra plant [Aphelandra], Dieffenbachia, and Emerald Ripple Peperomia) were placed in windows that received morning sun. Brighter light is precisely what they needed. Once I started succeeding with houseplants, I was hooked! The next year, I started a horticultural business.

Never give up. Read everything you can get your hands on. But remember: there is no substitute for the educational experience of handling plants, starting seeds, and digging in the soil. Year after year after year.

Now that spring is here or coming soon to the northern states, our thoughts turn to another attempt at a ripe red bell pepper or more than a few vine-ripened tomatoes. Armed with new information and renewed determination, you’ll be able to improve upon previous less-than-overwhelmingly-successful experiences.
Thanks for joining me on this quest toward better gardening. I hope you’ll find the answers to your garden questions and enjoy reading some of the articles posted here.
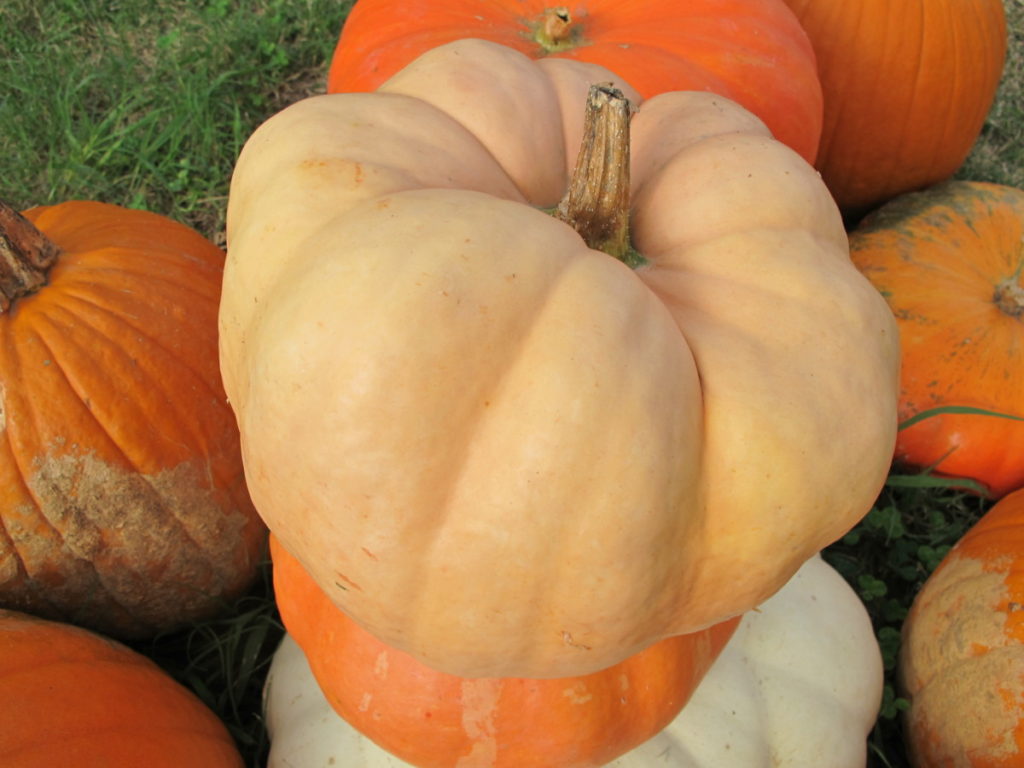
 

flats of plants growing on driveway

Flats of plants growing on the sunny driveway, in early spring.
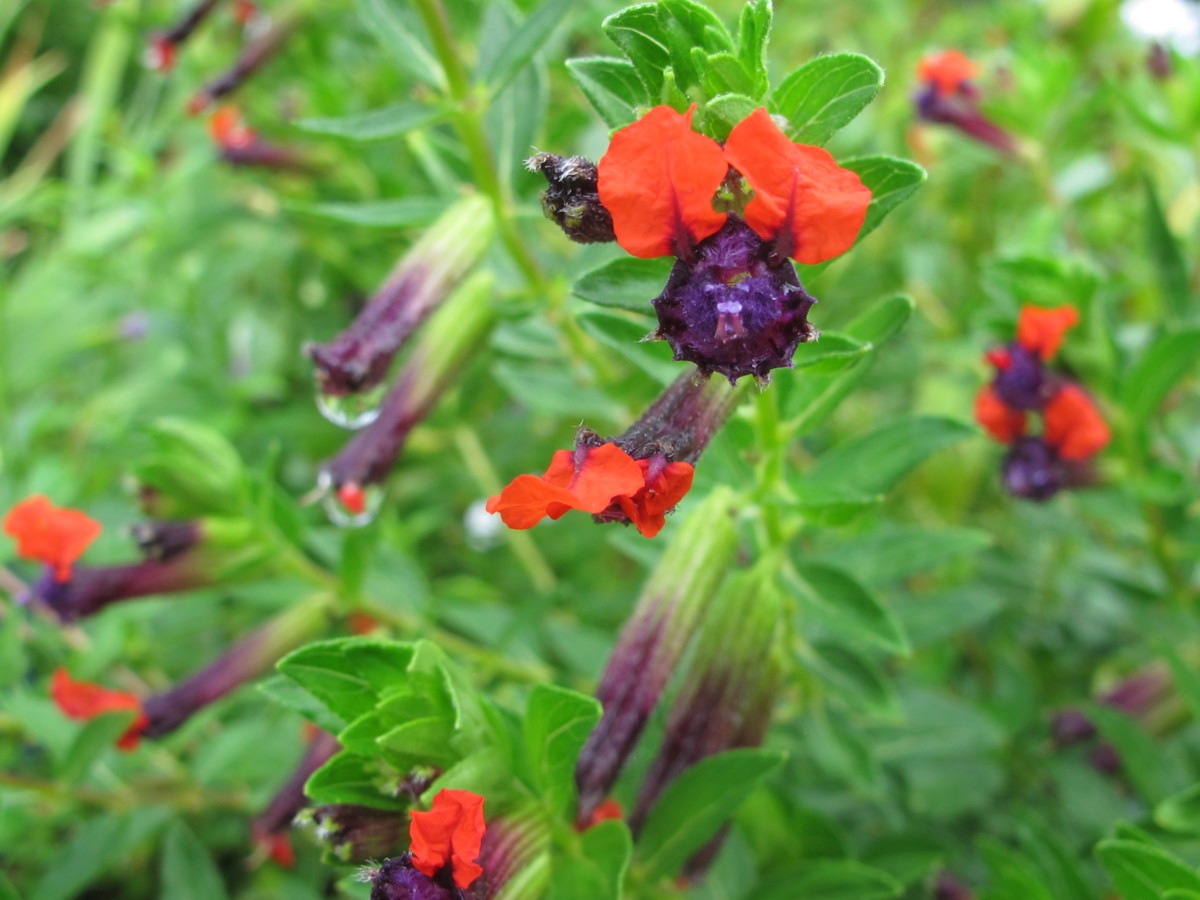
 

Return to the top